Canon C100 mkii configuration guide

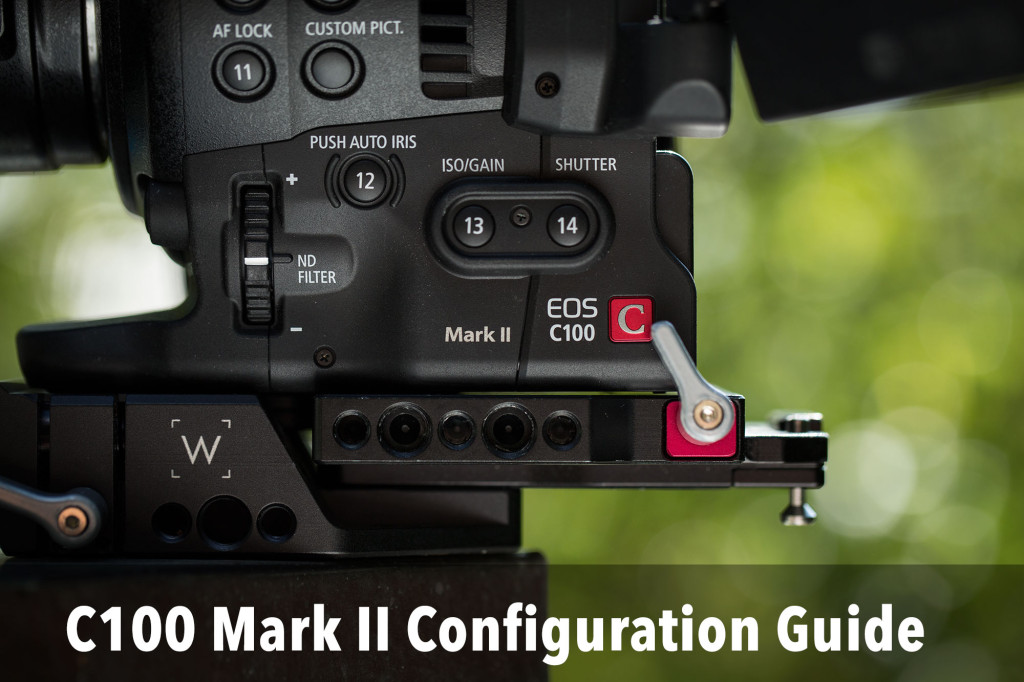
configguidec100mkiiThe C100 mkii is an amazing documentary camera. It’s capable of 12 stops of dynamic range and it gives you everything you need (ND filters, EVF, phantom power, etc.) without additional rigging. But to get the most cinematic performance out of it,  it’s important to set it up correctly, and remap one of the buttons. Here’s how I configure my camera before a big shoot.

First of all, do an auto black balance. Canon recommends you do this every time you change the ISO. It’s especially important to do this if you’ll be shooting with high ISOs. From Camera Setup menu, select ABB. Make sure a lens cap is on. Press OK to perform the balance.

Auto Focus

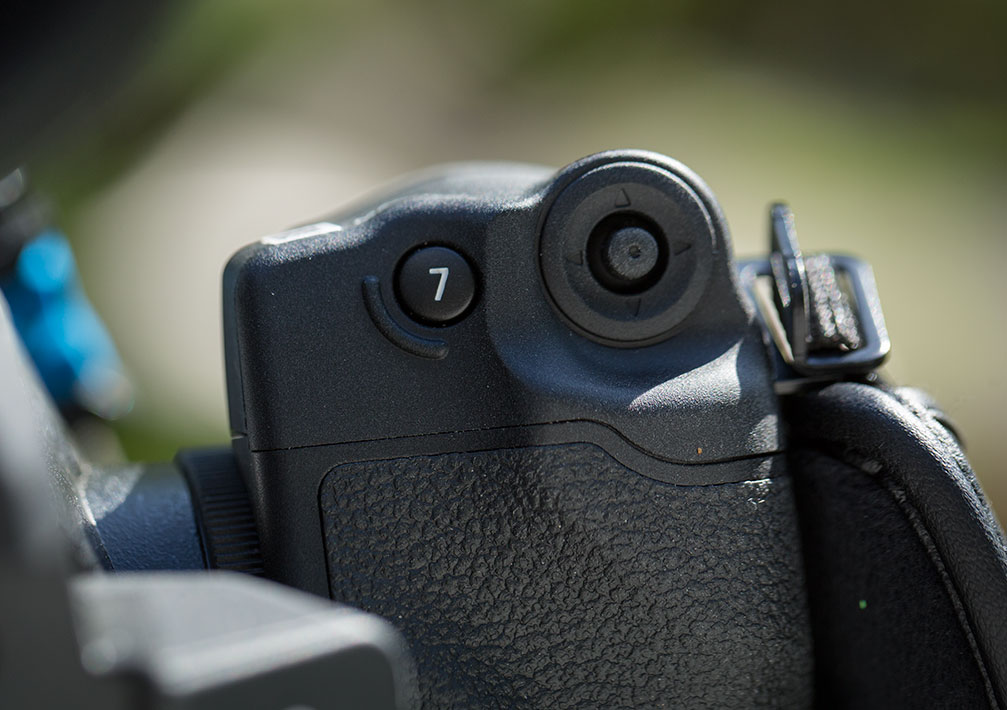
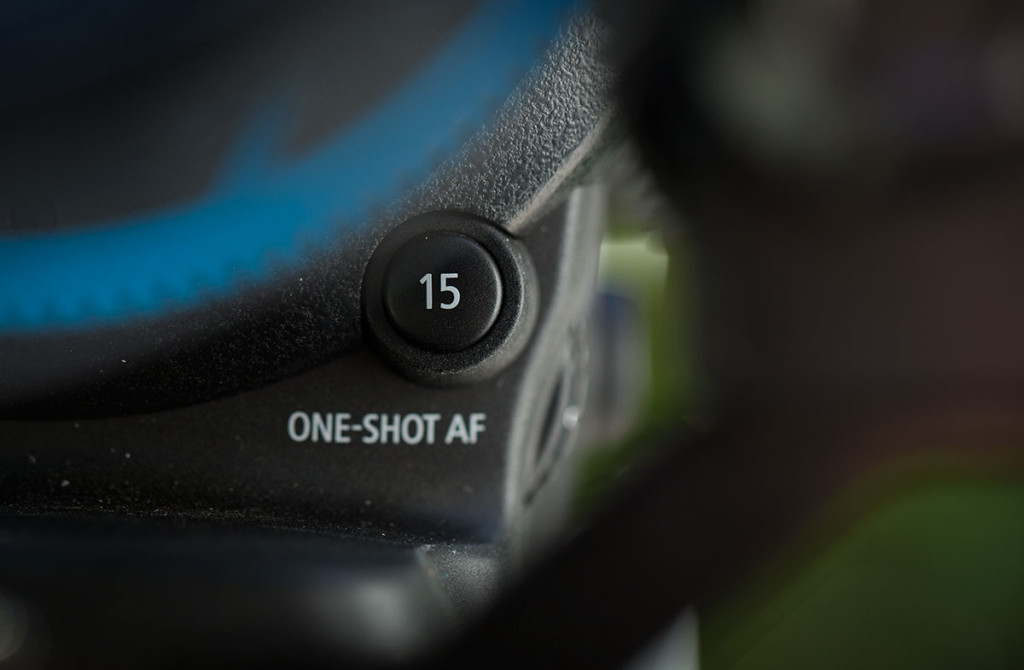
1. Reassign One-Shot Autofocus to button #7. Button 15, the default, is in a very awkward location if you plan to use autofocus regularly, like I do.

afdefault

This is an awkward button location for routine focus grabbing. So we’ll remap it.


button7

Button 7 is a great choice for one-shot autofocus, especially if you’re used to working with DSLR autofocus, which places it in the same spot as the autofocus button on pro Canon DSLRs

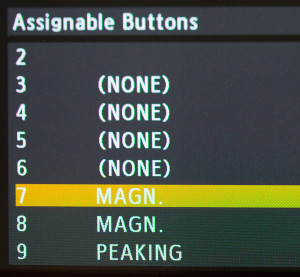
To remap the button, select Other Functions > Assignable Buttons. Then choose button 7.

assign7

Button 7 is set to Magnify by default.


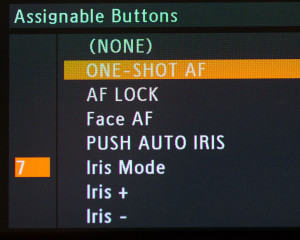
assignbutton

Press the joystick and scroll to select One-Shot AF

Picture Style

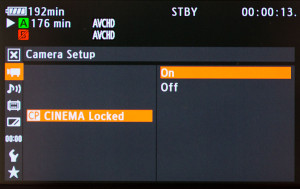
cine-locked2. Set to record Canon Log. Under the Camera menu, select CP Cinema Locked and set On. This enables Canon Log, which gives you a flat file that grades beautifully in post. Using this setting preserves all the options that are available to you in post. Using this setting in combination with a  C100 lookup tables supplied from Able Cine is a speedy way to get amazing looking footage.

Monitor

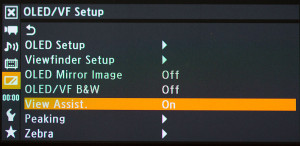
viewassist3. Enable View Assist. Under OLED/VF Setup menu, select View Assist and set to On. This makes what you see on screen look more like what the contrast and exposure settings will look like after the image is graded. If you don’t enable this, the image on screen will look very flat, making it difficult to judge exposure by eye.

ISO

4. ISO [850]. To get the maximum dynamic range out of this camera, set the ISO at 850. If you set a lower ISO, you will be losing information in the highlights.

Auto lens compensation

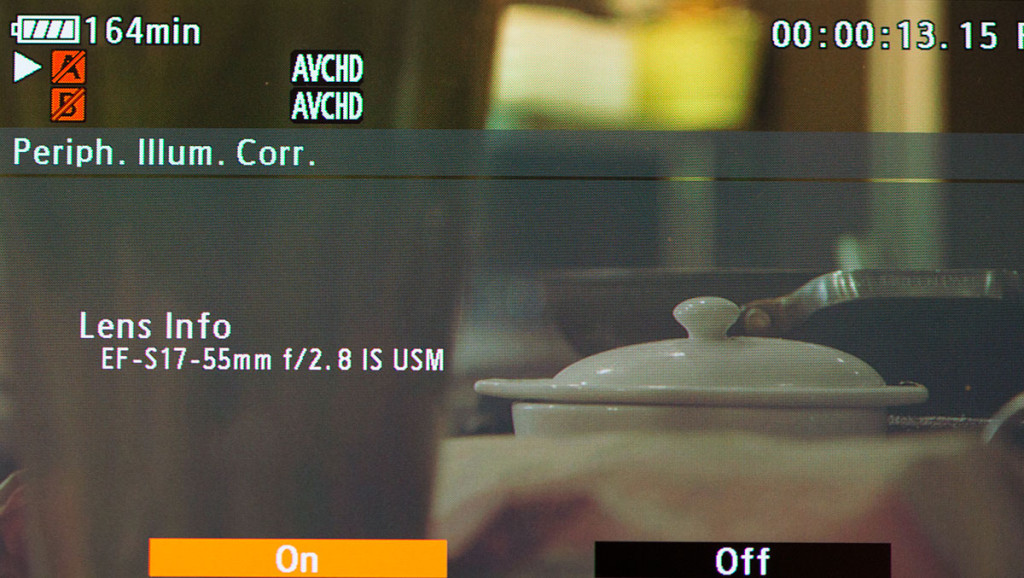
5. Peripheral illumination Correction. Under Camera Setup, set Peripheral Illumination Correction to On (if available for your lens). This will automatically fix vignetting and barrel distortion issues on supported Canon lenses. It works like magic!

perifph

Codec

6. Select AVCHD 24mbps. Under Other Functions menu, select Movie Format and choose AVCHD. Then, under AVCHD menu, select Bit Rate 24 Mbps LPCM (LPCM allows you to record uncompressed audio – the best quality). AVCHD is slightly better than MP4 in terms of quality.

With these settings, you can rest assured that your footage will live up to the amazing potential that this camera is capable of. Have a great shoot!

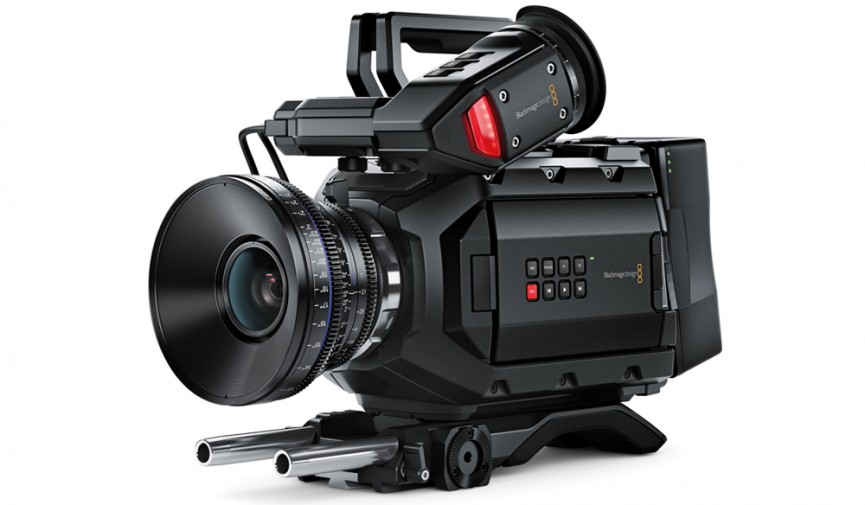
The real end of film is here. It’s called the Ursa Mini

Blackmagic-URSA-Mini-Cover-image-865x505

Ursa Mini

Arri_Alexa_camera

Arri Alexa

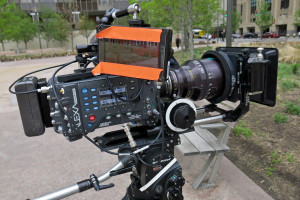
For very a long time (like, since 2010), Arri has been the only digital camera on the market (sorry, Red) that has truly rivaled film. With it’s implementation of digital sensor, which includes a neat  trick with how it reads data off the sensor twice, it managed to deliver the roughly 14 stops of dynamic range that film is capable of. As a result, it’s become the go-to camera of big-budget filmmakers. The only problem, for the rest of us, at least: an Arri Alexa costs about $75,000. Not to mention, it was too big and cumbersome for most documentary productions.

But if the news from NAB can be believed, 2015 is the year where everything changes. When Canon announced the C300 mkii would ship with 15 stops of dynamic range, it marked the first time when, for about $16,000, you could own a digital camera that has MORE dynamic range than film. And a couple days later, Black Magic blows the roof off with their Ursa Mini announcement. For $7,000, you can now get a fully kitted out, ergonomically correct camera that shoots 15 stops of dynamic range. It weighs 5 pounds.

This is the real end of film.


4 essential plugins for improving GoPro drone footage

I just finished filming an epic drone sequence on Seattle’s waterfront, in which I filmed a mammoth barge headed out to sea. Unfortunately I can’t share the footage, which my client is keeping under wraps for the moment. But I can share with you the 4 plugins that I’ve found indispensable for cleaning up and presenting drone footage shot with my GoPro Hero 4 and Phantom 2.

Digital-Anarchy-Flicker-Free-1.0.1-FULL-Precracked1. Flicker Free.

Cleans up the nasty interference pattern caused by quadcopter props when sun is a factor.

Any time you’re shooting into the sun, or when the sun is angled overhead in front of the camera, you can see this issue. It looks like a bad TV channel from the 60s: rapidly scanning lines caused by the shadow of the props on the lens. For the longest time I thought there was no way to fix this. One day I was using Flicker Free to clean up a time-lapse, and though: hey, why wouldn’t this work for aerial footage? I tried it, and it worked like magic. I generally get best results with the “remove horizontal bands 2” setting, but if that doesn’t work for you, try the other settings as well until you find one that does.

Screen Shot 2015-04-12 at 4.10.31 PM2. Lock and Load X.

Stabilizes and reduces rolling shutter. Works especially well to make parallax shots looks smooth and intentional. Something about how this plugin works just smooths out overcorrections in steering. It works far, far better for this than the built-in plugin in Final Cut Pro X or Adobe’s Warp stabilizer. This is another one of those magical pieces of software that I apply to ALL of my drone footage, whether it needs it or not. It always makes it better. Try it yourself – they offer a fully functional 30-day trial.

682482033. FilmConverPro with GoPro camera pack.

There are two presets for use with ProTune footage (which I use on my GoPro) that instantly make your footage look great. To get the most of this, you have to configure your GoPro Hero 4 the right way BEFORE you shoot. Here’s the settings I use:

  • Pro Tune
  • Flat
  • Max ISO: 400
  • Sharpening: low

I also find that the smoothest, most cinematic drone footage often results from shooting at 48fps in 2.7K (conformed to 24p in post). That way, in addition to the option for slow things down, if you ultimately export out to 1920×1080, you have a lot of extra frame that plugins such as Lock and Load and Fisheye Fixer can work with without losing any resolution. You can also crop in closer to your subject without losing resolution – which allows you to shoot a little loose – a little farther away from your subject. Improves the odds that you’ll get your drone back safely!

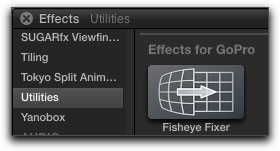
crumplepop_fisheye_gopro_douglas_044. Fisheye Fixer.

Straightens the horizon curvature that is always present with GoPro footage.
The curved horizon thing may look great for in-your-face sports action, but for the typical drone shot, it’s bullshit. Get rid of it!

Fisheye Fixer gives you fine grained control over how much curvature to remove, so you can dial in the perfectly flat horizon that we like so much.

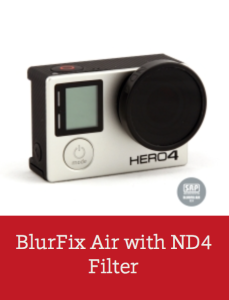
Screen Shot 2015-04-12 at 4.05.46 PMBonus tip: Use an ND filter in front of your GoPro. This is like putting a pair of sunglasses on your lens, and reduces the amount of light coming in so that the shutter speed can come down to something more cinematic. This allows movement to blur and look natural. It also goes a long way to reducing jello shutter that is exacerbated by high shutter speeds.

I recommend using the Snake River Prototyping BlurFlix Air ND 4 (good for both cloudy days and sun). It’s currently the best on the market for drone use because of it’s light weight, which allows them to be used without upsetting your delicate gimbal.

For if you’ll be shooting in bright sunlight all the time, I’d recommend their ND 8 filter.

Happy drone shooting!

Genaray GESPLR SpectroLED SP-LR review

lightwithtripodbagAs a documentary cinematographer, I’m a big fan of available light. However, it’s rarely perfect. A little fill on the shadow side of a window, for example, can create magic out of a monster. So wouldn’t it be nice if there was a light small enough to take with you anywhere, that you could just snap your fingers when you needed it?  Or like, wave a magic wand?

skerritlightInterviewing Tom Skerritt using Spectro-LED as rim light

When first I saw the IceLight from Wescott, I felt it wasn’t quite right for a couple of reasons. One, it wasn’t powerful enough. Two, it felt overpriced to me. So I waited. Given the rapid pace of LED development, I knew it was only a matter of time before we’d see an exciting development. In fact, I’ve been Googling for it. When a recent search for “IceLight alternative” uncovered something called the Genaray GESPLR SpectroLED SP-LR, I was interested. When I saw it contained both tungsten and daylight balanced lights, I was impressed. When I saw it was listed at $250 (half the price of an IceLight), I was sold.
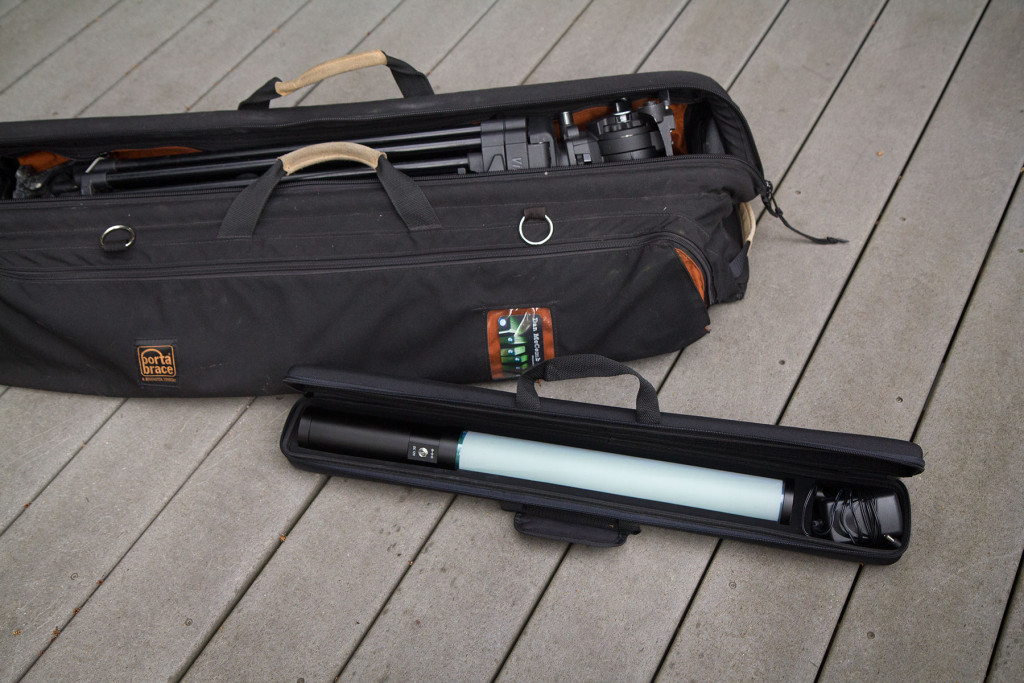
caseThe light arrived a couple of weeks ago, and the first thing that caught my eye was the case. It’s one of those padded, semi-hard things, solidly built, something I will actually use. The size of the light is nice and compact, at just under 22″ long. The active strip of light it produces is 14″ long. It tucks easily into my Porta-Brace tripod bag (with the tripod in it, too), which will allow me to carry it easily on the road.
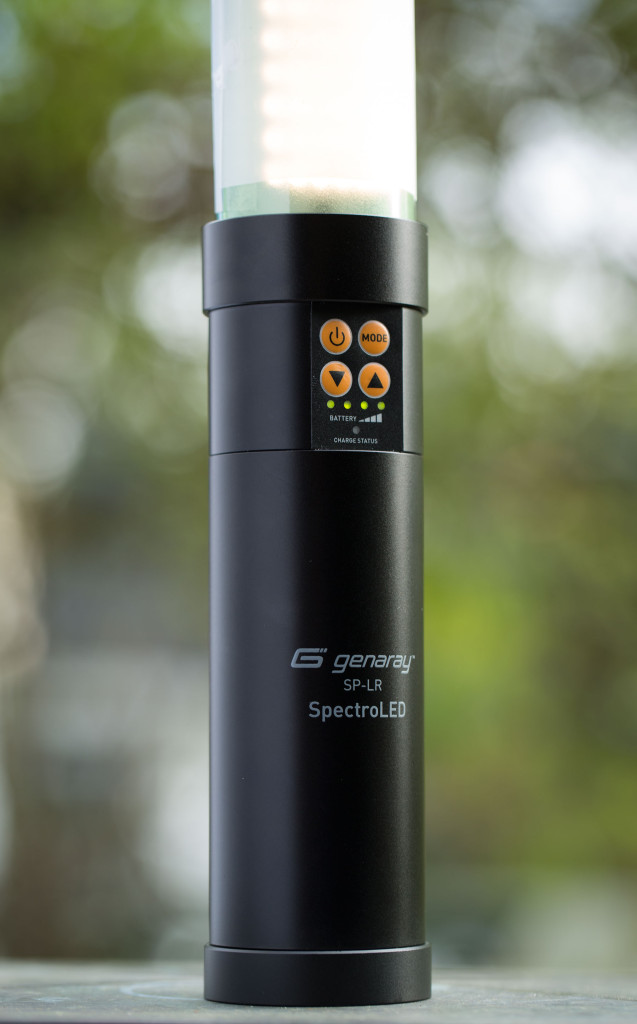
tubehandleThis light is impeccably professional looking. The black, all-metal handle includes buttons that electronically switch between tungsten and daylight, and dim the unit from 100 percent to 10 percent.

The mode button switches between tungsten on one side of the light, and daylight balanced LEDs on the other.

The dimmer works well, and produces no audible buzzing or sound of any kind (yay). Also, the light is flicker free at all settings.

The light is advertised to last for 2.5 hours at full blast. I found that not quite true. After running for 1.5 hours, I measured a small dip in brightness. After 2.5 hours, the light was still running strong, but had further dimmed, losing perhaps 1/-8 to 1/4 of it’s original brightness. At 2:40 it was down to 1/2 original power, before dying completely at 2:46. So it dies with a whimper.

This is a drag. I’d far prefer a light that dies with a bang, so that I could count on it being consistently bright whenever it’s on. Still, the fact that you can get in excess of 3/4 of it’s power after 2.5 hours isn’t too shabby for such a compact light. It’s just one more thing to keep track of during a shoot. For those reason, I’d recommend powering it via the AC adapter for longer interviews, or if you’re doing multiple interviews, for the later ones.

The battery is built in, so it’s not possible to pop in a spare when it runs out. An AC adapter is included, however, so you can run it all day off the cord, which also charges the battery.
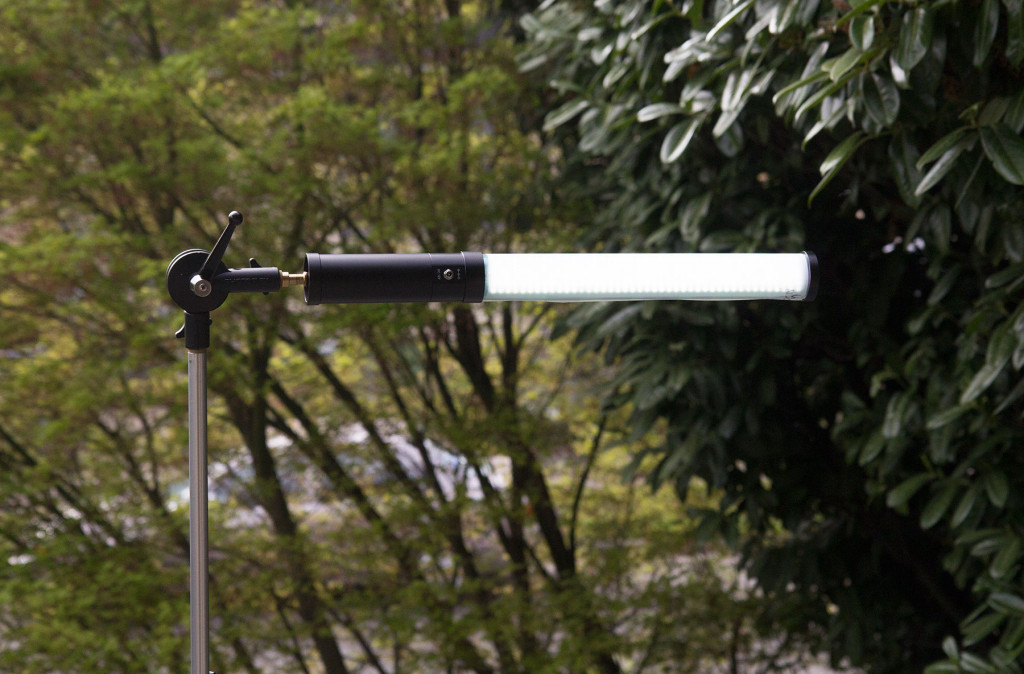
anglebracket

The light features a 1/4″ 20 female mount point in the handle. The included mounting spud has 1/4″ 20 screw on one end, and 3/8″ on the other. This makes it easy to attach to various mounting hardware such as tilt brackets that allow you to fly the light over camera for use as fill, for example.
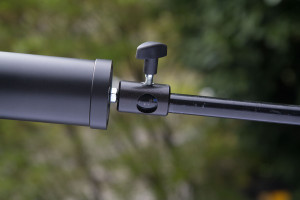
c-standadapterTo hang it off the arm of a c-stand, you’ll want one of these little guys (photo at right), a Manfroto 5/8″ to 1/4″ 20 rapid adapter. The light itself is so light (just 2 pounds) that it’s actually possible to hang it off a regular light stand, using a Photoflex heavy-duty grip swivel with a stand extension.  In that scenario, you’ll need to counterweight the bag. However, using a c-stand (below) you can fly it anywhere without counterweight. Which  makes fast and easy to reposition the light between setups.
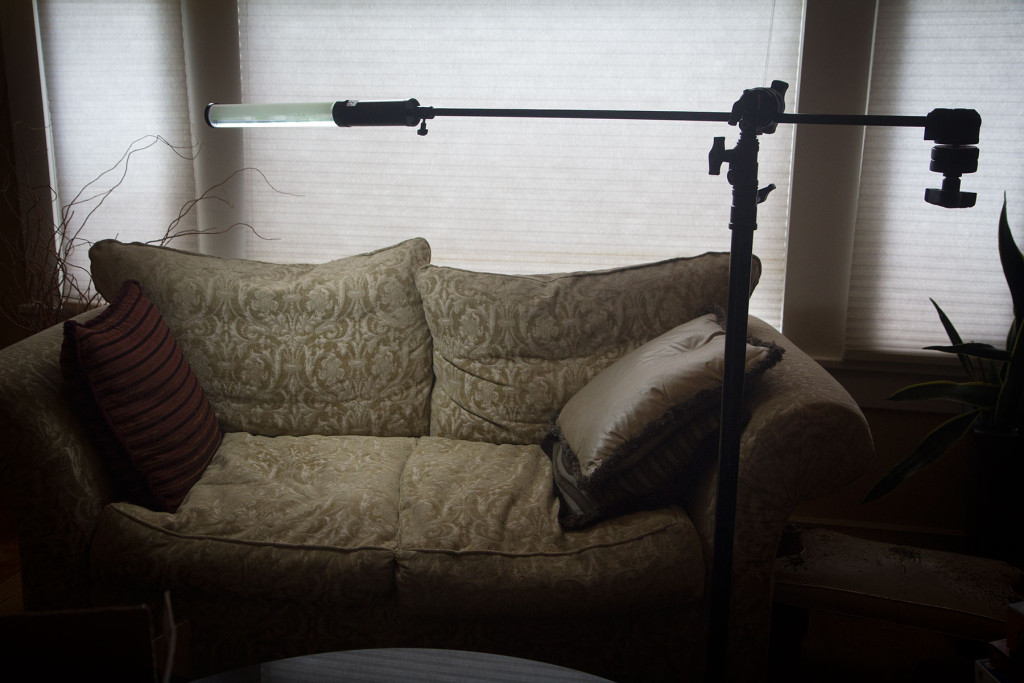
fillcouch

One gripe I have about the design is that, as shipped, it could use more diffusion. But it’s easy to add. Wrapping it with Lee 1/2 white diffusion softens it beautifully and completely eliminates the dreaded LED multiple shadow effect. The penalty for this is a full stop of light loss. However, given how bright it is,  this could be been seen as a positive, since the light doesn’t dim below 10 percent. If you just need the extra stop of light, it’s there.

Brightness

For such a compact light, it packs a big punch. (However, it loses some of that to color correction, as we’ll discover in a moment.) How bright? Here’s a real world example. After color correction gels were applied, I was able to set f/2.8 at 6′ with ISO 800 at a 48/sec shutter (24p). When dimmed fully, I read f/1.0 and a half. The tungsten side is about a third of a stop brighter due to needing less color correction.

Versatility

You can place the Genaray just about anywhere. With gaffer tape, you can affix it inside a car, for example, to get relatively soft illumination where you want it while hiding it from the camera.
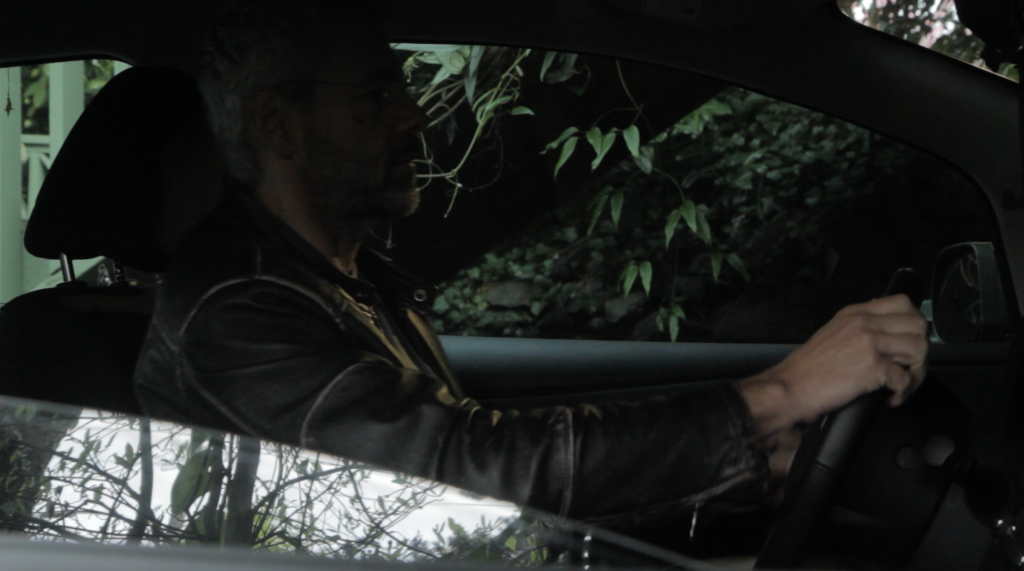
Screen Shot 2015-04-03 at 9.36.25 AM

Before

Screen Shot 2015-04-03 at 9.35.50 AM

After

The light has a rather nice, softly directional falloff, like a Kino-flo tube (more on that in a moment). I found it easy to feather the light by twisting it, and cutting it further is possible by applying black wrap.

This is the light of a million uses. Here’s a few that I’ve tried.
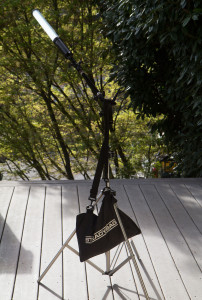
backlight

On swivel grip

Back light: Because it weighs just a couple of pounds, you can put it on a light stand with a swivel grip and stand extension, and boom it. I have a 7-lb Steadybag that is heavy enough to counterweight the light in this scenario (photo at right).

Fill light: Again, it’s so easy to fly this light directly over your lens with a light stand, where you can use it as a subtle, relatively soft fill.

Kicker: Simply screw it on top of the 1/4 20 thread of any light stand, and you’ve got a vertical strip of kicker light, that can chisel out some definition in an otherwise flat interview.

Traveling shots: Screw it onto the end of a Mogopod and you’ve got yourself a light boomed for traveling shots. It’s not as bright or as soft as the BBS Lighting Flyer, but then, that kit will set you back $3,499.
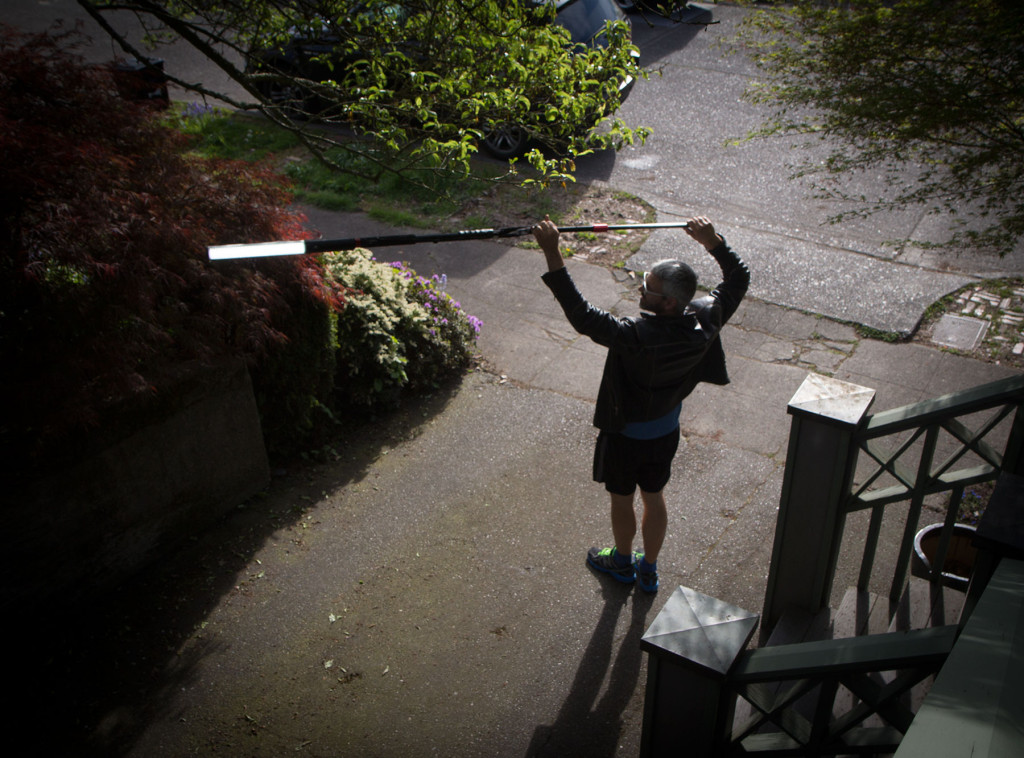
boomtravel

Quick and dirty traveling light boomed with Mogopod

Bonus: Skype light. Just stand the light vertically on the counter behind your laptop to illuminate your Skype conversations:
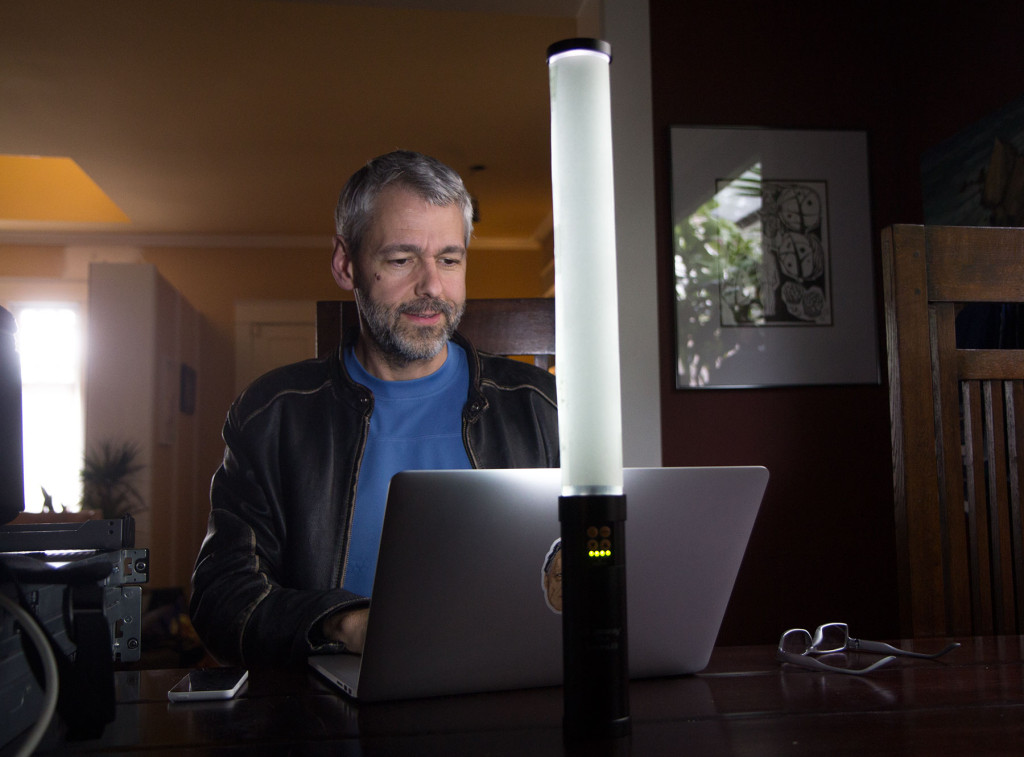
wandskype

Illuminating your next Skype conversation is as simple as placing the Genaray upright on your desk.
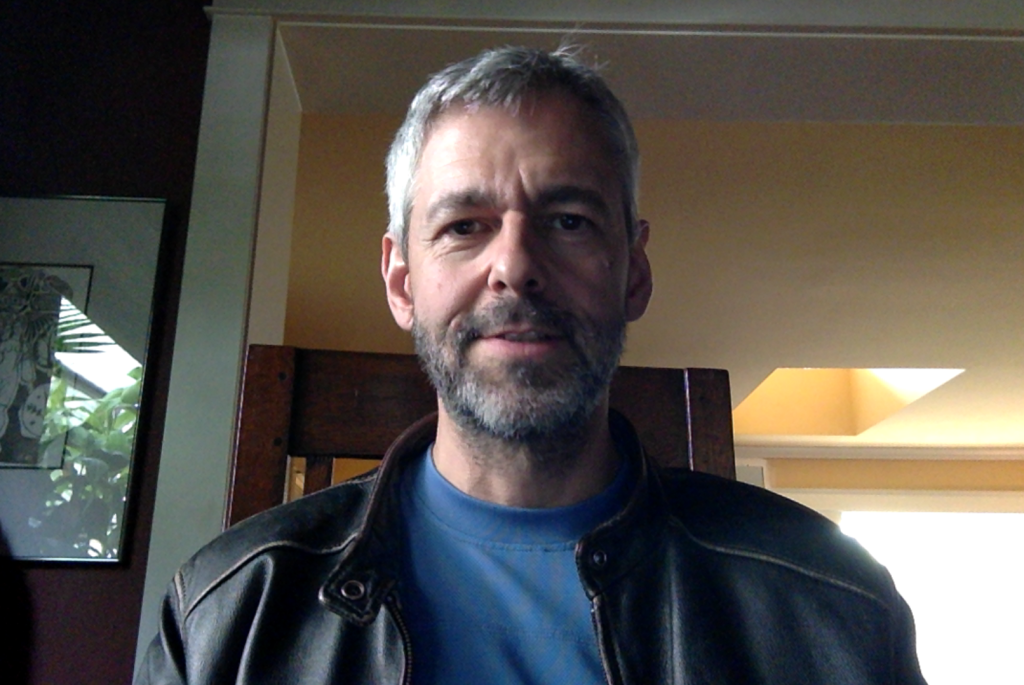
Screen Shot 2015-04-07 at 2.21.32 PM

Before light (lit only with window light)
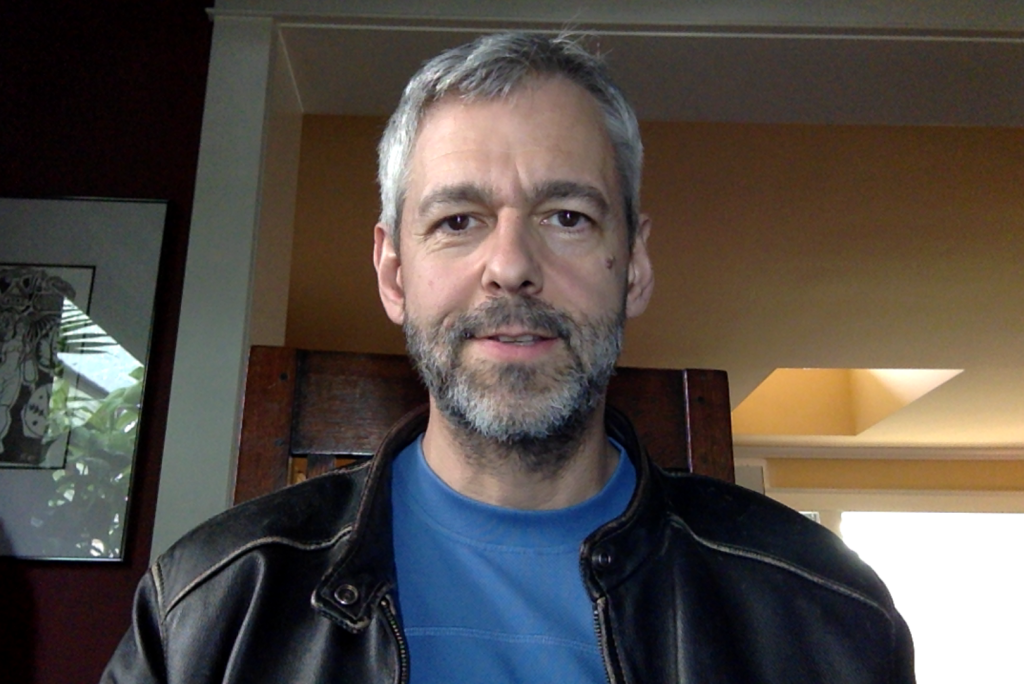
Screen Shot 2015-04-07 at 2.21.05 PM

After, with Genaray used as strong fill light

Bonus: Camping flashlight. This light works great to light up a campground picnic table!

So without doubt, this is a very flexible light. Great. But how does the light look?

Color accuracy

The Genaray is advertised at 3200K and 5600K. Previous inexpensive LEDs that I’ve reviewed have been all over the place with this. So, what can you expect out of a $250 LED these days?
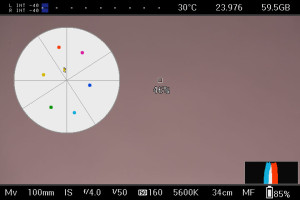
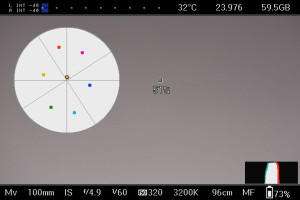
5600kdefaultOn the right is what the vectorscope shows me at 5600K (a perfect balance would place a tight dot in the middle of the scope). So it’s immediately clear that we’ve got WAY too much red. We can correct this by adding a little CTB and a lot of plus green.  We’ll find out just how much in a moment. But first, let’s see how the 3200K side of the light stacks up.

3200kdefault

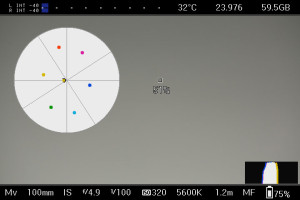
The 3200K LEDs, shown at right, are much closer to proper color balance. However, there is still a noticeable magenta shift. For a photo light, I want to see that dot in the bullseye. So we’ll need to add some plus green to get dial it in.

NOTE: I used an 18 percent Kodak gray card to do this test, and Magic Lantern’s Vectorscope on my 5dmkiii.
halfgreenblueOK, let’s tackle fixing the 5600K side first. After much testing, here’s what I came up with:

+ 1/2 green
+ 1/4 blue

Now we’re erring slightly on the yellow/green side, but just barely. And that’s the side I prefer to err on, because skin tones always look better a little yellow than any other color. I tried adding 1/8 blue, but that put us too far over toward blue/cyan. So this is about as close as we’re going to get this light, given that filters come only in 1/8th increments. Also note that this reduces the  output of the light by a full stop in 5600k mode.
plusquartergreen3200Fixing the 3200K was easier:

+ 1/4 green

I think it’s a shame these lights don’t match the color temperature they are advertised. But not as much a shame as paying $500 for the IceLight2! The price of inexpensive LEDs, at present, seems to be color temperature accuracy. But as you’ve seen, it’s possible to dial them in with a little work.

The CRI is 85 on these lights, which means colors won’t be as faithfully reproduced as with higher CRI sources. But in my experience, 85 is plenty high enough for general documentary use. My guess is that these lights are probably all different. So you will likely have to do your own testing to correct your copy of the light.

Light quality

OK, now that we’ve corrected our color balance, let’s take a look at the light qualitatively. That is, how does it look on a human face?

The closest thing I can compare this light with is a Kino tube. Only, minus all the crap you have to pack around to get the Kino fired up. It produces the same signature shadow as a Kino tube – soft on one axis and sharp on the other. So it’s an interesting mix of hard and soft light.

If you hold the light horizontally above your subject’s forehead, it casts a sharp shadow under their nose – but spreads soft light across their face from left to right.
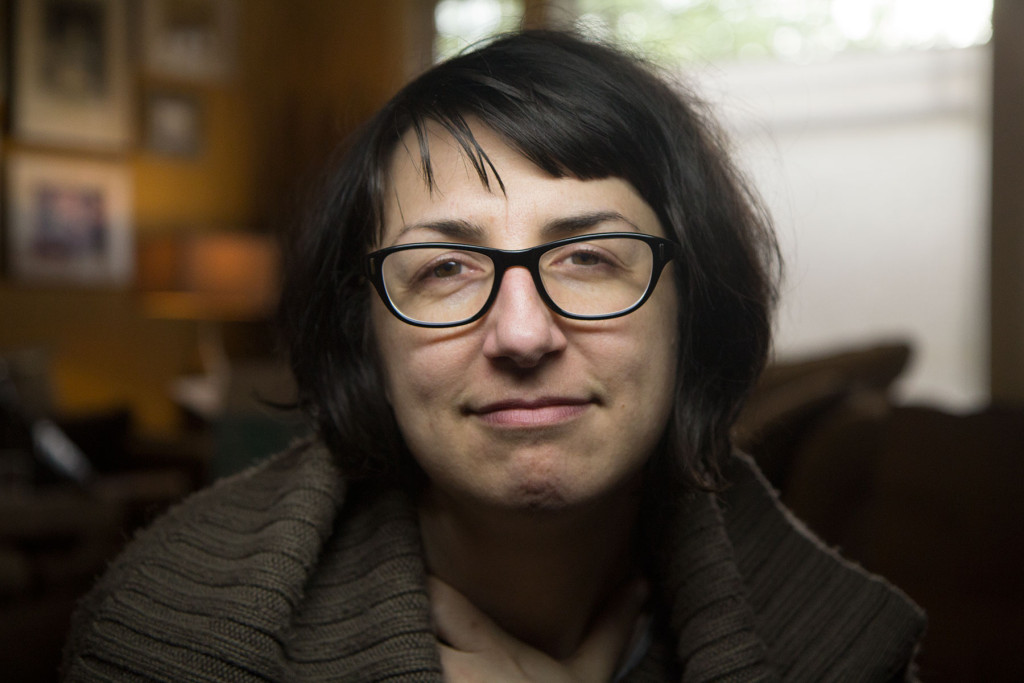
horizontal

Genaray held horizontally

Flip the light vertical to the subject, and you get soft shadows under the nose and chin, with rapid falloff of light on either side of the face (you also get nasty vertical glare on glasses, which is why they aren’t in the shot below).
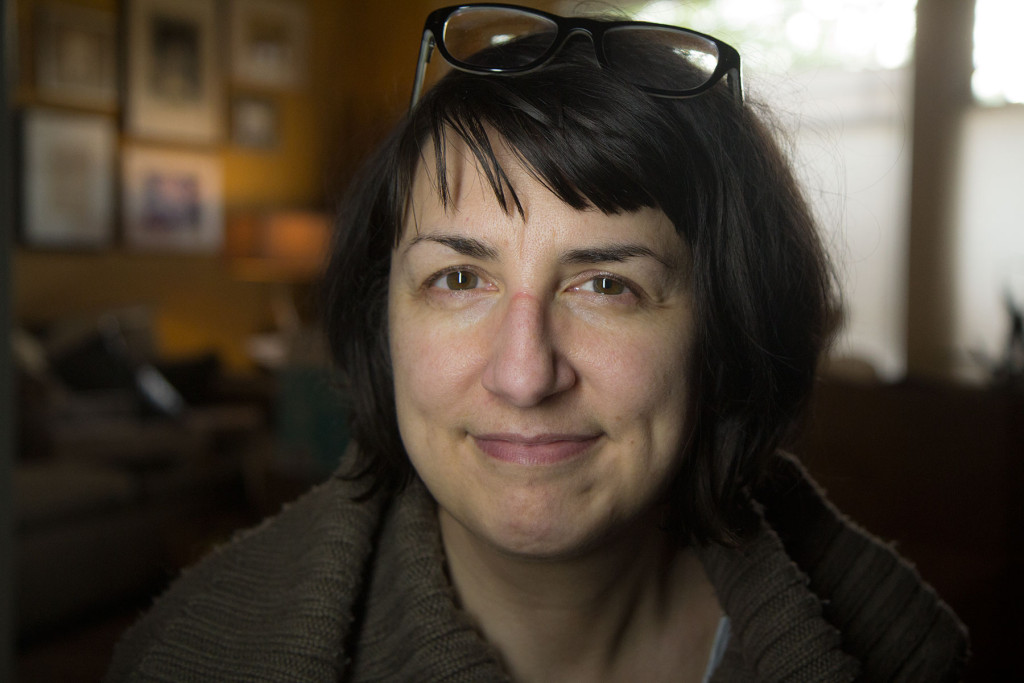
vertical

General held vertically

Used as a backlight, above and behind the subject, it spreads the light across head AND shoulders. I prefer this look to a point source.
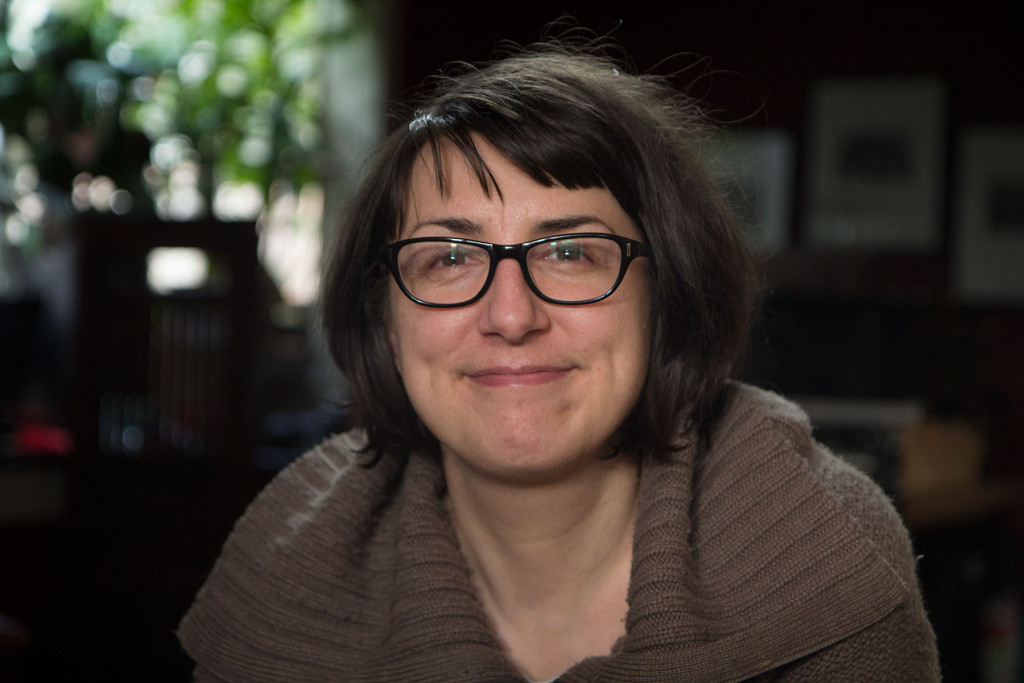
usedbacklight

Generay LED used as backlight

So to sum it all up: Despite being pretty far off the mark in terms of advertised color temperature, this light can be balanced with a little effort. And it’s effort that will pay off. For the price, you get a lot of light in a tiny package that can be put to work on just about any documentary shoot. Especially for travel, where space and weight are always a consideration, this light is a road warrior’s weapon.
Sound Advice Tour gives filmmakers opportunity to upgrade their audio chops

Werner Herzog was excited. He’d just learned that he was a finalist for a National Science Foundation grant to make a film about Antarctica. But then came the bad news: the other finalist was James Cameron. It costs about $10,000 a day to put a person in Antarctica, so the NSF had a question for the filmmakers: What is the minimum number of crew you need to make the film? Cameron replied that 35 should do it. Herzog pounced. “I need two people,” he said, “and one of them is me.”

Guess who got the gig?

alg-herzog-jpgIn addition to directing Encounters at the End of the World, Herzog assigned himself the job of sound recordist. The film went on to become his first to be nominated for an Oscar.  And it’s no surprise that Herzog, who relishes the “making” part of making movies, chose to wield a microphone instead of a camera. Because sound is the most important part of filmmaking.

Seattle filmmakers will get an opportunity to learn why that is true on May 27, when the Sound Advice Tour rolls into town hosted by legendary Hollywood sound designer Frank Serafine. Designed for filmmakers, editors, and aspiring sound engineers, this all-day workshop will cover techniques and tools to expand your skills and give you a solid foundation in the effective use of audio in all of your projects.

One of Hollywood’s top sound designers, Frank Serafine is an academy award winning sound designer who has created sounds for television shows, video games and major motion pictures, including, Poltergeist and The Hunt for Red October, which earned its sound editing team an Oscar.

IMG_0528_1I had an opportunity to interview Serafine by email recently to learn more about film sound and what filmmakers can expect from the one-day workshop.

Q: The workshop materials state that sound is 70 percent of a movie. How such a big number?

FS: This is something that major directors have been quoted saying, not only me as a supervising sound editor / sound designer. I understand the full importance, drama, atmosphere and psychological impact sound has, even over picture.

Sound is our most prominent sense and it’s omnipresent. We can only see 180 degrees in front of us, but we can hear 360 around. So, it’s really, really important to the success of any film.  Things that can save our life are embedded into our DNA through our hearing sense. For example, if we hear a tiger roar, which we’ve been trained to know a tiger roar. It’s a scary thing, but deep down if you hear that sound in the wild you know danger is lurking. Even if you can’t see it, you know something is wrong. In film sound we trick the listening audience senses into believing in the same way. With the latest sound technology coming into play nowadays we’re really able to trick the senses.  3D surround sound are becoming so sophisticated due to advanced scientific research in reflection and convolution studies, computers can now analyze and visualize the physics of what sound actually does and how the human brain perceives and reacts to it.

IMG_0491 (1)Q: If there is just one thing that a person can do to improve their film audio, what is it?

I would say production audio may be one of the most important parts of learning how to get the best possible sound on the set and in the field. Using a variety of different technologies that are available to us through our new MZed sponsors, Sony, Roland and Rode. Were using the latest location sound field recorders, microphones, boom poles, wireless transmitter/receiver systems, cameras and accessories that help us initially capture the best possible location production sound. The critical thing about good quality production sound is that it carries all the way through the film and an extremely important thing to making your film the best you can from the very beginning. It’s better not to be forced to: “Fix it in Post.”

Q: Why are you taking time out from your busy schedule to share what you know about sound design?

I’ve been an educator throughout my entire career. During the time I worked on the early Star Trek and Tron films and Hunt for Red October,  I was also busy  teaching at the UCLA Extension. I was also hired to write the curriculum, mentored over 1500 students, redesign and run the sound department at the Los Angeles Film School in Hollywood.  I always enjoyed passing on what I’ve learned from my great mentors, which I think is an important thing to do, otherwise who-else is going it pass on? I really did learn from all the best through out my career, and I’m excited to share all of that with my MZed attendees in 33 cities, throughout the US and Canada this spring.

I also really like Jeff Medford, and what he is doing with MZed. They have been doing advanced film educational tours around the world for a very long time now.  This is their first film sound tour.  With my Sound Advice Tour, not only are we educational, but highly entertaining. I’m using equipment that has never been seen or heard before, and I’ve been training and learning a lot of new things about this gear. I feel like educating people is just another part of my job. It’s what I love to do and something I’ll do the rest of my career, which will be until the last day I’m alive.

Here’s an outline of what will be covered at the workshop:

9:00 AM Introduction 

  • Audio Psychology
  • History of Audio & Film
  • Audio Terms & Lingo

9:30 AM Sound Recording

  • Equipment Introduction

9:45 AM Types of Recording

  • Field, Production, Foley & ADR

10:30 AM Microphone Technology, Options, Placement, Techniques, Types

11:00 AM Recording Challenges 

  • Sealthing, Noise, Ambient, Cloth movement

1:00 PM   Sound Editing

  • Tuning the room, Acoustic Engineering, Setup
  • Dialogue Editing

1:45 PM   Sound Effects

  • Live recording demonstration: Foley, Background, & Hard Effects
  • Sound libraries

2:30 PM  Sound Mixing

3:30 PM  Dealing with Unwanted Sounds

5:00 PM  Sound Design

6:00 PM  Soundtrack

6:30 PM  Sound Inspiration

7:30 PM Wrap-up

Even if you’re primarily a camera person, this will be a killer opportunity to learn the importance of sound and how to solve the problems you’ll encounter in production.

Learn more about the Sound Advice tour and sign up for the $299 workshop.

Mogopod’s one-twist solution raises the bar for monopod users

The other day I went shopping for a monopod. I discovered a lot of options: skinny ones, tall ones, ones made from carbon fiber (expensive ones). One thing all of them had in common was a multi-stage design, which allows them to telescope. Most require screwing to adjust. Some have quick-release knobs. But one had something that got my attention: an intriguing twist-locking mechanism that allows the user to reset the height with a single flick of the wrist.

Screen Shot 2015-03-23 at 4.12.27 PM

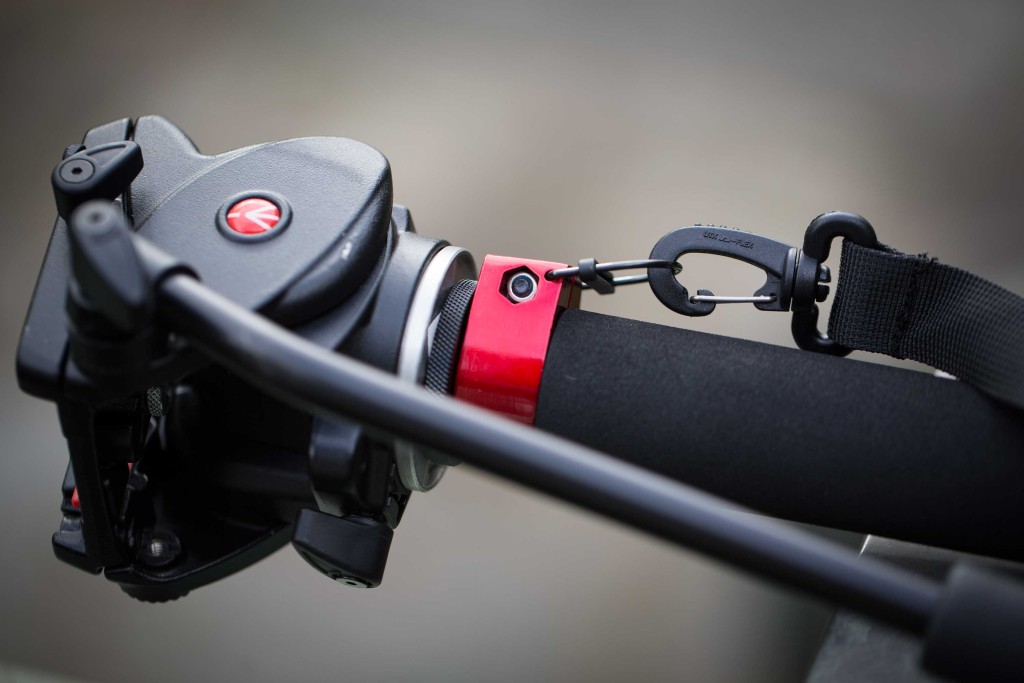
It’s called the Mogopod. And as I tried it out on the showroom floor, it immediately stood out as a product that had been designed with the user in mind. It fits beautifully into your hand, and includes a carrying strap that allows you to sling it over your shoulder between takes. But most impressively, the Mogopod is made from three stages, two of which telescope through an ingenious twist mechanism (which I’ve seen before on more expensive painter’s poles).

podtopReleasing the twist causes the stage above AND below to slide out simultaneously. And locking or unlocking doesn’t require multiple twist of the barrel – just a quick twist of the wrist. The result is a monopod that you can use to dance with your subjects, in my experience, quite literally.
At a wedding I filmed recently, the happy couple took their first married steps on the dance floor together and realized I wasn’t high enough on the stick to get the shot. Instead of having to take a short timeout while I reset the height (possibly missing the moment), I just reached down, made one quick adjustment, and kept shooting.

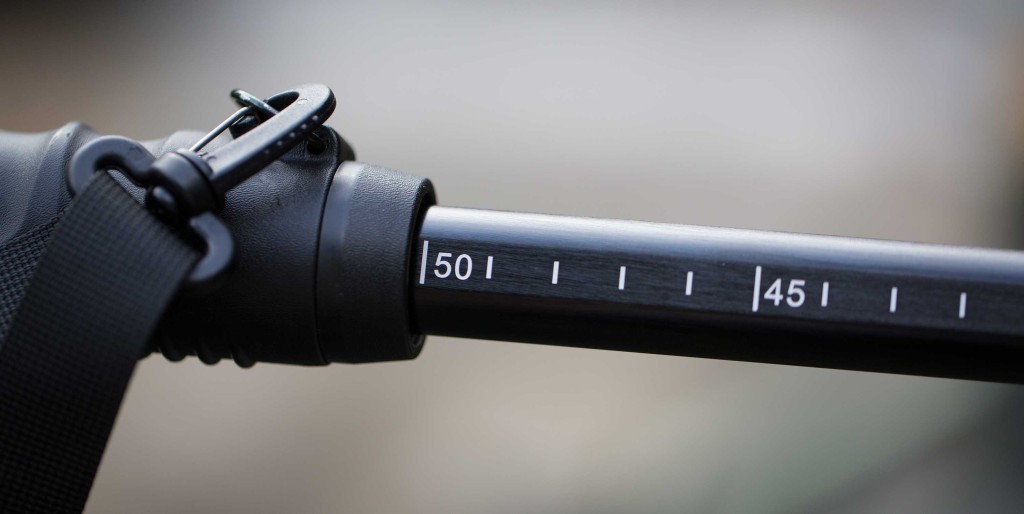
podlegThere are witness marks printed in inches on the side of the sticks that let you know exactly what height you’re at. I found that 50 inches was for me the “just about right” height for shooting while standing. So after going low, I knew immediately where to reset when coming up, saving me time.

toppinAt the top of the stick, another user-centered innovation is a dual-threaded reversible collar that allows you to select 1/4 20″ or 3/8 16″ studs. That sure beats those little screw-on adapters that I’m always losing every time I switch up to a video head on my other devices.

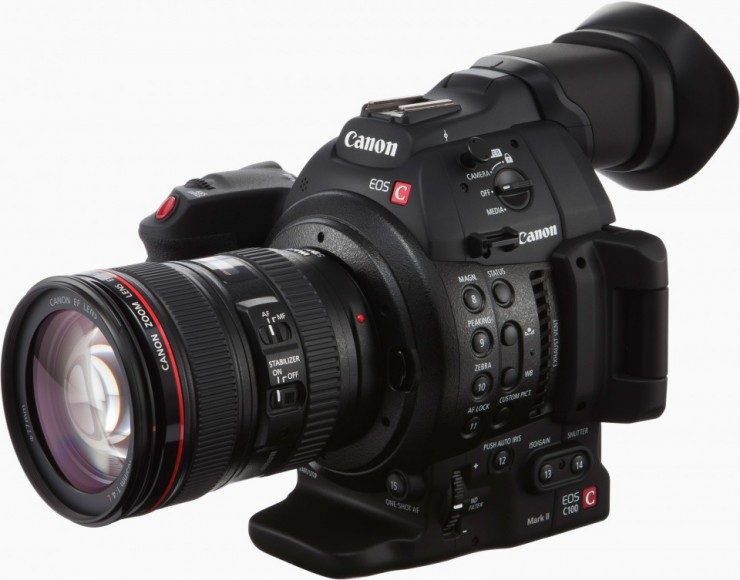
Adding a small, flat-mounting video fluid head such as my Manfrotto 701HDV allows quick upward and downward tilting of the camera. In this configuration I found it paired exceptionally well with the Canon C100 MKII for video work.

It isn’t the lightest monopod, as it is made from aluminum. And at 27″ when retracted, the medium sized Mogopod that I purchased doesn’t telescope down as short as many other pods (although the Mogopod Mk III Small, which I didn’t test, collapses to 20 inches). But if you don’t mind the slightly longer length, the increase in usability will more than compensate.

If you shoot like me, that means constantly changing your camera angle and camera height. So a monopod that gives you the ability to do that gracefully and quickly will make your day. It’s got a professional heft, and the red trim is an expensive-looking touch. But at $120, the Mogopod is one of the more affordable monopods on the market. That’s what I call raising the bar.

Canon C100 MkII autofocus is a game-changer for documentary

Canon-C100-Mark-II-Cinema-CameraWhen I was a young photojournalist in the early 90s, I remember the disdain that old-salt photographers had for autofocus. “Forget autofocus,” they told me. “It’s not for pros.” The technology was still in its infancy in those days, but today, you’d be hard-pressed to find a photojournalist who doesn’t routinely depend on it.

Motion picture is another story. Most cinematographers feel the same way about autofocus today as still photographers did 20 years ago. But change is coming, and it’s has a name:  Canon Dual Pixel CMOS AF. First introduced on Canon’s EOS 70D digital SLR camera in 2013, Canon has for the first time made autofocus a standard feature in their Cinema series cameras with the introduction of the C100 MkII. But does it really work?

I spent last weekend in Boston shooting a wedding that will be the climax of a forthcoming documentary film by Heather McHugh. I chose the Canon C100 MkII to shoot with because I wanted to put the camera in a situation where I could really push its autofocus capabilities to the limit, and see if it could perform as well or better than my manual focusing ability.

But first, a word about manual focus. When shooting video, it’s actually quite difficult to tell whether a shot is actually in focus. Especially when shooting wide or when stopped down, you can’t trust what you see on the screen. Tools like peaking that sharpens the image to better reveal focus, and peaking that places a color outline around in-focus areas, help. But nothing substitutes for actually SEEING that the image is sharp, and for me this means punching in, or digitally expanding the image to check focus. Canon DSLRs have a button that magnifies focus up to 5x for this purpose. But it only works prior to rolling – if the subject moves during the shot, you’re on your own. The C100 and other C-series Canon cameras have a 2x magnifier that works while rolling. This helps, but having to constantly punch in while rolling to check focus is distracting, and takes me out of the moment when following a subject.

When my C100 MkII arrived from Lensrentals.com, I spent a day getting comfortable with the menus and controls. And it became immediately clear that the autofocus button is in the wrong place – at the front of the camera in the same spot where the white-balance button is on many other video cameras. This makes grabbing focus a two-handed operation, no good. Luckily, Canon makes it possible to re-map the buttons to your heart’s content. I found that mapping the one-shot autofocus to the #7 button makes it an ergonomic dream to use.

Using this approach, I quickly fell into a one-handed shooting rhythm: Center the subject, press one-shot autofocus with my right thumb, and as soon as the green confirmation square lights up, roll camera with my right index finger.

What I have hated in the past about video autofocus is the dreaded “hunting and seeking” that happens unpredictably. With the C100, this is a thing of the past (except in very low light or on very low-contrast subjects, which I’ll address in a moment).

In fact, in my own manually focusing, I find myself hunting and seeking all the time: I focus, then punch in to check, then slightly overcorrect focus to see where the sharpest point is, then come back to it. Then punch out, and roll. So when I realized that Canon’s autofocus just goes to the sharpest point and locks there, I was very impressed. In that way, it focuses better (faster) than my human eye.

Canon provides two autofocus modes: one-shot and continuous. Unfortunately you can’t map the buttons to continuous – just to one-shot. This means if you want to switch between continuous and one-shot, you have to drill into the camera menu, a cumbersome process. I hope Canon makes continuous focus a mappable option in a future firmware update.

Continuous autofocus will attempt to keep whatever is in the center of the frame in focus. One-shot focuses to the point you’ve selected, and stays put regardless of where your subject moves after that. In practice I almost never used continuous focus. But it is very handy when a subject is coming toward you, such as a push-in shot. It’s also great for those times when you can’t touch the focus ring – such as when the camera is mounted in a Movi.

And here’s my first gripe: it’s only possible to focus in the dead center of the frame. In practice this isn’t so bad, because you can focus, reframe, and roll. But it would be very nice to be able to (as you already can with the Canon 70D) assign the autofocus area to another part of the screen. I found myself favoring the center of the screen for my compositions more than I normal would have done.

While shooting at the wedding, I loved the confidence that having autofocus gave me. It speeded up my work. Instead of squinting intently into the frame, I could center the subject, press one-shot, get focus confirmation, and roll without wondering whether my shot was focus. If the person moved, I could again press one-shot and get focus confirmation without interrupting my shot. Because there is so much to cover so quickly during a wedding, I found myself simply letting the camera roll, reframing a new shot, focusing, and repeat as needed.

The nagging feeling of “did I get that in focus?” that so often haunts me at the end of a good shot just melted away as I became more and more confident. Instead of concentrating on focus, I found myself concentrating on framing, on getting the right angle, on moving the camera to where it needed to be for the next shot. But of course, it wasn’t perfect.

I noticed that low-contrast or dimly lit subjects sometimes presented an autofocus challenge to this camera. In low light, I occasionally saw the hunting and seeking behavior that has plagued lesser video autofocus. But it doesn’t take long to figure out what situations I had to manually take over, and which I could trust the camera to handle. And, asserting focus is as simple as grabbing the focus ring. You don’t have to enable or disable autofocus first with Canon glass. You just leave autofocus enabled on the lens, and focus manually as needed. With one-shot, it won’t fight you.

On a few rare occasions, I noticed that the camera seemed to fasten onto a background object rather than focus into the foreground as I wanted it to. These were situations with a low-contrast object in foreground against a high-contrast object in background.

As the day went on, I wondered whether my near-constant use of autofocus would cause the battery to run out faster. It didn’t. I shot the entire event on a single Canon BP-955 battery. It had 25 percent of it’s life left at the end of the day. So the C100 does what it does without being a battery hog. Pretty incredible.

When I reviewed my footage afterward, I noticed something I haven’t seen in my footage before: shots that snapped into focus and stayed focused. Instead of my rocking back and forth to settle on focus, it just went straight to it with authority, meaning that I could react more quickly to a moment and nail it.

Before the C100, I could count on some percentage of my shots (maybe 10 percent?) being slightly soft. With the C100, virtually all of my shots are spot-on. Focus becomes a framing exercise, rather than a squinting exercise. And the result is renewed confidence. The C100’s autofocus isn’t perfect, but for covering events like a wedding, at least, it’s already better than my eyes. And that’s good enough for me.


Perceptiv SHIFT drone upgrade simplifies cinematic tracking shots

One of the most difficult things about shooting video with my Phantom II is tracking shots. I’ve found it’s very difficult to keep the camera focused on an object while the drone moves around it, much less stay focused on an object that is itself moving. Wouldn’t it be nice if there was a smart app that would allow you to tell the camera what to focus on, freeing you to do the flying?

Screen Shot 2015-02-28 at 8.29.59 AMStarting this fall, you’ll be able to do that, thanks to well-funded startup called Perceptiv, which has announced a relatively affordable upgrade it to your Phantom or 3DR Iris drone. The pre-order price is $600, which their website says will rise to $800 after the units being shipping.

It’s clear to me that DJI has realized how difficult getting cinematic shots is, by including a dual-operator option on the new Inspire 1. This will allow splitting camera operation and flying into two jobs, and give the camera operator a fighting chance of getting great tracking and parallax shots. But this tool looks even easier.

I’ll look forward to seeing how it works in real life, though. Most of the shots in the demo video are shot against green grass, which mimics green screen, probably the easiest situation for a camera to track. What would happen when you’re trying to track, for example, a specific car on a road full of other cars? I look forward to finding out.

Domke Next Generation bag gets details right

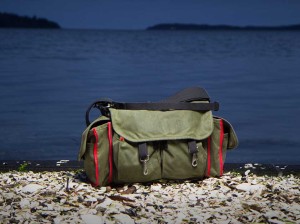
nextgendomkecover

When I was in college, I had an opportunity to study photojournalism in London for a semester.  I didn’t shop much in those days, but one thing I remember spending a lot of time hunting for was the perfect camera bag. I wanted one that would protect my gear but didn’t scream “expensive cameras here.” In other words, I didn’t want to get mugged. So I bought my first Domke bag, because it resembled a canvas gym bag on the outside – with the guts of a camera bag on the inside.

My fears were justified. One night on the last train home to my N. Portobello Road flat, I took some epic photos of a couple making out in a tube station. I knew they were going to be good. Elated, I rewound the film, slung the camera over my shoulder, and marched to my flat, unaware that someone had noticed the camera and started following me. I opened the door to my flat and walked in without waiting for the door to close.

I never had time to be scared. The first thing I knew, my face was slamming into the wall. Shocked, I turned to see someone dashing out the door. I realized two things instantly: I had my Domke bag over my left shoulder, but I did not have my Nikon over the right.

If I had to be mugged any place in the world, London isn’t a bad choice. The thief’s only weapons were surprise and speed. But in that moment all I could appreciate was the fact that my camera was gone. Then I felt into my pocket and remembered I still had the film.  I flipped open my Domke bag, where I still had everything I needed to continue shooting: a second body, and my glass. And I thought: had I tucked that camera back into the bag where it belonged, I might still have it.

small-bagThe photos I took that night went on to win awards that helped me land my first newspaper job. I carried that Domke bag with me on every assignment for four years, until I literally wore a hole through the side of the canvas.

Domke bags haven’t changed much since then, and for good reason. How do you improve a bag that, by design, isn’t supposed to call attention to itself?

velcroSo I was intrigued and a little worried when I heard that Domke was making a new generation of camera bags. When I got an opportunity to review one called The Chronicle, a large bag posing as an item of military surplus, I jumped on it.

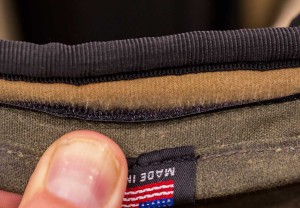
The first thing I noticed as I pulled the bag out of the box is the material. It’s made from the same waxy, waterproof stuff that Aussie cowboy slickers are made from. At a glance the bag still looks pretty unassuming. Which is what I would hope. But details matter. And that is where things get interesting.

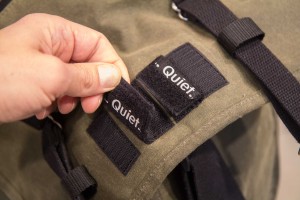
quietThe first detail I noticed was the velcro. Some very clever designer has solved a problem that I didn’t even know I had (yet one that has definitely plagued me over the years). You know that ripping sound it makes every time you open a pocket? Any time you’re on a film set with sound rolling, you can forget about opening those pockets. Sound recording and velcro don’t mix.

claspWell, Domke has a solution. You can now fold the velcro back on itself, reversing it to reveal a “quiet” label. In this configuration, the velcro won’t stick, rendering it completely quiet. So clever! All velcro closures on the next-gen bag has this new feature.

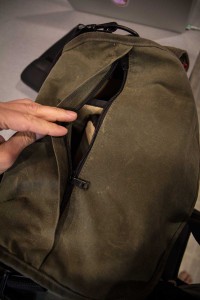
topzipper-vThe sturdy metal clips that have always secured the bag’s top flap have a minor improvement. They are slightly more heavy duty than on my old bags, and have a more ergonomic thumb release. In practice I’ve found that these snaps are a bit of a pain, so I often carry my bag with the snaps open, so I can quickly get in and out of the bag. But that leaves the contents less secure. A tradeoff, right? No more. This new bag allows me to have it both ways. A zipper running down the middle of the top flap provides access to the contents of the bag when it is clipped shut. This is a great solution.

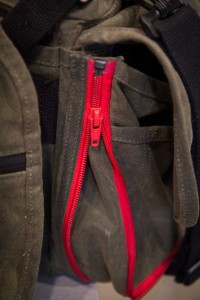
side-zip-pocketAnother clever detail: side pockets now have a zipper expansion option. Zipping them open provides twice the space. Closing them makes the bag much more compact. The front pockets have a snap that pops open to achieve a similar expansion, providing extra volume only when needed.

Do these details matter? Well, with the pockets fully expanded, I was able to fit in a change of clothes on a recent trip to Canada, allowing me to take just one bag. This would not have been possible with my previous Domke bag, which I still own. I like to travel light, so it’s definitely working for me!

theft-codeThe bag also includes a bar-coded ID tag. Ostensibly this is a way for you to be reunited with a lost bag, should some nice honest person find it. But actually it’s a clever way for Tiffen, the parent company of Domke, to get a ton of information about you for their mailing list. The 9 required fields on the signup form (including home address and phone number) includes the text “Email marketing you can trust” below the signup button. So you can trust you’ll be receiving spam from the 8 or 9 companies Tiffen owns if you hit submit.

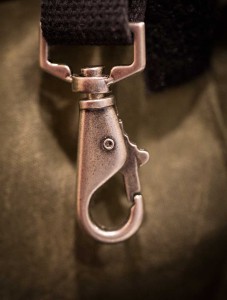
snapLuckily they’ve provided a low-tech solution: a key-ring snap on the inside of the back flap, where you could attach a name tag. It’s a little hard to find, though. It took me three months of using the bag before I stumbled upon it while examining it closely for this review.

The inside of the back has a nice partitioning system, with several dividers you can lock into place with velcro. You can quickly configure the bag to carry different types of camera and lens combinations. My old bag had a fixed divider, so it wouldn’t have been possible to, for example, reconfigure it to carry an FS700. With this bag, you can.

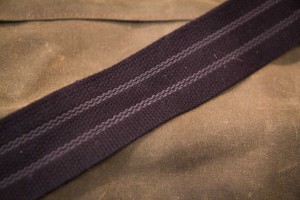
strapThe signature Domke bag straps are unchanged. I love the simple, unpadded wide strap with it’s shoulder-gripping rubber cord woven into the stitching.

All shoulder straps slip off, though, so it’s not foolproof. I was carrying this bag on my shoulder while juggling two other bags going into the Paris Metro last December, and it slipped off at just the right time to get caught in the turnstile. Those doors don’t open once they’re closed! Luckily a passenger on the other side freed my bag and then kindly handed it over the gate to me.

tagWhich brings me to my conclusion. What I most love about this new Domke bag is that it keeps it’s simple appearances, while adding some welcome features that make it even more pleasurable to use.


Cameralends.com aims to do for camera owners what AirBNB did for vacation homes

Screen Shot 2015-02-18 at 10.09.05 AMHave you ever thought about offsetting the cost of your expensive camera gear by renting it out? I have. But I’ve never done it, for two big reasons: I don’t know how to find renters, and I don’t know if I can trust them.

Enter a new service called CameraLends.com. CameraLends is a peer-to-peer lending community for photographers and videographers. Equipment owners post items for rent to other photographers. You can rent gear directly from local photographers, potentially faster and cheaper than through traditional vendors.

That’s nice, but what happens if your equipment gets damaged or stolen? Cameralends will reimburse you the replacement cost of your gear. Problem solved! And, they’ll help you find customers by connecting you to other photographers in your area who are looking to rent equipment. The price: 20 percent of each transaction.

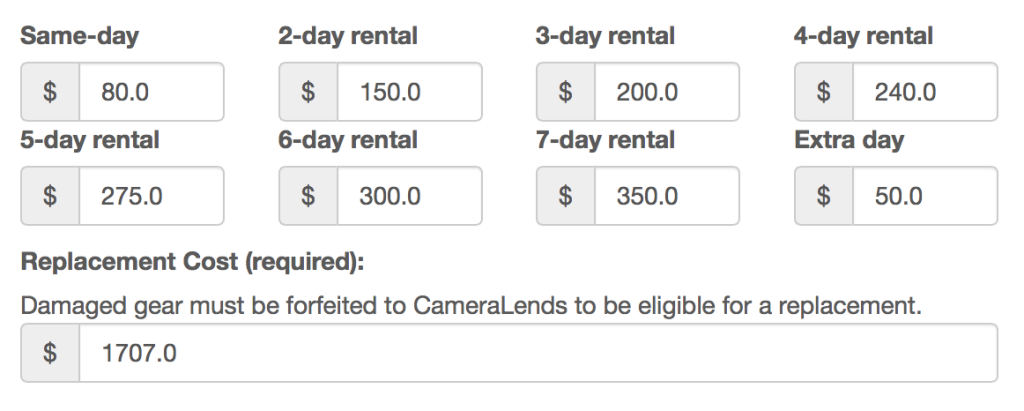
The service gives you full control over how much to charge for each piece of your equipment. You can even set discounted pricing for multi-day rentals, the same as most rental houses do. And you get to set the value amount, which is the amount you’ll be refunded should your gear be damaged.

Screen Shot 2015-02-18 at 10.57.20 AM

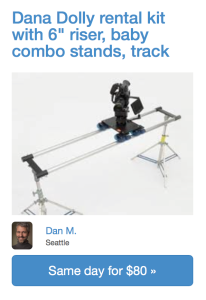
So, how does it work in practice? I decided to list one of my most expensive and least-used pieces of equipment, my Dana Dolly.

The signup process was straightforward (though missing a Facebook signup option). Once I created my account, the first item I decided to list was my $1,700 Dana Dolly rental kit, which I purchased a year ago and have used only on a handful of projects. It’s the perfect piece of gear when I need it, but that isn’t very often. So why not rent it out?

To save time, I simply cut and paste the product description from the manufacturer’s website. Paragraph breaks show up correctly on the back end – but not on Seattle Dana Dolly rental published page. This makes it difficult to read descriptions that are longer than a single paragraph. (Update: I’ve been told a fix for this is in the works).

Screen Shot 2015-02-18 at 10.56.16 AMUploading a photo is easy, and adds professional polish to your listing. You can add more than one photo, too.

The site conveniently provides  a drop-down menu listing all of the equipment they think you’re likely to own – but of course, my Dana Dolly wasn’t on the list. Luckily, there is an alternative field for adding a new item. But when I saved it, I discovered it had defaulted to 5D Mark III. Bug! I submitted the problem via email, and someone responded right away both to my message and by posting a bug fix within a few hours.

So far, I haven’t had any bites on my dolly. But it’s been just two days, so time will tell. If it hasn’t rented in a few weeks, I will adjust the pricing. One thing I have noticed immediately, though, is how quickly my rental comes up in search results. If I Google for “seattle dana dolly rental,” my listing already comes up in the top half of results on the first page.

I’m excited by the potential that Cameralends.com has to put some of my seldom used equipment to work, reduce the cost of ownership, and help other filmmakers connect with a great deal on local equipment.