Monthly Archives: January 2016

Sony FS5 Quick Setup Guide

left-menus

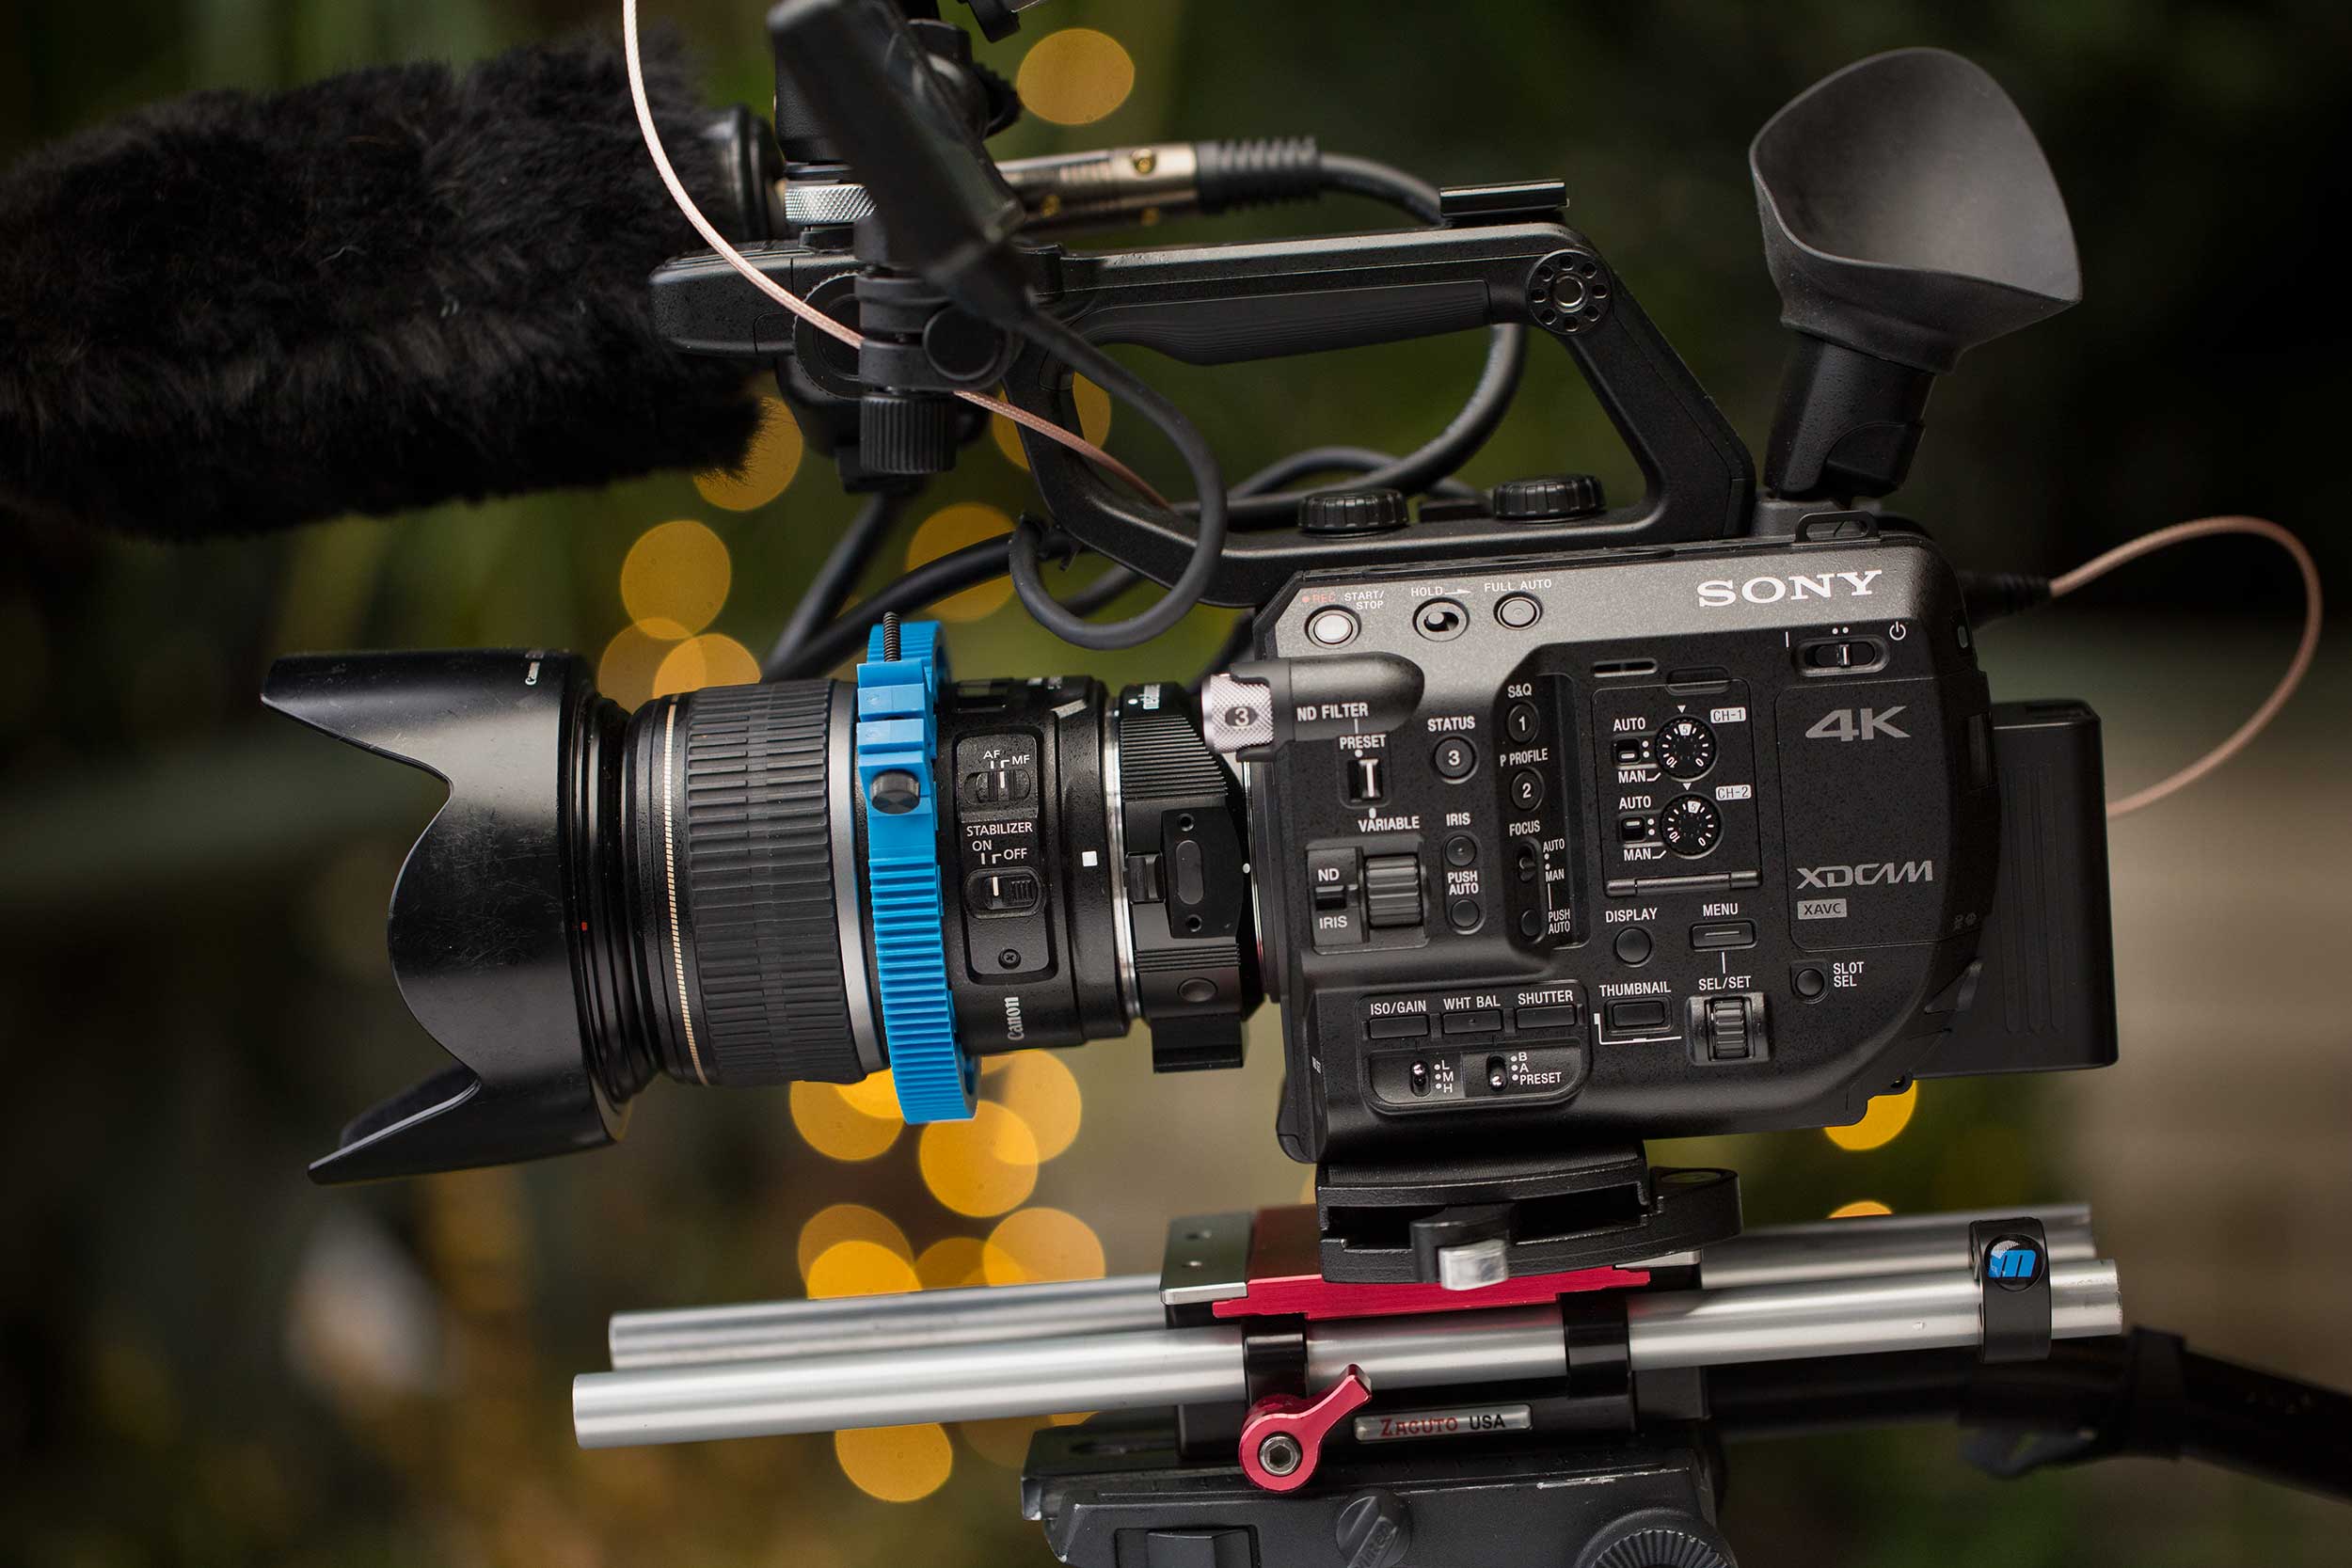
If you’re starting out with the Sony FS5, and going for a cinematic look, here’s a setup guide that will have you up and rolling fast.

Codec

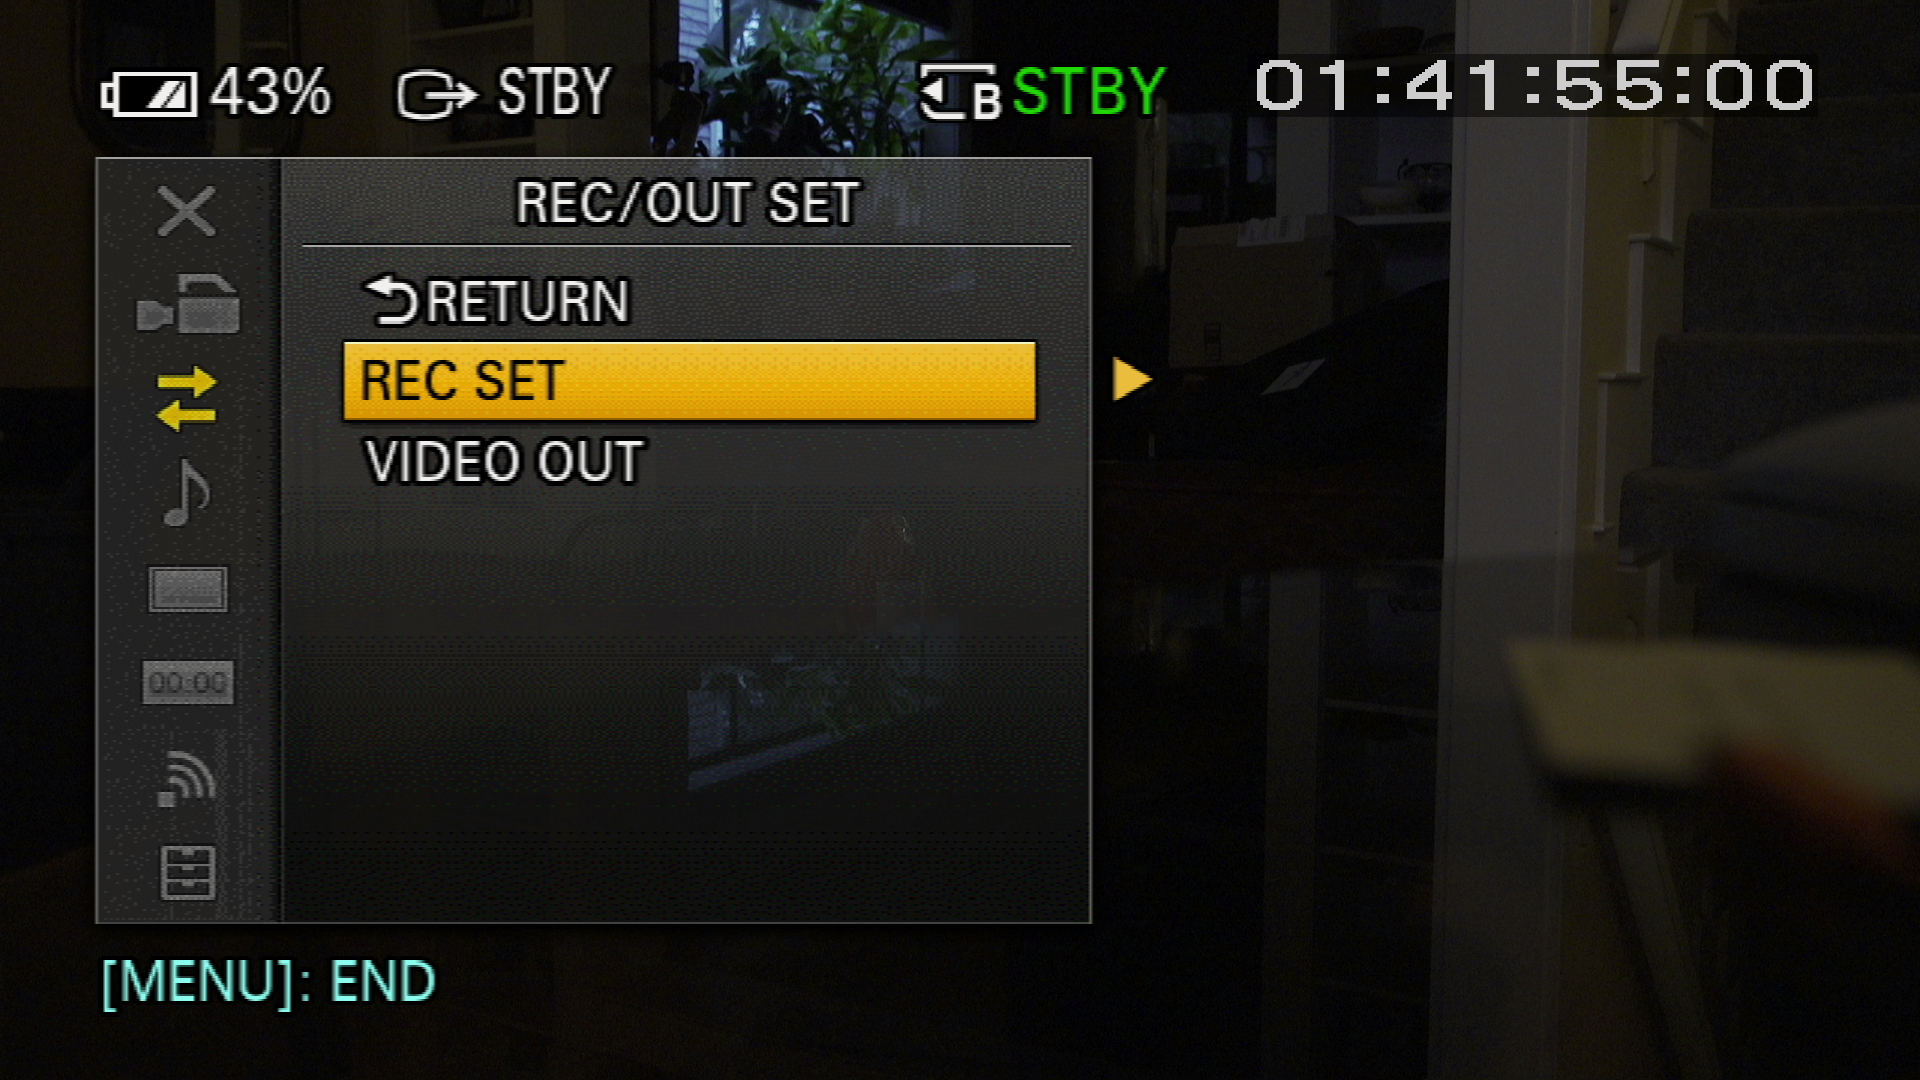
Select REC SET from in/out menu, and choose:

File Format: XAVC HD
REC FORMAT: 1080/24p 50Mbps

SHD_IMG_0007

SHD_IMG_0008

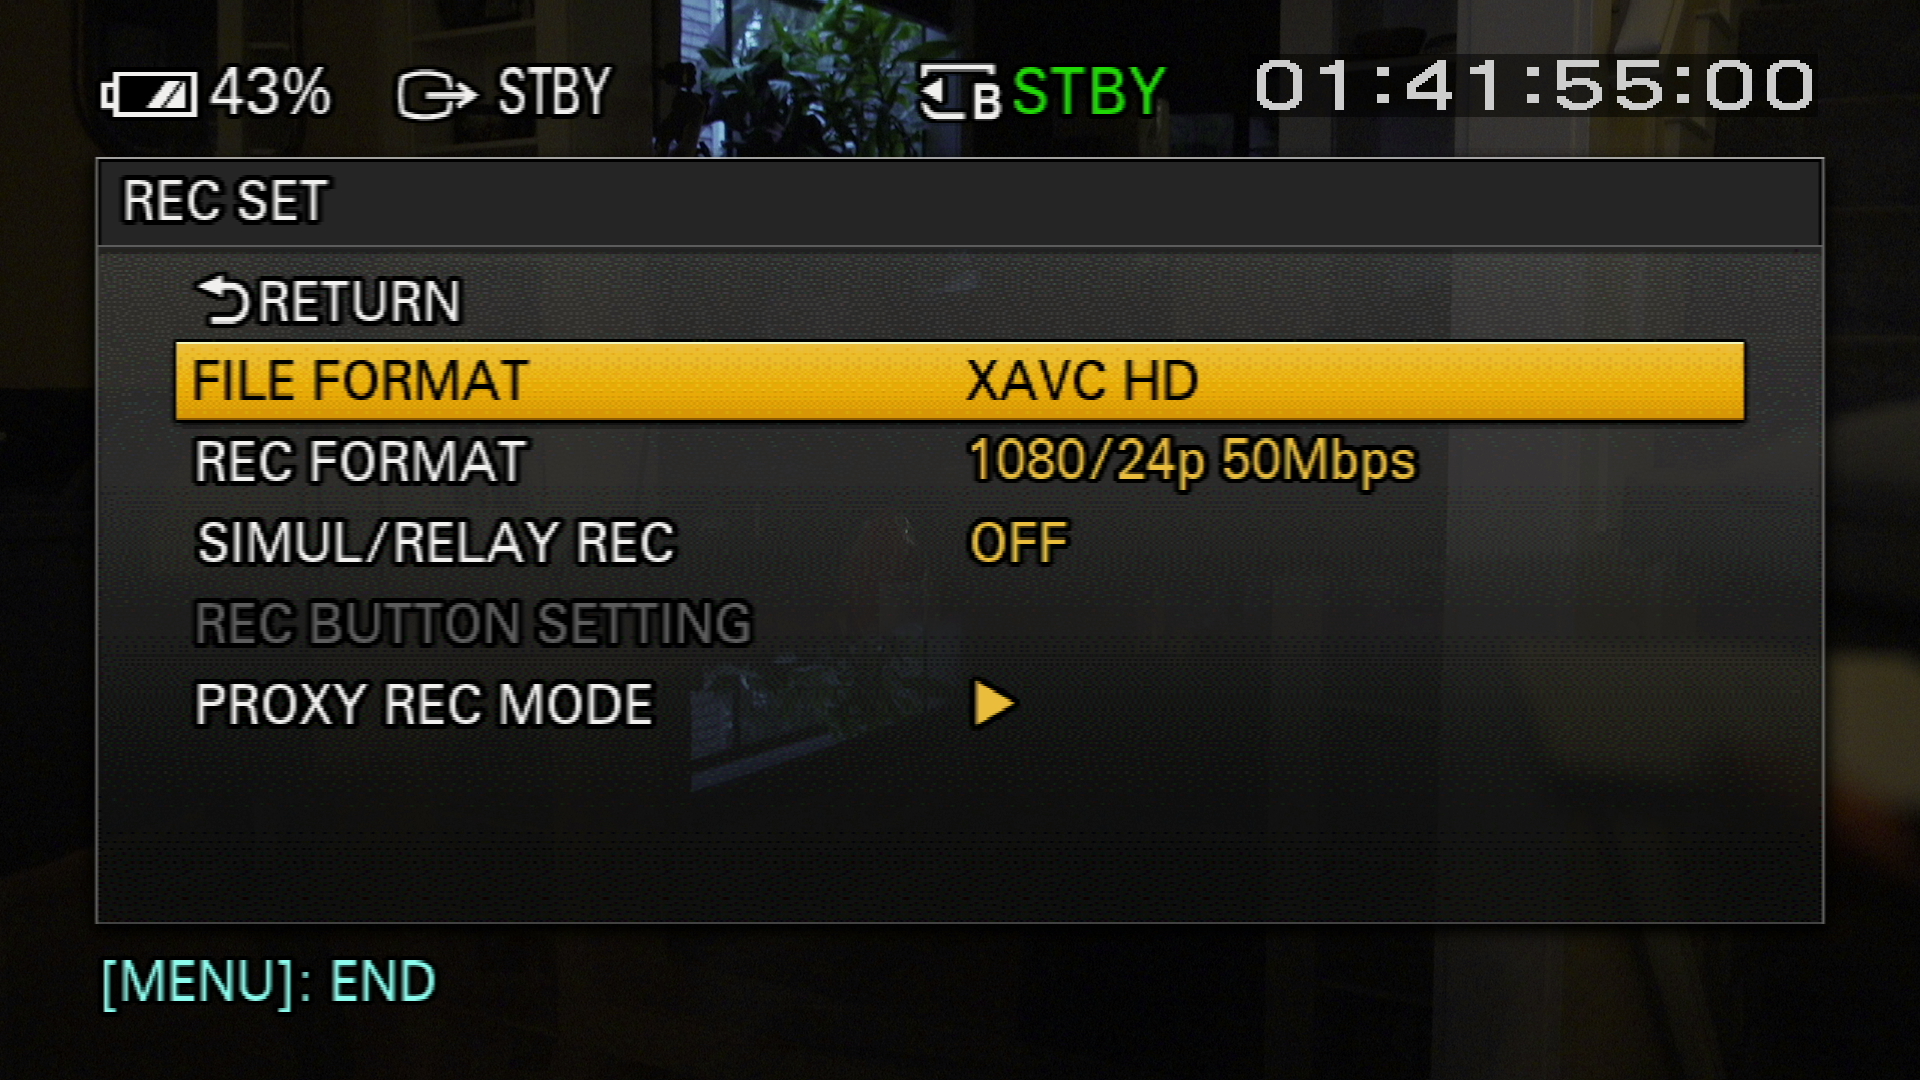
XAVC HD will give you the best quality image this camera is capable of, in gorgeous 10-bit, which can withstand a lot of color grading without getting noisy. The default XAVC QFHD option gives you 4K, but only in 8 bit. So unless you need the higher resolution, stick with HD. And avoid using QFHD in low light.

Monitor

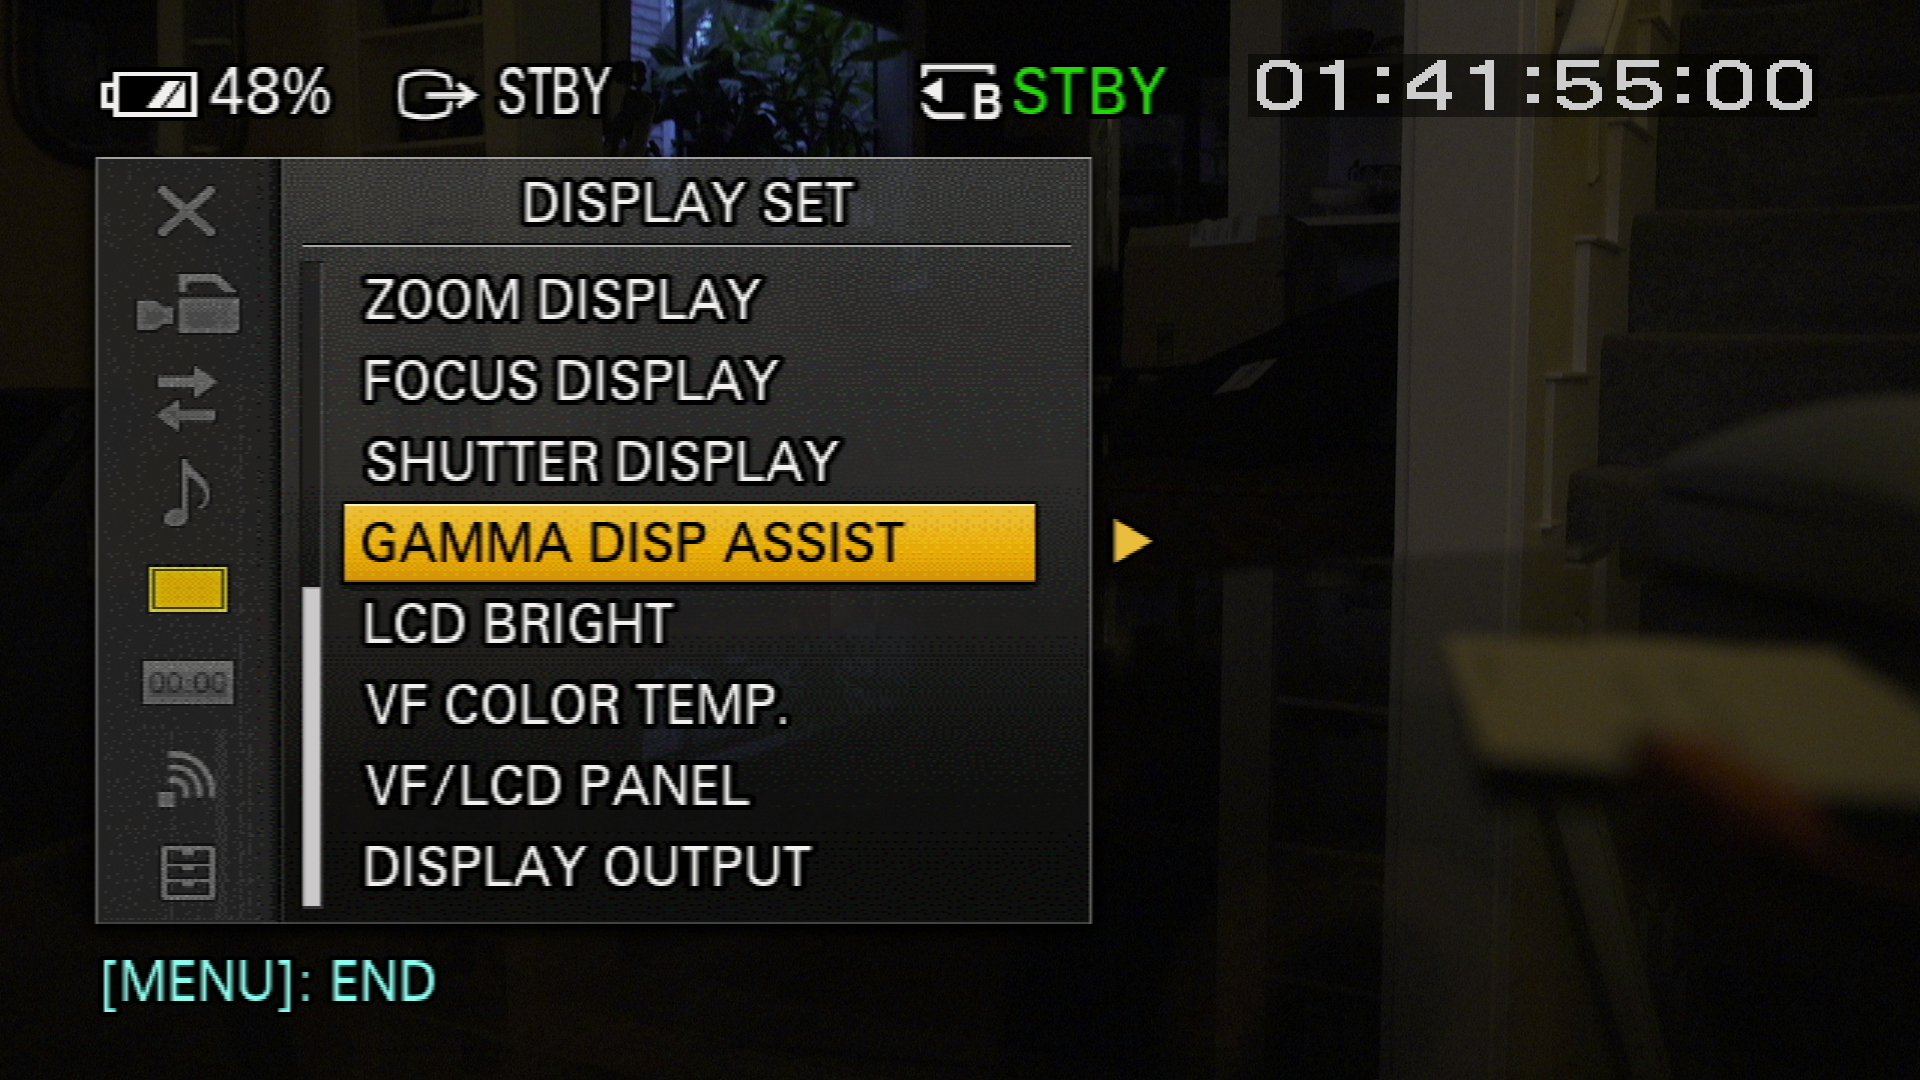
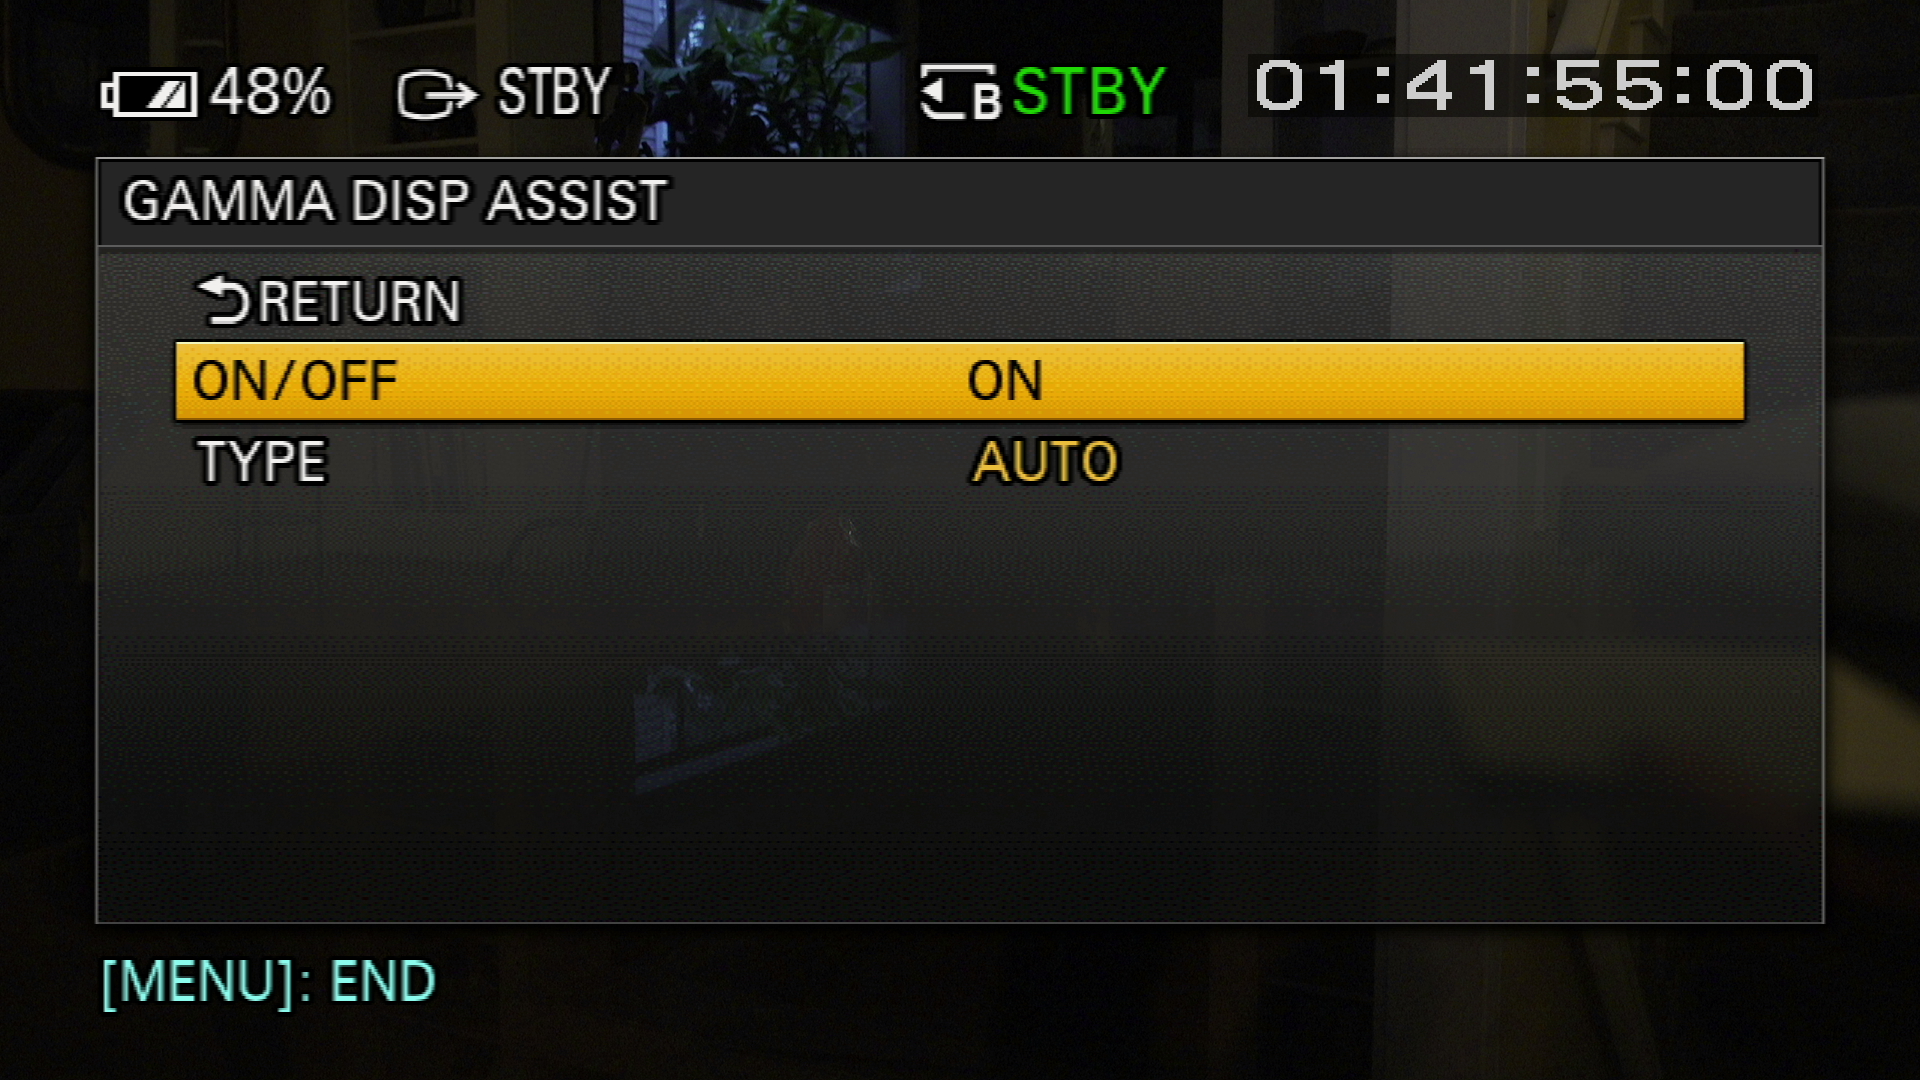
Enable the Gamma Display Assist. This increases contrast when shooting SLOG, making it easier to focus. When not shooting SLOG, it is automatically disabled.

SHD_IMG_0004

SHD_IMG_0005

VF/LCD Panel: I set to LCD Panel. Choosing Auto (the default) means your LCD will turn itself off and on whenever you inadvertently block the eyepiece of the viewfinder. You can then enable the viewfinder when needed by sliding the switch on the top of the LCD screen to OFF.
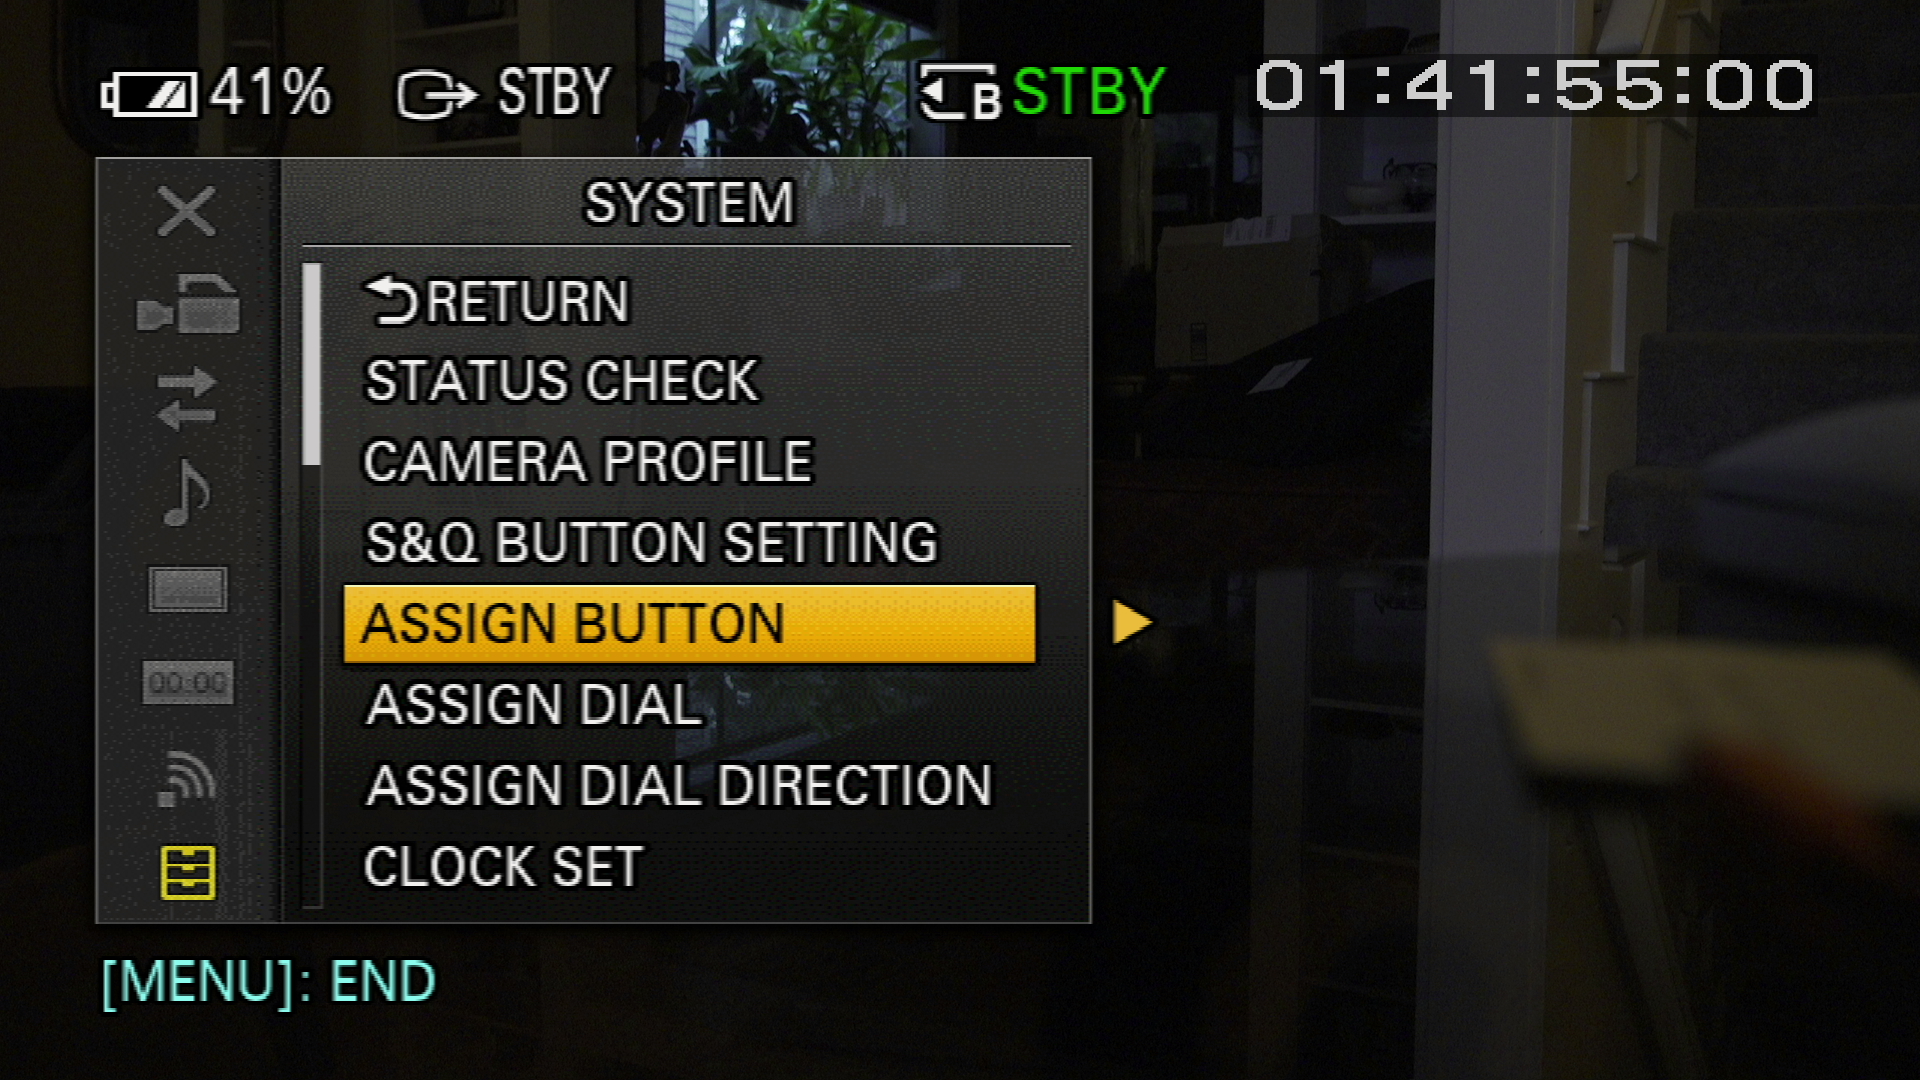
SHD_IMG_0006

Hand grip buttons

I recommend setting Button 6 to Center Crop. But if you use zebras, it’s a convenient place to toggle those on and off as well, since there’s no dedicated button for zebras on this camera. If you go with center crop, this will give you a fast way to reframe the shot by punching in to it for a quick closer angle. But be careful: this technique isn’t great in low light, as noise in the image is magnified dramatically.
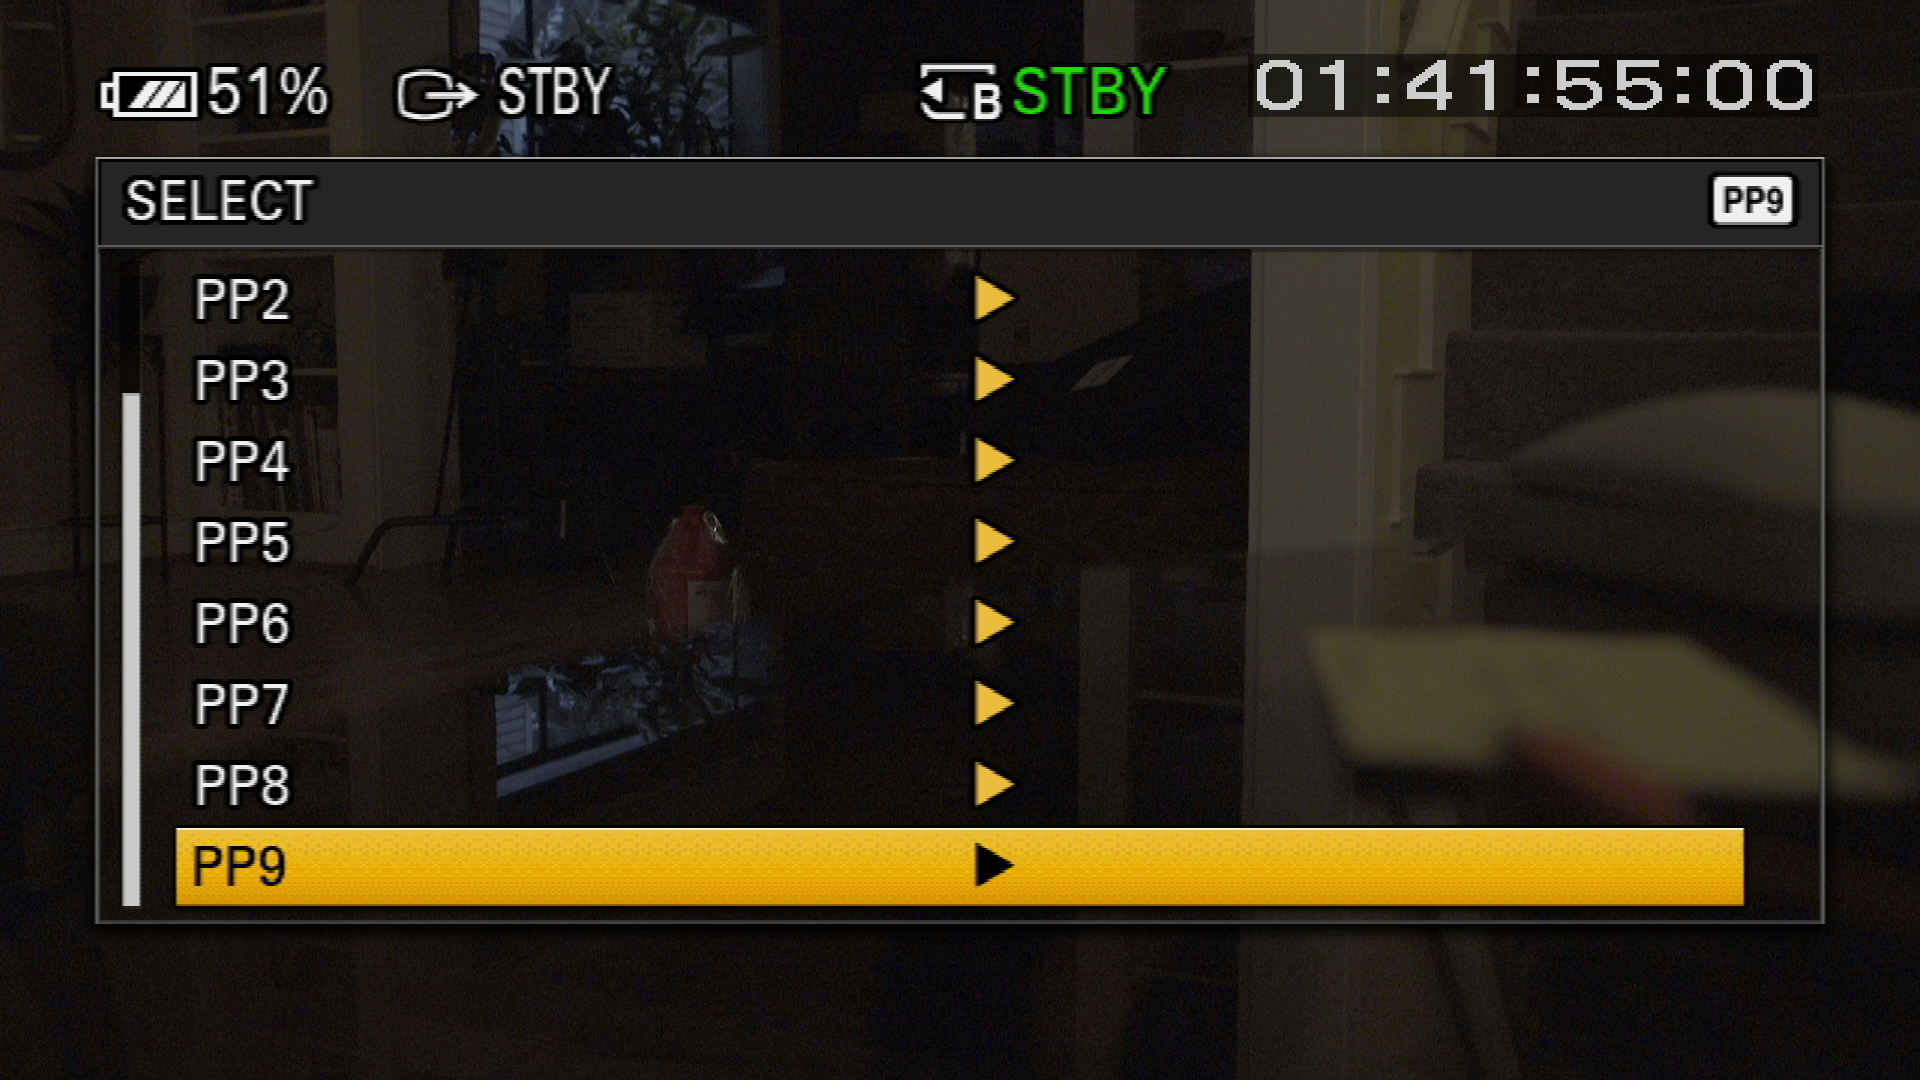
SHD_IMG_0009

SHD_IMG_0012

Picture Profiles

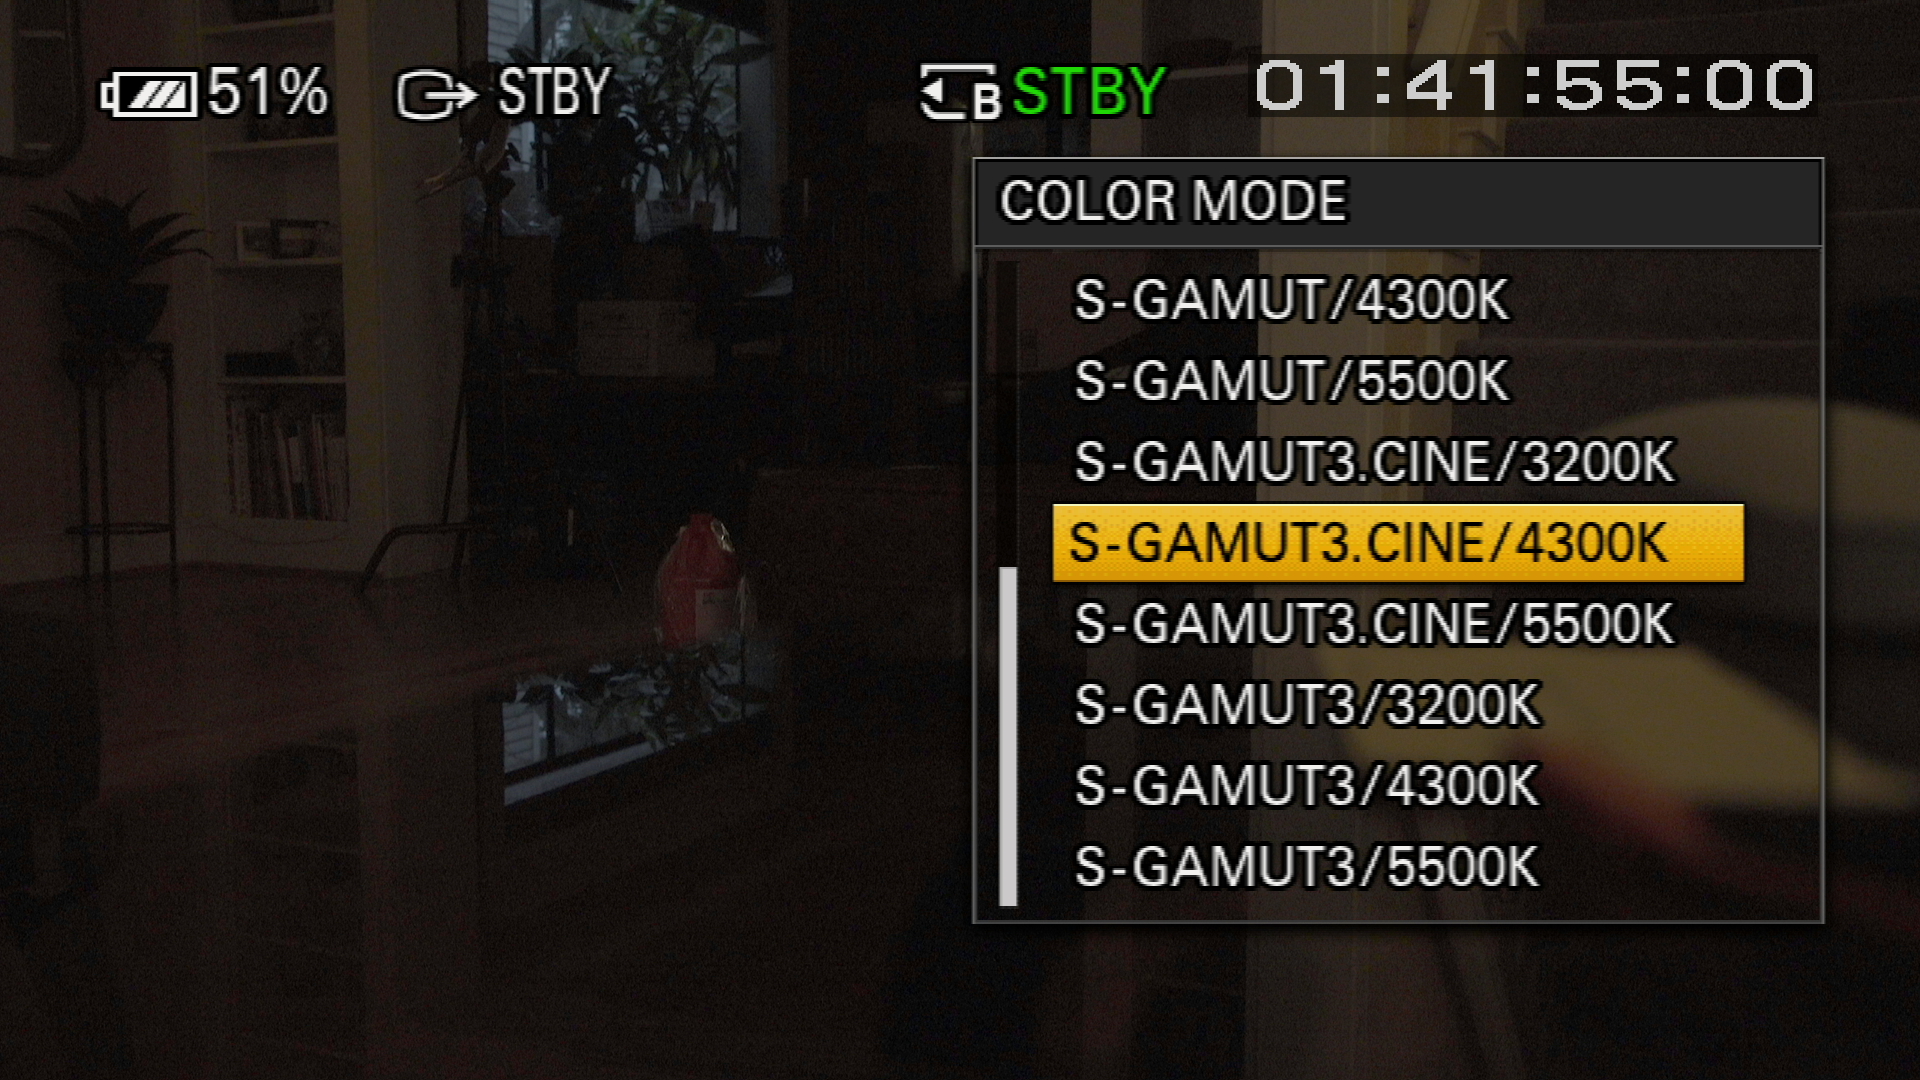
For well lit scenes in general, where you need to hold all the dynamic range possible, shoot SLOG 3. That’s PP 8 for daylight, and PP 9 for tungsten environments. For some reason Sony made the color temperature part of the picture profile in SLOG 3 when using the Sgamut color modes. Choose the option that’s appropriate for your lighting. OR, if you want precise control over color temp, choose Pro color mode. But I prefer to stick with Sgamut3.cine color mode when shooting Slog 3.

SHD_IMG_0001

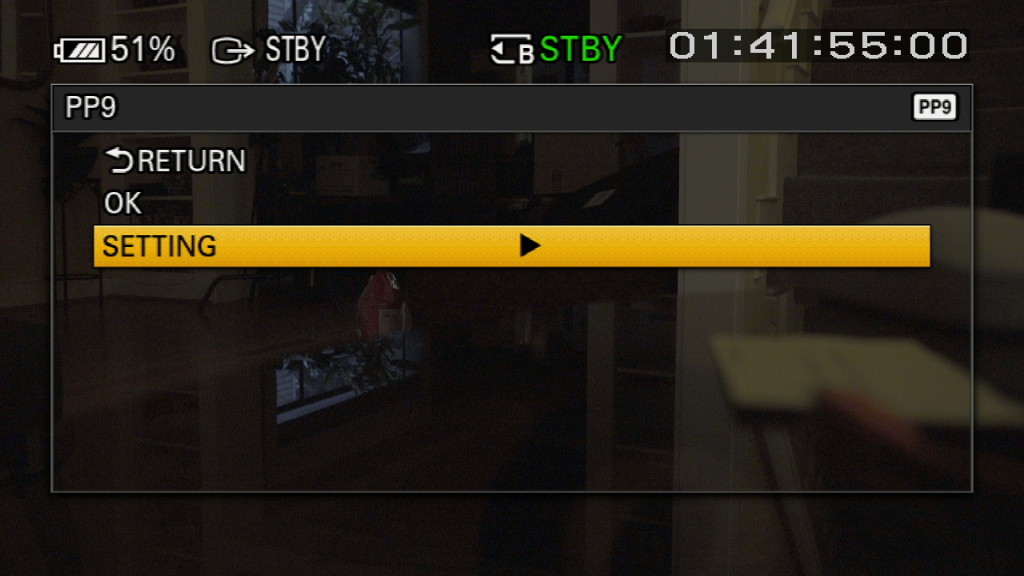
If you’re in a mixed light environment and want to split the difference, open either picture profile and dig into the menu, and select the 4300K option.

SHD_IMG_0002

SHD_IMG_0003

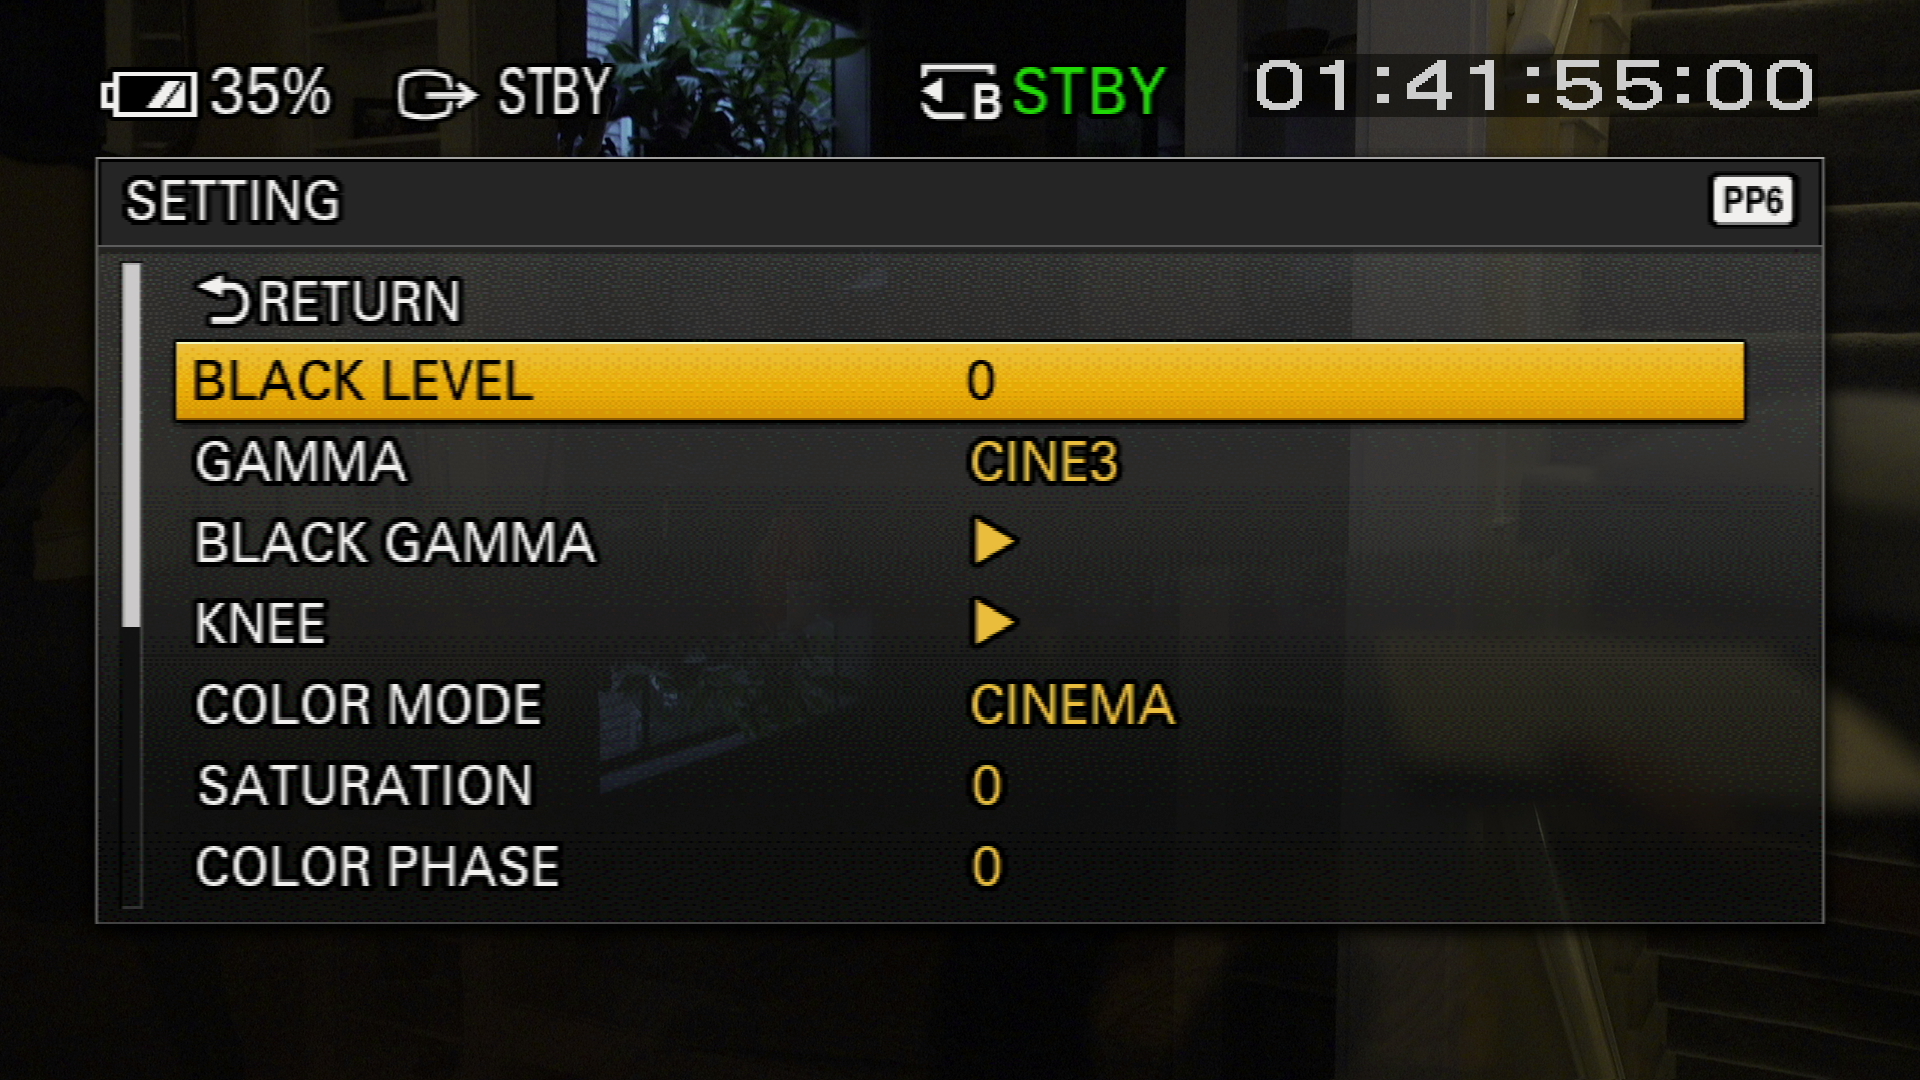
For lower light situations, choose a Cinegamma rather than SLOG. Here’s the rule of thumb: For brightly lit scenes such as direct sun, shoot Cine1. For average lighting, choose Cine3. For low light situations, go with Cine4. Each of these will require a little grading, but not much – just some contrast adjustments to make them look less flat by crushing the blacks a little. I’ve set my camera up with Cine3 on PP6 on my camera, like so:

SHD_IMG_0011

Gain

If you’re confused by the way the sensitivity of the sensor appears to be changing when you switch from CineGamma to Slog, you’re not alone. Rest assured the sensitivity isn’t changing, just the recommended exposure settings from Sony for each. So if you want to keep it simple, just change the ISO/GAIN SEL to GAIN. This will then display 0db when you are shooting at the camera’s native gamma, which is what you should be using most of the time. When you get in low light, boost the gain (as little as possible to avoid noise).

If you want to use ISO, from the Camera menu, set up the L-M-H gain switch on the left side as follows:

SHD_IMG_0014

SHD_IMG_0015

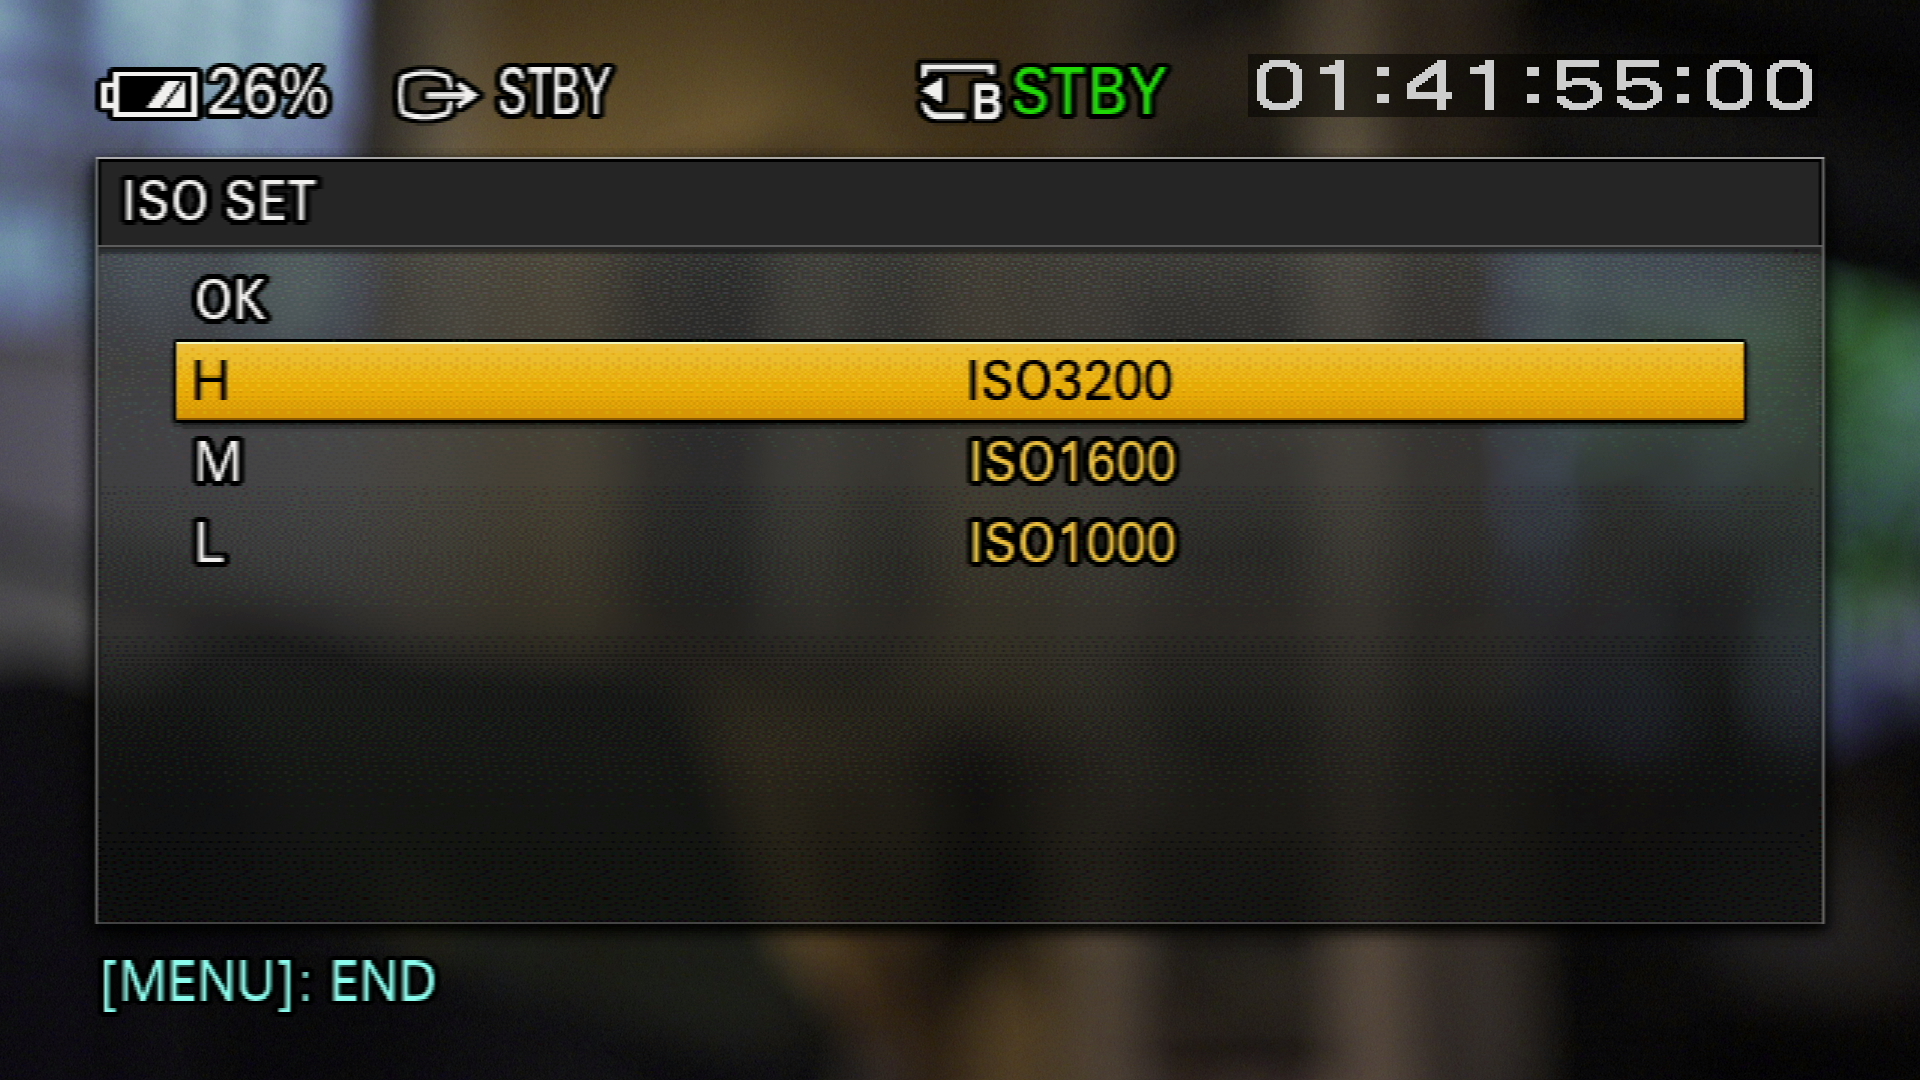
I recommend staying at or below 9db of gain (ISO 1600) with this camera when shooting with the hypergammas. The image quality starts to degrade significantly above 18db of gain (ISO 3200). For best results in very low light, try PP3 (Rec 709/Pro).

When shooting in SLOG, avoid exceeding 19db of gain (3200 ISO). If you need to push beyond that, switch to a CineGamma (see Picture Profiles above).

Audio settings

For general run and gun shooting with a shotgun mic, I set channel 2 for the shotgun mic, and set it to level 5 manual. Channel 1 I set to the internal mic, on AUTO. Adjust the manual level as needed depending on your environment. The auto channel is a backup, that should catch any prolonged loud spikes such as if your subject starts yelling, giving you something to cut to in the edit should you need it.

SHD_IMG_0018 SHD_IMG_0017

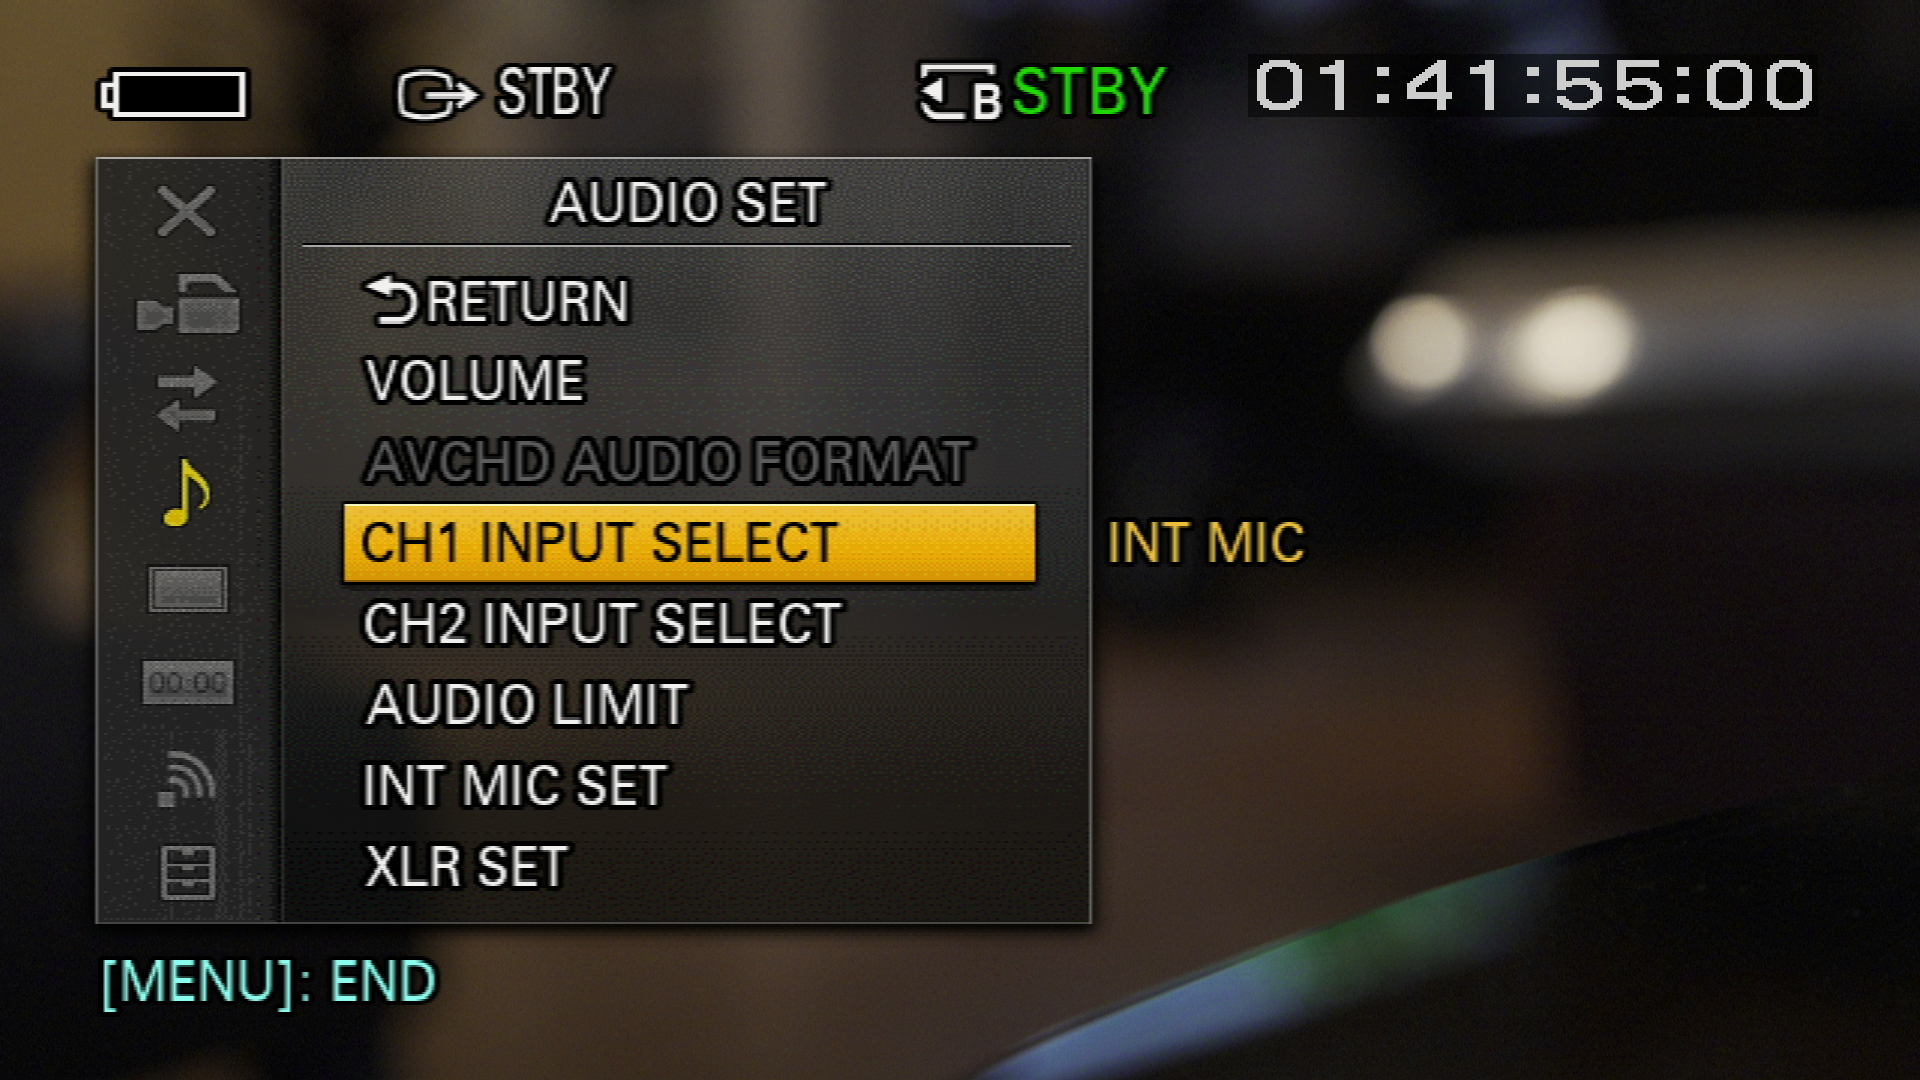
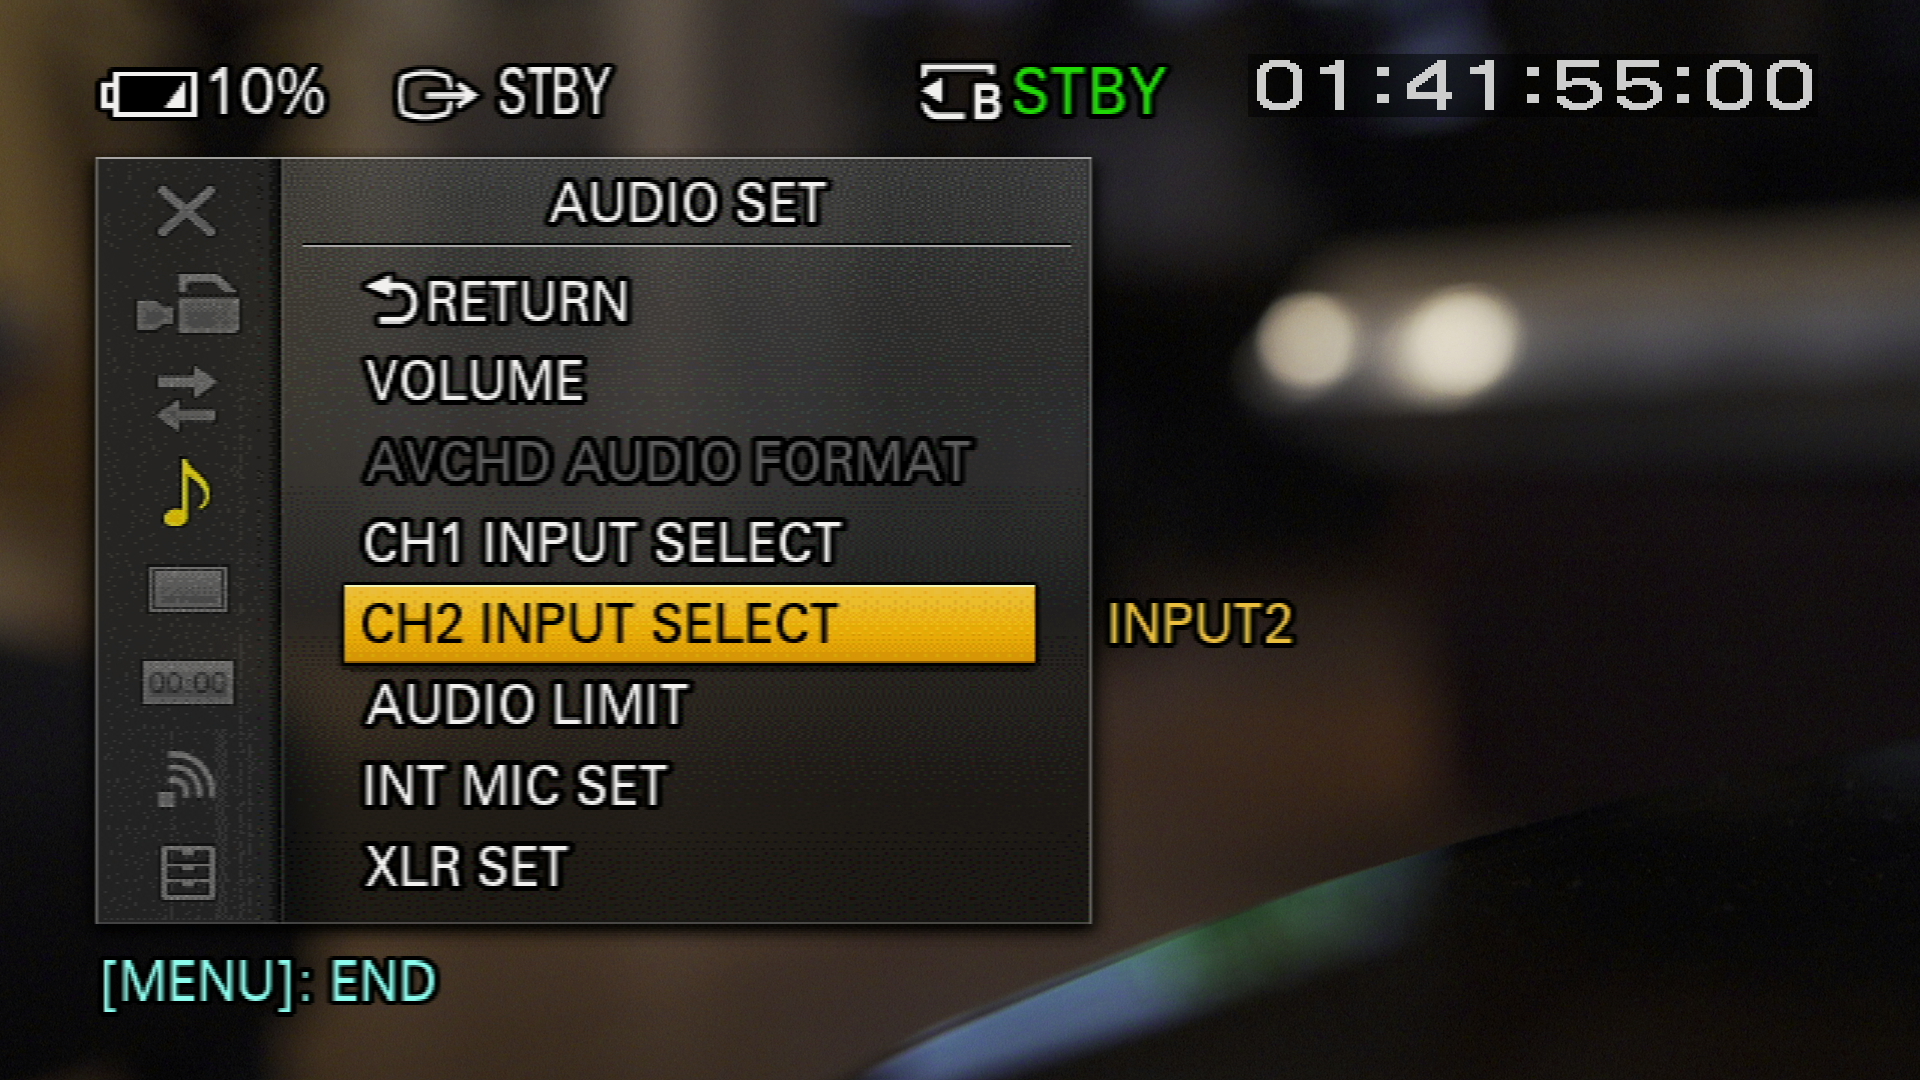
For recording interviews or woking with a boom op, leave the shotgun mic as-is on channel 2 (so you can quickly untether and shoot b-roll without having to touch the menus again) and plug in your external source via XLR cable to Input 1, being sure to set the input on the XLR jack to phantom power (for most shotgun mics) or line level (from mixer output) as necessary. Then, set CH1 Input to INPUT1. That’s it in a nutshell.

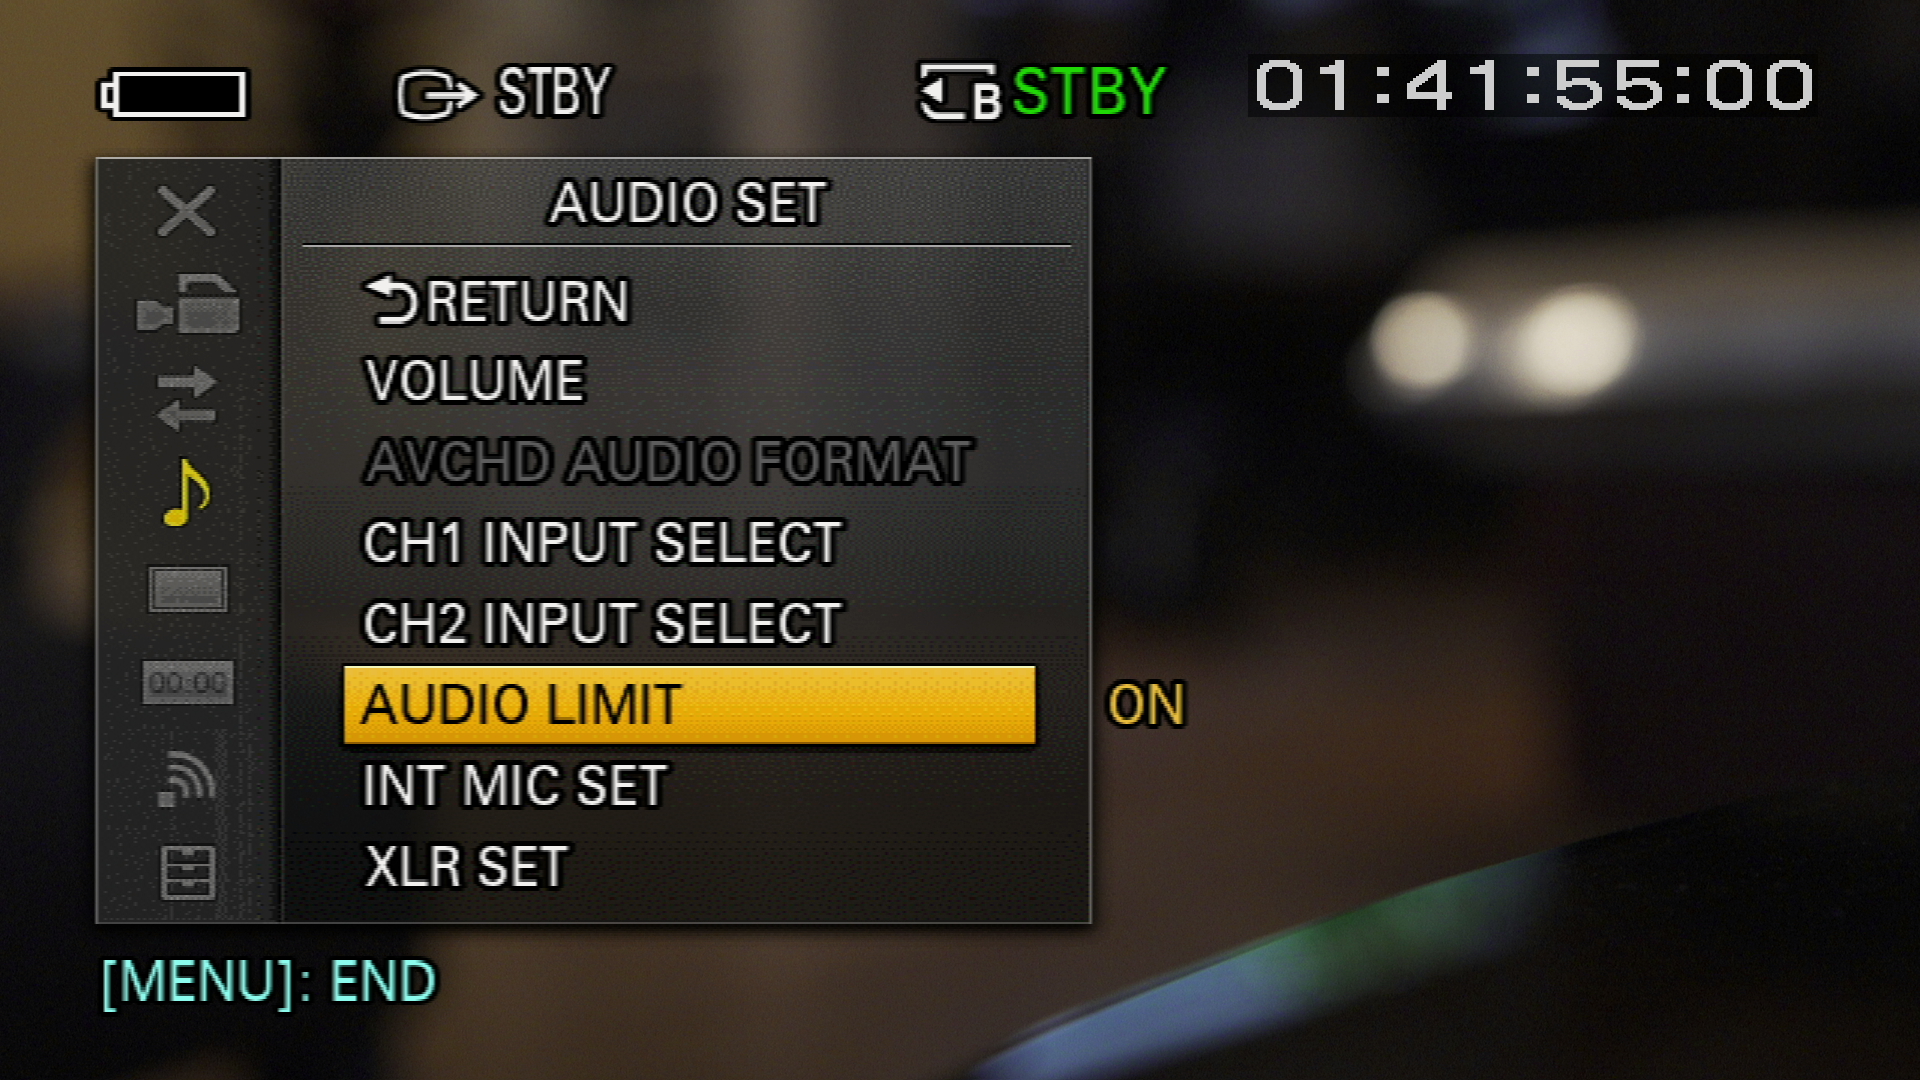
Engage the AUDIO LIMIT to help prevent clipping from sudden brief loud noises such as coughing in an interview. I leave this off when working with a  sound recordist, as limiting is better handled by the mixer.

SHD_IMG_0019

Tip: How to expose SLOG vs. Hypergammas

Exposing SLOG (PP 7, 8 or 9) at the Sony-recommended levels results in noisy shadows. Fixing that is easy: Overexpose your footage by 1 stop (also referred to as a one-stop pull). You will still have plenty of headroom to avoid clipping, and your shadows will be less noisy. You can even go as much as a 2-stop pull, but the image on the LCD and viewfinder will appear blown out, so you’ll need an external monitor that supports LUTs to accurately gauge your exposure.

When shooting in any of the other picture profiles, slight underexposure, by a half stop, will produce the best results, especially with skin tones.

SLOG2 or SLOG3? 

For most situations, I recommend SLOG3. SLOG2 is more difficult to grade than SLOG3. Both will give you 14 stops of dynamic range, but the response curve is different. As a result, if you’re shooting 4K in SLOG, you’ll get the most information possible in the limited 8-bits available by choosing SLOG2. If you’d like to understand why this is, along with a lot of other excellent info about shooting SLOG on this camera, check out this talk by Alister Chapman.

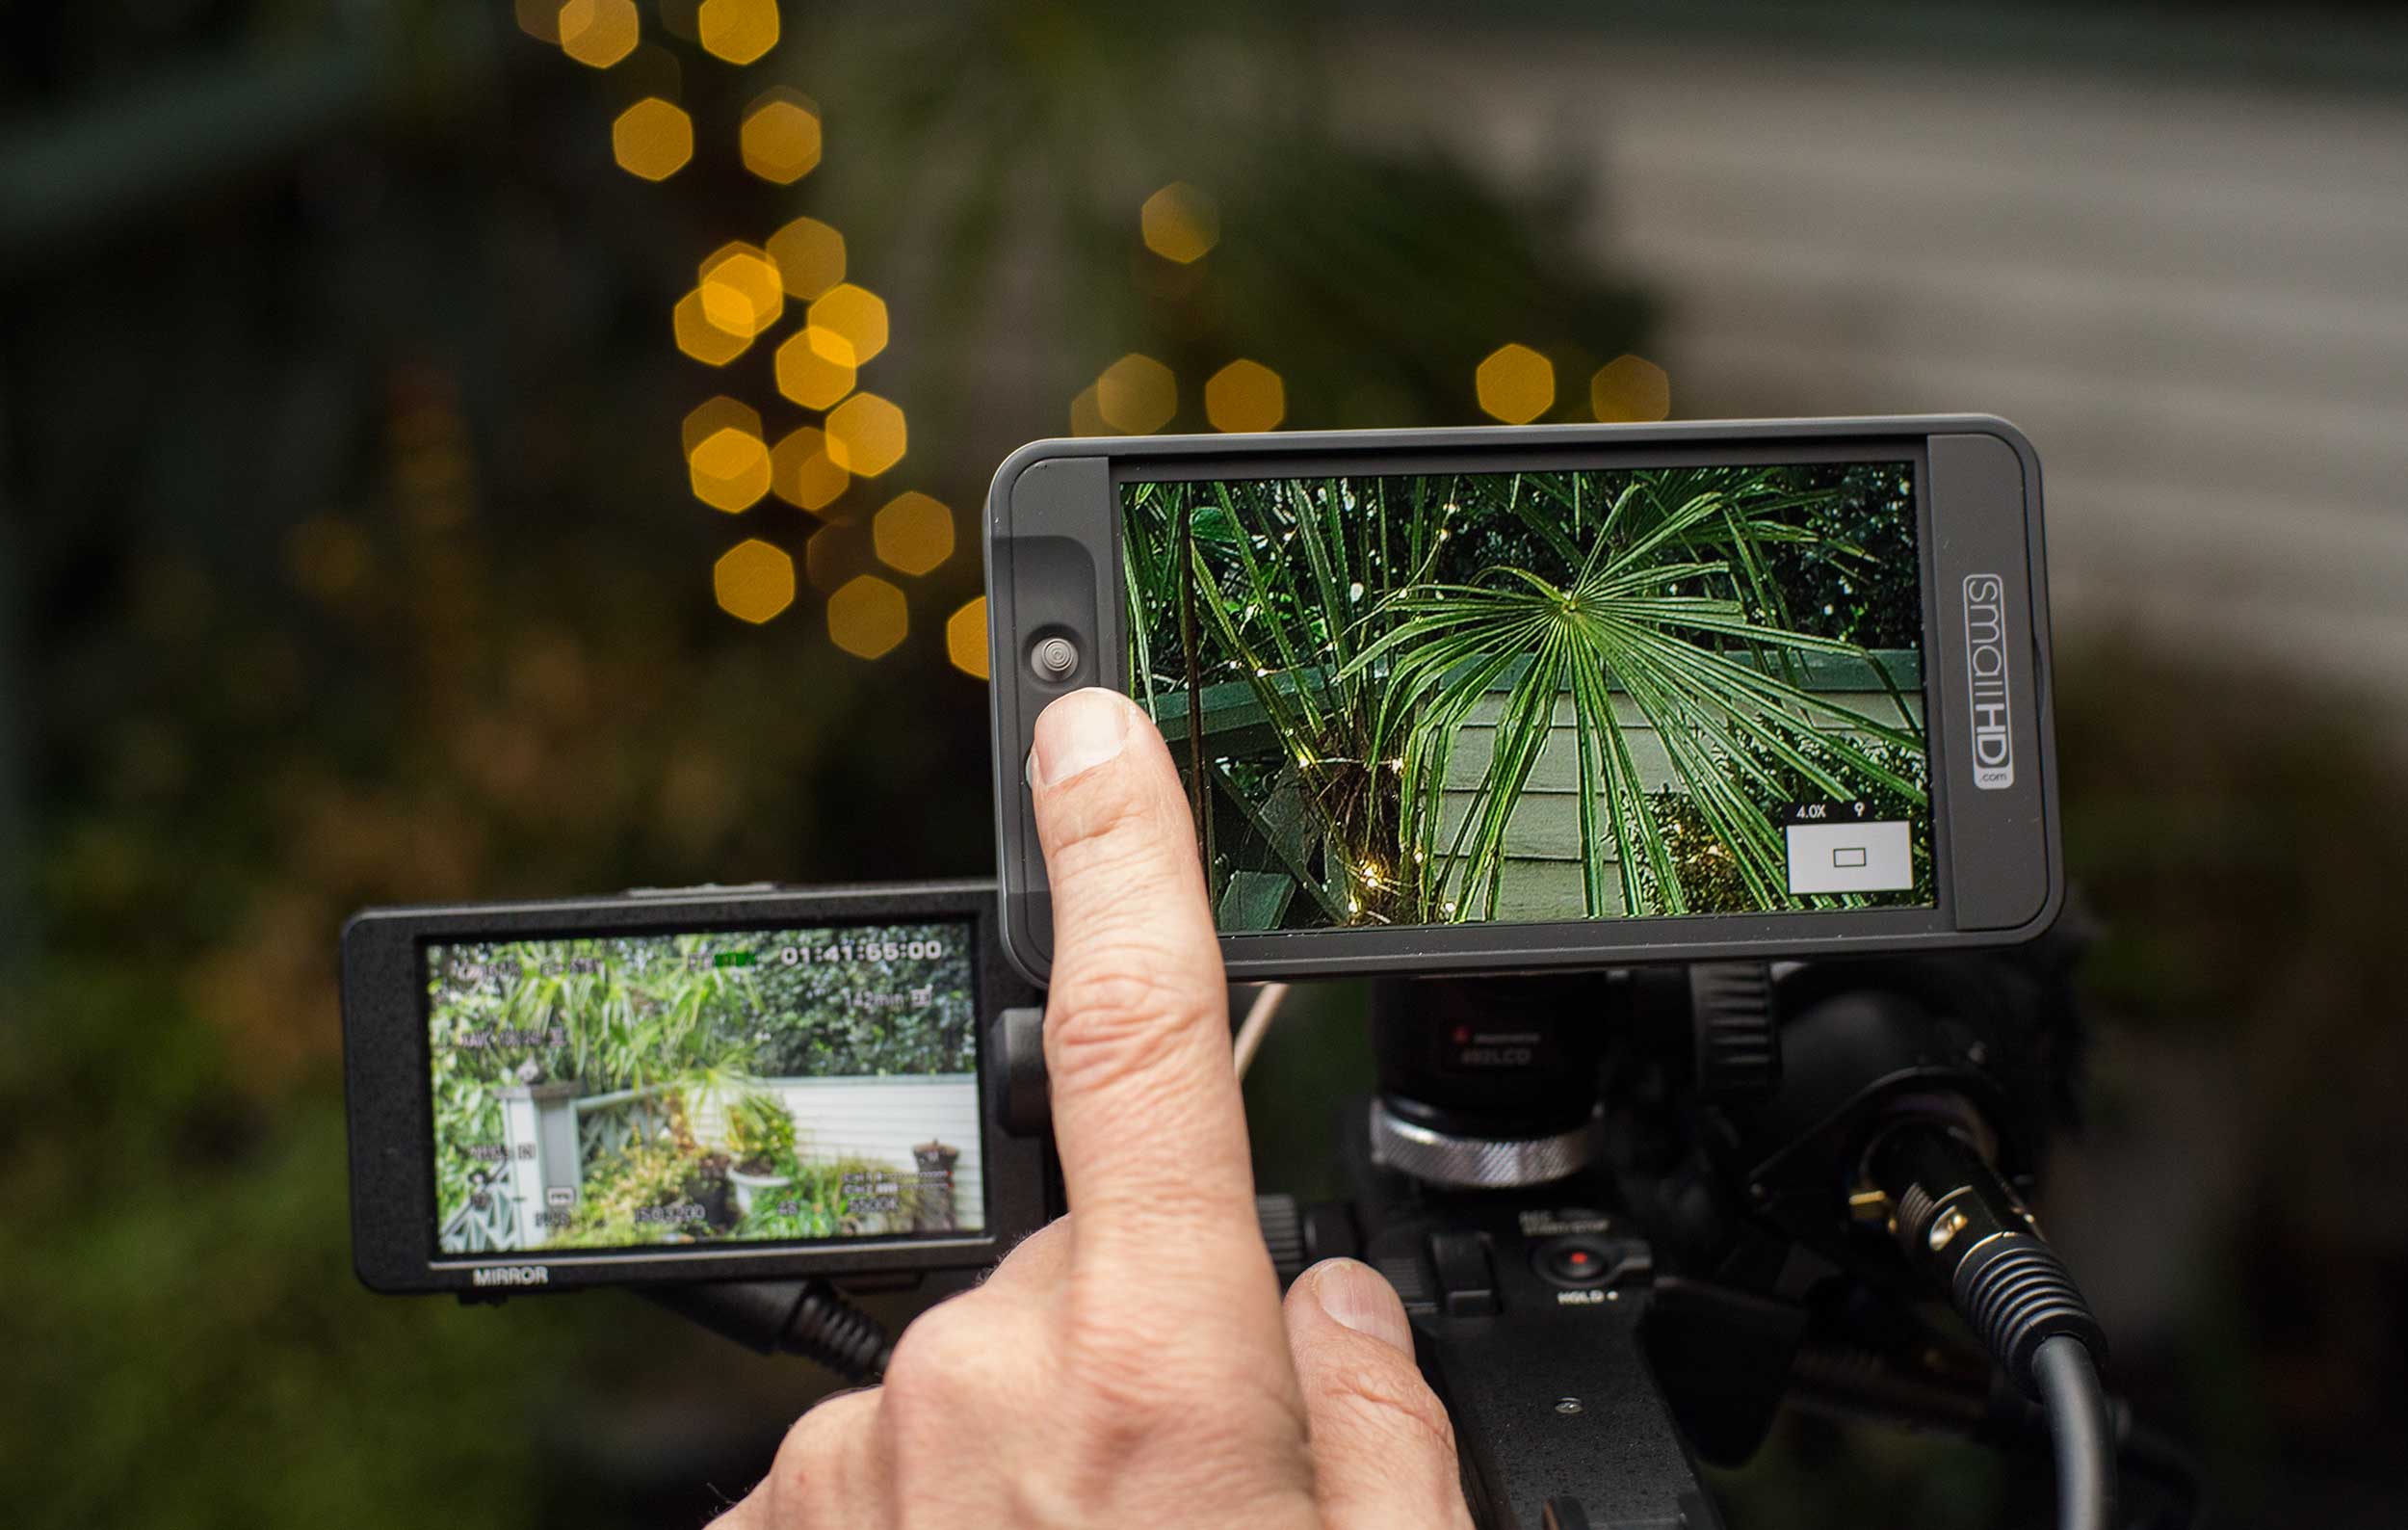
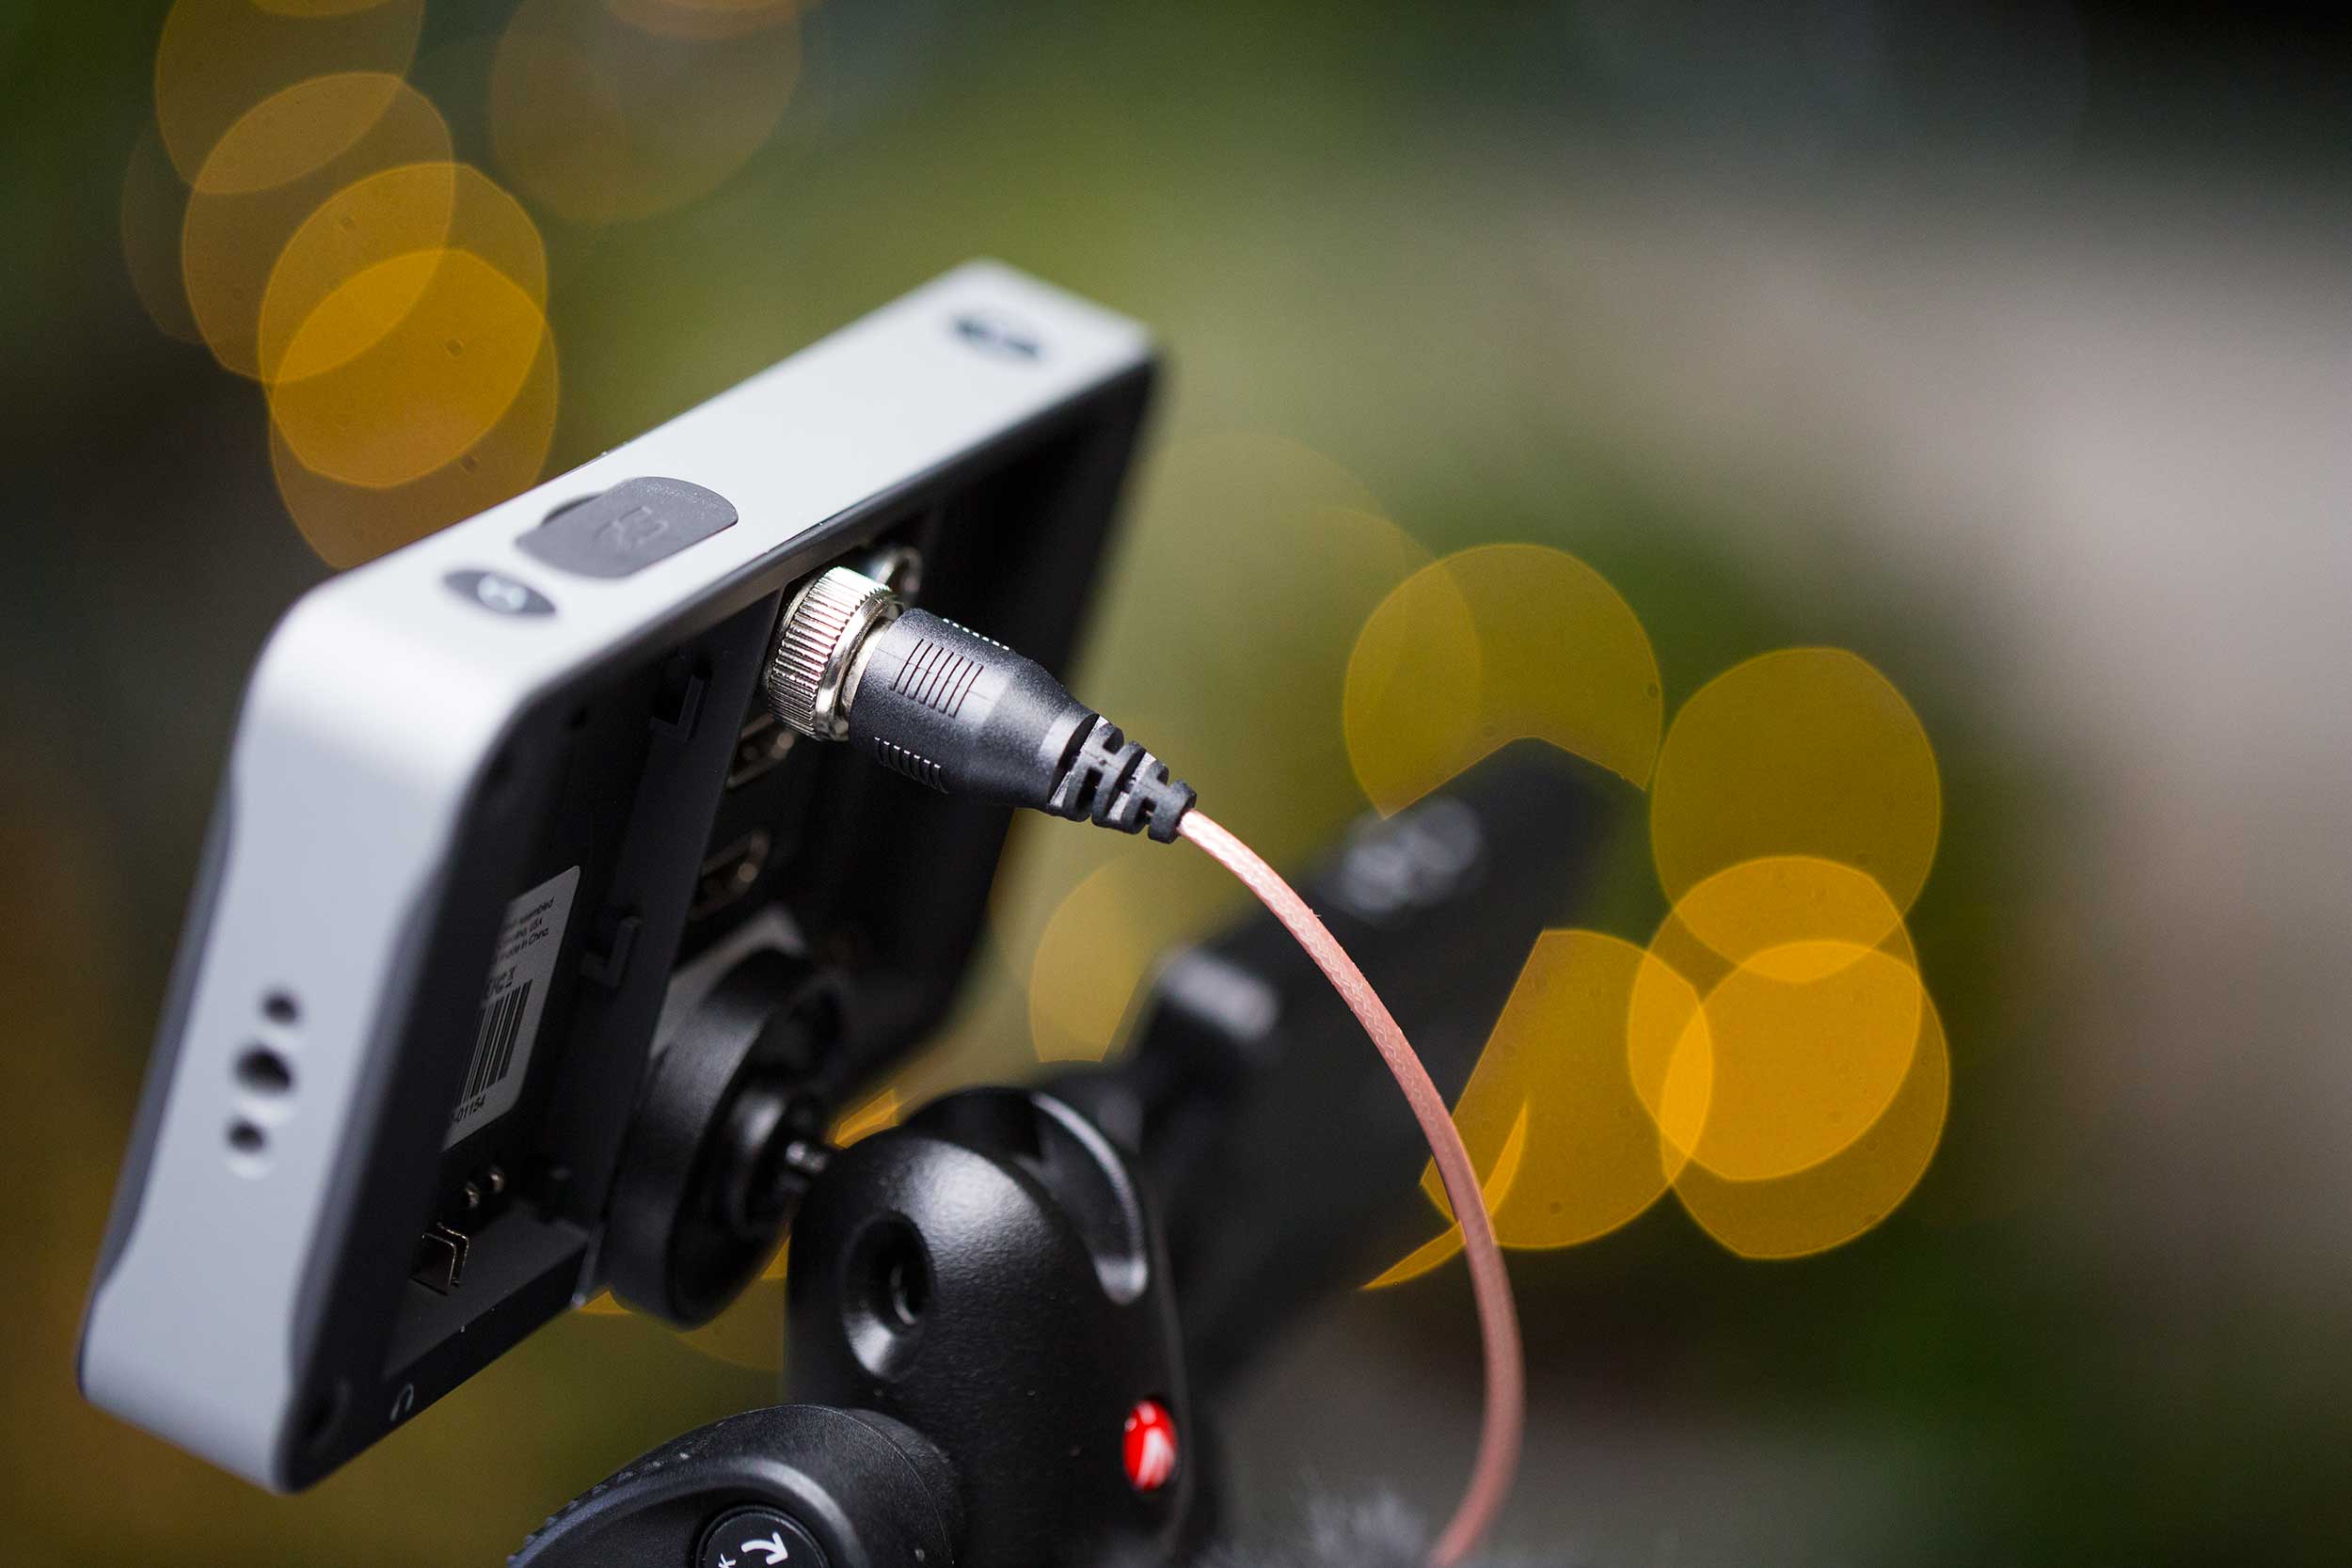
A quick way to start your grade with SLOG3 footage is to use a LUT. I’ve found two very good LUTs for this purpose. The first is Sony’s Alexa emulation LUT. It comes in two flavors, one- and two-stop exposure pulls. The second is a higher contrast version of the same LUT, with a one-stop pull, called AA709A, that was developed by Art Adams. I’ve packed up all three and tweaked them so they’ll work with the magnificent SmallHD 502, a monitor that preserves the form factor of the FS5 while giving you the ability to gauge SLOG exposure correctly through use of a LUT. You can download these FS5 LUTs here.

Shooting tips

It’s very useful with this camera to toggle the WHT BAL on and off when shooting in hypergamma picture profiles. This turns auto white balance on and off, and I’ve found the auto white balance feature to be very useful with the FS5. With most other cameras, I wouldn’t be caught dead using auto white balance. But Sony seems to have implemented this well, and I find it quite useful in difficult mixed lighting situations.

Use Button 5 on the hand grip for fast access to ISO, shutter speed and manual white balance.

To get a quick shot you you’d otherwise miss, just toggle on FULL AUTO on the top of the camera. The camera will take over EVERYTHING – white balance, shutter speed, ISO (and aperture if using a Sony lens). You won’t want to use these settings for long, but it’s a lifesaver in some challenging situations, such as following someone through a doorway and into a house.

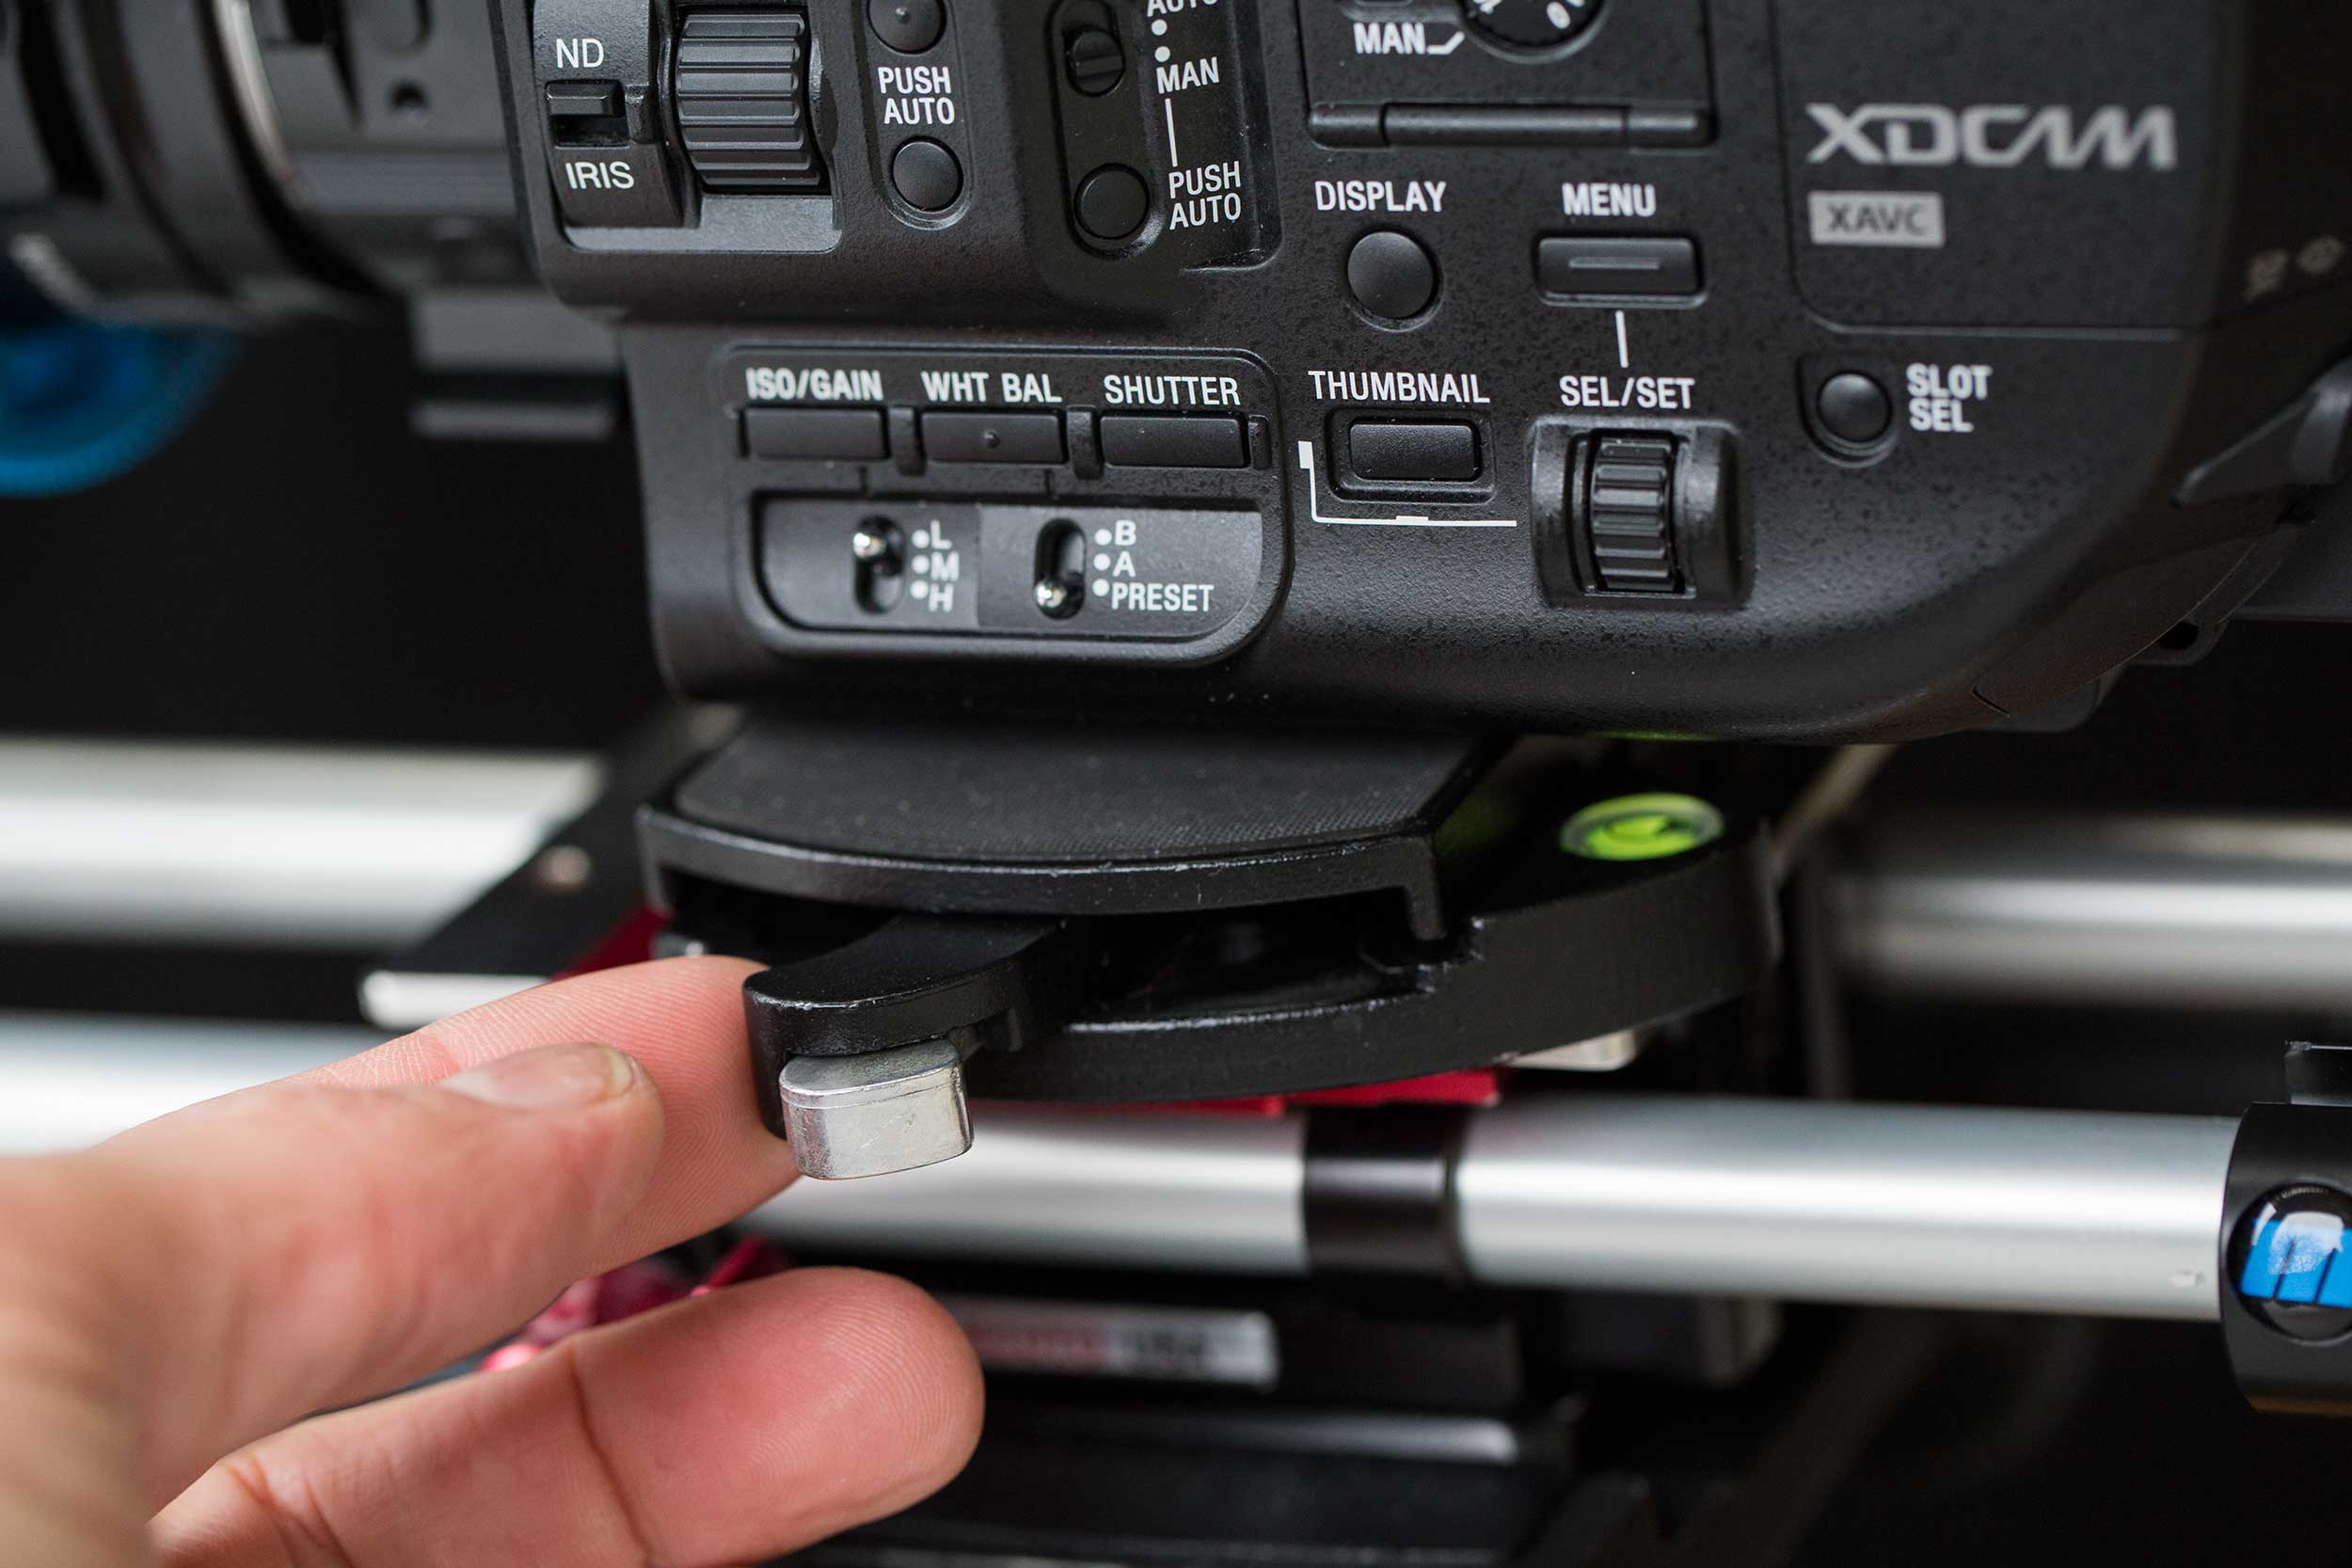
Toggling any of the three ISO/GAIN, WHT BAL or SHUTTER buttons along the left bottom side of the camera enables auto for each, as well as allowing you to manually set the shutter. For manually adjusting them,  I find it’s faster to access them via Button 5 on the hand grip.

ndsetting

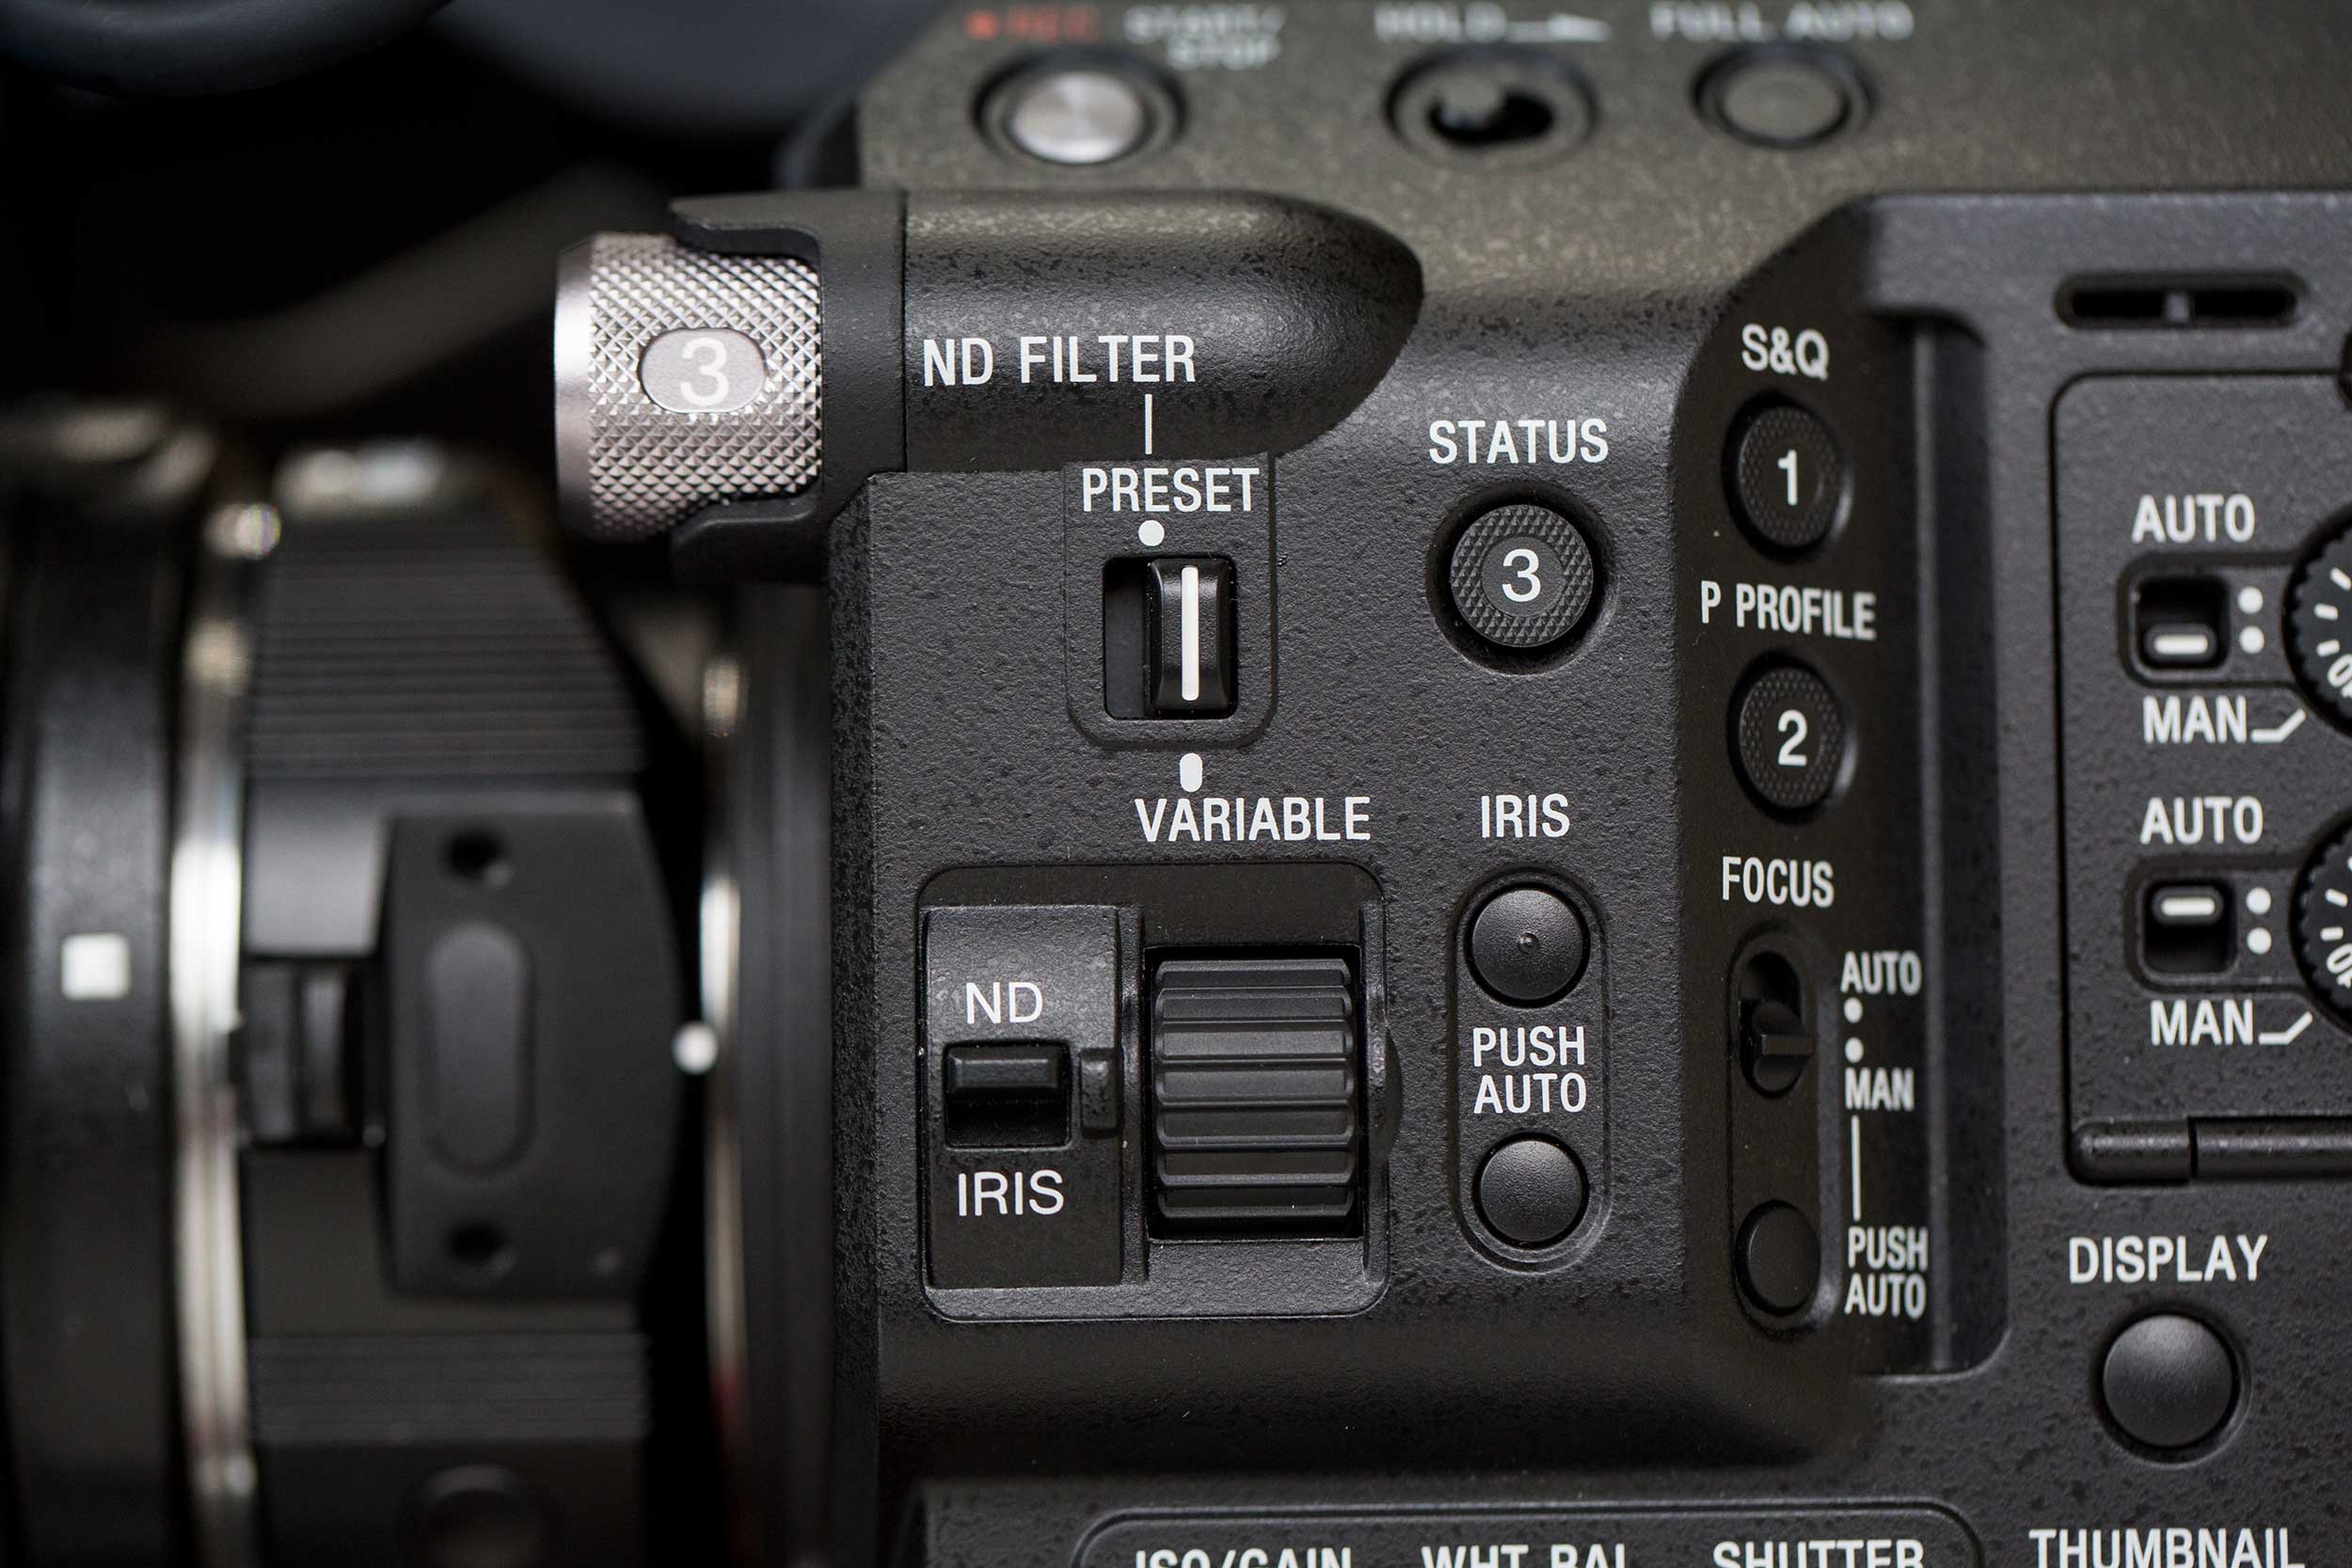
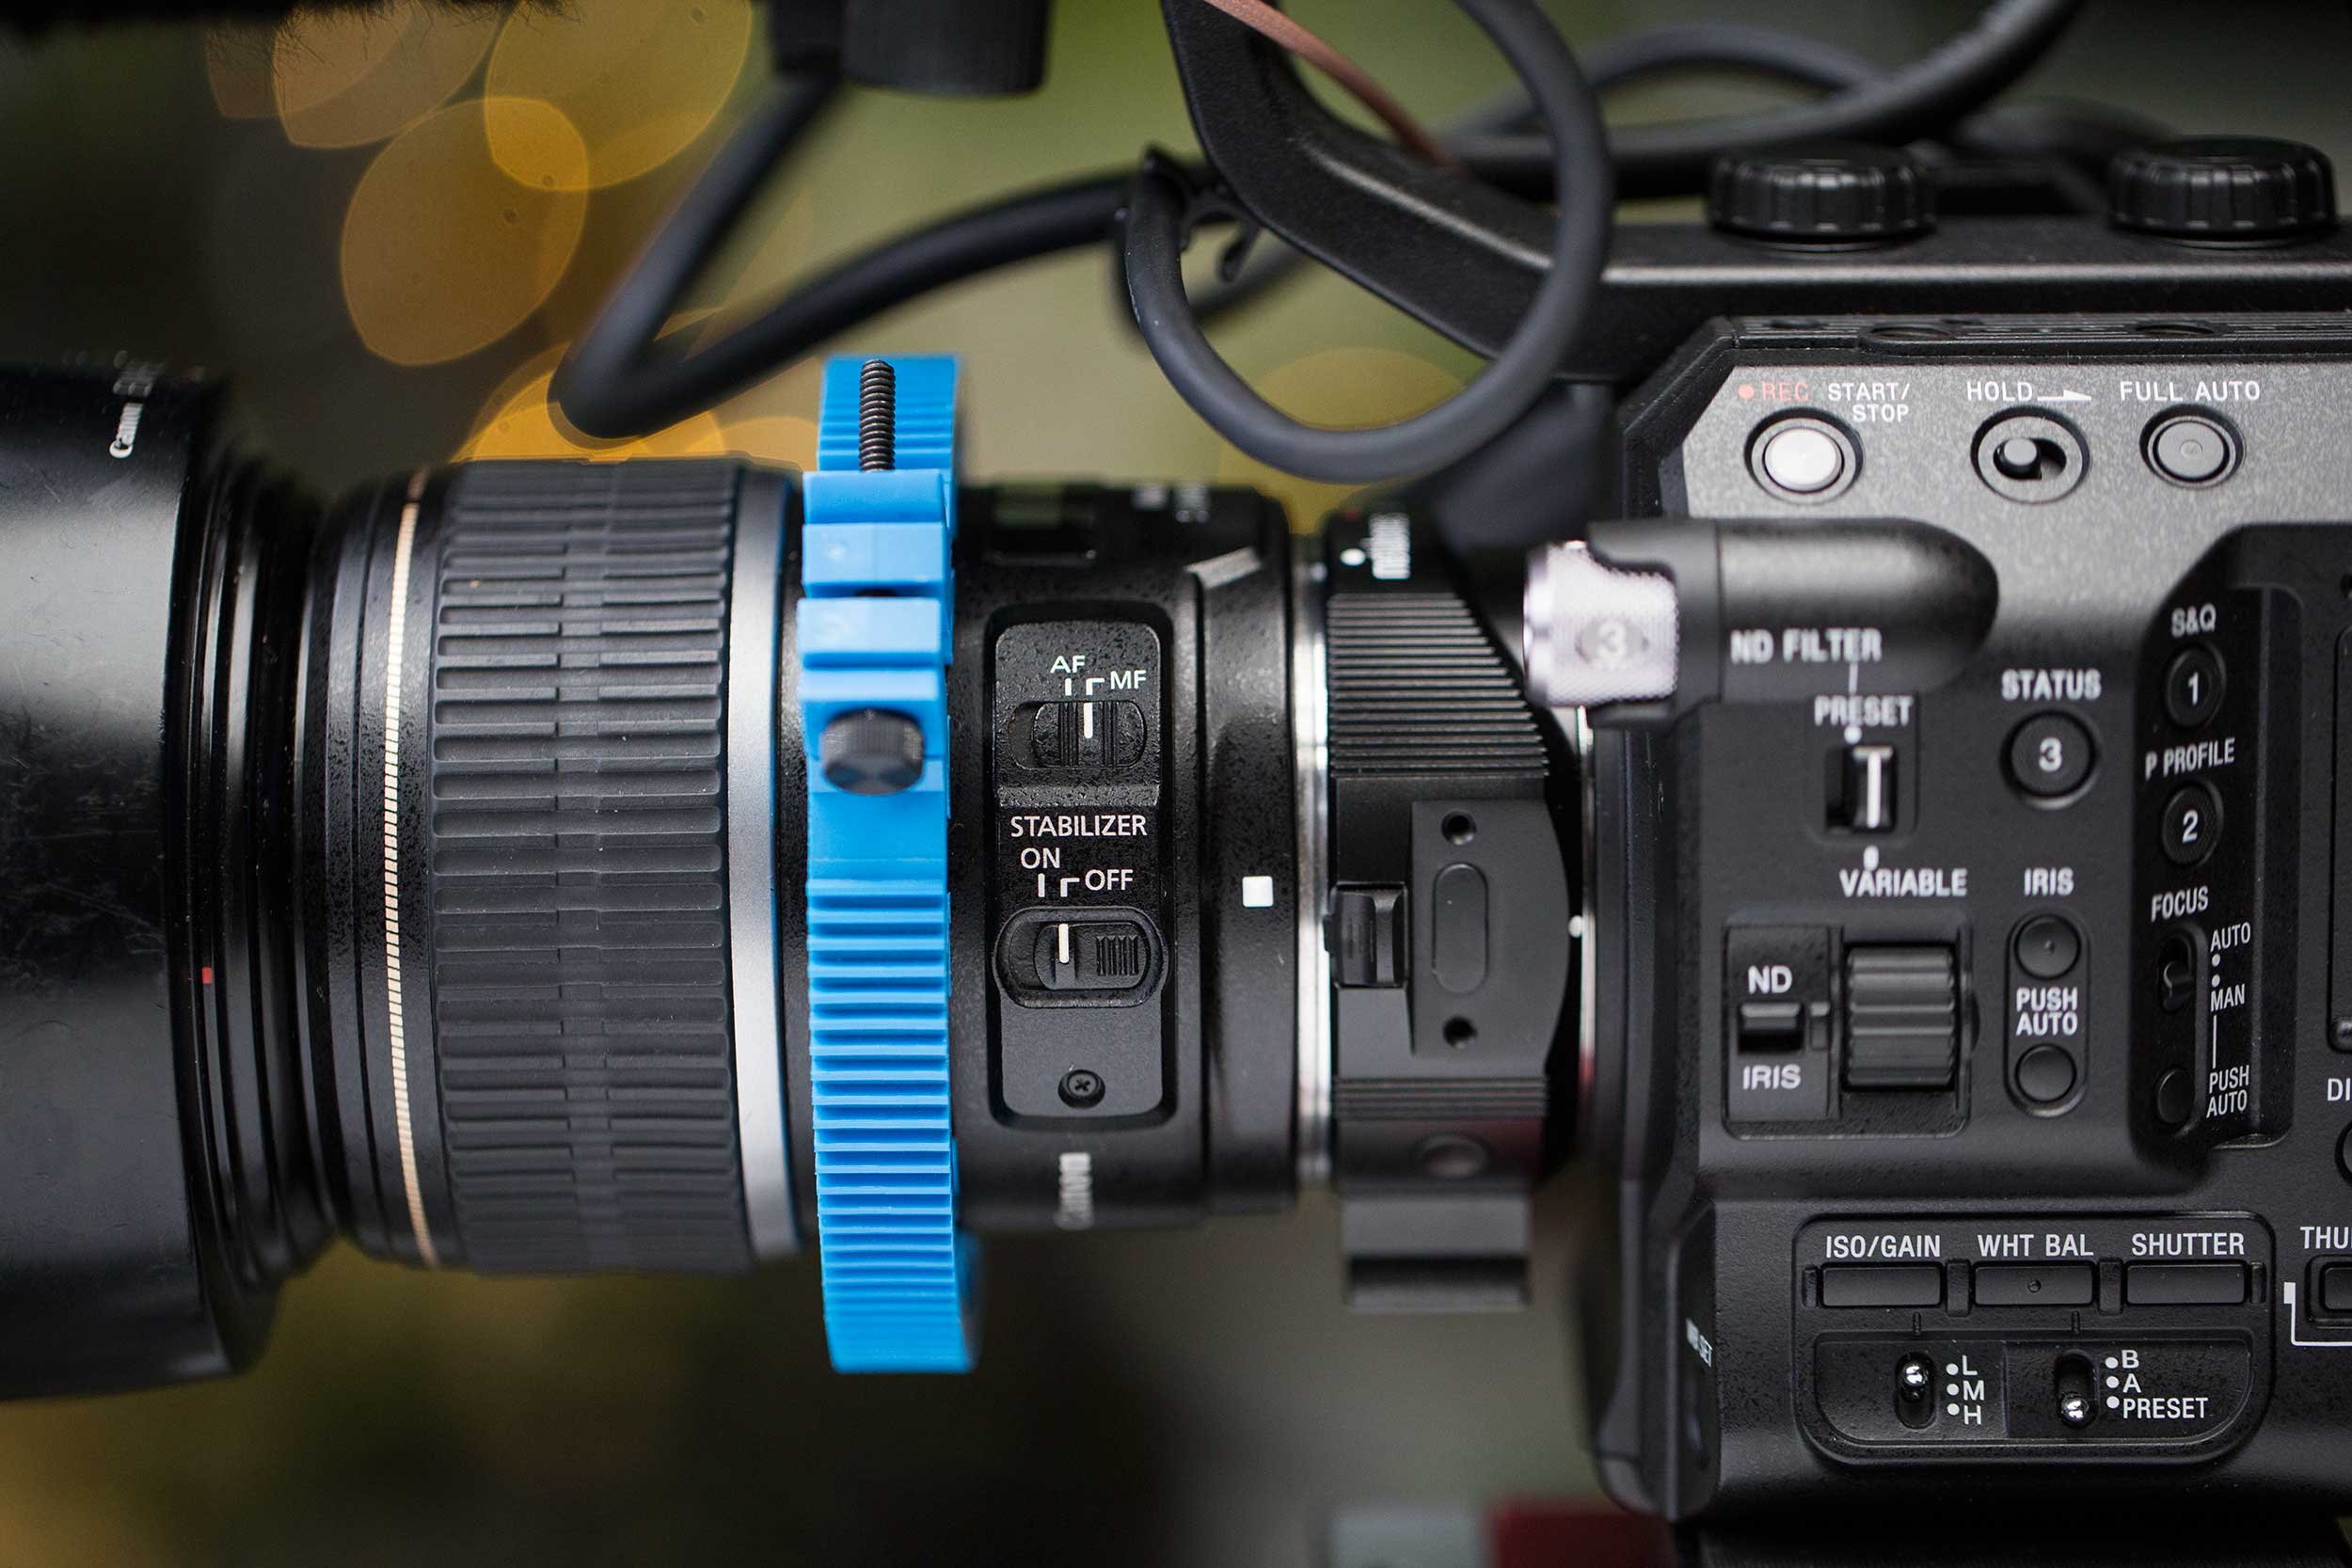
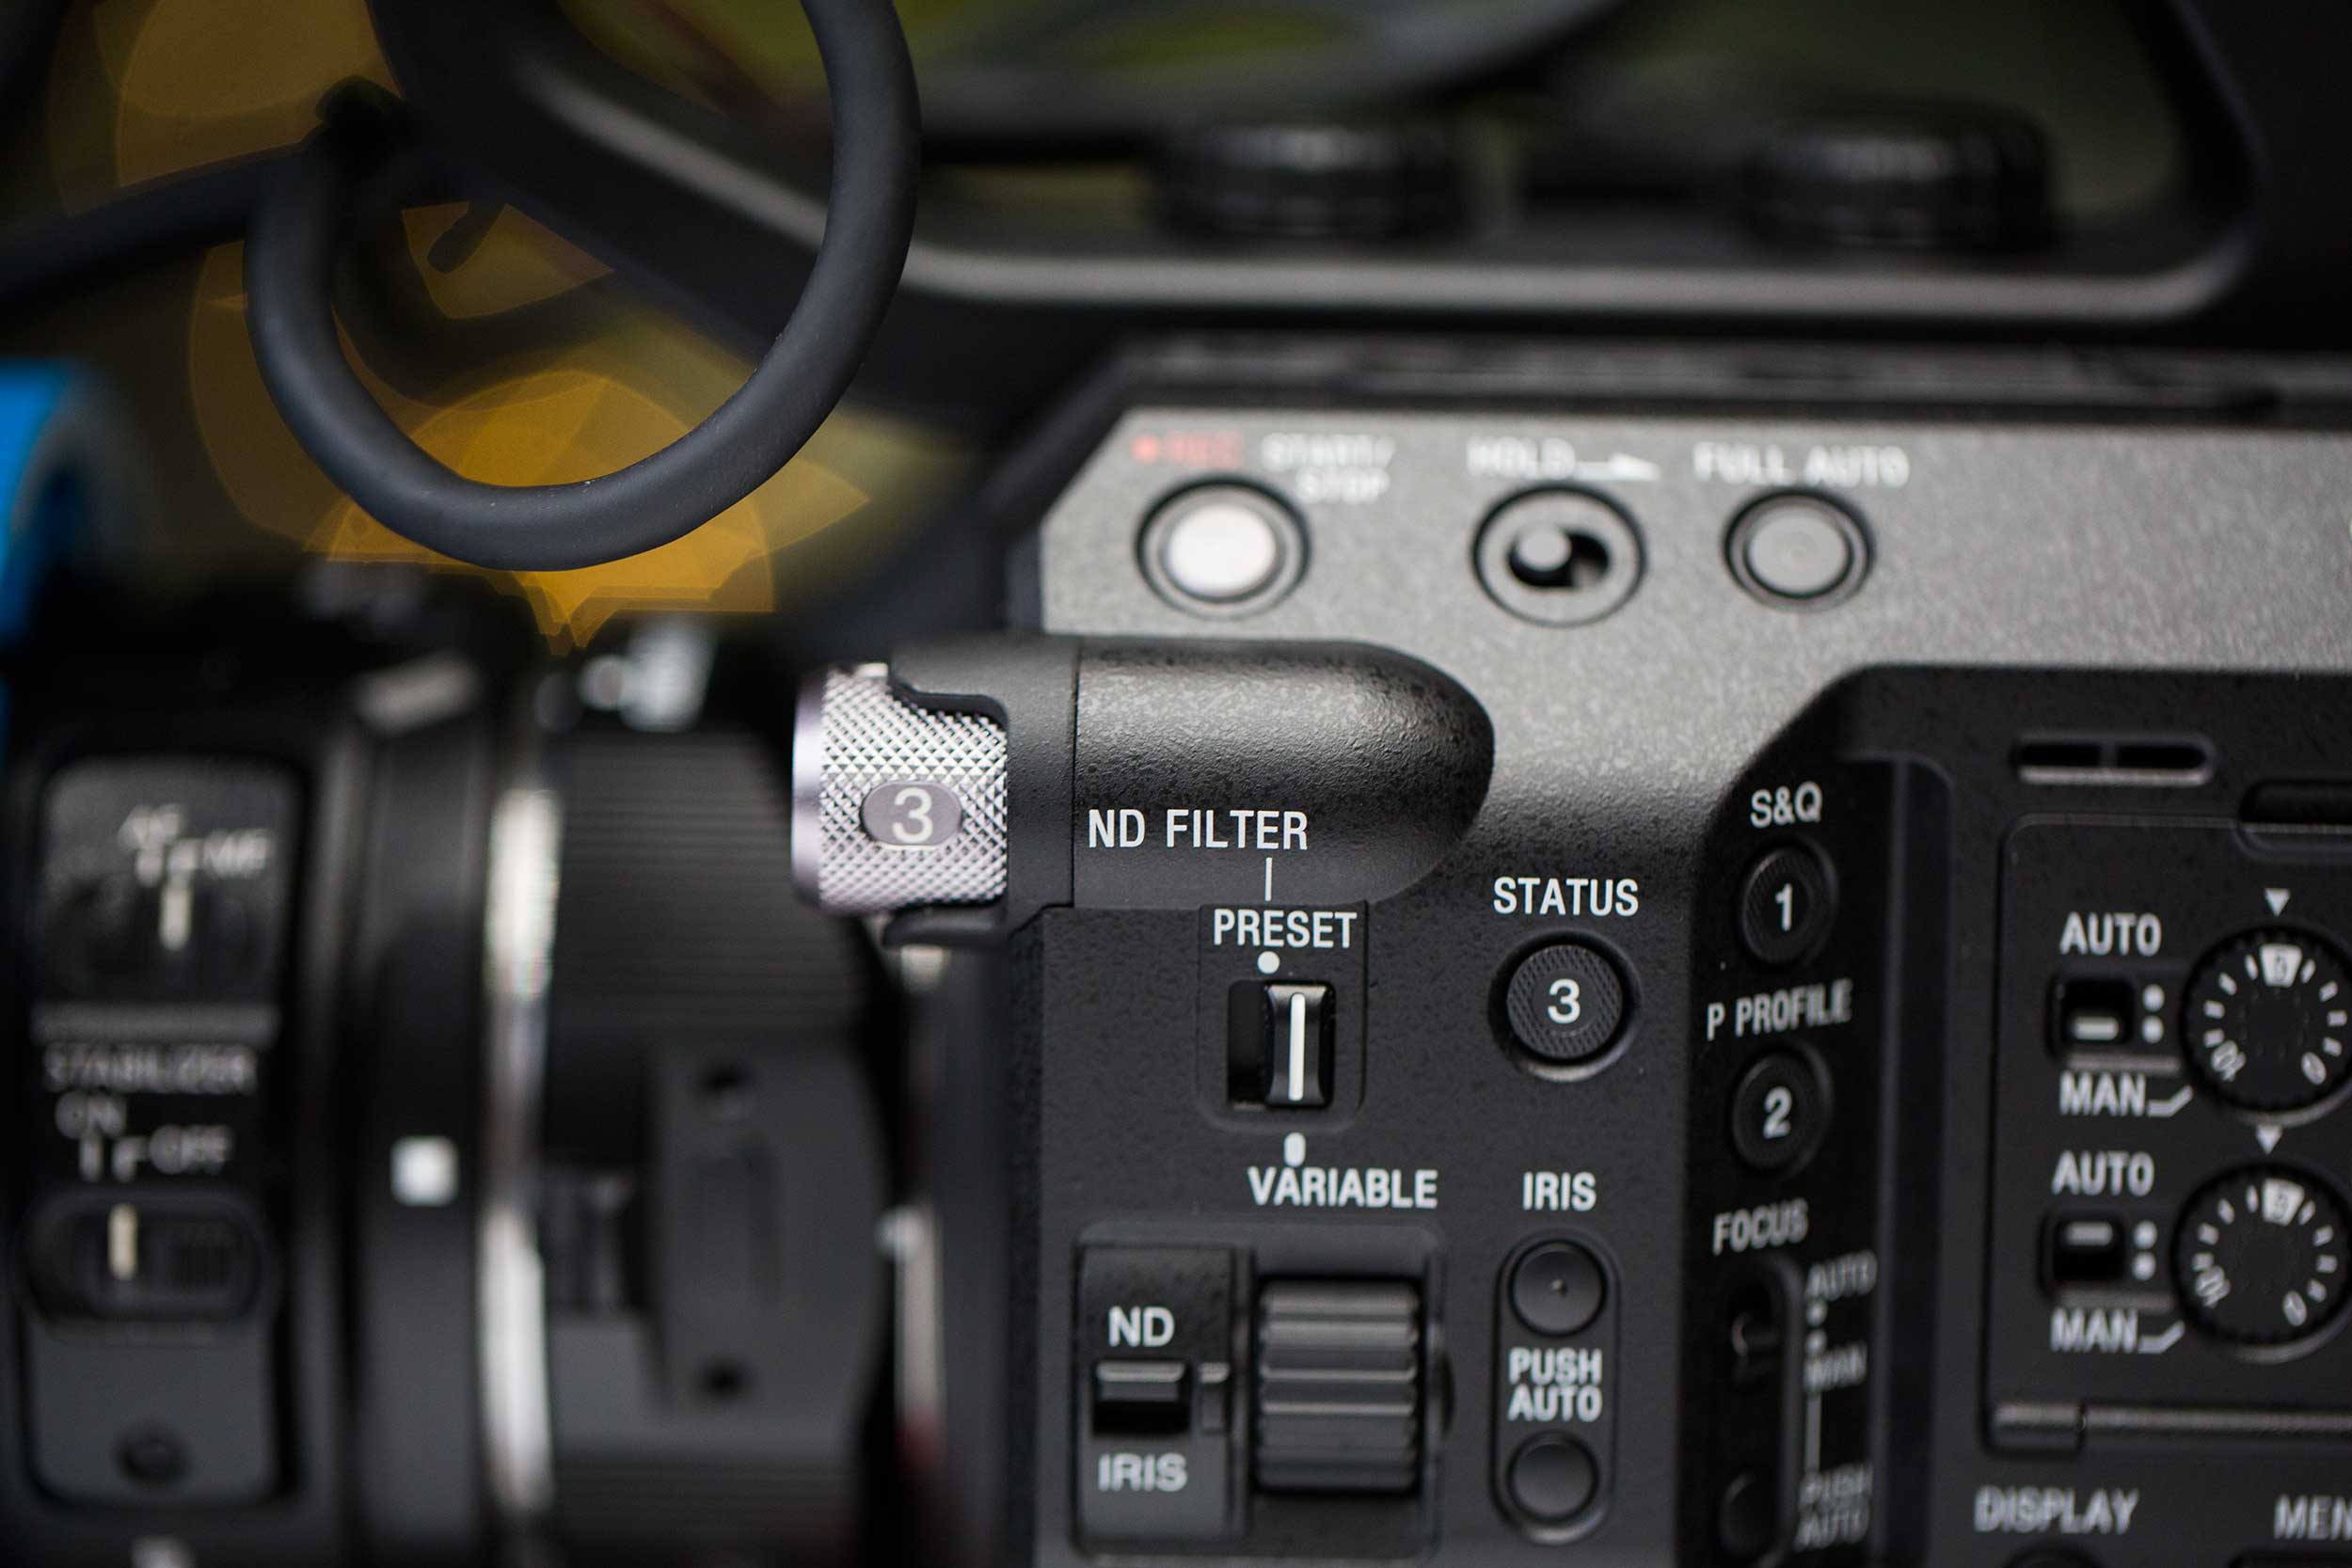
Set the ND FILTER to VARIABLE and ND/IRIS to ND. This allows you to steplessly control exposure with the wheel on the left side of the camera. It’s really the best way to control exposure, and the most innovative feature of this camera. Use it!

Auto ND

With version 2.0 firmware, auto ND is enabled. This is a very, very cool feature. It’s a way to get an automatic exposure without messing with your shutter speed, depth of field or ISO levels. I’ve remapped the Status button (3) so that when pressed, it toggles auto ND on and off.

Oh, one last thing: When you copy your clips off the SD card, be sure to copy over the entire folder structure (not just the clips). Your NLE needs them when determining how to display the files at their optimum quality. Once you’ve transcoded the footage into an editing codec such as ProRes, you can throw them away.

Armed with this camera and these settings, your footage is going to look amazing. Get out there and shoot something epic.

So this is how I configure my FS5. How do you set up your yours?

SaveSaveSaveSave

SaveSave

How does Sony FS5 compare with Canon C100mkii?

Sony FS5: Best documentary camera ever?

Is the Sony FS5 the best documentary camera ever?

Over the past couple of years, I’ve migrated away from DSLR shooting to pretty much using the EOS c-series cameras, in particular the C100mkii, for most of the documentary-style shooting I specialize in. But a few weeks ago when the Sony FS5 began shipping, I opted to become an early adopter. The specs were just too tempting.

Last week I wrapped production on my first commercial project with the FS5. And while I have a long way to go in exploring this camera fully, I’d like to share some of what I have – and haven’t – observed so far.

IMG_0427

First up: I haven’t seen anything nasty in the footage, as others have reported. The only unacceptable quality I’ve seen so far is when shooting in center crop mode in low light, with the gain jacked up to 3200 ISO or higher. That produces nasty pebble-sized grain. But as long as I hang at 0db (ISO 1000 in hypergammas or ISO 3200 in slog) I find the results are spectacular. Razor sharp, crisp detail, plenty of color information to play with in 10-bit HD.

The FS5 gets noisy when pushed past 3200. In fact, I would say it’s best not to push it past 1600 ISO. And in SLOG, don’t pus it at all. It really wants a lot of light. Like one to two stops more than base ISO. So to my way of thinking, this is an ISO 1000 camera, whether you’re shooting SLOG or standard gammas. Set it in your head and forget it. And ISO 1000 is a pretty decent base ISO, isn’t it? The C100mkii’s base is 850. So we’re in the same ballpark with both cameras here. But the C100mkii can be pushed well over 3200 with great results. So Canon retains the edge for low-light shooting.

Canon color science is also more cinematic with less effort. All you have to do to get great looking footage when shooting C-log is drop on a LUT in post. The FS5, in SLOG, also requires dropping on a LUT (more about which ones in a moment). But then you have to do more work. Sometimes much more.

The good news is that the 10-bit HD footage loves to be graded! And it’s actually a lot of fun to push it around and you can do that to quite an extreme without the image falling apart. It’s definitely a different look, the Sony. I read somewhere that because Sony has a long tradition of news cameras, their look is more video than cinema. Canon, with it’s EOS C-series, is gunning squarely for cinematic results. And I have to say I prefer the Canon look. Skin tones look more alive. But it’s a subtle thing. I like the image coming out of the FS5 a lot, it’s just different from the C100mkii.

The first project I shot with the camera didn’t lend itself to shooting SLOG (as Allister Chapman has eloquently argued, SLOG isn’t good in low light) so I shot in PP6, which is Hypergamma 3/cine. No LUT required, off we go. Here’s how a few of the interview frames looked without too much grading – I just added a little Film Convert using FS7 settings:

1 2 3

You can see that the last guy’s skin tones are unfortunately rather lifeless, but that’s not the camera’s fault:  I didn’t do a good enough job flagging him off from ghastly artificial light in the warehouse location where the interviews were shot, so you get a lot of that light showing up under the key.

Regarding 4K, I haven’t shot with it enough to comment. And I don’t plan to use much 4K anyway. That’s not why I bought this camera. It’s a pain in the ass to edit 4k (at least on my circa 2011 iMac) and none of my clients are asking for it. The only reason I can imagine using it regularly would be for getting two shots out of an interview, but in most cases I’d rather have the 10-bit than the 4K. Still, it’s very nice to have the option, something the C100mkii doesn’t.

Above: properly (over)exposed SLOG looks blown out on FS5’s LCD. SmallHD 502 with LUT applied fixes that.

Above: properly (over)exposed SLOG looks blown out on FS5’s LCD. SmallHD 502 with LUT applied fixes that.

In my SLOG shooting tests, I definitely find that this camera needs to be overexposed by at least one stop to keep noise down in the shadows. This makes monitoring a challenge. With the FS5, you’re stuck with just a single LCD mode that boosts the contrast to help with focus – but does nothing to reduce the overexposure. Not good enough! You really do need to shoot with a LUT when shooting SLOG.

LUTs are not supported by the FS5, however, so to use them you need a third-party monitor that supports them. I rented the SmallHD 502 on the advice of Seattle DP Gabriel Miller, and liked it so much that I bought one after using it for a single day. I wouldn’t dream of shooting without it now. It’s screen is almost as big as my DP6, but it’s tiny. A photographer friend asked me if it was my iPhone when he first saw it! And ultra lightweight. It lives on the top handle of my FS5, without compromising the compact form factor of the camera. Unlike the Atomos Ninja, which I also rented. Way too big and makes the whole thing top-heavy. No good.

So, which LUTs to use for monitoring (and post)? I’ve found two very good LUTs for this purpose. The first is the Sony Alexa emulation LUT. It comes in two flavors, one- and two-stop pushes. The second is a higher contrast version of the same LUT, with a one-stop push, called AA709A, that was developed by Art Adams. I’ve packed up all three and tweaked them so they’ll work with the SmallHD 502. You can download the FS5 LUTs here.

Next up, I’d like to talk about my favorite thing about the FS5: it’s body.

The ergonomics of the FS5 are SUPERB. It’s the first camera I’ve used in years that makes me want to shoot handheld. And I’m doing it all the time now. I’d basically forgotten that shooting handheld was even an option for me, ever since trading in my JVC HM100 for a 5dmkii. Even with the C100mkii, I find it wants to live on a monopod. But not this camera. It begs to be held in your hand, and it’s so easy to get great results with it, because it’s so light and so easy to MOVE with it. It’s changing how I think about shooting b-roll.

With both the FS5 and the C100mkii, the beauty is you can arrive on location and pull your camera out of the bag and begin shooting without building anything. But I give the FS5 the edge here, because even with my SmallHD 502 monitor attached and rotated horizontal, it measures just 10” high. That’s enabled me to turn my unused Steadicam Merlin travel bag into the perfect grag-and-go camera case for the FS5. It’s the perfect size bag to fit camera with my Canon EFS 17-55mm f/2.8 zoom lens, with Metabones IV adapter, a shotgun mic, and 502 monitor attached. The only thing I have to do to begin shooting is rotate the monitor to the right shooting angle, and press record.

I find myself picking up the FS5 with my right hand, by reaching into the grip, squeezing it, and lifting it, one-handed. It’s so light you can do that. It just balances in your right hand like an extension of your body, freeing your left hand to focus, operate the menus, and to cradle the camera for stability. That right handle is perfectly balanced. Really, the design team at Sony deserves an award for the FS5.

lens-mount

I haven’t used the FS5 with any Sony lenses. I am using it with my Canon EF glass, using the Metabones adapter and speed booster. Unfortunately my Contax Zeiss set won’t work with speed booster, because there are elements on the lenses that protrude too far.  I haven’t been able to try out the autofocus features of the camera with Sony glass.

The nice thing about the Metabones adapters, at least the version IV one that I have, is that the firmware issues others have reported seem to be resolved. Changing the iris behaves as expected, with the aperture dial on the camera. Also, image stabilization works perfectly on Canon glass with the adapter. My go-to lens on the C100mkii has been the the Canon EFS 17-55mm f/2.8, and it works flawlessly on the FS5 with the Metabones adapter.

It’s also very nice to be able to punch in to center crop mode and get even more reach from the lens.  But I do find that center crop works best in plenty of light. The Clear Image Zoom feature is also handy, but in the situations I’ve tried it, I definitely noticed a drop in image quality. Not as bad as most digital zooms, but enough that I won’t plan on using it regularly. Apparently the feature works better in some situations than others, because it uses a database of images to determine what image processing to apply. This will require more testing before I determine its strengths and weaknesses.

To compare with the C100, the Sony FS5 is definitely a manual focus camera. I LOVE the autofocus on the C100mkii, and I will continue to rent the C100mkii when I have projects that need snappy autofocus such as sports shooting or other situations where I don’t have time or mental bandwidth to chase focus. However, paired with the 502, manual focusing with the FS5 is a joy.

Touching the joystick enlarges the image 4x or 8x

Touching the joystick enlarges the image 4x or 8x

Using the 502, I’m able to gauge focus on the FS5 very precisely. A quick flick of the joystick zooms me into the image to check focus while rolling, and the way SmallHD has implemented peaking on the monitor is superb. So I really don’t find I miss the C100 autofocus so far.

quickrelease-detail

I have rigged up my FS5 with a Manfrotto quick release plate, which allows me to go instantly from rails and follow focus on a tripod, to handheld configuration. The camera is so lightweight that I have to rig it up and raise the center of gravity in order for it to balance on my Vinten AS5 fluid head. But the quick release gives me the best of both worlds: super stable, controlled tripod shooting one minute, and nimble handheld the next.

ball-head-detail

With a C100mkii, I use an external monitor mounted to an arm coming off a rail block. But with the FS5, I’m finding it most convenient to put the lightweight, compact 502 monitor right on top of the handle using a Manfrotto LCD ball head. This is a heavy ball head! It weighs as much as the monitor itself. But it’s buttery smooth in its operation, almost effortless to adjust, unlike the cheaper, lightweight ball heads. These have to be cranked down so hard it hurts your thumb, and they work loose and sometimes fall off. So it’s worth every penny and every ounce to get the Manfrotto. It’s the right tool for the job.

smallhd502

I find myself shooting with both the LCD and the 502, keeping the menu display active on the LCD, and the 502 clear of menus so I can focus and frame without any distraction. With the latest firmware, you now have the option to send the menu display to the external monitor, should you wish, as you can on the C100mkii. But the C100mkii’s monitor is in a much more awkward place than the FS5, which is completely configurable however you like it, and depending on your shooting situation. But the EVF on the C100mkii is superior to the FS5s, which feels just adequate.

smallhd_cbl_sgl_bnc_bnc_mm_thin24_thin_gauge_bnc_male_1446499276000_1194339

It makes sense to have everything as light as possible with this camera, and to that end, I purchased a very thin, very flexible thin gauge 24” SDI cable that SmallHD makes. It works amazing. This little guy is what you want for monitoring. HDMI cables don’t cut it! I’m SO very glad that FS5 includes an SDI out, something the Canon C100mkii does not. I can’t tell you how many times I’ve cursed the C100mkii when the signal drops out momentarily to my external monitor because I simply touched the HDMI cable. So yay for no more HDMI cables. And with the SmallHD SDI cable, you get the same thin flexibility as a thin HDMI cable. Yay!


swit

Another neat trick with the FS5 is to get Swit S-8U63 batteries that include a d-tap. I picked up 3 of these, which aren’t cheap at $180 apiece. But three batteries is enough for me to shoot all day. I get about 2.5 hours shooting time per battery while also powering the SmallHD 502. Also great news is that with the Sony FS5 charger, these batteries go from empty to fully charged in less than an hour. *UPDATE:  A reader commented that these batteries occasionally reset the camera clock on the FS5. This is something I’ve observed, but didn’t know it was the fault of the battery. So if you rely on accurate timecode for your projects, you should avoid Swit batteries for now, and choose Sony’s OEM batteries instead.

nd

The ND wheel that allows you to smoothly and steplessly adjust the ND to control exposure is the killer feature of this camera. I can’t overstate how epic this is. Finally, a tool to control exposure without stepping the iris and changing depth of field! It’s the best thing ever for documentary style shooters. Goodbye, matte box. I don’t know if I can shoot anything else again after using this. And apparently Sony is going to release a firmware update that allows this to be set to an auto mode, which will automatically set the correct exposure using only this ND. How cool is that?

The slow motion features are fantastic, but I haven’t had a chance to use them much yet, so I won’t comment on that other than to say it gives me great pleasure to know that 240fps in full 10-bit HD is  just a button push away when I want it.

To sum up, I love this camera for it’s body. Does that make me shallow? I don’t think so. This camera has taught me that form IS function.  I’ll continue to admire the C100mkii for its look, for its autofocus and low light capabilities.  But for now I’m going steady with the FS5.