Monthly Archives: July 2012

Magic Lantern is ready for prime time with 2.3 release

I’ve been using Magic Lantern on my Canon 60D for over a year, despite the fact that it would occasionally freeze my camera in the middle of a shoot. But it unlocked so many powerful controls such as ability to zoom in and check focus while rolling, that I was willing to tolerate the occasional hiccup. The solution was (and remains) simple: remove the battery from the camera, and restart.

Luckily, that era of instability appears to be behind us now, with the release of Magic Lantern 2.3. I’ve been beta testing this release for a few days, and so far it hasn’t shut down on me once.

For shoot next week, I’m renting a 5DMKIII. This will be the third shoot I’ve done with the camera, and one of my biggest frustrations with it is that I can’t run Magic Lantern on it. I’ve gotten so that I depend on the features that Magic Lantern provides. Here’s my favorites:

1. Waveform displayed on the monitor – allows me to visually check exposure levels.
2. Audio levels read out in monitor, so you can visually see whether your sound is at correct levels while rolling.
3. Spot meter in center of focus area reads out exposure values in percentage value. So I can see instantly whether a face is too hot, for example, but checking the percentage. This alone has changed the way I shoot. I feel naked without the spot meter reading, and I constantly move this around the frame to check my exposure values.
4. Time elapsed during a take OR space remaining in the card is displayed in the upper right corner of frame, which allows me to keep tabs on how much time is left in a take (important because of the approximately 11-minute clip limit of my DSLR).
5. Zerbras! This new version offers even faster zebras, and you can set the sensitivity. I generally set mine to clip anything above 95%, which it displays as solid blocks of red color.
6. Exposure override in movie mode: allows setting an extremely slow shutter speed and correspondingly slow frame rate of two frames per second. This is great for getting a timelapse effect – for example, mount it on car and drive through city streets at night to record streaks of light flying by.

Exciting new features that come with this release:

1. Vectorscope displayed on the monitor – allows checking color values and especially skin tones.
2. Blub ramping – allows flicker-free lowering of shutter speed as night falls, or increase of speed as sun rises. Haven’t tested this feature yet myself, but looks promising.
3. Stability. That’s the biggie for me.

The Magic Lantern project is completely open source and the developers creating it are volunteers. You can support the project by donating here (scroll to bottom of page). I have donated to them twice, because they are doing what Canon could easily have done, but chooses not to. Canon in recent times have chosen to unlock features such as these only in their high-end offerings priced in the neighborhood of $15,000. This is extremely disappointing, and it makes me very happy to support this project, which is giving extremely powerful pro tools to us for FREE.

Congratulations to the crew at Magic Lantern on this major release. Now, how soon can you have this running on a 5DMKIII?
SEOmoz on Radical Transparency in Business

The idea of being honest with your customers sounds great, but what about when things go wrong? Here’s the most recent installment in the series we’re doing for Seattle Interactive Conference, a 2-minute look at what radical transparency means to the people running Seattle-based SEOmoz.

This is the first piece that my partner Lisa Cooper edited, almost entirely on her own, in Final Cut Pro X, with very little help from me. Nice job Lisa!

Nordstrom's windows

Our most recent commercial piece is up today on Nordstrom’s Facebook Page. Lisa and I shot this piece primarily with three GoPros, all running concurrently in timelapse mode, one frame every two seconds. We repositioned the cameras a couple times to get more angles covered. But I think what makes it especially fun is the very brief moments of dslr footage intercut with it.

Some frame grabs:

Great read: Film Lighting by Kris Malkiewicz

I was at Barnes and Noble a few weeks ago, poking around in the filmmaking section, and discovered a book that I almost couldn’t put down: Film Lighting by Kris Malkiewicz. I did, however, put it down long enough to find out whether it was cheaper to buy on my iPad. It was. So I downloaded it on the spot and walked out the door, past the Nook display, glad that physical bookstores still exist, and excited to be living in a world where this kind of instant comparison-choice-delivery is possible.

This is a new version of a classic book that has been revised to include coverage of digital video and new developments like LEDs. It’s a series of conversations with mostly Hollywood DPs and gaffers. But what surprised me is that much of the advice they give applies to tiny budget filmmakers like me. Who knew, for example, that using a Leko stage light is a great way to target bounce light? Yep. The venerable ellipsoidal spotlight is still a killer tool, because it’s infinitely controllable, equipped with shutters that allow you to shape the light without having to use cutters or barn doors. You can aim it at a bounce card across the room, and entirely eliminate any light spill. It’s the guided missile of lighting. And I was able to pick one up on ebay for $80.

Haskell Wexler shared this tip: “I find that I learn the most when working on documentaries. When the budget is minimal, you are forced to look at light as you find it and to make it look good.” There’s a big chapter in the book about how to light car interiors, and some of it gets pretty complicated. But Wexler is a fan of keeping it simple. “A lot of the equipment that we use when lighting inside cars is basically unnecessary to get good results. If you can control the intensity of the background with neutral density gels on the windows in the shot, it is possible to use the natural existing daylight in the car to make perfectly acceptable shots.”

That prompted me to pick up a 4’x25′ roll of .3 ND gel, which I’ve begun using everywhere. It’s a lot easier to pack that roll and a pair of scissors and tape than it is hump lights and the stands, sand bags, power cords, batteries, etc. to power them.

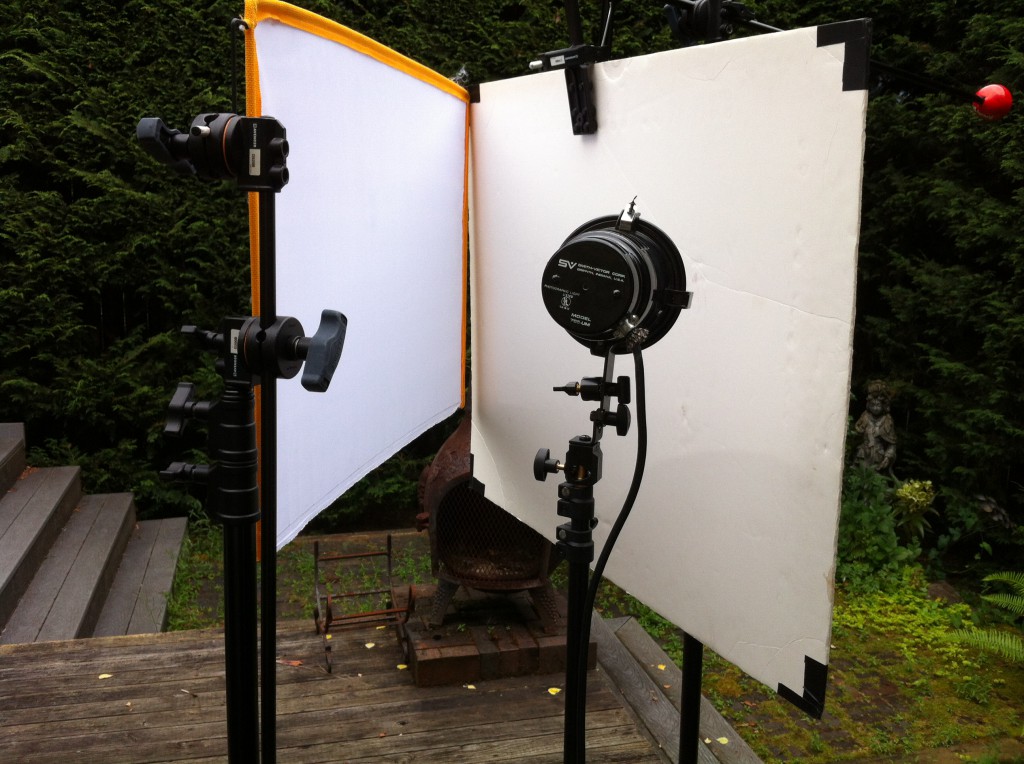
And speaking of books, ever heard of a book light? It’s a staple soft light in the film industry, what gaffers call the “seven-minute drill,” because it can be assembled very quickly. You take a big bounce board, and angle a light into it. Then, you place some diffusion such as a silk in front of the bounce, so that it connects with the bounce at the far end from the light, opening like a book toward the light. Like so:

This book is full of similar tricks from masters like gaffer James Plannette, who recommends improving car scenes by putting pieces of white sheet on the hood of the car to bounce light into actor’s faces. And, he says “it’s good to be shooting toward the south side of the street, so the fronts of the structures are not very bright.”

Robert Elswit offered a great tip that he learned on the set of There Will Be Blood. Because the characters were wearing hats, there was a lot of dark shadows that needed to be filled in. He took sheets of bleached muslin and laid them on the ground. This exaggerated the natural sun light just enough to perfectly light the faces.

What emerges from this book is that much of lighting is basic problem solving using a variety of tools, many of which are within reach of anyone. Reading it has helped me to become more conscious of the light everywhere: morning light, street light, breakfast table light, I notice all of it now.

I recently started a “light journal” which I’m slowly filling with snapshots of interesting light, grabbed with my iPhone. I’m also making screen grabs of nice lighting when I see it in videos and in stills. I plan to use it as a reference, a cook book of sorts that I can refer to when I’m planning shoots.

Better film lighting starts with Omnigraffle iPad app

I’ve tried out a lot of filmmaking apps since I began using an iPad last December. But so far only one has become a fixture on nearly every shoot. And it’s not even specifically a filmmaking app. It’s a $49 business app called Omnigraffle.

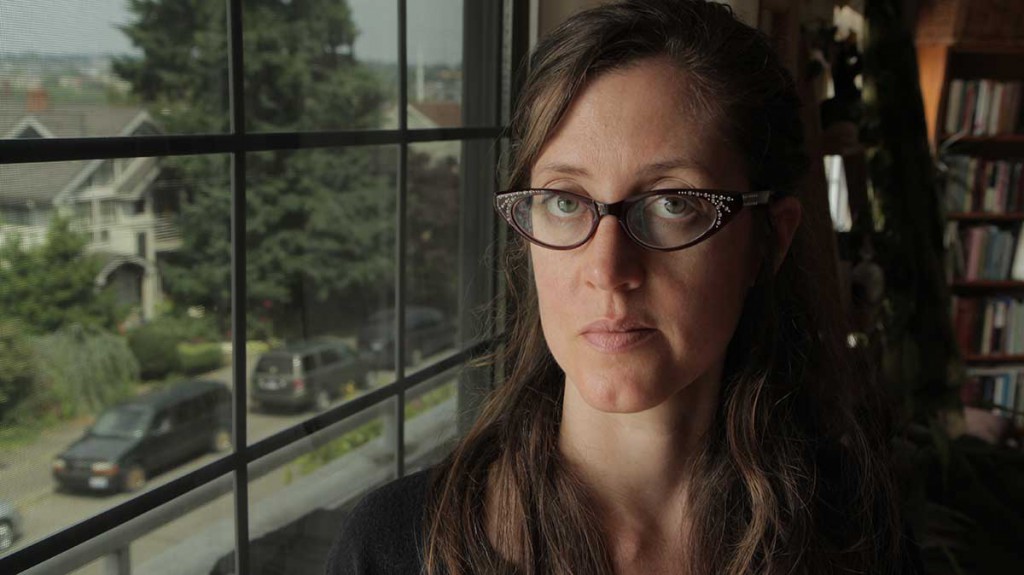
I use Omnigraffle to plan my lighting, even on simple interview setups like this one, which used simply window light. But it’s never as simple as it looks, is it. Here’s the process that works for me.

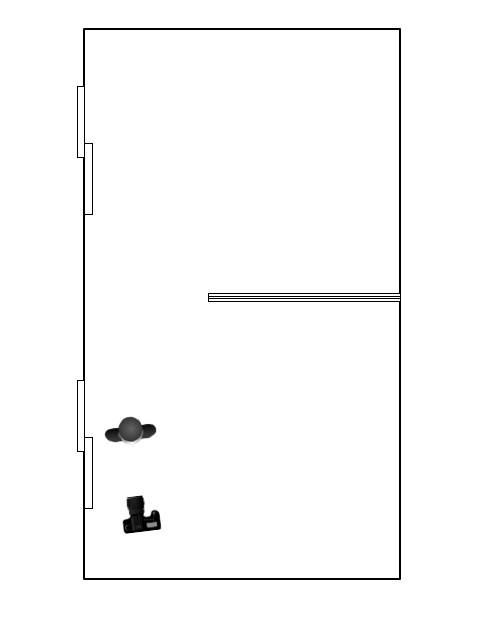
While I’m location scouting, I begin to sketch my plan on the iPad version of the app. It can be very simple, like so:

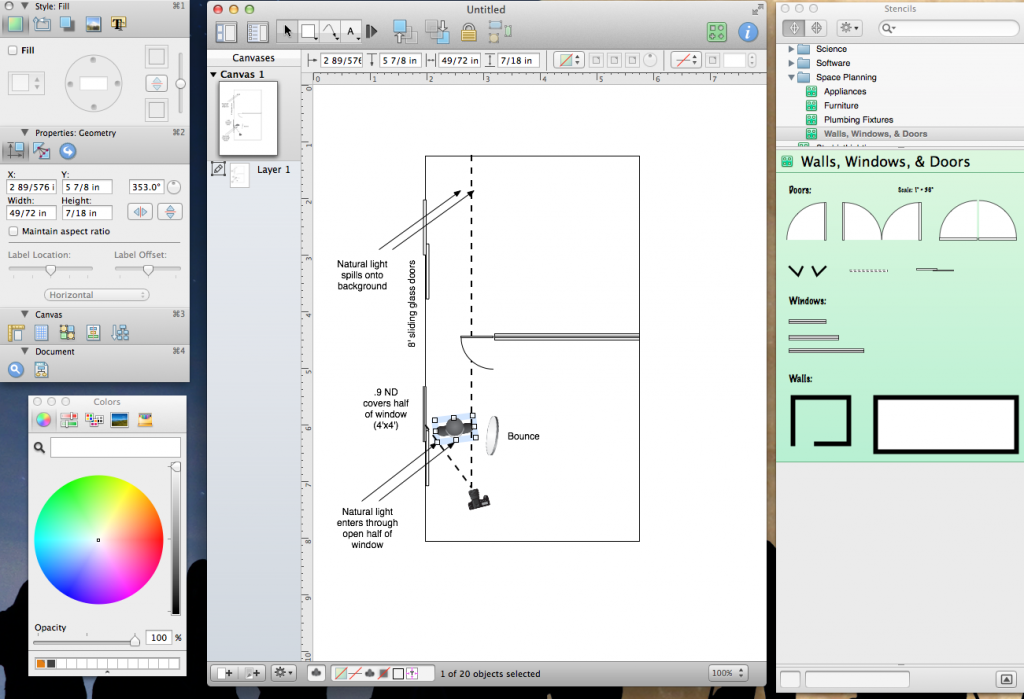
Then, I’ll email the file to myself via the built-in share tool (under Diagrams, press and hold the diagram icon to call it up). Then, I’ll open it with the more powerful desktop version of the app (which costs $99) where I’ll revise and enhance the plan (see below).

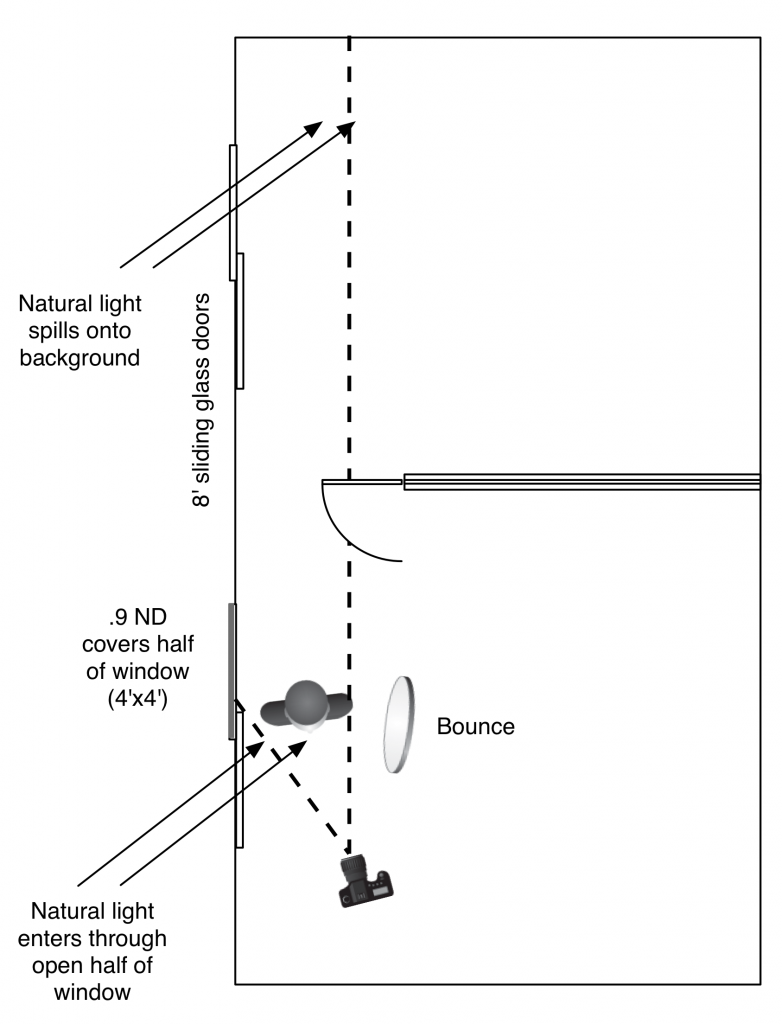
This is a lighting plan so simple that it doesn’t contain any artificial lighting! I used just two things to augment the lighting in this shot: a 4′ wide roll of Lee ND .9 filter gel, and a collapsible reflector disc. Check it out:

The trick to this natural lighting setup is to have a window that is large enough to split in half: one half you allow light to come through, the other half you cut down 3 stops by covering it with the roll of .9 ND gel. Place the subject just at edge of the ND covered portion of the window, so that the full daylight washes over her, but behind her, in the background, the camera sees only through the filtered area. Note that this wouldn’t work if direct sunlight were streaming into the window – in that case, you’d have to place some diffusion over the open side of the window first.

Omnigraffle helps me to previsualize lighting, and it also helps me share the plan with crew.

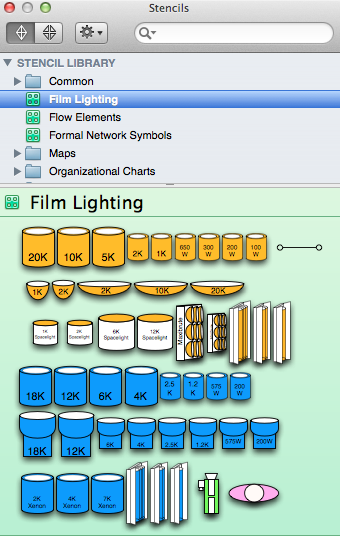
What’s powerful about Omnigraffle is that you don’t have to be an artist to draw complicated diagrams. The app allows you to install free plugins, called Stencils, which contain objects that you can combine to create your plans. You can find dozens of them at graffletopia.com. Check under the Film and TV category to find the most relevant ones. To install, just double click after downloading and they are automatically loaded. Here’s three of my favorites:

1. Film Lighting

2. Strobist Lighting

3. Space Planning > Walls, Windows and Doors (already installed by default).

One bug that I’ve encountered: I can’t begin a file on the desktop app, email it to my iPad, and open it. Every time I try, I get this error:

Is it worth the substantial $150 to buy both apps, when free alternatives are available? For me it is, because the free diagraming apps that I’ve tried have no support for downloadable stencils, which is what makes both versions of Omnigraffle so useful to me. I do think that $49 is a lot to pay for any app. But until something equally capable and more affordable comes along, Omnigraffle is the way to go.

If you had 6K to spend and didn't own any lenses, what would you buy?

A friend facebooked me this multiple-choice question this morning: If you had 6K to spend and didn’t own any lenses, what would you buy?

A) Canon 5d mk3 and used lenses from craigslist
B) Used Canon 5d mk2 and more lenses
C) 2 used canon 5d mk2 and less lenses
D) 1 canon 5d mk2 and 1 7D and lenses
E) Blackmagic Cinema Camera
F) Something else

I run everything at Visual Contact with a pair of Canon 60Ds, and quite a bit of used Nikon glass. In practice, I actually just use two things for probably 85 percent of my shooting: one Canon 60D and one Canon Zoom lens, the EF 18-55mm f/2.8. Having the second 60D body is great, and I do sometimes use it. But more often than not, it’s there just in case something breaks on my A camera. Which hasn’t ever happened. Yet.

So my snap answer, based on my experience and shooting style: I’d pick one camera and one sweet zoom that covers (in 35mm equivalent terms) the 24-70mm range (which is good for everything from establishing shots to interviews). I’d buy that lens new, because great used glass holds it resale so well, so you’re not saving much, and you’ll be able to sell it for most of what you paid for it.

Which camera to buy is a tougher question.

I’ve used the Canon 5dmkiii twice, and I really like it. In addition to being exquisitely sensitive to low light, it gives me the option to go really wide with my 20mm Nikor lens, the widest prime lens I own, which on my 60D equates to just a 32mm lens. But my favorite thing about the 5dmkiii is that Canon has fixed the moire issues that plague all first-generation DSLRs. Is it worth $3,500 just for that? Maybe.

Ever since their big announcement at NAB, I’ve been trying to figure out how to justify spending $3,000k on the Black Magic Design Cinema Camera. It’s not very much money for what you get, of course, but it’s a lot for me. I’m going to start out by renting it. It looks like an amazing camera. But with a 2.4 crop factor, finding wide glass for this camera could be a bitch. And after shooting on APS-C, I’ve got reservations about the Super 16 sensor size that I look forward to exploring when I get my hands on the camera. What’s most promising about this camera to me is the purported 13-stops of dynamic range. That’s very attractive to my style of shooting, which depends on doing a lot with minimally augmented lighting.

I quite like the APS-C sensor size of my 60Ds. It’s very close to Super 35 film size, and it gives all my glass extra reach, turning my 300mm Nikor into a far-seeing 480mm lens. And in the two and a half years that I’ve been shooting on my 60D, I’ve never once had a client complain about the image. When I compare the 5D image next to the 60D image, however, I do love the extra smoothness, color fidelity and shallow depth of field that I see. It also produces a slightly sharper image. The one Achilles heel of this camera is moire. I have to deal with it all the time and it drives me nuts.

I’m curious to see what Canon has up its sleeve with the next generation of the 60d, which some people are referring to as the 70d. Canon didn’t fix moire in the T4i, so it’s possible they won’t fix it in the new version of the 60D. If that’s the case, I won’t buy it and I’ll lean more heavily toward the BMDCC. There’s also rumors that Canon will make an entry-level full-frame camera soon, possibly in September. If they could bring the price of that down to something closer to 60D territory, and still fix the moire issues, I’ll probably buy one and use it a lot.

So there you have it. I’d spend about half of the money on a camera, and half on the best zoom lens you can afford in the 24-70mm range. And any money I had left over I’d spend on renting the specialty lenses you need only when you actually need to use them.