When I started filmmaking with a DSLR about 7 years ago, I discovered that the most difficult thing to get right in post production was skin tones. No matter what I tried, they just didn’t look right. A lot of the time, I couldn’t even put my finger on why.
Then I discovered FilmConvert Pro. With my Canon DSLRs, all I had to do was drop FilmConvert on a clip, and something magical happened. The skin tones suddenly looked human and alive. That made such an impression on me that I used FilmConvert to grade my first feature-length documentary, which was shot on a pair of Canon 60Ds.
In the years since I’ve moved into shooting more and more commercial work on higher quality cameras. Along the way I taught myself how to use DaVinci Resolve and began relying on it to generate dailies. So when I decided to try FilmConvert again recently on a commercial project, I was surprised with a new discovery: the skin tones I was getting in Resolve didn’t look as good as the ones that FilmConvert could give me!
The good news, however, is that FilmConvert works inside Resolve, so I don’t have to give up the power and precision of Resolve. I can still create complex masks, track motion, etc., while using FilmConvert. I’ll explain how to do that below as I create a nursing recruitment video. But first, I should mention that it’s possible to use the standalone version of FilmConvert if you don’t have Resolve, or any other editor, for that matter. But it has some limitations.

FilmConvert Standalone version
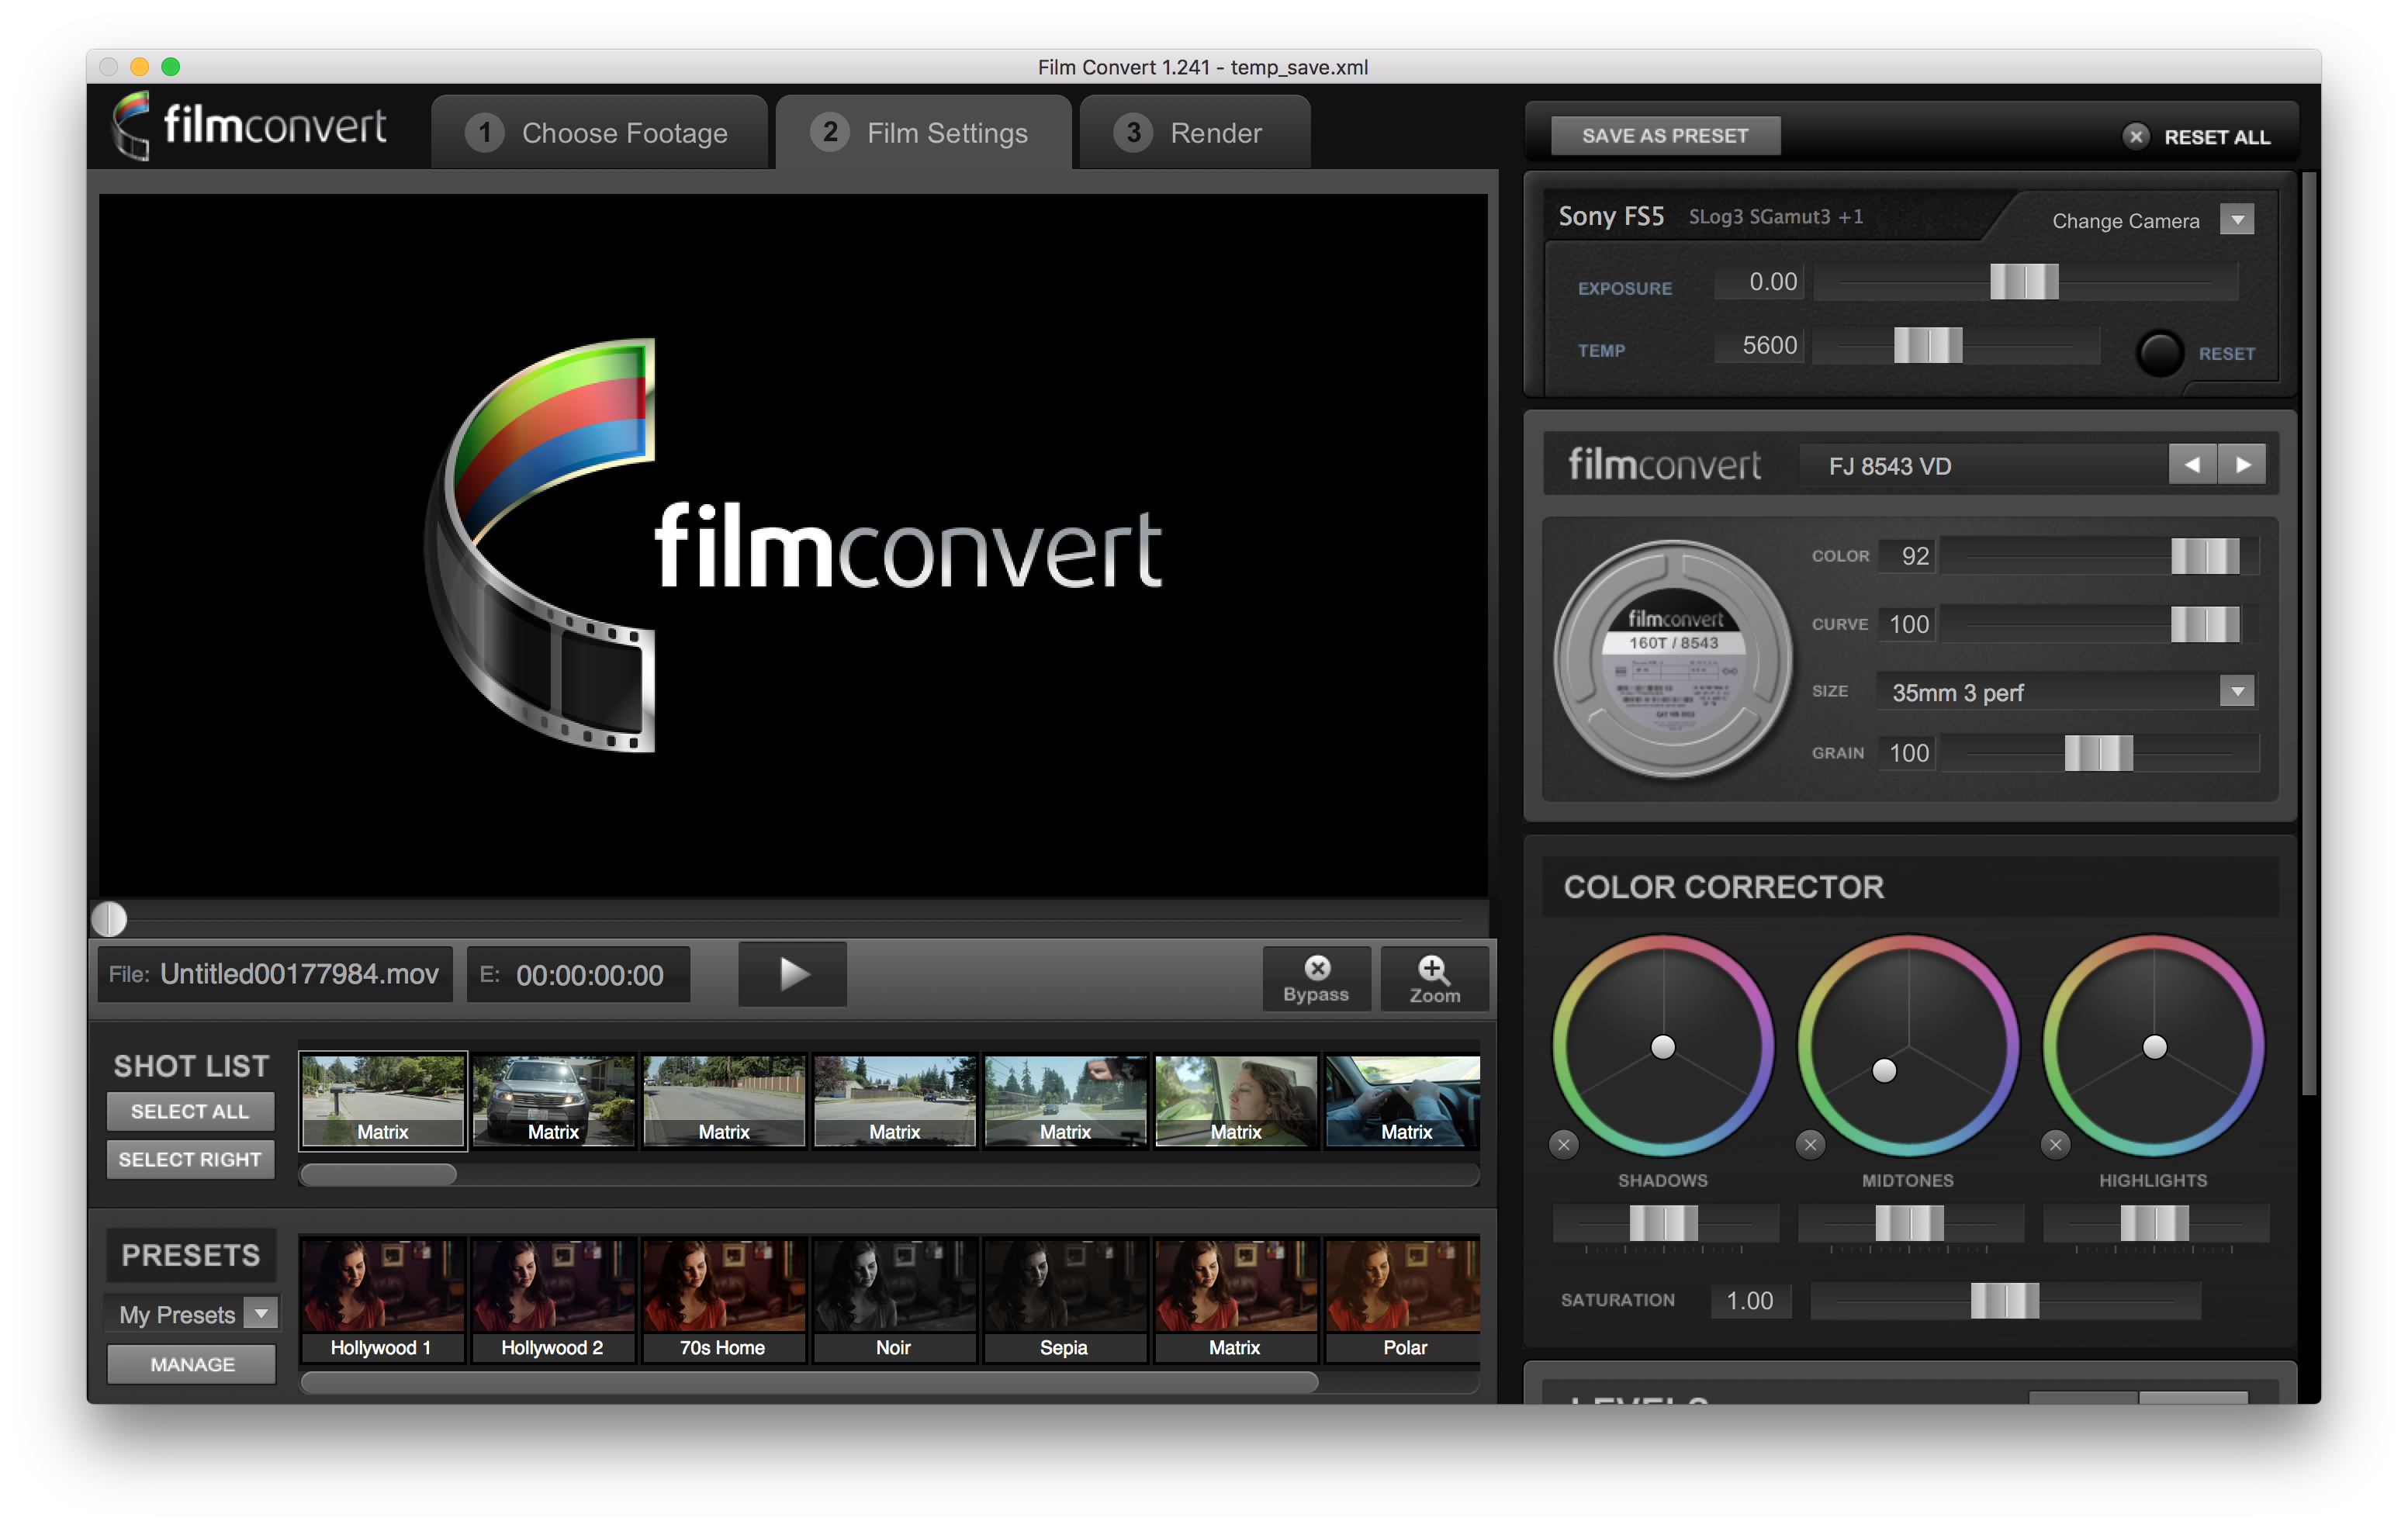
The first thing I noticed about the standalone version of FilmConvert is that It feels a little raw. Some of the basic Mac OS conventions don’t work. For example, in the Clip Browser, if you want to use the arrow key to advance to the next clip, you can’t. So you are forced to use your mouse to select clips, which slows me down. It also takes more than two seconds after clicking on a clip for the thumbnail to appear, which doesn’t seem like a big deal until you start scrolling through a list of a hundred clips. There’s also no way to play a clip in the browser – you just get a static thumbnail or list view.
These days I’m shooting a lot of my projects on a Sony FS5, so I was disappointed to discover that MXF files are not supported in the standalone version of FilmConvert. You can, however, import an XML file from an application like Final Cut or an EDL from Resolve. But that adds another step to your workflow.
On the plus side, however, once you get your clips into the app, the Film Settings panel makes it very easy to preview clips and audition different settings. Hitting the space bar plays clips as expected, but JKL keys are not supported for shuttling through footage. Once you’ve found a look that works for your project, you can save it as a preset.
The app also provides a menu called Viewing Target, that allows you to change the gamma to match that used in the three most common finishing platforms – Premiere Pro, FCPX/Quicktime or FCP/Resolve. Very helpful.
DaVinci Resolve
DaVinci Resolve and I have a love/hate relationship. I love the power that Resolve gives me to control color, but with great power comes great responsibility. I hate the amount of work it takes to tweak things before they look just right, especially with SLOG footage. Also, SLOG 2 footage requires slightly different tweaking than SLOG 3. But I’m never sure exactly which tweaks.
With FilmConvert’s OFX plugin version, you can get 90 percent of the way to your grade simply by dragging and dropping. It’s a real timesaver for me to load FilmConvert, which knows all about the differences between picture profiles, as my first step. From there, the remaining tweaks are usually simple.
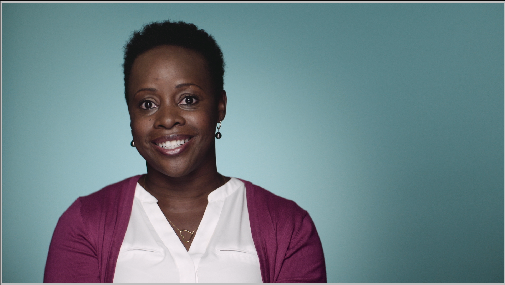
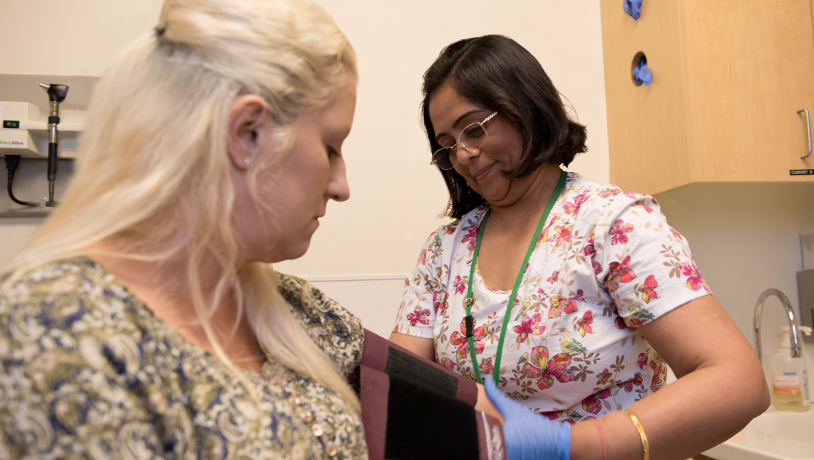
Before we jump into Resolve and see how this works, I should mention that the footage for this project was shot on my Sony FS5 using SLOG-3/Cine overexposed one stop to kill noise. When I open Resolve and place the clips into a timeline, here’s what one of the ungraded SLOG clips looks like:

Uncorrected SLOG-3 clip looks very flat
Note that you can do everything I’m demonstrating here with the free version of Resolve. Then, download the OFX version of FilmConvert Pro, and follow the directions to install it in Resolve. The first time I installed FilmConvert this way, I made the mistake of trying to apply it to my clips in the Edit tab, which contains a OpenFX tab under the Effects Library menu. Ignore that, and instead apply FilmConvert on Resolve’s Color page. Here are the steps.
- Import your clips into Resolve and add into Media Pool.
- Create a new timeline with your clips.
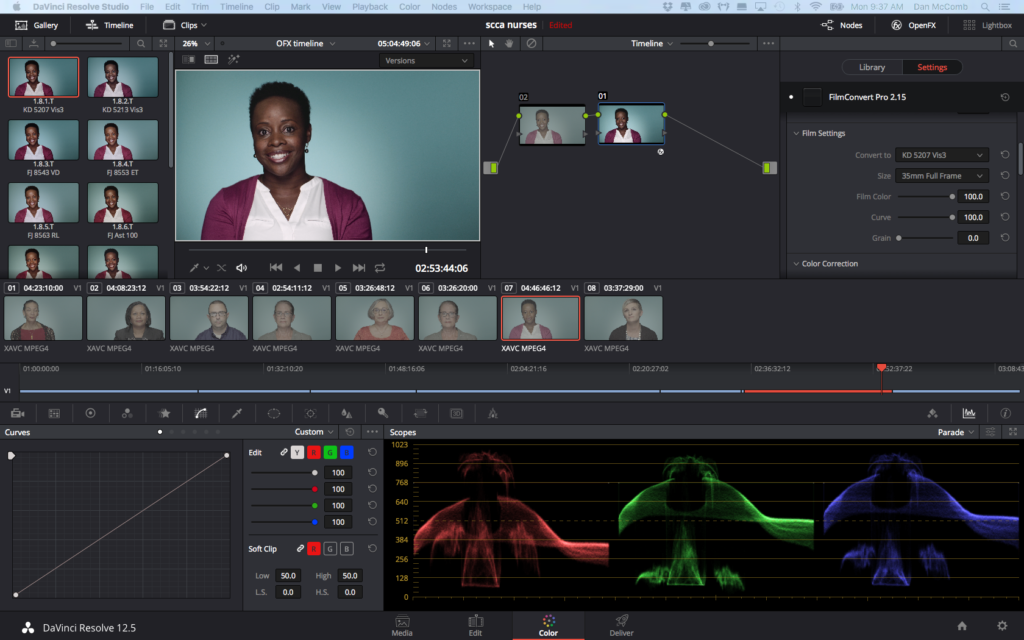
- Open the Color tab. For my workflow, I want to convert all the clips simultaneously, so instead of applying FilmConvert to each clip, I start out by switching from Clip mode into Timeline mode. This allows us to simultaneously apply FilmConvert to all clips in the timeline.
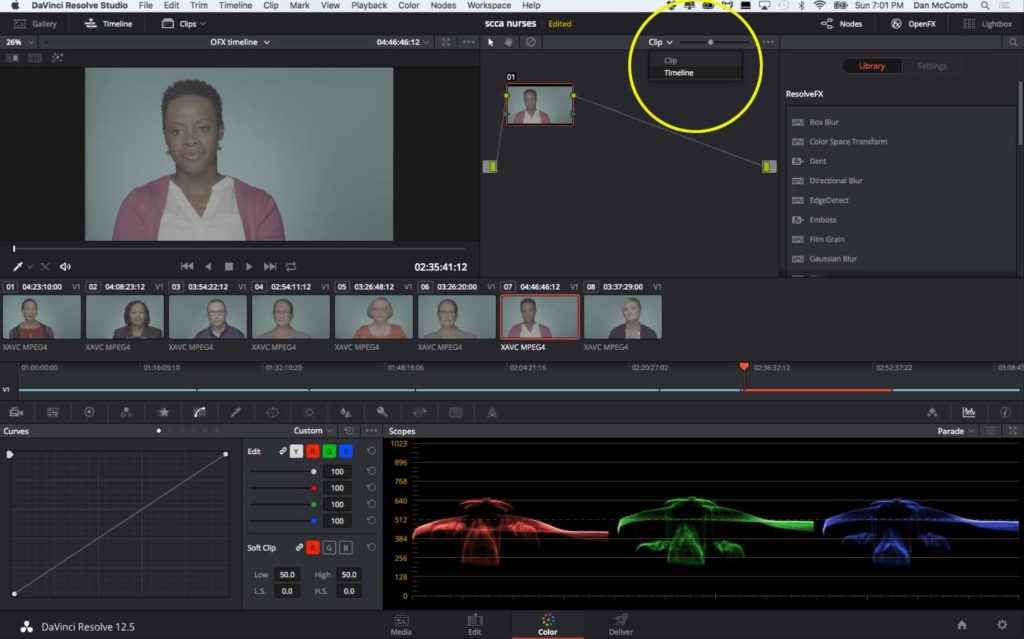
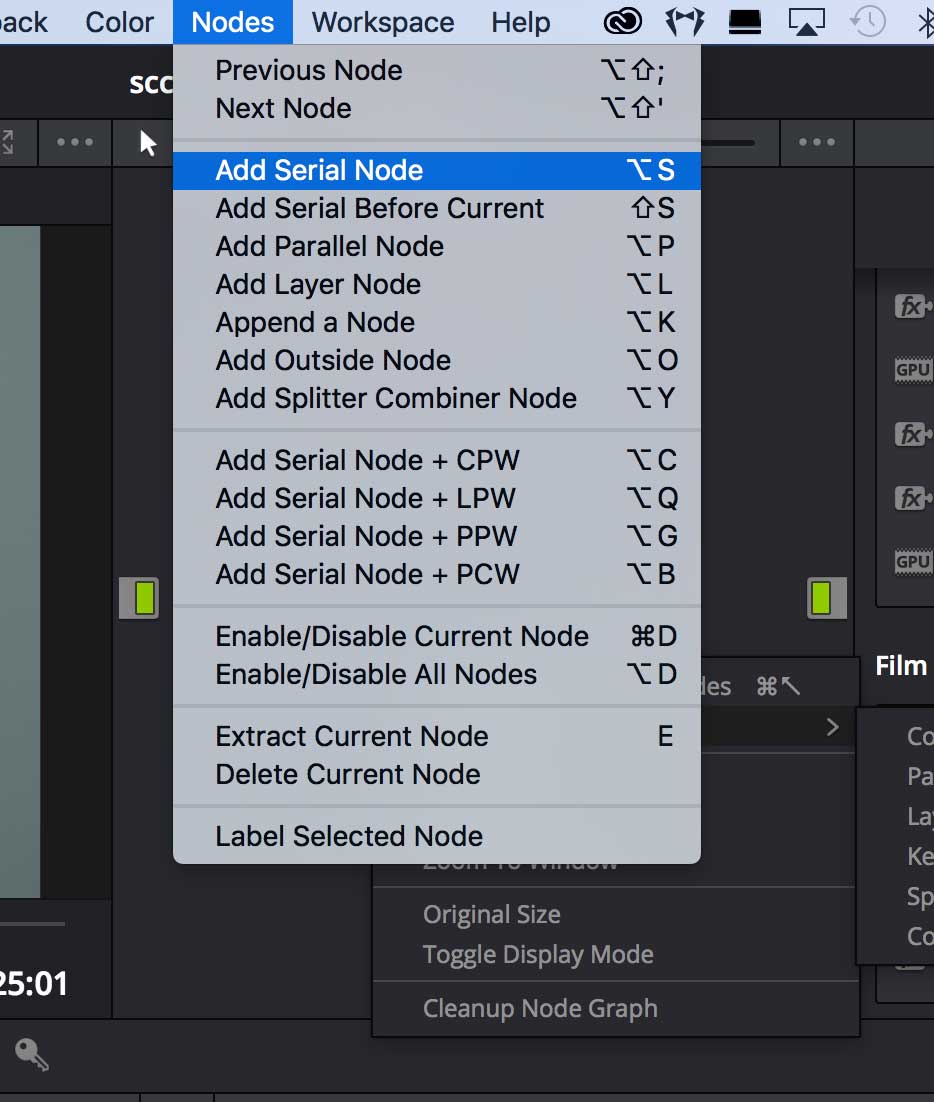
- Create timeline node. You’ll notice that there are no nodes in the node tree when you switch into Timeline mode. You will need to add one before you can apply FilmConvert. From the Nodes menu, select Add Serial Node (or press option-s).

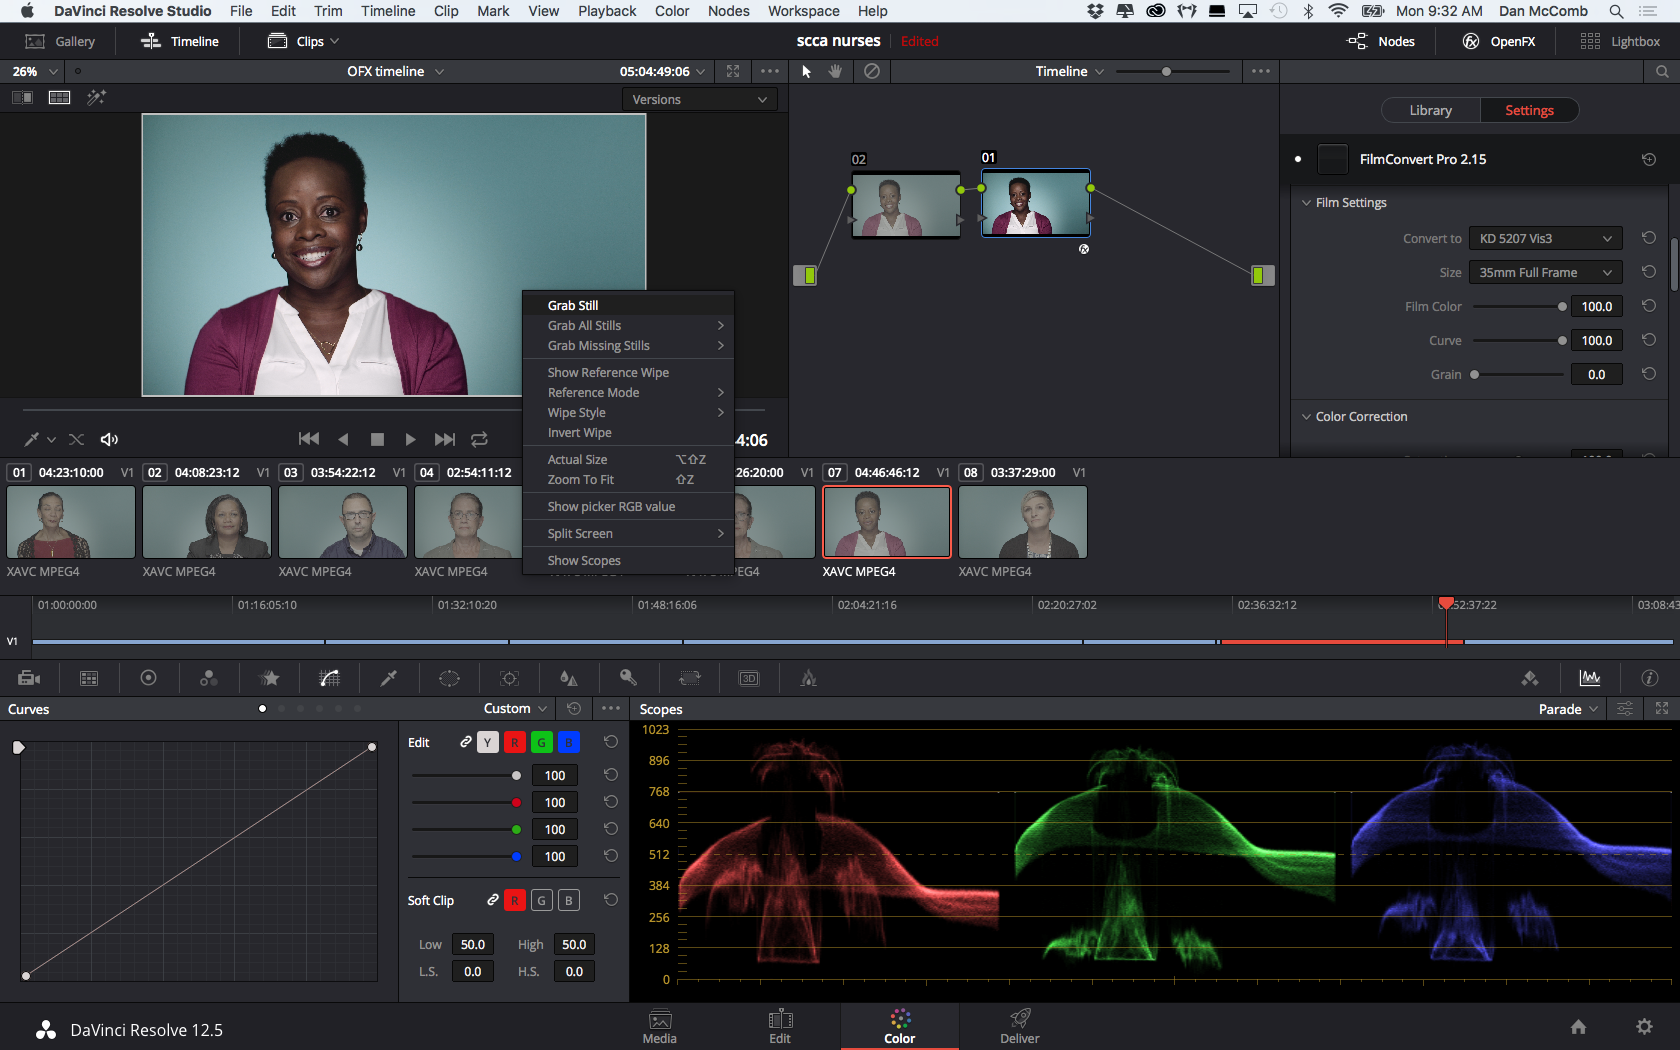
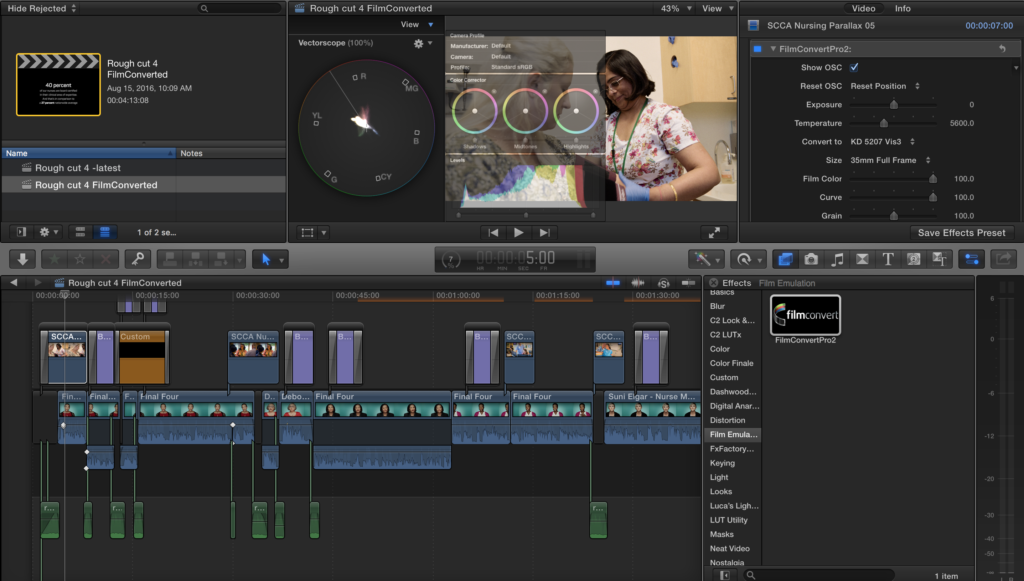
- Apply FilmConvert. Click on the OpenFX menu to reveal the OFX Library, and scroll down until you see FilmConvert. Drag it onto the timeline node to apply it (below):
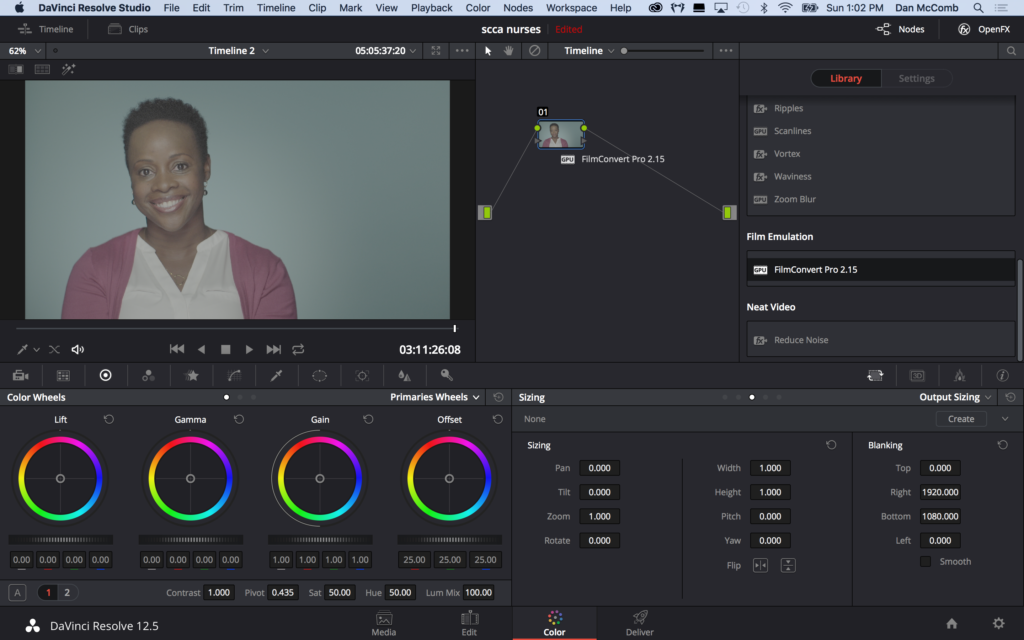
- Default profile is applied. You’ll immediately notice the clip gets grainy. FilmConvert applies a standard profile by default, and adds a lot of film grain. We’ll fix that in a minute.
- Add a serial node. In order to make global color corrections later, I add a second serial node in front of the one I’ve applied FilmConvert to (shift-s). FilmConvert should always be applied to the last node in the node tree. Then double click on the 02 node so that it’s active.
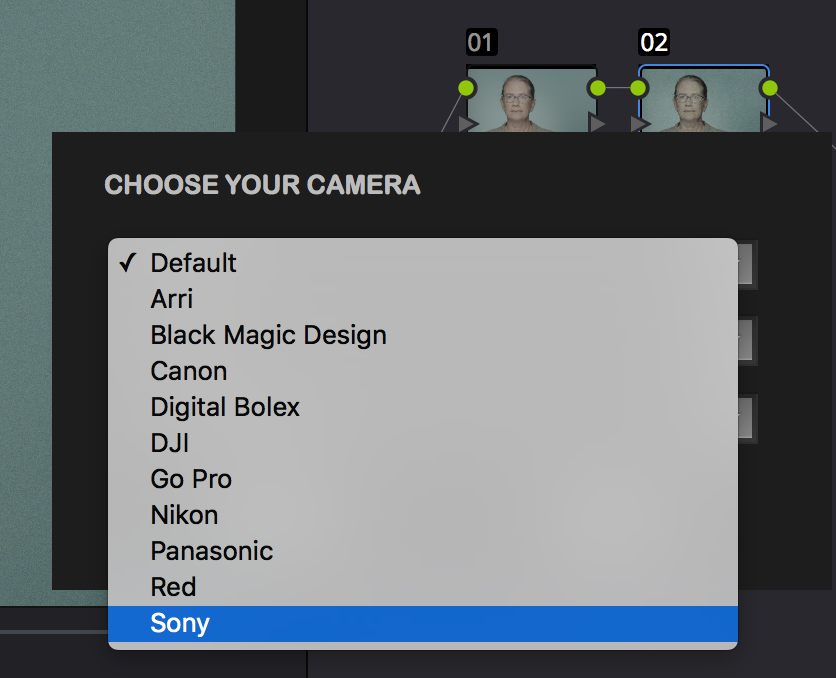
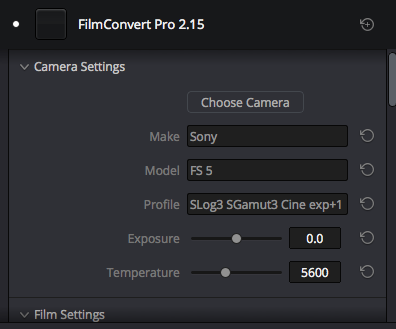
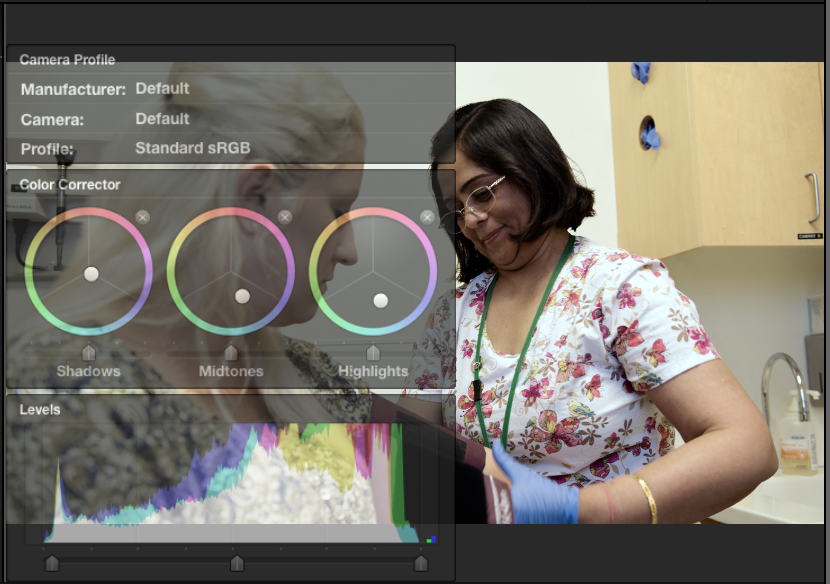
- Select Camera. Next, in the FilmConvert menu in the Settings sidebar, we want to select our camera profile:
- Select picture profile. Also choose the picture profile you used when shooting. FilmConvert gives you options for +1 and +2 overexposure options:
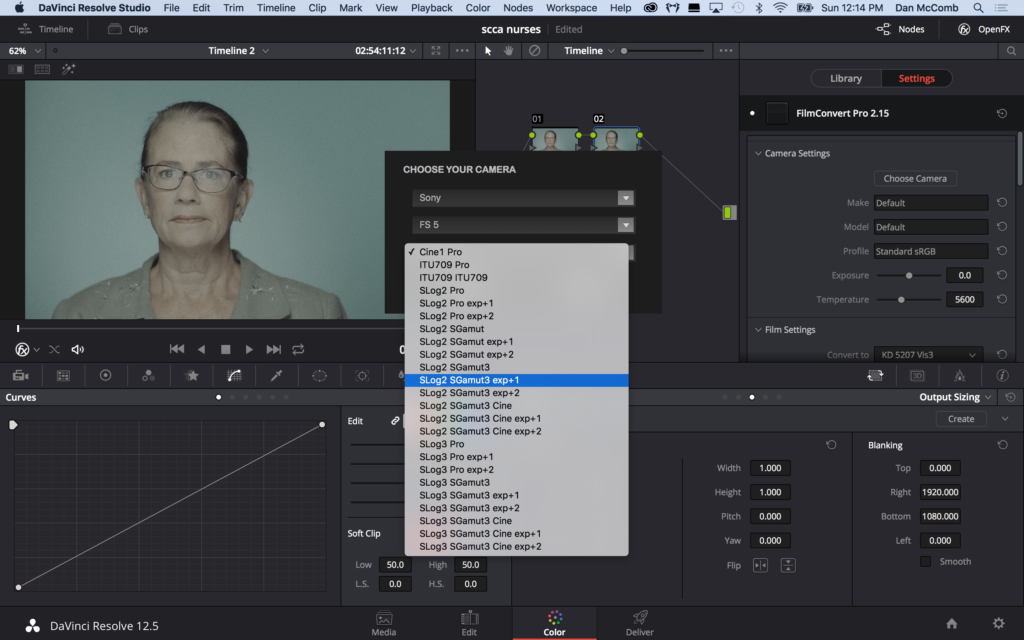
Select picture profile
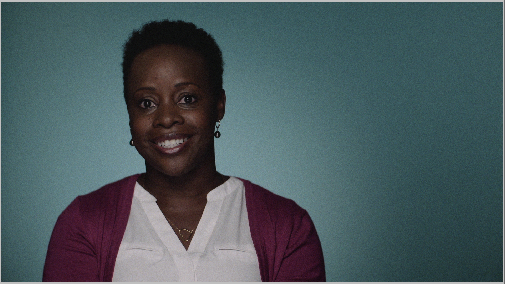
Image with default profile, which is too grainy for my taste
 Adjust grain. OK so now you should see your image starting to look better. But the first thing I notice is that it looks very grainy. I’m not a fan of film grain for most commercial videos (the whole point of having high quality camera sensors is to get rid of grain, isn’t it?So the first thing I do is reduce the grain slider to 0. I DO sometimes like the grain for more creative pieces, however, and in fact, the grain can be very helpful in disguising thinner 8-bit codec adjustments. In those cases, I find that setting the grain slider between 30 and 50 is about right. But for this piece, we’ll keep it clean.
With a few exposure adjustments, our image begins to pop
 Adjust the exposure. The next thing I’m noticing is that my clip is a little dark. FilmConvert provides contrast adjustment tools within the plugin. You can make global exposure and color temperature adjustments in the plugin’s Camera Settings menu. Or scroll down to make more detailed adjustments to lift (shadows), gamma (midtowns) and gain (highlights). However, we’re already working within one of the most powerful tools for contrast and color adjustment – DaVinci Resolve – so I tend to make my global changes in that node we added previously. But if Resolve’s controls are intimidating to you, don’t worry! Just grab the Exposure slider and move it until your image looks properly exposed.
- Choose a film stock. OK, so with a few contrast adjustments made, our image is looking pretty good. Now for the fun part: choosing our film stock. This is the palette you get to play with, the place where subtle differences can be hard to see, but have a huge impact on your final look. I recommend using one of Resolve’s comparison tools, Grab Still, to help you see the difference between stocks side by side. With the default Film Setting selected (KD 5207 Vis3), click on the viewer and select “grab still.”

- Grab a still for each stock. Select the next film stock on the list, KD 5213 Vis3. Grab another still. Repeat for each of the stocks you want to compare (FJ Neo through KD TrX400 are black and white, so I’ve skipped those). Now click on Gallery at the top left of Resolve’s window. You will see a thumbnail of each still displayed in the left column. You can click on each still and give it a name that matches the film stock.
- Expand the gallery. In the menu at the top of the stills, you’ll notice a slider that controls the size of the thumbnails. To the right of that is a search icon and a four-arrowed icon. Click the arrowed icon to expand the gallery.
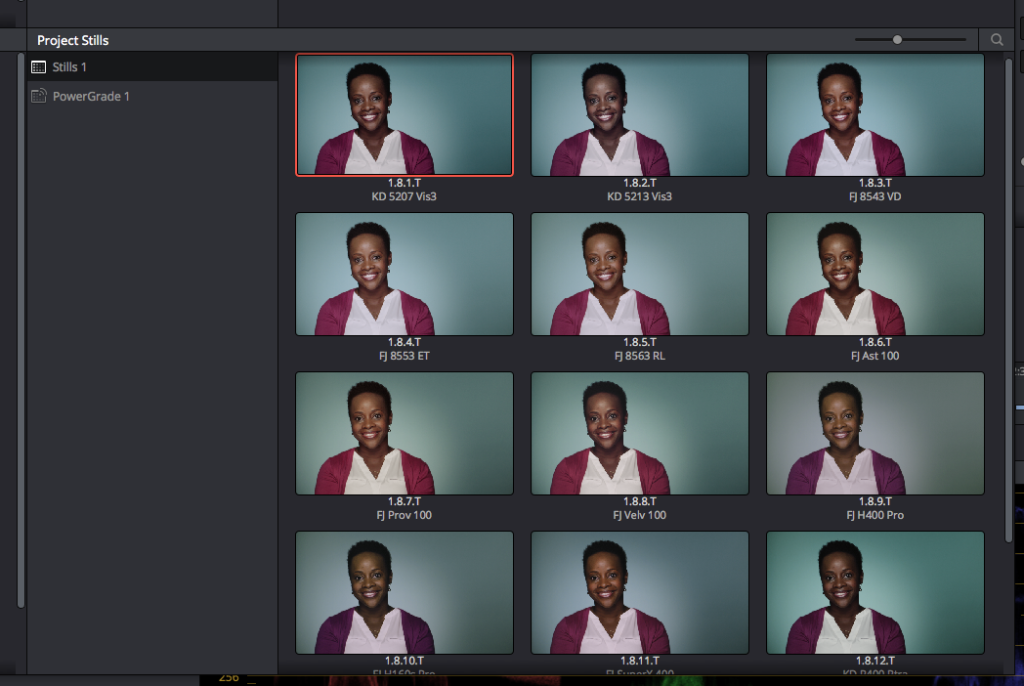
With gallery expanded, you can easily compare the subtle differences between film stocks.
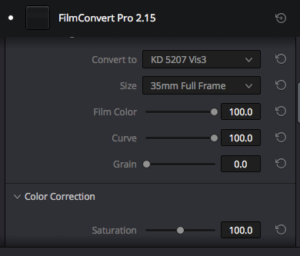
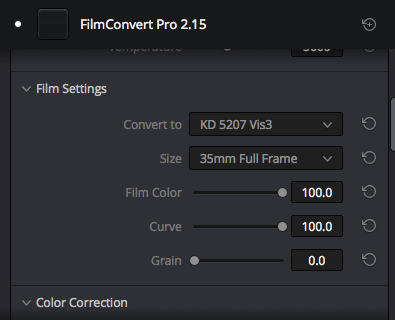 Select film stock. Choose the film stock you like best. You can make further refinements to the look in the FilmConvert plugin controls. Film Color and Curve are two controls that help you dial in the exact look you want. I find that FilmConvert’s Curve tends to be quite contrasty when applied at the default 100 percent. You may want to back it off slightly. And Film Color is like the opacity sliders in Photoshop that allow you to back off on the intensity of the entire plugin (dialing this down to 0 returns you to completely flat SLOG3).
- Make individual adjustments. Check the other clips in your timeline. They will likely need individual adjustments, and you can do those on the Clip node, rather than the timeline node.
- Export dailies. When you are happy with how each clip looks, switch to Resolve’s Deliver window, and export your files in the editing-friendly codec of your choice. I export to ProRes for editing in Final Cut Pro X.
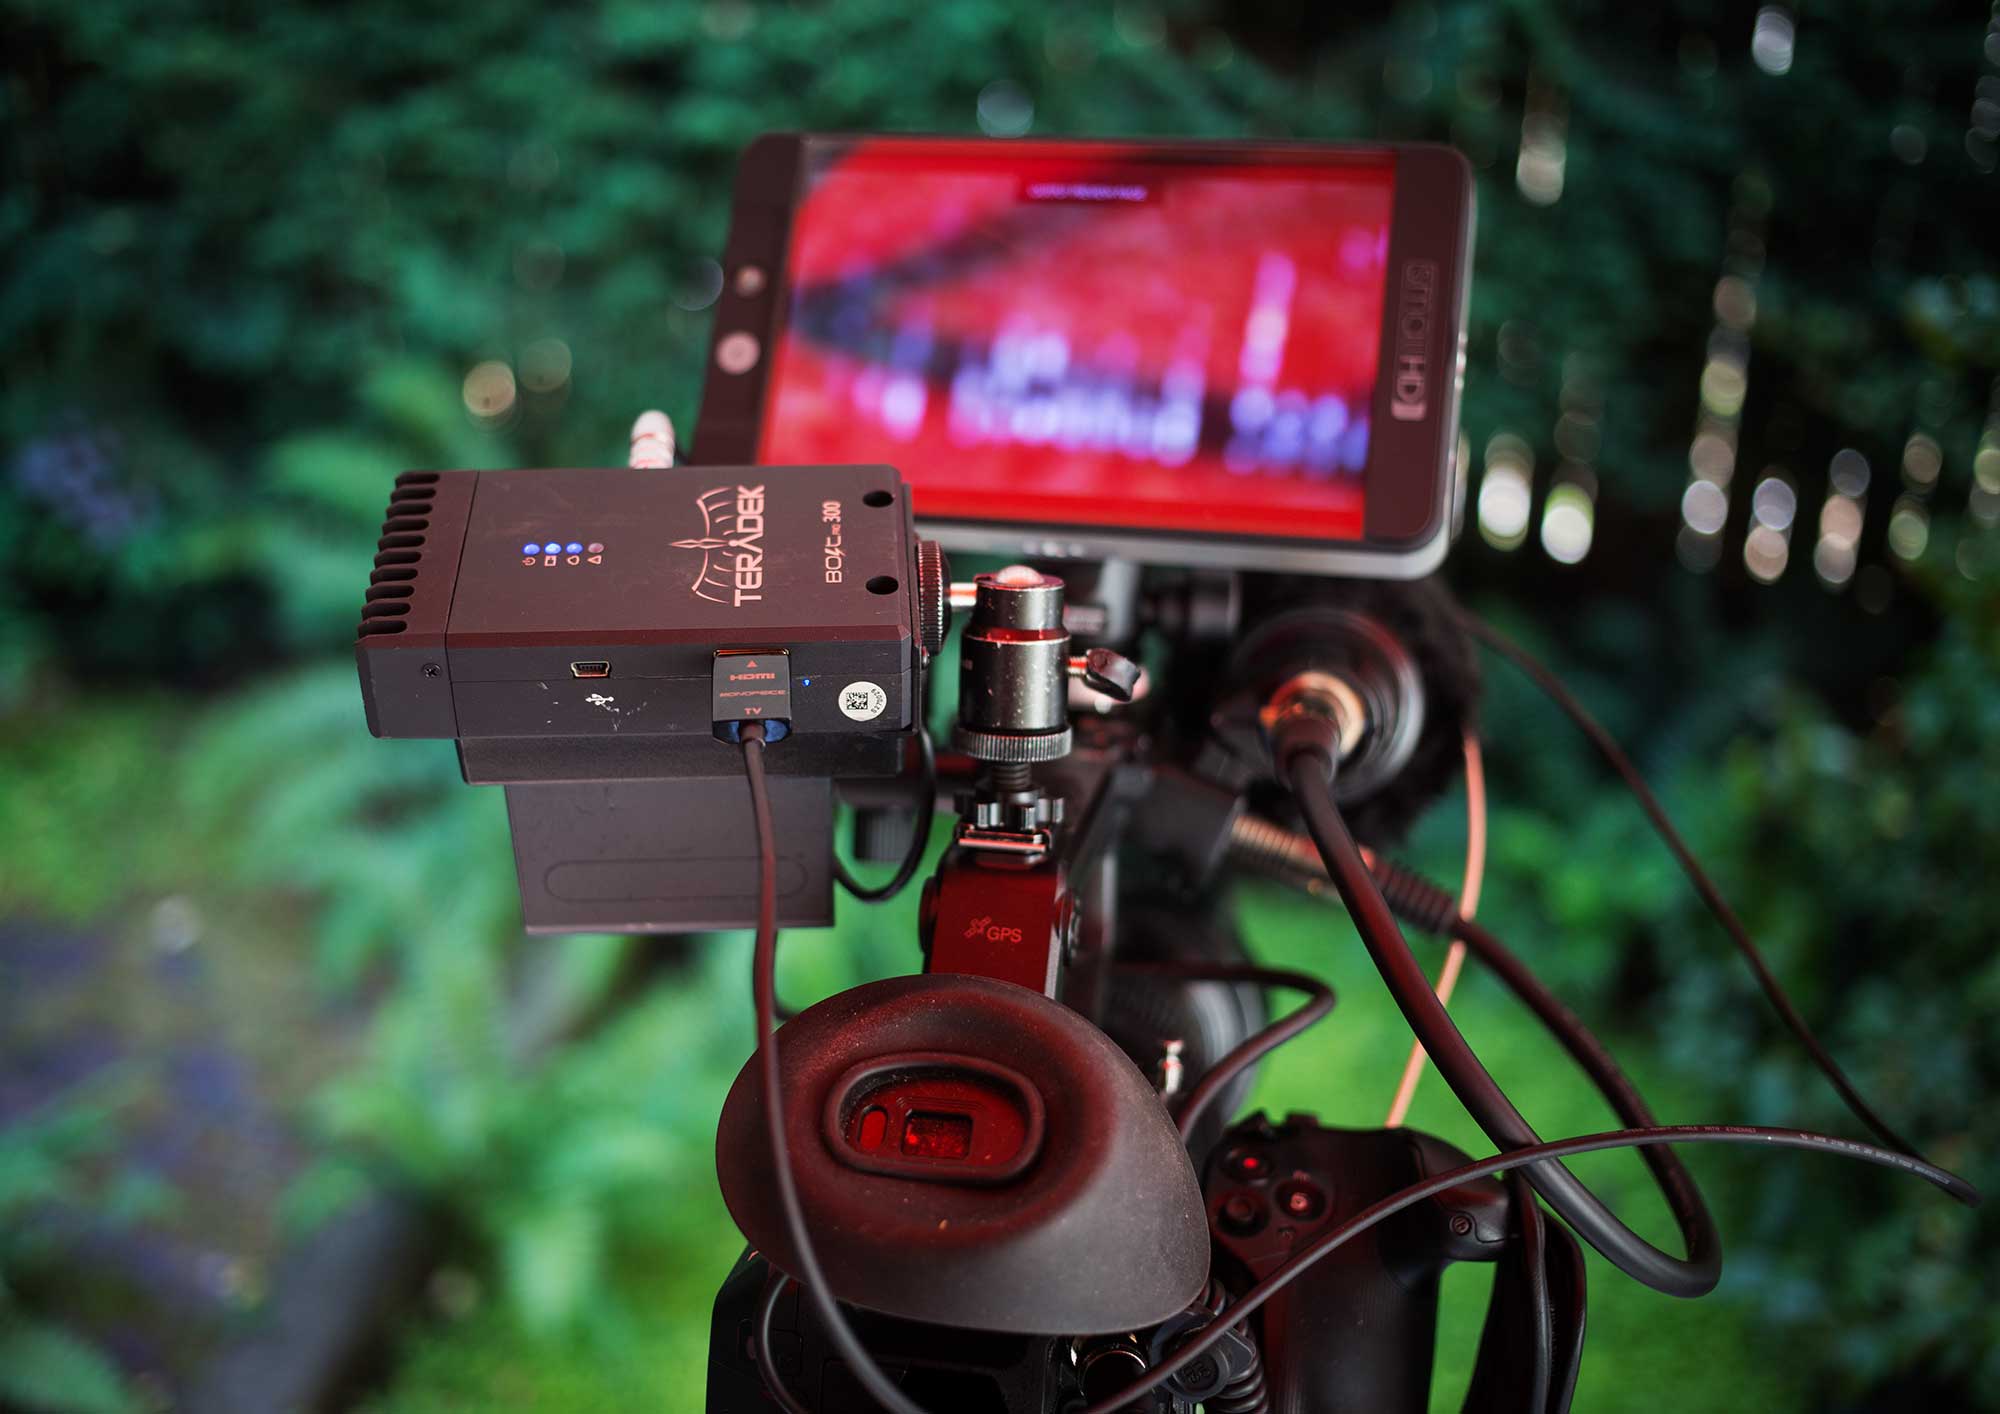
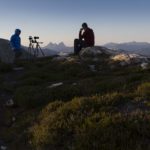
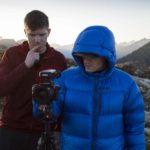
Before we leave Resolve, I want to point out one more very cool feature of FilmConvert. It’s the ability to export a LUT based on your film look. I use this a lot, because I most often am shooting SLOG on a Sony FS5 using a SmallHD 502 or 702 monitor. These monitors support LUTs, so by loading this LUT into the monitor, I can see what the video will look like AFTER FilmConvert is applied using my settings. It’s a great way to previsualize on set. If you have a client looking over your shoulder while shooting, this is invaluable. Here’s how to generate the LUT:
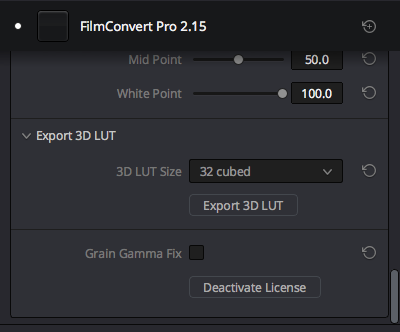
Click “Export 3d LUT”
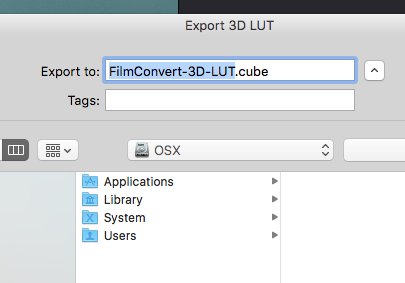
The default name isn’t very helpful
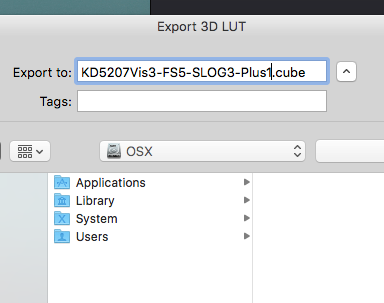
Give the LUT a name that accurately describes the look being applied
The resulting .cube file can be then loaded onto the monitor.
OK back to cutting our video. The next step in my workflow is to cut my footage in FCPX. So I import the dailies we’ve generated in Resolve into FCPX, and start cutting. For this particular video, I will use some additional media (animated stills) that doesn’t have FilmConvert applied to it. That’s OK! FilmConvert works with FCPX too (provided you have the FCPX-specific plugin, which can be downloaded from the FilmConvert site.
The stills I’m working with were shot with an unknown camera. So to match them to my footage in FCPX, I drag and drop the FilmConvert plugin onto the still, and using the on-screen controls, select the Default profile.
In FCPX, we can match unknown camera types using the default settings and onscreen controls
This shot is too warm – I want to cool it off. So I drag the puck in the middle of the color wheels in the direction of my desired color shift.
Before applying FilmConvert

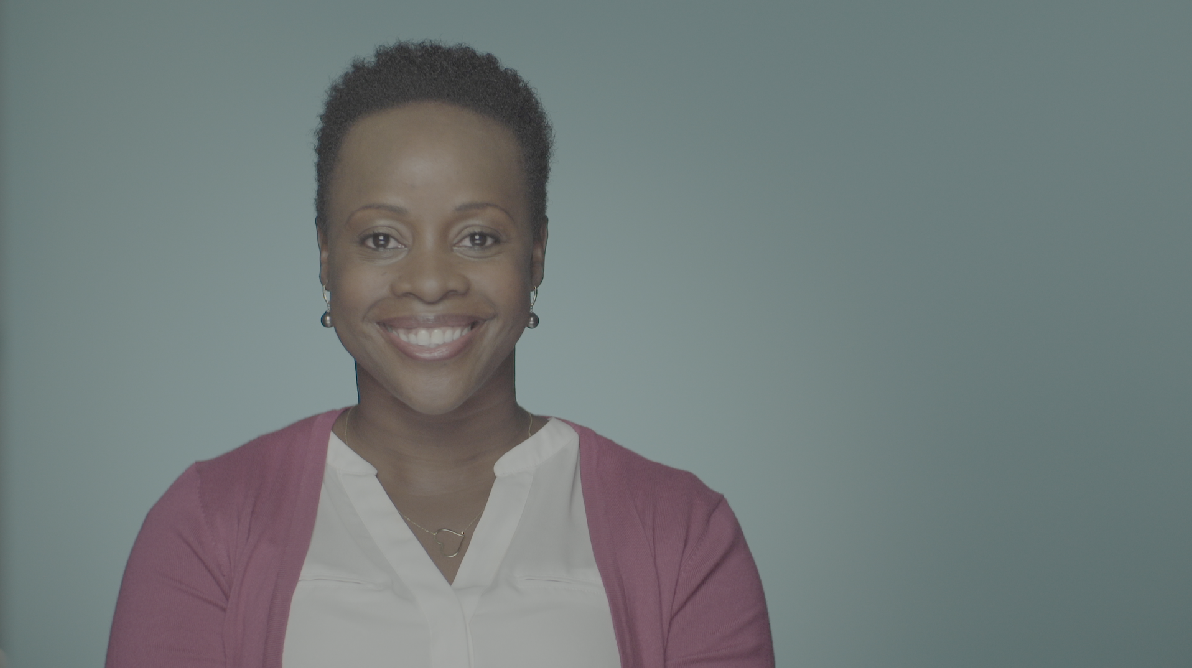
After applying FilmConvert
To apply the same change to all of the additional stills, simply copy and paste the effect.
Here’s the finished video:
Getting a consistent film look is quickly achievable using FilmConvert, without having to delve into the complexities of color correction. And even if you do know those complexities, grading from scratch takes a lot of time. And that’s why I like FilmConvert Pro: it frees me to focus on the story, and empowers me to ship faster. What’s not to love about a tool that can do that?