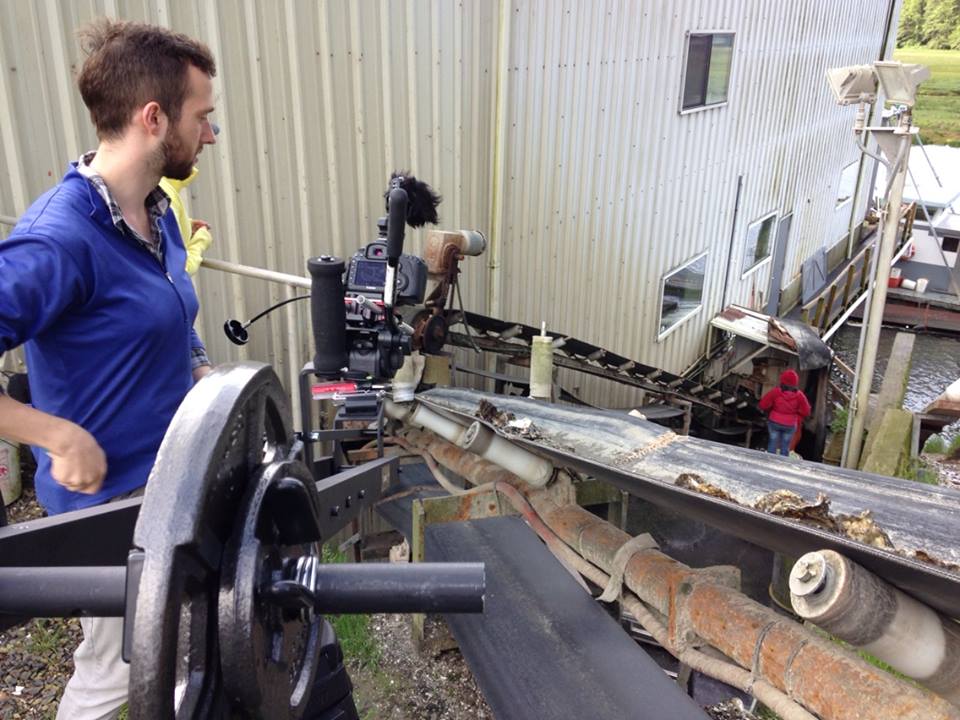
I just finished shooting a short film called Pearl, for Seattle director Amy Sedgwick. It’s a film about a woman who works at a small oyster cannery who dreams of a bigger future for herself. When the opportunity arrises, she seizes it.
When Pro Am gave me a chance to review their new Taurus Jr. heavy duty camera crane, I jumped on it. A jib shot would be the perfect way to establish the first location in the film, as the two women enter the cannery for the first time, by revealing something of the environment and at the same time advancing the story. And there’s nothing like using a piece of equipment on an actual production to discover its strengths and weaknesses.
Here’s the shot:
As you can see from this clip, there was a bit of wind that we had to contend with. And, we had a manual focus pull, too. The camera I shot the film with was a 5dmkiii (shooting Magic Lantern raw) fully rigged up with v-lock battery, etc. So it weighted about 10 pounds.
The Taurus Jr. enabled us to get this shot where many smaller, lighter weight jibs simply wouldn’t have cut it. I own an Aviator Traveler jib, and while it’s an amazing bit of gear, it would have never held steady for a focus pull, much less the wind.
After using this jib, I really appreciate the benefit of a heavy-duty jib for getting consistent, repeatable results on location, on deadline. You don’t get to control the weather. But you still have to shoot your film.
Weather aside, what is it that really keeps filmmakers awake at night? Money. There’s never enough of it. That’s where the Taurus Jr. really shines. At $399, it costs less than a third what comparable jibs do. I get excited whenever I can put more money into paying actors and crew, and the million and one other things that have to get paid for to bring a creative idea to life, rather than sinking it into equipment.
This jib doesn’t quite come with everything you need to get up and running. You’ll need to buy some weights for balancing it. Luckily these are inexpensive and I came home from my local Big 5 sporting goods with everything I needed to get going: a couple of 2.5lb weights, a couple 5lb, and a 10lb. That combination gave me plenty of options to keep various camera rig configurations flying in perfect balance.
At four feet, this isn’t exactly a long jib. Isn’t bigger better? Not for me, it isn’t. I am a real fan of subtle jib moves, rather than the big sweeping ones. A little move can go a very long way. And the ease of transporting and setting up a 4′ jib compared to an 8′ one is like night and day. The best tool is the one you will have with you when you need it.
To keep costs low, presumably, the Taurus Jr. designers cut one corner that I wish they hadn’t. The horizontal brake is really flimsy, and doesn’t precisely stop the jib from moving a little back and forth. If there’s one thing I’d change about this jib, it is this. And, there’s no easy way out of the box to mount a monitor – you need to purchase an accessory arm for that.
So let’s sum it up:
Pros:
Price – it’s just $399. Very affordable for a jib of it’s capabilities.
Solid, multiple-reinforced aluminum construction.
Holds up to 30 pounds of camera with all cinema accessories, no problem (matte box, battery, monitor, etc.)
Cons:
The only major flaw with this jib is the horizontal brake. It is flimsy, and doesn’t reliably work.
Wish it came with:
Monitor mounting point. A monitor arm is available as an accessory.
It’s awkward to transport easily – need to get the optional carrying case, really.
Bottom line:
This jib is a winner for budget productions that need a short jib that can produce consistent, repeatable moves in a variety of conditions. I like it so much I’m probably going to buy one next time I’m on a production that needs a jib. And when you start thinking about shots, it doesn’t take very long to dream up amazing shots that only a jib can bring to life. Thanks to Pro Am and the Taurus Jr., budget-conscious filmmakers can stop dreaming and start shooting.
