Monthly Archives: April 2016

Is DJI Osmo more than a toy?

My first step on the journey from still photographer to cinematographer was to simply grab a camera and start shooting. I quickly learned to put it on a tripod instead. Or a shoulder rig. Or a slider. More recently, a Movi. But the reality of gimbal-stabilized shooting is that it can end up looking like this:

bigrig

Hardly freeing! So when DJI announced the Osmo late last year, with the promise of a stable camera that fits in your palm, I was fully intrigued.

Osmo is priced aggressively enough that I didn’t have to think about it too long before deciding to buy. Over the Christmas break I had a chance to do a little shooting with it, to answer the question: is Osmo more than a toy? Could the footage it produces work on a real documentary production?

DJI-OSMO-01-650x489

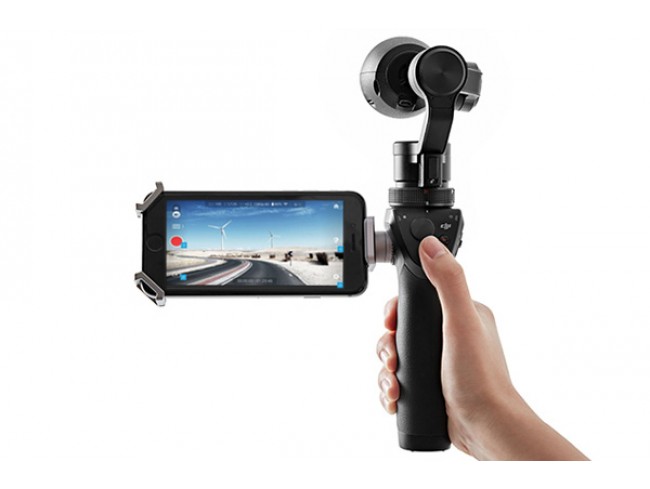
The first thing I noticed out of the box is that Osmo is cute. Sexy, even.  The sleek black device invites holding and feels great in your hand. If it were white, I would swear it was an Apple product. But then I turned it on, and the next thing I noticed was that the horizon wasn’t level. And it kept crashing when I touched the screen in the wrong place. Definitely not an Apple product!

Based on my early observations, it’s clear that DJI released Osmo before the firmware was fully ready. DJI embodies a trend in which camera manufacturers use early adopters as beta testers for firmware that is still in development. But within a few weeks, and just in time for Christmas, DJI released new firmware, and most of the problems I observed are much improved, if not fully corrected.

The Osmo’s lens is fixed-focus, like a GoPro, which keeps everything more than 1 meter away in focus. Everything close than that falls out of focus. A meter is almost 40 inches, and to get the camera that far away, you’ll need to use the optional DJI selfie stick (currently in short supply) to get sharp images of yourself. I’ve ordered one and look forward to the option of getting the camera up high (drone like) for close aerial perspectives with the Osmo.

selfiesoft

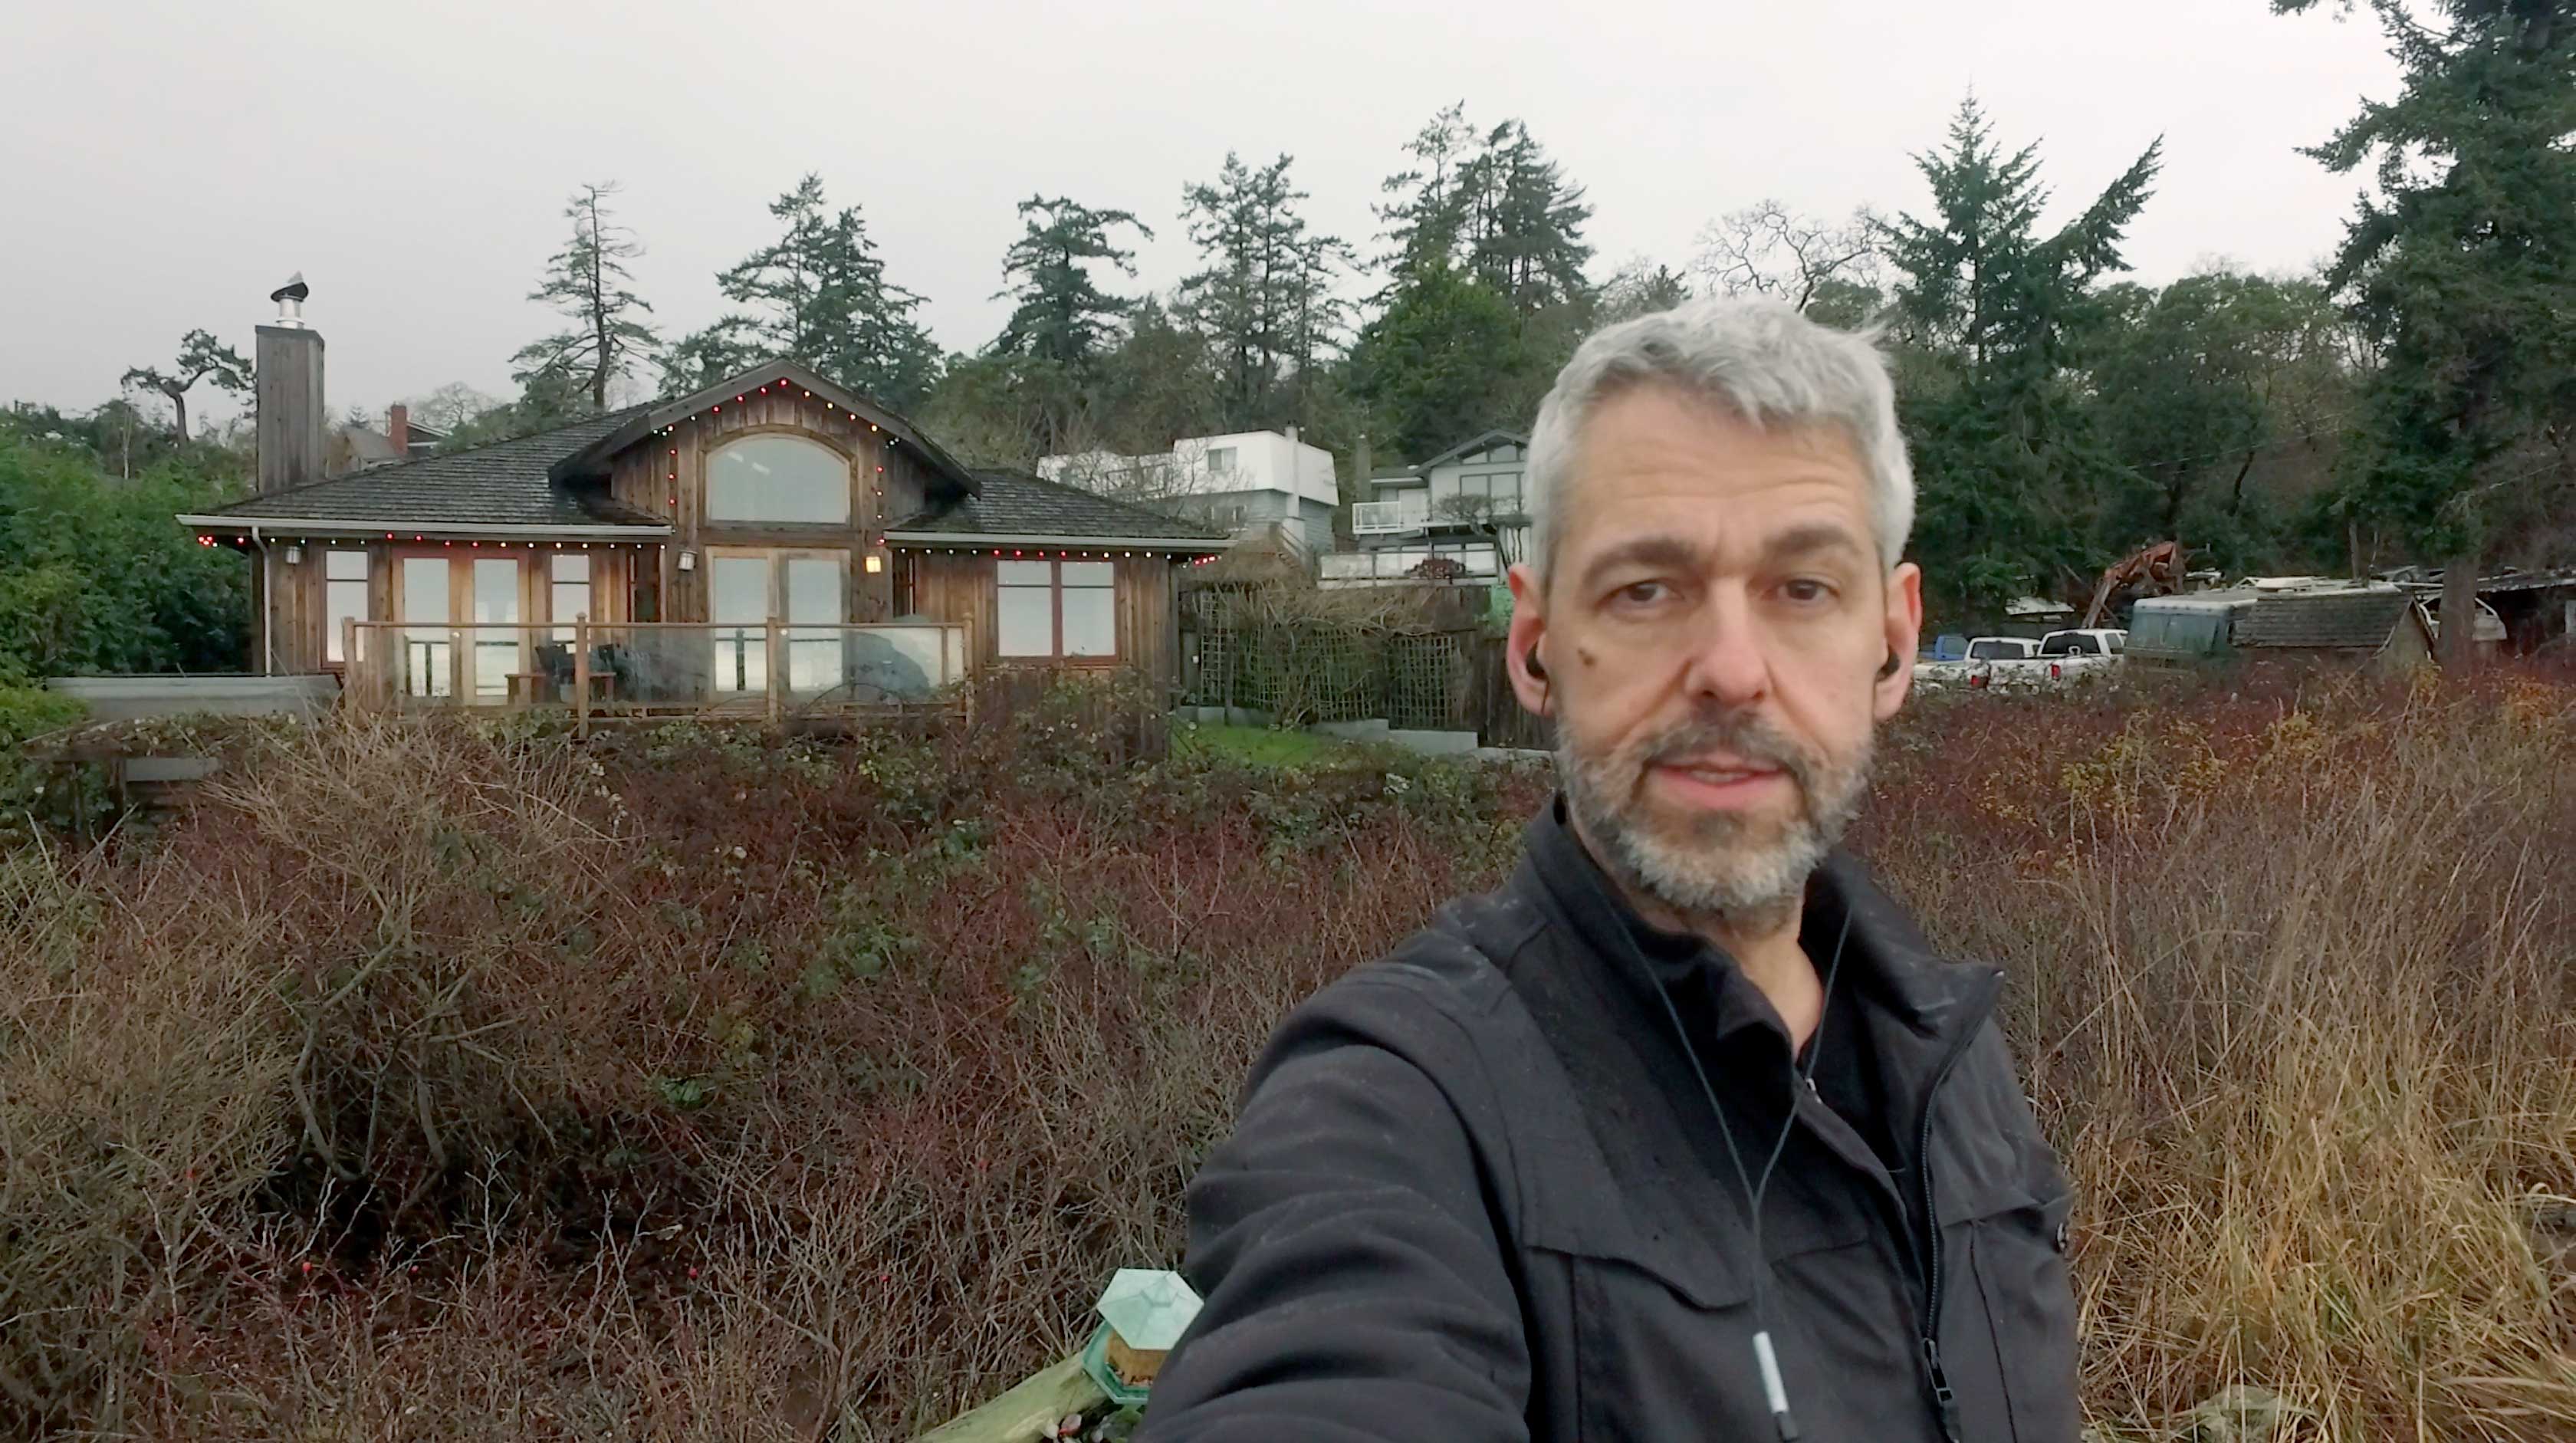
Selfie mode at arms length

Shooting in selfie mode produces a slightly back-focused subject in frame. Click the image above to view at full resolution, which reveals the full extent of the problem (the downsampled image as rendered above disguises this).

Another challenge: the Osmo with X3 doesn’t do closeups. It doesn’t even do medium closeups. Remember, the Osmo field of view is the equivalent of a 20mm lens on a full frame camera. That’s wide!

tooclosecamera

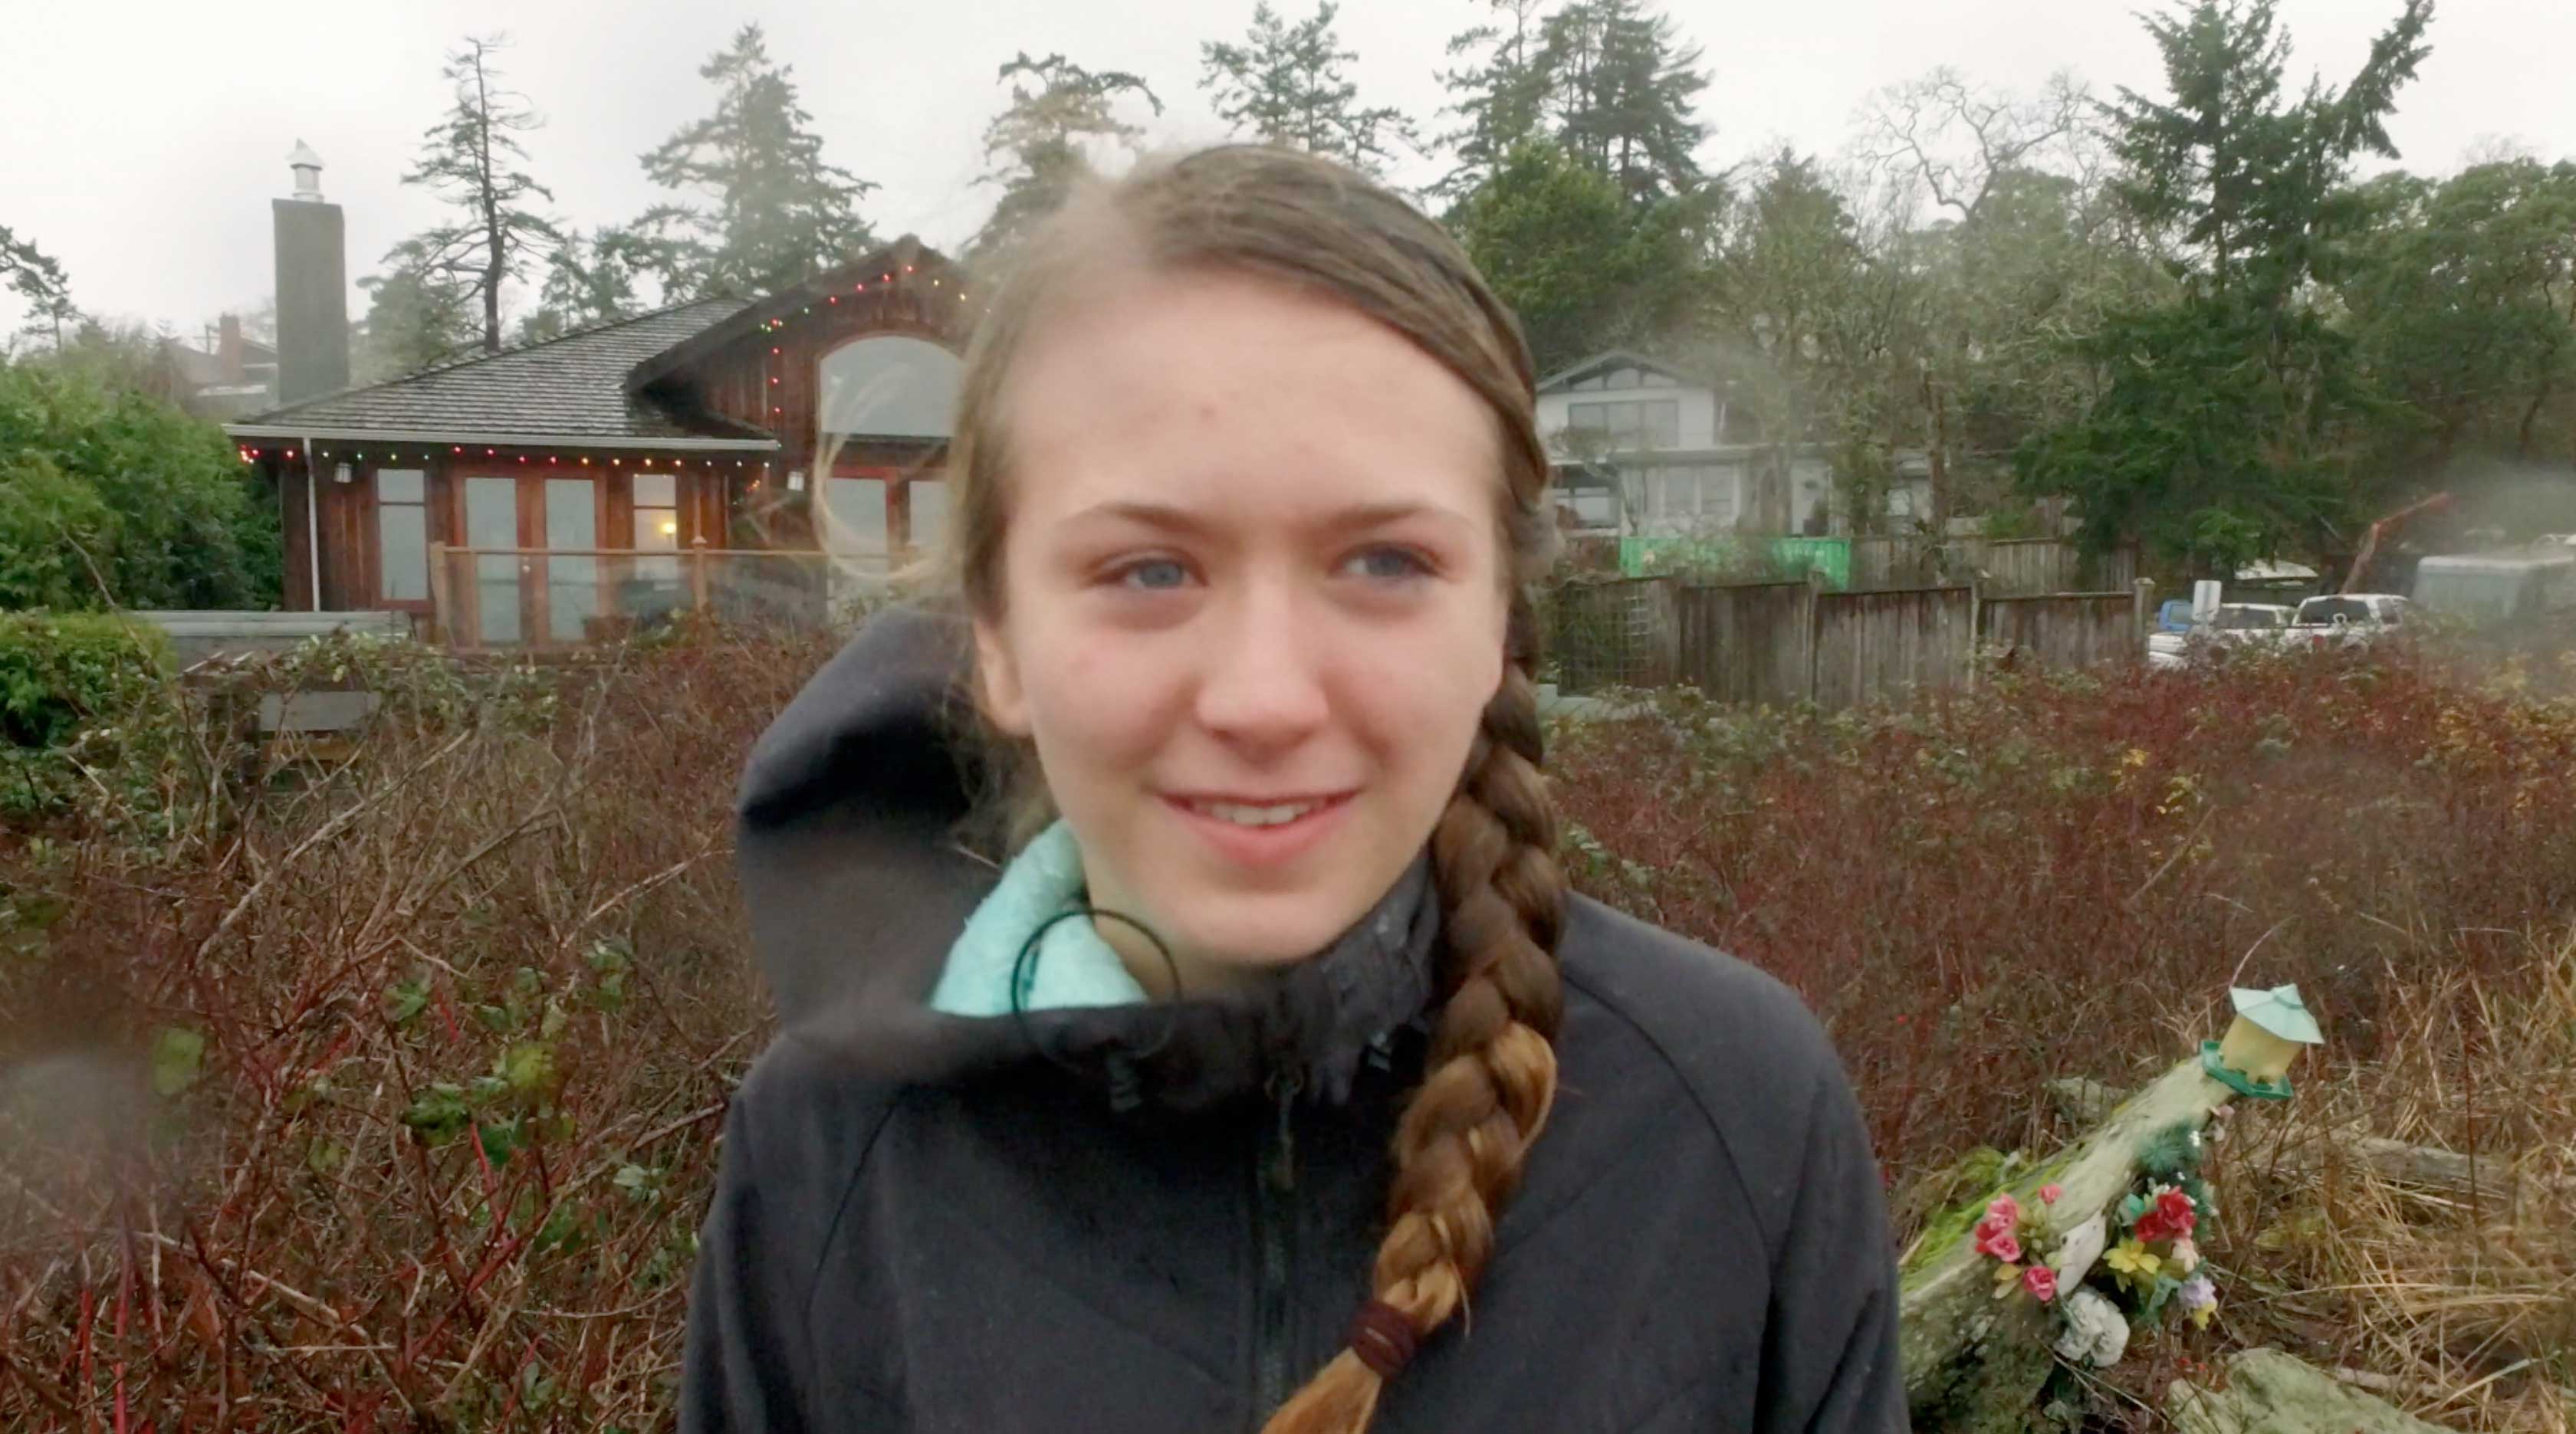
Distortion and soft focus ensues when you get the Osmo closer than 1 meter

Moving Osmo too close both distorts your subject and throws it slightly out of focus. The slight defocusing is made all the more apparent because whatever is behind it will be perfectly sharp.   So, with Osmo, I have to fight my instinct to get the camera close, especially when shooting people.

The closest thing to a workaround (until the X5 camera for Osmo is released) is to shoot in 4k, and leave lots of room around the subject, then crop into the shot in post. But I find it’s best to just keep people a meter or more away. That’s just how this camera was designed to be used.

Slow motion

In 1080p, you have some nice framerate choices for conforming to 24p slow motion: 30p, 48p and 60p. You can also engage the slow motion mode which shoots at 120p in windowed mode.

The best quality slow motion results happen from shooting no more than 60fps. Anything more than that, and the image suffers from significant noise. To my eye it looks like 720p that’s been scaled up: a little soft, and very noisy. Still, with some denoising, you can get some usable results. The field of view when shooting in 120fps is much narrower due to the windowing of the sensor.

Battery life

You’ve got two batteries to stay on top of with Osmo: one in the handle that powers the camera, and one in your smart phone powering your screen. I find the Osmo batteries last about 30-40 minutes in constant use. So you’ll need a handful of them to get much shooting done.

iPhone battery life is greatly reduced when shooting with Osmo. During an afternoon of shooting, I was able to keep going by plugging my iPhone into a portable battery quick-charger. It’s easy to operate the Osmo with a charging cable running to your pocket. Your smart phone battery life may vary, but if you plan to shoot for more than 45 minutes or so I recommend something like this.

4K

I was unable to get the camera to record in cinema 4K at the DCI standard of 4096 x 2160. I thought at first that my card wasn’t fast enough, during the time I was writing this post, DJI released firmware version 1.4.1.8, and this resolved the issue (and many others). All 4K modes work perfectly now!

Selecting 4096 x 2160 changes the aspect ratio into a slighter wider field of view than 16×9 (approximately 1.9:1) and sets shutter to 24p. The more common UHD-1 (16×9 aspect ratio) 4k standard is supported in this camera in frame rates of 30p and 24p.

Screen Freezing issue

For some reason, the DJI Go app freezes occasionally when I tough the screen anywhere that isn’t a menu. This is definitely a bug, because the screen is designed to allow setting a spot-meter by touching the screen when in auto exposure modes. The v. 1.2.1.8 firmware update does not fix this problem. UPDATE: This issue has been fixed with the latest firmware update.

Manual controls

One of my favorite things about the Osmo is that it gives you full manual control over exposure. In practice, this means you will be able to get cinematic results from this camera that GoPro users can only dream about. For example, shooting in dark forested areas and emerging into more brightly lit areas, I was able to set the exposure to be correct on the brightest areas and allow the rest to go dark. Great for reveal shots. Trees and foliage tends to overexpose when set to auto, and going manual resolves this. The controls are easily accessible by touch, and unlike many other cameras, you can punch the screen while rolling without disturbing the shot because the brushless gimbals are doing their thing. So it works very well.

Another nice touch is the option to set shutter priority – which allows locking in a cinematic framerate of 50p, while letting the Osmo set aperture and ISO.

ND filtration

Although it doesn’t come with any ND, Neutral density filters can easily be screwed onto the Osmo’s threaded filter (it ships with a clear filter). The Osmo’s X3 camera uses the same filters as the Inspire 1. Luckily, there are quite a few options for ND filtration available for Inspire 1. I purchased a set of 3 Renaat ND filters for US $69. These filters weigh just 3 grams apiece, and won’t unbalance the gimbal. To purchase a set of your own, send an inquiry email to ceulenaere@gmail.com.

For overcast conditions, I found the 1/8 ND works great. For more brightly lit conditions and direct sun, the 1/16 and 1/32 filters will give you access to those cinematic shutter speeds. At 1/324, IR pollution becomes a bit of an issue, but I prefer to deal with a little color correct than to live with staccato shutter effect that results from high shutter speeds.

D-log

Osmo gives you a whole bunch of picture profiles to choose from. The most interesting one is d-log, which gives you a flatter image, holding onto highlight detail in post. I find it’s  more like Canon’s C-log than it is like Sony’s S-log: less dynamic range, but easier to grade. It feels to me like d-log gives you a ballpark of around 10 stops of dynamic range. Exceptionally good for this little camera!

In my original testing, d-log had a noticeable red shift, which had to be corrected in post. But this seems to have been corrected in firmware updates and I’m no longer seeing this issue.

What it’s really good at

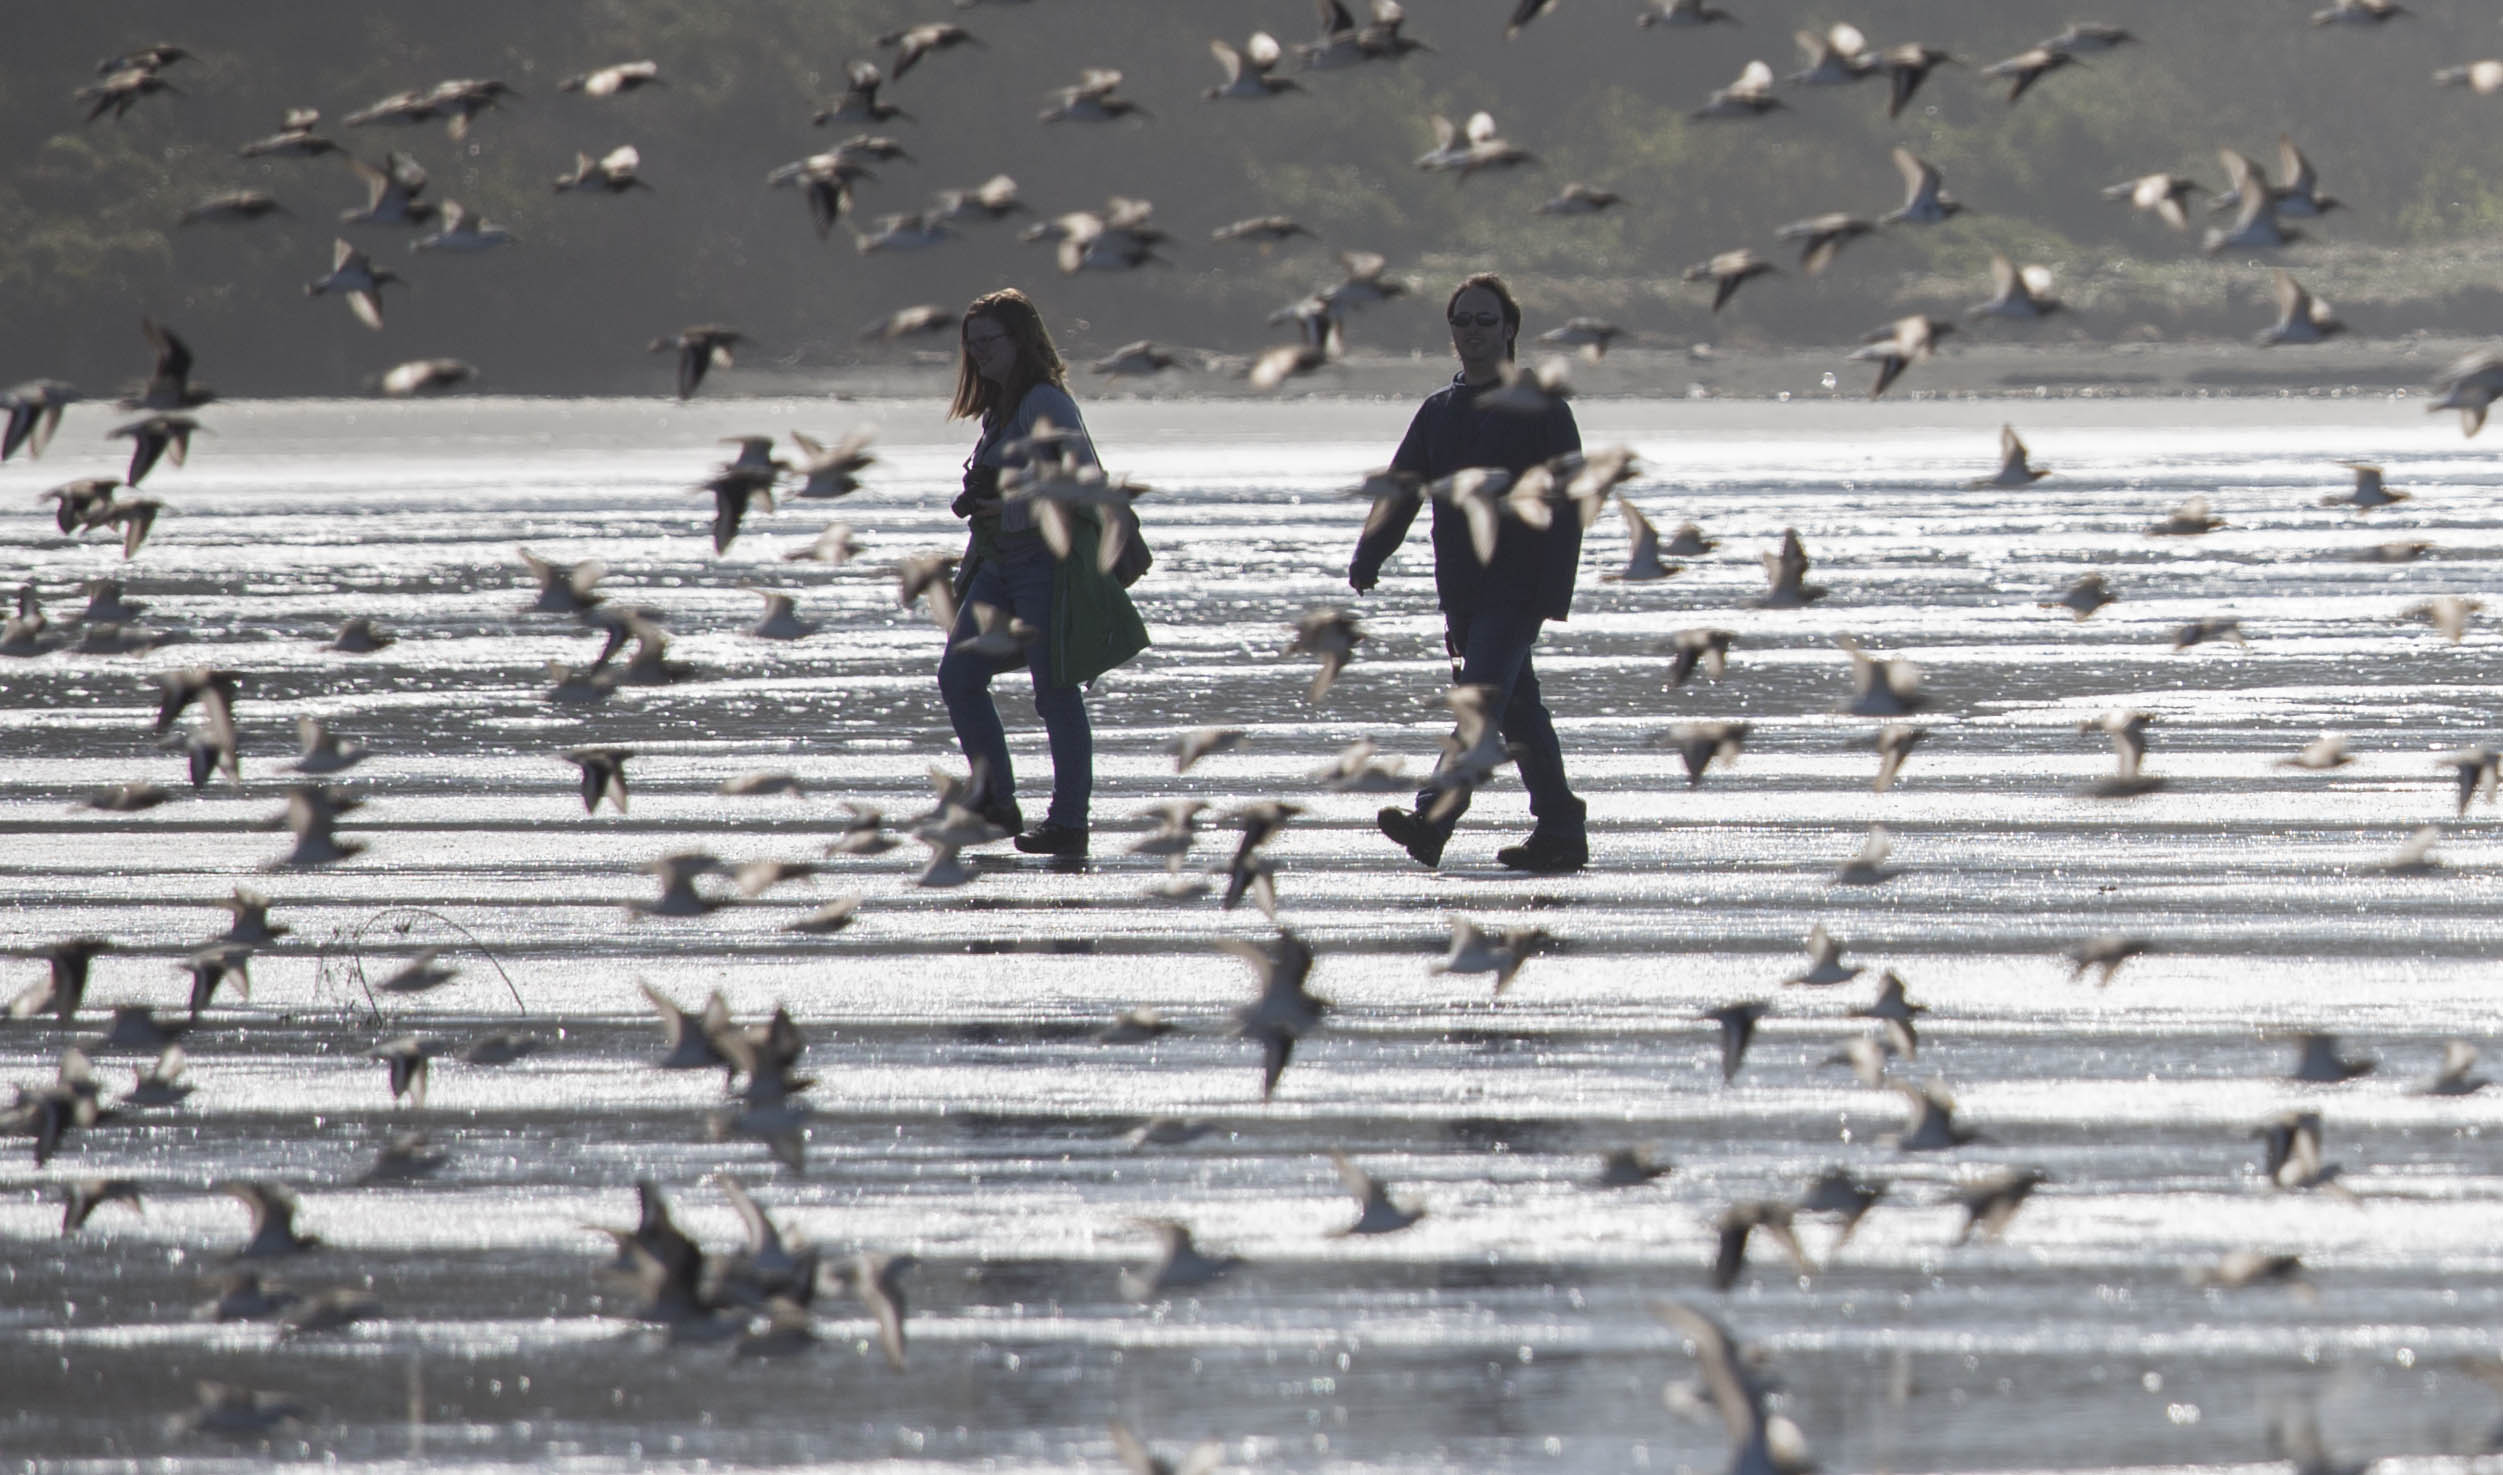
Tracking shots! The Osmo excels when you’re in motion filming something that’s also in motion. For big establishing shots where you want everything in frame to be in focus, it’s killer. Think of it as a drone that you can hold in your hand, and shoot accordingly. So, passing between things or through things, big sweeping reveals, that sort of thing.

I’ve used the Osmo for one commercial project, and found it to be an incredible tool for getting shots I wouldn’t have been able to get any other way. In the video below, all of the traveling shots were shot with Osmo, and intercut with Sony FS5 footage. The cardboard walls in the space were 8′ tall, and I wanted a way to see over the top of the walls while moving, to reveal the participants interactions. I put the Osmo on a painter’s pole, which allowed me to extend it about 6 feet. This allowed me to get some dramatic crane-up reveal shots, like the shot that opens with the team huddled over an iPhone screen, booming up to reveal the view over the walls. Pretty sweet, and a shot I couldn’t have dreamed of getting with a larger camera rig in the cramped space.

What it’s not so good at

It doesn’t do closer than 1 meter, or selective focus.

Conclusion

The Osmo X3 is an exceptionally useful tool right now. For wide sweeping shots with movement, it’s killer. But the need to keep the camera at least a meter away from your subject limits it’s storytelling capabilities. The small sensor means everything in the frame is in focus.

When the X5 for Osmo is released, things will get a lot more interesting. Footage should then intercut seamlessly with higher quality cameras, and focus will be controllable, opening up a world of possibility.

But I’m not waiting for that. I’m carrying Osmo today on many of my commercial projects, looking to bag those special wide shots that I otherwise wouldn’t have time or budget for. The Osmo is the gimbal you can always have with you. And that makes it a winner with a very bright future.

C300mkii cfast file corruption issue – and one tedious solution

meNo shit. There I was. At the end of a long day of shooting for a commercial client with a rented C300mkii, and I get this error message: “Buffer overflow.” I tried to dismiss the error but the camera’s OS had frozen. I had to pull the battery to cycle power and restart. I hit record and same error. Additionally, another error popped up with something like “some files need to be recovered.” WTF?

My rented 256gig Lexar 3400 Cfast card was 6 minutes away from being full in slot A. I had a fresh card (same brand and capacity) in slot B, and my first thought was to switch cards. I did that, and everything was happy. I finished the shoot without further incident.

But when I inserted card A into the reader that evening, much to my surprise, my Mac froze and had to be hard-rebooted. Damn! Now I was getting nervous. This was a big project for a client who had flown to Portland from Austin, at considerable expense. I started to imagine the extremely uncomfortable conversation I was going to have to have with him.

“Um, you know that second day of shooting we did? The one where you kept telling me the shots looked so much better than our first day of shooting? Yeah, that extra day of shooting that you didn’t plan to pay for but did because I convinced you it would be worth it?”

I did some Googling, and discovered that the only Cfast cards officially supported by Canon for the C300mkii are all SanDisk cards, in capacities only up to 128GB.

SanDiskCampatability


I was extremely disappointed to find discover this fact, because my rental house, Lensrentals.com, had listed the Lexar drive as “works well with” the c300mkii. But who knows whether the Cfast card error thrown by the camera was related to the media anyway? Maybe it was something else. But I didn’t want to point fingers: I wanted to find a solution.

I put the bad card back into the camera, switched into media review mode, and held my breath as I tried to open the files. And guess what? I could open them! Big sigh of relief. If the data was readable on the camera, that meant the files would be recoverable. But how?

lexar3400After several attempts to do disk first aid and data recovery on the card failed with the same OS freeze as before, I got another idea. Would it be possible to copy, one at a time, the files from the Cfast card onto the camera’s SD card, which normally records proxy media? Nope. No can do. There isn’t even an option for that. But as I was exploring the C300mkii’s file options, I discovered that it IS possible to copy files using the camera menu from Cfast card A to B. I took another deep breath and gave it a try and…bingo! The file copied and the copied card was readable on my Mac.

It took me about half a day to painstakingly go through all 128 files and copy them over, but it was the best half day I’ve ever spent.

I alerted the rental house to the potential card compatibility issue, and they said they’d investigate. I still have no clear optic on what caused this data drama. But I do know a couple of things. The first one is that a problem like this has never happened to me while shooting with my Sony FS5. The second is that the next time I rent a C300mkii, you can be damn sure I’ll be sticking with the cards that Canon has officially supported.

UPDATE: After investigating, the fine folks at Lensrentals.com told me “it looks like the card was defective” and issued me a refund for the card rental.  “We haven’t had any higher issues with these cards/cameras than any other. I wouldn’t hesitate to use them again – just perhaps with a backup or two.”

New king of the ring: Cool-Lux gears

cool-lux-gears

I’m always surprised when I see documentary shooters working without a follow focus unit. To me, the precision and added stability are essential. But plenty of documentary shooters roll with Canon zooms, and gearing those lenses has until recently required making an awkward compromise (i.e., Red Rock gears) or an expensive permanent choice (Duclos mod). I’ve written about one ring to rule them all, but those hard-plastic gears are really for primes, and won’t fit on my favorite documentary zoom, the Canon EF-S 17-55mm f/2.8 (above right).

Enter Cool-Lux Lux gears. These gears are unique in my experience in that they are made of a firm yet flexible silicone, which has just enough stretch to slip on over protruding zoom lens elements. Yet when finally worked into place, they stay put. Even with constant ins and outs from a camera bag, they don’t budge and have the look and feel of a permanent solution. Plus, they can still be removed when desired.

peel-on

The 76-77mm gear slides over the protruding stabilization switch on the 17-55mm f/2.8 Canon EFS zoom

slide-on

After I ordered one of the gears, and raved about it on Facebook, Cool Lux’s product manager Patrick Fee dropped me a thank you. Very kind of him. So I seized the opportunity to ask him a few questions about the company and how the gears are made.

Q: What kinds of gear do you make, who do you make it for, and how long have you been doing this? 

Cool-Lux started off as a lighting company way back in 1977 specializing in on-camera lights for video professionals, the type of thing you would see on the shoe mount of an ENG camera to add some fill light or get an exposure in the dark.  Advances in LED technology has since led to Cool-Lux’s current line of Pro LED Panel Lights.

In fall of 2013 I was hired on to focus on making innovative new camera rig and accessory products for cinema video professionals like yourself.  In that time, I designed a completely new shoulder mount camera rig system for Cool-Lux based on the idea of going from a tripod to the shooter’s shoulder with the press of a button.  It’s actually a really cool system with a flip out action and chest support aimed at rental houses and production companies that use a lot of different cameras because it works on everything. I also designed some very simple but effective lens gears called Lux Gears that are just now starting to take off.

Q: The market for gears seems pretty crowded. What inspired you to jump in? 

You’re right in saying the market for lens gears is pretty crowded but everything out there was just a copy of the same old terrible design.  I always hated the one size fits all type.  Yeah they are easy for a distributor to stock but the damn buckle is not only hideous to look at, it also prevents the product from doing what its intended to do, especially on lenses that don’t have built in stops.  The only other option was to permanently fix a gear to a lens, which is fine if you’re only going to use it in a cinema type setting, or have something custom made to your specific lens that could, in theory, be removable and still give you a secure 360° rotation.  The Lux Gears filled that gap by providing a simple range of 16 follow focus lens gears that look professional and perform like a very secure permanent gear but can also be easily removed in seconds without having to get out the tools.  There is nothing else like them.

Q: The striking thing about these gears is how they stretch over the lens to fit perfectly and stay put. How are the gears made?

Lux Gears are a precision molded product.  We use a high durometer silicone material to get the elasticity needed to stretch over the lens barrel but also have enough rigidity to hold up to the amount of torque needed to turn the lens with a manual follow focus or motor driven gear.  Most people might think that a flexible gear would lead to a lot of slop or backlash when it comes to dialing a follow focus back and forth.  I actually found the opposite to be true.  Consider that with two rigid gears the engagement has to be perfect.  Either there is space between the teeth which leads directly to “slop” between the gears or the teeth are too tightly engaged which leads to a grinding of the gears.  With the high durometer silicone the engagement can be slightly too tight and the gears will not grind because of their slight flexibility.  They provide more margin of error when engaging the driving gear which is a benefit I didn’t see coming.

Q: Where are these gears made? 

We partnered with a local Chicago company that specializes in elastomers to help with the product development and make the production molds and gears for us.

So there you have it. Cool-Lux gears are the clear winner in the quest to make the perfect follow focus gear. They run about $28 each. Learn more at http://www.cool-lux.com.

Great glass: Canon 70-200mm f/4 IS

lacross

The Canon 70-200mm f/4 lens is an ultrafast autofocusing lens when paired with a DSLR such as 5dmkiii, making shots like this almost easy.

OK, I just gotta rave on my newest lens for a minute. The Canon 70-200mm f/4 IS USM lens isn’t a new lens – it was released 10 years ago. But that’s one of the great things about it: it’s a lens that sports all of the fancy new technology like 4-stop image stabilization and autofocus, yet it’s been around long enough that you can find a perfectly good used one inexpensively on Ebay. I picked up mine there for $785 including shipping, and with a little more patient hunting you can find one in the low to mid $700s. It retails new for about $1,200.

KU0A2638 KU0A2657

As a stills lens, it’s ultra fast at autofocus. Consider these frames I snapped at a lacrosse game last night. Shot at f/4, the background is plenty out of focus at that aperture to provide good separation. The lens is small enough to carry around easily and handhold.

canonglass

But what gets me really excited is pairing this lens with the the Sony FS5 for video work. With the Metabones Speedbooster, you get f/2.8 brightness (albeit with f/4 depth of field characteristics), all in an easy to carry lens that doesn’t absolutely require additional lens support (as the 70-200 f/2.8 IS lens most certainly does).

It’s compact, easy to carry, and quick to pop on and off during a shoot. It interchanges quickly with other lenses because of it’s smaller size, and you get f/2.8 performance out of it with the Speedbooster. Want even longer length up to 300mm at f/4? Just pair it with the Metabones IV Smart Adapter instead.

gear

I’ve semi-permanently attached the excellent Cool-Lux gears to mine (the stretchy rubber gear is pretty easy to wiggle on and off should you want to remove it, but otherwise stays firmly put – making Cool-Lux gears the best focus gears I’ve ever owned). The size you want for a perfect fit with this lens is the 74-75 Cool-Lux Gear.

What’s your favorite bargain glass?

I’ll leave you with a few more frames I shot with this dandy lens over the weekend. Enjoy.

big-wing-vertical killergull KU0A0342 KU0A2085 KU0A2110 KU0A2126 KU0A2128 KU0A2152 seagull wings