For a long time I’ve been hunting for the perfect LED light. In the documentary-driven work I do, that means a light that packs down small, sets up quickly, controls spill, accurately reproduces color, is bright enough to fill strong window light, can dial from tungsten to daylight without gelling, is fully dimmable without flickering or color shifts, can run off a brick battery, and is a good value for the money. Is that too much to ask?
LiteGear came to my attention on a recent commercial shoot with Jeremy Mackie, a supremely talented Seattle gaffer. I noticed Jeremy using a home-made box light that he built out of wood and LiteGear’s LiteRibbon. It looked a little scary to me, but the quality of light it produced was absolutely wonderful. So I went to LiteGear’s website to see if they had something a little more approachable for us less DIY types.
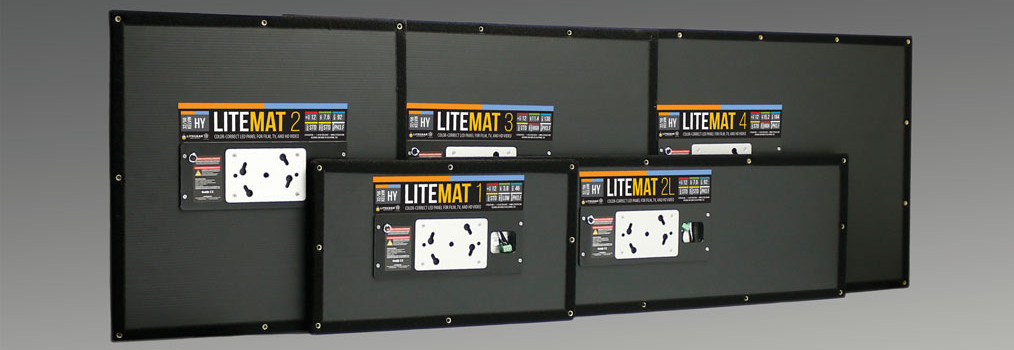 It turns out my timing was perfect. After learning what gaffers like Jeremy were doing with LiteRibbon (used to light the set of Her, among other significant films), LA-based LiteGear decided to make a light for rest of us. The result is called the LiteMat, which had just begun shipping. After reading the impressive specs, I chose the LiteMat2 because at 21″x21″ it seemed big enough to be effective in a variety of situations, but small enough to transport readily.
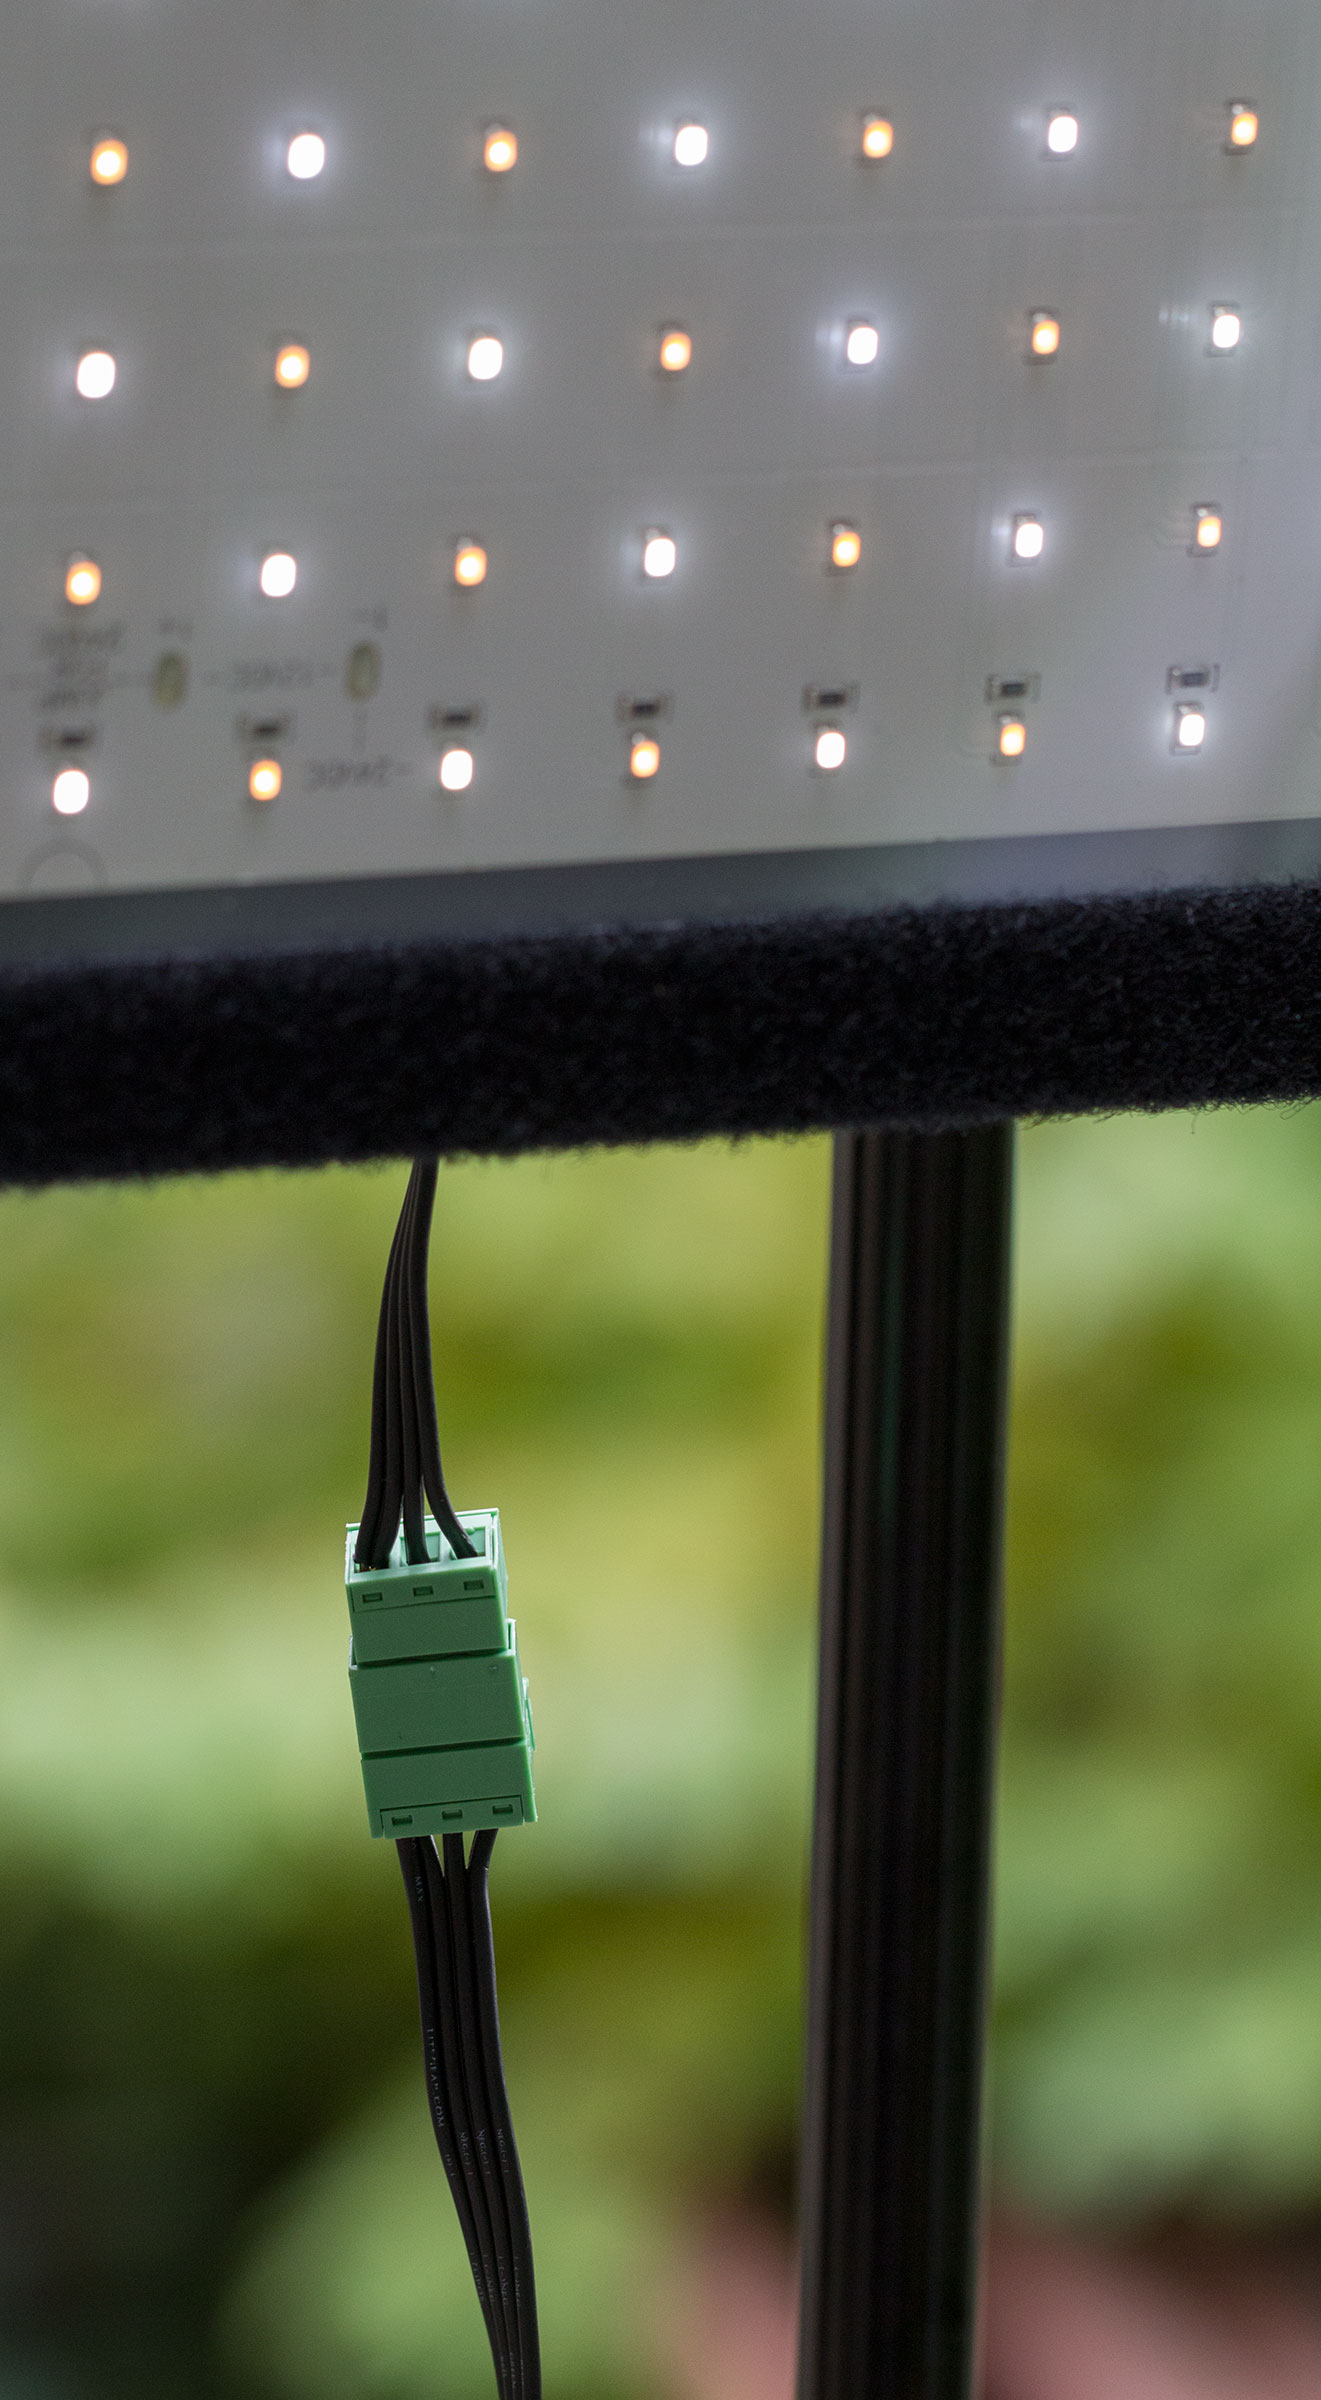
The first thing I noticed taking the LiteMat2 out of the box is that it looks like a cousin of the KinoFlo. It has a Kino center mount built into the unit, and the backing on the light feels like it’s constructed of the same study plastic hollow-core material as many Kino lights. The kit ships with a Kino-flo branded twist-on mount with 5/8″ baby receiver. Good stuff.
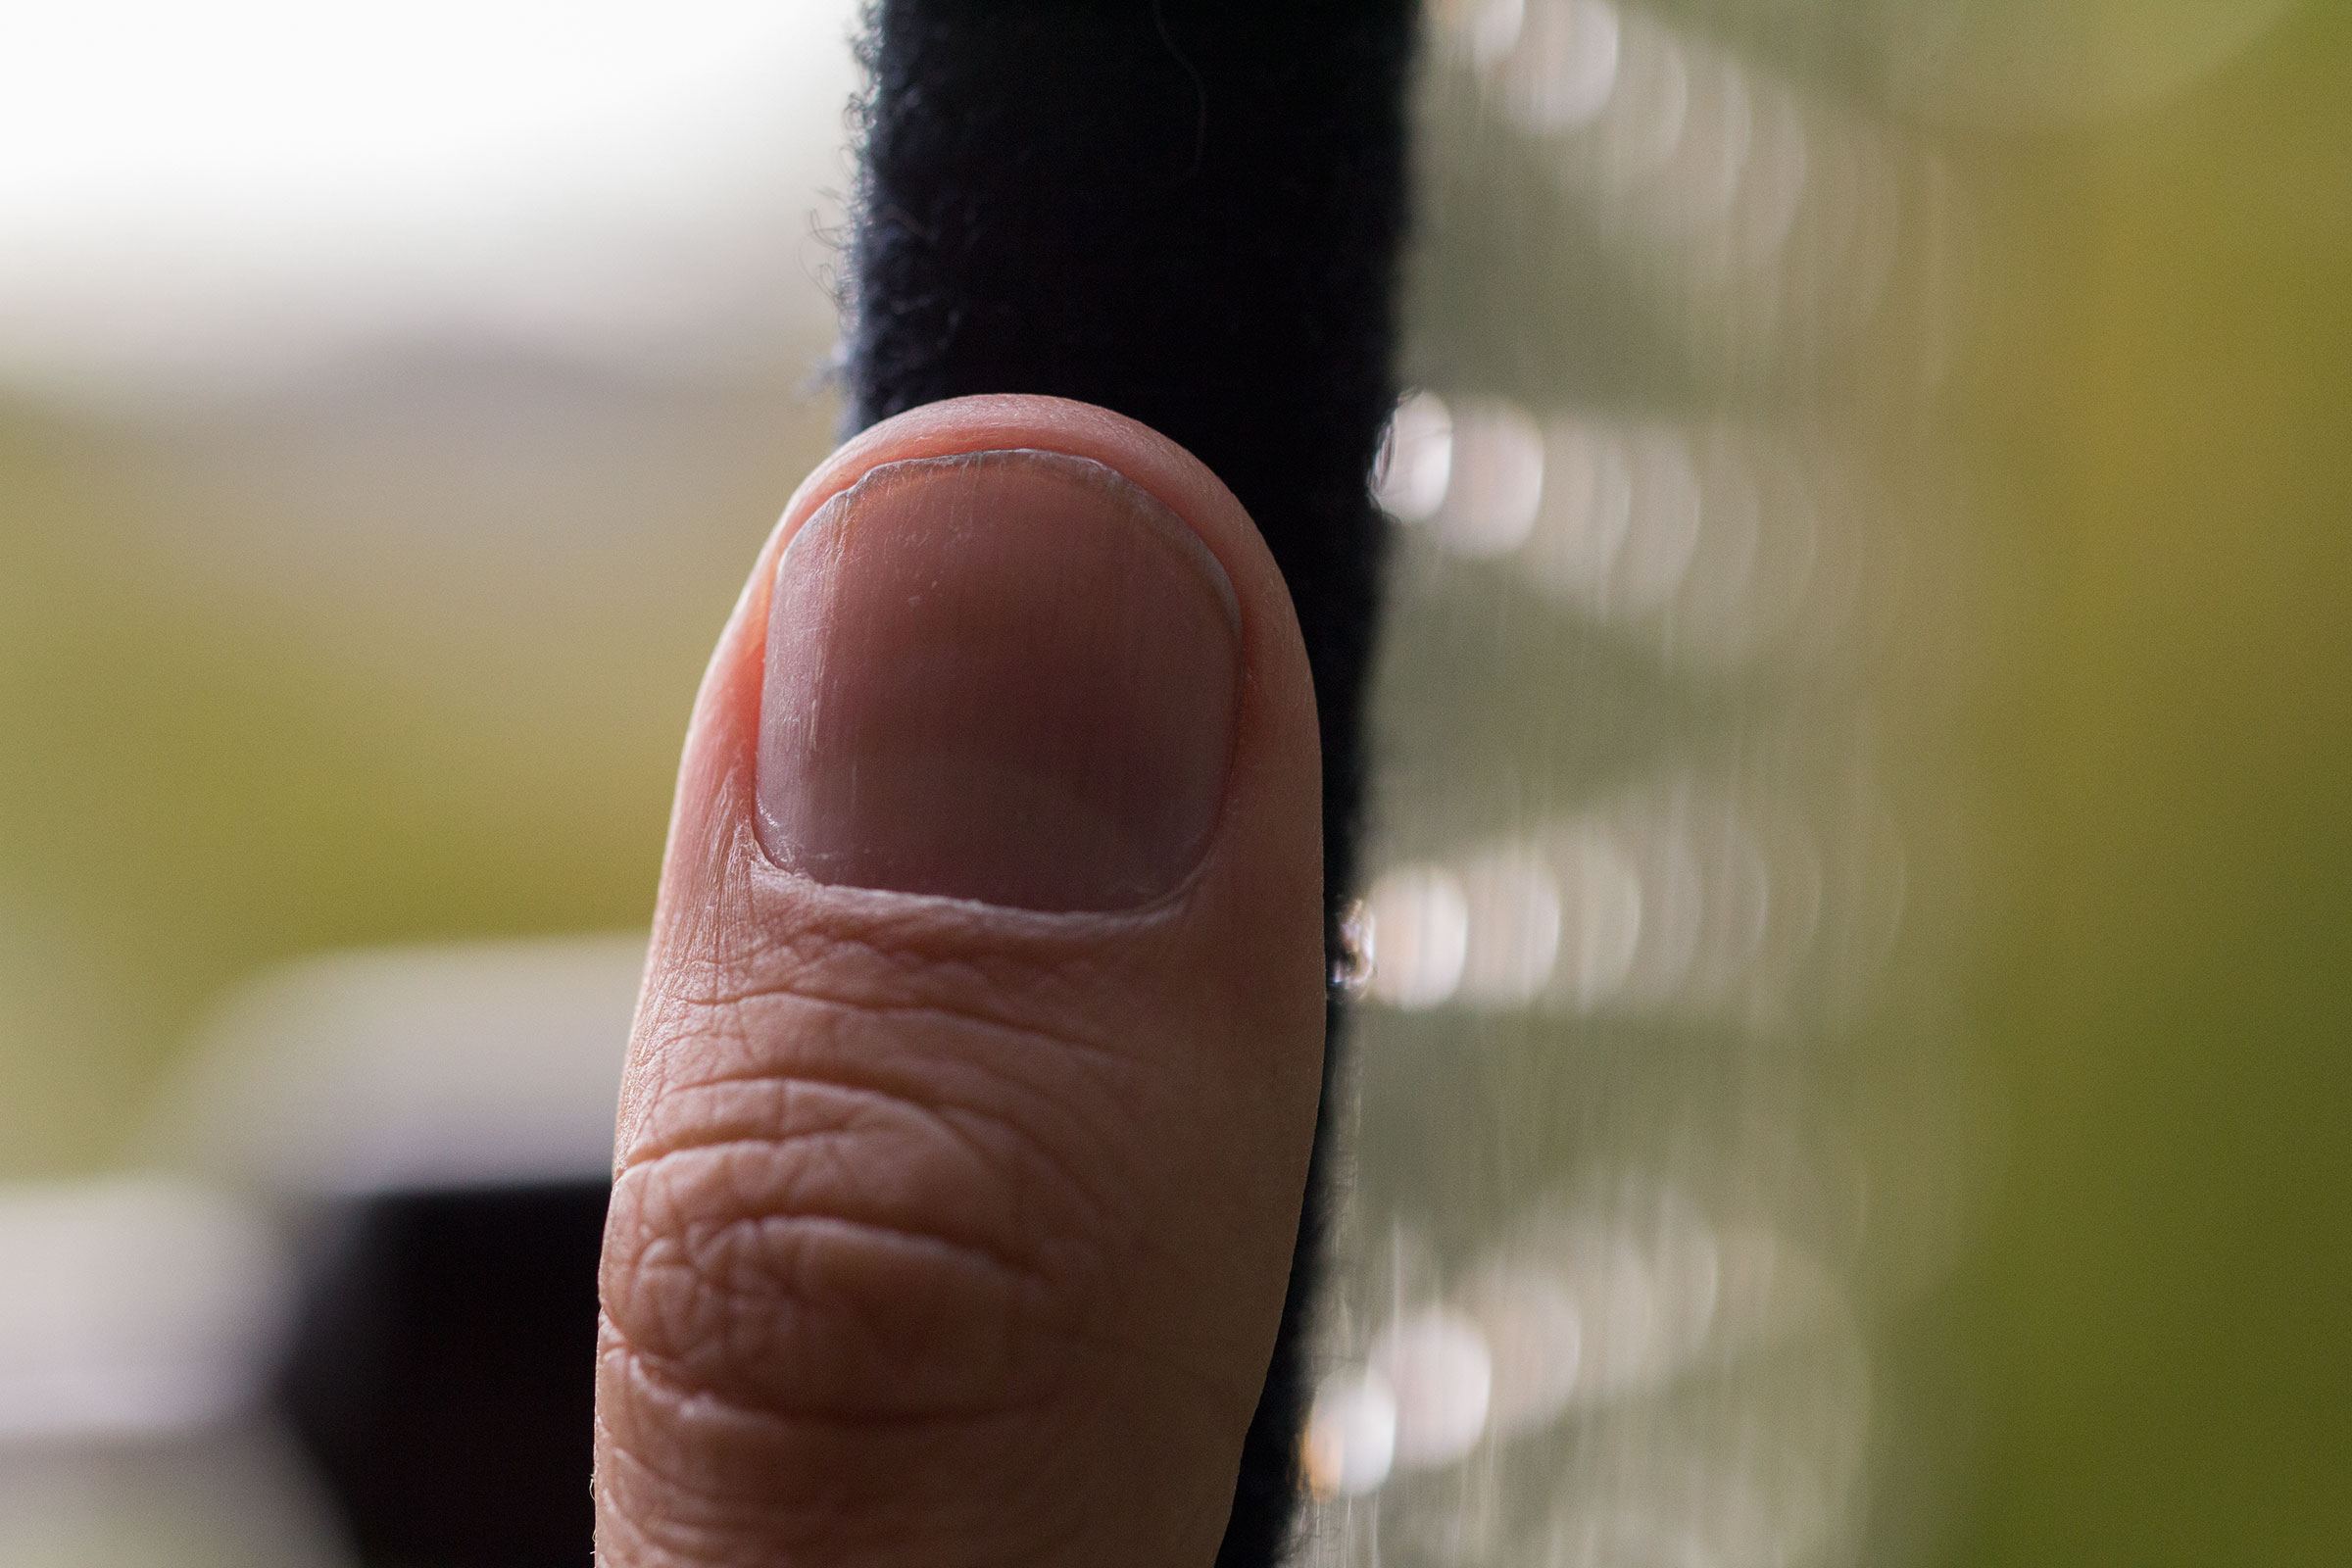
The LiteMat2 hybrid unit is the width of my thumb! This puts it into a special category of softbox. At 21×21 inches, it’s a slightly awkward size to pack around. But the travel bag that comes with the unit has a pocket for everything, and it packs down really slim.

The LiteMat2 hybrid kit comes with everything you need to get the most from the light in a variety of situations:
- a velcro-lined skirt that allows you to control light spill and attach diffusion
- a rugged travel bag with pockets for all accessories
- 3 types of diffusion material (1/4 grid, 1/2 grid and full grid cloth)
- flicker-free LED dimmer
- extra-long power cable
- AC adapter
- mirrored egg crate that transmits 100 percent of the light (unlike the more common black crate that cuts output by up to a full stop).
- Kino-flo twist-on mount with junior receiver.
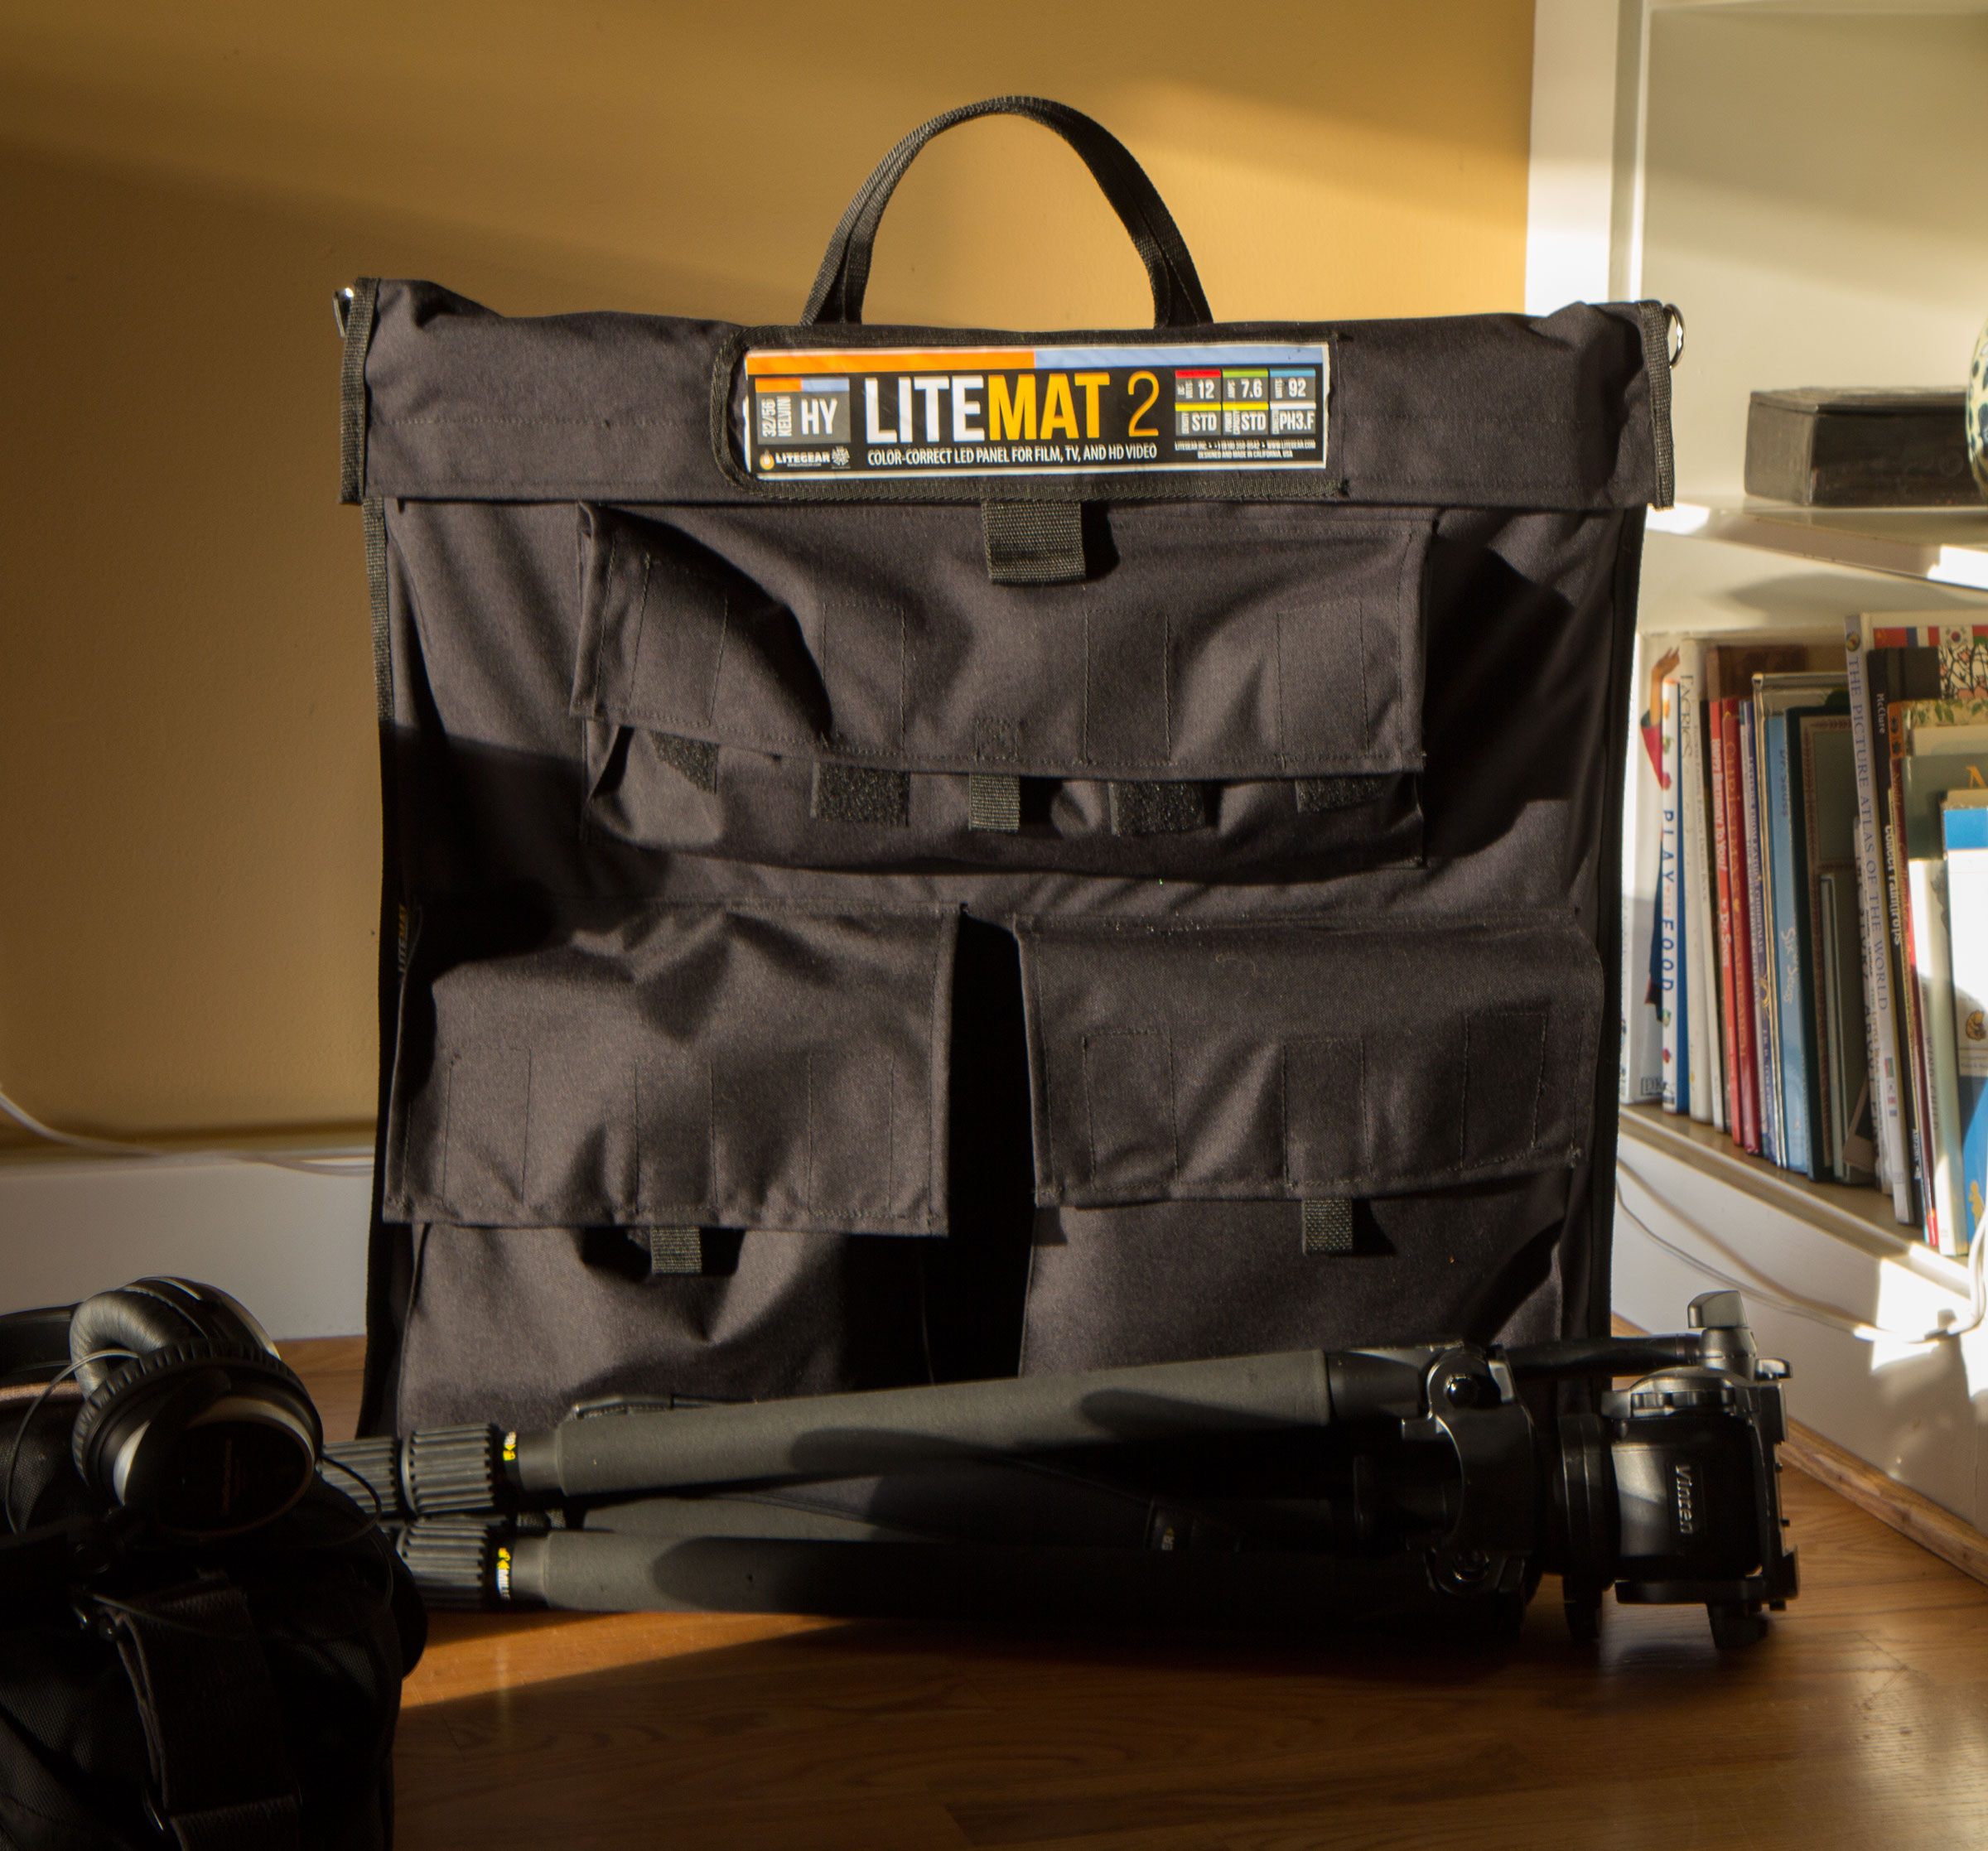
The whole kit weighs 14 pounds when packed. Because it’s so flat, it’s pretty easy to find space for it. The case is reinforced with hard plastic, so you really won’t need a hard case for this light, unless you plan to ship it. I haven’t flown anywhere with mine yet. For taking this baby on the road, I’m thinking a medium-sized suitcase in checked luggage.
 The only additional item you’ll need, if you want to power the light from a brick battery, which I definitely recommend, is a $26 d-tap battery adapter.
Value comparison
As far as I know, no other LED panel that I’m aware of comes complete with this many accessories. Lets do a little comparison with LitePanels Astra, shall we? The Astra bi-color unit is $1,300. If you want to use a battery with it, you have to pay more – a lot more. If you want a softbox with it, more again. If you want different levels of softening for the front of the softball, each costs $50. Here’s a comparison:
Astra: $1,350
Softbox: $234
Set of 3 cloth diffusers $76.50
LitePanels grid: $225
Battery plate: $148
PortaBrace Astra case: $210
Astra total: $2,243.50
LiteMat2 total: $1,526
LiteMat2 savings: $719

In addition to being a great value, the LiteMat2 is incredibly versatile. It’s light enough that you can tape it to the ceiling or a wall with painter’s tape, for example.
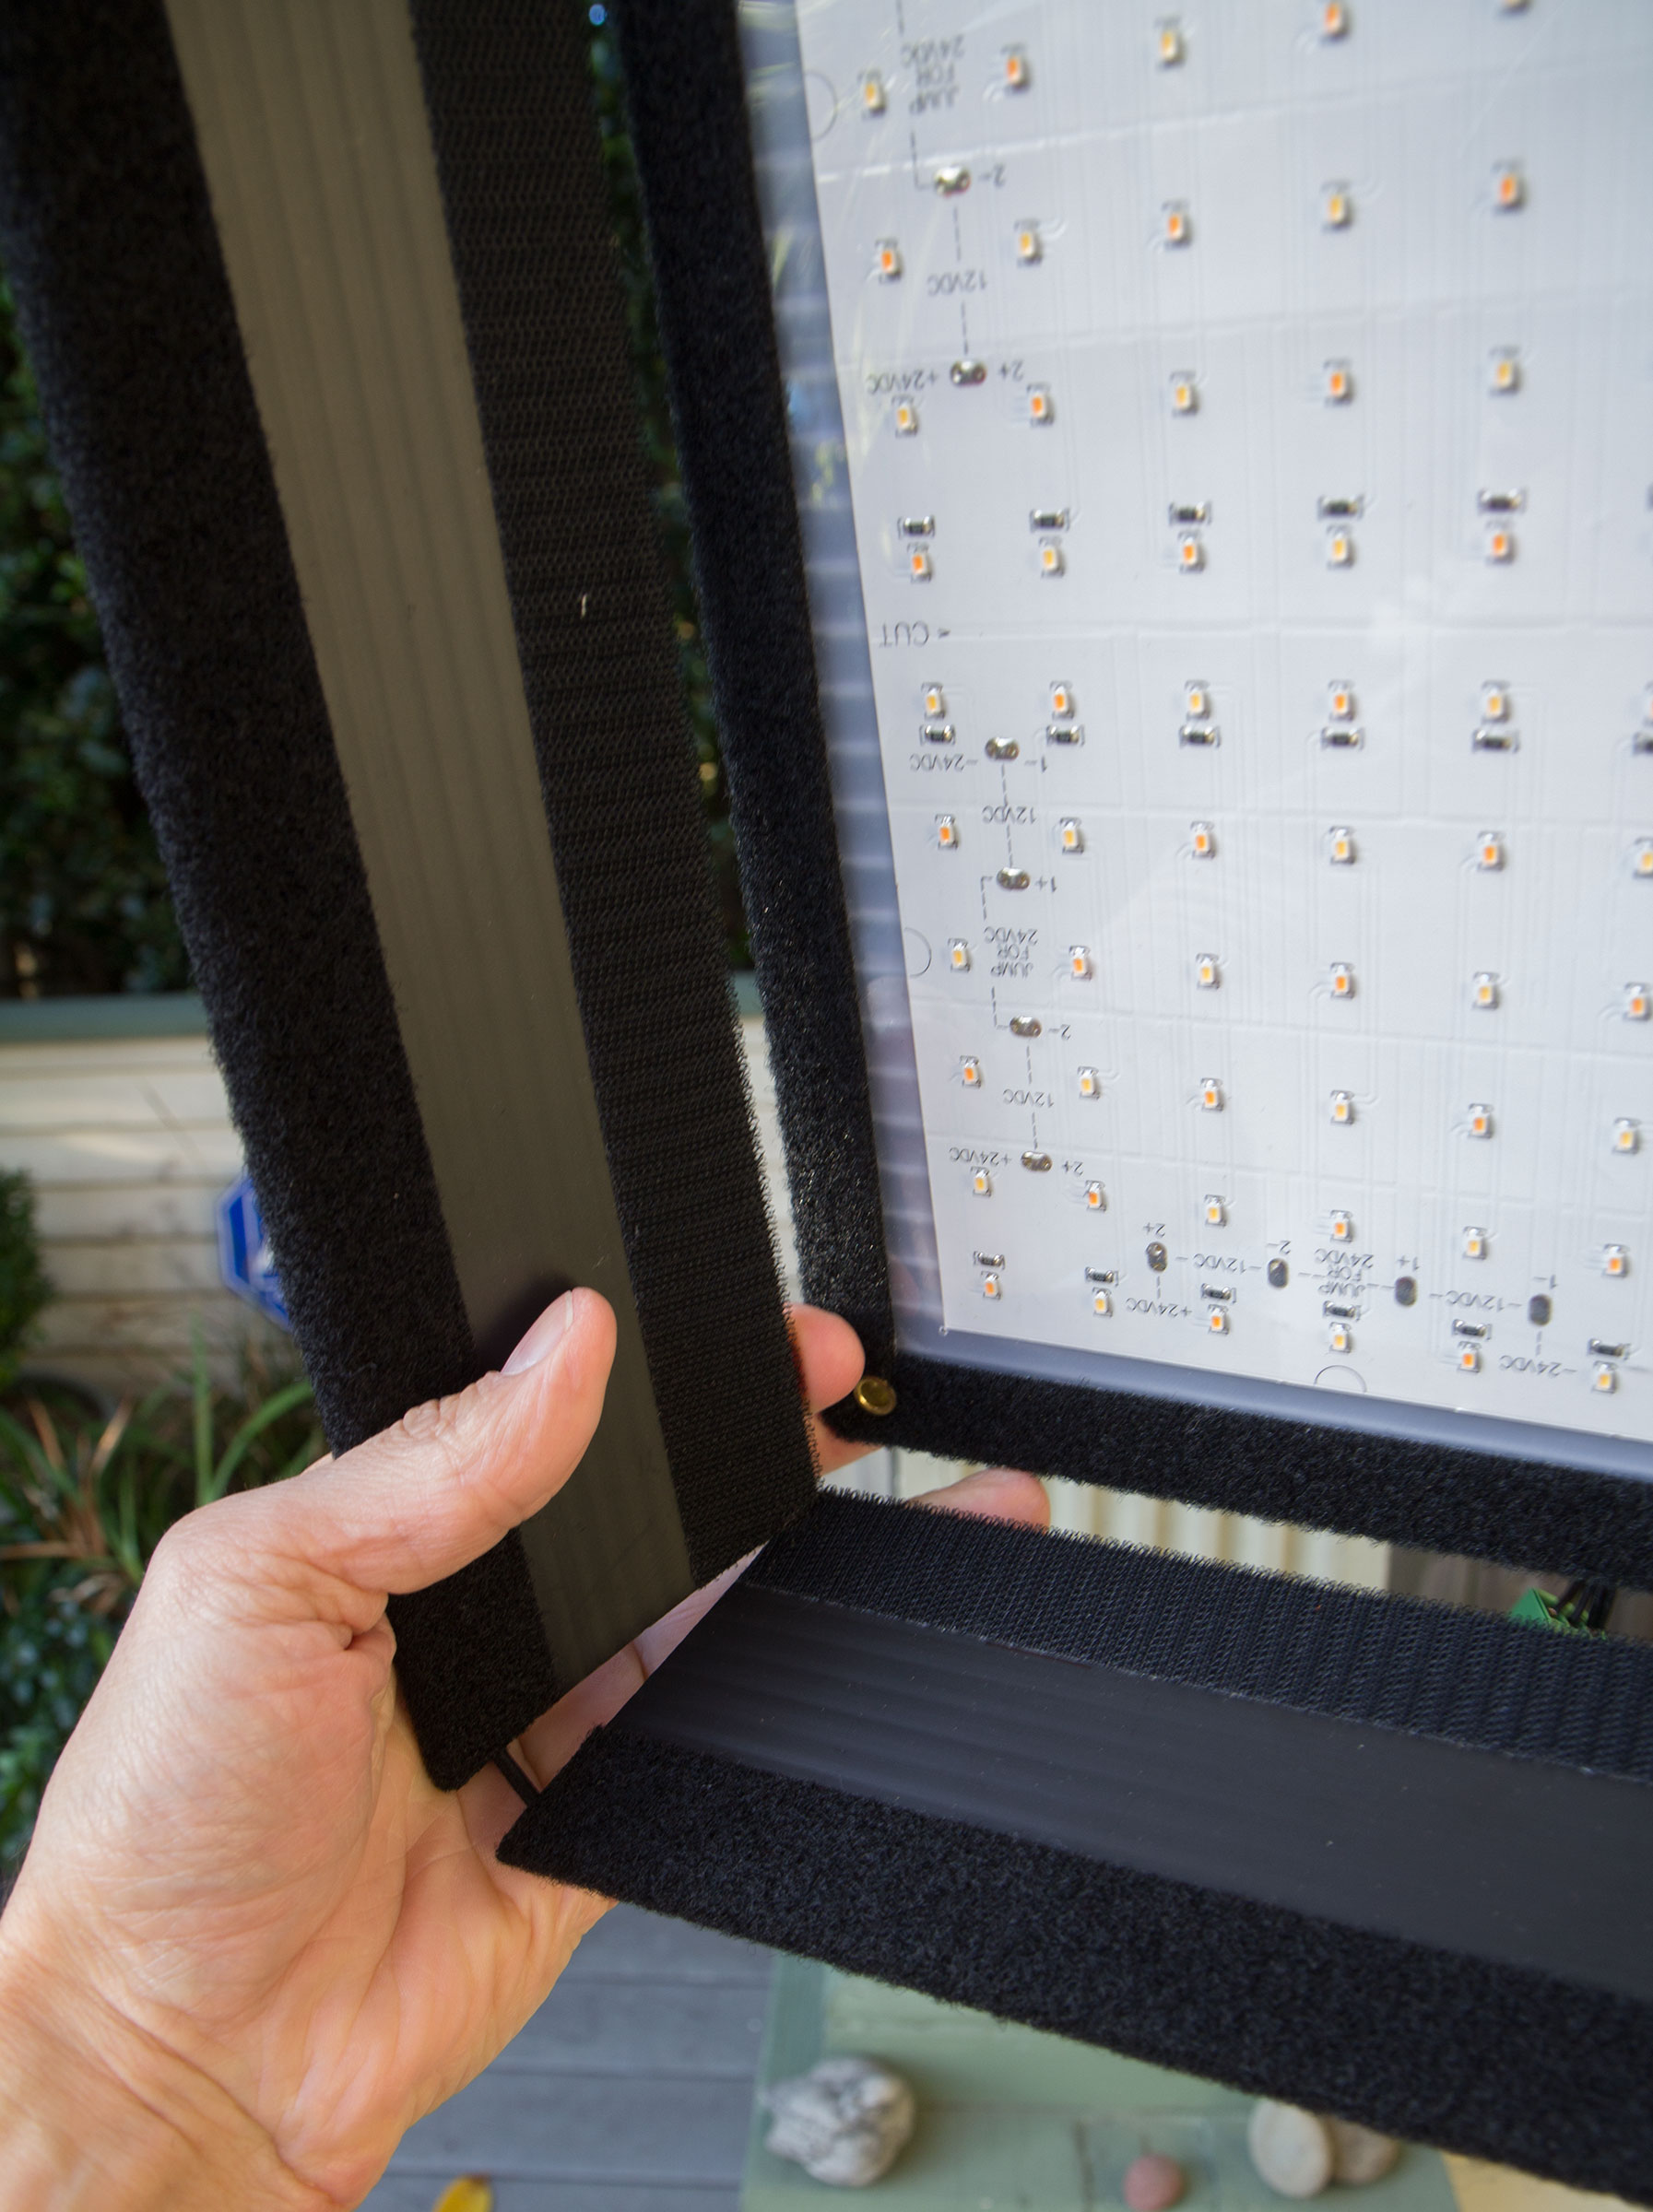 A velcro skirt attaches to the unit, turning it into a soft box.
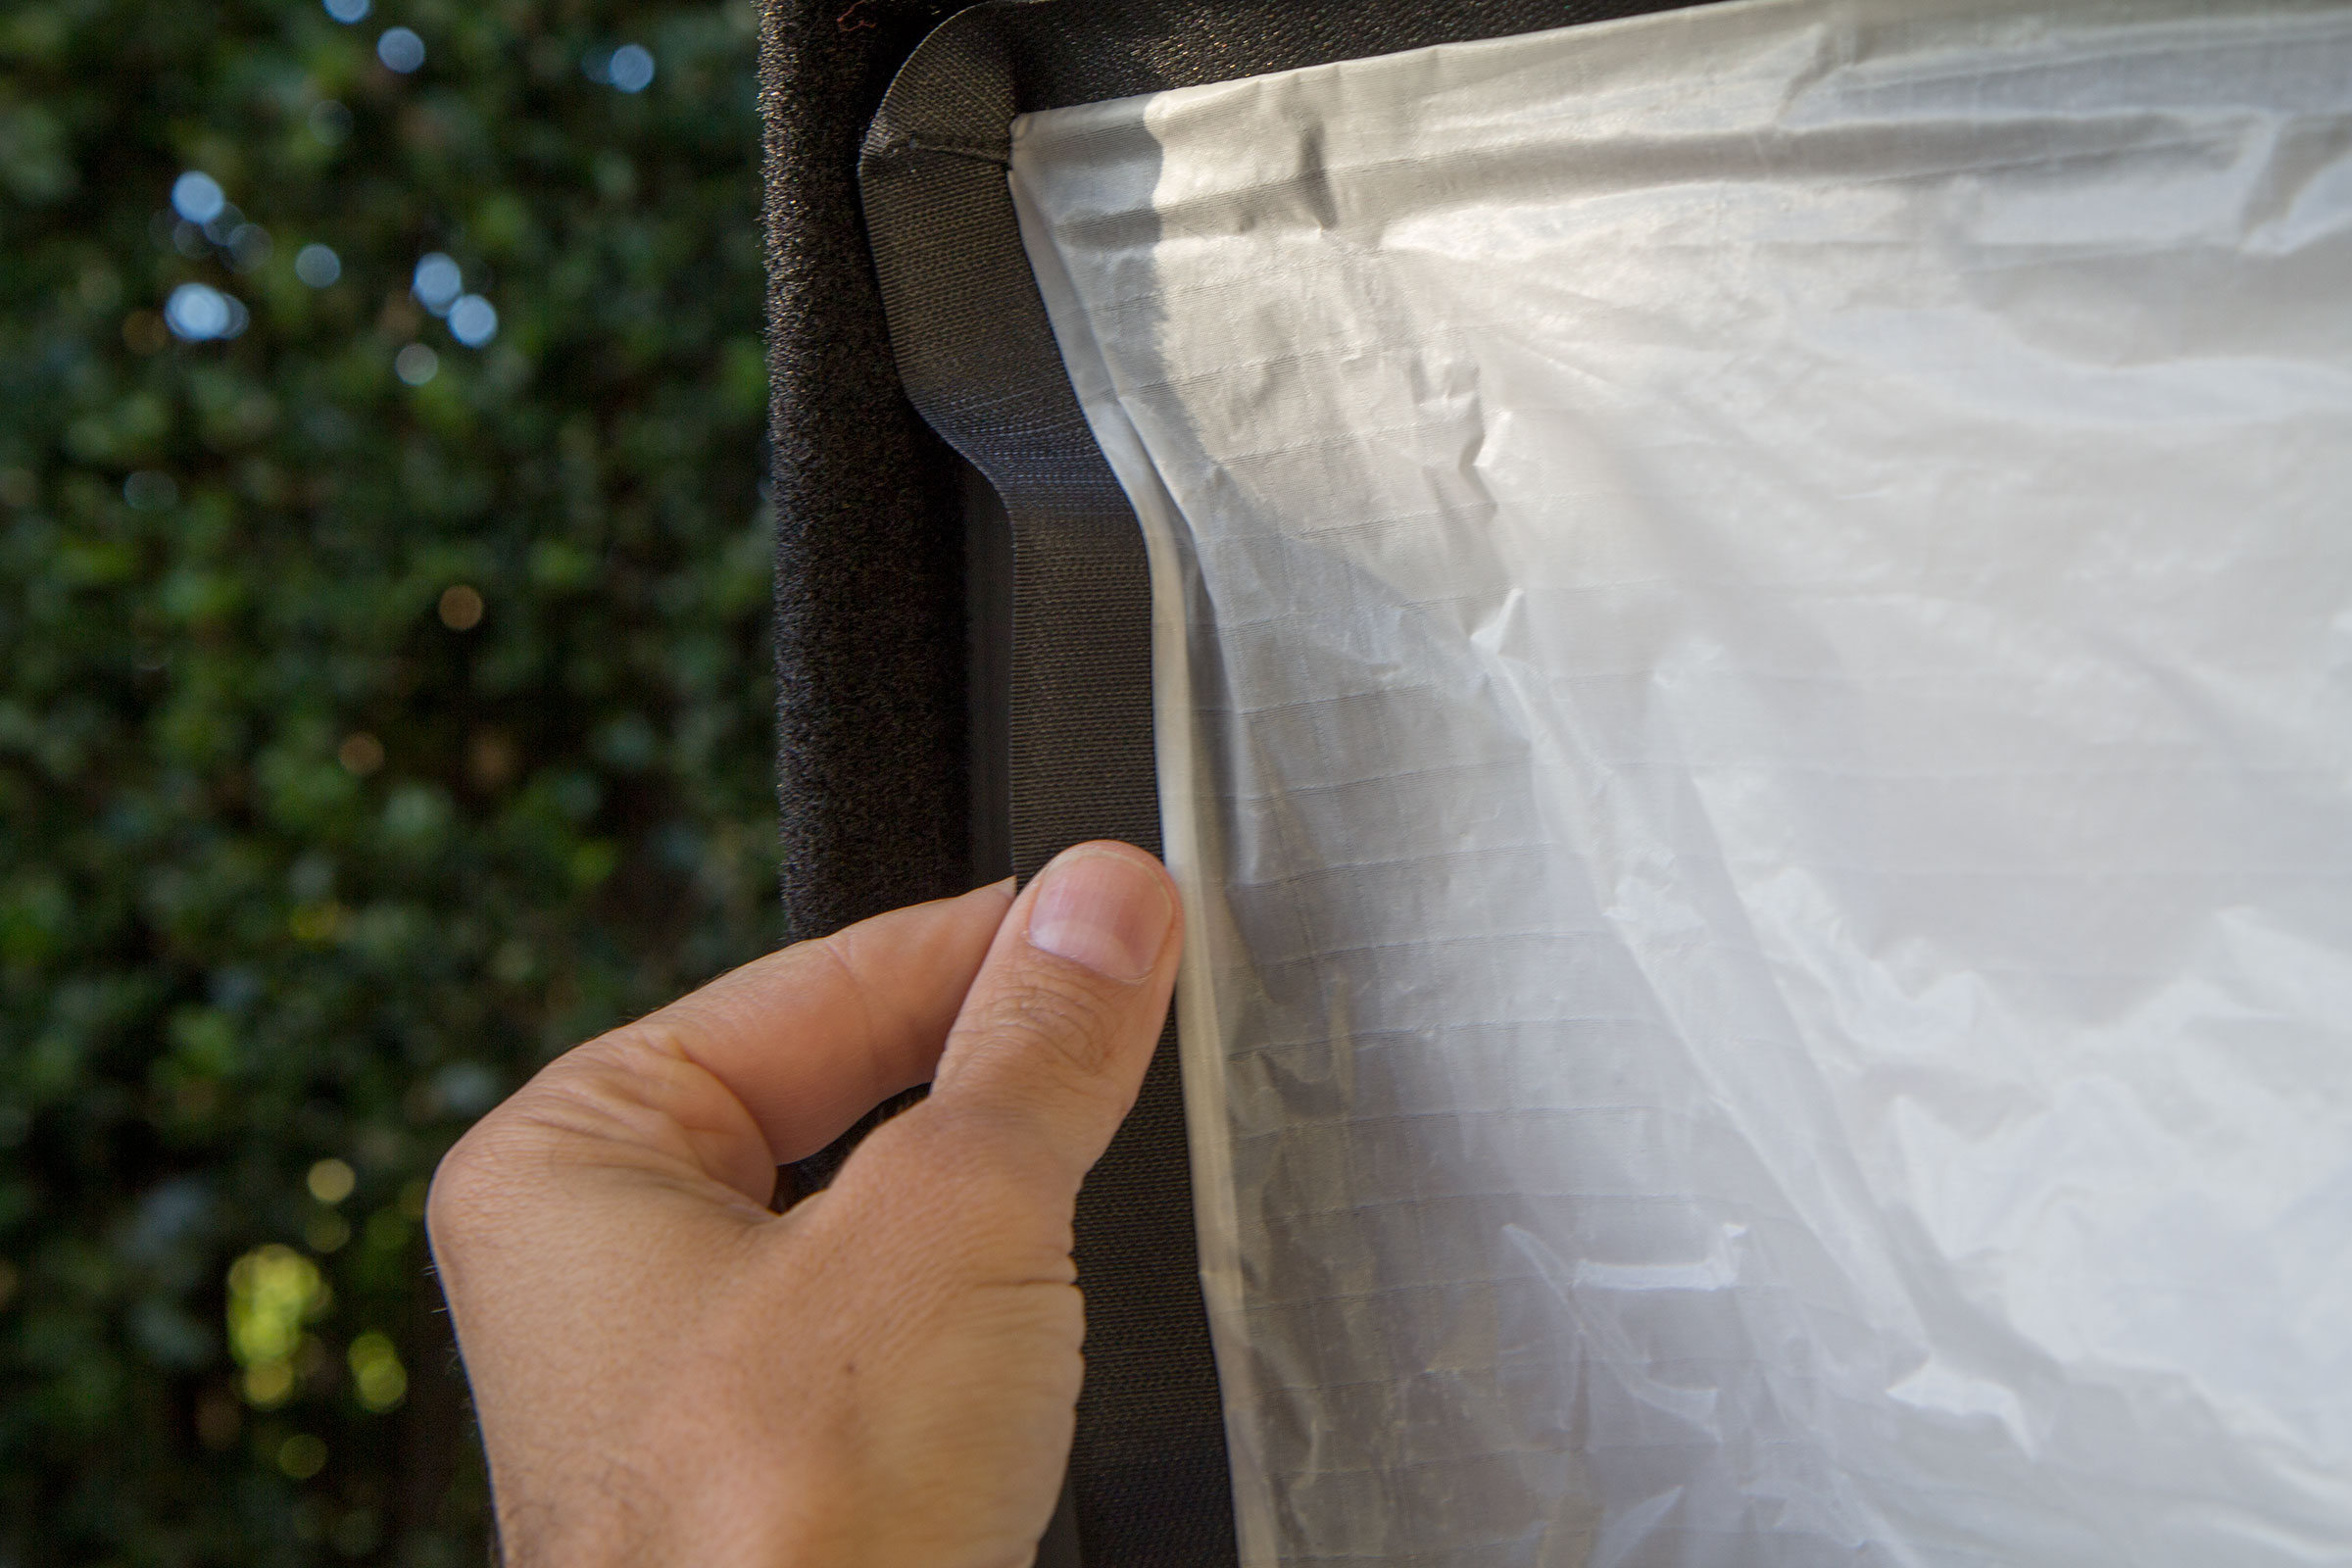
Three grades of grid cloth are included: 1/4, 1/2 and full grid.
I can imagine making a simple skirt for this light, using black fabric and velcro, that would turn it into a space light.
Brightness
I judge a light’s brightness by what f-stop I can set at ISO 800 at 6 feet. By that standard, this light is an f/4.0 cranked all the way up in normal (green) mode, 5600K, battery powered (see below for more on modes and battery operation). Which means it’s an f/2.8 at 12 feet, f/8 at 3 feet, etc.
That certainly makes it more than bright enough to use as a key light for an interior interview, and as fill for north window light. Controlling spill using the included egg crate is as simple as velcroing it on.

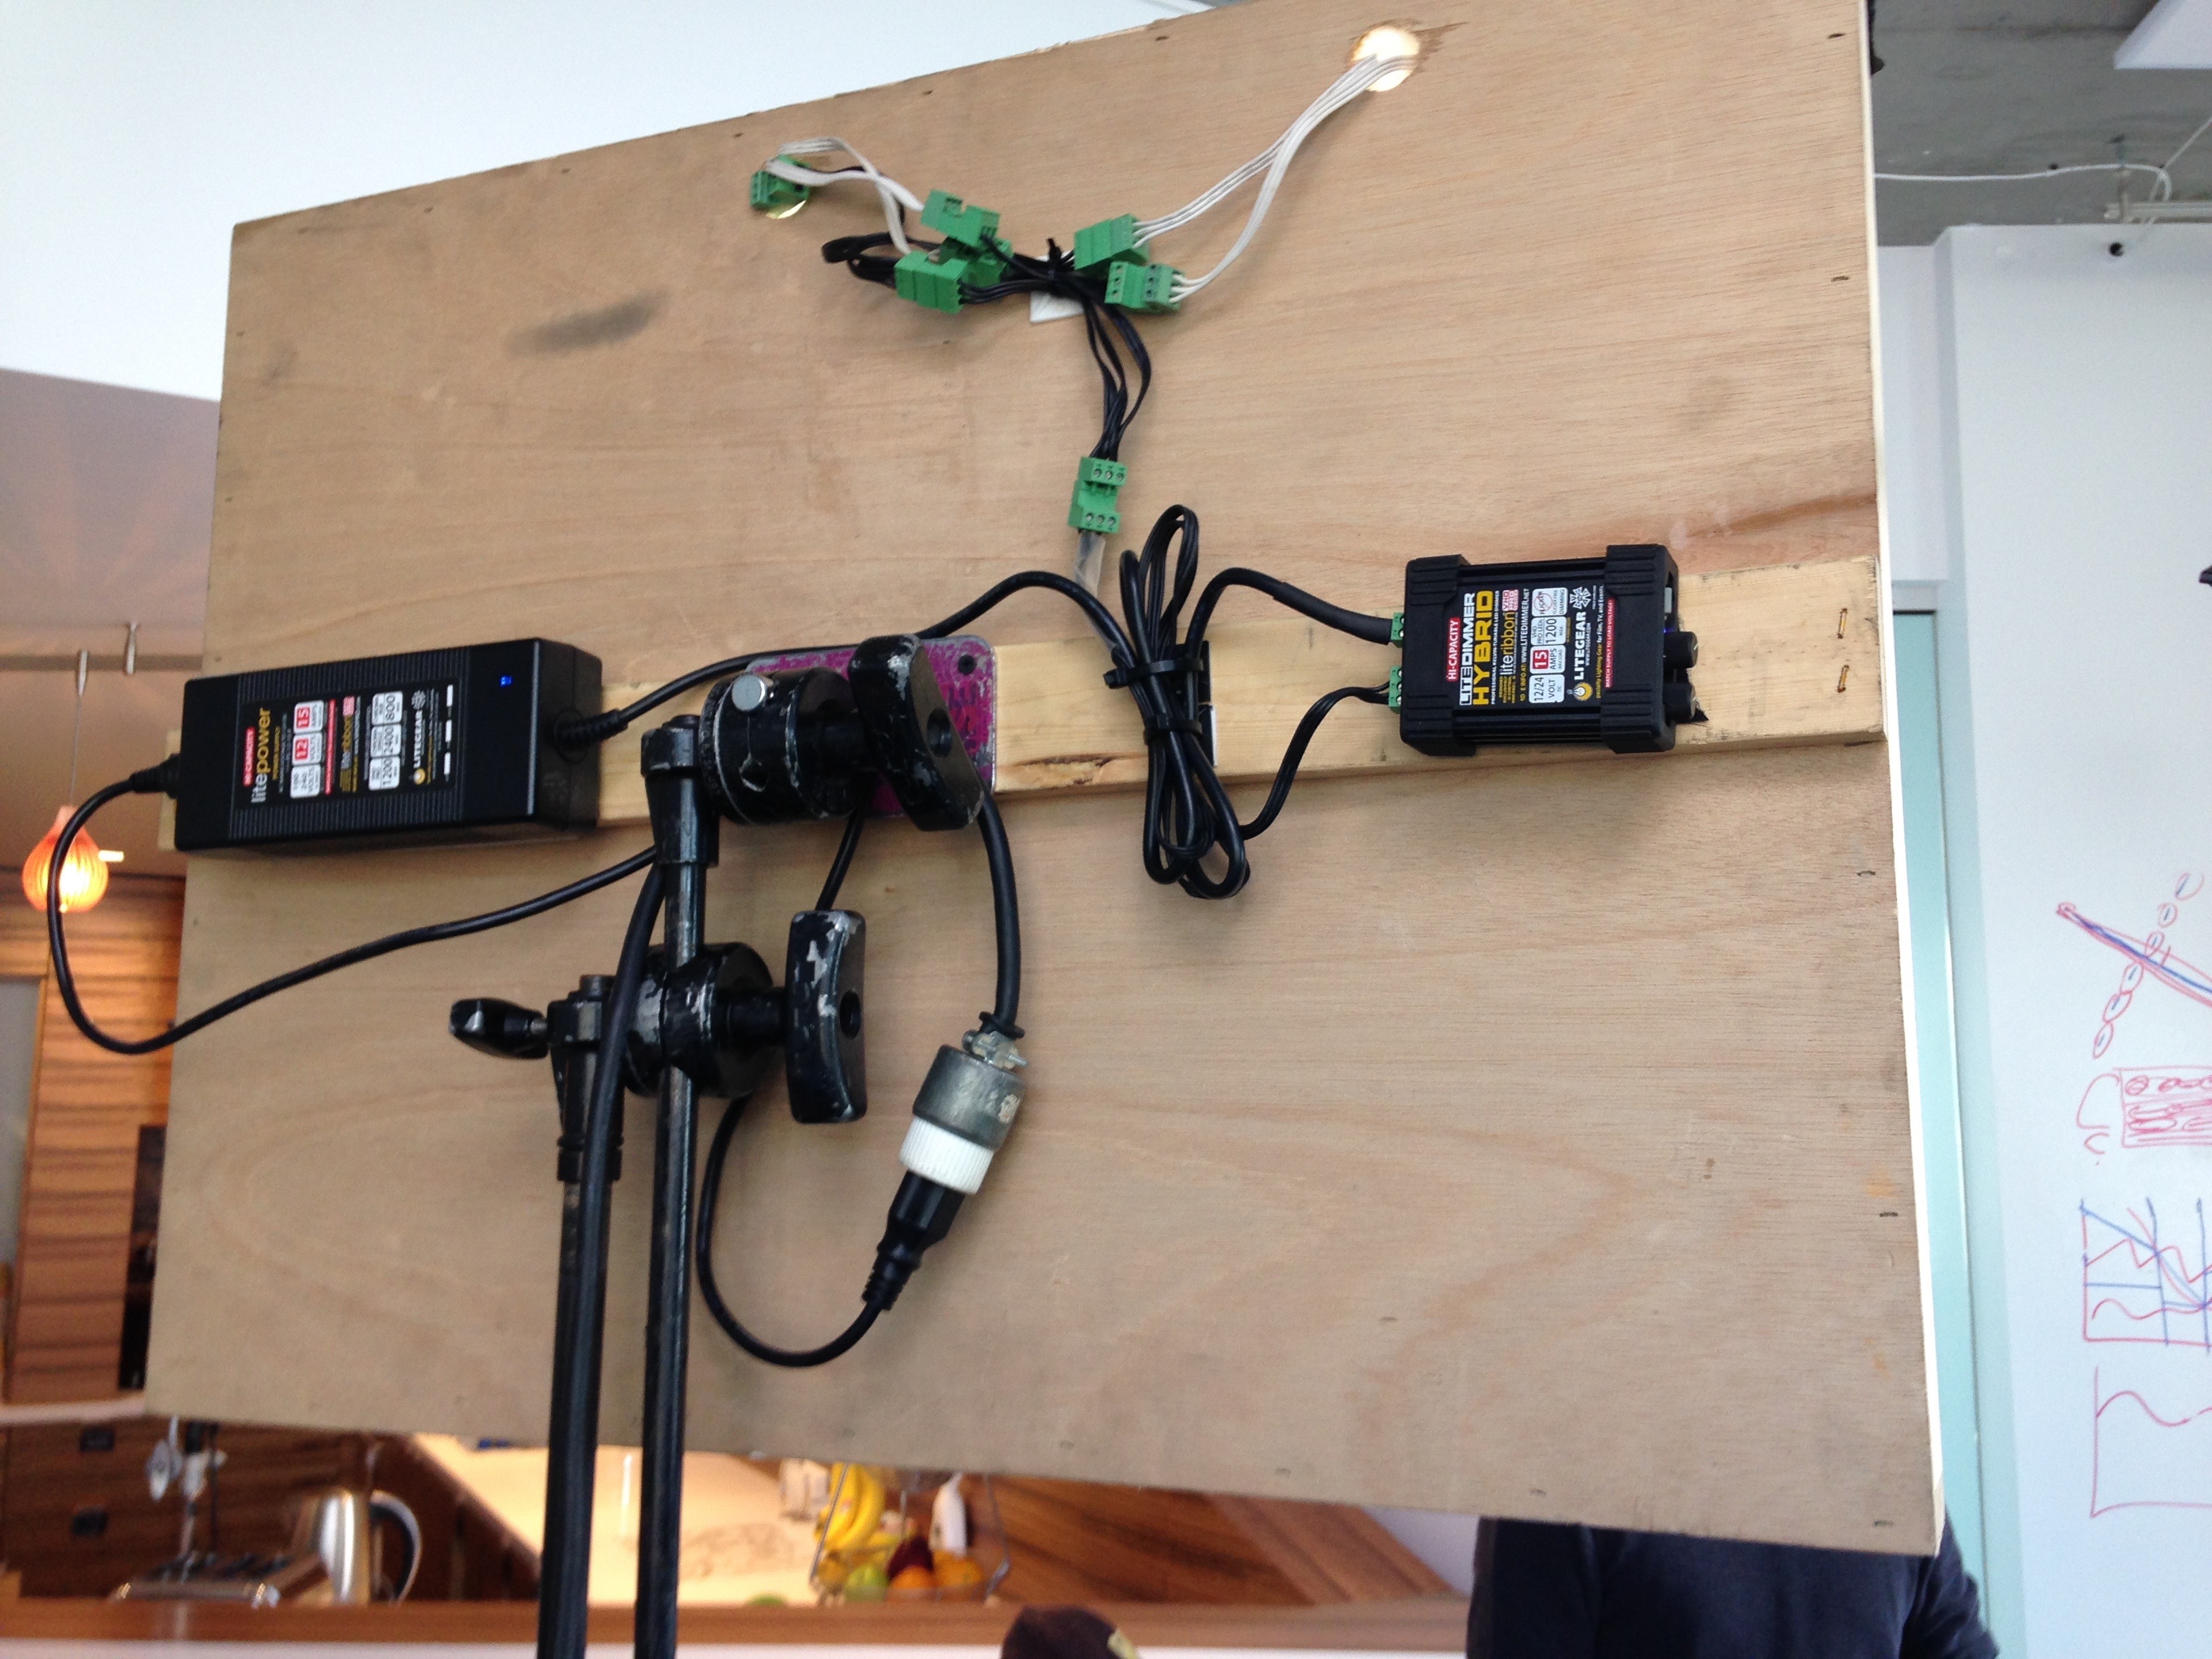
It’s a cinch to hang it off a medium-duty light stand, using a stand extender to get it out over the subject, for a no-fuss interview key. In the example below, I’m using a scrim bag to hold the battery and dimmer, and a Manfrotto 420B combi-boom stand. This is a lightweight, aluminum stand, but with its counterweight bag, it’s no problem to boom this light securely.

Battery operation
A surprising thing happens when the LiteMat is powered from a brick battery: it gets about 1/3 stop brighter than when plugged into AC power. I’m scratching my head over that one, but I love cutting the cord whenever I can, so I’m not complaining. Repositioning the light is as easy as grabbing the stand and moving it. Now that brick batteries are pushing beyond 250wh capacity, powering it with battery all the time becomes a real option.
How long does it last on a brick battery? I tested it with a 98WH Switronix v-lock (make sure to use a high-output version such as the Switronix Hypercore – the older ones don’t support the required wattage draw of close to 100 wats). After an hour at full intensity (green mode, daylight), it had only lost 1/10th of a stop in brightness. Five minutes later, it was down 2/10ths of a stop. At 75 minutes, 1/3 stop brightness. By an hour and 20 minutes, it’s down a full stop, which is where I ended the test. Its slow decline in intensity probably says more about the battery than it does the light.

Modes
The dimmer can be easily programmed in three modes. To do so, press the recessed Prog button with a pen for about a second. The status light will begin blinking. Then, dial the Kelvin temp dial to select which mode you want. Depress the Prog button again to confirm setting.
Three are three modes (activated by pressing the Alt switch):
White: Overdrive (default). This provides 1/3 stop more light on the daylight (6000K) channel. It has no effect on the tungsten channel.
Blue: Low-power. This cuts the output by 75 percent (2 stops), allowing more precise dimming at low light levels.
Yellow: 2-channel. This allows you to control the brightness of the tungsten and daylight channels independently, which allows both channels to be powered at 100 percent at the same time. This allows you to get maximum brightness from the light, making it twice as bright as it would otherwise be at 4300 Kelvin.
Color accuracy
The numbers for this light are VERY good. Not only does it score well on the CRI standard, but it does well on the newer standard, TLCI. According to LiteGear, this light scores CRI 95 across the temperature range. But TLCI reveals it’s more accurate at the daylight end, scoring a 95 there, 92 in the middle at 4300K, and 89 on tungsten. Very impressive.
My own test is a simple one. I shoot a Kodak grey card, first at 3200k white balance on both the camera and light, and then at 5600k. I look at the vectorscope. There should just be a tight dot in the very middle of the crosshairs. However, that’s almost never the case.
With LiteMat2, the color range stated on the dimmer is 3000k – 6000k. However, I was able to place things closest to the crosshairs by setting 2800K on the warm end and 5600k on the cool end. Here’s what my test showed:


Looking at a scope like this from an LED makes me want to dance! Even though it’s not “perfect,” it’s really great. In fact, I’m guessing that my simple vectorscope measuring the temp is less accurate than LiteGear’s, but I wanted to see how it landed on my camera, since that’s what I’ve been using to measure all my other lights.
UPDATE 7/9/16: I tested my LiteMat2 with a Sekonic Spectromaster c-700R and here’s what I found.
Warm end: 2959K and 92.9 CRI

LiteMat2 measurements dialed to fully tungsten with CRI value
Cool end: 5879K and 93 CRI.
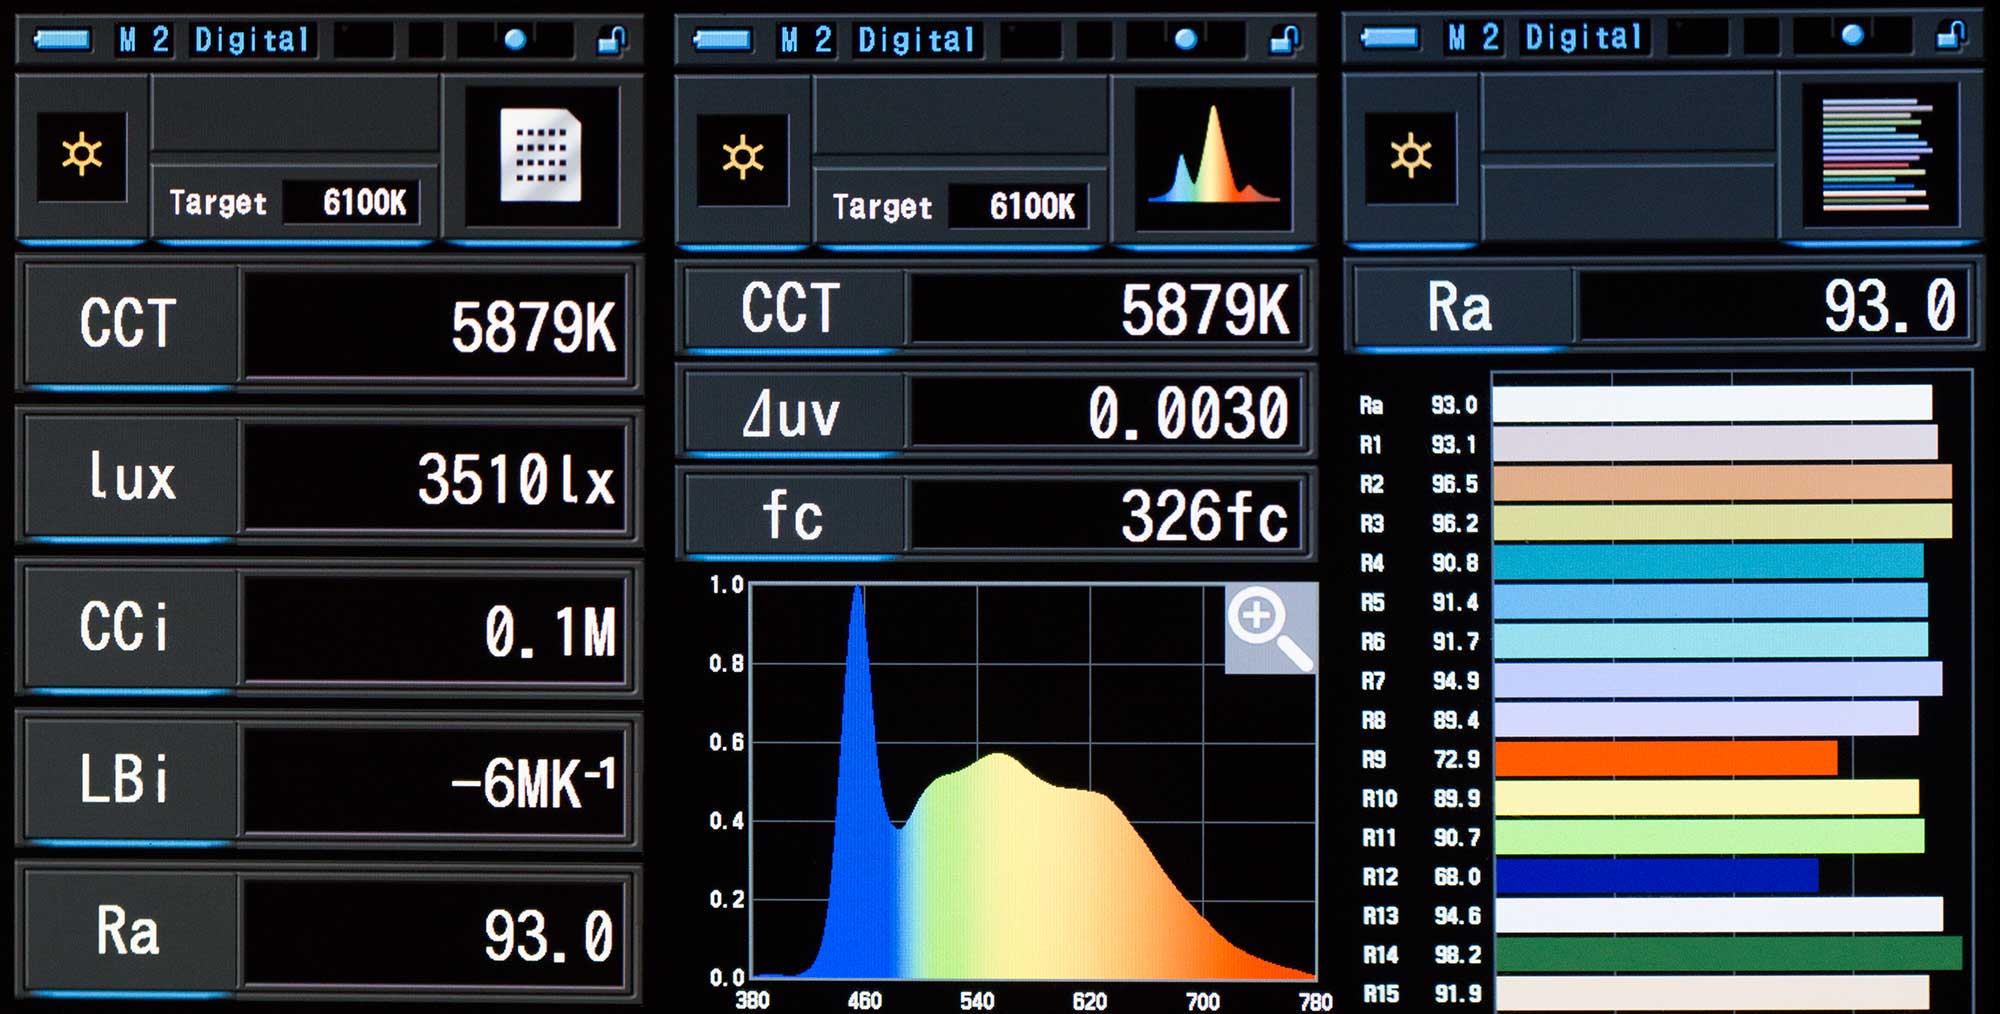
LiteMat2 at full daylight CRI rating and color temp scores
But enough about the numbers. How does the light actually look? I’ve been shooting with LiteMat2 on a few projects over the past couple weeks, and I’d like to share a few frames:
LiteMat2 used as key light in softbox mode with 1/4 grid cloth
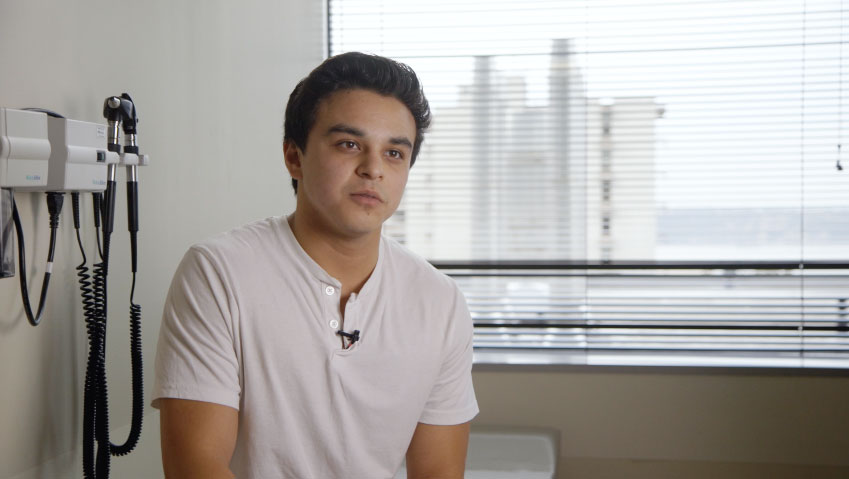
 LiteMat2 used as key-side fill with window light as key with 1/4 grid cloth
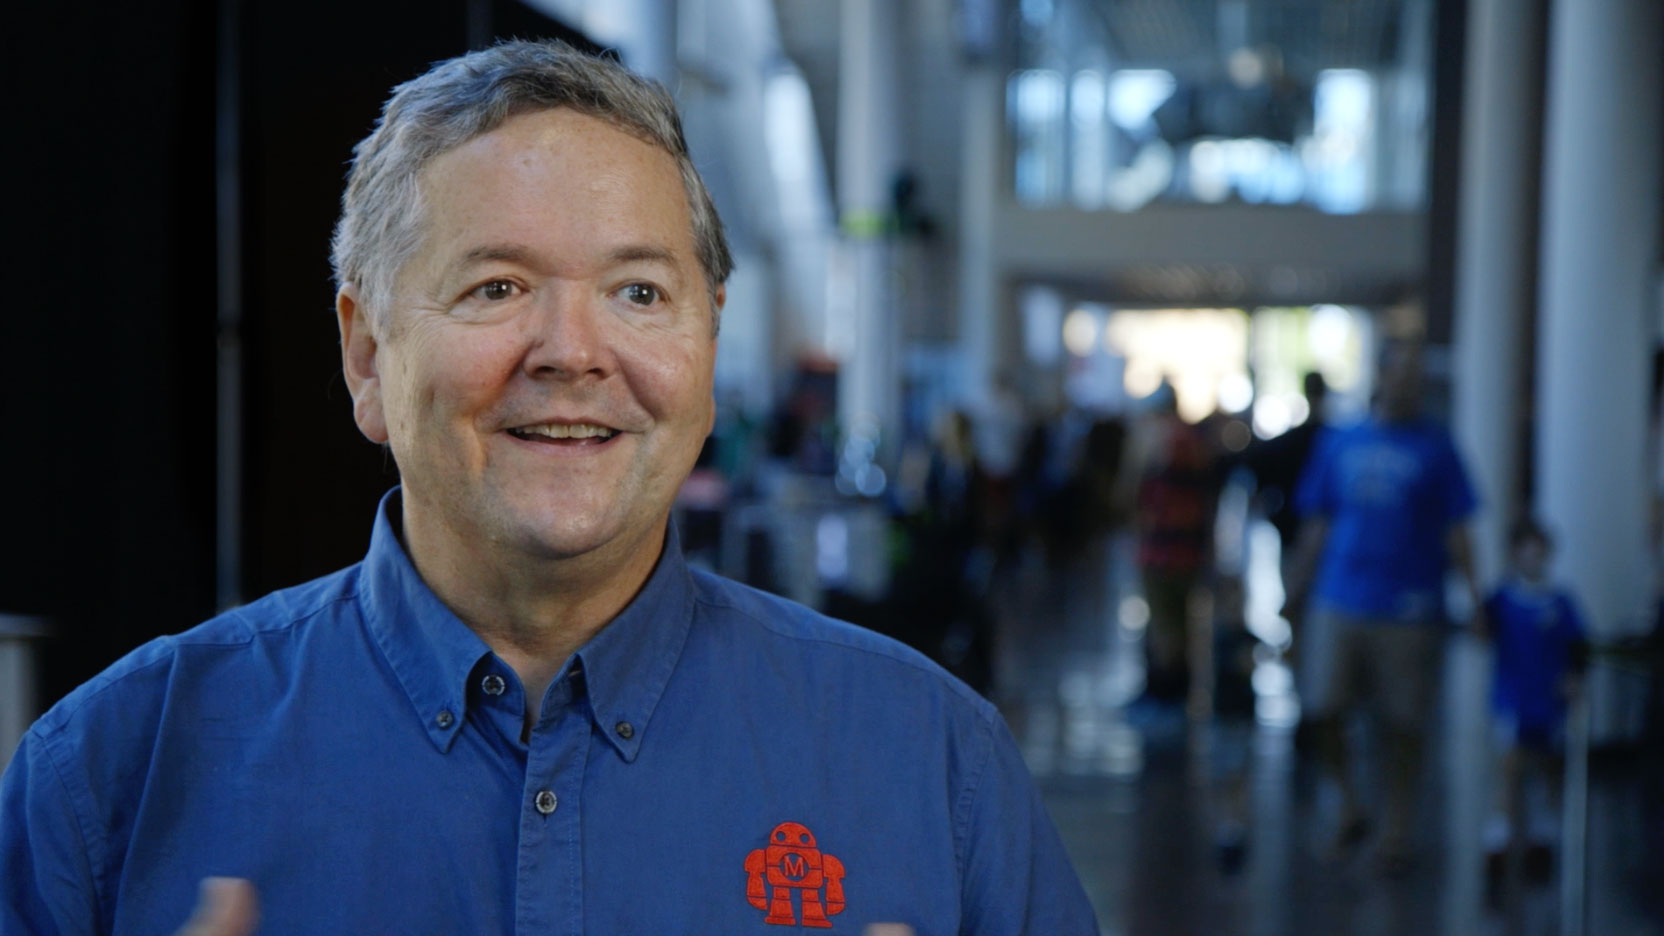 LiteMat2 as key, with 1/4 grid cloth
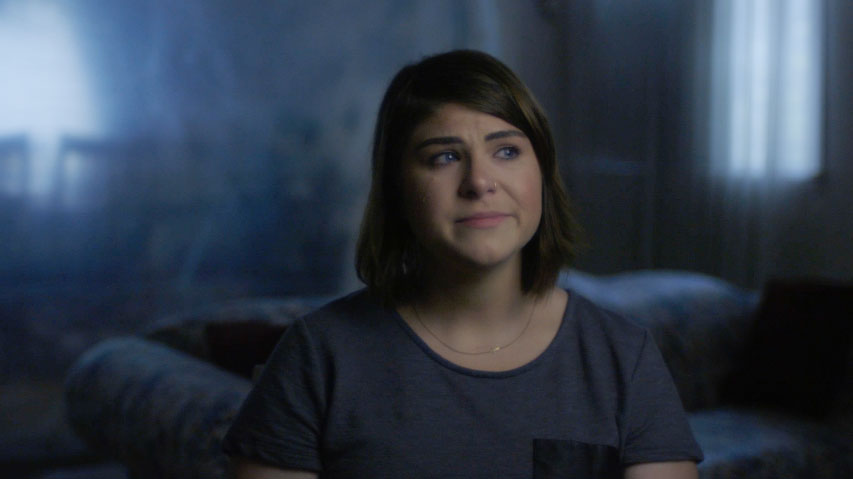
 LiteMat2 used as key-side fill to wrap light around face from window with 1/4 grid cloth and crate
Conclusion
This is, without hesitation, the best light I’ve ever used for quick interview setups. I can’t stress how freeing it is to control brightness and color by dial rather than by gel. I just set this light up, dim and color balance to eye, and roll camera. Most of my interviews last about 40 minutes, easily within the range of a 90wh brick battery, which in my testing lasted more than an hour.
No light is perfect, of course, and I find myself wishing that the mirrored crate wasn’t so heavy. It’s not as heavy as the light itself, but damned near. Is that all I can find to say bad about this light? For now, at least! I’ll update this post as I spend more time with it.
So. To sum up in a single sentence: the LiteMat2 is a versatile weapon in the war against lame lighting. It’s a light that gets me excited about lighting, because it shortens the distance between what I see in my imagination and what I see on the monitor. And it’s a real bargain considering it comes with virtually every accessory you’ll need.
 4. The image stabilization is really good, but it’s not a silver bullet. I found that it was possible to handhold footage up to about 35mm, maybe 50mm (in full frame mode); beyond that, it’s Movi time. And forget trying to shoot handheld with Super 35 crop mode – the rolling shutter is just too noticeable. Still, it’s the first time I’ve been able to seriously consider using a DSLR to handhold anything other than hybrid stabilized lenses like my Canon 100mm 2.8 macro IS. So that’s really something.