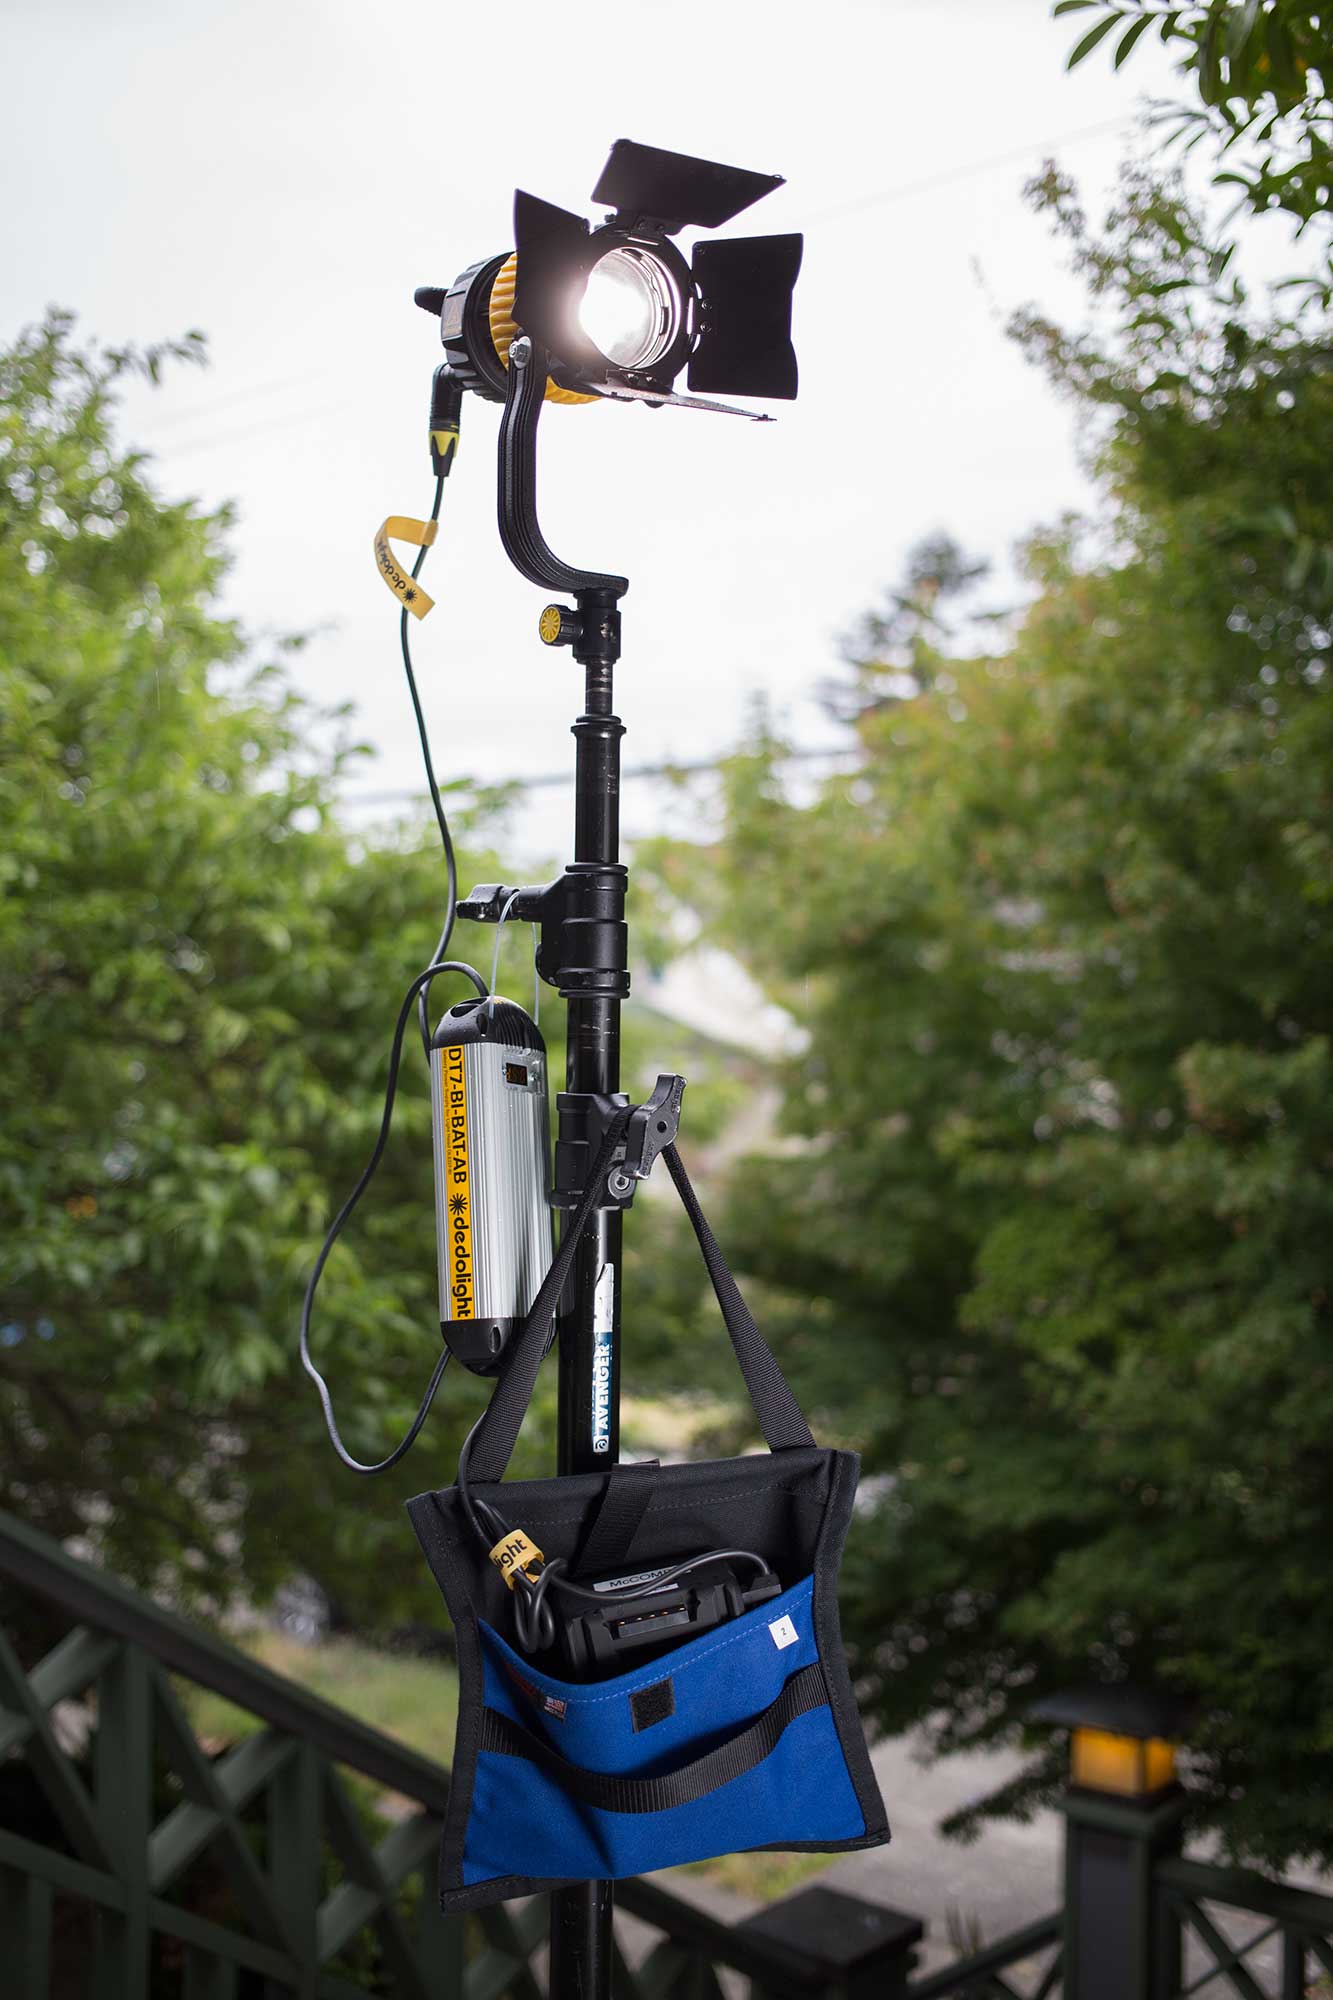
The new DLED7 Turbo is an exceptionally precise and versatile light with all the Dedolight features plus optional battery operation
Lighting involves two big things: putting light where you want it, and NOT putting it where you don’t want it. To say a scene is lit means more precisely that an important part of it is lit, and an equally important part remains hidden. Placing shadows is just as important as placing highlights. And no light allows you to place shadows with less fuss than a Dedolight.
Original Dedolight
Dedolights have earned a reputation for precision in the film industry. The venerable 150-watt DLHM4-300 tungsten hot light can throw a 3200K beam exactly where you want it, with virtually no light spill, thanks to the company’s patented aspheric optics. What’s more projector attachments are available to further focus the light. With one of those, you can literally hit a nail on the head from across a room.
I’ve lusted after one of these beasts for a long time, but decided to wait until an LED version arrived, because more often than not, I’m mixing daylight on location rather than tungsten. The wait is now over, and it’s called the DLED7. (Note, Dedolight’s DLED4, which shares the same form factor, has been available for more an a year but wasn’t powerful enough for my needs).
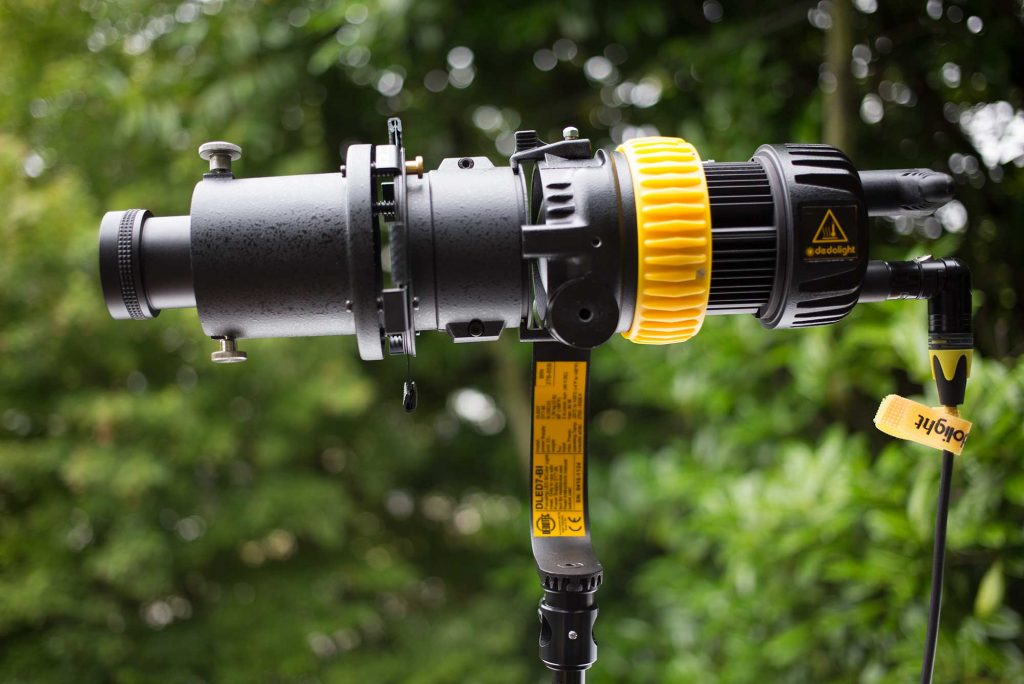
DLED7 rigged with optional DP2 projector
On paper, the DLED7 gives you everything its tungsten predecessor gave you in terms of precision while adding a number of new benefits:
- Low power draw (90 watts) means it will run for a little over an hour at full power on a high-output v-mount battery such as the Switronix Hypercore 98WH.
- Dimming is greatly improved, because the LEDs don’t suffer the red shift that tungsten lights do when dimmed.
- The DLED7 is also runs much cooler, although it does require a very quiet fan. The light gets warm to the touch when operating, but never too hot to hold.
- Color temperature is adjustable from 2700K to 7400K without gels.
- The even beam of light produced by this instrument is gives you consistent light meter readings from nearly edge to edge. So you can use it to light a background with a single source. And, the light can be spotted from 1:20 (a typical fresnel is only 1:5) and cut very precisely with barn doors. Exciting stuff!
How does it work?
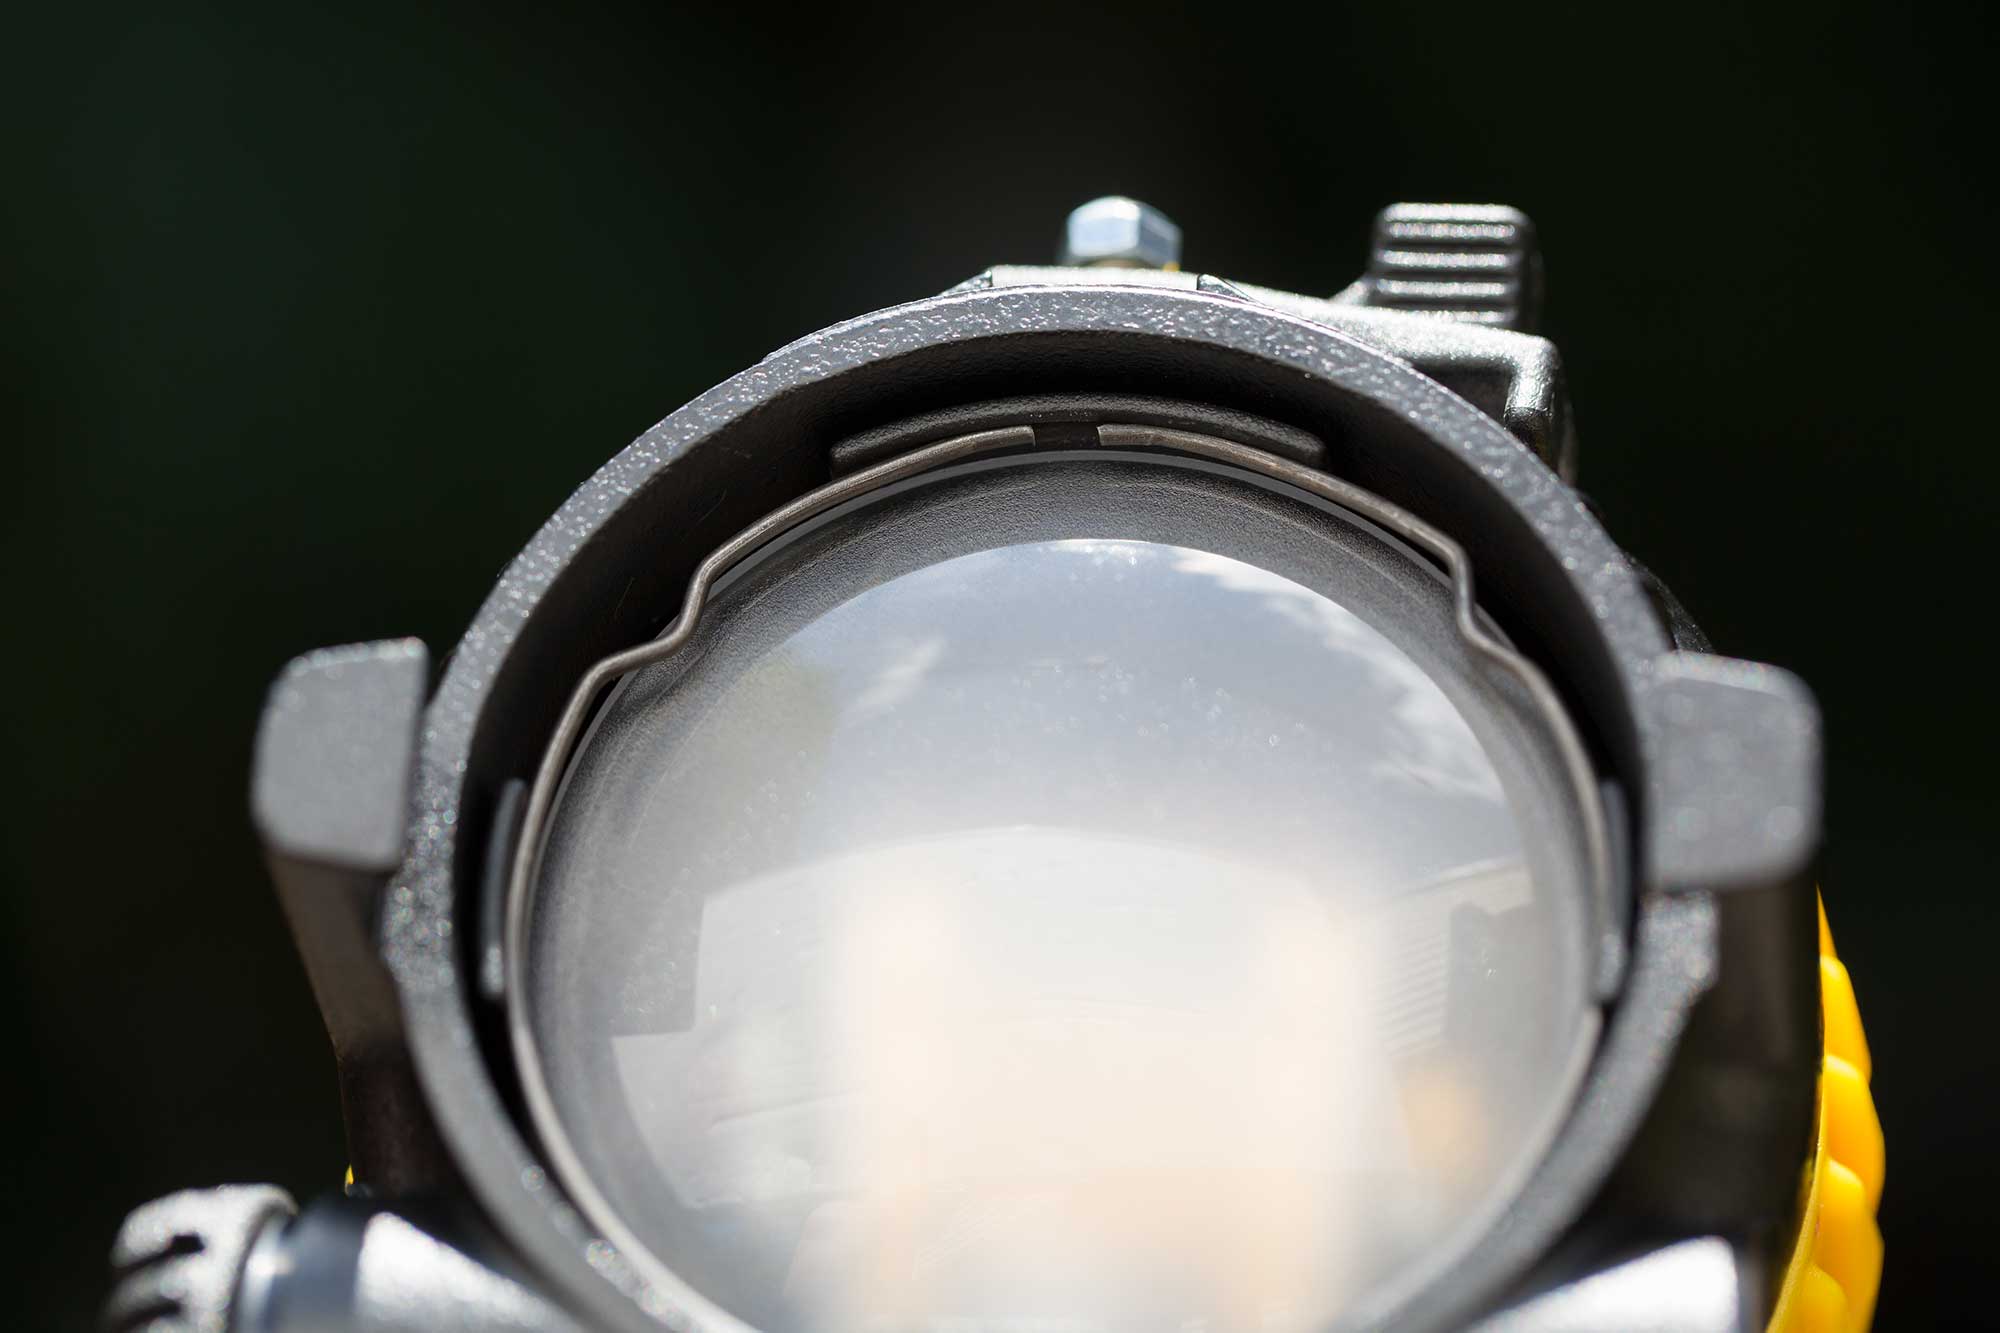
It’s a remarkable design achievement, really, that Dedo can make a bi-color light that remains fully focusable for both tungsten AND daylight. They achieve this by checkerboarding the different color LEDs at the focus point of the light behind the two aspheric lenses. I removed the lenses to have a peek at the guts:

It’s a simple matter to remove the two aspheric lenses and get a look at the LEDs themselves.
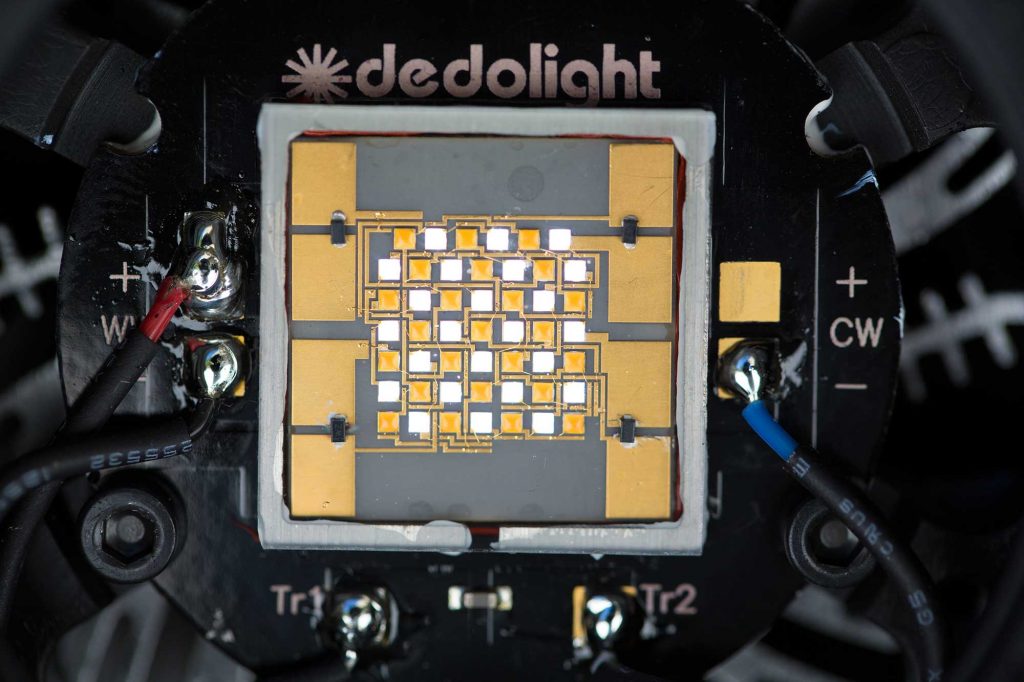
The DLED7 LEDs are arranged in a checkerboard shape. Half of the LEDs are tungsten and half are daylight (90 watts total for each)
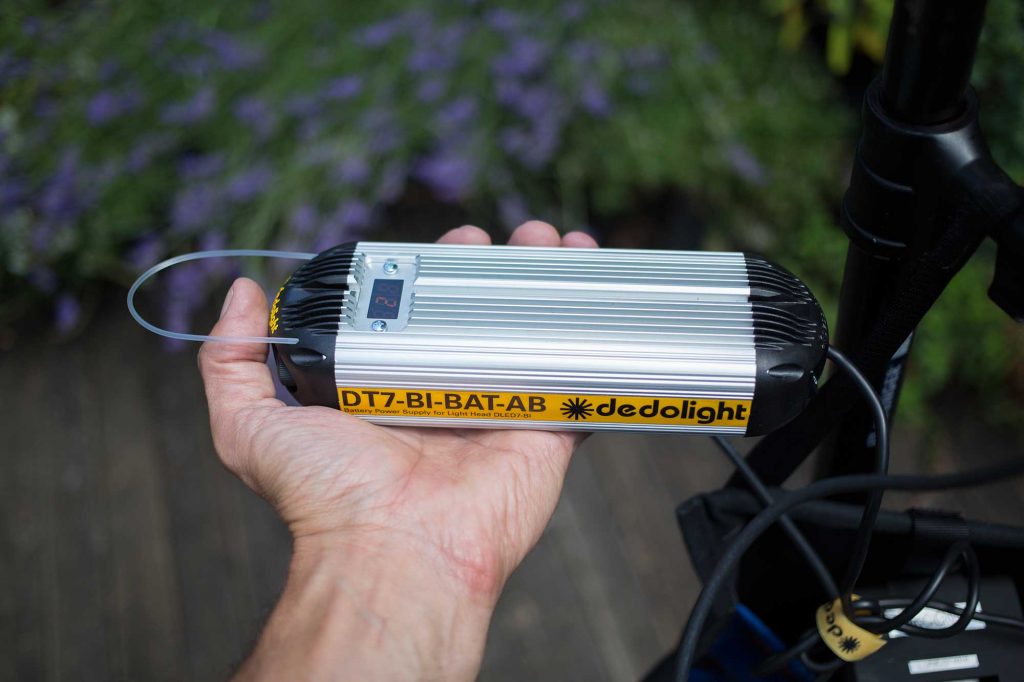
DLED7 battery ballast is rather large and heavy. It offers dimming and color temp controls and on/off switch.
The first time I used the light for more than half an hour at full power, I was surprised how hot the ballast became. The temperature increases the longer you run it all the way up to about 140 degrees, which is almost too hot to touch. I emailed Dedolight support asking whether that was a problem. I received a personal note from Dedo Weigert himself, explaining that the heat is a design tradeoff they made to keep the ballast as small as possible.
Another observation about the dimmer: it is not stepless, changing in small increments like aperture control on a Canon. The steps are small enough to not be an issue, but it’s impossible to do a completely smooth fade up or fade down the light without visible stepping, just as smooth iris pulls are impossible with Canon still lenses.
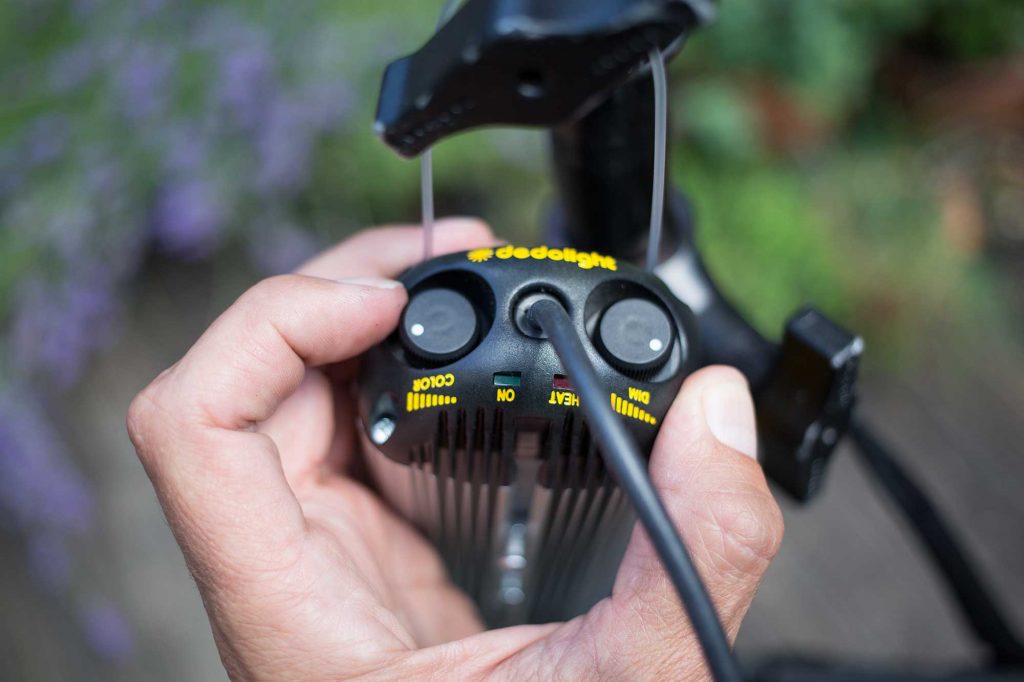
DLED7 ballast controls
The first time I switched on the light, I was surprised it wasn’t brighter. But then I realized just how bright it gets when focused. Just how bright is it?
DLED7 vs Lowel Pro Light
By way of comparison, I put the DLED7 head to head with my Lowel Pro Light, a small 200-watt light that throws a very nice beam a long way. I found that the Pro Light is about 3 times brighter when fully spotted, to the DLED7 in tungsten mode spotted equivalently (which is about half spotted). However, it’s possible to focus the DLED7 MUCH more precisely. But daylight is the great equalizer. With a dichroic filter attached to the Pro Light to bring it to 5600K, the two lights are equally bright, and with equal throw.
Wide color range
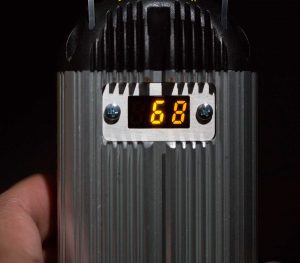
DLED7 color temp indicator
It’s worth noting that my DLED7 is slightly less bright at 3200K than it is at 5600K, by about 1/3 stop. The DLED7 goes even further up and down the Kelvin scale, though, advertised to go from between 2700K and 6800K. As it turns out, it actually goes quite a bit further up the Kelvin scale than that, as I discovered next.
Color accuracy scores
I tested the DLED7 with a Sekonik Spectromaster C-700R color meter, which reveals some interesting details about the quality of the light.
First test: How accurate is the ballast color temperature indicator vs. the actual measured color temp?
What I observed is that the DLED7 tends to run cooler than the ballast readout, and that the more you turn up the dimmer, the cooler the color temp gets. The only way I could hit 2700K, in fact, was to dim the light all the way down to 2 percent (the light is off at 1 percent), where it read 2733K.
Color temp set at 2700K:
Dim 2 percent: 2733K
Dim 10 percent: 2775K
Dim 25 percent: 2776K
Dim 50 percent: 2827K
Dim 75 percent: 2845K
Dim 99 percent (brightest setting): 2860K
Going to the far blue end of the scale, with my color temp set to 6800K, we find the same thing, only it’s even more blue-shifted. Here’s my readings:
Dim 2 percent: 6738K
Dim 10 percent: 6905K
Dim 25 percent: 7089
Dim 50 percent: 7395K
Dim 75 percent: 7459K
Dim 99 percent: 7422K
So where the DLED7 is furthest from its advertised color temp is when it’s at it’s bluest and brightest, at which point it’s about 600K over the mark. Definitely something to be aware of.
In practice, it’s pretty easy to adjust for this to hit 3200K. Just set the temp readout to 3100K, which put my readings within 100K of the target at all dimmer settings. For 5600K, though, things get trickier. At 25 percent dim, set to 5900K. At 50 percent, it wants to be at 5500K. At 99 percent, setting to 5300K got me real close. In practice, as long as you don’t mind being a few hundred K off your mark, you’ll be fine. But for precise color work? Carry a color meter and be ready to use it a lot.
How does the DLED7 stack up against other lights in terms of CRI rating?
I tested the CRI and color spectrum of the DLED7 at both 3200K and 5600K (as measured on meter, not by the color temp readout on the ballast, because those numbers are slightly different as outlined above). For this test, I used a Sekonic Spectromaster C-700R.
At 3200, the DLED7 scores exceptionally well. CRI: 97.3
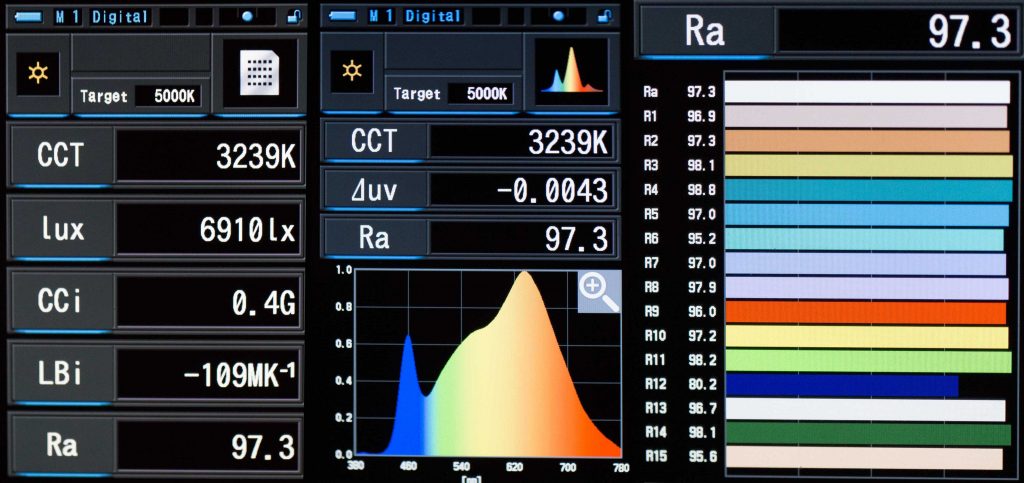
The DLED7 measured at 3200K
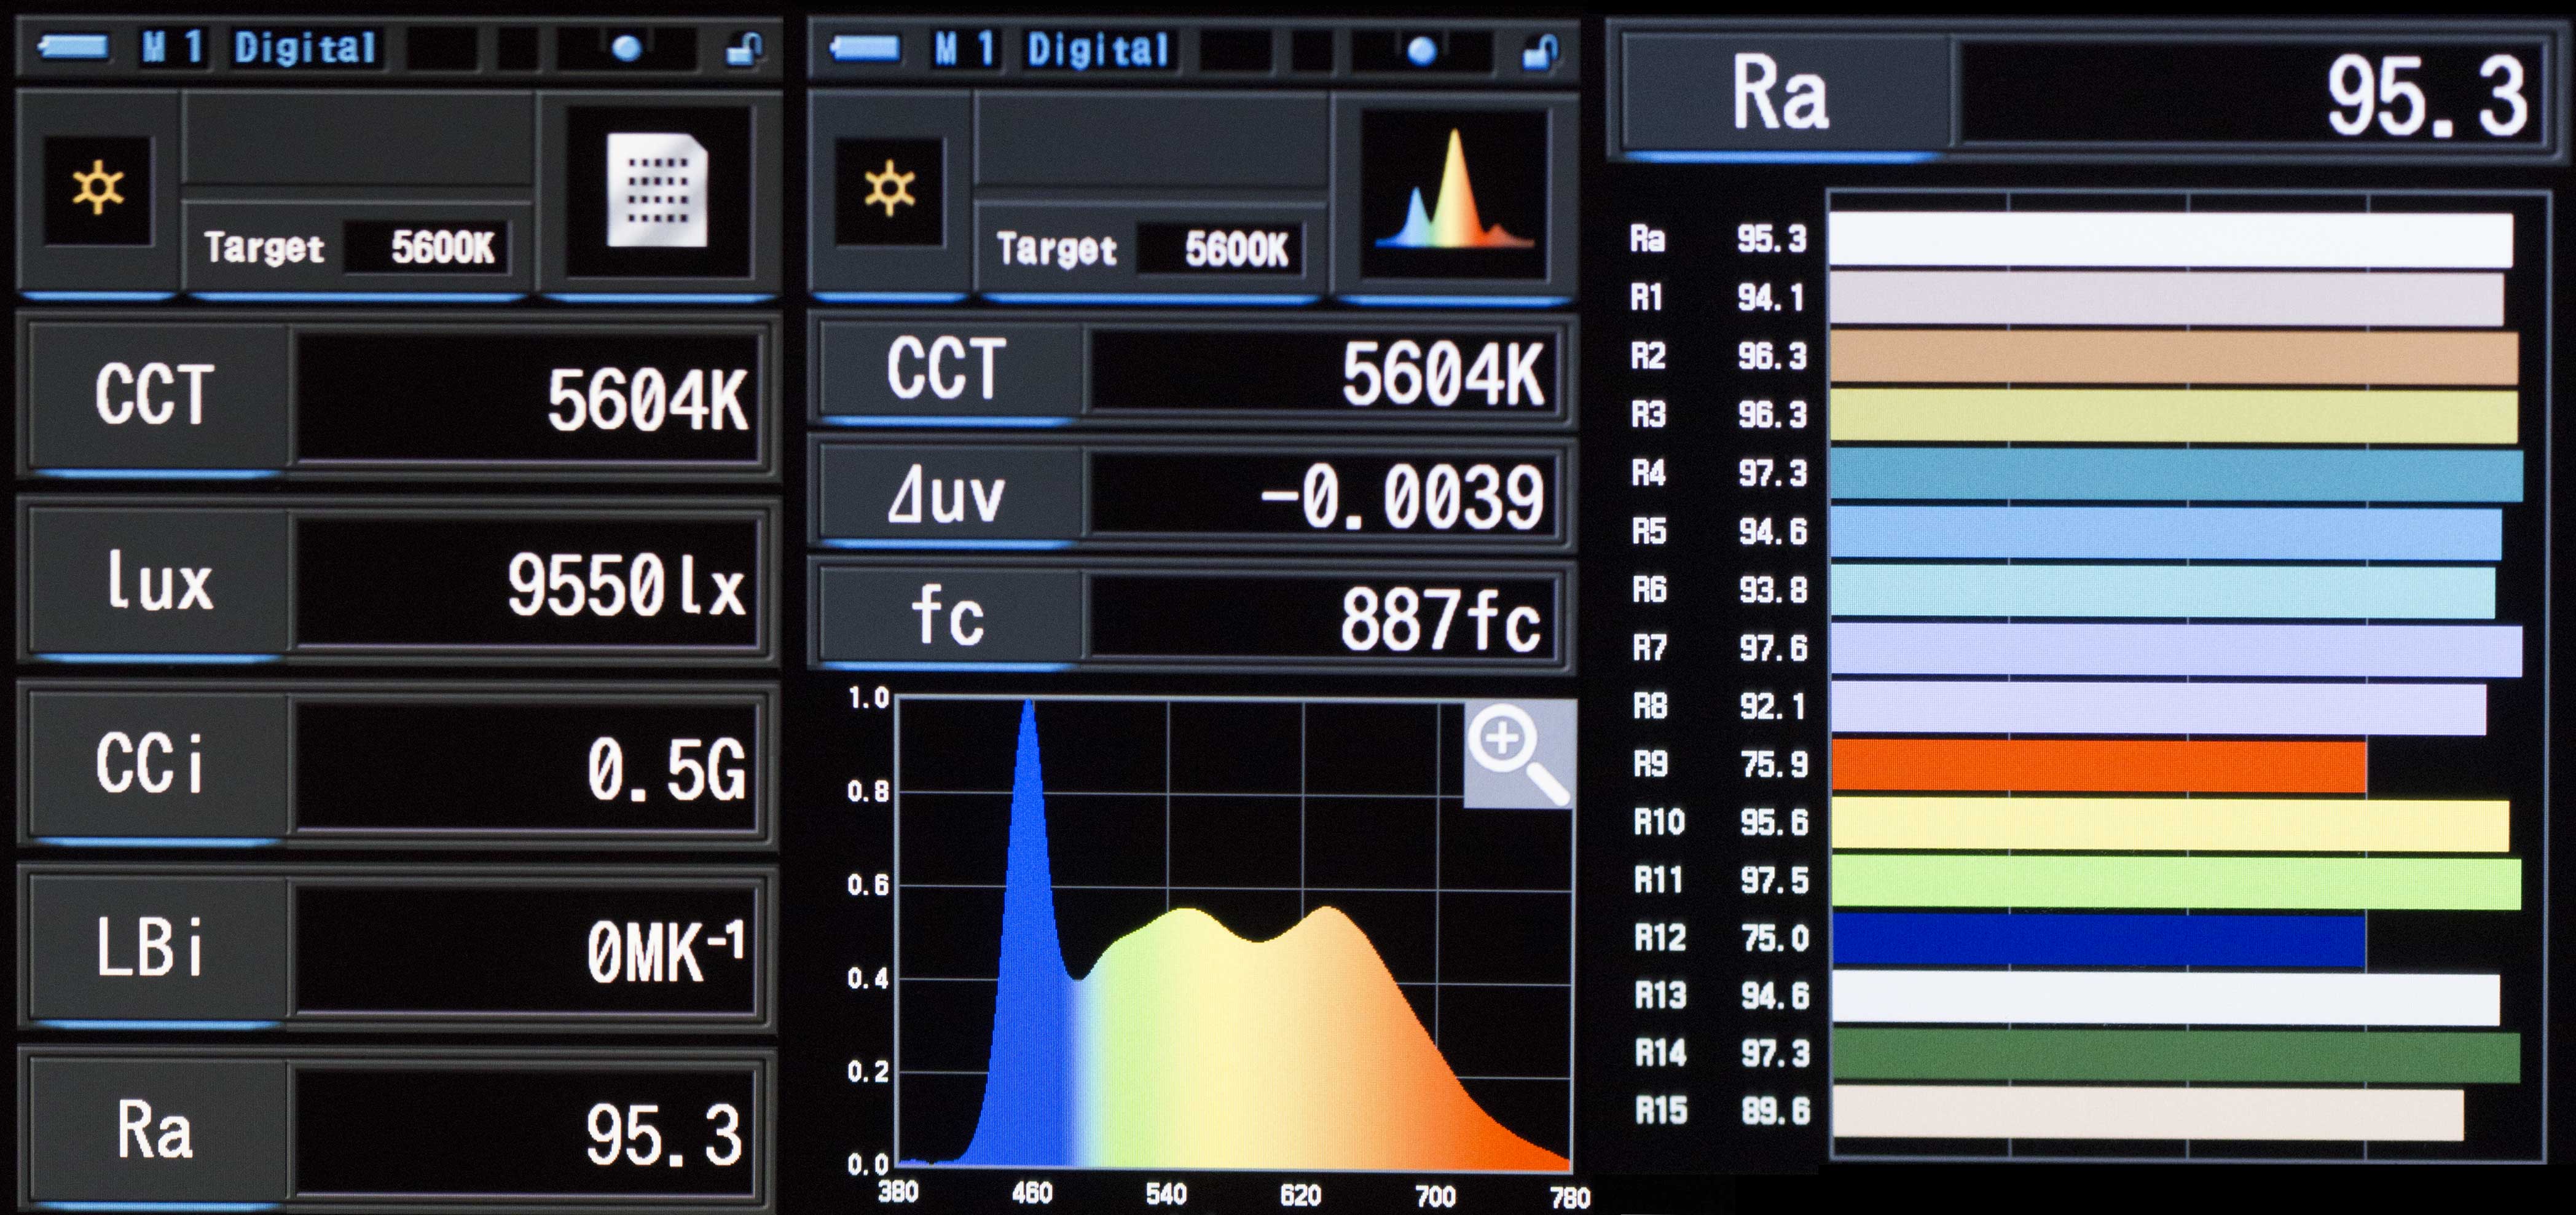
At 5600, things slip just a little a bit. CRI: 95.3

DLED7 measured at 5600K
Most notable is the R9 readout in the far right column, above. The R9 shows how well the light does in reproducing saturated reds. These are important colors for skin tones. So we would ideally like to see as high a rating as possible for R9.
It turns out, though, that scoring 75.9 in R9 is quite good for an LED light. By way of comparison, my lovely bi-color LiteGear LiteMat2 has a measured CRI of 93 and a R9 score of 73.2 for daylight and only 64.4 for tungsten. And yet, it still produces fabulous results with skin tones.
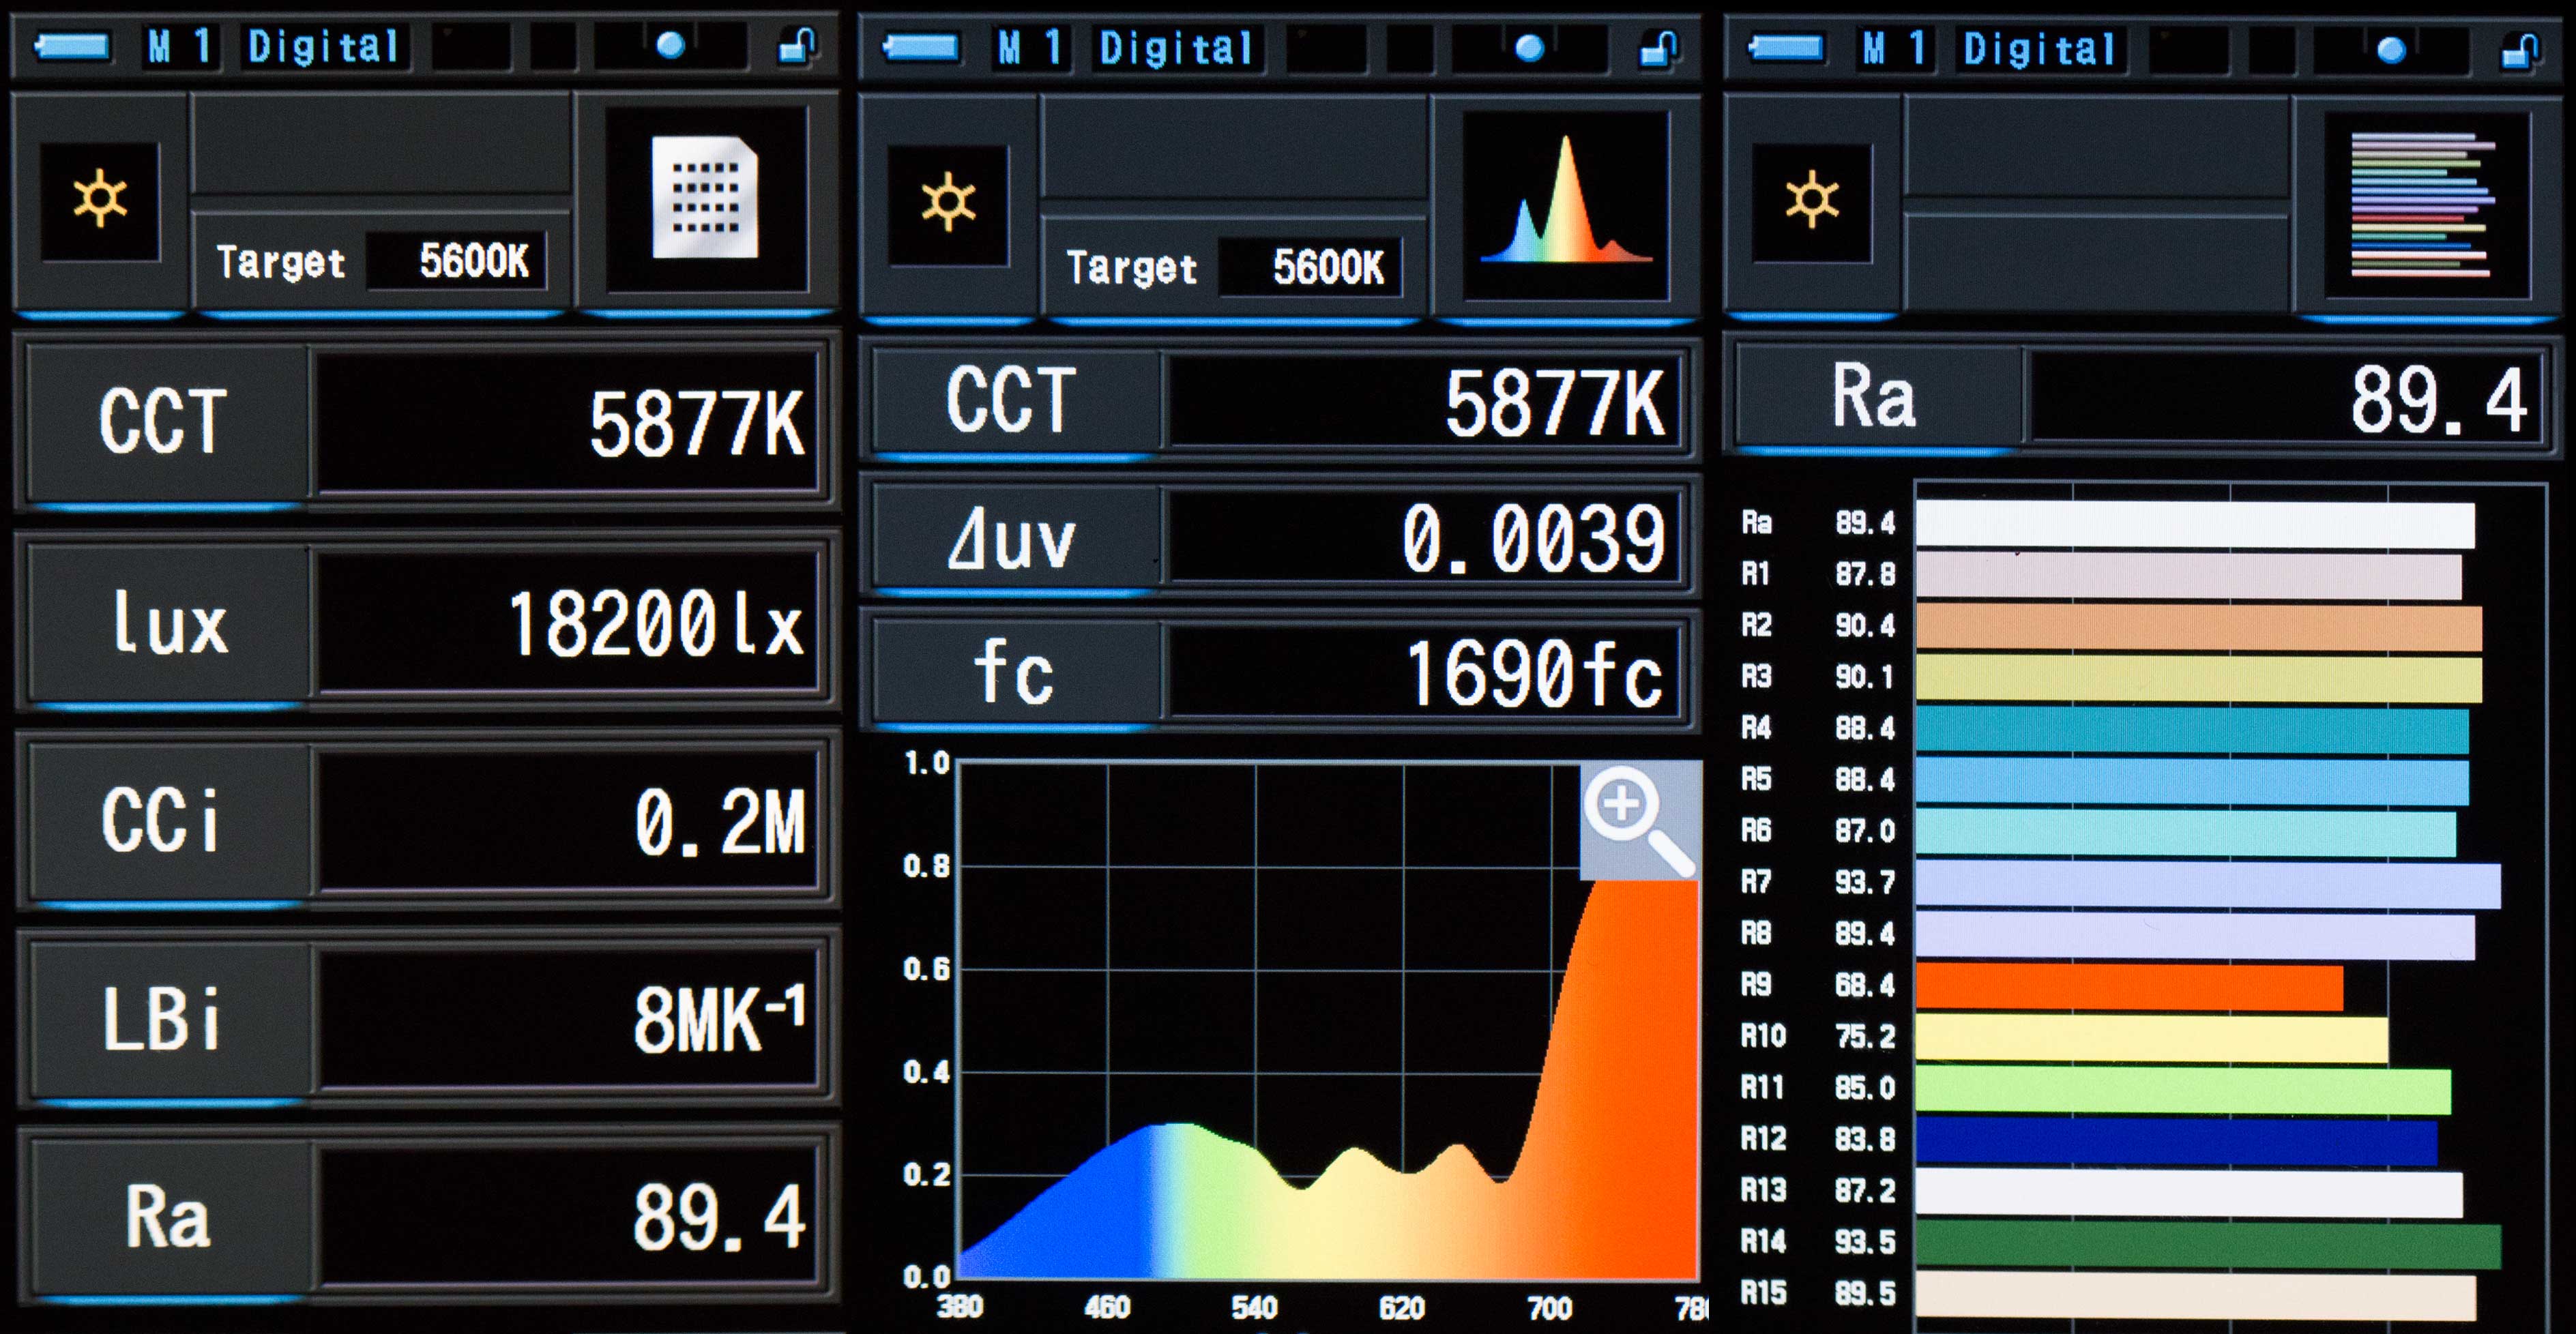
To illustrate why, consider this: professional gaffers wouldn’t hesitate to place a full CTB filter over a tungsten light to match daylight. But guess what that does to the R9 score of a tungsten light? See for yourself (measured with my Lowell Pro Light and full CTB):
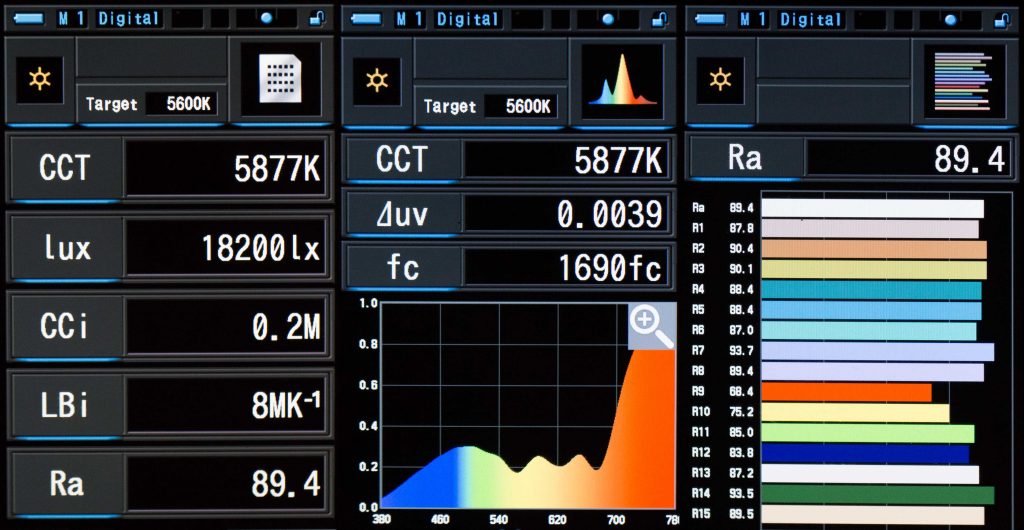
A tungsten light corrected to daylight with full CTB filter reveals an even lower R9 score of 68.4 with a CRI of 89.4.
Suffice to say, if the Dedolight DLED7 is posting scores that easily beat a tungsten light corrected with CTB, it’s more than good enough for film production work.
For information about how this light stacks up against other LED film lights, check out the very comprehensive light test results published by Indie Cinema Academy. As of this writing, their tests do not include ratings for the DLED7.
A few tips for getting the most from the DLED7:
Glue black felt on the barn doors (the two larger ones, not the small adjustable ones). Because they no longer get hot, adding light-absorbing material to the surface of the doors makes them less reflective and improves their light shaping ability tremendously.
The barn doors feather the light when it is spotted, and cut it when it is flooded. For example, if you rake the light along a wall at full spot, closing the barn doors on the wall side, you can feather the light to spread it evenly across the wall, achieving the same effect as a graduated scrim.
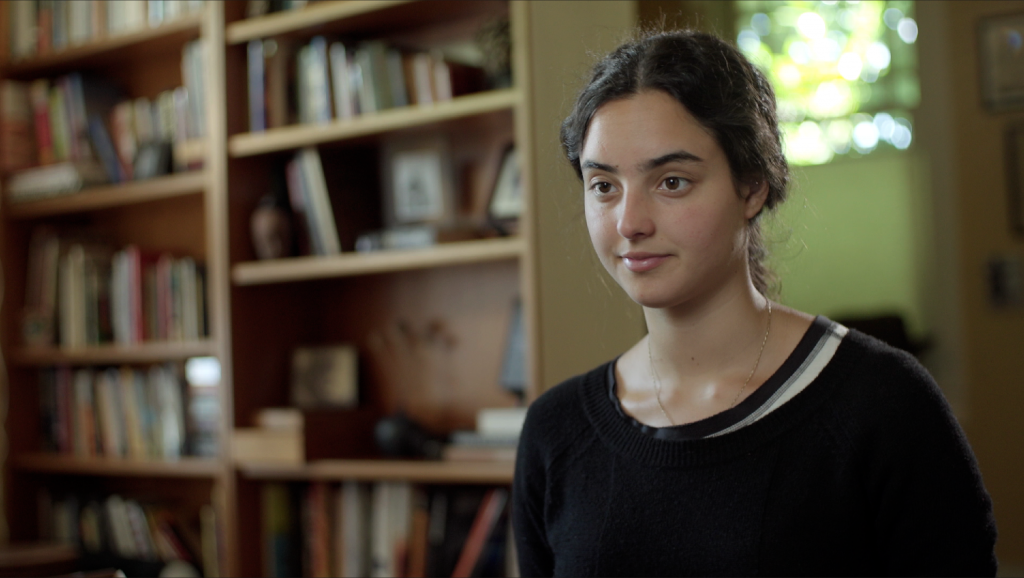
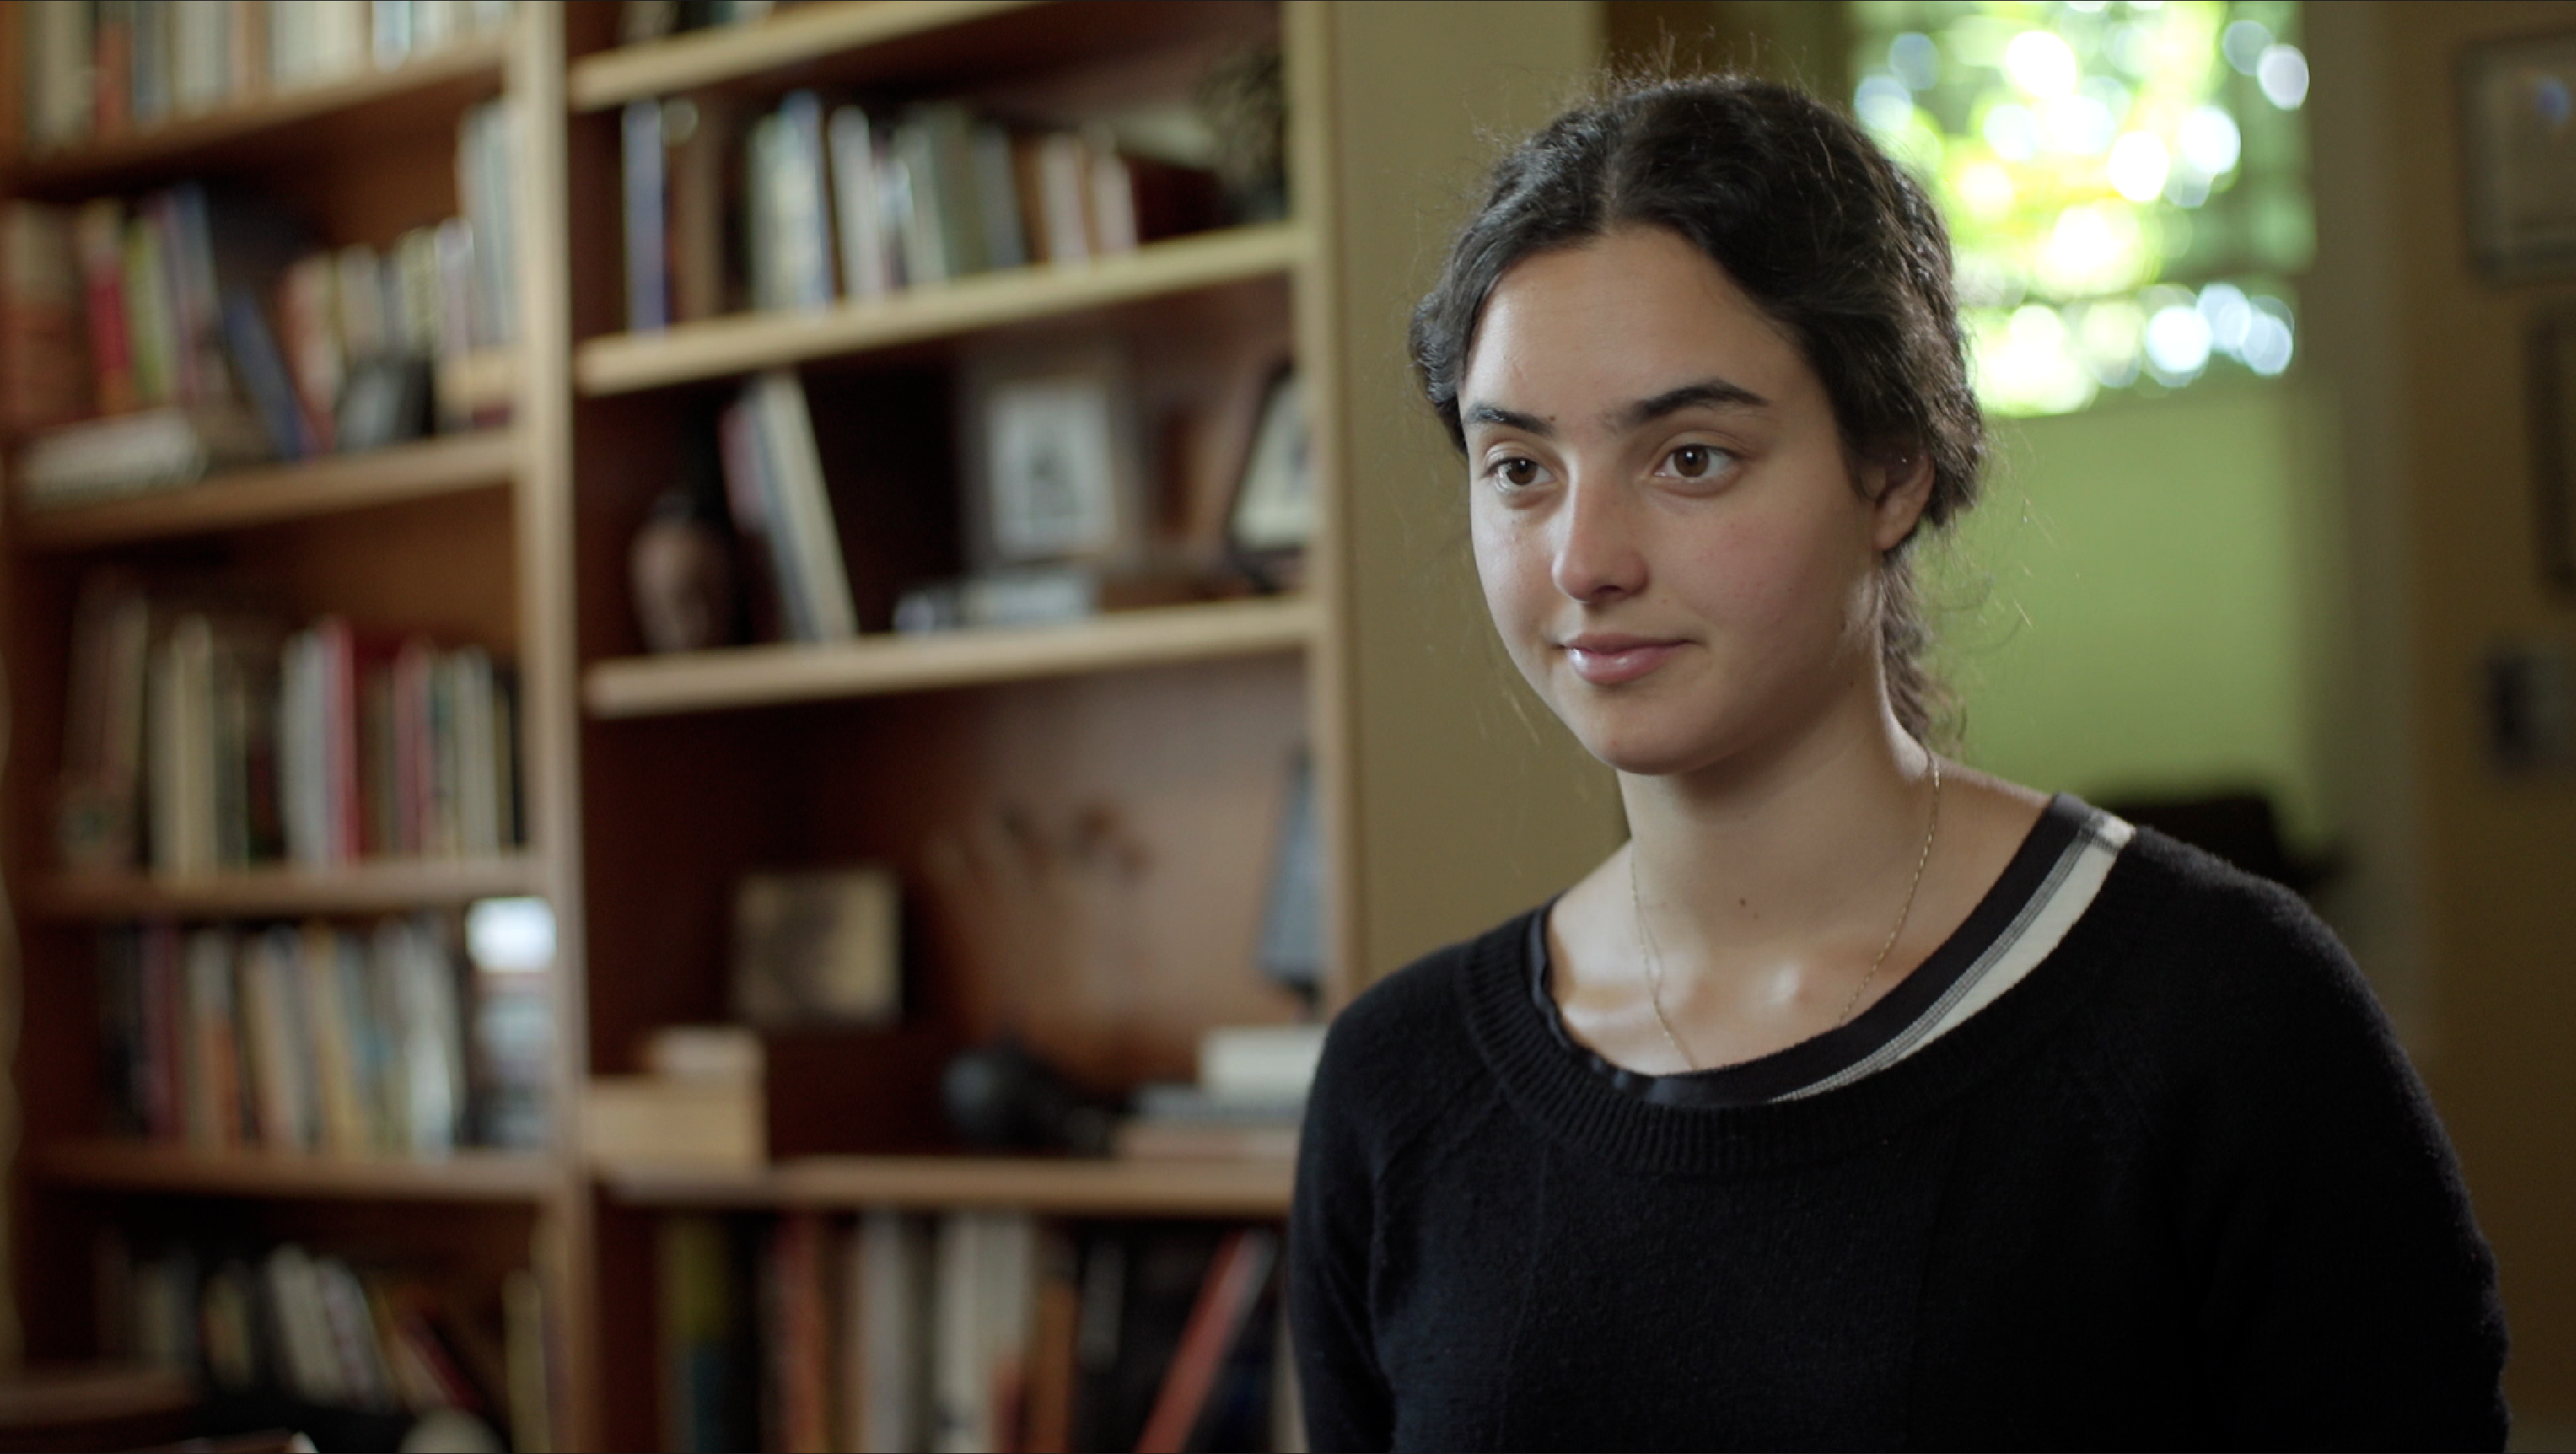
DLED7 as motivated rim light, with barn doors used to feather light as it falls off subject’s camera-right shoulder.

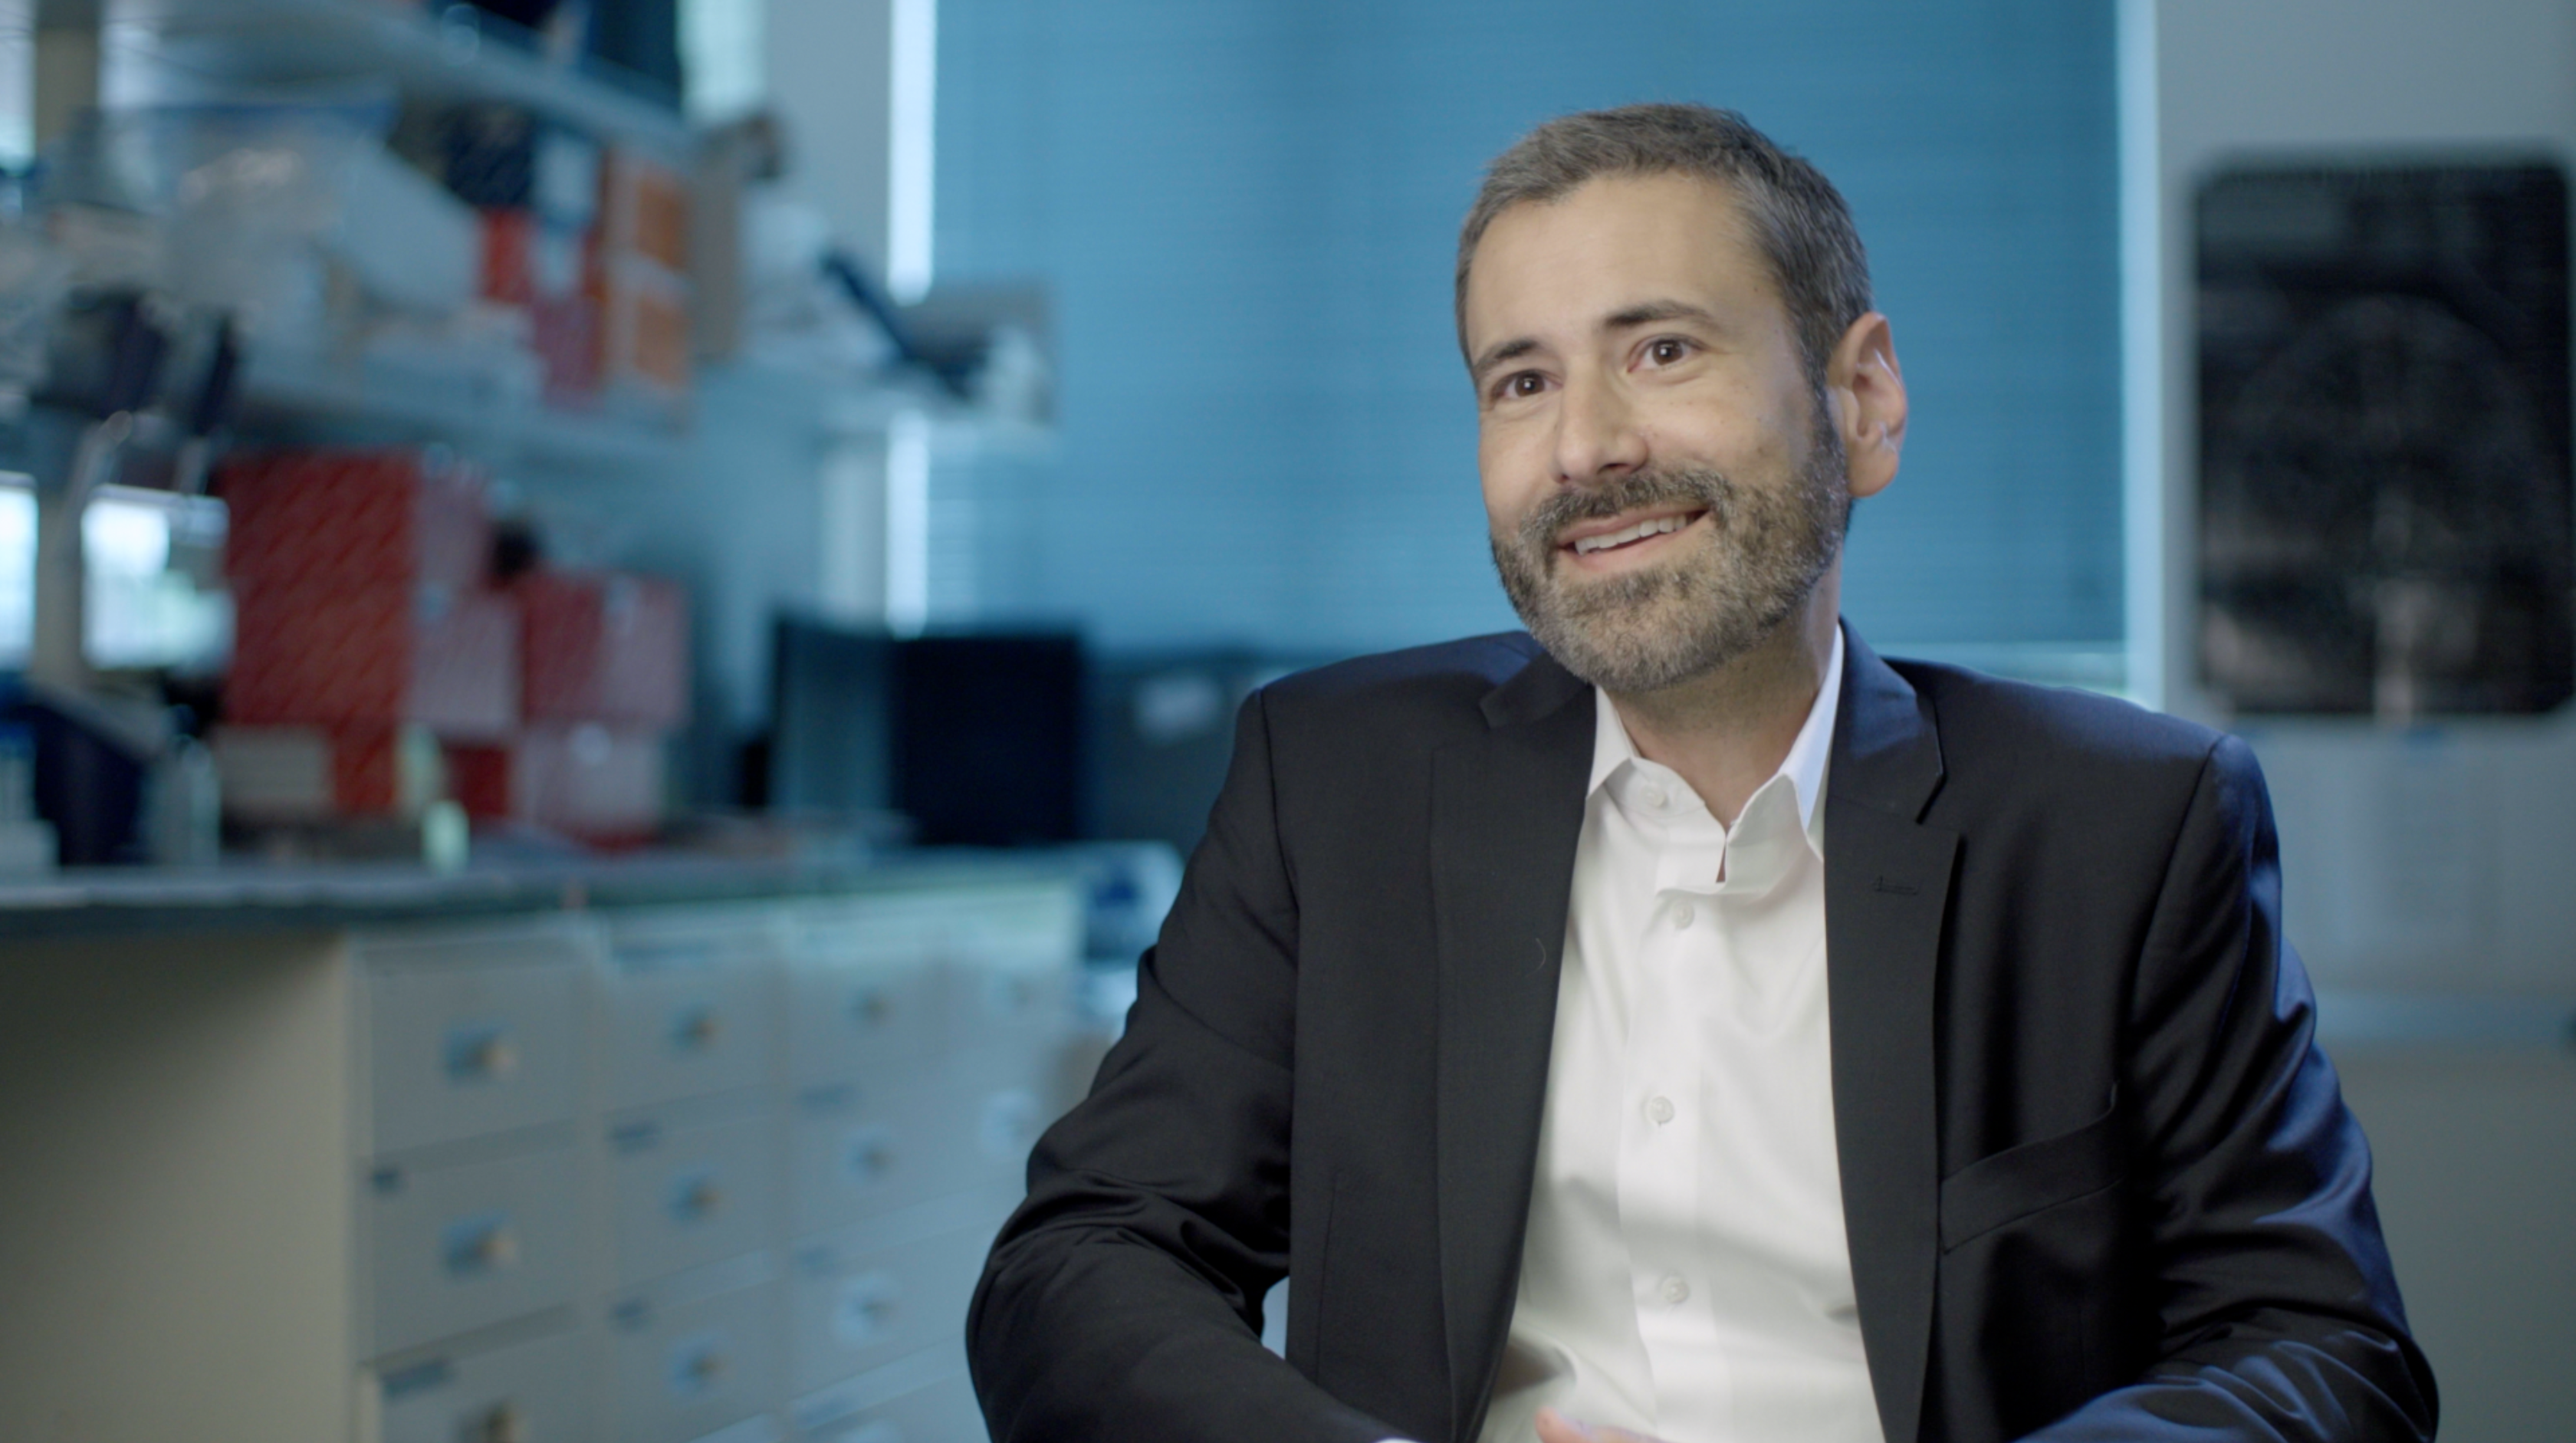
DLED7 as back light, visible as the splash of blue light on subject’s camera-right shoulder.
The power connectors on the ballast are well designed, and have plenty of length to allow you to run the light up a stand without fuss.
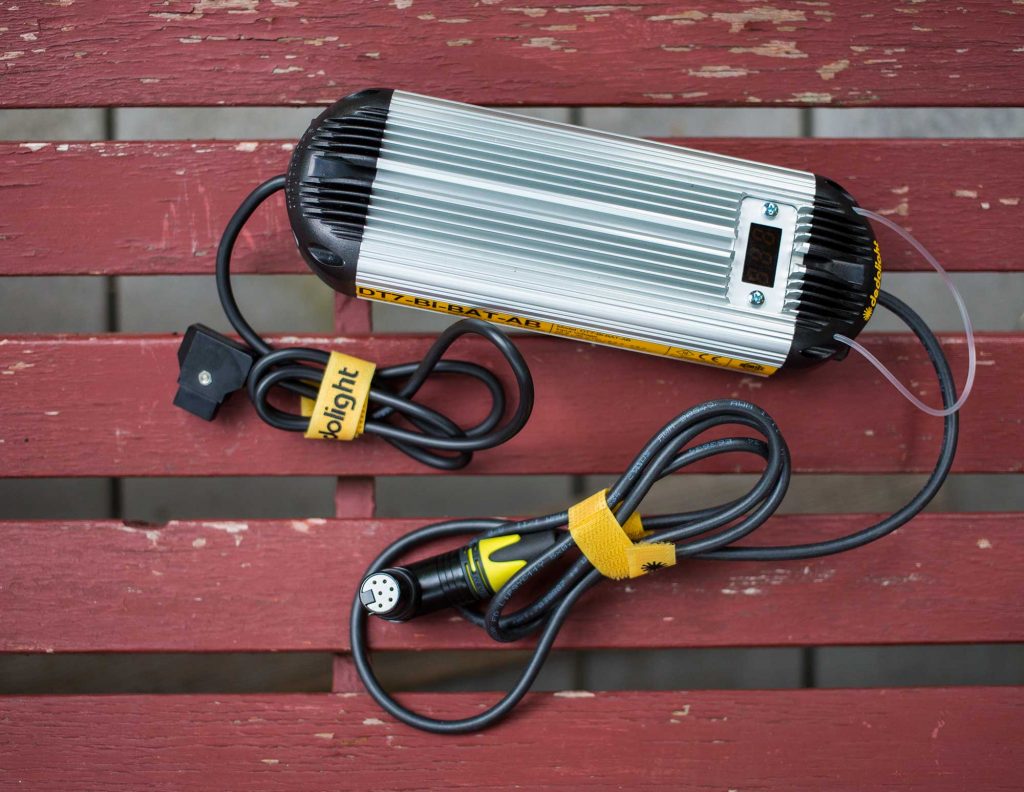
DLED7 battery ballast

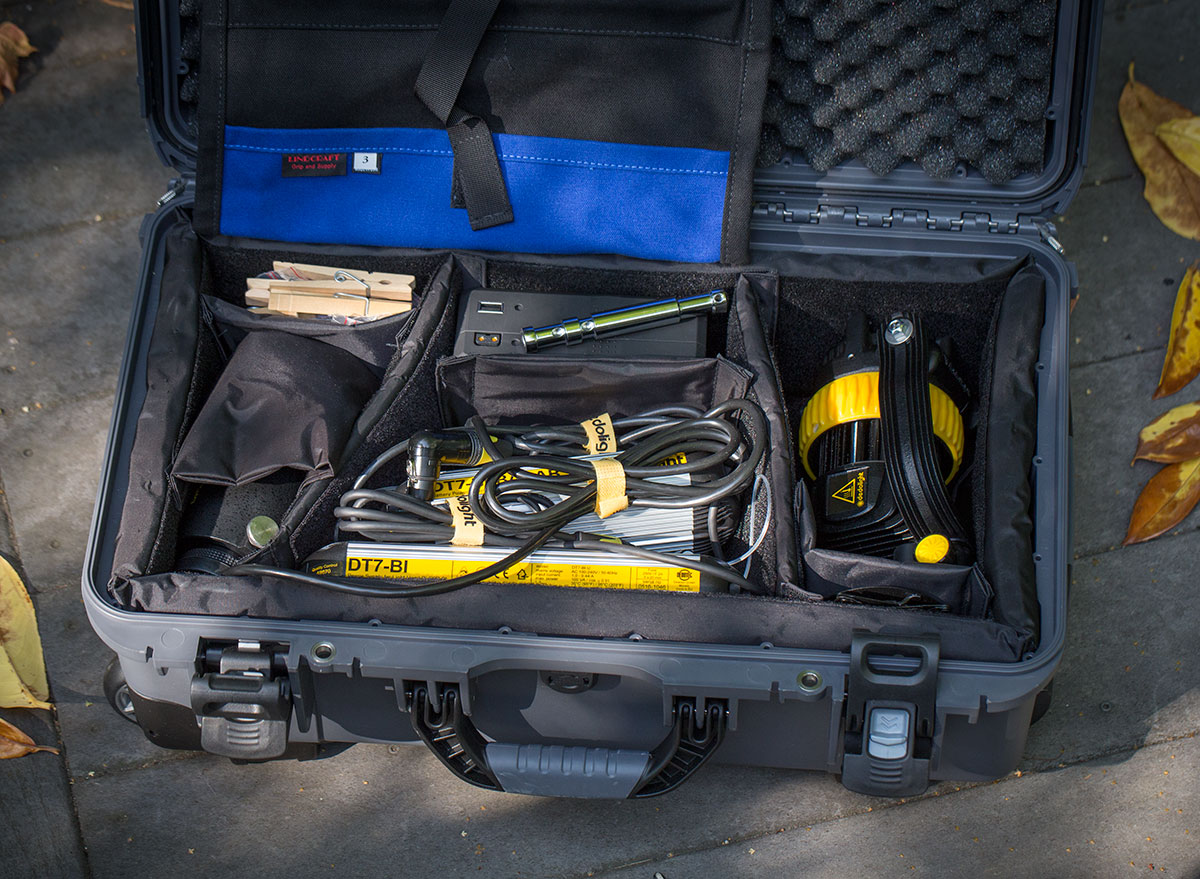
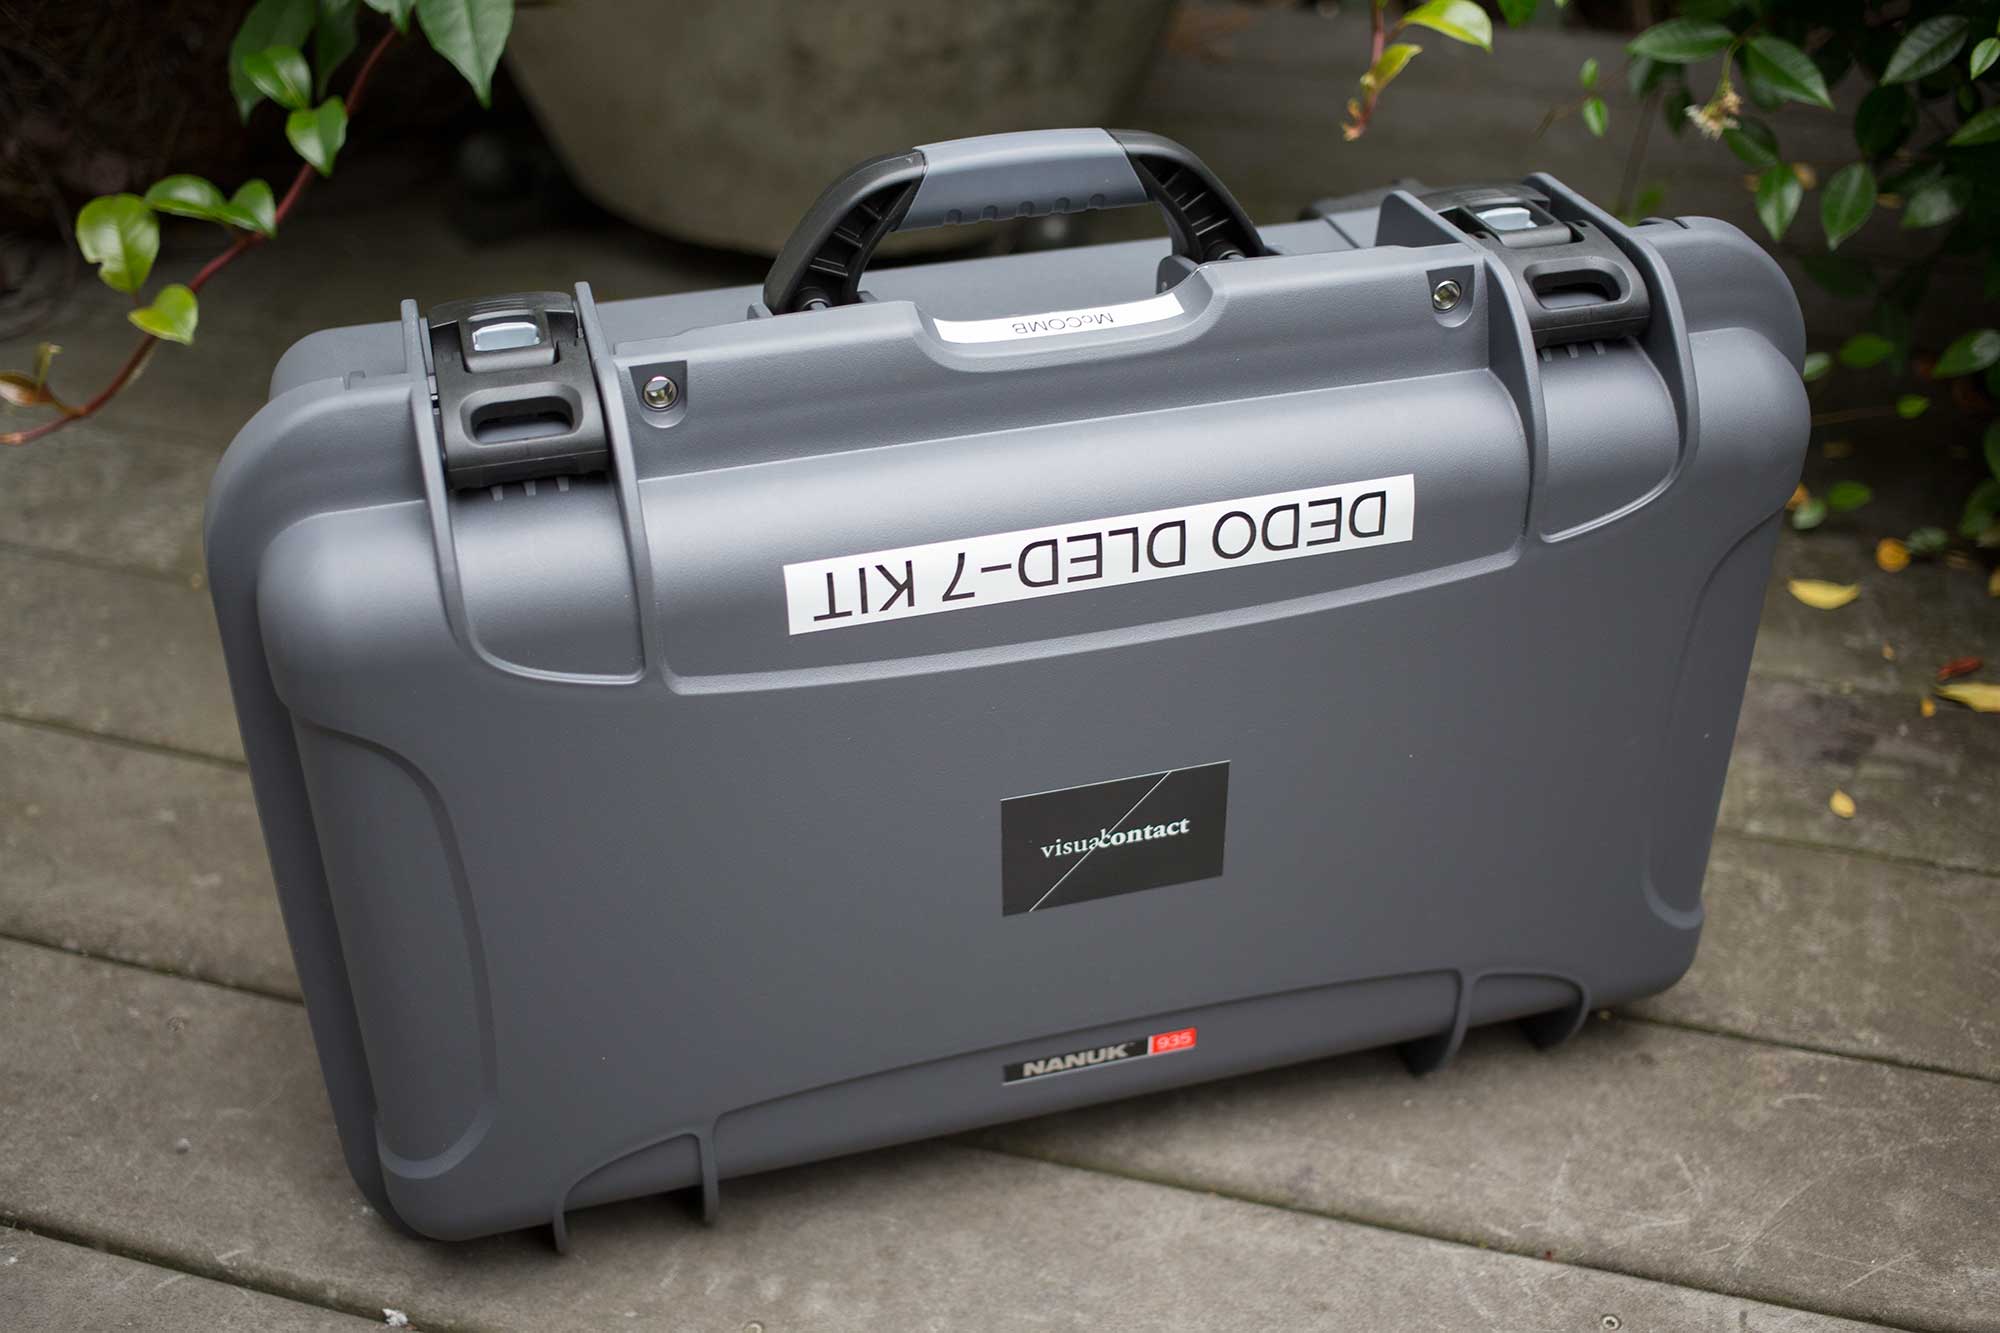
My DLED7 kit all ready to roll in Nanuk road case, with both AC and DC ballast.
Hanging the DLED7
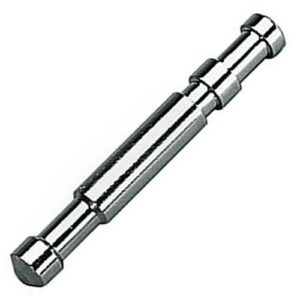
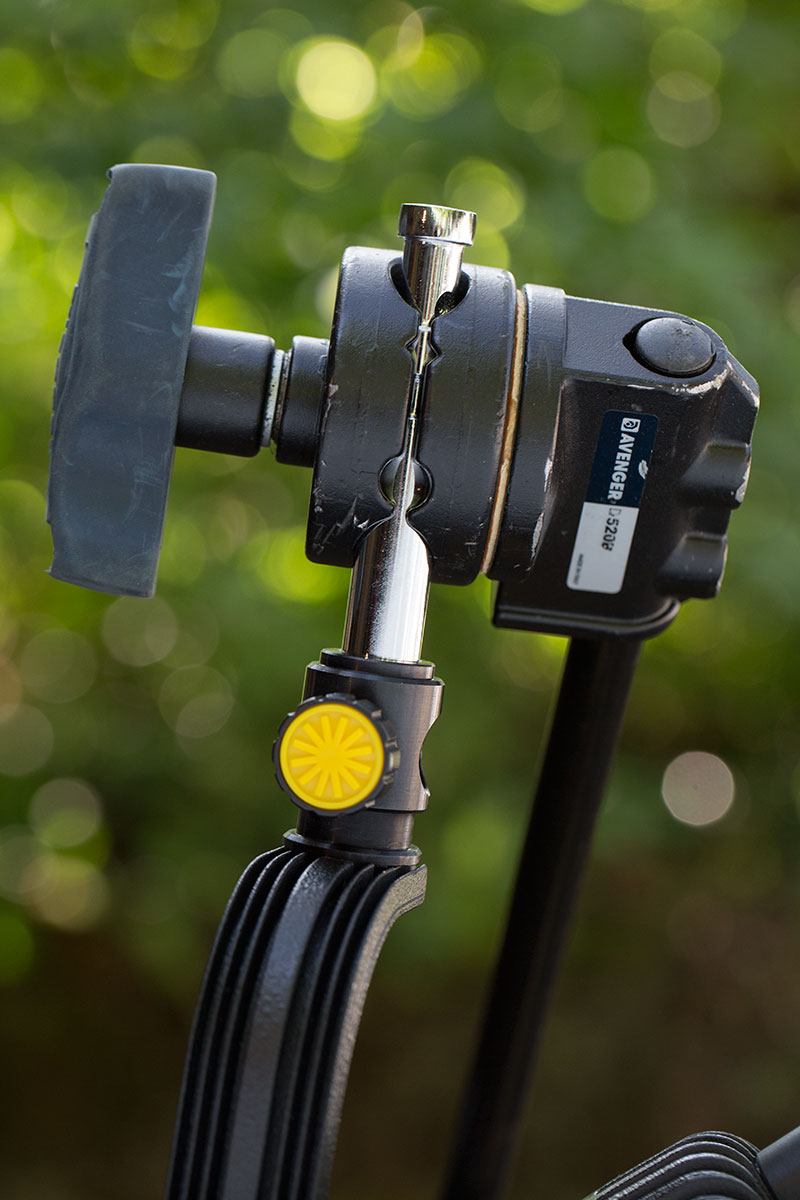
Avenger baby pin
I’ve found that the best way to mount the DLED7 on a stand is with the aid of a 5/8″ baby pin. The yellow mounting screw on this light is a little funky, requiring like five turns to mount it to a light stand. And because it’s bottoming out at that point, it has to be over-cranked to get a firm enough bite to keep the light from slipping.
Using a pin gives you a lot more flexibility in how you mount the light, and because the 5/8″ pin is ticker than a standard light stand, it doesn’t have to be over cranked.
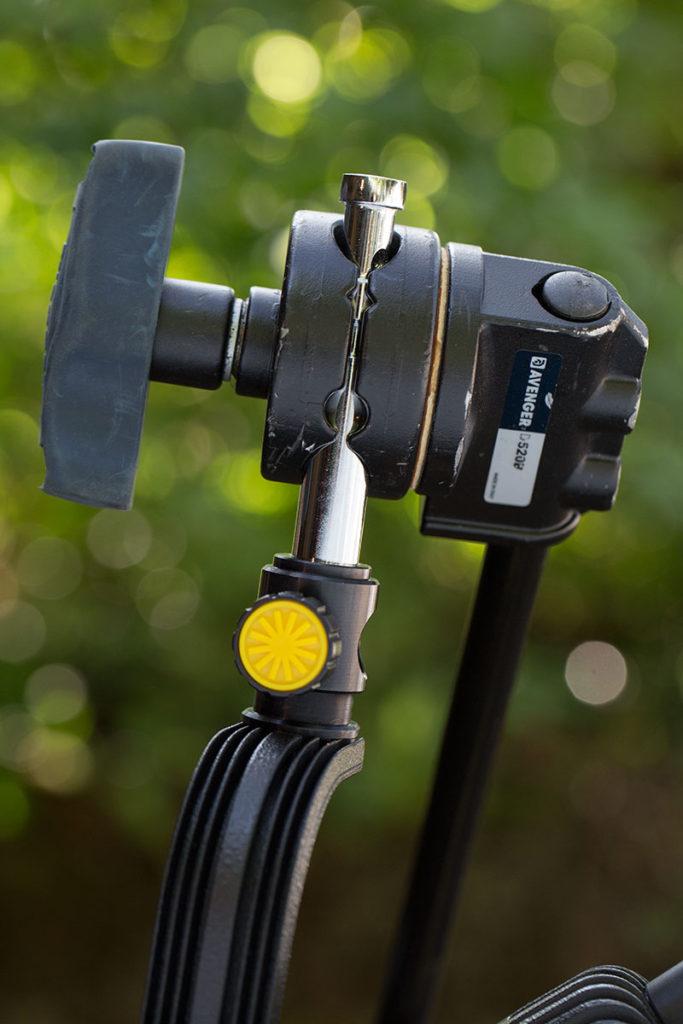
Mounting DLED7 to stand using a 5/8″ baby pin allows more flexibility and security
A Norm’s Pin isn’t a good choice for this, because the DLED7’s receiver isn’t deep enough to engage properly. Instead, I use an Avenger E250 Long Double 5/8″ Baby pin which has a shallower lip. As a bonus, the Avenger baby pin also fits perfectly into a Manfrotto Boom Stand.
So, here’s what it all boils down to:
CONS
- Pricey and doesn’t include required accessories.
- LED version isn’t as bright as its tungsten predecessor.
- Currently it’s a special order item in the US.
- Measured color temperature runs cooler than ballast indicators display.
- Dimming, especially at cool end, shifts the color temperature.
PROS
- Wide color temperature range from 2700k – 7400K (measured)
- Very portable
- Dimming at warm end without significant color shift
- Battery operable for long periods
- Controllable, even light spread
- Exceptionally focusable
The DLED7 is very special location light that can do what no other LED light can do in terms of focused throw with virtually zero light spill. It’s very easy to place a light or a shadow exactly where you want it with this light. It excels as a background light, and as a back light, rim light or hair light. For some kinds of commercial work, such as photographing a beer label illuminated just perfectly, it’s in a class all by itself. It’s portability, battery operability, and huge color temperature range make it the swiss army knife of location lights.
But at $1700, it’s also quite expensive and doesn’t ship with required accessories (you have to add a ballast, and the one for battery use costs over $500 and the one for AC use costs more than $700). The DP 2.1 projector with 85mm lens adds another $477. DP EYESET diffusers adds another $116. Barn doors: $50. Also, the ballast color temperature readout isn’t fully accurate, and especially at the cooler end of its spectrum, the light shifts color temperature as it is dimmed.
Nevertheless, this is a light that gives you real lighting superpowers: the ability to decide exactly where to place the light and shadow in your frame, at whatever color temp you want, without a power cord. I recommend it without reservation. It’s exceedingly well made and precise, exactly what you’d expect from a Dedolight. And the premium price is something we in the film industry expect to pay for top gear. I look forward to recouping that expense over the many years of service this light is likely to give me.
Want to try it out for yourself? Rent my Dedolight road kit, which includes all the above items, via Cameralends.com. (Seattle pickup only please.)
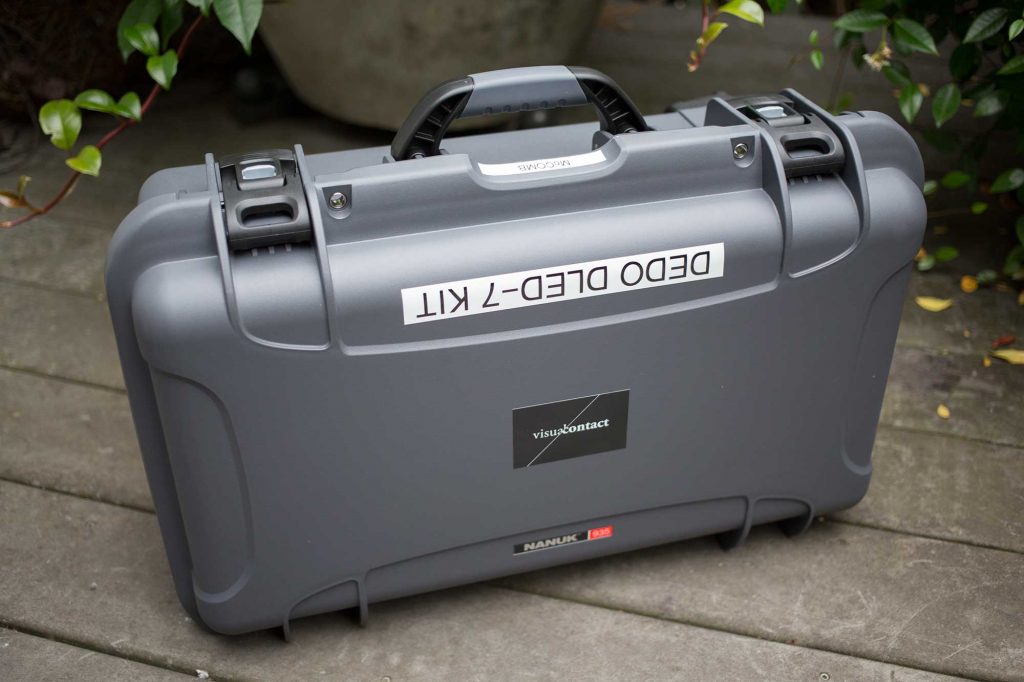
DLED7 kit ready to roll in Nanuk 935 case