My biggest complaint about MixPre and Zoom H4N is that they are both battery hogs. I’m sick and tired of getting interrupted midway though shoots because my Zoom or Mixpre batteries need to be changed. I priced several industry-standard NP battery distribution systems, and they just seemed way overpriced, and frankly more than I need. Would it be possible for me to build a bomb-proof power distribution system with a Tekkeon My PowerAll MP3450i battery and inexpensive parts?
After about a week of ordering parts and teaching myself how to solder, I’m happy to say the answer is, definitively, yes. Including the cost of soldering iron and 3rd hand soldering clamp, I was able to build a power distribution system that will power my audio bag all day and then some, for $205.00. Here’s what it looks like, and how to make it.
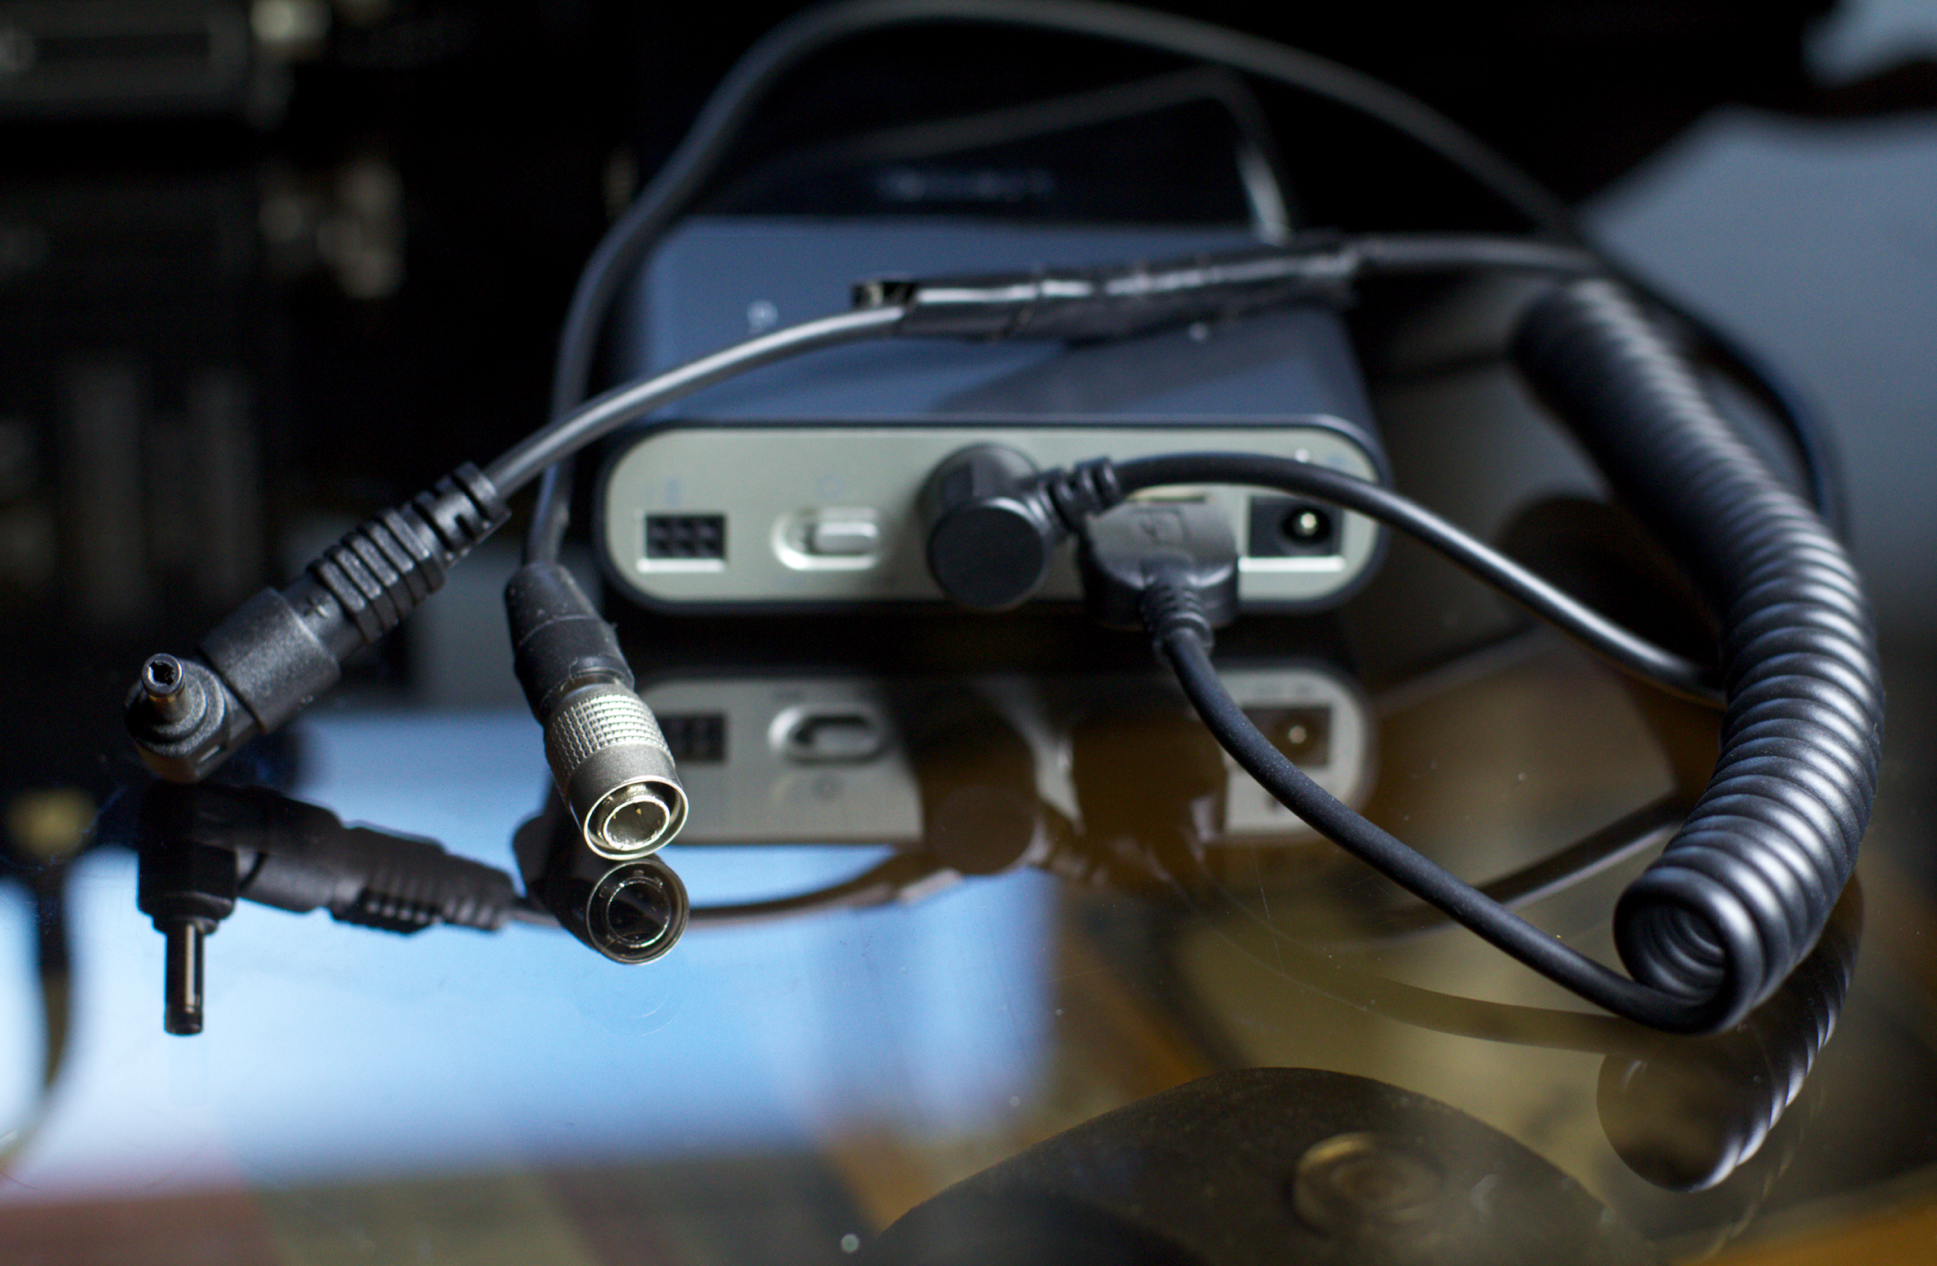
The battery and the DIY cables:
Ready to roll all day long:
Parts list:
- Gomadic Coiled USB Cable for the Zoom H4n with Power Hot Sync and Charge capabilities ($17.95)
- Hirose 4-pin power connector HR10A7P4PR ($12.32)
- Tekkeon myPower ALL Plus MP3450i battery, which you can set to provide 5-19 volts of power. ($139.99)
- MyPower Original Adapter Tips Set ($16.95)
- Tekton 7521 Helping Hand soldering holder with magnifying glass. ($9.80)
- Right-angle power cable for Tekkeon ($7.95)
The Tekkeon has two DC outputs: one is a variable voltage cable that supplies between 5 and 19 volts (set via a dip switch on the battery). The other is a USB out that provides 5 volts no matter what the rest of the battery is set to. The Zoom requires 5 volts, so it’s the obvious choice. This was theoretically the simplest cable – I ordered this one only and it was supposed to come with everything to immediately connect up to the Zoom, but they shipped me a unit with a tip that wouldn’t work with the Zoom. I was able to splice the correct connector by cutting off the tip of the Tekkeon power cable that I also ordered (see below), and putting on the appropriate tip, which Tekkeon sells in this pack of connectors. Just splice and solder the red and black wires together, and ignore the white and green usb data wires.
I didn’t want to perform surgery on the Tekkeon power cable that came with the unit, because I sometimes want to power my LED light with it. So I ordered one of the fine right-angle connectors from Tekkeon, which present a lower profile in the audio bag when plugged in. I cut the tip off it (which I put to work as outlined above), and got ready for the most challenging scene in this DIY drama: mating with the Hirose 4-pin male connector required by the MixPre.
First, you have to uncouple the Hirose connector, and remove the 4-pin connector that you must solder to. It unscrews from inside the main unit – I used a pair of needle nose pliers to get it turning, and then it came out by hand. Others recommend plugging it into your MixPre, which gives you a better grip to unscrew from. Here’s a picture that shows the Hirose broken down into it’s component parts, ready for soldering.
Soldering the Hirose 4-pin connector is not a trivial undertaking. The pins are very tiny, and my hands are the opposite of nimble. So a third hand device was mandatory for me, which I found for about $10 on Amazon, including a magnifying glass for extra credit. The magnifying glass turned out to be mostly useless, but the alligator clips were essential to holding everything in place during my many soldering attempts. The trick: pre-tin the cups and the wires, so that things bond quickly as soon as they’re hot. But first, which wires go where?
Knowing that the MixPre will simply ignore power that is the wrong polarity, I set about soldering different combinations until I found the right one. It took me 5 tries before I found the winning combo: #4 pin to positive (red), and both white AND black get soldered to the #1 pin. As I was grinding my way through the ordeal, some solder dripped onto the #2 pin while I was soldering the two cables to #1 pin, connecting the #2 and #1 pins with the both the black and white wires. So bit of a cluster there. Anyway, it works. (I think the #2 pin is ignored in this wiring scenario).
Oh, there’s one more thing. Once I had everything soldered up correctly, I realized I’d forgotten to slide the rubber jacket and screw-in body of the Hirose connector onto the cable BEFORE I started soldering. Which of course meant I had to redo everything. Don’t do that.
There’s some discussion in the forms about what voltage is ideal to set the battery to provide to the MixPre, which will accept anything from 5-18 volts. I chose 9 volts and it works great. The lights are much brighter on the MixPre when it’s powered this way, and it seems to power mics a bit hotter with 9 volts than it does with the internal AA batteries.
As a bonus, I discovered that both the Zoom and MixPre fail over to internal batteries automatically without interruption if the Tekkeon is accidentally switched off, runs out of battery, or if their cables come loose. Sweet.
Thanks to following websites for help: TaperJ on Tappersection.com has great advice on wiring Hirose connectors. Also thanks to instructables.com for advice on how to solder wire correctly.


