Apple’s ProRes Raw is the most exciting thing out of NAB this year. Fancy new LEDs that immitate police lights are cool, but they will be surpassed by even cooler lights within a year or two. ProRes Raw, however, is going to be with us for a long time. And for good reason.
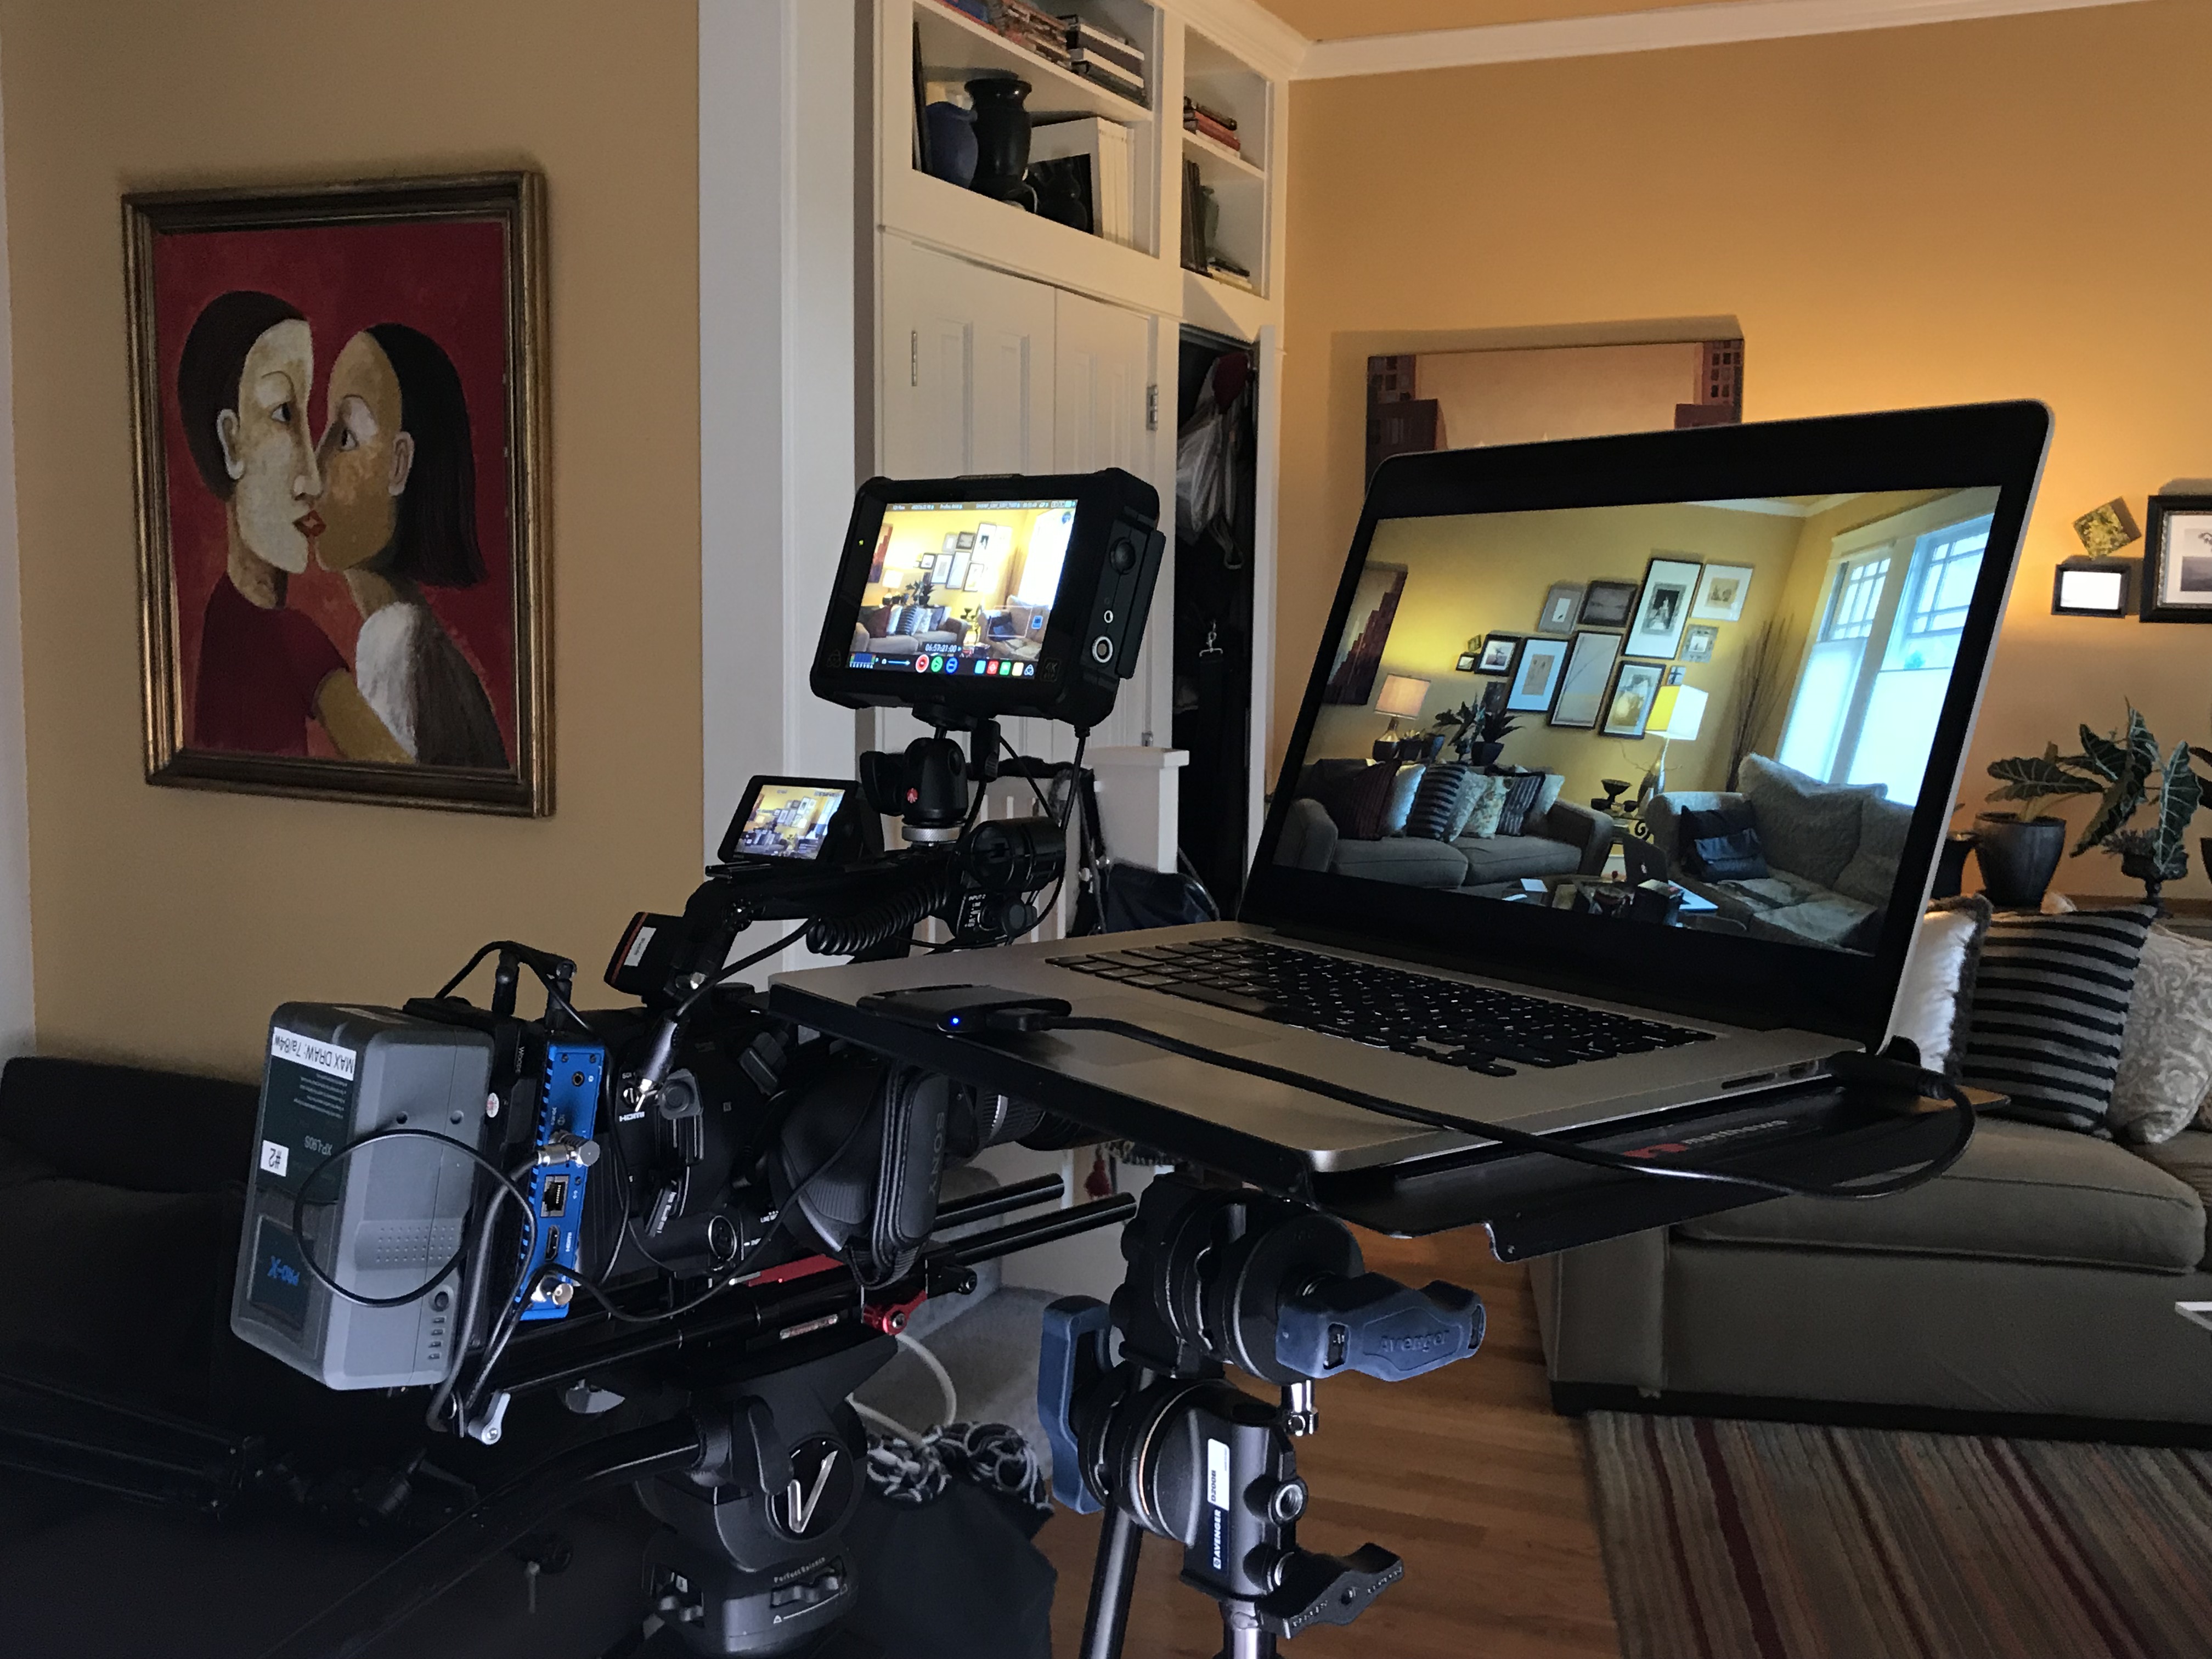
I’ve been playing with ProRes Raw for the last few days, using my Sony FS5 and Shogun Inferno, bringing the footage into Final Cut Pro X to learn how it works and what it can offer me and my clients.
First of all, let me just say, I’ve never been a big fan of 4K. Few of my clients ask for it, and when they do, it slows me down in my post-production by a factor of three or four. So it’s expensive. Everything takes forever to render, and in the end, we invariably end up delivering HD anyway. So why shoot it?
Well, ProRes Raw just gave us some pretty compelling reasons.
- First, it doesn’t slow your editing down nearly as much as before. I found that by setting playback to “Better Performance” in FCPX, I was able to play back a ProRes Raw 4K timeline on my late 2013 MacBook Pro without any frames dropping.
- Secondly, to get ProRes Raw using FS5 and Shogun, you MUST acquire in 4K. There’s no option to record a 2k signal, apart from recording in high frame rates. So it would take a lot longer to down convert your footage and transcode to HD than to stay in 4K.
- Thirdly, the options you get in post by acquiring the raw and the 4K are actually pretty cool given that they no longer slow you down the way they used to.
So, if you could have a Tesla for the same price as a boring gas car, which would you buy? (Only, you’re going to have to wait a long time for that Tesla, and you can have ProRes today.)
Consider this:
- No transcoding = no need to make dailies. Your raw files ARE your dailies – and you can change your mind about camera LUTs later without re-rendering 🙂
- 12-bit color depth. Woot.
- File sizes aren’t much bigger than current flavors of ProRes
So how does it work?
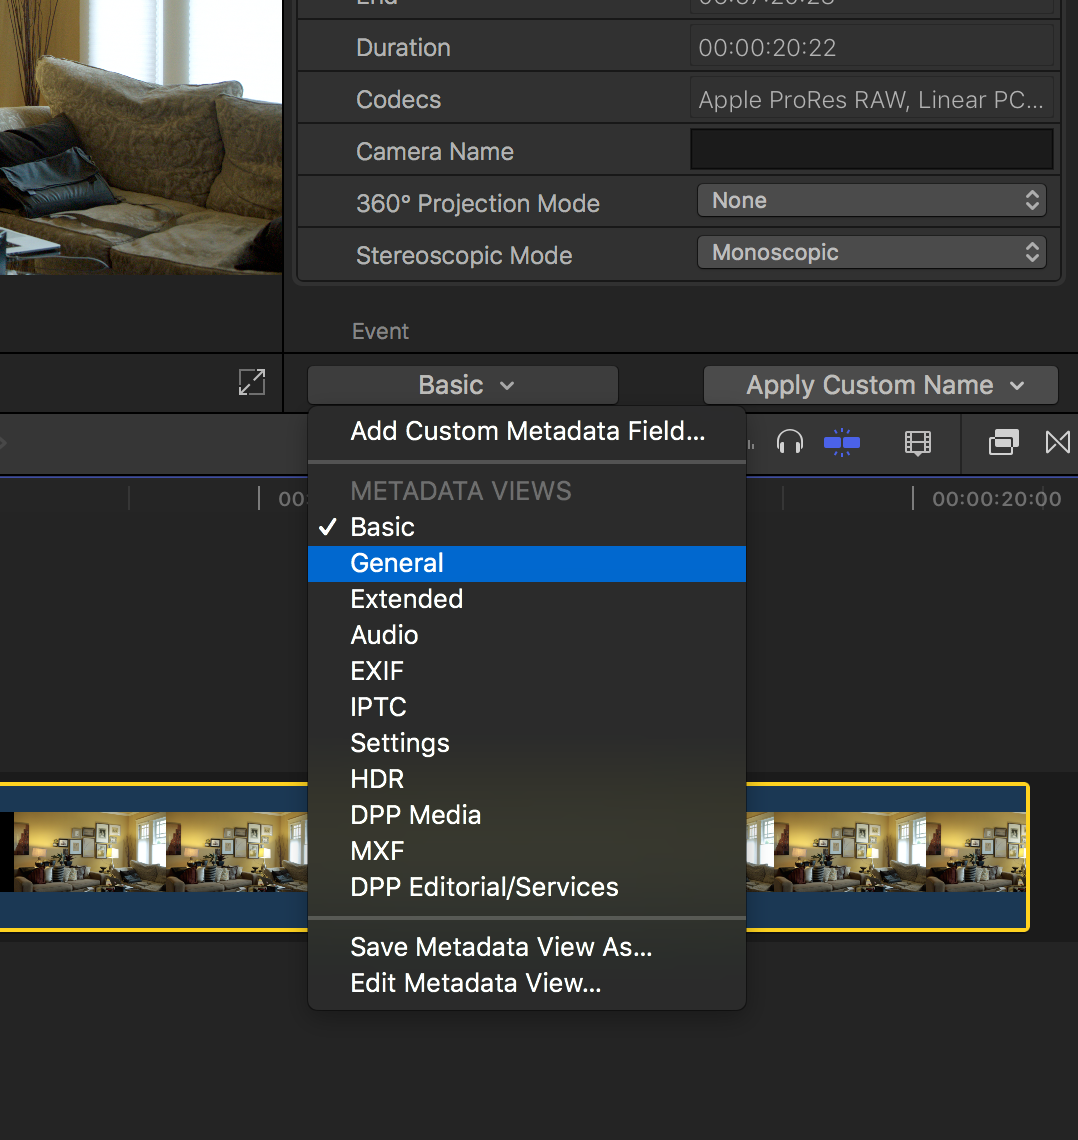
To get started working on your ProRes Raw footage in FCPX, you need to show the “Info Inspector” and change the default view from Basic to General. This reveals the ProRes Raw-specific controls that allow you to debayer your footage.
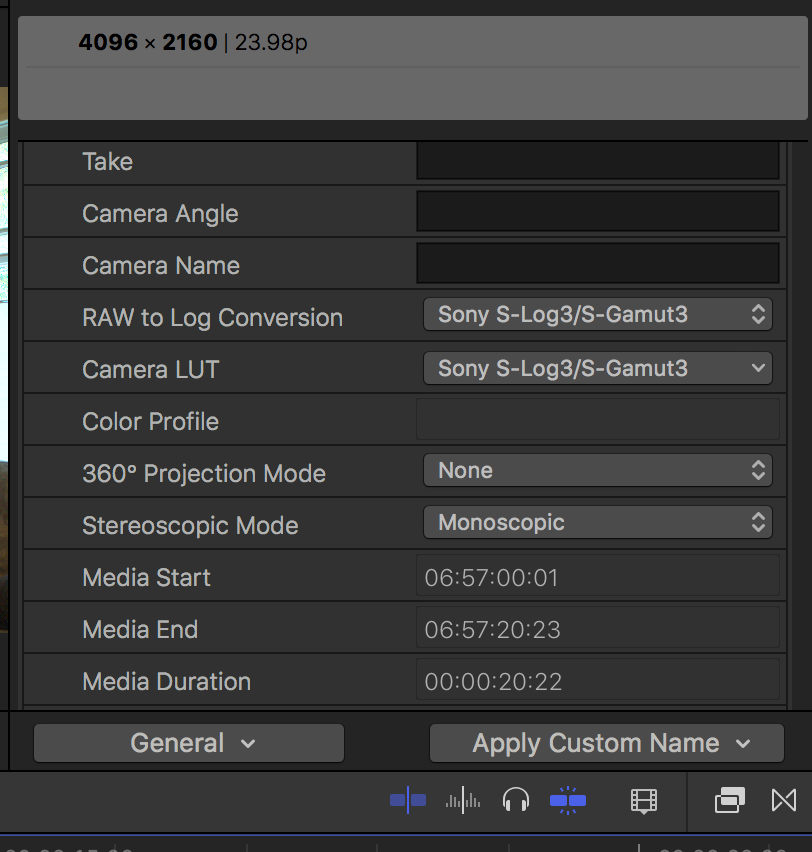
RAW to Log Conversion controls which flavor of Log you want to debayer to (it’s also possible to choose None and work directly with RAW – more on that in a moment).
Camera LUT applies a LUT to the LOG signal before it’s sent out – akin to baking in a look on your recorder (but it allows you to change your mind later).
The first thing I wanted to test out was how the Shogun was interpreting the raw signal, and see if that was the same as the way Final Cut Pro X interprets it. Turns out, they’re different. And that has implications on how you shoot.
Shogun interprets the raw signal from a Sony FS5 like Slog-2 – only it’s not.
When you look at the raw signal on the Shogun, it doesn’t matter whether you send it Slog 3 or Slog 2 on your FS5 – the Shogun thinks it’s getting an Slog 2 stream, at least for the purpose of applying LUTs. It’s NOT an Slog2 stream, though – it’s raw sensor data. But Shogun is receiving metadata from the camera so that it can interpret it, and whatever it’s doing is in SLOG2. So when you drop on a LUT designed for Slog3, it looks all wrong (way too crunchy). So until we have more options in FCPX, it’s important to stick with using SLOG2 LUTs for monitoring on the Shogun.
When you bring your ProRes Raw footage into Final Cut Pro X, however, there’s no option to debayer the footage as SLOG2. Currently the only options for Sony cameras are Slog3 in two flavors – either Sgamma3 or Sgamma3.cine.
You can also apply a camera LUT in FCPX at the same time you are debayering, but it’s important to note that if you do, it’s the same thing as applying a LUT at the beginning of your color pipeline, rather than at the end of it. Before ProRes Raw, this was generally the wrong place to do this, because if the camera LUT crunches the shadows or clips the highlights, you won’t be able to recover them when making adjustments to the clip later. But. And this is a big but: When you apply a camera LUT to ProRes Raw at the source, THERE IS NO RENDERING. Did you hear that correctly? No rendering.
Actually, with FCPX 10.4.1, it’s not only possible to apply a camera LUT to RAW, but you can also apply a camera LUT to any LOG footage.
Yep, you can play with LUTs to your heart’s content, find one that gives you a ballpark without clipping your highlights, and take it from there. So this really is a fantastic way to make dailies – but with the ability to change your mind later without incurring any rendering penalty. How cool is that?
But (a small one this time). Since you can’t shoot with SLOG3 LUTs using Shogun (or more correctly, since Shogun won’t interpret your raw footage as anything other than SLOG2), and since it doesn’t work to apply an SLOG2 camera LUTs in FCPX due to the fact that it’s debayered as SLOG3, we at a bit of an impasse, aren’t we?
Matching Slog2 to Slog3
Turns it it’s not that difficult to overcome. It’s entirely possible to find an SLOG2 LUT for shooting that comes fairly close to matching what you’ll see off the sensor in SLOG3 in FCPX. I did this by placing my MacBook monitor on a stand next to my Shogun, and trying lots of different LUTs on. Turns out that loading the SONY_EE_SL2_L709A-1.cube LUT onto the Shogun, I’m able to get pretty close to what I’m seeing when I open the clip in FCPX using the default Slog3 raw to log conversion, and the default slog3/sgamma3 camera LUT. I do look forward, though, to FCPX supporting more options for debayering.
OK enough about LOG. Let’s roll up our sleeves and get straight to the real RAW, shall we? All you have to do is select None as the option on Raw to Log Conversion, and you get this:
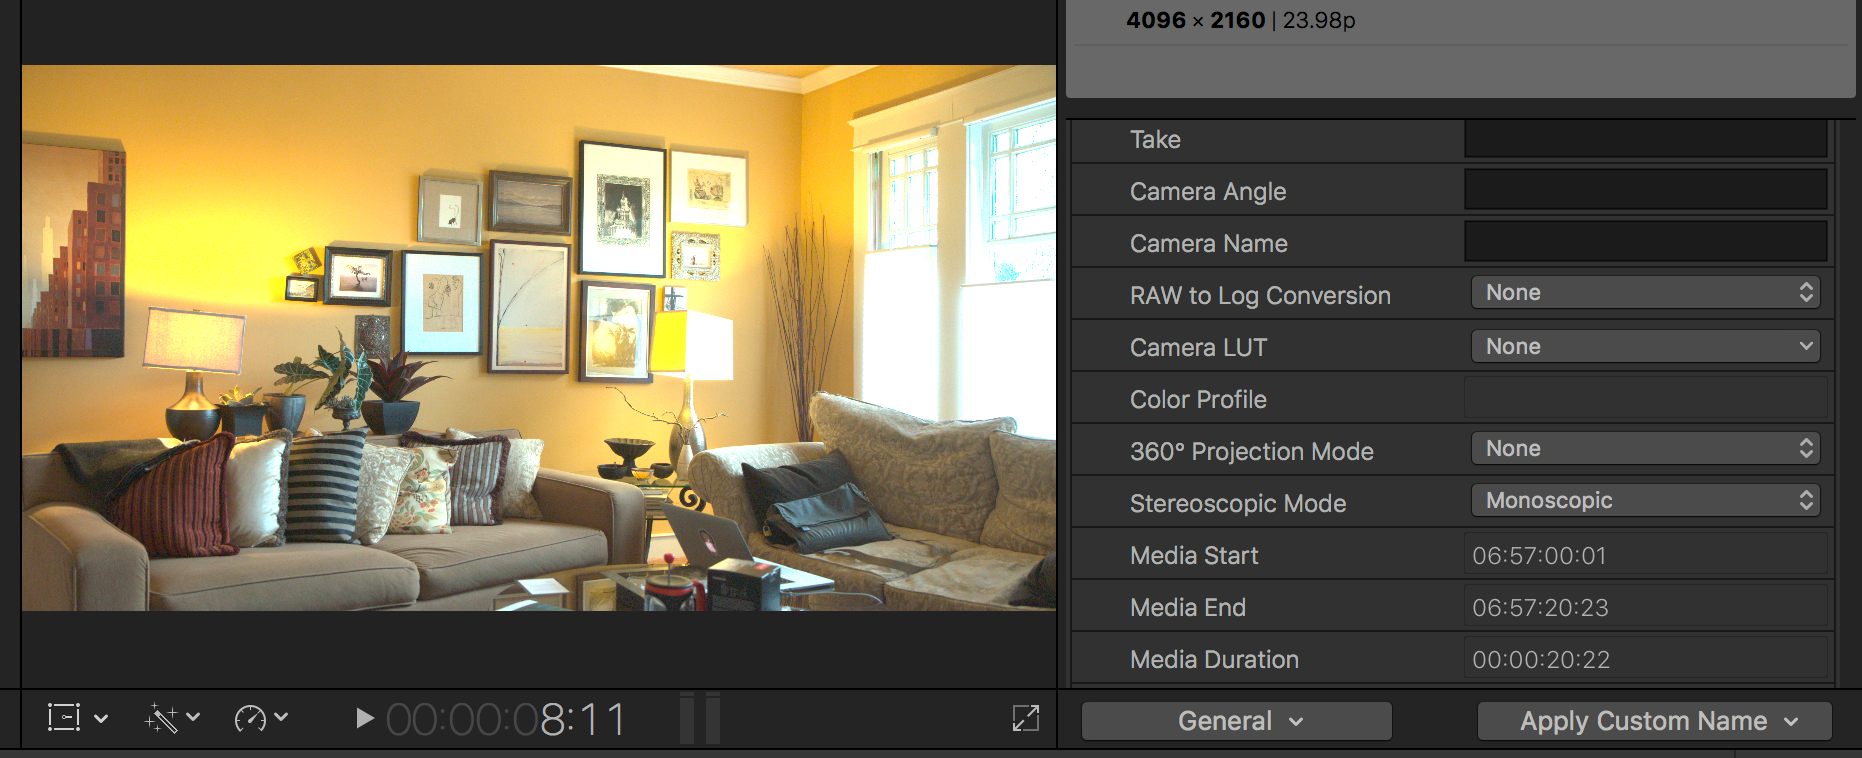
You get an image that looks, well, raw. To work on it, you have to drop it into a timeline, and start applying color controls. That’s great and all, but now you have to deal with rendering. So right away you can see that there are some workflow reasons why you’d want to stick with Log. Having said that, you can do all the corrections you want to do and save them using “Save Effects Preset” so you can apply them in a single click later. Not the same as a LUT, but definitely a timesaver. But I digress.
I was blown away by how you can pretty much, within FCPX, do the same things I used to doing to an image in Photoshop. You can recover highlights until forever! But you do have to be careful – pulling highlights down has an impact on the rest of the image, so you have to jack a contrast curve something crazy if you want to recover highlights outside a window. But you can do it:
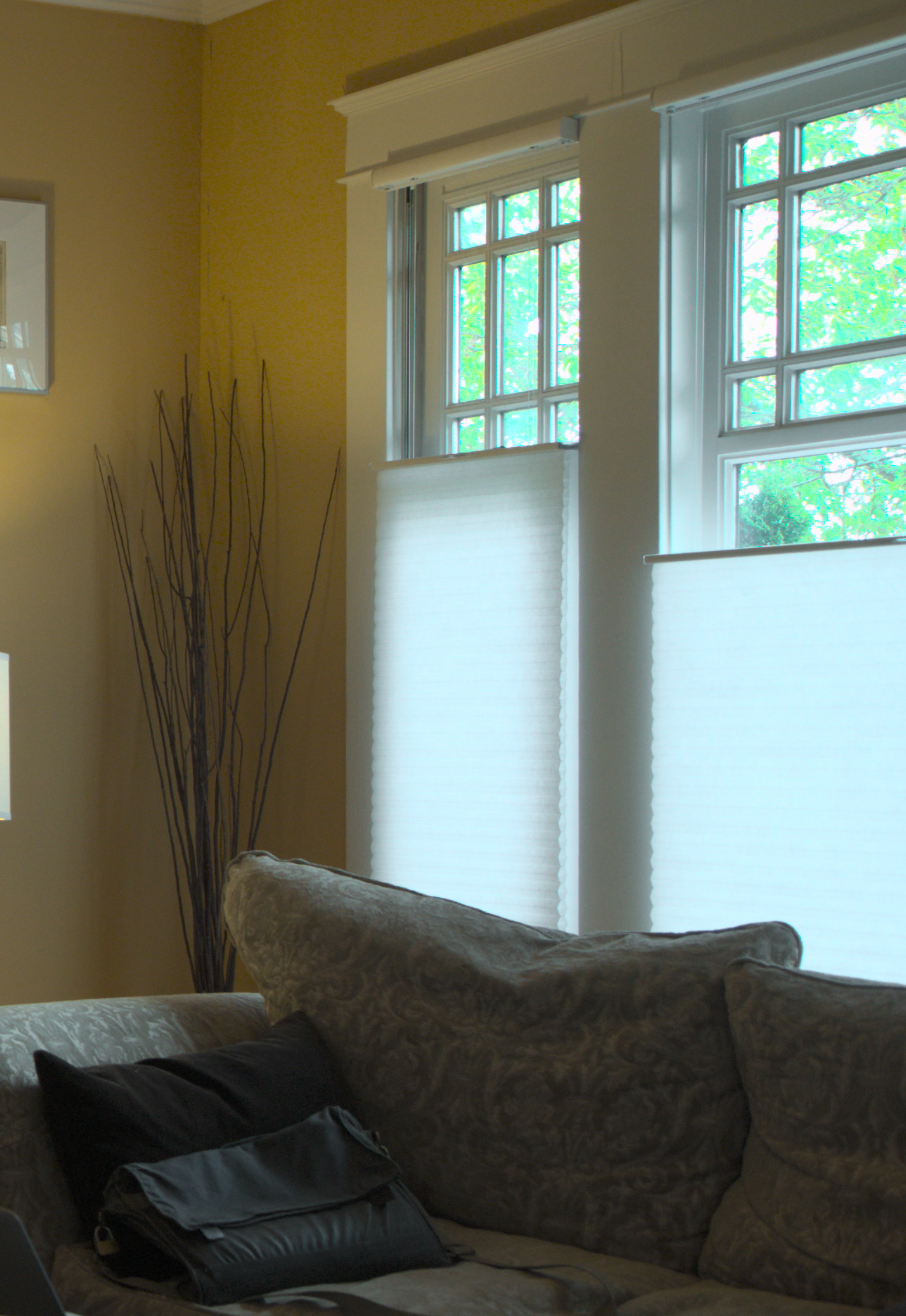
Recovered highlights in a bright window
You’ll notice that the brightest highlights went a little crazy there, but good news – you have pinpoint control over color saturation using hue-sat curves in FCPX. After a little playing around, I was able to calm it down like so:
Tamed highlights
The bottom line is you quickly find yourself spending a LOT of time fussing with things when you get into grading the raw RAW. But it sure is a neat thing to be able to do it when you want to.
I think I’m going to find that I stick with a Log workflow for now, but with the option to to straight into raw for some challenging shots, where I really want the kind of control that Photoshop gives a still photographer.
Blowing the image up to 200 percent, a little noise becomes apparent after all the pushing around:

Noise in 12-bit raw
But dare I say, it’s filmic noise, not ugly digital noise. That right there is the benefit of shooting 12-bit, most def. Shooting 10-bit 4k on the Shogun you definitely have noise issues in the shadows. I’d say definitely less so with 12-bit.
Here’s a side-by side comparison of 10-bit SLOG2 footage with LUT applied next to RAW 12-bit:

4k enlarged 200 percent
There’s currently no tool in FCPX raw controls akin to the denoise setting in Adobe Camera Raw tools. So to denoise this, you’ll need a plugin like the excellent Neat Video Denoiser. And that, my friends, is where the Apple ProRes party slows down a bit. You’ll definitely want to apply that filter as the very last step of any project, because the render times with denoising are painfully long.
But never mind a little noise that has to be enlarged to be seen. ProRes Raw has me all fired up. This codec looks like a game changer to me. More workflows will emerge quickly, supported by more software and hardware tools such as cameras that shoot direct to ProRes Raw. In the mean time, Apple has handed us Sony FS5 owners a way to stay on the bleeding edge for the foreseeable future (without upgrading to the Sony FS5 MKII, thank you very much).