 As a documentary cinematographer, I’m a big fan of available light. However, it’s rarely perfect. A little fill on the shadow side of a window, for example, can create magic out of a monster. So wouldn’t it be nice if there was a light small enough to take with you anywhere, that you could just snap your fingers when you needed it? Or like, wave a magic wand?
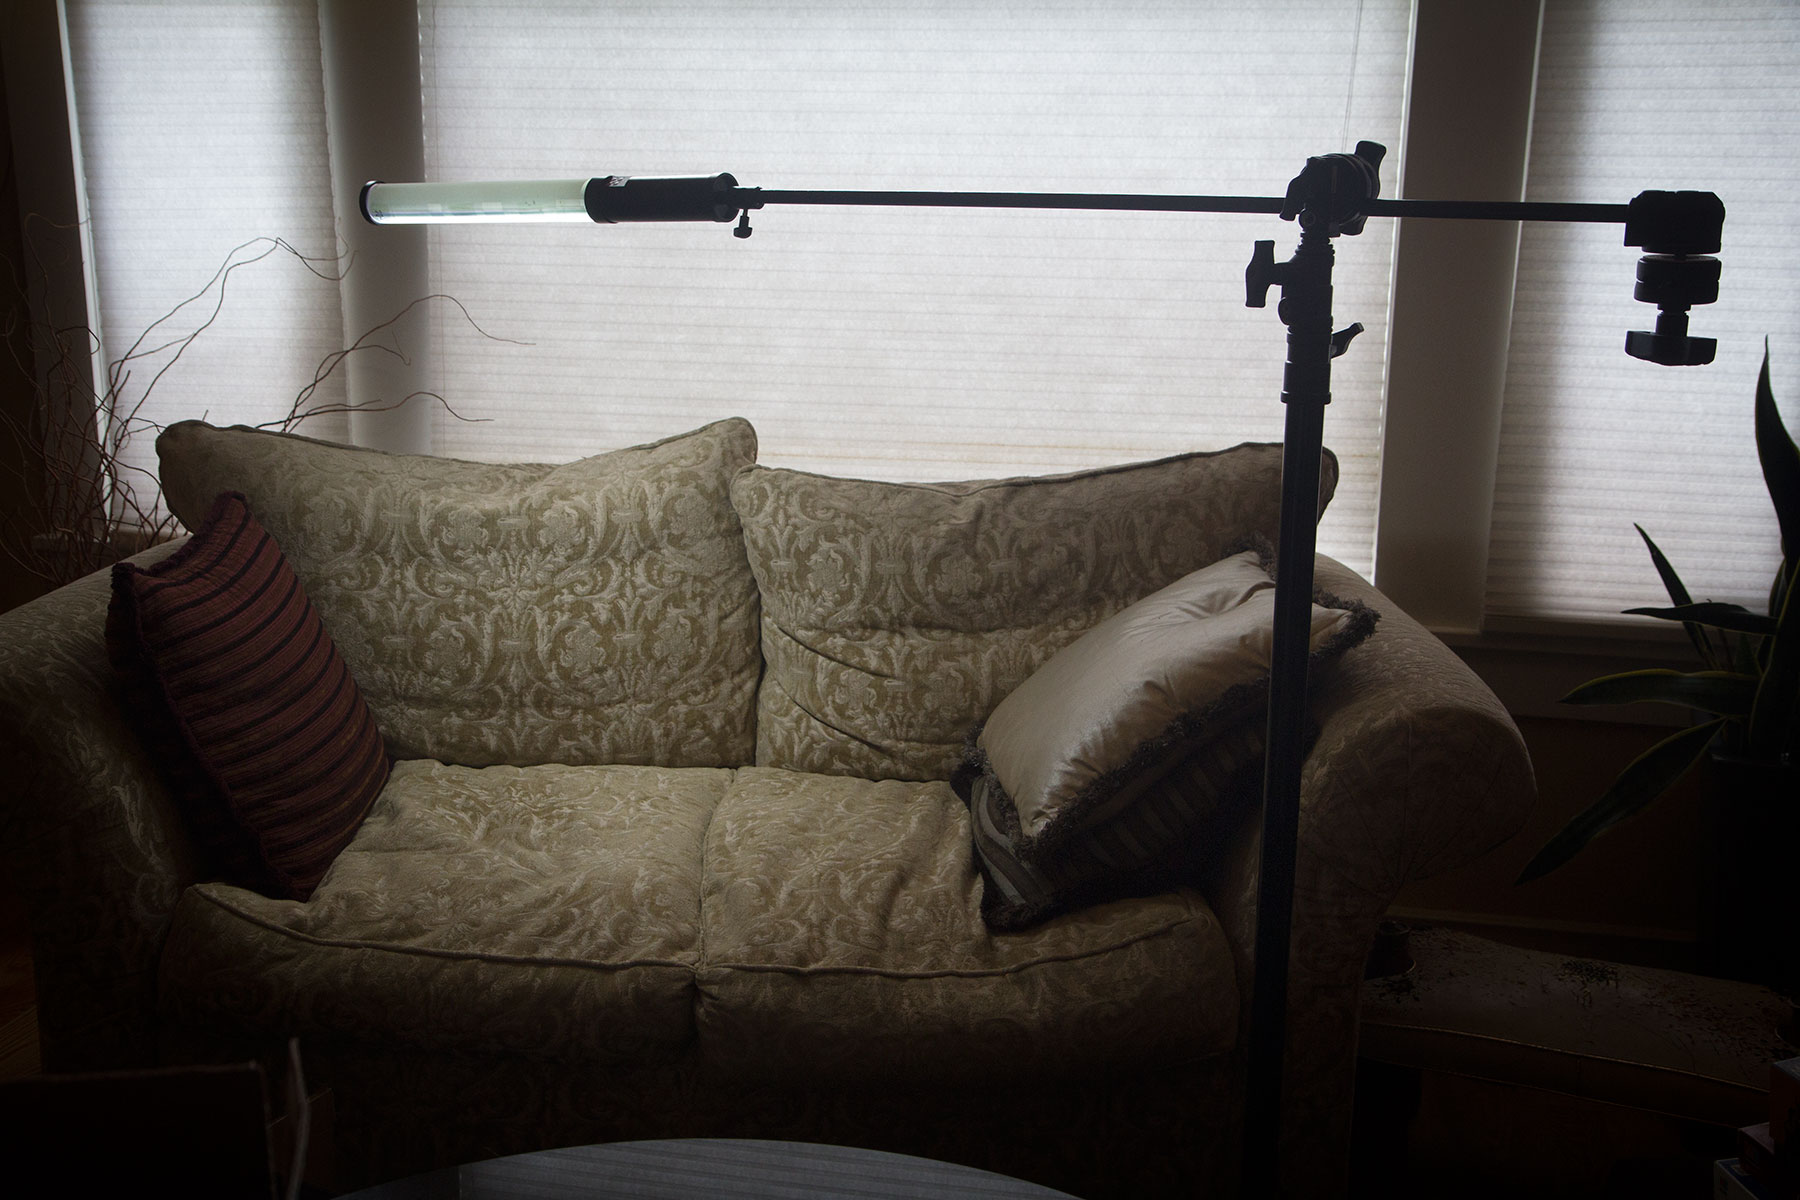
 Interviewing Tom Skerritt using Spectro-LED as rim light
When first I saw the IceLight from Wescott, I felt it wasn’t quite right for a couple of reasons. One, it wasn’t powerful enough. Two, it felt overpriced to me. So I waited. Given the rapid pace of LED development, I knew it was only a matter of time before we’d see an exciting development. In fact, I’ve been Googling for it. When a recent search for “IceLight alternative” uncovered something called the Genaray GESPLR SpectroLED SP-LR, I was interested. When I saw it contained both tungsten and daylight balanced lights, I was impressed. When I saw it was listed at $250 (half the price of an IceLight), I was sold.
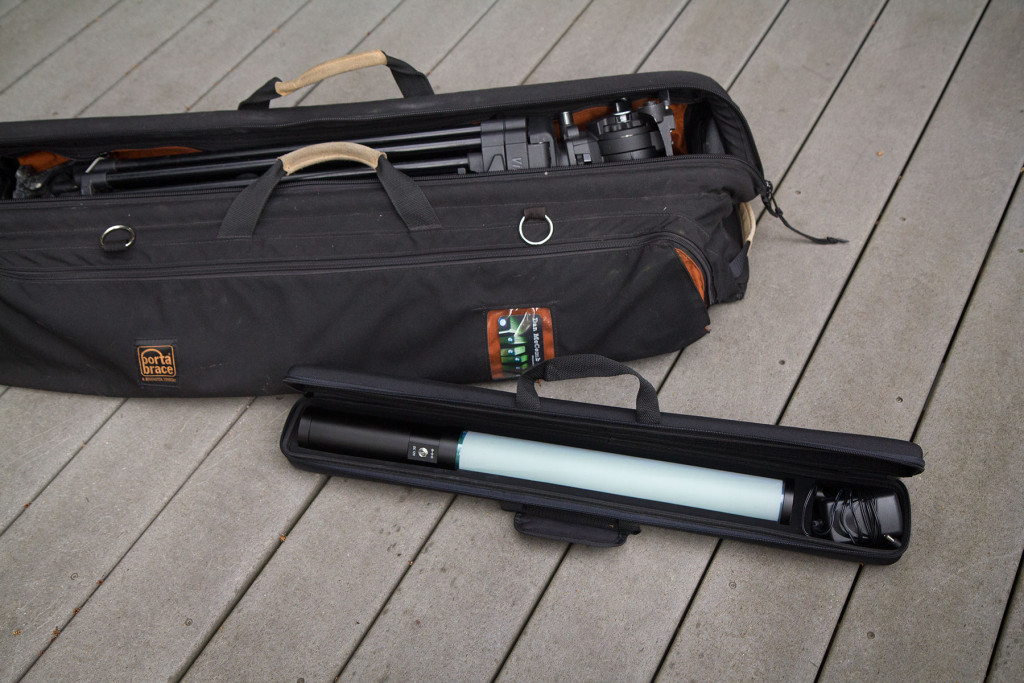
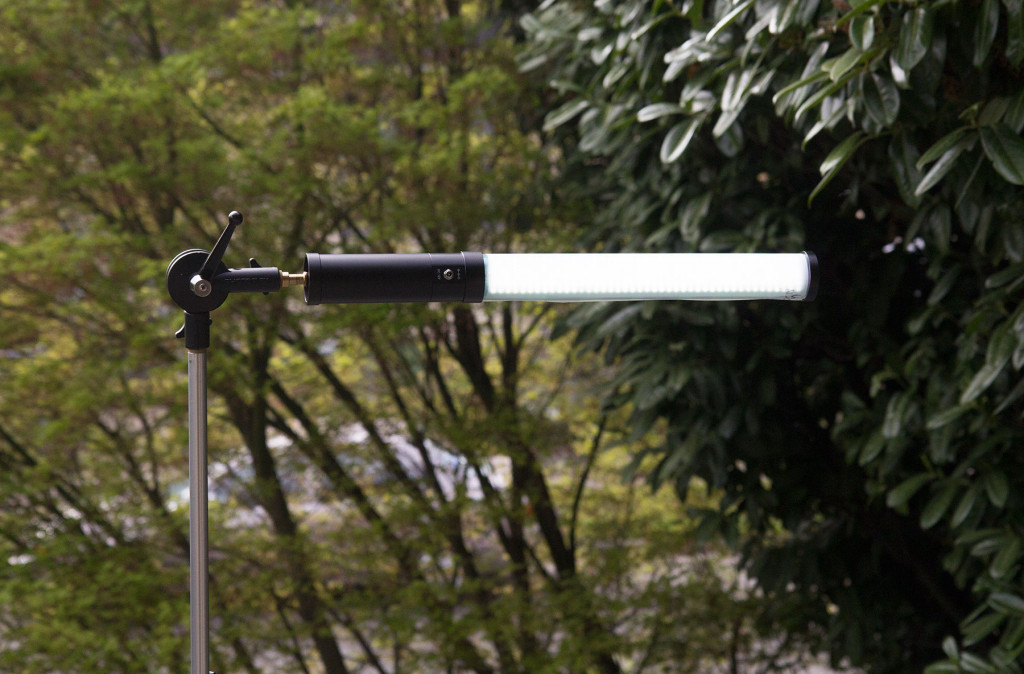
 The light arrived a couple of weeks ago, and the first thing that caught my eye was the case. It’s one of those padded, semi-hard things, solidly built, something I will actually use. The size of the light is nice and compact, at just under 22″ long. The active strip of light it produces is 14″ long. It tucks easily into my Porta-Brace tripod bag (with the tripod in it, too), which will allow me to carry it easily on the road.
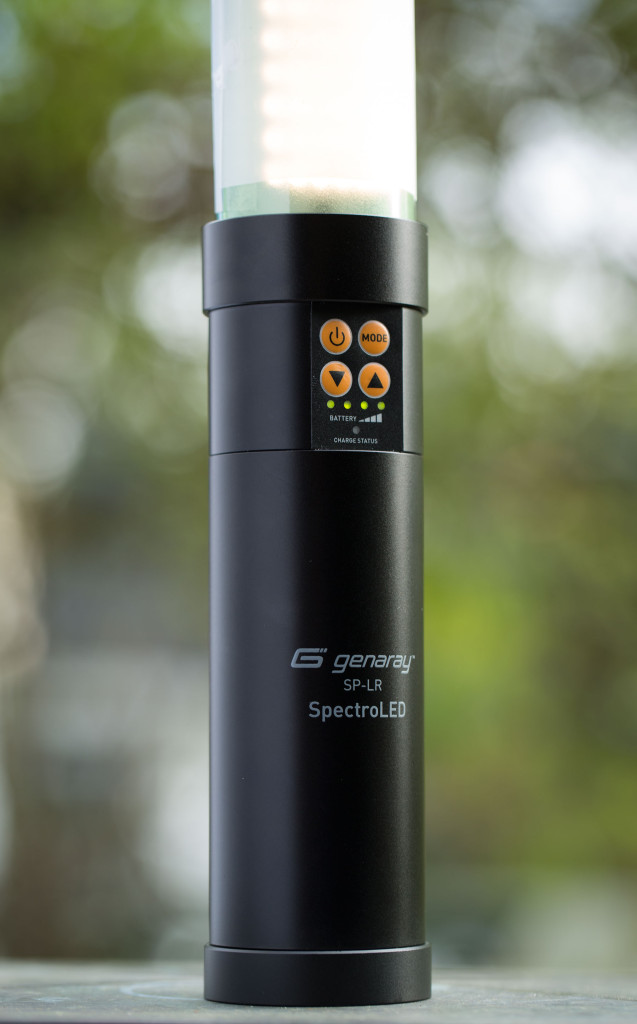 This light is impeccably professional looking. The black, all-metal handle includes buttons that electronically switch between tungsten and daylight, and dim the unit from 100 percent to 10 percent.
The mode button switches between tungsten on one side of the light, and daylight balanced LEDs on the other.
The dimmer works well, and produces no audible buzzing or sound of any kind (yay). Also, the light is flicker free at all settings.
The light is advertised to last for 2.5 hours at full blast. I found that not quite true. After running for 1.5 hours, I measured a small dip in brightness. After 2.5 hours, the light was still running strong, but had further dimmed, losing perhaps 1/-8 to 1/4 of it’s original brightness. At 2:40 it was down to 1/2 original power, before dying completely at 2:46. So it dies with a whimper.
This is a drag. I’d far prefer a light that dies with a bang, so that I could count on it being consistently bright whenever it’s on. Still, the fact that you can get in excess of 3/4 of it’s power after 2.5 hours isn’t too shabby for such a compact light. It’s just one more thing to keep track of during a shoot. For those reason, I’d recommend powering it via the AC adapter for longer interviews, or if you’re doing multiple interviews, for the later ones.
The battery is built in, so it’s not possible to pop in a spare when it runs out. An AC adapter is included, however, so you can run it all day off the cord, which also charges the battery.
The light features a 1/4″ 20 female mount point in the handle. The included mounting spud has 1/4″ 20 screw on one end, and 3/8″ on the other. This makes it easy to attach to various mounting hardware such as tilt brackets that allow you to fly the light over camera for use as fill, for example.
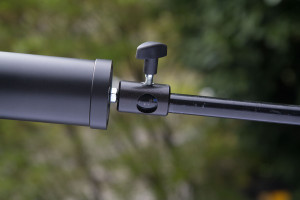 To hang it off the arm of a c-stand, you’ll want one of these little guys (photo at right), a Manfroto 5/8″ to 1/4″ 20 rapid adapter. The light itself is so light (just 2 pounds) that it’s actually possible to hang it off a regular light stand, using a Photoflex heavy-duty grip swivel with a stand extension. In that scenario, you’ll need to counterweight the bag. However, using a c-stand (below) you can fly it anywhere without counterweight. Which makes fast and easy to reposition the light between setups.

One gripe I have about the design is that, as shipped, it could use more diffusion. But it’s easy to add. Wrapping it with Lee 1/2 white diffusion softens it beautifully and completely eliminates the dreaded LED multiple shadow effect. The penalty for this is a full stop of light loss. However, given how bright it is, this could be been seen as a positive, since the light doesn’t dim below 10 percent. If you just need the extra stop of light, it’s there.
Brightness
For such a compact light, it packs a big punch. (However, it loses some of that to color correction, as we’ll discover in a moment.) How bright? Here’s a real world example. After color correction gels were applied, I was able to set f/2.8 at 6′ with ISO 800 at a 48/sec shutter (24p). When dimmed fully, I read f/1.0 and a half. The tungsten side is about a third of a stop brighter due to needing less color correction.
Versatility
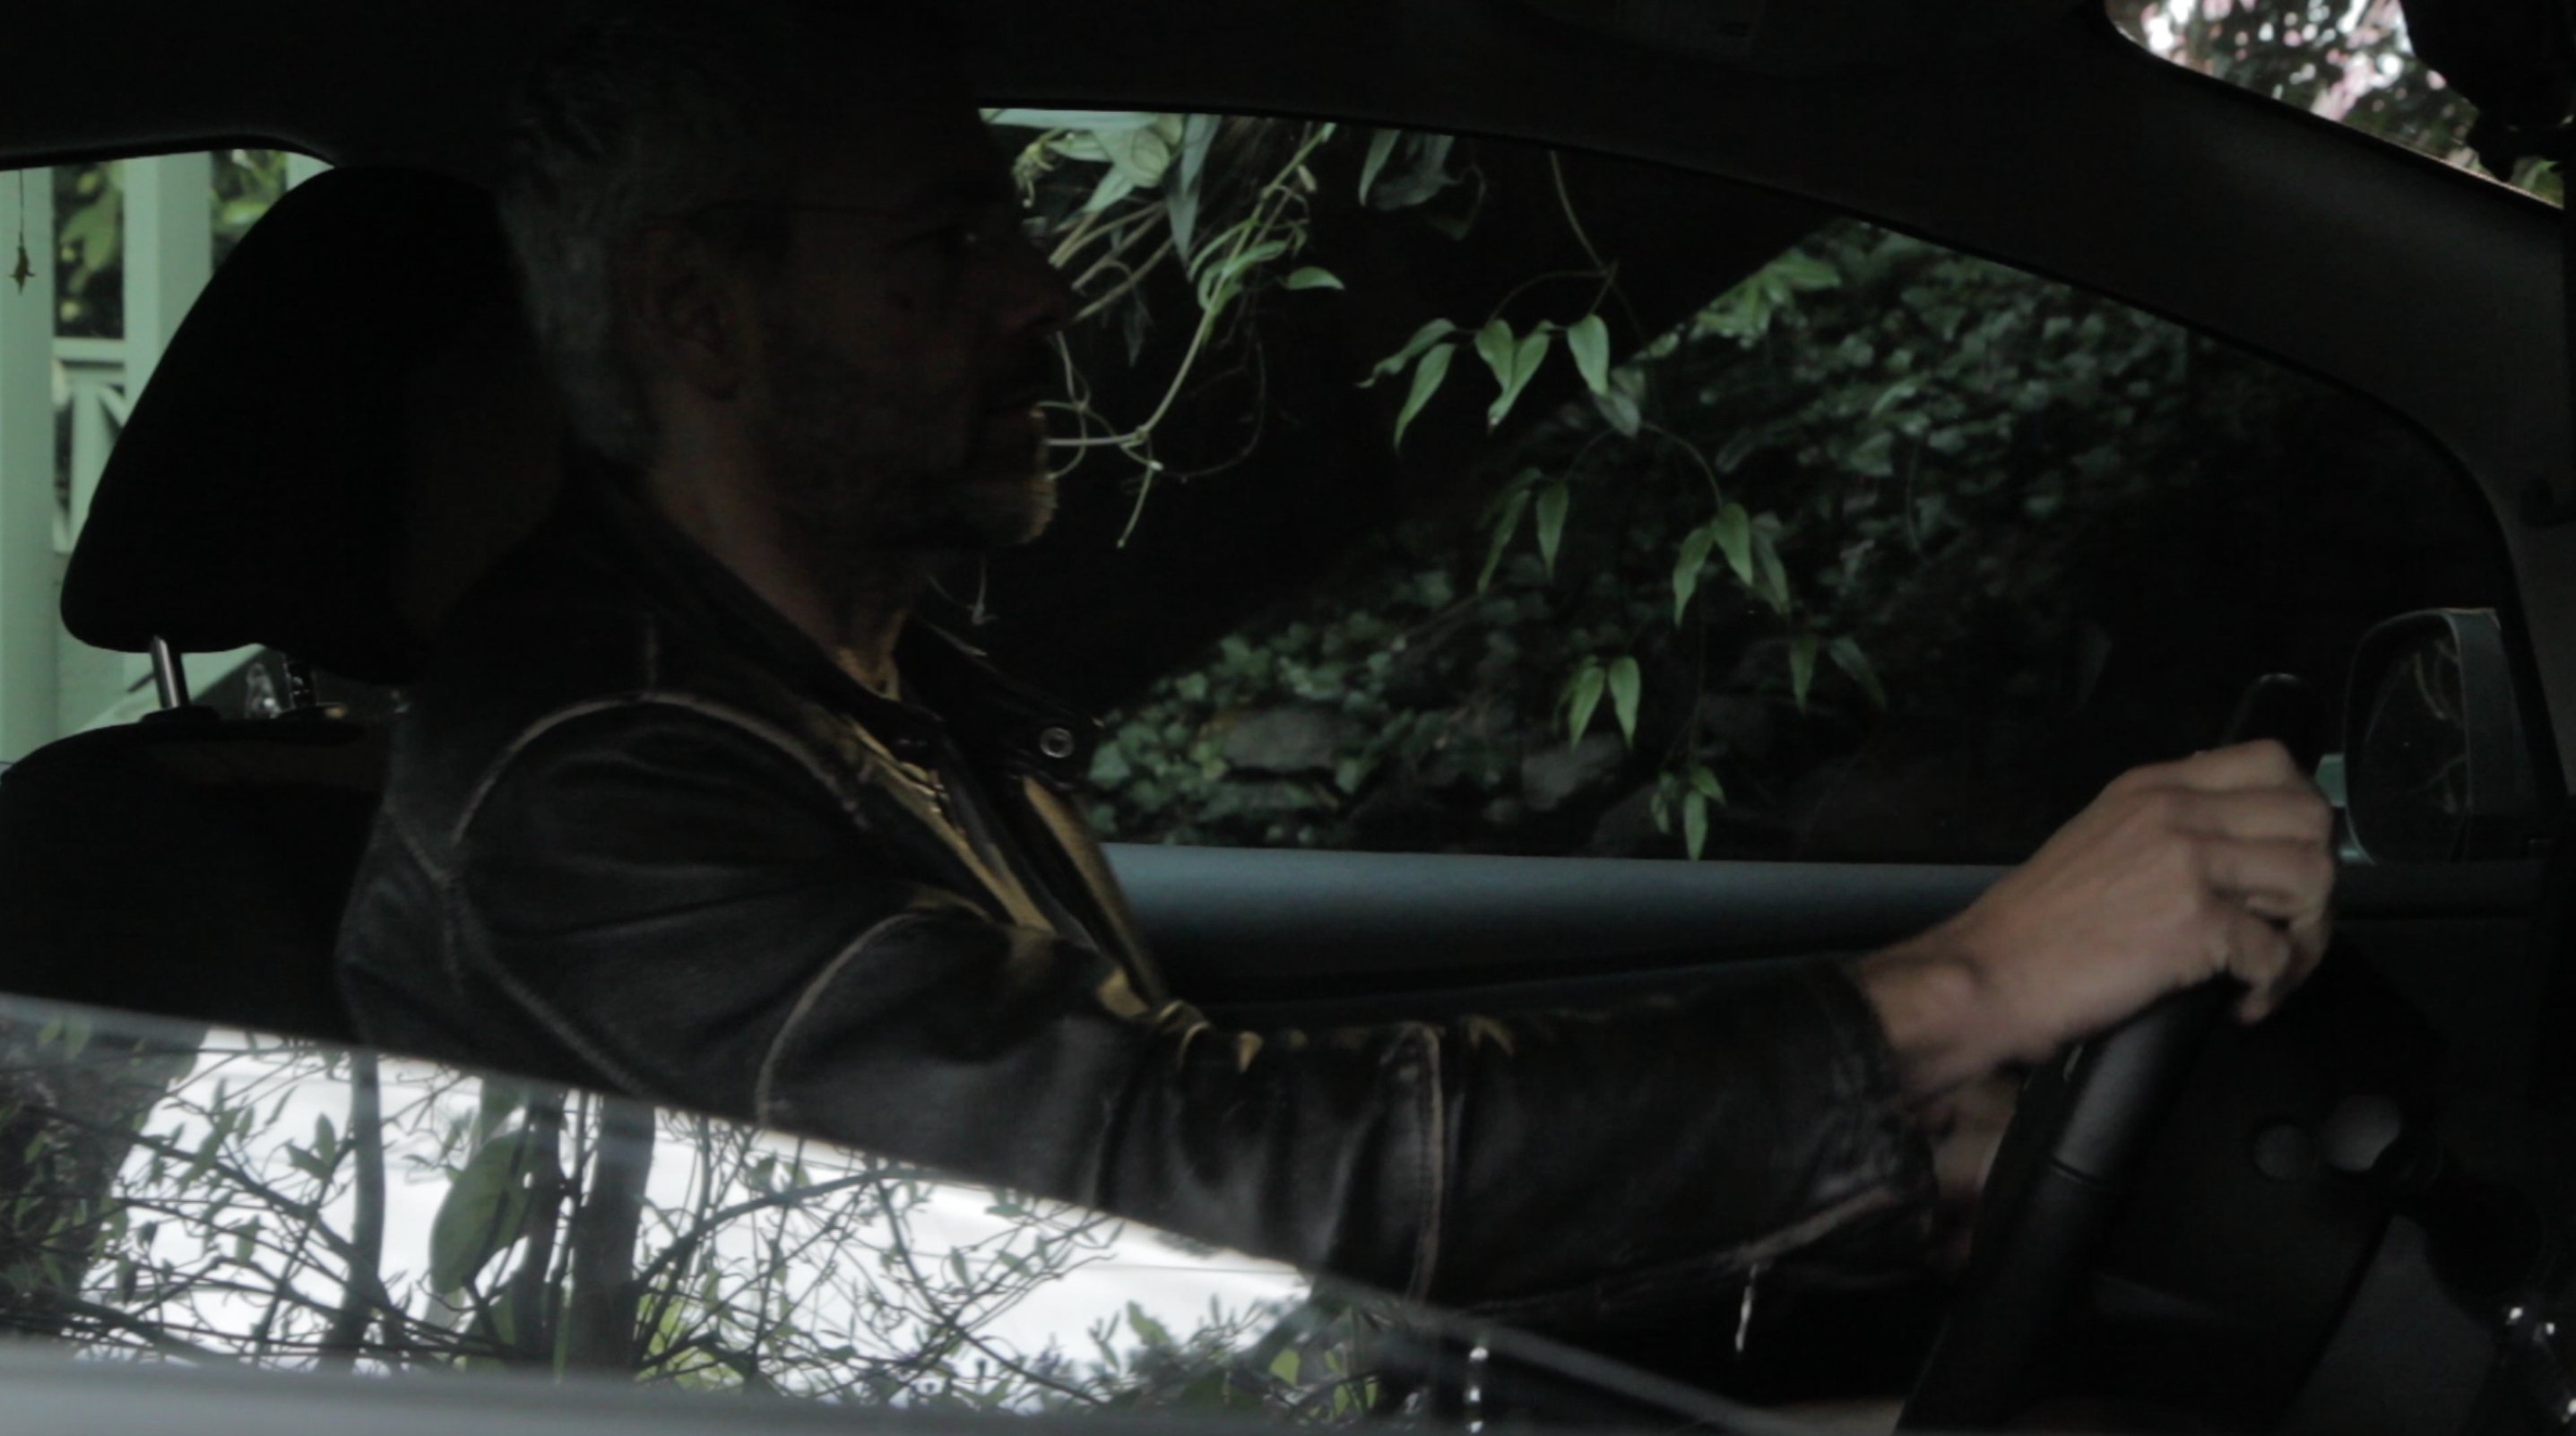
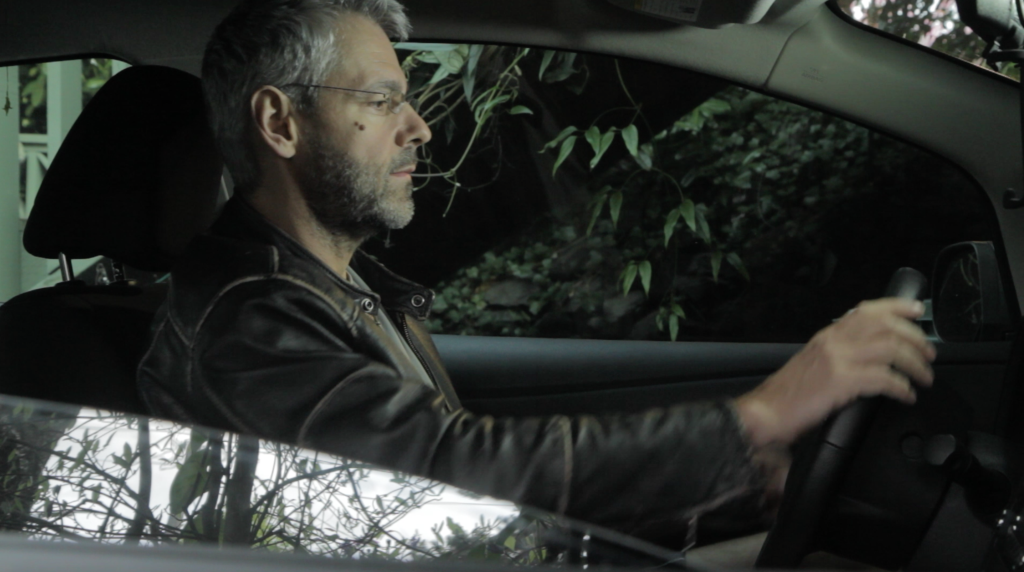
You can place the Genaray just about anywhere. With gaffer tape, you can affix it inside a car, for example, to get relatively soft illumination where you want it while hiding it from the camera.

Before
After
The light has a rather nice, softly directional falloff, like a Kino-flo tube (more on that in a moment). I found it easy to feather the light by twisting it, and cutting it further is possible by applying black wrap.
This is the light of a million uses. Here’s a few that I’ve tried.
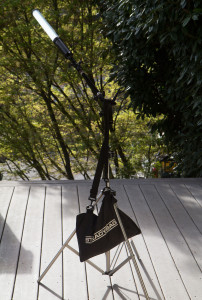
On swivel grip
Back light: Because it weighs just a couple of pounds, you can put it on a light stand with a swivel grip and stand extension, and boom it. I have a 7-lb Steadybag that is heavy enough to counterweight the light in this scenario (photo at right).
Fill light: Again, it’s so easy to fly this light directly over your lens with a light stand, where you can use it as a subtle, relatively soft fill.
Kicker: Simply screw it on top of the 1/4 20 thread of any light stand, and you’ve got a vertical strip of kicker light, that can chisel out some definition in an otherwise flat interview.
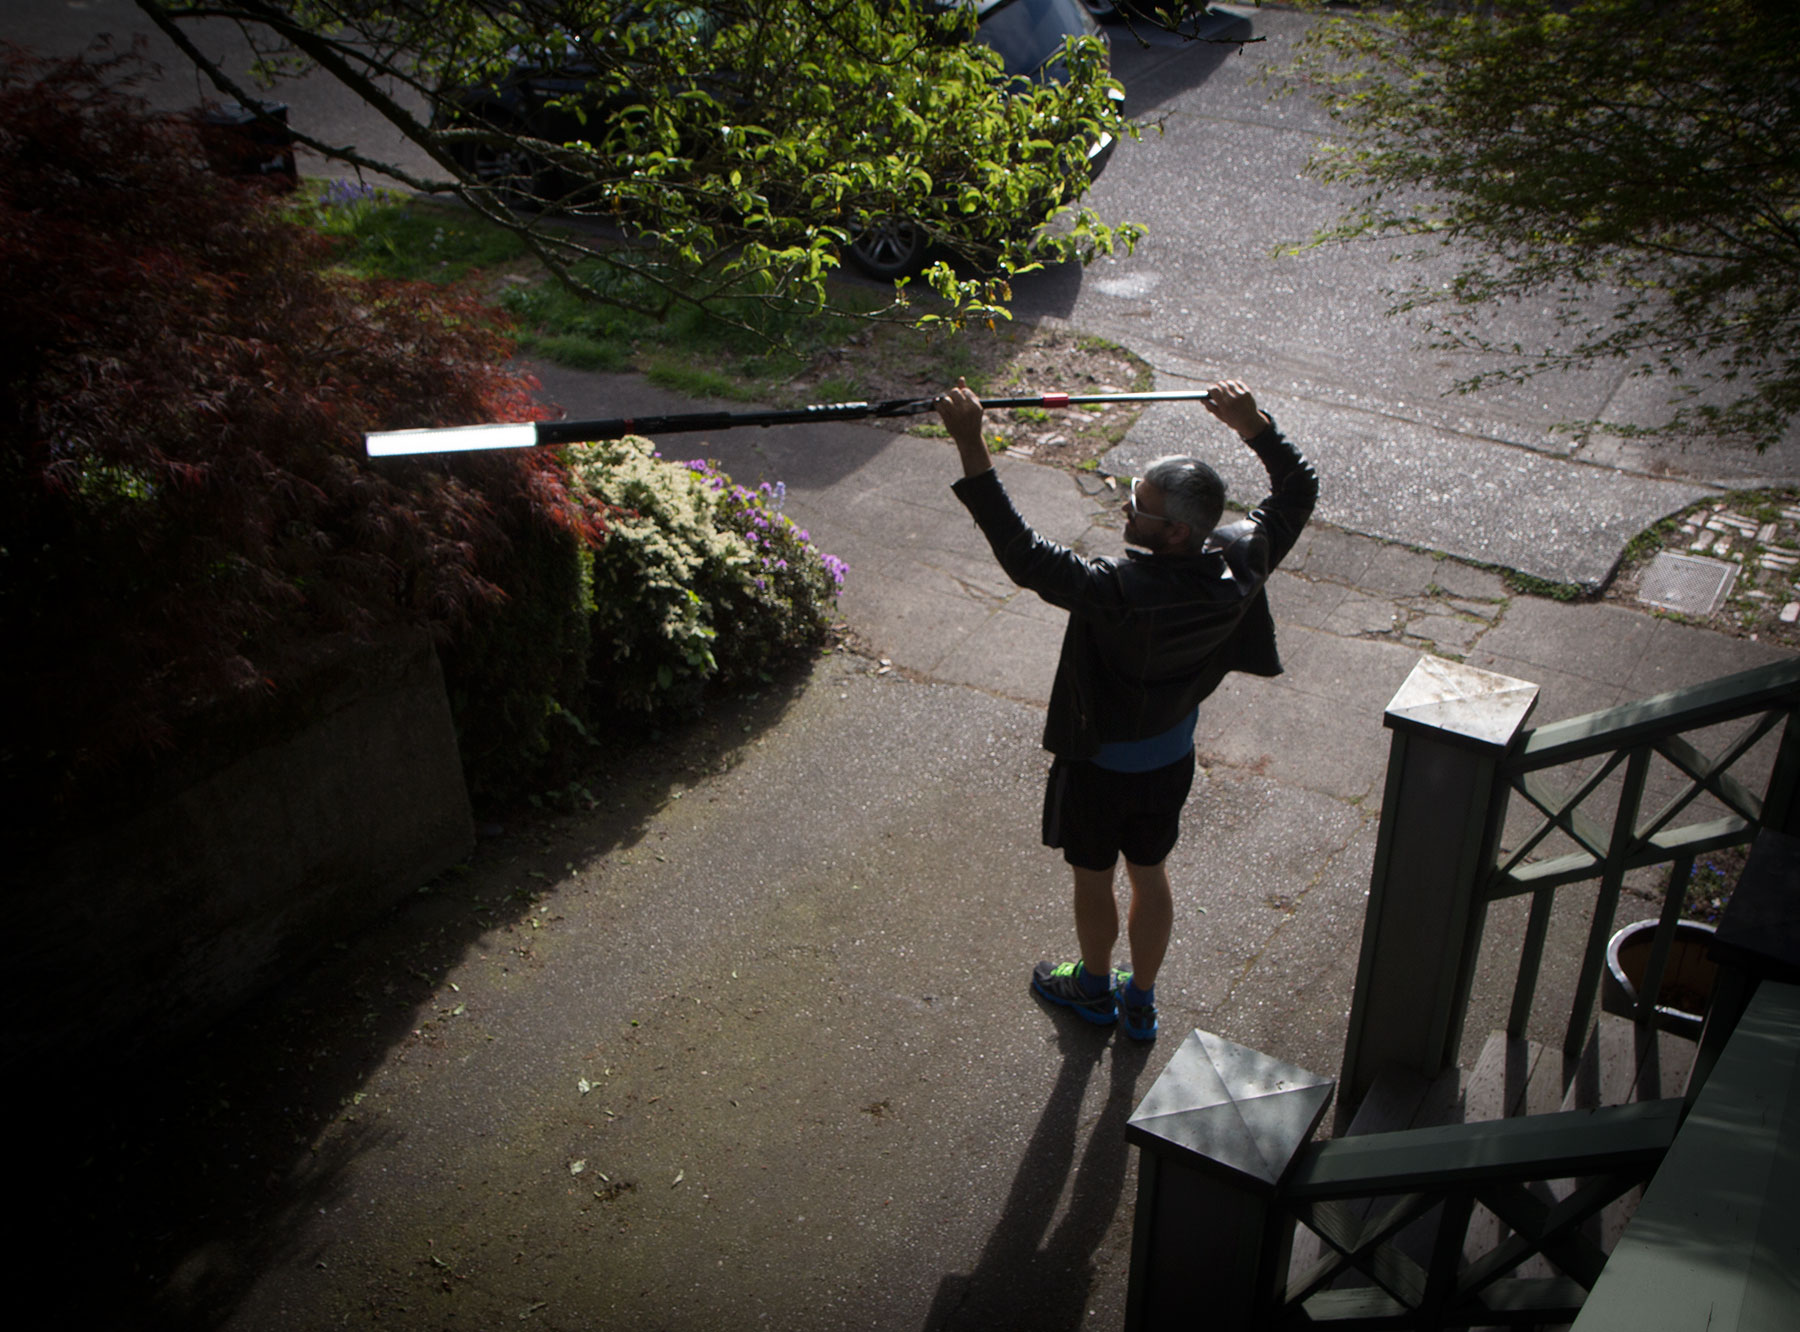
Traveling shots: Screw it onto the end of a Mogopod and you’ve got yourself a light boomed for traveling shots. It’s not as bright or as soft as the BBS Lighting Flyer, but then, that kit will set you back $3,499.

Quick and dirty traveling light boomed with Mogopod
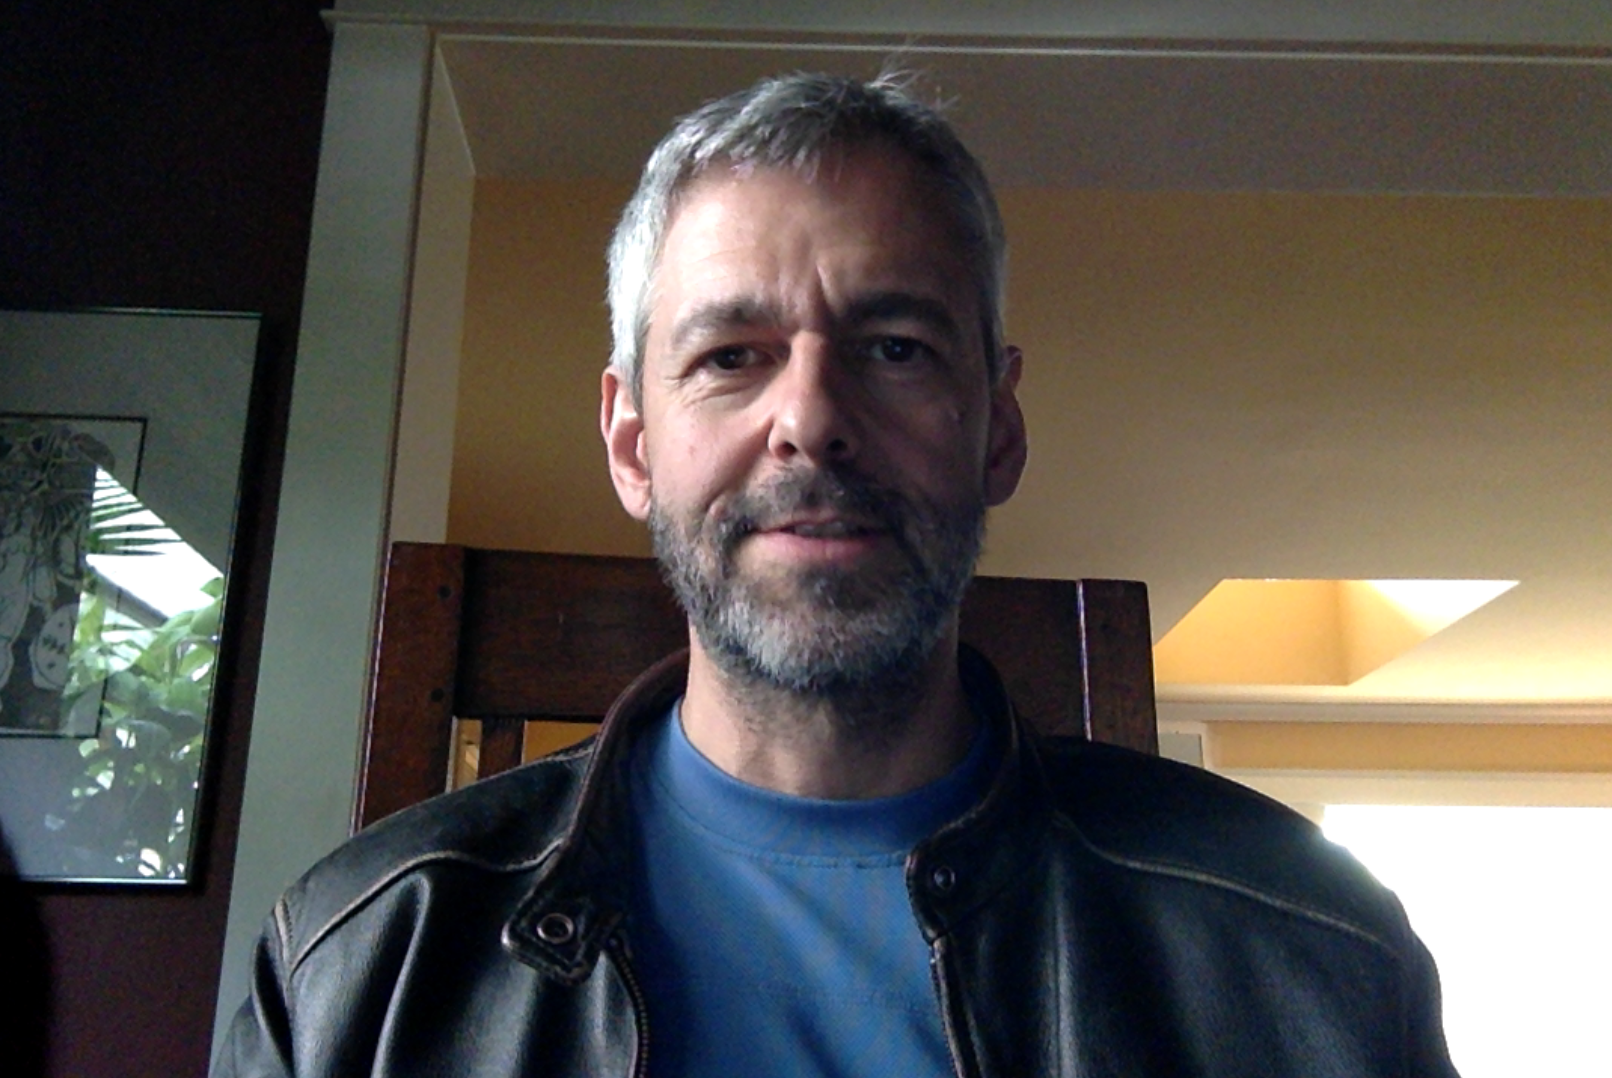
Bonus: Skype light. Just stand the light vertically on the counter behind your laptop to illuminate your Skype conversations:

Illuminating your next Skype conversation is as simple as placing the Genaray upright on your desk.

Before light (lit only with window light)

After, with Genaray used as strong fill light
Bonus: Camping flashlight. This light works great to light up a campground picnic table!
So without doubt, this is a very flexible light. Great. But how does the light look?
Color accuracy
The Genaray is advertised at 3200K and 5600K. Previous inexpensive LEDs that I’ve reviewed have been all over the place with this. So, what can you expect out of a $250 LED these days?
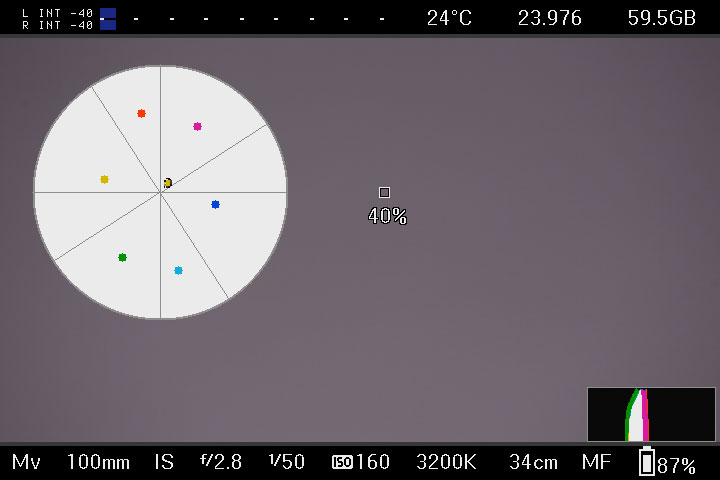
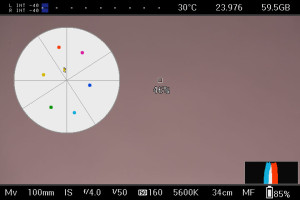 On the right is what the vectorscope shows me at 5600K (a perfect balance would place a tight dot in the middle of the scope). So it’s immediately clear that we’ve got WAY too much red. We can correct this by adding a little CTB and a lot of plus green. We’ll find out just how much in a moment. But first, let’s see how the 3200K side of the light stacks up.

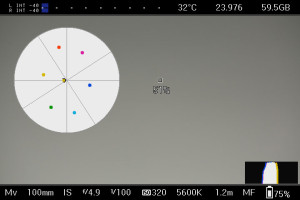
The 3200K LEDs, shown at right, are much closer to proper color balance. However, there is still a noticeable magenta shift. For a photo light, I want to see that dot in the bullseye. So we’ll need to add some plus green to get dial it in.
NOTE: I used an 18 percent Kodak gray card to do this test, and Magic Lantern’s Vectorscope on my 5dmkiii.
 OK, let’s tackle fixing the 5600K side first. After much testing, here’s what I came up with:
+ 1/2 green
+ 1/4 blue
Now we’re erring slightly on the yellow/green side, but just barely. And that’s the side I prefer to err on, because skin tones always look better a little yellow than any other color. I tried adding 1/8 blue, but that put us too far over toward blue/cyan. So this is about as close as we’re going to get this light, given that filters come only in 1/8th increments. Also note that this reduces the output of the light by a full stop in 5600k mode.
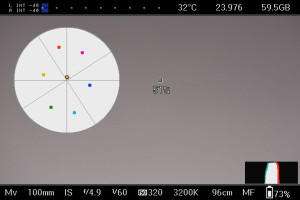 Fixing the 3200K was easier:
+ 1/4 green
I think it’s a shame these lights don’t match the color temperature they are advertised. But not as much a shame as paying $500 for the IceLight2! The price of inexpensive LEDs, at present, seems to be color temperature accuracy. But as you’ve seen, it’s possible to dial them in with a little work.
The CRI is 85 on these lights, which means colors won’t be as faithfully reproduced as with higher CRI sources. But in my experience, 85 is plenty high enough for general documentary use. My guess is that these lights are probably all different. So you will likely have to do your own testing to correct your copy of the light.
Light quality
OK, now that we’ve corrected our color balance, let’s take a look at the light qualitatively. That is, how does it look on a human face?
The closest thing I can compare this light with is a Kino tube. Only, minus all the crap you have to pack around to get the Kino fired up. It produces the same signature shadow as a Kino tube – soft on one axis and sharp on the other. So it’s an interesting mix of hard and soft light.
If you hold the light horizontally above your subject’s forehead, it casts a sharp shadow under their nose – but spreads soft light across their face from left to right.

Genaray held horizontally
Flip the light vertical to the subject, and you get soft shadows under the nose and chin, with rapid falloff of light on either side of the face (you also get nasty vertical glare on glasses, which is why they aren’t in the shot below).

General held vertically
Used as a backlight, above and behind the subject, it spreads the light across head AND shoulders. I prefer this look to a point source.

Generay LED used as backlight
So to sum it all up: Despite being pretty far off the mark in terms of advertised color temperature, this light can be balanced with a little effort. And it’s effort that will pay off. For the price, you get a lot of light in a tiny package that can be put to work on just about any documentary shoot. Especially for travel, where space and weight are always a consideration, this light is a road warrior’s weapon.
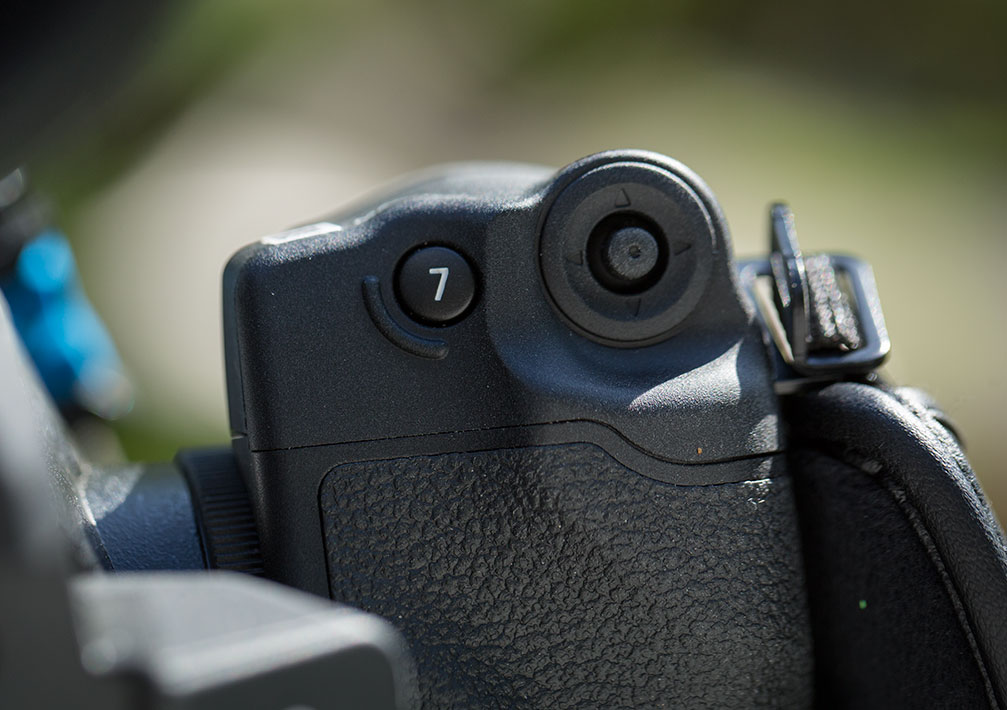
 The C100 mkii is an amazing documentary camera. It’s capable of 12 stops of dynamic range and it gives you everything you need (ND filters, EVF, phantom power, etc.) without additional rigging. But to get the most cinematic performance out of it, it’s important to set it up correctly, and remap one of the buttons. Here’s how I configure my camera before a big shoot.

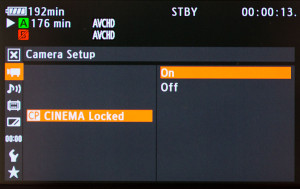 2. Set to record Canon Log. Under the Camera menu, select CP Cinema Locked and set On. This enables Canon Log, which gives you a flat file that grades beautifully in post. Using this setting preserves all the options that are available to you in post. Using this setting in combination with a C100 lookup tables supplied from Able Cine is a speedy way to get amazing looking footage.
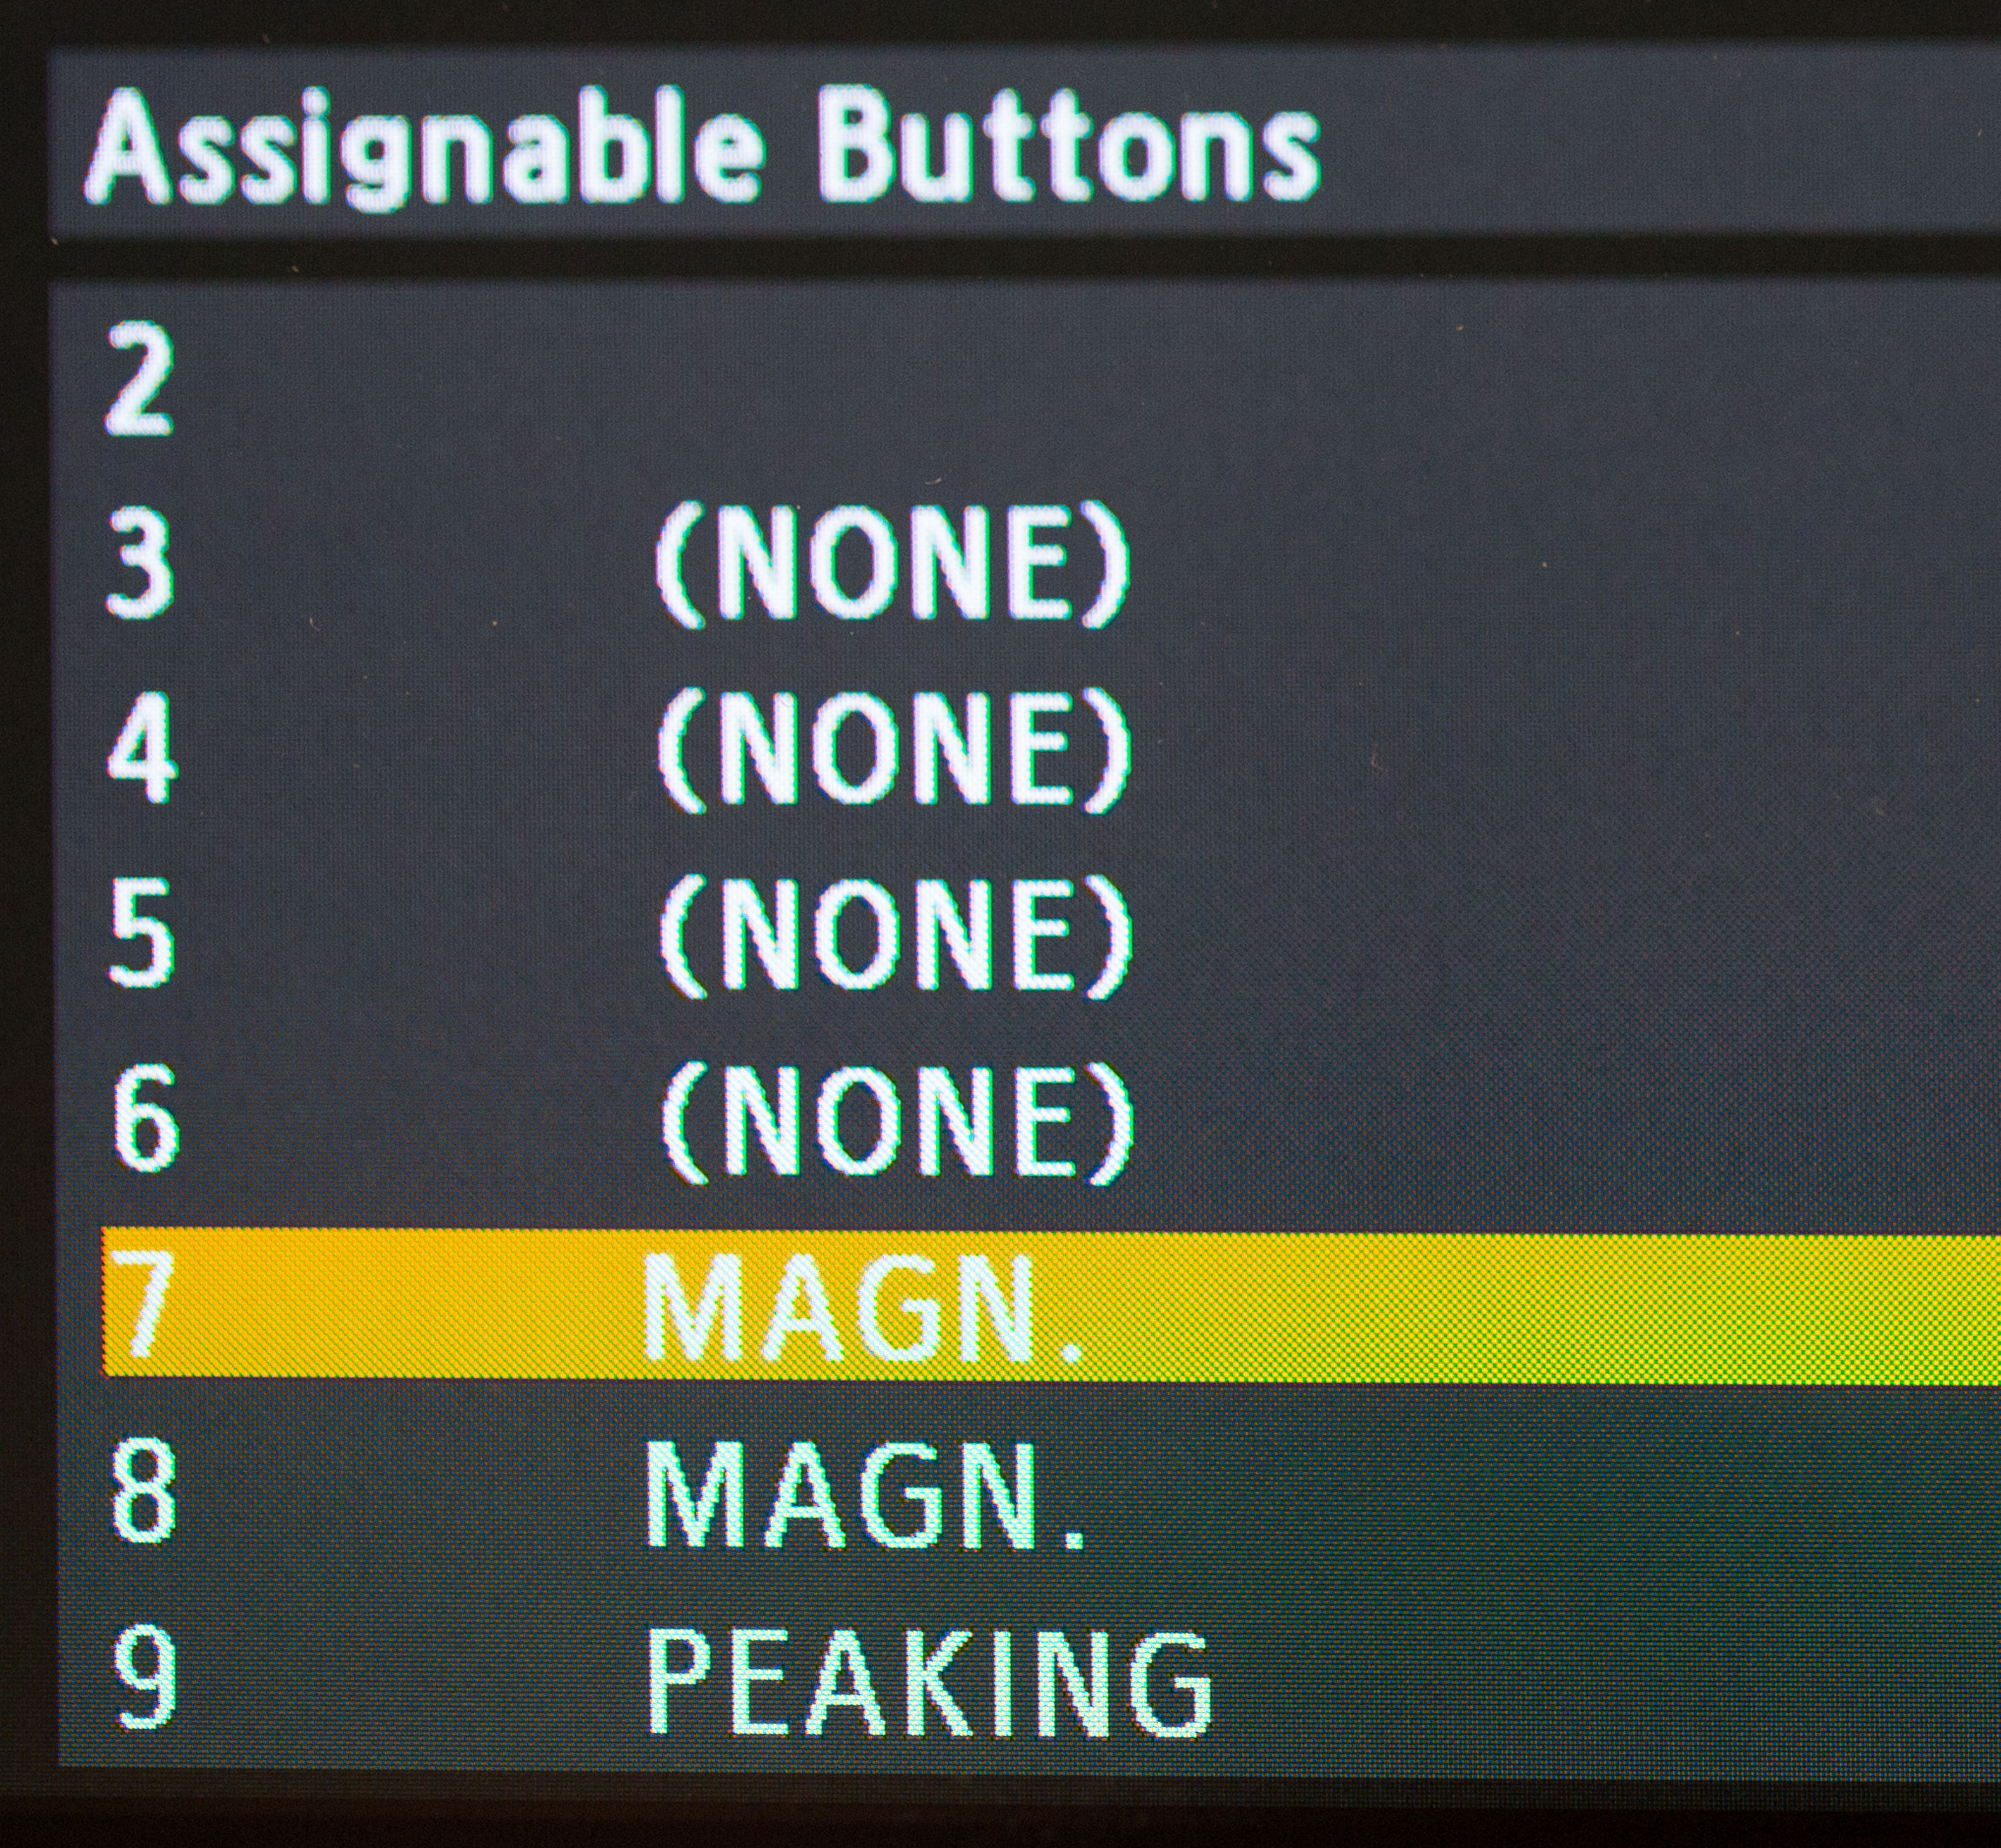
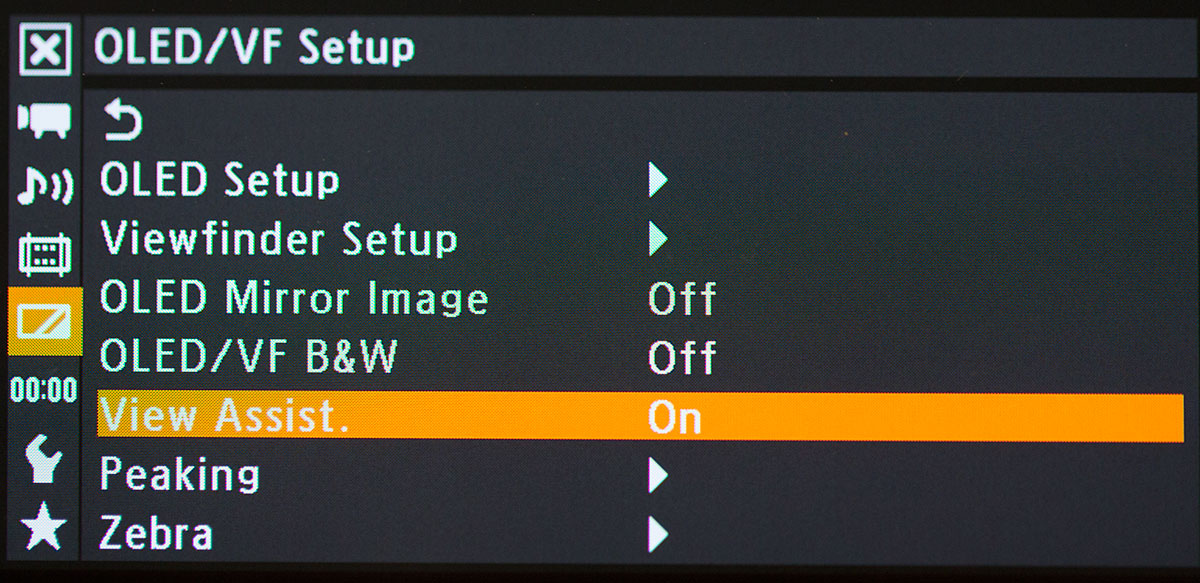 3. Enable View Assist. Under OLED/VF Setup menu, select View Assist and set to On. This makes what you see on screen look more like what the contrast and exposure settings will look like after the image is graded. If you don’t enable this, the image on screen will look very flat, making it difficult to judge exposure by eye.
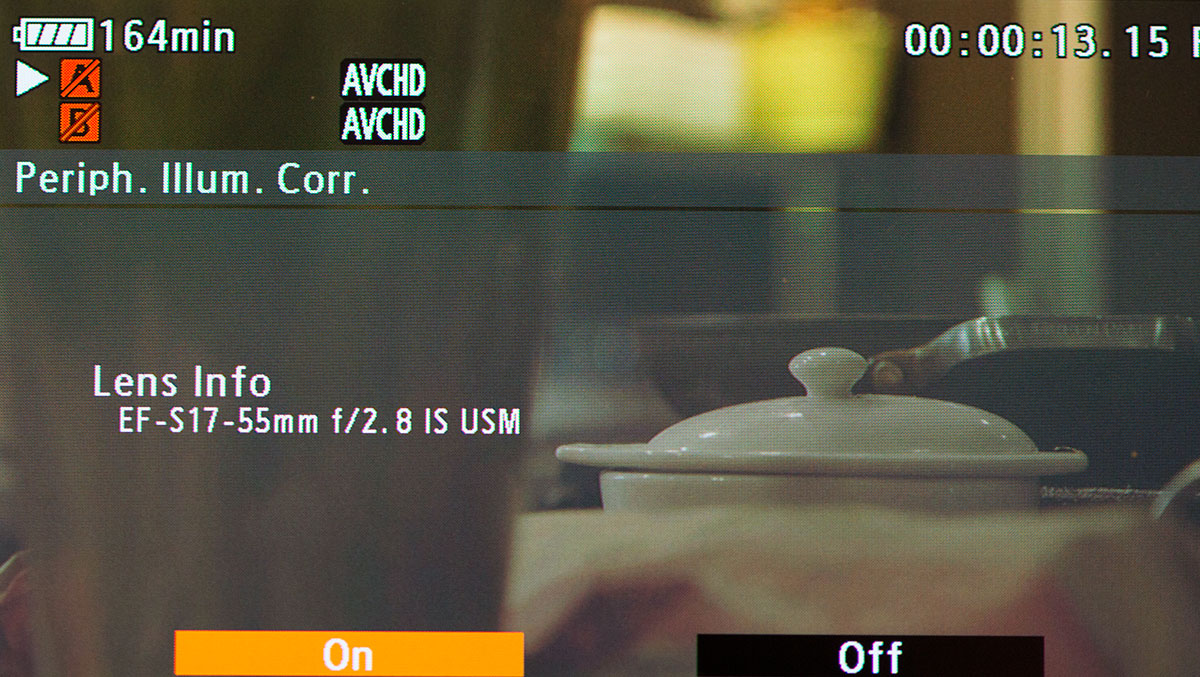


 Bonus tip: Use an ND filter in front of your GoPro. This is like putting a pair of sunglasses on your lens, and reduces the amount of light coming in so that the shutter speed can come down to something more cinematic. This allows movement to blur and look natural. It also goes a long way to reducing jello shutter that is exacerbated by high shutter speeds.