Ever since LEDs became a thing, I’ve been wishing for an LED that is bright enough to balance interiors with exteriors. Traditionally, you needed a HMI for this task. But HMIs are heavy, expensive, and hot. Nevertheless, gaffers love them for their ability to blast through diffusion and gel predictably. But for small productions like mine, generally just me, a sound recordist, and an assistant, having a light that packs the punch of an HMI but with the advantages of LEDs could be a real benefit. Enter the Hilio D12 Daylight Balanced LED Light from Litepanels.
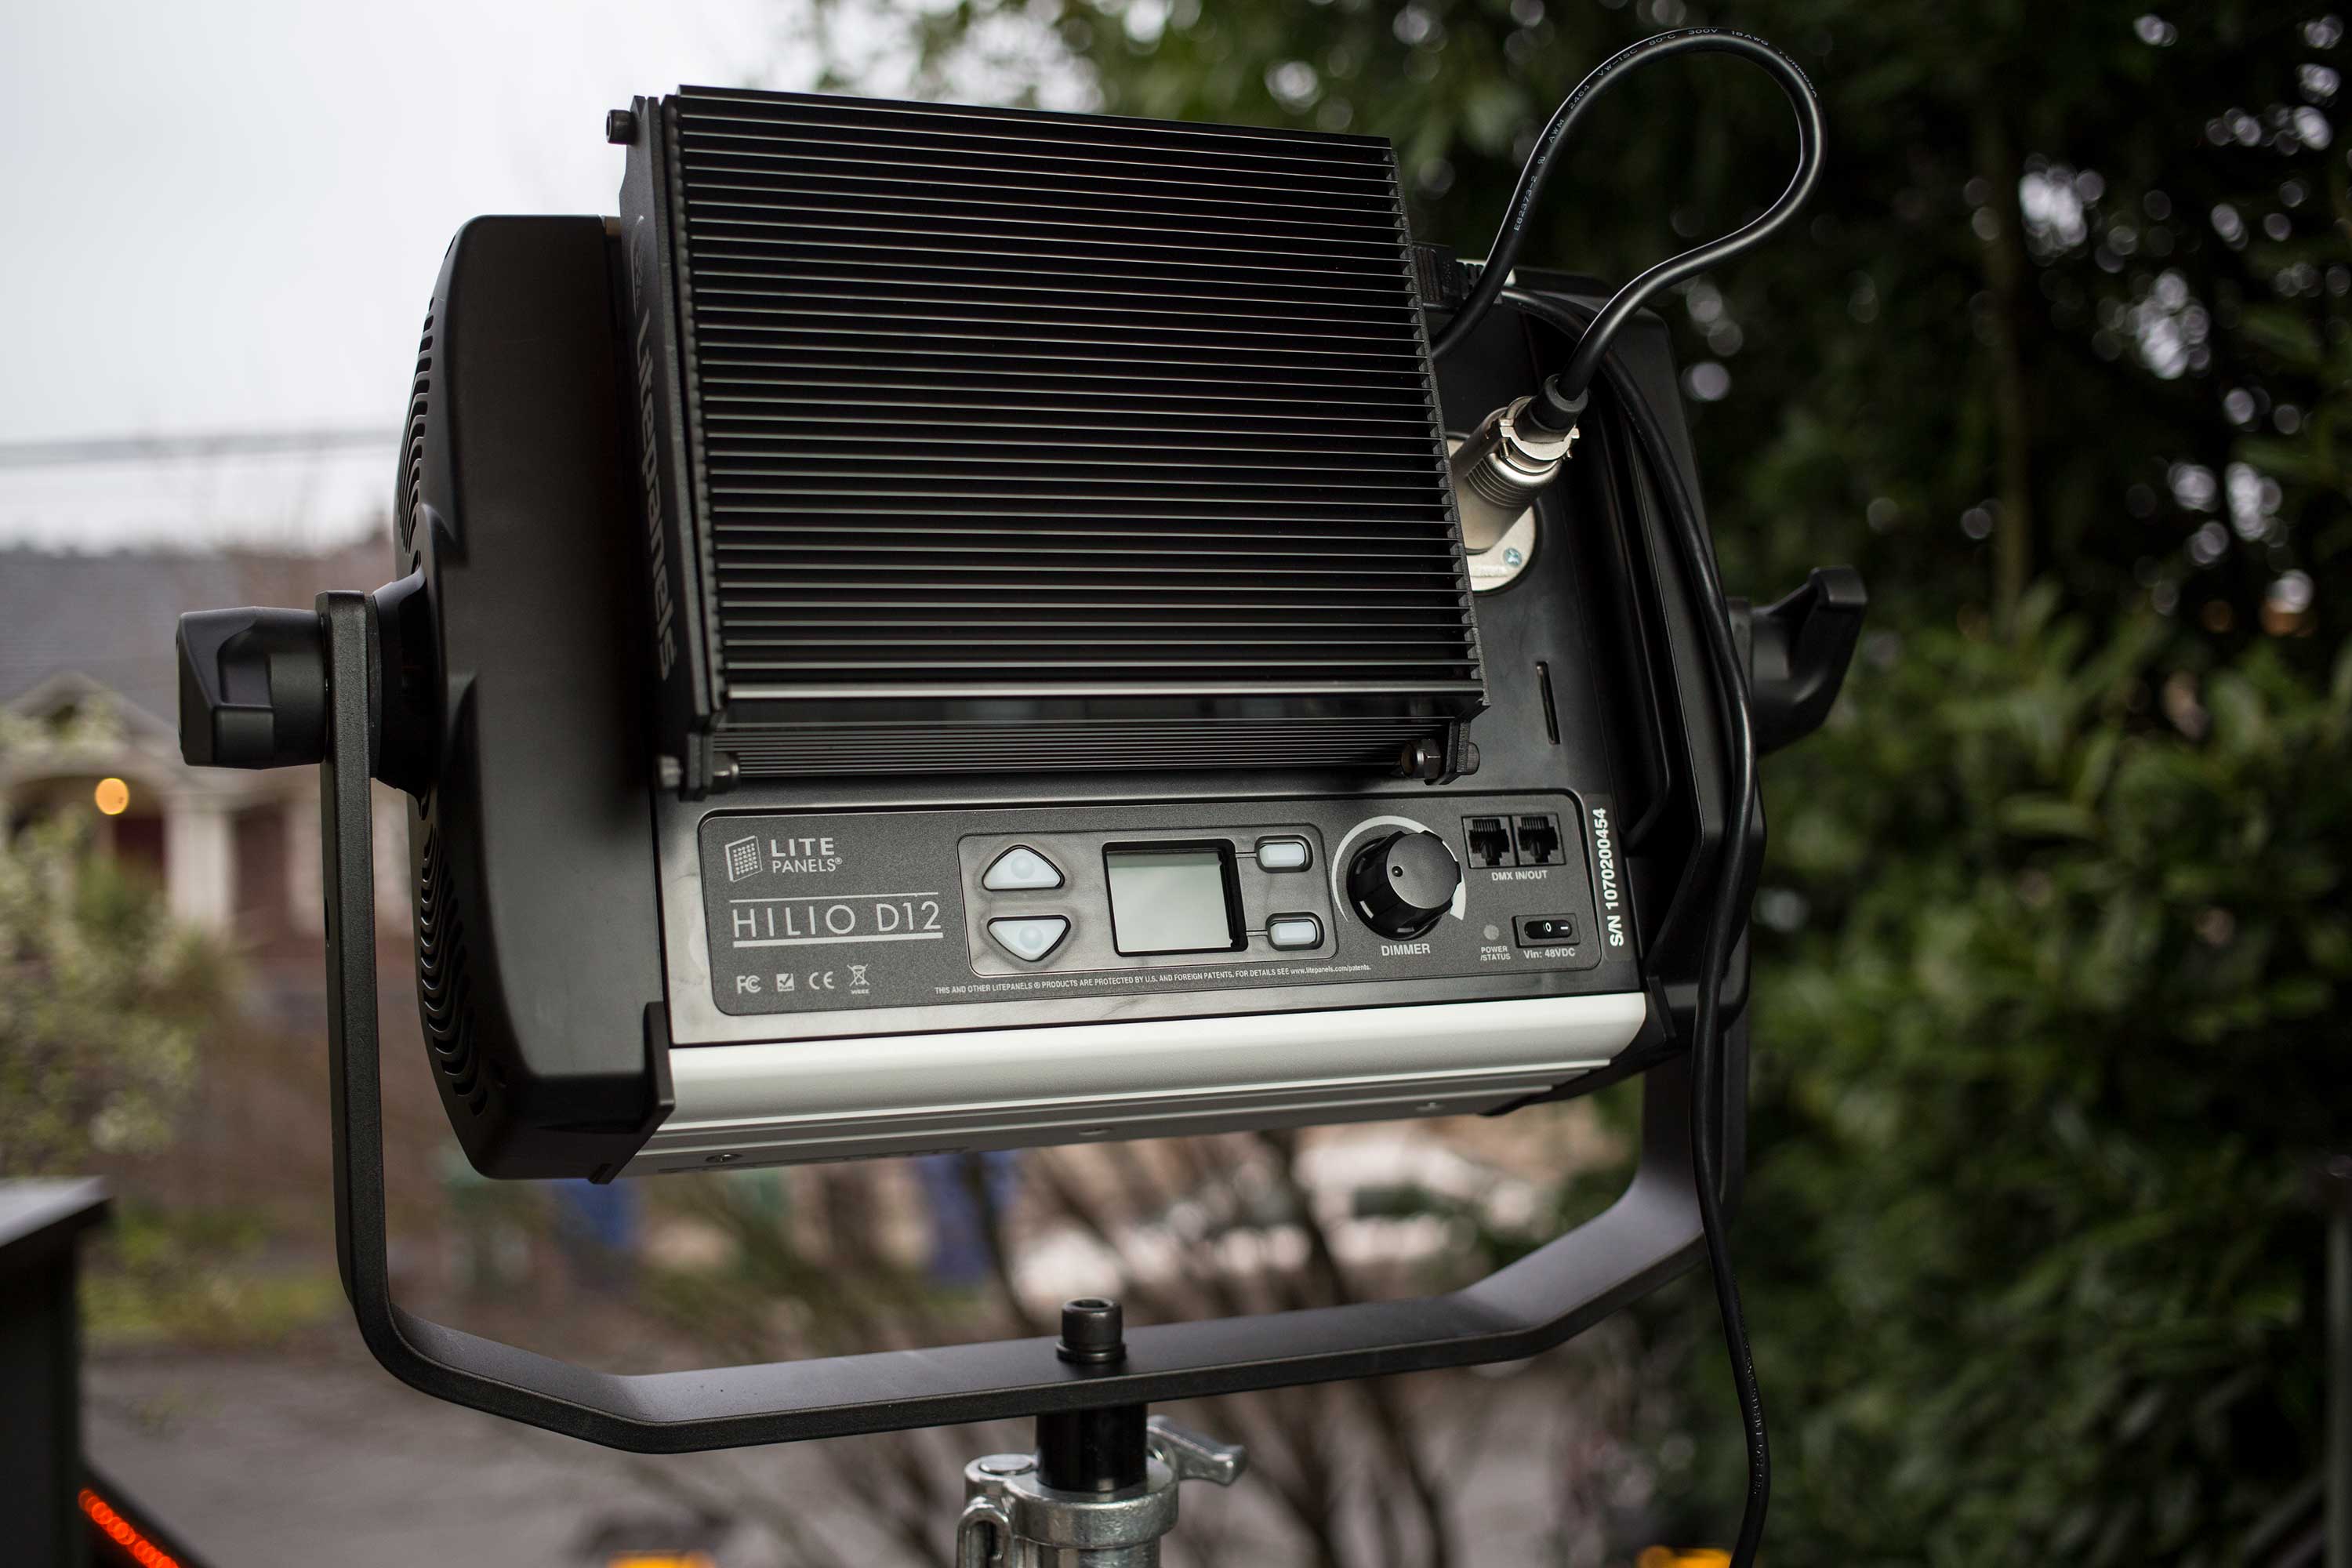
Hilio D12 controls
The Design
The Hilio has an all-in-one design, with the ballast attached to the upper back side of the unit. At first I found this pretty awkward, because the weight on top like that means the light always wants to flop onto its back when you release the twin locking grips to aim it. But with a Snapbag in place (and you really do need diffusion on this light – more about that below) the unit feels pretty well balanced. I think LitePanels made a good choice to keep the ballast on the unit instead of separate, like some other manufactures. It makes it really compact, but at 25 pounds, this isn’t a small light. In fact, you need something like a Master Combo HD Stand (11′) with a junior receiver that accept this light’s 1 5/8″ spud. You can’t place this light on a standard C-stand.
My problem with the design of this light is a nitpick, really: the power cord. At just 6 feet long, it is a lot less useful than the power cord that comes standard on Arri 650s. I really wish it had at least a 12′ cable with a more robust, locking connection to the unit. The ballast has a nice locking connector, so why not the power cord? Be sure to pack extra stingers when you use this light, because you really can’t plug it in without one.
With HMIs diffusion is nice; with Hilio D12, it’s mandatory
The thing with LEDs is that, apart from chip on board designs, they tend to have many individual points of light. That’s not a bad thing, but it means that you definitely have to diffuse the light to avoid multiple shadows. This is especially true of the Hilio, which is essentially an oversized light panel.
Here’s a comparison that shows how much diffusion is necessary to achieve good results:
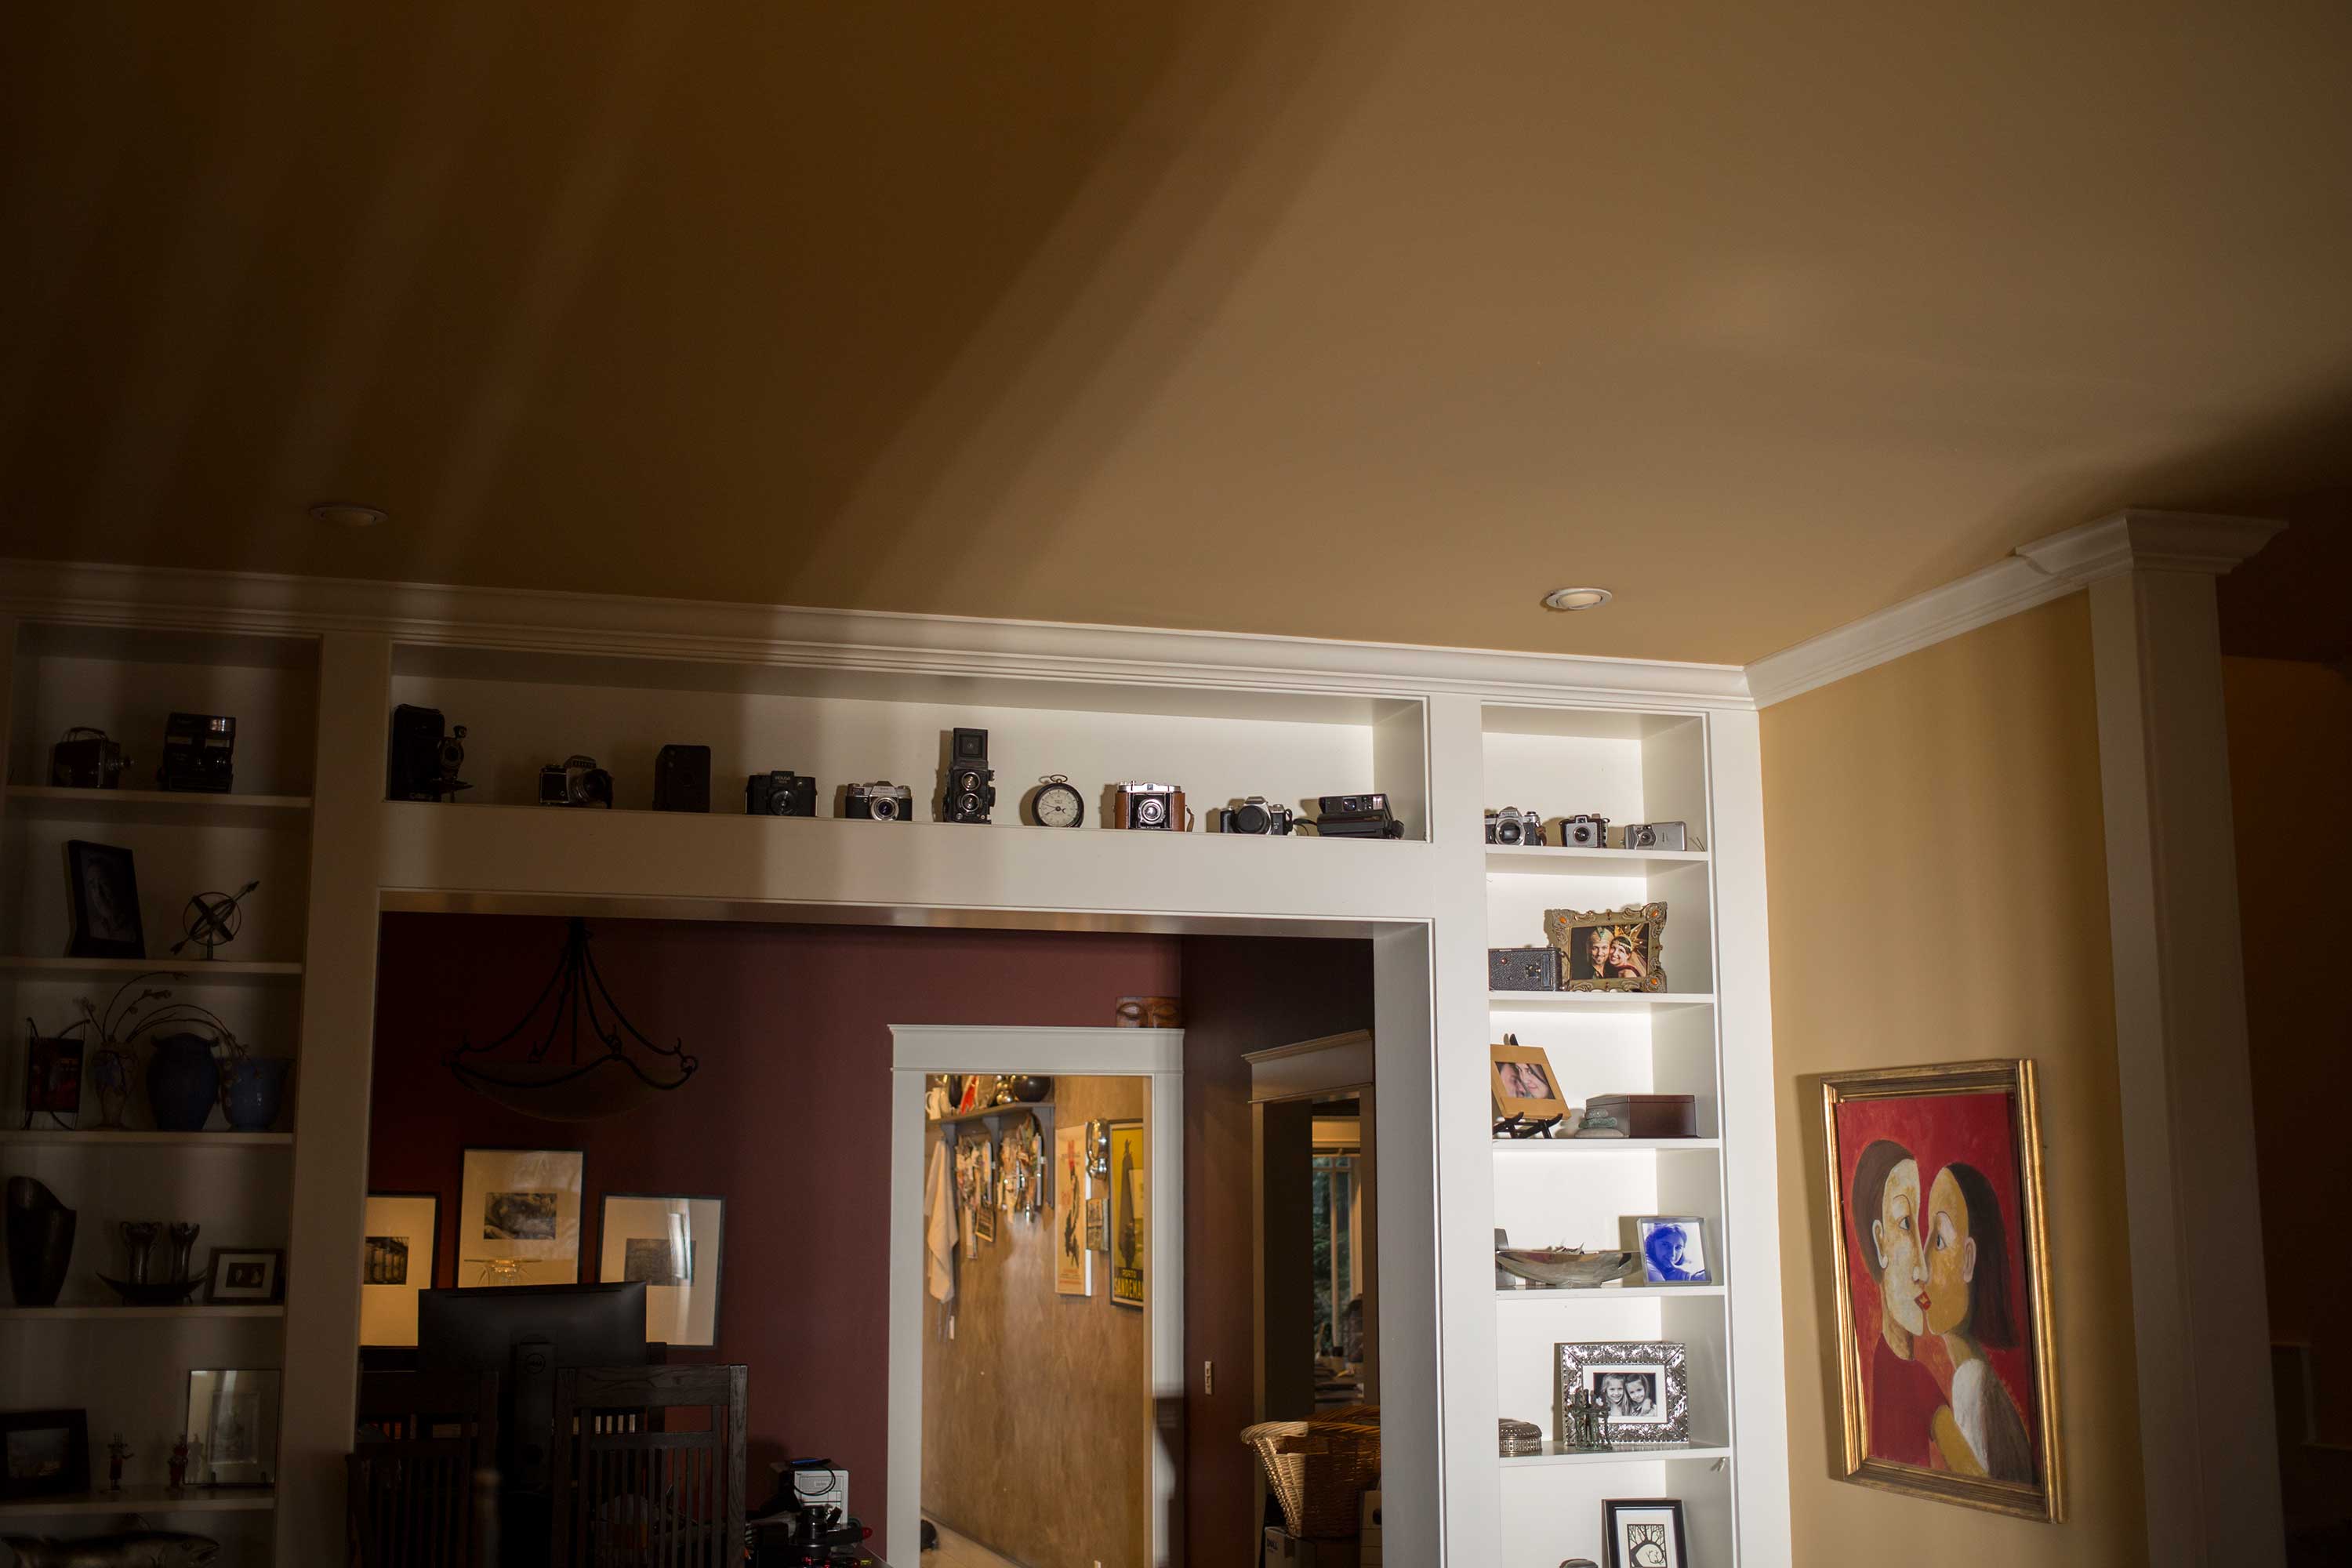
Raw beam through doorway
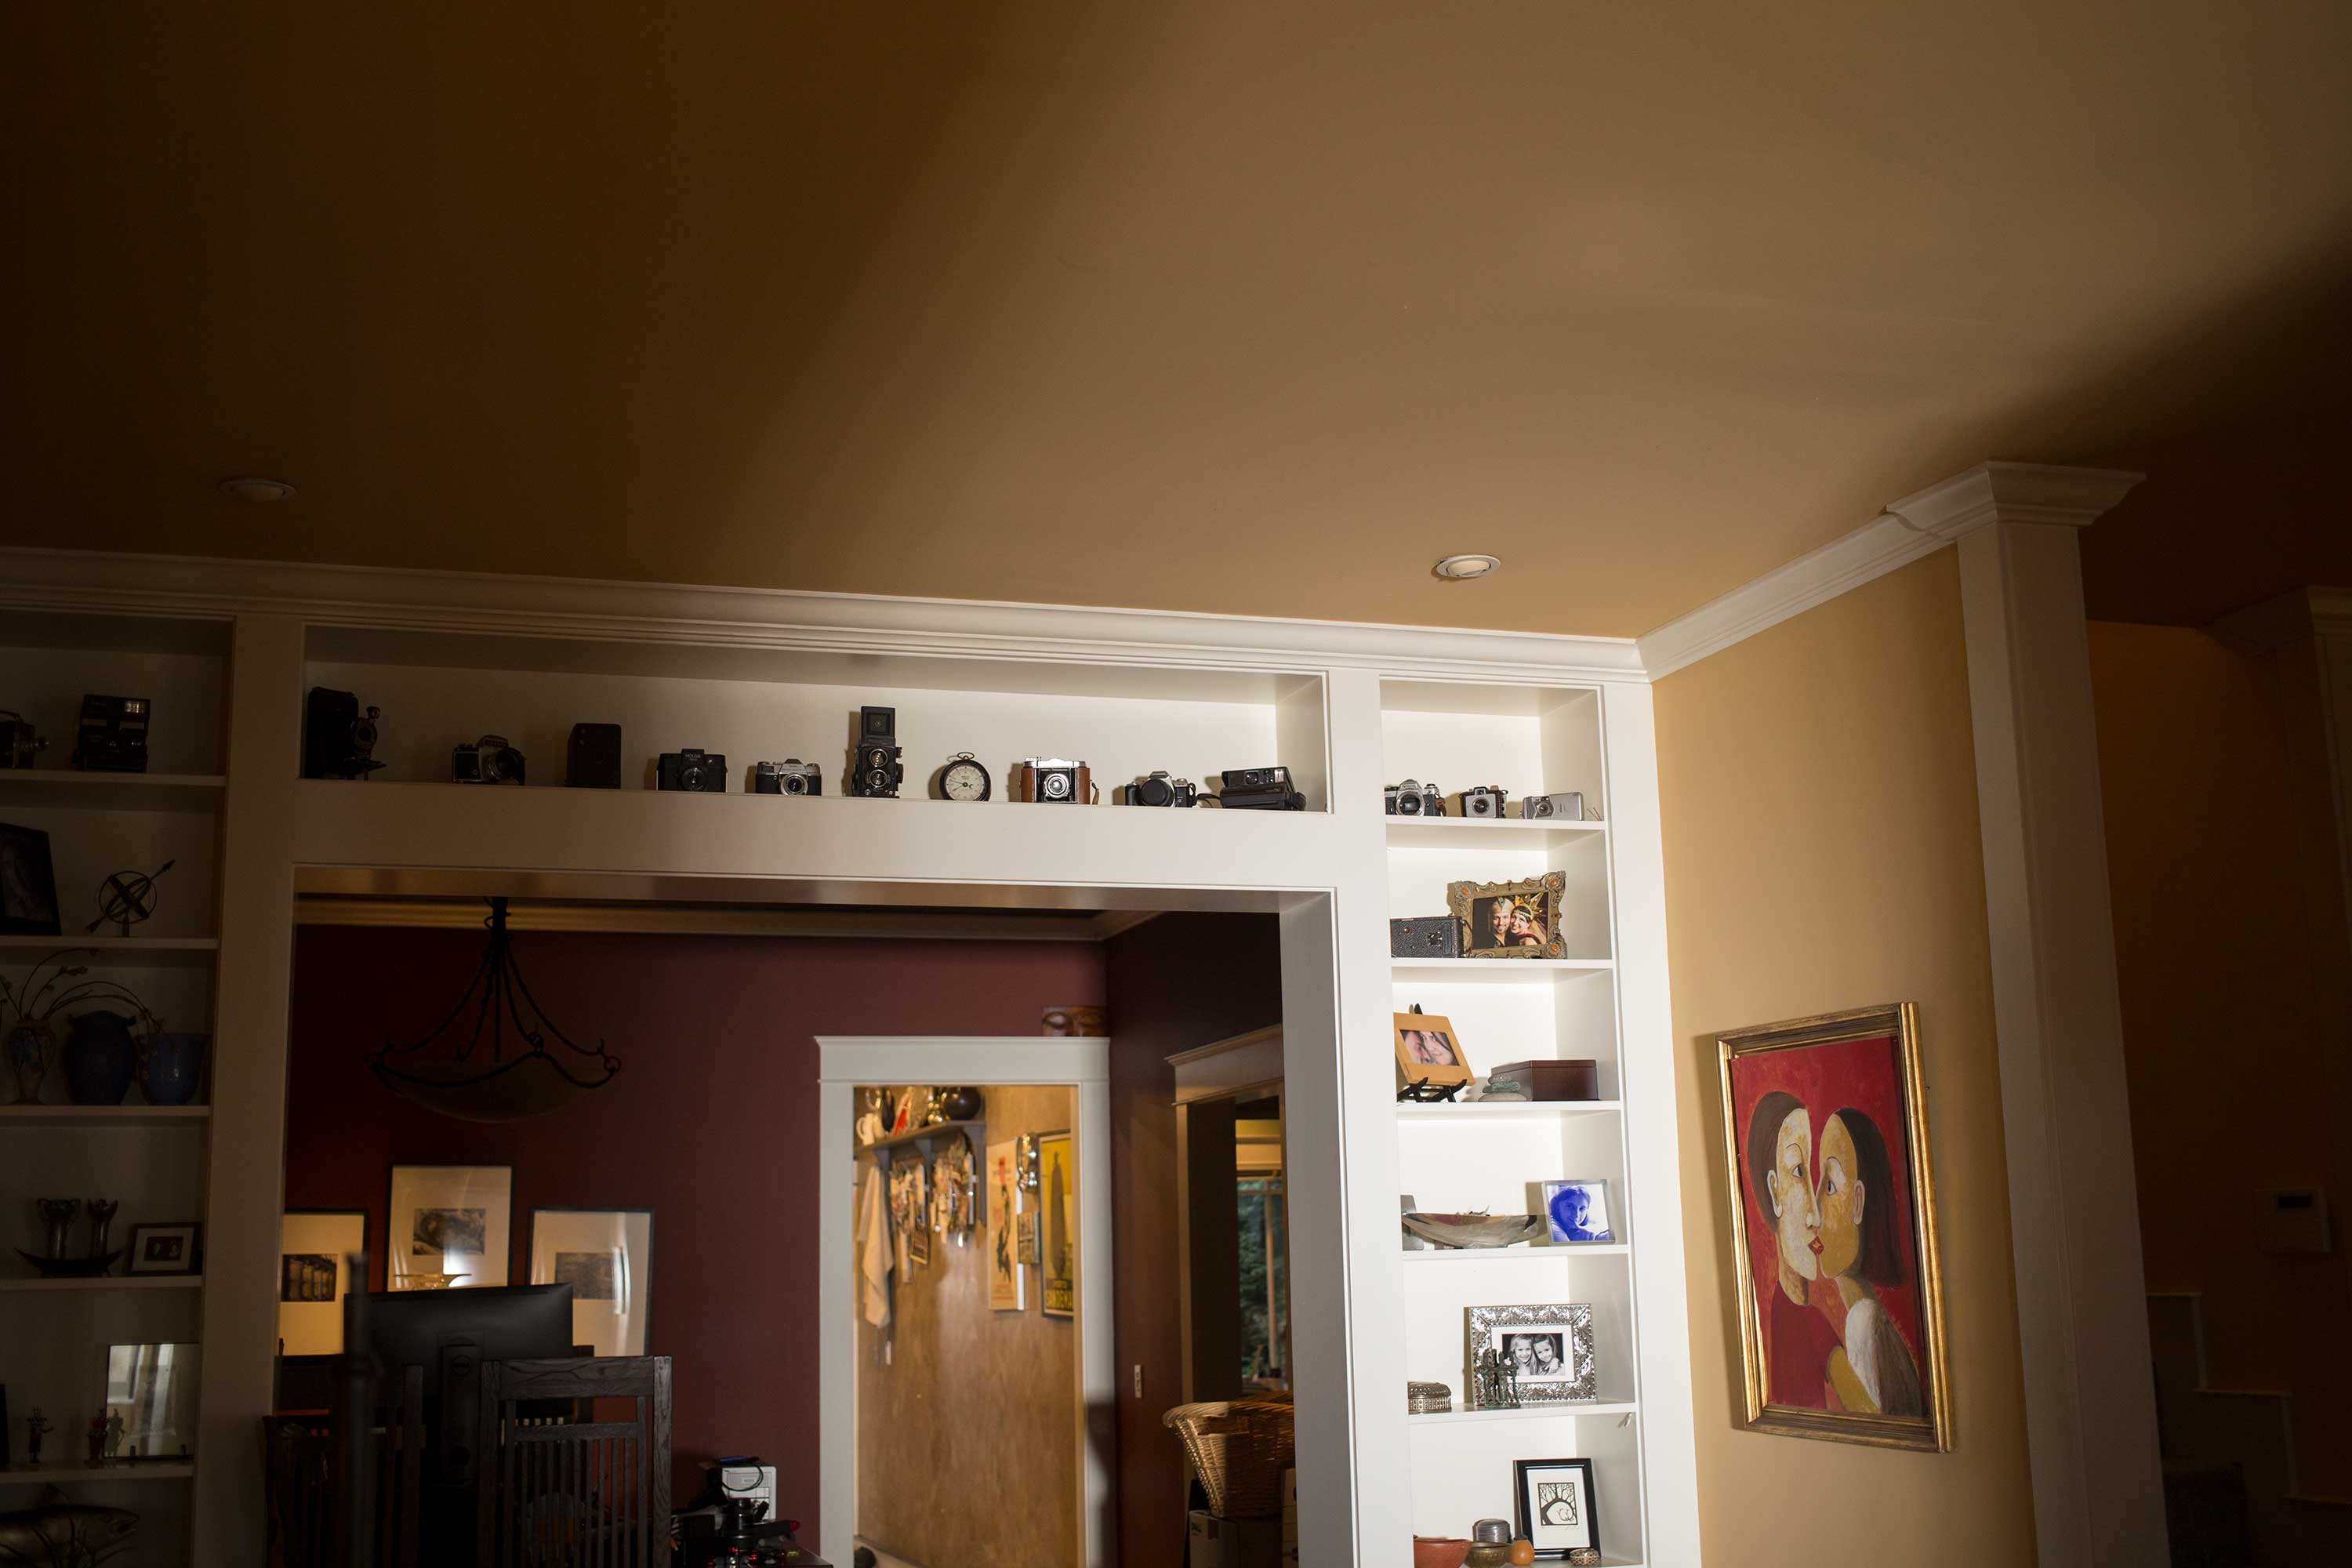
Raw beam through 4×4 of Hampshire frost light diffusion (note lines are still visible)
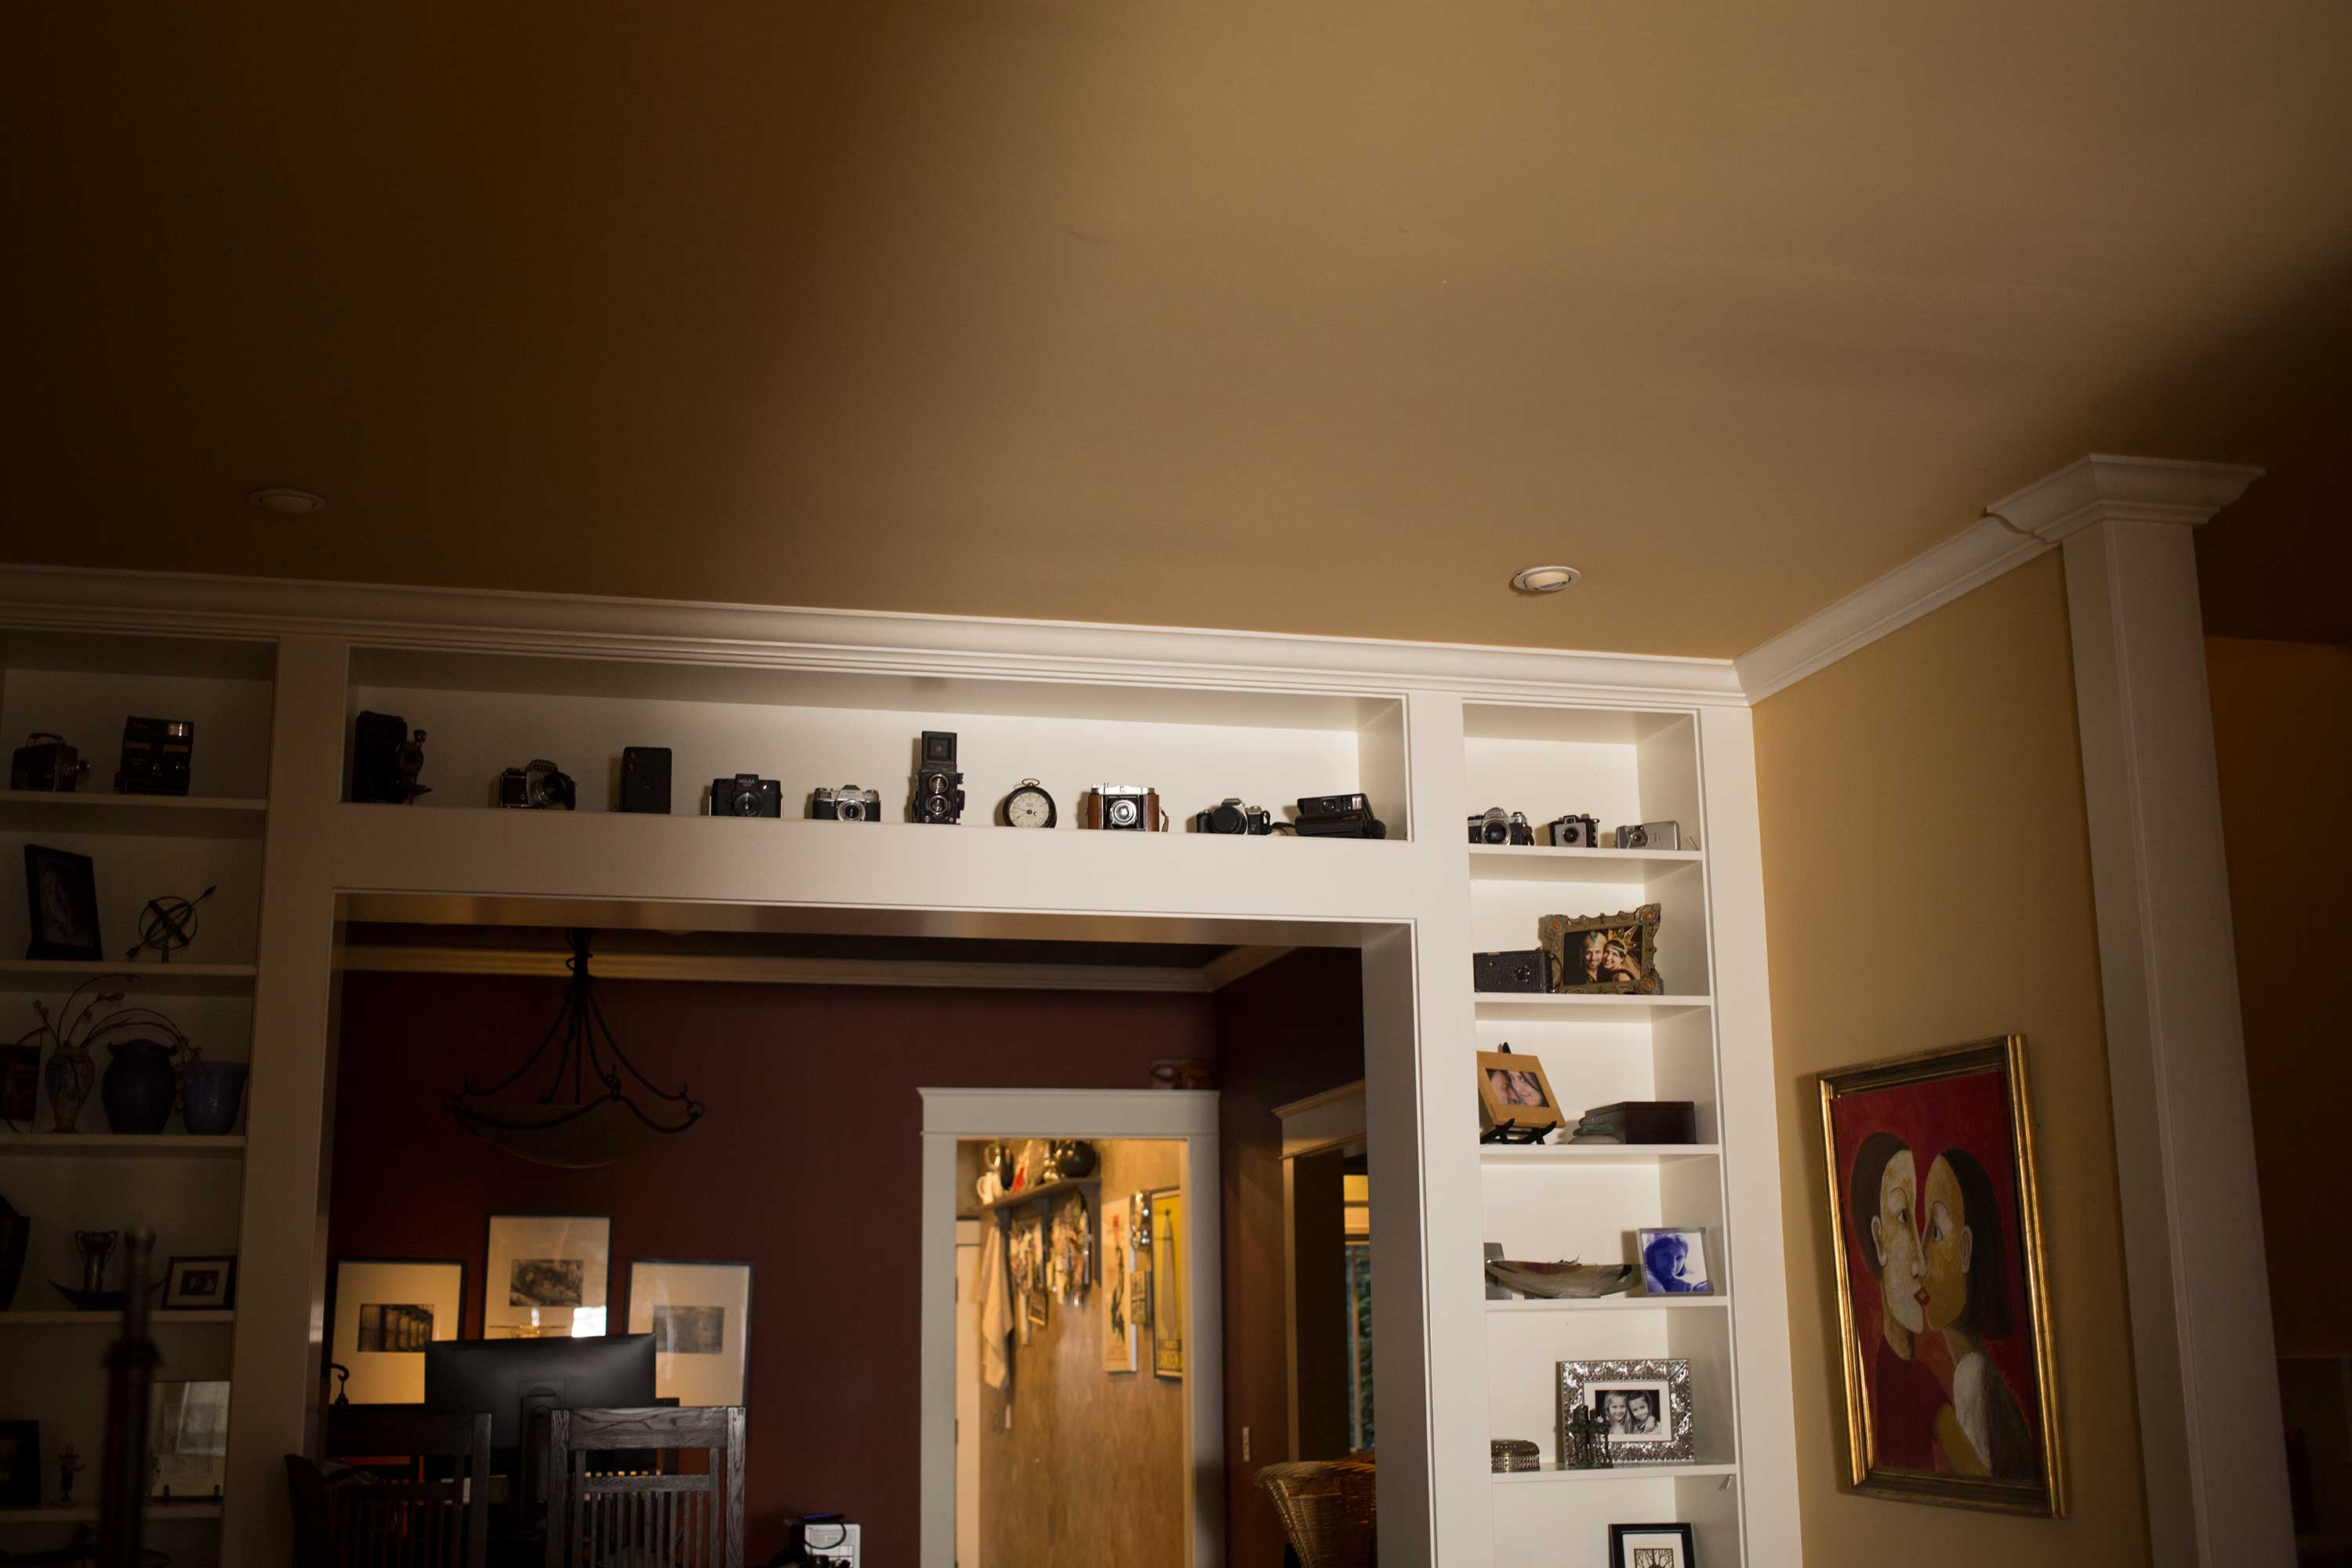
Beam diffused with 1/4 grid lamp head bag
The shots above make it pretty clear the Hilio D12 isn’t a great solution for throwing a hard beam of sunlight into a room, like you can with an HMI. LitePanels does offer a set of Nanoptic Lens Set For Hilio D12/T12 LED Lights which are advertised to help shape the light, but I’m not sure it would solve this multiple-shadow problem. The loaner I tested for this review did not include the filters.
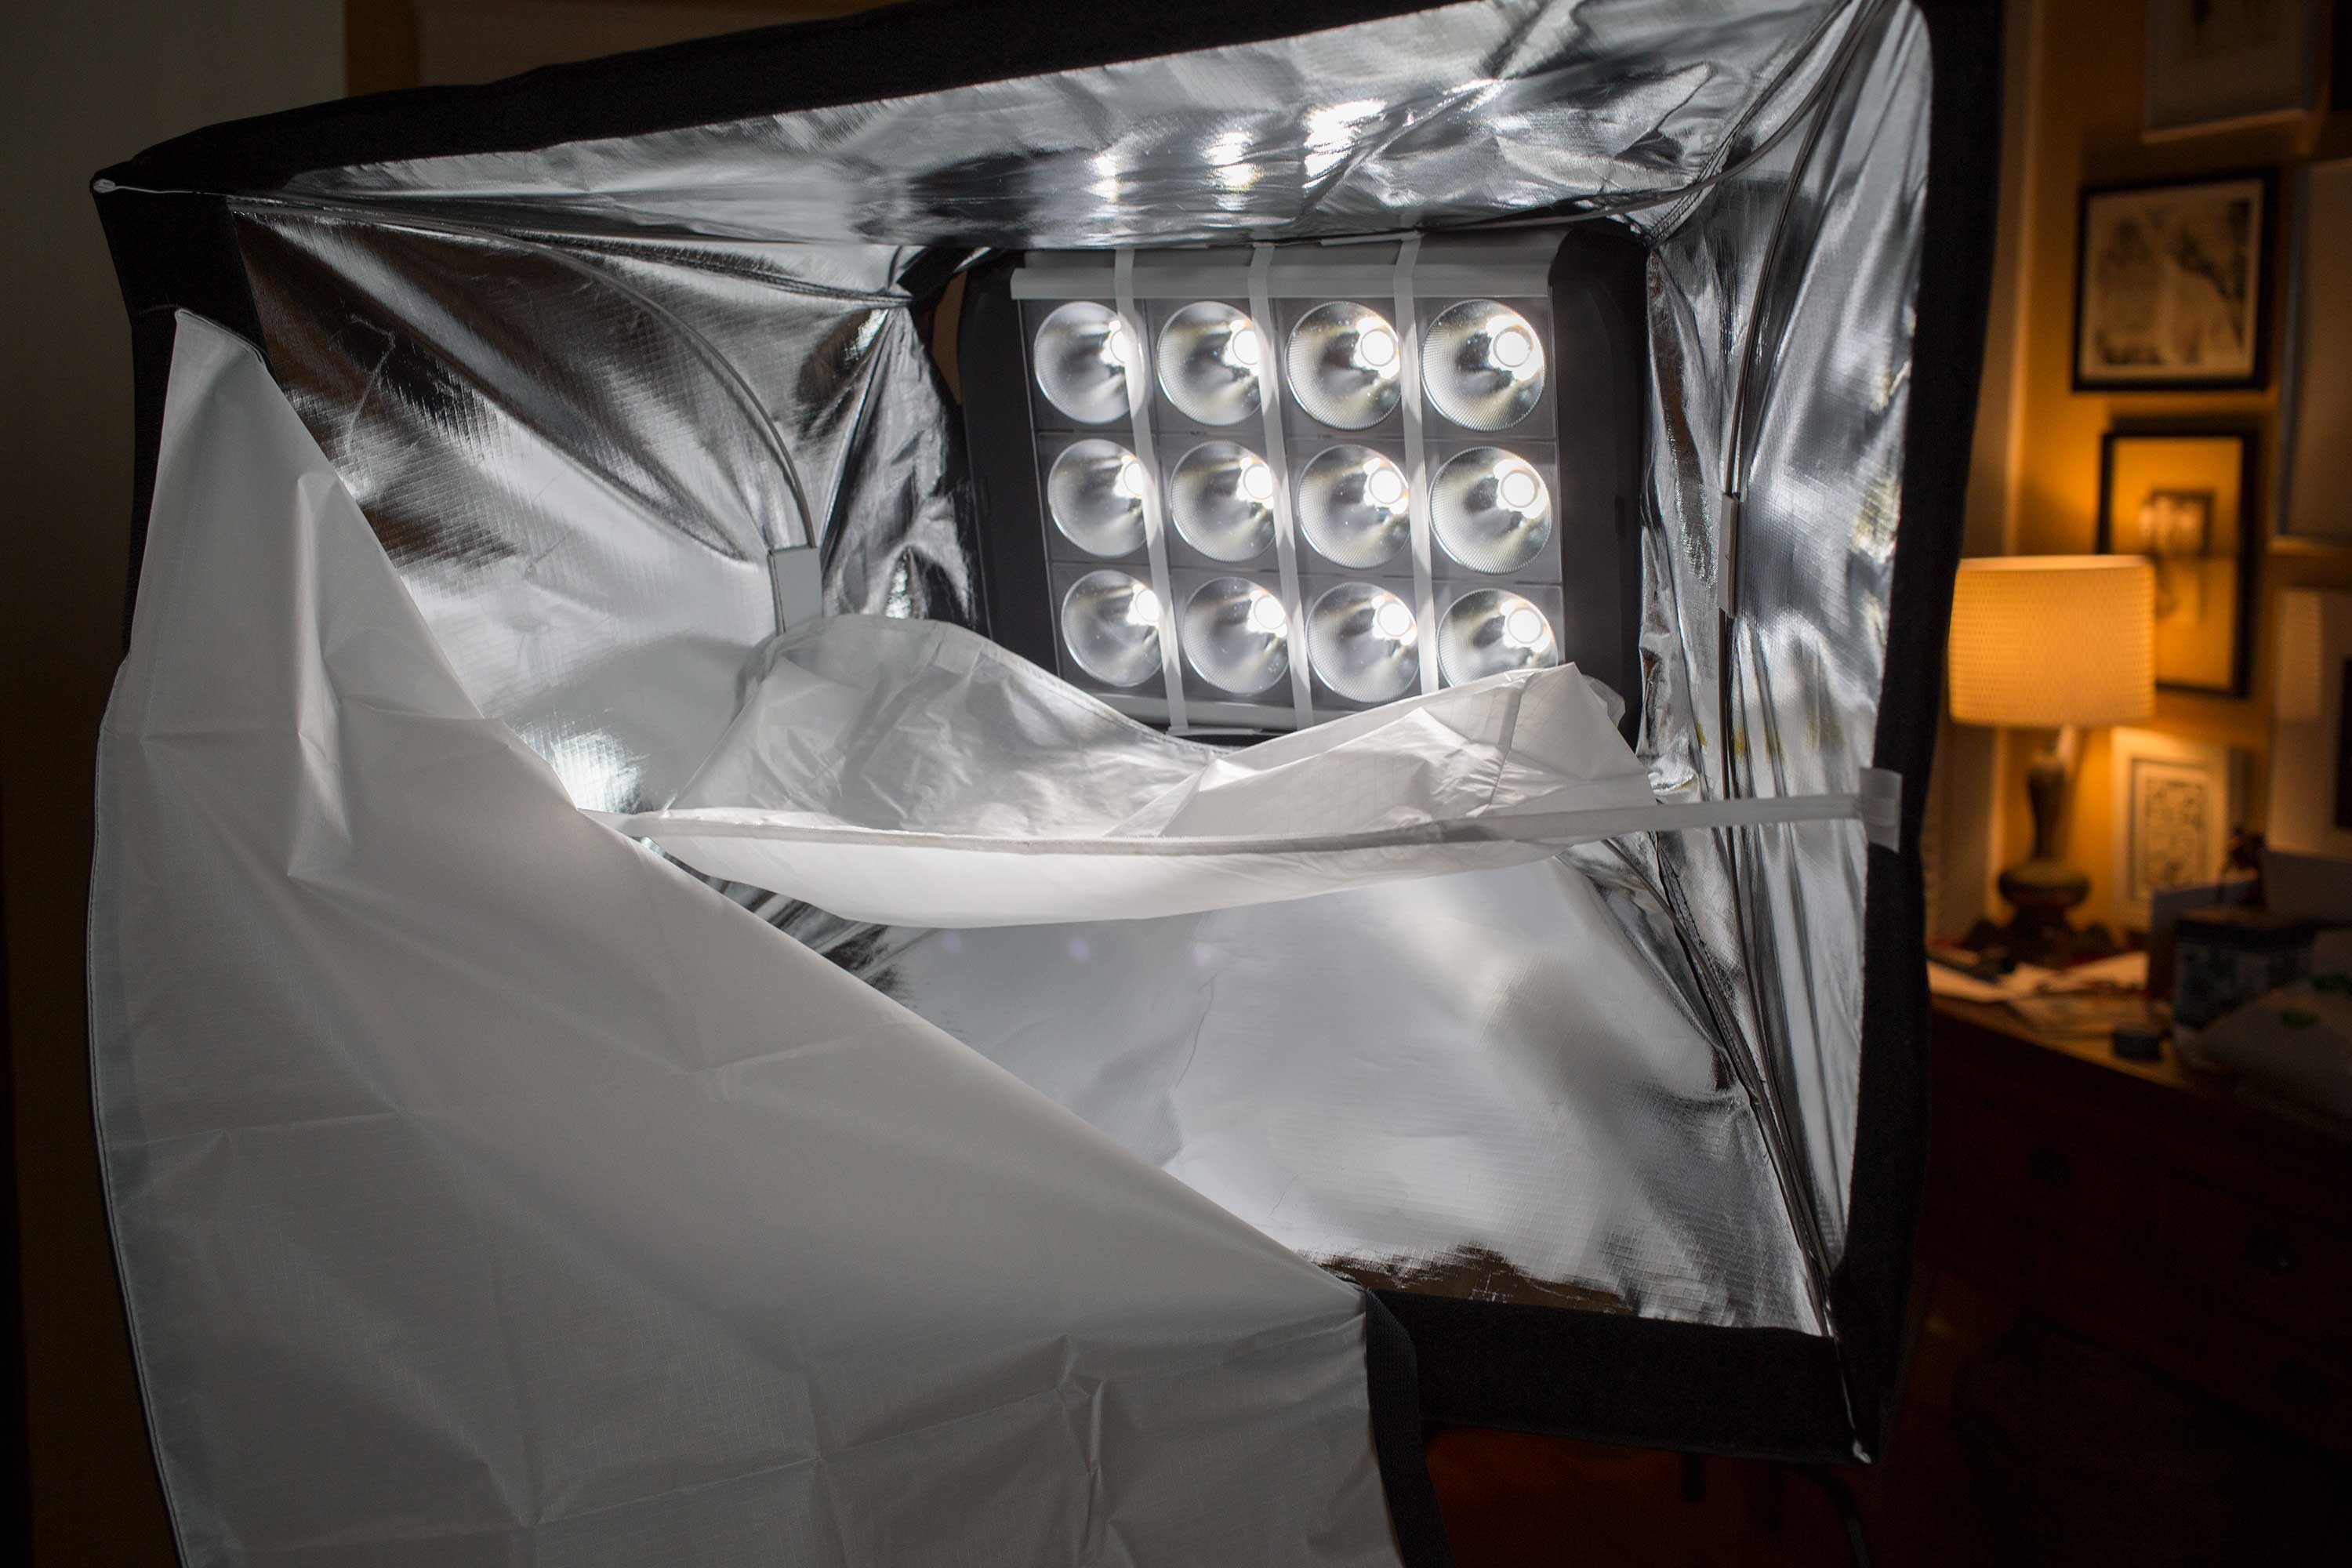
Snapbag soft box
Snapbag with 1/4 grid lamp head diffusion attached

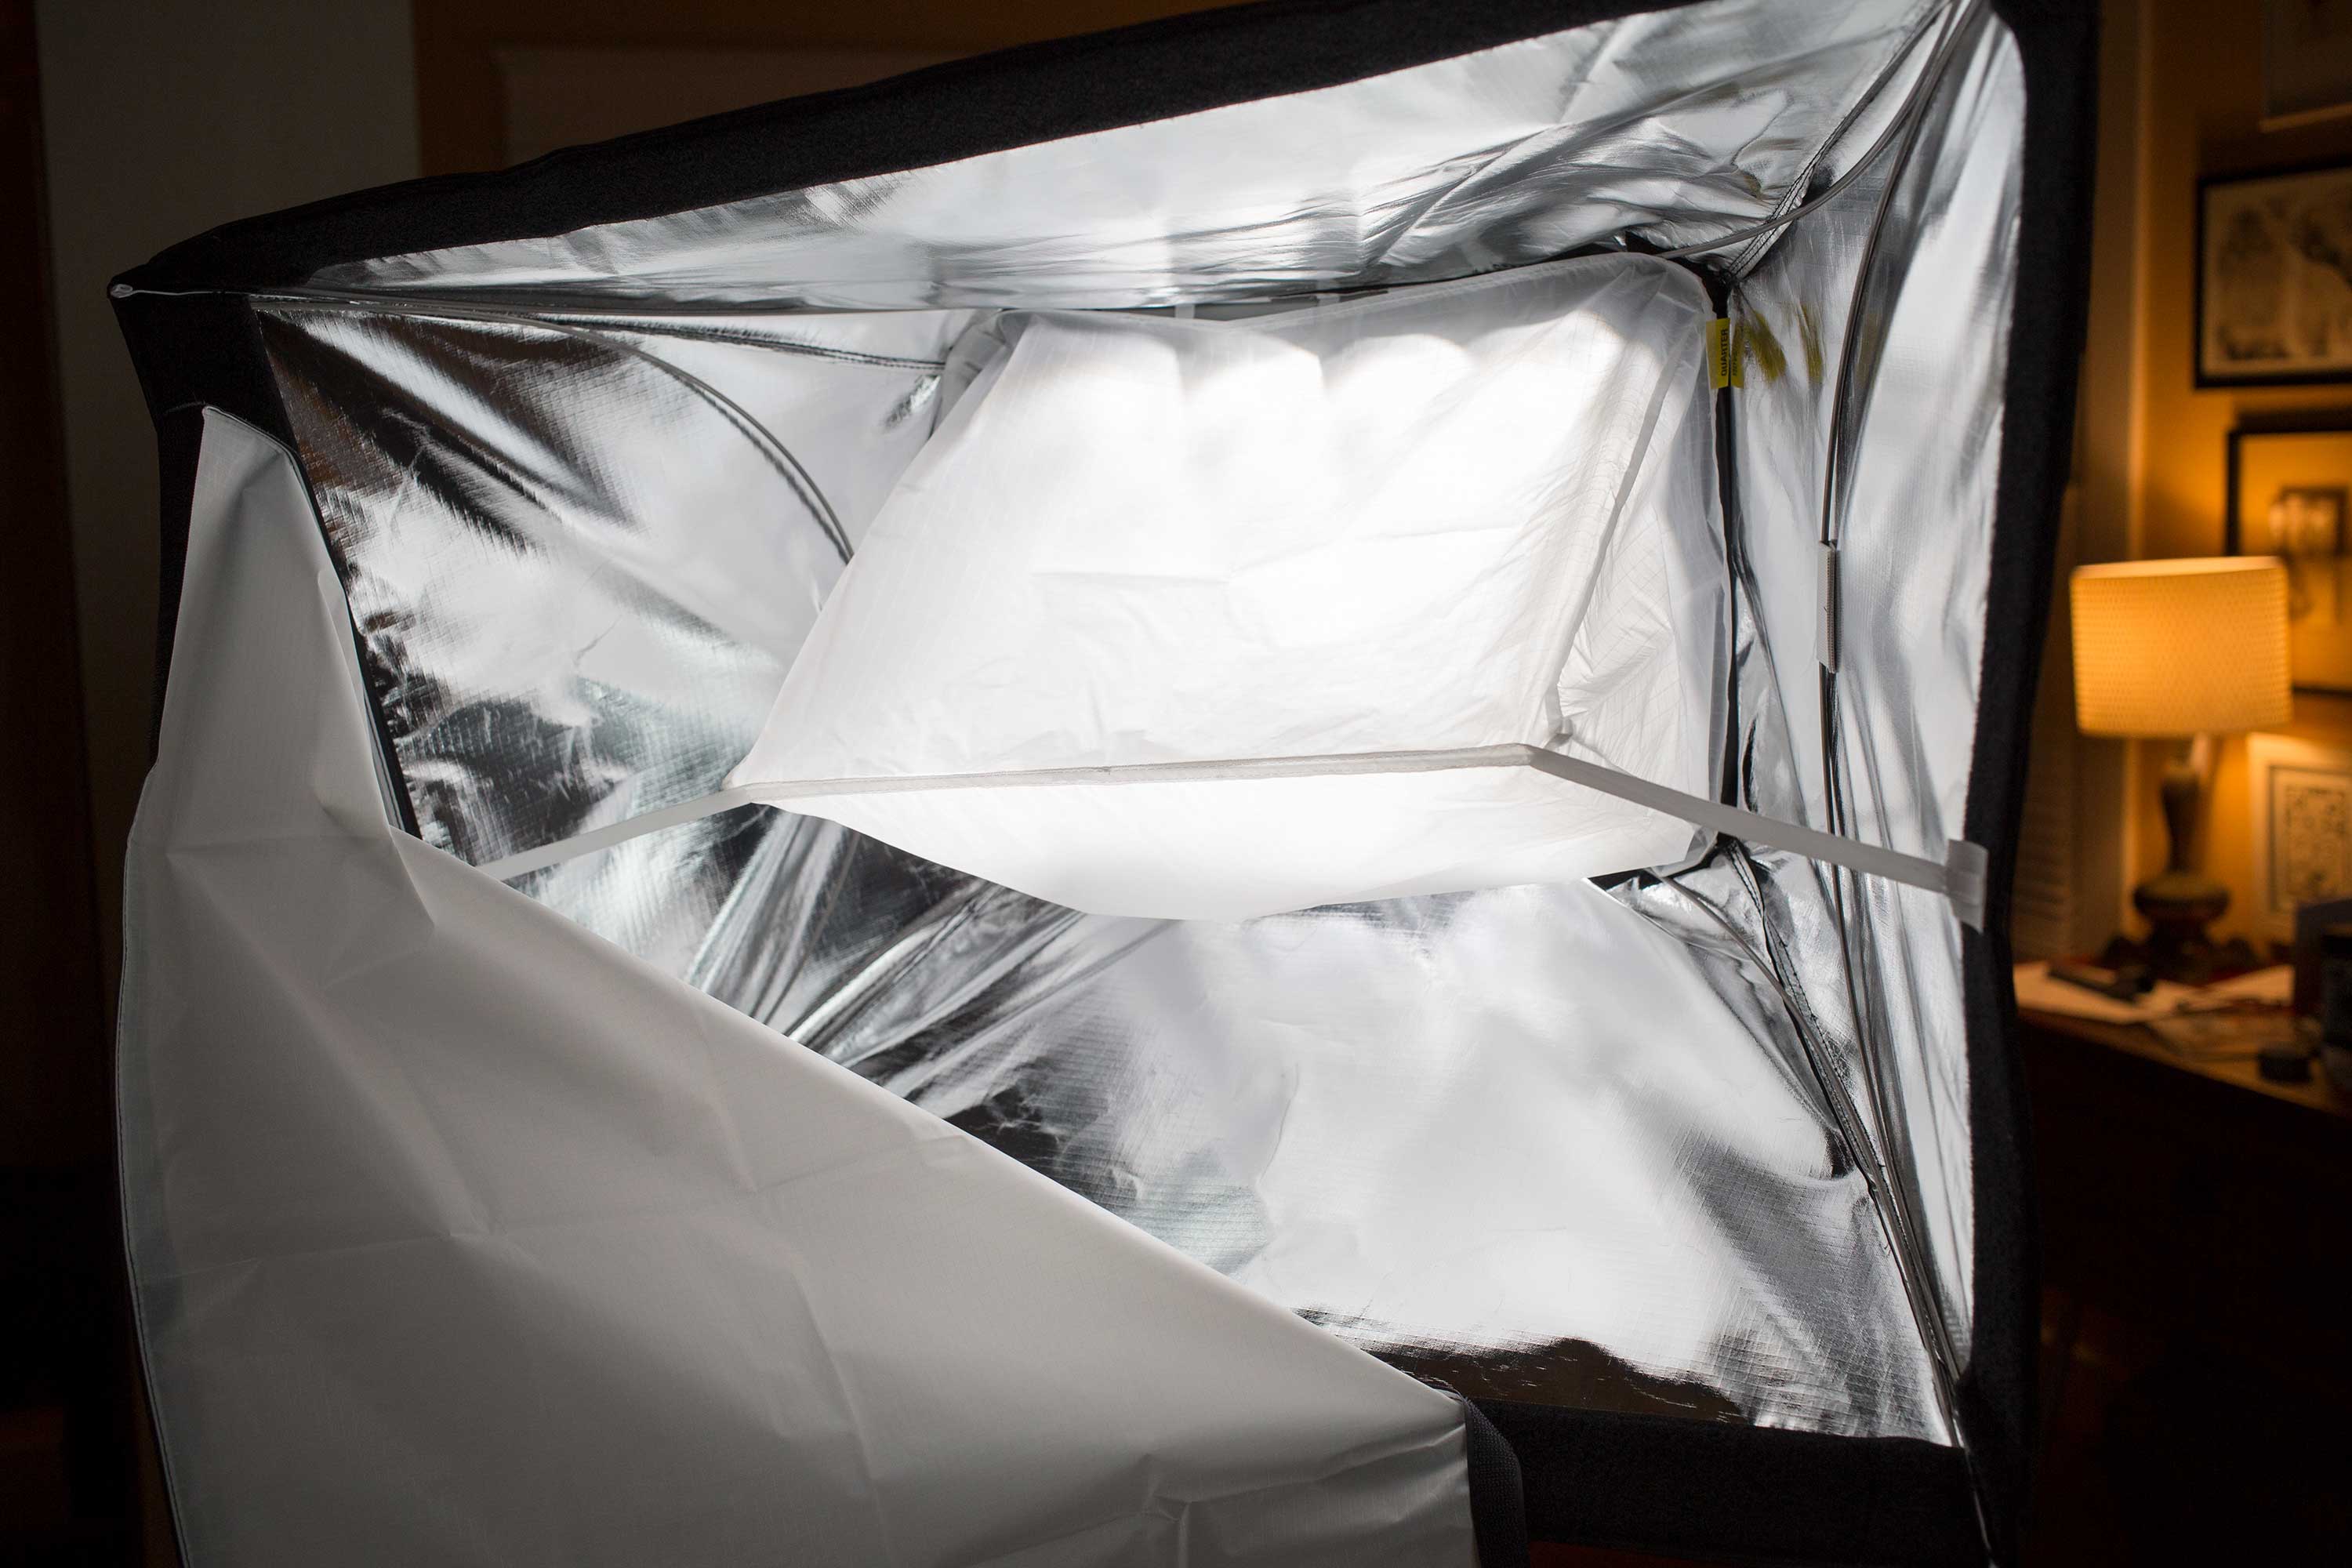
Snapbag with full grid diffusion in place
The Oversized Softbox with Baffle for Hilio D12/T12 LED Light (Otherwise known as Snapbag) is very impressive. It folds right out of its bag without requiring any assembly or hardware, and attaches to the head of the light with two velcro straps in a few seconds. It’s not a big softbox, but I found it to be a nice working size – not too big to be unwieldy on location, but not too small to diffuse the light adequately.
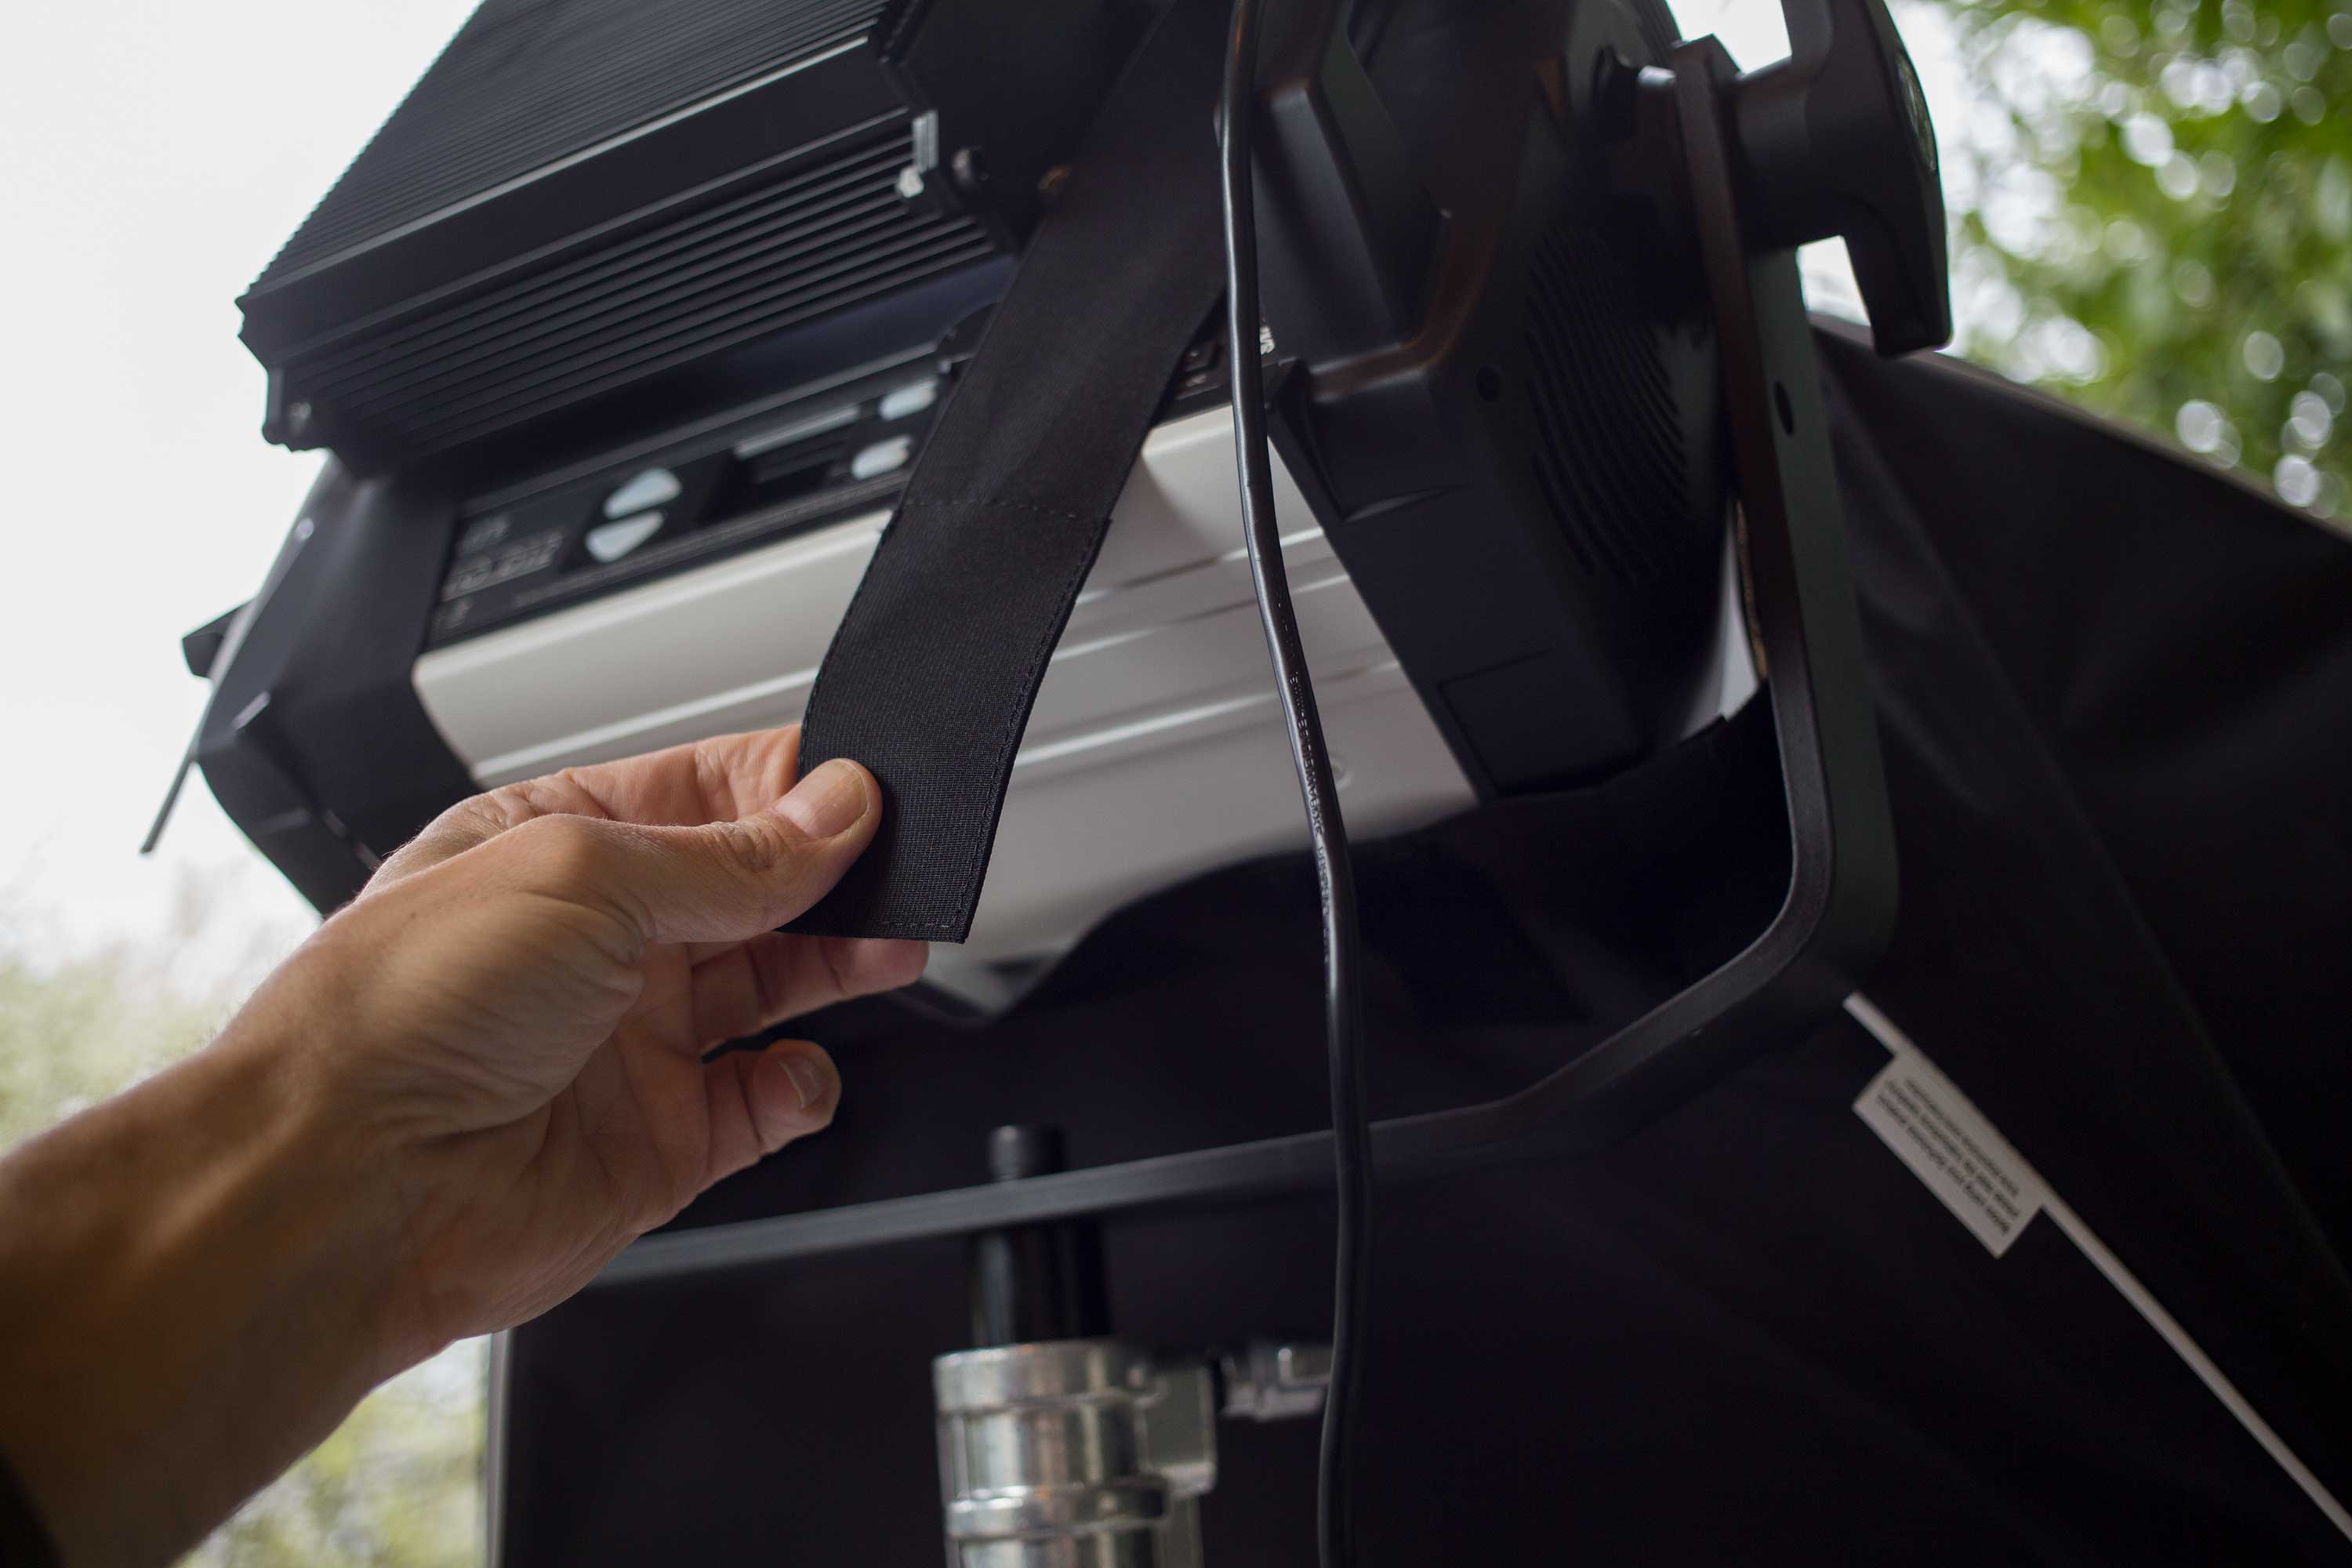
Snapbag straps
However, I noticed that even with the 1/4 grid lamp head bag AND the full grid on the face of the Snapbag, the light emitted wasn’t particularly even. See photo above. I recently spent a week shooting on location with Kino Flo Celebs, and their perfectly even illumination surface made them a joy to work with.
Finally, using the quarter grid and full grid really cuts down the power of this light. You find yourself pretty quickly wanting to diffuse the hell out of this light, but not being able to, because you need more punch. But that’s a problem with HMIs too, right?
The window test
So, how much power do we really need, anyway? I’m not all that interested in foot candles or LUX; I prefer to talk about real-life scenarios. With artificial intelligence, you have the Turing test. With lighting, you have the window test. In my world, an LED is only a contender for the HMI equivalent prize if it’s bright enough to light a subject so that she looks good in front of a background that includes a window. So how does the Hilio do?
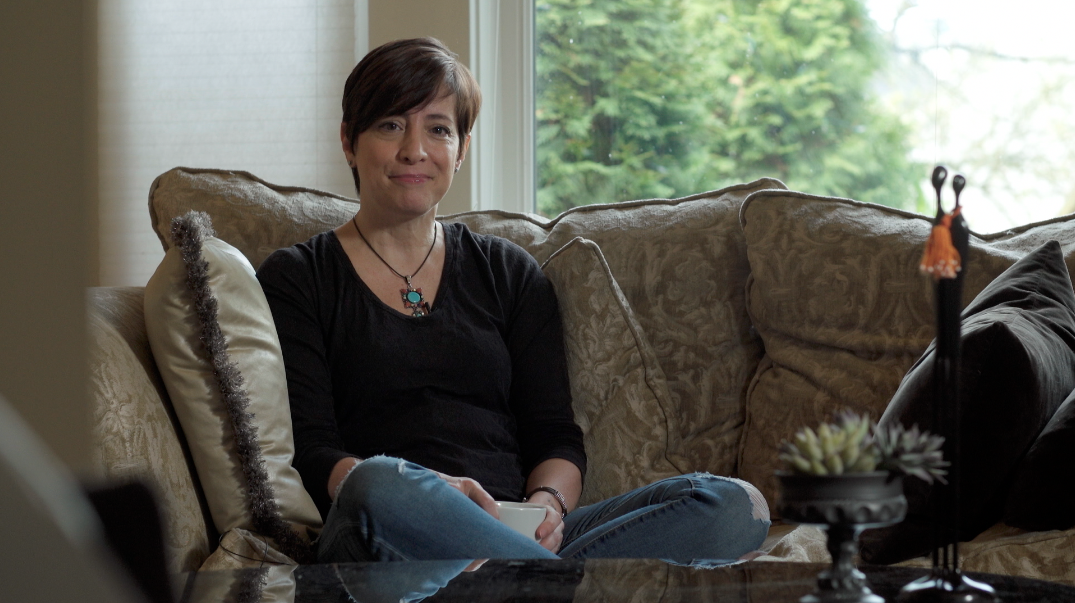
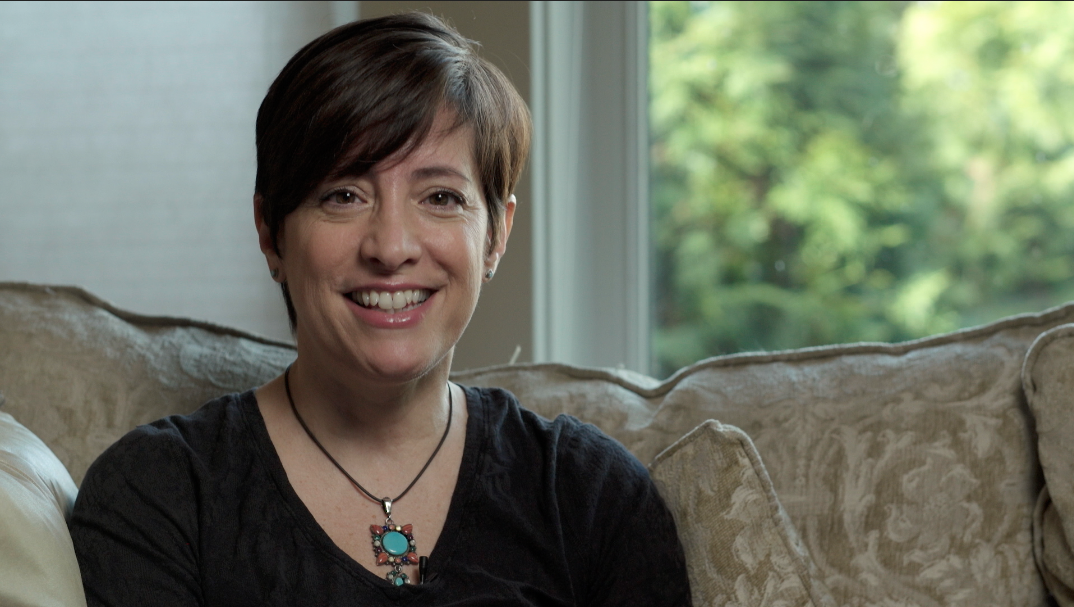
Hilio D12 as key with window in background
In the frame above, the Hilio was positioned, at full power, about 8′ from subject with the 1/4 grid lamp head bag to give it basic softening and spread. The light was further softened with a 4×4 of Hampshire frost (which costs just 1/3 stop of light). I used a sheet of black foam core to cut the light off the background and foreground. The light is slightly hard on her face (see the shadow cutting across the camera left side of her neck). But this light totally works for me.
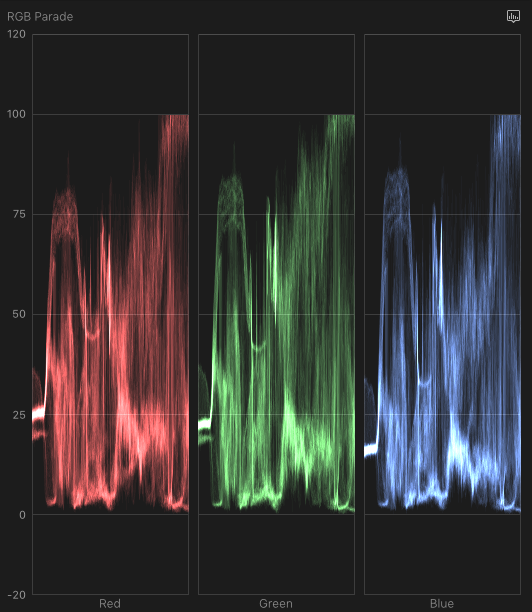
RGB Parade
Looking at the RGB parade for this exposure, you will notice that the right side of the window is actually blown out. Shooting SLOG3 with my Sony FS5 allows the highlights to roll off pretty smoothly, though, retaining some of the texture of the branches. So I would say this is acceptable. However, this wasn’t shot on a particularly bright day here in beautiful Seattle. Had their been bright sunlight hitting those trees, it would have blown them out with the light at 8′ from subject.
Moving in for a close up, I wanted to further soften the light. I got rid of the Hampshire, and velcroed on the full grid which ships with the Snapbag (in addition to the 1/4 lamp head diffusion already in place). This gave us this result (which in hindsight is a little overlit for my taste -dialing the light intensity down half a stop would improve the shot):
Hilio D12 close up
In this frame, the sun has indeed come out for a minute, so I’ve had to close down a stop to hold detail in the window. The light can handle that because I’ve moved it in closer – here it’s about 4 feet from her, AND there’s only foliage visible in the window frame. Foliage is actually quite dark, absorbing a couple of stops more light than more reflective objects such as buildings.
In summary
The Hilio isn’t something to cart around with you just in case you need it. You’ll be needing some crew to deploy this light. It’s a big gun, and that means being proactive rather than reactive about your lighting setups. Too heavy to travel with easily, it’s your friend in situations where you need to balance interior and exterior lighting. However, it doesn’t take gels the way tungsten or HMI lights do, so if you want to tweak the color you’ll need the 5-Piece CTO Gel Set with Bag for Hilio D12 LED Light which is tuned to match the light’s LED emitters. This makes the light a poor team player for work on sets with traditional lights. But if you work in small crew situations, like I do, it is a real workhorse.