Category Archives: Tips

New king of the ring: Cool-Lux gears

cool-lux-gears

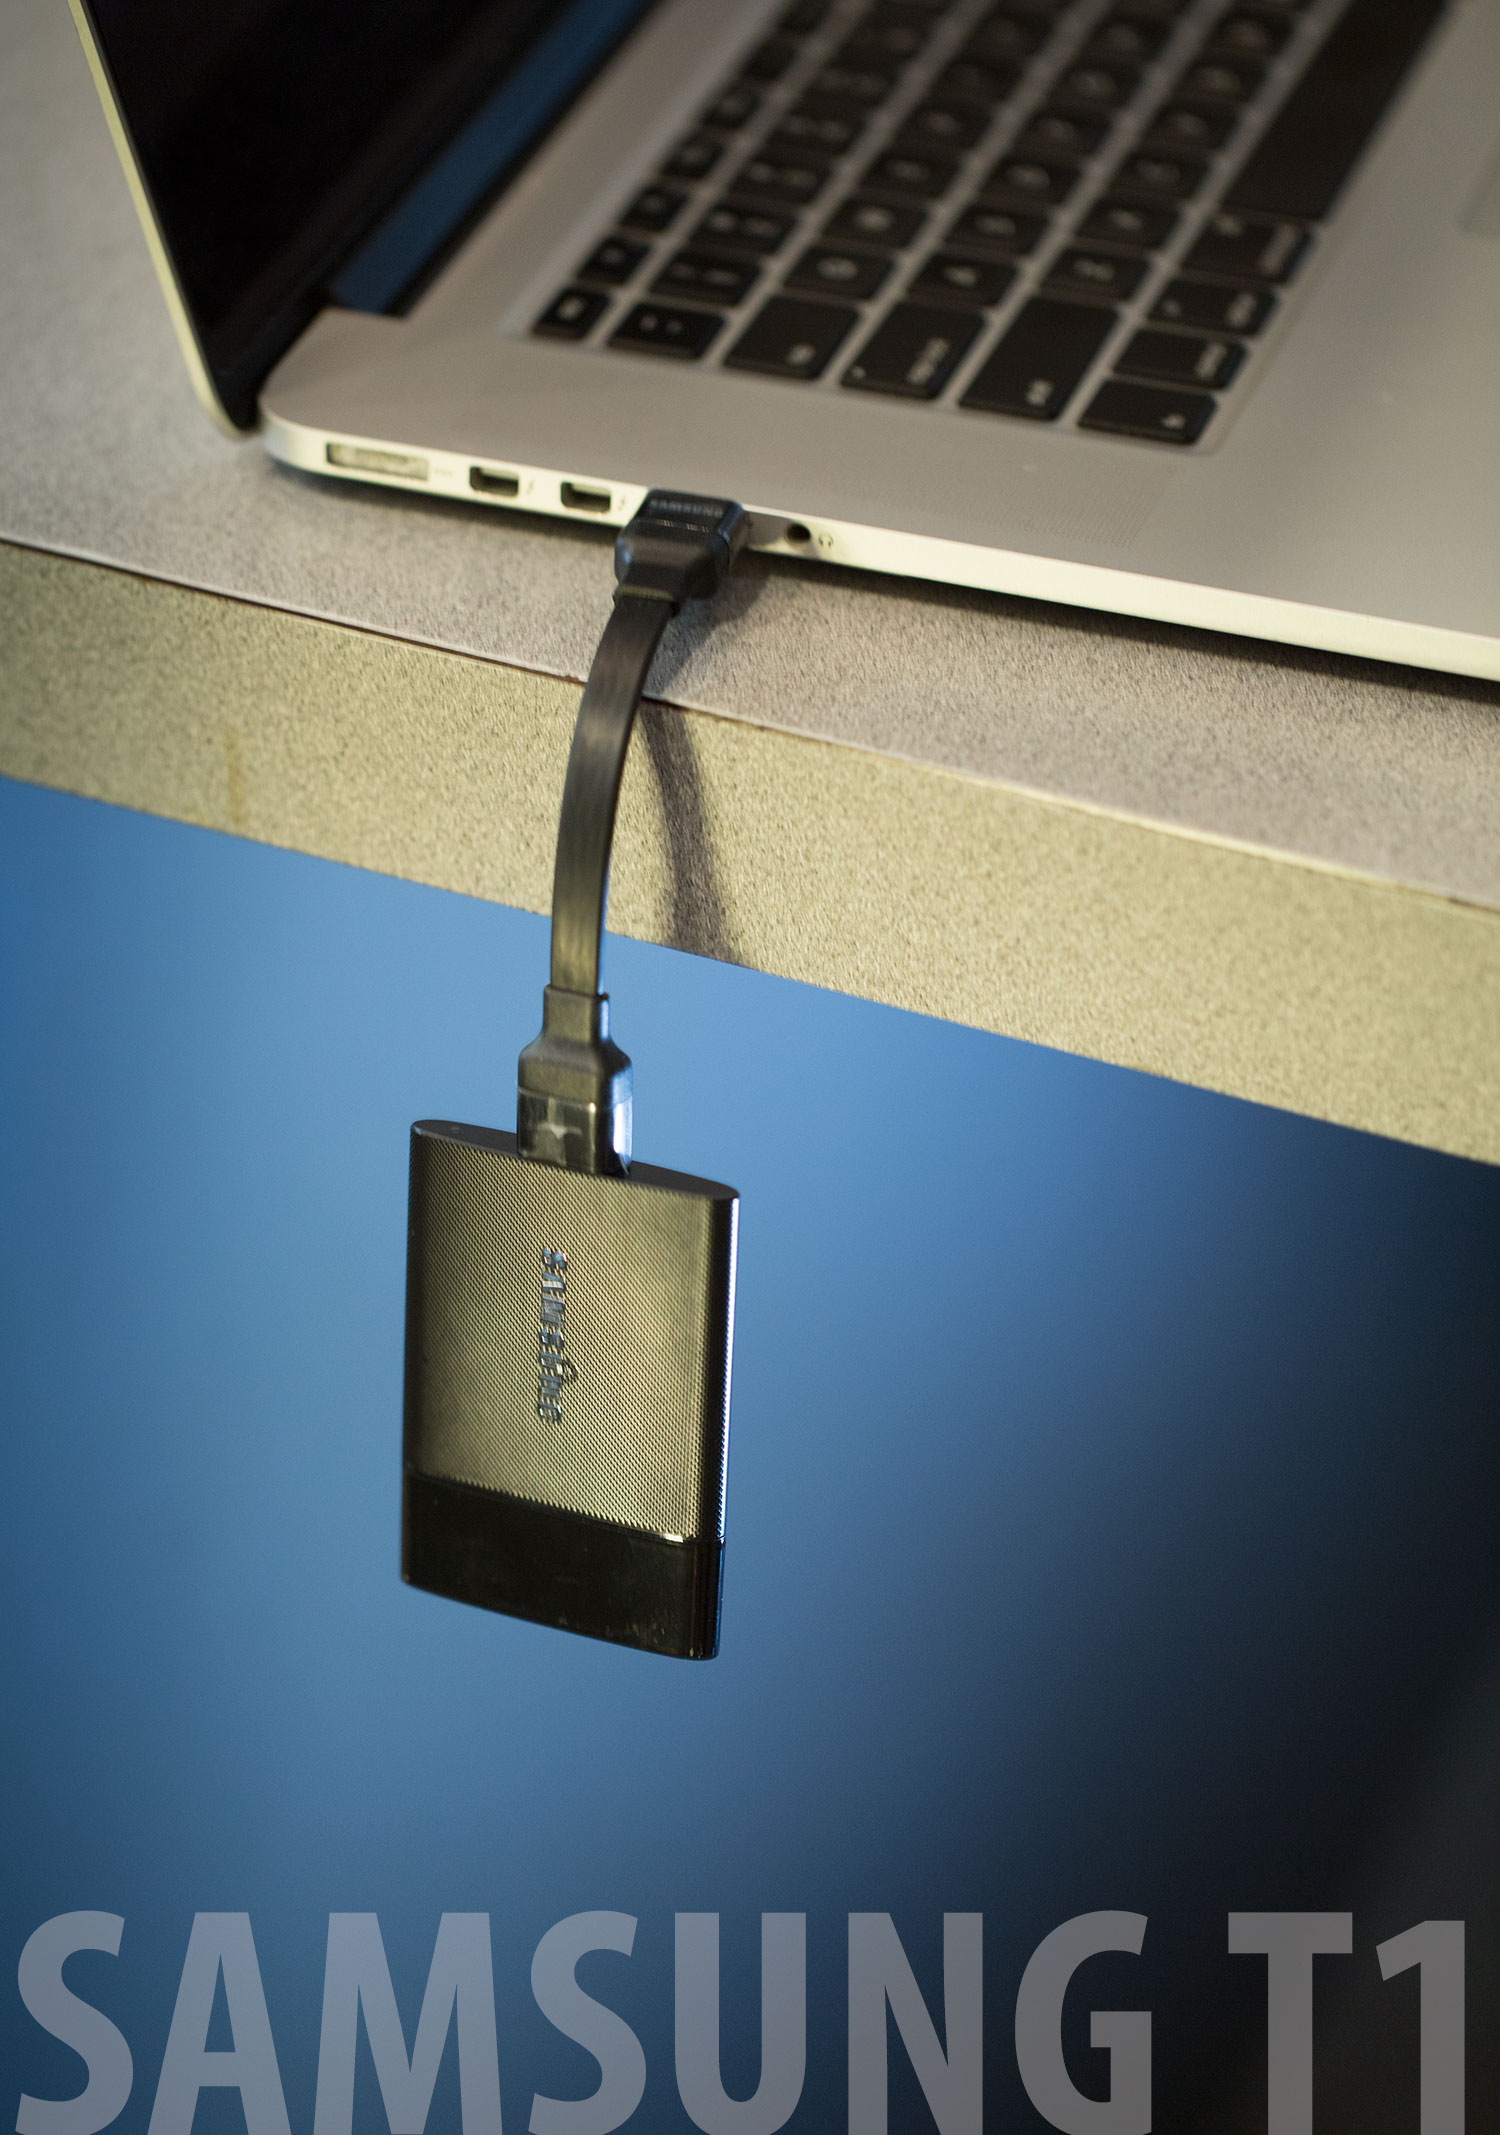
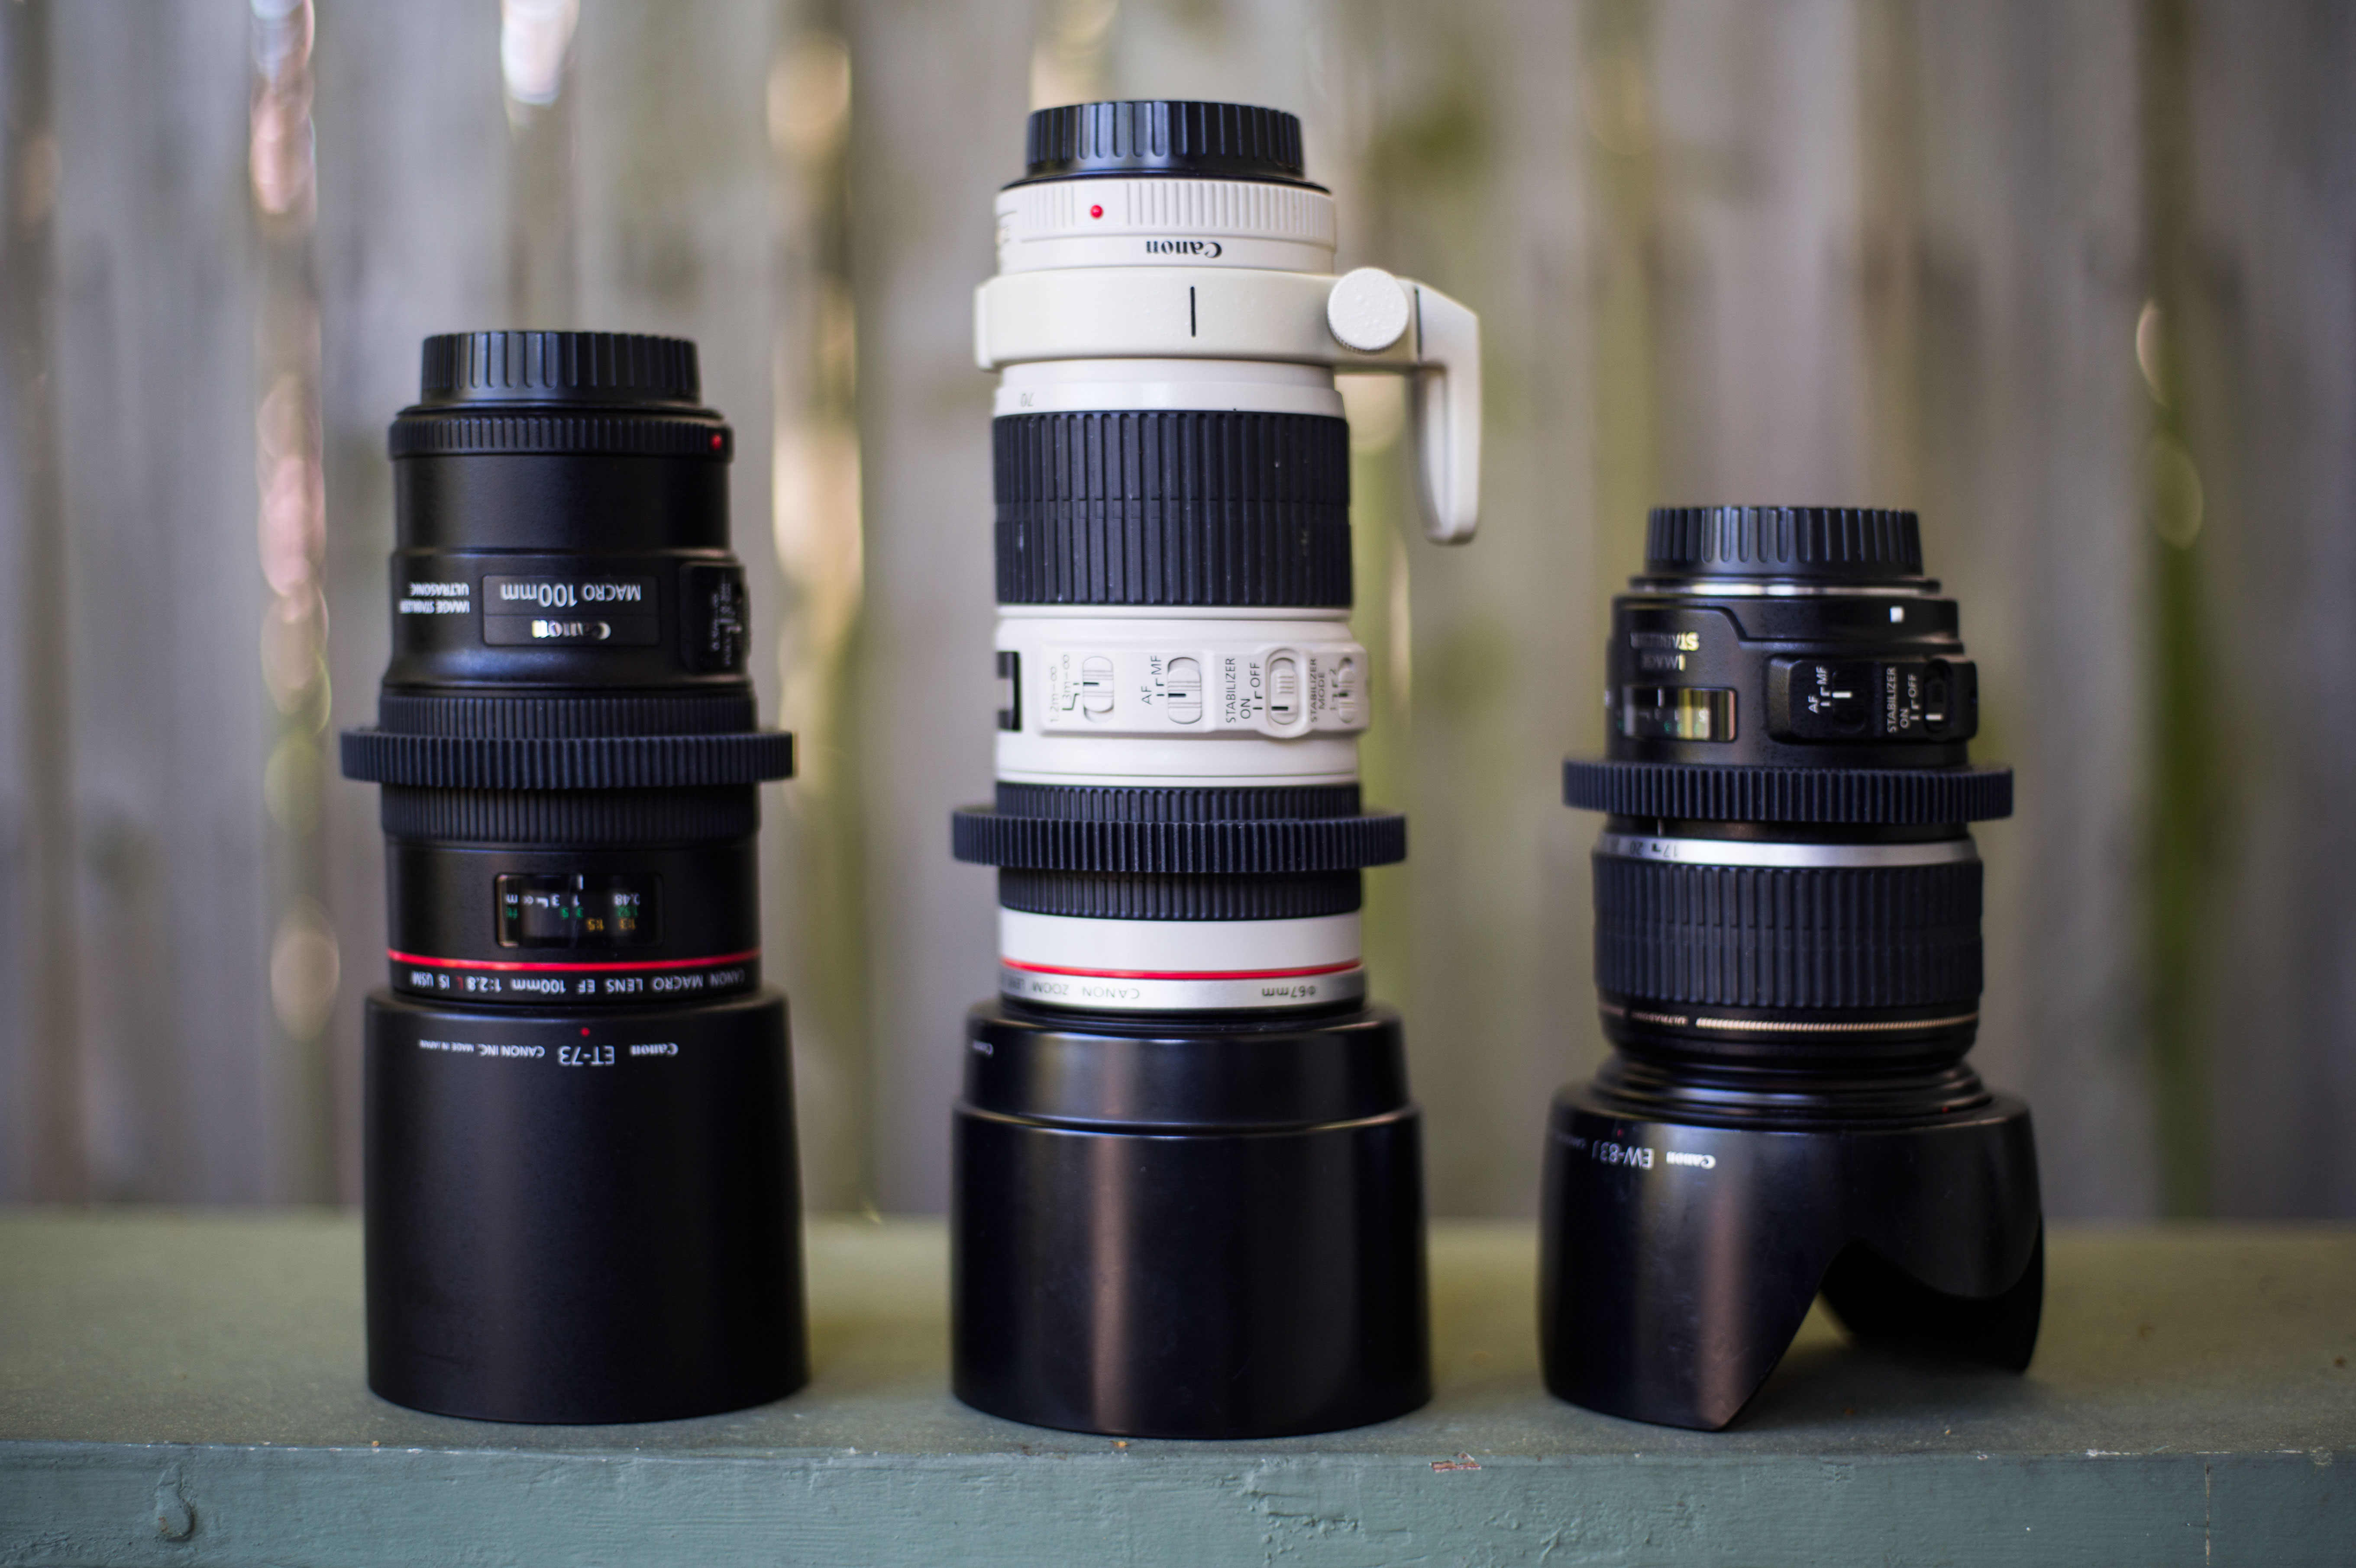
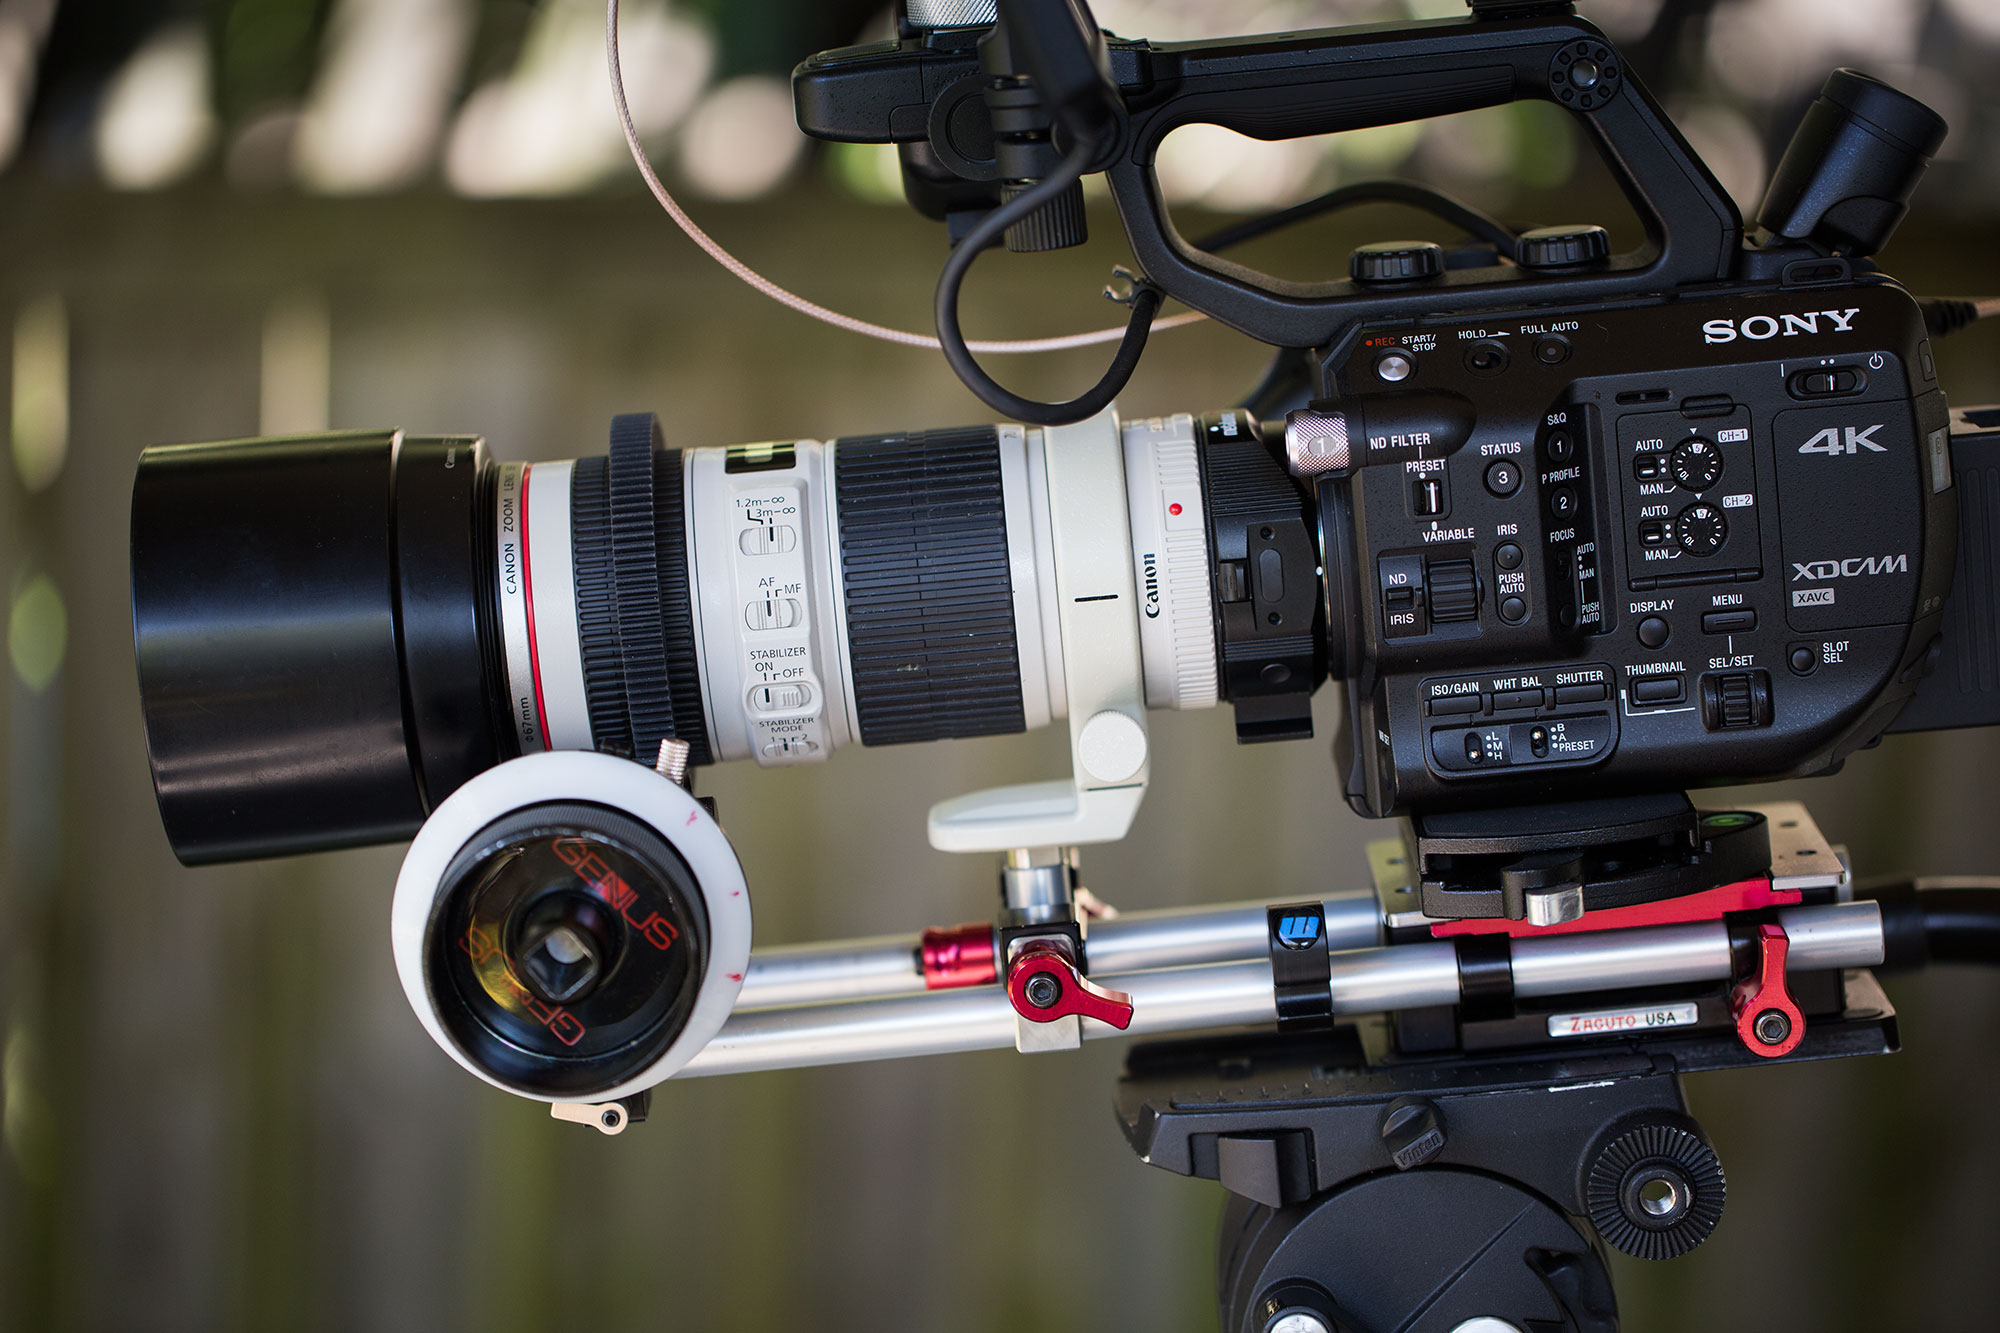
I’m always surprised when I see documentary shooters working without a follow focus unit. To me, the precision and added stability are essential. But plenty of documentary shooters roll with Canon zooms, and gearing those lenses has until recently required making an awkward compromise (i.e., Red Rock gears) or an expensive permanent choice (Duclos mod). I’ve written about one ring to rule them all, but those hard-plastic gears are really for primes, and won’t fit on my favorite documentary zoom, the Canon EF-S 17-55mm f/2.8 (above right).

Enter Cool-Lux Lux gears. These gears are unique in my experience in that they are made of a firm yet flexible silicone, which has just enough stretch to slip on over protruding zoom lens elements. Yet when finally worked into place, they stay put. Even with constant ins and outs from a camera bag, they don’t budge and have the look and feel of a permanent solution. Plus, they can still be removed when desired.

peel-on

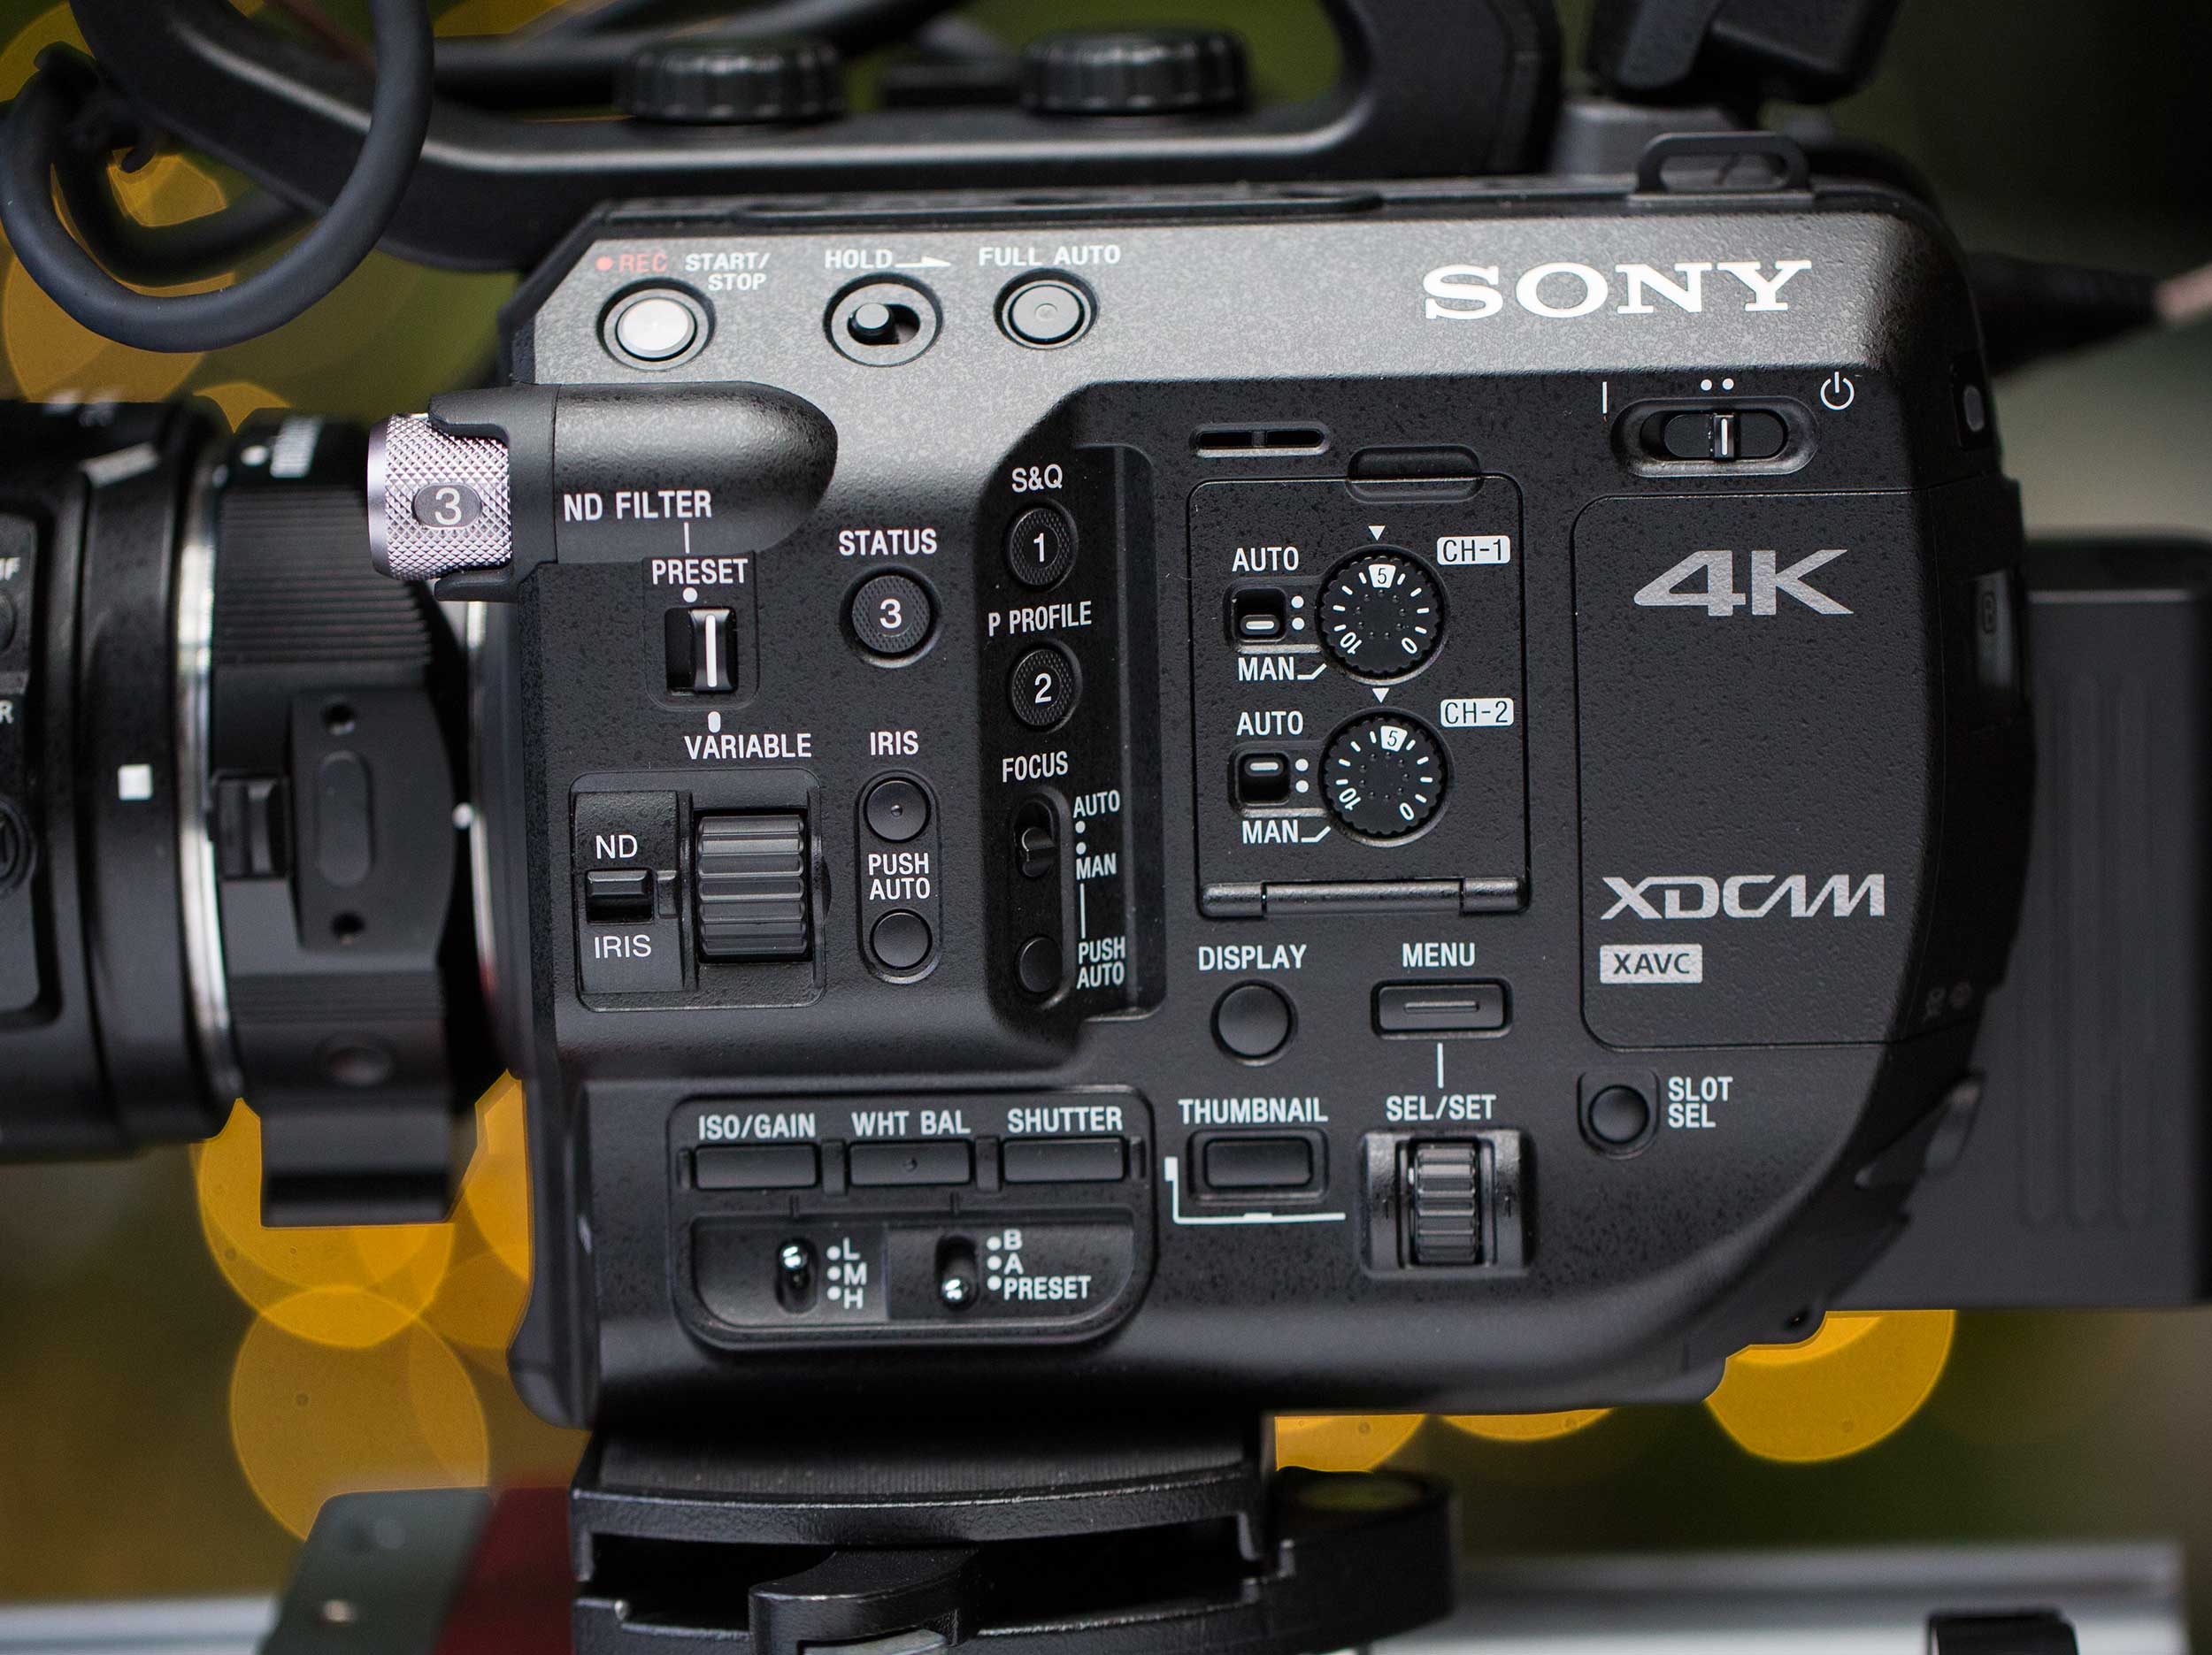
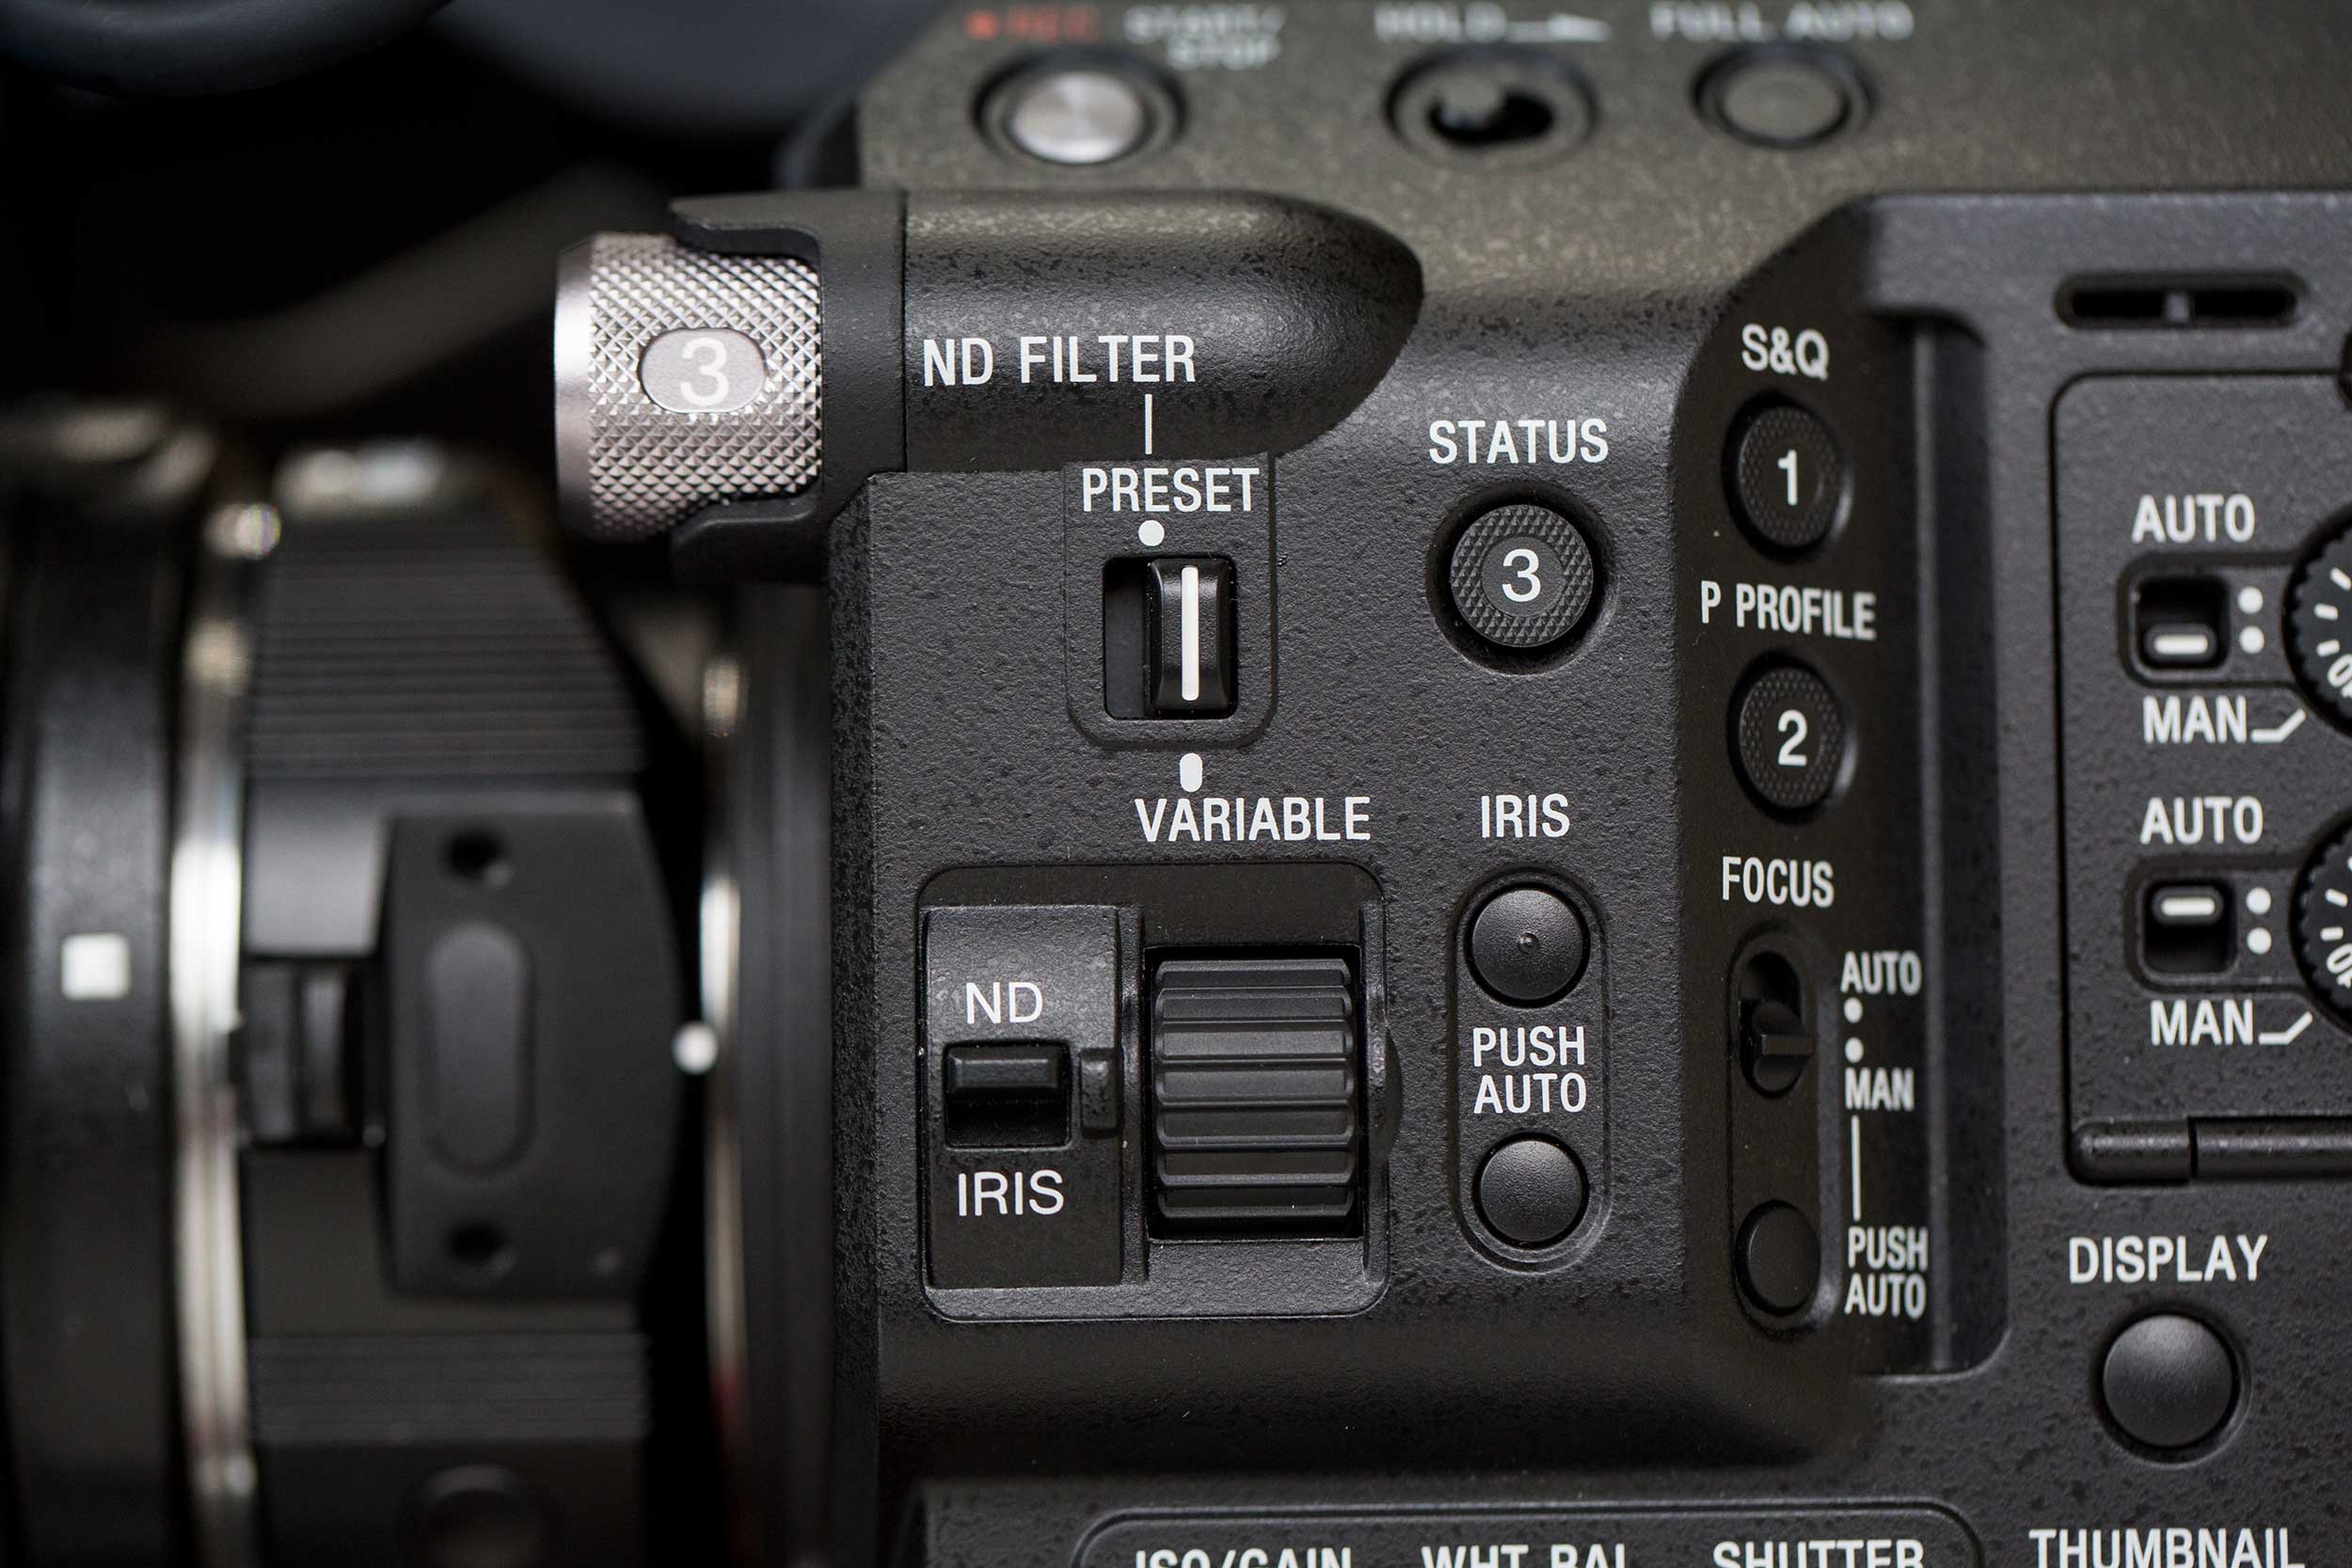
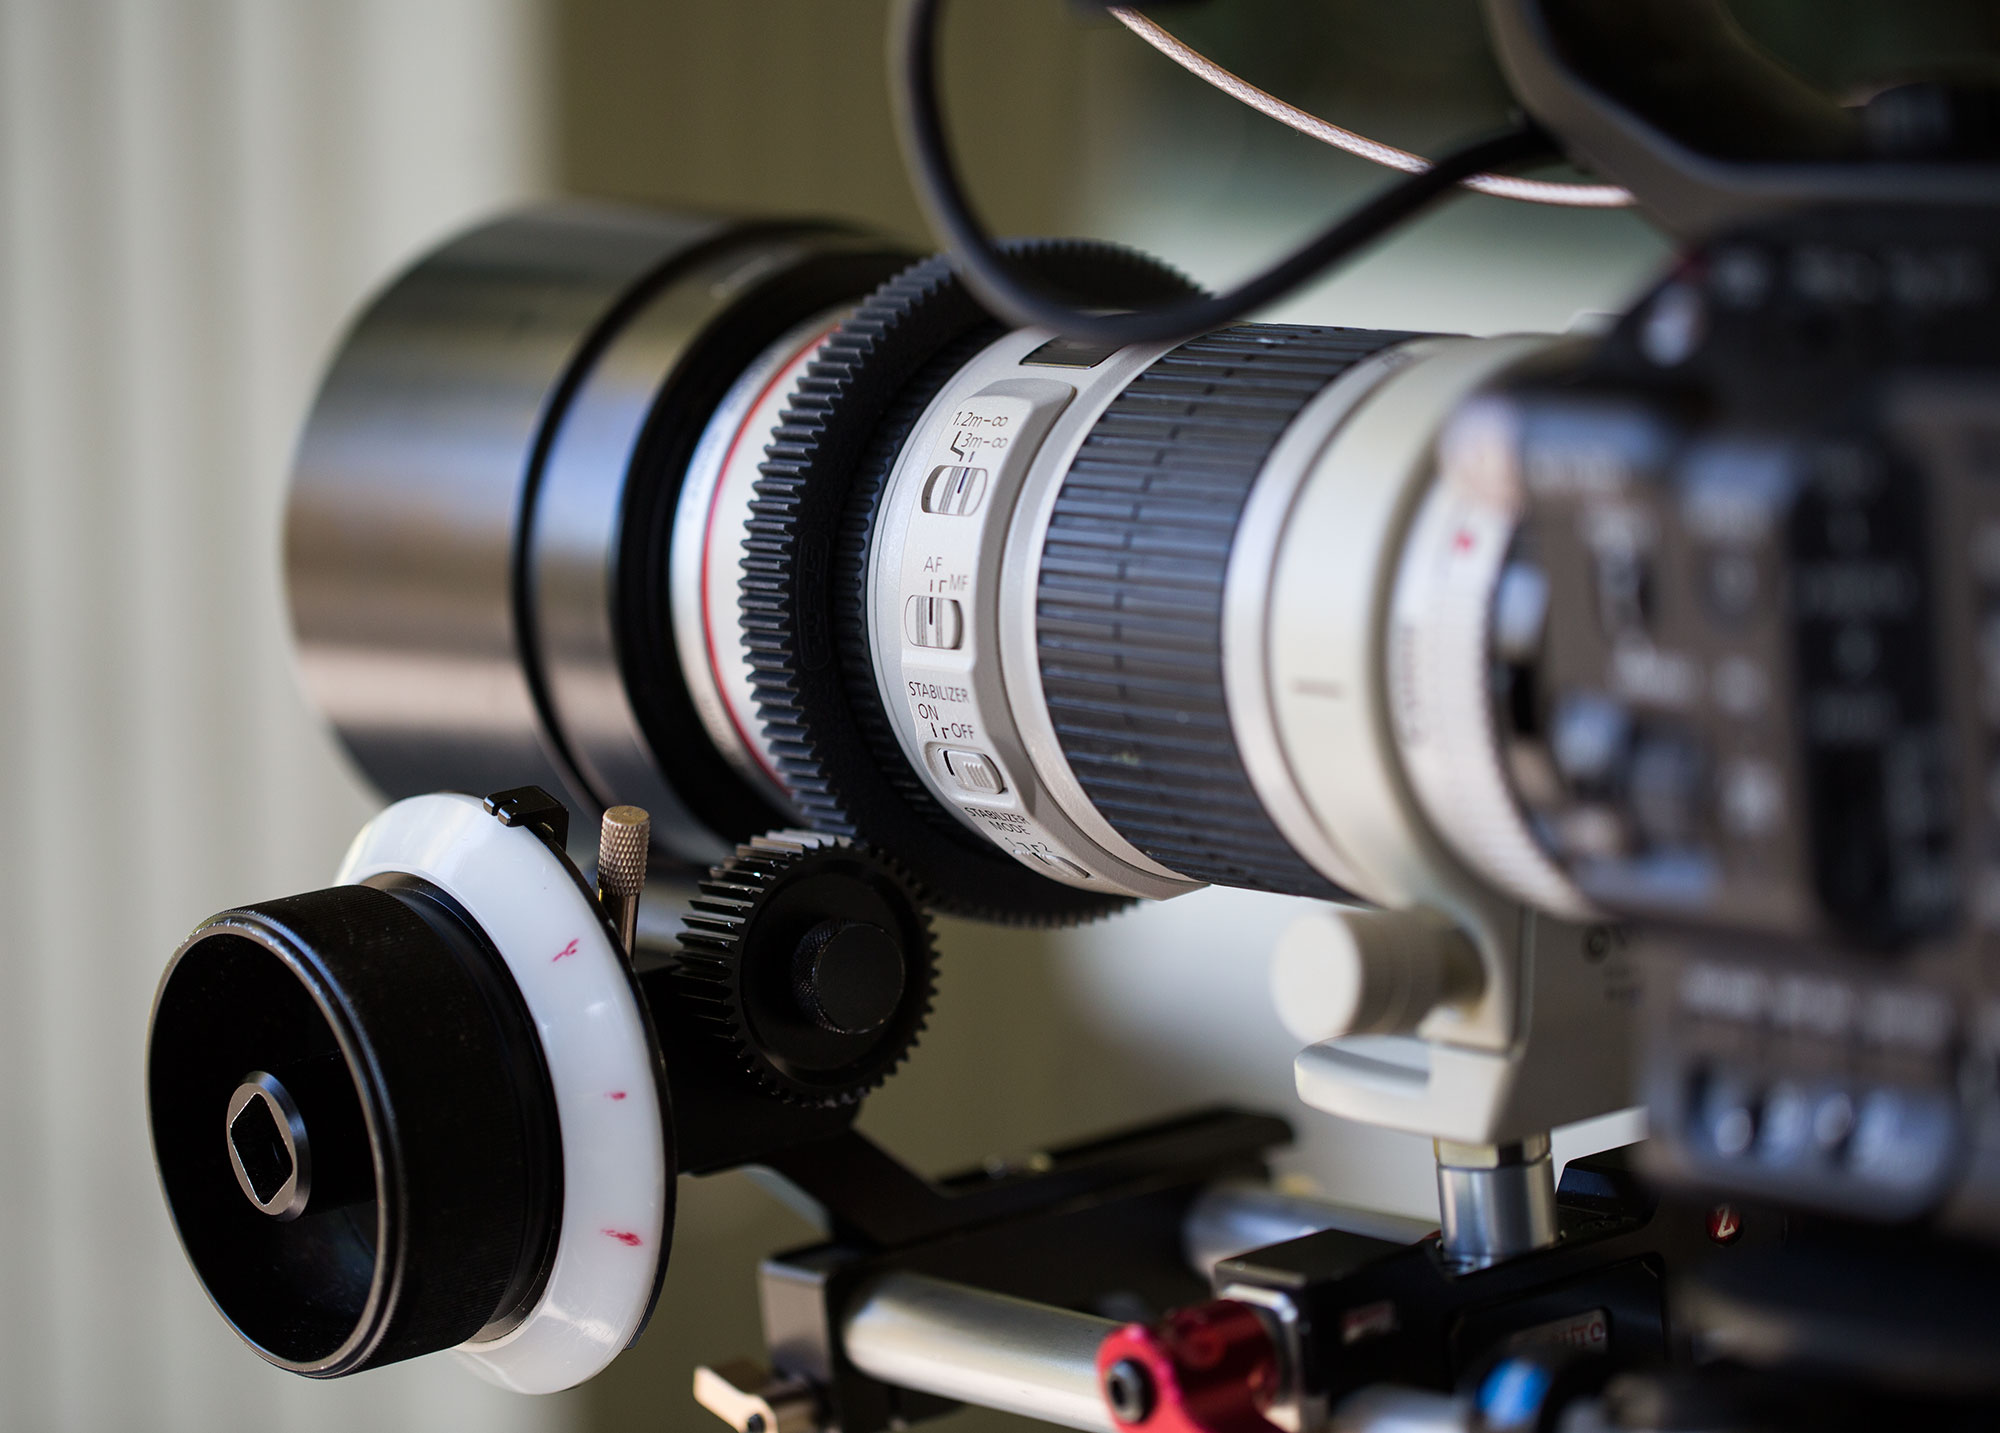
The 76-77mm gear slides over the protruding stabilization switch on the 17-55mm f/2.8 Canon EFS zoom

slide-on

After I ordered one of the gears, and raved about it on Facebook, Cool Lux’s product manager Patrick Fee dropped me a thank you. Very kind of him. So I seized the opportunity to ask him a few questions about the company and how the gears are made.

Q: What kinds of gear do you make, who do you make it for, and how long have you been doing this? 

Cool-Lux started off as a lighting company way back in 1977 specializing in on-camera lights for video professionals, the type of thing you would see on the shoe mount of an ENG camera to add some fill light or get an exposure in the dark.  Advances in LED technology has since led to Cool-Lux’s current line of Pro LED Panel Lights.

In fall of 2013 I was hired on to focus on making innovative new camera rig and accessory products for cinema video professionals like yourself.  In that time, I designed a completely new shoulder mount camera rig system for Cool-Lux based on the idea of going from a tripod to the shooter’s shoulder with the press of a button.  It’s actually a really cool system with a flip out action and chest support aimed at rental houses and production companies that use a lot of different cameras because it works on everything. I also designed some very simple but effective lens gears called Lux Gears that are just now starting to take off.

Q: The market for gears seems pretty crowded. What inspired you to jump in? 

You’re right in saying the market for lens gears is pretty crowded but everything out there was just a copy of the same old terrible design.  I always hated the one size fits all type.  Yeah they are easy for a distributor to stock but the damn buckle is not only hideous to look at, it also prevents the product from doing what its intended to do, especially on lenses that don’t have built in stops.  The only other option was to permanently fix a gear to a lens, which is fine if you’re only going to use it in a cinema type setting, or have something custom made to your specific lens that could, in theory, be removable and still give you a secure 360° rotation.  The Lux Gears filled that gap by providing a simple range of 16 follow focus lens gears that look professional and perform like a very secure permanent gear but can also be easily removed in seconds without having to get out the tools.  There is nothing else like them.

Q: The striking thing about these gears is how they stretch over the lens to fit perfectly and stay put. How are the gears made?

Lux Gears are a precision molded product.  We use a high durometer silicone material to get the elasticity needed to stretch over the lens barrel but also have enough rigidity to hold up to the amount of torque needed to turn the lens with a manual follow focus or motor driven gear.  Most people might think that a flexible gear would lead to a lot of slop or backlash when it comes to dialing a follow focus back and forth.  I actually found the opposite to be true.  Consider that with two rigid gears the engagement has to be perfect.  Either there is space between the teeth which leads directly to “slop” between the gears or the teeth are too tightly engaged which leads to a grinding of the gears.  With the high durometer silicone the engagement can be slightly too tight and the gears will not grind because of their slight flexibility.  They provide more margin of error when engaging the driving gear which is a benefit I didn’t see coming.

Q: Where are these gears made? 

We partnered with a local Chicago company that specializes in elastomers to help with the product development and make the production molds and gears for us.

So there you have it. Cool-Lux gears are the clear winner in the quest to make the perfect follow focus gear. They run about $28 each. Learn more at http://www.cool-lux.com.

Great glass: Canon 70-200mm f/4 IS

lacross

The Canon 70-200mm f/4 lens is an ultrafast autofocusing lens when paired with a DSLR such as 5dmkiii, making shots like this almost easy.

OK, I just gotta rave on my newest lens for a minute. The Canon 70-200mm f/4 IS USM lens isn’t a new lens – it was released 10 years ago. But that’s one of the great things about it: it’s a lens that sports all of the fancy new technology like 4-stop image stabilization and autofocus, yet it’s been around long enough that you can find a perfectly good used one inexpensively on Ebay. I picked up mine there for $785 including shipping, and with a little more patient hunting you can find one in the low to mid $700s. It retails new for about $1,200.

KU0A2638 KU0A2657

As a stills lens, it’s ultra fast at autofocus. Consider these frames I snapped at a lacrosse game last night. Shot at f/4, the background is plenty out of focus at that aperture to provide good separation. The lens is small enough to carry around easily and handhold.

canonglass

But what gets me really excited is pairing this lens with the the Sony FS5 for video work. With the Metabones Speedbooster, you get f/2.8 brightness (albeit with f/4 depth of field characteristics), all in an easy to carry lens that doesn’t absolutely require additional lens support (as the 70-200 f/2.8 IS lens most certainly does).

It’s compact, easy to carry, and quick to pop on and off during a shoot. It interchanges quickly with other lenses because of it’s smaller size, and you get f/2.8 performance out of it with the Speedbooster. Want even longer length up to 300mm at f/4? Just pair it with the Metabones IV Smart Adapter instead.

gear

I’ve semi-permanently attached the excellent Cool-Lux gears to mine (the stretchy rubber gear is pretty easy to wiggle on and off should you want to remove it, but otherwise stays firmly put – making Cool-Lux gears the best focus gears I’ve ever owned). The size you want for a perfect fit with this lens is the 74-75 Cool-Lux Gear.

What’s your favorite bargain glass?

I’ll leave you with a few more frames I shot with this dandy lens over the weekend. Enjoy.

big-wing-vertical killergull KU0A0342 KU0A2085 KU0A2110 KU0A2126 KU0A2128 KU0A2152 seagull wings


Rhino Camera Gear hosts meet up at Gas Works Park **RESCHEDULED for 3/28 at 5:30pm

Screen Shot 2016-03-14 at 10.08.21 AM

I’m a big fan of Rhino camera sliders. They are lightweight, extremely well designed, and their support is top notch. When a connector failed on mine recently, the team shipped me a brand new replacement unit, featuring a better design, BEFORE I even returned my defective unit. What’s more, they are a Seattle company!

Screen Shot 2016-03-14 at 10.05.38 AMSo I’m thrilled to see that Rhino is hosting a meet up in my neighborhood, at Gas Works Park, on Monday, March 21.

** NOTE: This event has been RESCHEDULED due to rain for Monday, March 28 at 5:30pm.

They’ll be bringing sliders and the new Rhino Arc, and shooting time lapses. So this will be a great opportunity to check out some top-notch gear and see it in action, and meet the people behind the product. Everyone who attends will get a $100 gift card good for purchase of Rhino products.

Participants will meet at the south-east corner of the park at 5:30pm, and from there will spread out to find the best spots to make time lapses.  Unfortunately I’m out of town until Tuesday so I’m going to have to miss this. Looks like fun.

Here’s where you can RSVP for the the free event – https://www.eventbrite.com/e/rhino-meetup-gas-works-park-tickets-20981388899

Why the SmallHD 502 crushes Sony FS5’s built-in LCD

Above: properly (over)exposed SLOG looks blown out on FS5’s LCD. SmallHD 502 with LUT applied fixes that.

The SmallHD 502 is a monitor that feels like it was made for the Sony FS5, addressing the camera’s fatal monitoring flaw while remaining true to it’s handheld aesthetic.

Sony’s new FS5 is a killer documentary camera. After just three months using the camera on a variety of projects, I’m hopelessly addicted to it’s stepless ND, it’s 14 stops of dynamic range, and it’s hand-hugging ergonomics. But if you want to take advantage of those 14 stops, you have to shoot SLOG. And if you shoot SLOG, you need to overexpose by at least a stop, to kill noise in the shadows. On higher-end Sony cameras like the FS7 and F55, you can load monitor LUTs to compensate for this. But the FS5 doesn’t support monitor LUTs. So overexposing blows out the image, making it difficult gauge exposure on the LCD.

This problem isn’t going to be fixed in firmware, we’re told by Sony. The chip in this camera will never be fast enough to support monitor LUTs. So. What’s a self-respecting documentary DP to do? I went looking for an external monitor that supports LUTs. One that doesn’t disrupt the feng shui of this fit-in-your-hand camera. Here’s what I found.

First the bad news: many of the popular external monitors that support LUTs are too big for the FS5. I’ve used two, the Atomos Ninja Assassin and the Odyssey 7Q+. Perched on the top handle of the FS5, they are about as complementary to the aesthetic of this camera as Donald Trump has been to the presidential ambitions of Jeb Bush.

The whole point of the Sony FS5 is grab and shoot. This camera empowers you to feel your way into a scene, with everything at your fingertips. So bolting a lot of stuff, or turning it into a shoulder mounted beast like it’s bigger brother the FS7 (as Zacuto would love for you to do), just isn’t right. We need to look for an option that respects the form of this camera.

A fellow Seattle DP, Gabriel Miller, recommended I take a look at the SmallHD 502. And after spending a few days shooting with it, I got really excited and bought one. I’ll explain why in a minute.

But first, a few words about my old monitor, which happens to be the SmallHD DP6.  I’ve been using it since 2011,  and I love this monitor. But recently I’ve observed what seems to be a trend toward larger on-camera monitors. Good-quality LCD and even OLED screens must be getting cheaper to make, because there sure are a lot of them out there. And it seemed to me that having another inch or so of screen would be a very nice thing indeed.

So when SmallHD announced the 501 and 501 monitors last May,  I was skeptical. Why go small when you can go big? But all of that thinking changed when I got my hands on the 502 (The 501 is HDMI-only, and 502 offers SDI as well. SDI is the only way to go for professional use).

The first thing I noticed is that, as small as it is, the actual screen size is almost as big as the DP6 (which isn’t actually a full 6″ diagonal – it measures 5.6″). It’s very compact, very lightweight, yet manages to provide all of the essential features that larger monitors do, like peaking, scopes and support for user-created 3D LUTs.

The second thing is that the 502 is visibly much sharper than that DP6. It’s much easier to tell at a glance if you’re shot is in focus, even without using any of the focus assists. That’s because the 502 packs a full 1920×1080 pixel stack into that 5″ screen, while the DP6 maxes out at 1280×800. Those extra pixels translate into a clearer picture of what’s happening in your frame.

Scopes

“Everything should be made as simple as possible, but not simpler.” That quote, attributed to Einstein, describes what my thinking on scopes. The original scopes on the 502 were TOO simple – they lacked any numeric display. I found it hard, for example, to figure out what the values are on the waveform monitor, because the lines were not accompanied with their number value, leaving me to have to compute where the values fell in my head every time I glanced at the monitor. So I was delighted to find, upon updating the firmware to v. 2.2, that marks had been added.

waveform


However, the histogram on the 502 remains a little too simple. I’d like to be able to drop in a zebra marker so I see where a specific value is falling on the histogram, as Sony monitors do. Here’s the histogram on the 502 (below):

smallhist

And here’s the Sony FS5 histogram, which allows the option to drop a  line at the zebra level (in this case, I’ve set it to 70 percent):

SHD_IMG_0024

On the FS5 histogram, the background darkens above 100 percent, clearly indicating the super white area. This way, without numbers, I can see at a glance where my data is falling. With the SmallHD histogram, I have to guess. A few tweaks like this would go a long way to making the 502 histogram more useful.

One very nice control that SmallHD gives you that Sony doesn’t is the ability to scale the size, location, and opacity of the scopes. You can also choose between RGB and Luma styles. And, with firmware v2.2, vectorscope has been added, which is very useful when dialing in a specific color balance using a grey card and for testing lights.

Frame grabs

Pressing the button on the top right of the monitor (about where you’d expect to find the camera button if it were a smartphone) captures the current frame as a still. Grabbing a frame captures the image without SmallHD’s overlays (but includes the FS5 overlays when sent from the camera). This is good most of the time, but there are times I want to capture all the overlays (such as for writing blog posts). I’d love to have an option for that.

Focus assist

The 502 has  3 ways to help you judge focus: peaking, and a joystick that lets you enlarge the image to confirm focus by pressing it upward, 2x and 4x. Pressing down on the stick zooms you back out. If you want to scroll around the image, you depress the joy stick and follow the arrows.

My favorite tool for helping me nail focus is the 502’s implementation of peaking. I find that the default value of 5 is too sharp – everything starts looking like it’s in focus. But setting it at 3 is just right. Focus planes snap into sharp focus while leaving out of focus areas soft. I really feel lost trying to focus without this peaking feature now, it’s that good.

Starting the 502 requires holding the start button down for about two seconds. Not bad, but I prefer the DP6’s simpler on/off switch. A switch shouldn’t require me to give it my attention for even a couple of seconds. I’ve got a lot of other things on my mind during production and having to press-hold-count to two every time I fire up the monitor actually turns out to be a minor irritation.

Support

I had a shoot against a white screen a few weeks ago, and for the first time I noticed that the screen of my 502 wasn’t quite right – there were darker, clouded areas in the monitor that I hadn’t noticed before (see below):

arrows

So I realized that I had a defective monitor. I put in a request to SmallHD service using their convenient online support system. I got an email the next day asking for clarification about the problem, so I sent in a photo of the screen. After a brief back-and-forth via email, the friendly support person sent me an RMA number and about a week later my monitor was shipped back to me, with a replaced screen, no charge. The new screen is now consistent from side to side and top to bottom, so I’m a happy customer and can say from experience that SmallHD support is prompt and friendly.

Bug: Every time I start the monitor, it opens the first screen in the menu. It should return me to the last screen used.

Design fail: It’s ridiculously difficult to get the SD cards in and out of the provided slot. You almost need a pair of tweezers to fish them out, because the protective door opens only halfway, making it impossible for anyone with adult-sized fingers to grasp the card.

But overall: This is a fantastic monitor choice for use with the Sony FS5. It’s small size, high resolution and support for LUTs enable me to preserve the ergonomic advantages while at the same time giving me essential big-camera exposure tools.

The Samsung T1 SSD is a video editing powerhouse – and it’s the size of a business card

samsungt1ssd

Who edits video on a desktop computer any more? Except for a final color pass and final audio mixing with studio monitors, 90 percent of what I do happens in my lap, on a MacbookPro. I edit on my couch, at a standing desk, in coffee shops, the kitchen, wherever I feel like it. But until I discovered the Samsung T1 USB3 SSD, I had trouble finding portable drives that were large enough to hold entire projects, fast enough to keep up with FCPX, and affordable.

This drive has been a game changer for me. Here’s why.

First observation: it’s tiny. With a smaller footprint than a business card, and weighing just 9 ounces, it feels almost weightless dangling from the side off my MacBook. Other drives will fall off under their own weight if left to hang like that.

But don’t let the small size fool you. The Samsung T1 USB3 SSD is a seriously professional tool, perfect for cutting video. Of critical importance, files stored on the T1 are significantly more secure than files stored on a traditional hard drives, because there are no moving parts.

But speed is where it really shines. Check out the Speed Test numbers below: 374 MB/s write and 425 MB/s read. That’s a zero-wait state for my video editing needs. This drive is FAST.

Samsung T1 speed test

The Samsung T1 is super fast, tiny, and secure

That brings us to price. The benefits of SSD media are well known to just about everybody these days. But affordability? Not so much. Until recently, the fastest SSD I could afford was a half-terabyte Lacie SSD. However, my projects commonly climb to around half a terabyte by the time they ship. So 500GB drives aren’t big enough. There are workarounds, such as cutting with proxies and storing original media on a RAID, and reconnecting later. But screw that. I want to carry ALL the original media around with me when I’m working on a project, whether it’s across my office or across the Atlantic.

So I paid $380 for my T1. Not cheap, for sure, but having used it a few weeks, I’ve got two words to describe the price: worth it. I’ve noticed the price has since gone up to over $400 on Amazon. But for me, even at that price, it remains a value. The time saved while editing, the peace of mind of having my project files on an SSD vs a spinning hard drive, and the ability to carry ALL of my files with me wherever I go is breathtaking.

Here’s a few of the other portable drives I own, in descending order of how I rate them (best at top) and why the Samsung T1 beats each of them:

1. Lacie 500GB Rugged Thunderbolt External SSD

This drive is actually slower the T1, which surprised me, given that it rocks Thunderbolt. And it’s only half a terabyte. And it costs $500 (although you can find them for close to $400 if you hunt around). If you want to step up to a 1TB Lacie SSD, the only option currently is the Lacie Big Disk Thunderbolt 2 1TB SSD – and that will set you back a whopping $1,200, which puts it out of my league.

For smaller projects, this drive is great. But all that rubberized ruggedness translates into bulk, and I find the Thunderbolt cable is too short to allow me to park the drive on the coffee table when I’m editing on the couch, for example. So I end up sitting on it, and it’s too big for comfort. On the other hand, you won’t misplace this drive! The T1 beats this drive in size, in price, and in speed. But the Lacie is certainly more rugged.

41bgioCTCxLScreen Shot 2016-03-05 at 10.48.59 AM


2. Western Digital 4TB MyPassport Pro.

Despite the fact that this drive defaults to RAID 0 and sports a Thunderbolt connector, it isn’t fast enough to cut HD video with on my laptop without slowing me down. FCPX makes a lot of demands on hard drives when skimming through mountains of footage, and I find the spinning beachball is a commonplace when cutting this drive. It’s ALMOST fast enough, but frustratingly, not quite. The Thunderbolt cable is also too short at times. But it’s 4TB size makes it a great place to store backups, and that’s what I use mine for now. This drive costs $300. The T1 beats MyPassport Pro in both speed and size by a long shot. But MyPassport Pro has a lot more capacity, making it a great backup drive.

20140427-4868Screen Shot 2016-03-05 at 10.44.57 AM


3. WD Elements 2TB.

This is a dog in terms of performance, but it’s cheap, reliable, and a great way to hand project files off to clients or other editors. The $78 price tag is very attractive. What more can I say.

81CsBz8AWSL._SL1500_Screen Shot 2016-03-05 at 10.42.50 AM


4. Seagate Backup Plus portable 2TB drive.

This is another drive that’s really only useful for backups and handing project files around. It’s pretty much the equal of the WD Elements, and costs the same roughly $80. But I put it at the bottom of my list because it requires installing a driver to work on Mac, while the Elements works right out of the box.

81i+abHgH5L._SL1500_Screen Shot 2016-03-05 at 10.53.48 AM


Sony FS5 project: The Puppet Maker

I’d like to share a project I just completed for the University of Washington, which tells the story of a grad school student who makes puppets. It features footage shot entirely on the Sony FS5. I shot SLOG 3 in Sgamut3.cine color mode, generated dailies in DaVinci Resolve, and cut the piece in FCPX.

This project required every one of the 14 stops of the dynamic range this camera offers, and the results speak volumes about what this camera is capable of.

My assistant Sean McGrath picked up a few of the shots, in particular the traveling shots which were shot on a Ronin M. The FS5, stripped to the body only, fits perfectly on the gimbal, which is incredibly light and easy to handle in this configuration.

Screen Shot 2016-03-27 at 9.13.19 AM

The approach with this story was to use the puppet making visuals over Reed’s story to explain how UW’s Core Programs can help students find a community and find their voice while in grad school. Using this cinematic, storytelling approach as opposed to straight documentary achieves the goal of making it interesting while staying on message.

We spent a lot of time searching for the right story in the preproduction phase of this project. Finding the right story to tell (one that offers interesting action to film) and then developing a storyline to follow makes it all come together like magic. It’s no exaggeration to say that I spent more than 50 percent of my time on this project in preproduction, and less than half actually shooting it (we did the shoot in an easy day – a few hours spent filming the sewing in the morning, and a couple of hours shooting the scene in the square in the afternoon).

Sony FS5 Quick Setup Guide

left-menus

If you’re starting out with the Sony FS5, and going for a cinematic look, here’s a setup guide that will have you up and rolling fast.

Codec

Select REC SET from in/out menu, and choose:

File Format: XAVC HD
REC FORMAT: 1080/24p 50Mbps

SHD_IMG_0007

SHD_IMG_0008

XAVC HD will give you the best quality image this camera is capable of, in gorgeous 10-bit, which can withstand a lot of color grading without getting noisy. The default XAVC QFHD option gives you 4K, but only in 8 bit. So unless you need the higher resolution, stick with HD. And avoid using QFHD in low light.

Monitor

Enable the Gamma Display Assist. This increases contrast when shooting SLOG, making it easier to focus. When not shooting SLOG, it is automatically disabled.

SHD_IMG_0004

SHD_IMG_0005

VF/LCD Panel: I set to LCD Panel. Choosing Auto (the default) means your LCD will turn itself off and on whenever you inadvertently block the eyepiece of the viewfinder. You can then enable the viewfinder when needed by sliding the switch on the top of the LCD screen to OFF.

SHD_IMG_0006

Hand grip buttons

I recommend setting Button 6 to Center Crop. But if you use zebras, it’s a convenient place to toggle those on and off as well, since there’s no dedicated button for zebras on this camera. If you go with center crop, this will give you a fast way to reframe the shot by punching in to it for a quick closer angle. But be careful: this technique isn’t great in low light, as noise in the image is magnified dramatically.

SHD_IMG_0009

SHD_IMG_0012

Picture Profiles

For well lit scenes in general, where you need to hold all the dynamic range possible, shoot SLOG 3. That’s PP 8 for daylight, and PP 9 for tungsten environments. For some reason Sony made the color temperature part of the picture profile in SLOG 3 when using the Sgamut color modes. Choose the option that’s appropriate for your lighting. OR, if you want precise control over color temp, choose Pro color mode. But I prefer to stick with Sgamut3.cine color mode when shooting Slog 3.

SHD_IMG_0001

If you’re in a mixed light environment and want to split the difference, open either picture profile and dig into the menu, and select the 4300K option.

SHD_IMG_0002

SHD_IMG_0003

For lower light situations, choose a Cinegamma rather than SLOG. Here’s the rule of thumb: For brightly lit scenes such as direct sun, shoot Cine1. For average lighting, choose Cine3. For low light situations, go with Cine4. Each of these will require a little grading, but not much – just some contrast adjustments to make them look less flat by crushing the blacks a little. I’ve set my camera up with Cine3 on PP6 on my camera, like so:

SHD_IMG_0011

Gain

If you’re confused by the way the sensitivity of the sensor appears to be changing when you switch from CineGamma to Slog, you’re not alone. Rest assured the sensitivity isn’t changing, just the recommended exposure settings from Sony for each. So if you want to keep it simple, just change the ISO/GAIN SEL to GAIN. This will then display 0db when you are shooting at the camera’s native gamma, which is what you should be using most of the time. When you get in low light, boost the gain (as little as possible to avoid noise).

If you want to use ISO, from the Camera menu, set up the L-M-H gain switch on the left side as follows:

SHD_IMG_0014

SHD_IMG_0015

I recommend staying at or below 9db of gain (ISO 1600) with this camera when shooting with the hypergammas. The image quality starts to degrade significantly above 18db of gain (ISO 3200). For best results in very low light, try PP3 (Rec 709/Pro).

When shooting in SLOG, avoid exceeding 19db of gain (3200 ISO). If you need to push beyond that, switch to a CineGamma (see Picture Profiles above).

Audio settings

For general run and gun shooting with a shotgun mic, I set channel 2 for the shotgun mic, and set it to level 5 manual. Channel 1 I set to the internal mic, on AUTO. Adjust the manual level as needed depending on your environment. The auto channel is a backup, that should catch any prolonged loud spikes such as if your subject starts yelling, giving you something to cut to in the edit should you need it.

SHD_IMG_0018 SHD_IMG_0017

For recording interviews or woking with a boom op, leave the shotgun mic as-is on channel 2 (so you can quickly untether and shoot b-roll without having to touch the menus again) and plug in your external source via XLR cable to Input 1, being sure to set the input on the XLR jack to phantom power (for most shotgun mics) or line level (from mixer output) as necessary. Then, set CH1 Input to INPUT1. That’s it in a nutshell.

Engage the AUDIO LIMIT to help prevent clipping from sudden brief loud noises such as coughing in an interview. I leave this off when working with a  sound recordist, as limiting is better handled by the mixer.

SHD_IMG_0019

Tip: How to expose SLOG vs. Hypergammas

Exposing SLOG (PP 7, 8 or 9) at the Sony-recommended levels results in noisy shadows. Fixing that is easy: Overexpose your footage by 1 stop (also referred to as a one-stop pull). You will still have plenty of headroom to avoid clipping, and your shadows will be less noisy. You can even go as much as a 2-stop pull, but the image on the LCD and viewfinder will appear blown out, so you’ll need an external monitor that supports LUTs to accurately gauge your exposure.

When shooting in any of the other picture profiles, slight underexposure, by a half stop, will produce the best results, especially with skin tones.

SLOG2 or SLOG3? 

For most situations, I recommend SLOG3. SLOG2 is more difficult to grade than SLOG3. Both will give you 14 stops of dynamic range, but the response curve is different. As a result, if you’re shooting 4K in SLOG, you’ll get the most information possible in the limited 8-bits available by choosing SLOG2. If you’d like to understand why this is, along with a lot of other excellent info about shooting SLOG on this camera, check out this talk by Alister Chapman.

A quick way to start your grade with SLOG3 footage is to use a LUT. I’ve found two very good LUTs for this purpose. The first is Sony’s Alexa emulation LUT. It comes in two flavors, one- and two-stop exposure pulls. The second is a higher contrast version of the same LUT, with a one-stop pull, called AA709A, that was developed by Art Adams. I’ve packed up all three and tweaked them so they’ll work with the magnificent SmallHD 502, a monitor that preserves the form factor of the FS5 while giving you the ability to gauge SLOG exposure correctly through use of a LUT. You can download these FS5 LUTs here.

Shooting tips

It’s very useful with this camera to toggle the WHT BAL on and off when shooting in hypergamma picture profiles. This turns auto white balance on and off, and I’ve found the auto white balance feature to be very useful with the FS5. With most other cameras, I wouldn’t be caught dead using auto white balance. But Sony seems to have implemented this well, and I find it quite useful in difficult mixed lighting situations.

Use Button 5 on the hand grip for fast access to ISO, shutter speed and manual white balance.

To get a quick shot you you’d otherwise miss, just toggle on FULL AUTO on the top of the camera. The camera will take over EVERYTHING – white balance, shutter speed, ISO (and aperture if using a Sony lens). You won’t want to use these settings for long, but it’s a lifesaver in some challenging situations, such as following someone through a doorway and into a house.

Toggling any of the three ISO/GAIN, WHT BAL or SHUTTER buttons along the left bottom side of the camera enables auto for each, as well as allowing you to manually set the shutter. For manually adjusting them,  I find it’s faster to access them via Button 5 on the hand grip.

ndsetting

Set the ND FILTER to VARIABLE and ND/IRIS to ND. This allows you to steplessly control exposure with the wheel on the left side of the camera. It’s really the best way to control exposure, and the most innovative feature of this camera. Use it!

Auto ND

With version 2.0 firmware, auto ND is enabled. This is a very, very cool feature. It’s a way to get an automatic exposure without messing with your shutter speed, depth of field or ISO levels. I’ve remapped the Status button (3) so that when pressed, it toggles auto ND on and off.

Oh, one last thing: When you copy your clips off the SD card, be sure to copy over the entire folder structure (not just the clips). Your NLE needs them when determining how to display the files at their optimum quality. Once you’ve transcoded the footage into an editing codec such as ProRes, you can throw them away.

Armed with this camera and these settings, your footage is going to look amazing. Get out there and shoot something epic.

So this is how I configure my FS5. How do you set up your yours?

SaveSaveSaveSave

SaveSave

Why do I love Zeiss prime lenses so much?

cu-lens

Why do I love my Contax Zeiss primes so much? I prefer them over Canon zooms just about any day. At least, any day I have time to change lenses between setups. Consider the following two frame grabs of my coffee mug…

Contax Zeiss 50mm f/1.4 @ f/2

Contax Zeiss 50mm f/1.4 @ f/2

Canon EFS 17-55mm f/2.8 @ 2.8

Canon EFS 17-55mm f/2.8 @ 2.8

Besides being faster (enabling me to shoot the first frame at ISO 1000 and requiring the second one to be shot at ISO 1600), the Zeiss has a dreaminess to it. And that bokeh with it’s hooked aperture blades? Pure magic. The Canon has a little higher contrast both in color and luma. But I would call that “clinical sharpness.”

Nevertheless, if you see me rolling handheld you’ll probably see me rocking a Canon zoom, for one reason: the ability to keep shooting without having to change lenses all the time is priceless for documentary work. Not to mention that you can do with a single zoom what you’d need a whole Pelican case full of fixed lens glass to do.

But if I’ve got the time, don’t get between me and my primes!

lenses-in-case

How has 6 years changed cameras?

howhas6years

Six years ago this month, my journey into documentary filmmaking began with the purchase of my first video camera, a JVC HM100. I loved that camera: it fit perfectly in my hand, used inexpensive SD cards, had built-in ND filters, and great audio capabilities. But its 1/4″ CCD sensor left me wanting more.

I used a rented Red One to shoot part of my first film. Since then I’ve used many cameras. I shot a feature length doc with a pair of Canon 60Ds, captured slo-mo with the FS700, and fell in love with the Canon 5dmkiii for its full frame, shallow focus look. Recently I’ve come to prefer the super 35 Canon C100mkii for it’s ergonomics, autofocus and color rendering. But none of them fit as nicely into my hand as that first camera.

This December, I am putting my end-of-year money on the Sony FS5. I’ll have plenty to say about this camera shortly. But as I await delivery today, I’m reflecting on how far cameras have come in six years.

In terms of image specs, the FS5 isn’t THAT big of a leap. Six years ago, there was a super 35 digital camera that could shoot video in 4K, at slow frame rates (albeit only 120fps). It was called the Red One. It boasted 11 stops of dynamic range, weighed a ton, and cost $17,500 (body only).

Six years ago, Red was roiling the market with big promises of “4K for $4K.” That never happened. Six years later, 4K is really an option. We have many cameras, most notably DSLRs from Sony, that can do 4K for considerably less than $4K. But I’ve learned over the years that a DSLR is an awkward choice for filmmakers. We need ND filters, audio options, and much more that has to be bolted on to DSLRs. Nevertheless, after 6 years of waiting and jerry rigging, we finally have a camera equal or superior to the Red One (including raw output coming in a future upgrade), that fits in your hand, for less than $6K. Amazing.

First observation: Good cameras still ain’t cheap. Six grand (the cost of the FS5 with an extra battery and EF lens adapter) is a lot less than $17,500, but it’s still a serious chunk of change. It’s almost twice the price I was willing to pay 6 years ago for my  JVC-HM100. And given the ease of renting through sites like lensrentals.com, $6K is on the outside of what I would consider spending to own any camera.

Camera sensors are currently evolving at the pace of Moore’s Law, so it’s a sure bet that, two years from now there will be another, better camera. However, I can sell my FS5 in two years for at least half of what I bought it for today. And in the mean time, I’ll be making money with it. So it definitely makes sense for me to own it at this price.

Apart from price, the biggest change is that today, small can be good. This is a really big deal. It’s not just a question of convenience. For me, it’s the difference between doing and dreaming. I can rig up my 5dmkiii into a very capable camera capable of shooting amazing, 12-stops dynamic range raw HD video (with Magic Lantern). That’s the combination I used to shoot Pearl, which won best foreign short at Milan this fall. But shooting with a DSLR is a pain in the ass. After making that film, I gravitated toward the C100, which doesn’t have to be rigged up: you just turn the camera on and start shooting.

So why am I not purchasing a C100mkii this year? The two things I most love about this camera – autofocus and color – are awesome. I have no doubt I’m going to miss them on the FS5, which requires a lot of work in post to get good results from the SLOG footage, and has mediocre autofocus. Even the fact that the C100 is 8-bit, and the FS5 is 10-bit in HD, doesn’t make that much difference. In my experience, 8-bit color from a C100 looks every bit as good as 10-bit from a Sony. For me the big thing is dynamic range.

Compared with 6 years ago, camera dynamic range is much improved today. The FS5 has seduced me by promising to give me almost everything I want in terms of image quality and features, in a camera I can fit into my hand, that has 14 stops of dynamic range. Fourteen stops! A documentary filmmaker can never have too much dynamic range.

I’m also seduced by the ability to shoot 4K, even though I doubt I’ll use it much because it slows down my edit. But there are situations, for example shooting an interview, where 4K will allow resizing the shot in post in to pull a closeup from a medium shot, effectively giving me a two-camera shoot from a single camera. I want in on that.

SD cards are still king. When I bought my first camera six years ago, a big selling point was that I could use small, affordable SD cards rather than being forced to buy something expensive and proprietary like P2 cards or red min-mags. While the competition seems to be moving toward expensive CFast cards, Sony releases a fully-speced camera that uses cheap, widely available media. I love that.

I’m looking forward to hand holding again. The C100 is ergonomically great, but it wants to be on a monopod. The soul of shooting for me is handheld. And I look forward to finding that soul with the FS5.


Lumu Power turns your iPhone into a color meter for $200

This is exciting: a $200 device that turns your iPhone into a color-temperature meter. The closest thing to this is the Sekonic SpectroMaster C‑700R, but that will set you back $1,700.

I’m not the only person who was excited about it: their Kickstarter campaign was funded in just 3 hours today.

The Lumu Power will be very useful in matching a fill light to ambient lighting conditions, for example. Or matching two LED lights, or just for figuring out what color temp the light is under any situation.