Category Archives: Product reviews

Reviews of filmmaking products or services that I’ve personally used.

Dedolight DLED7: the ultimate LED shadowcaster?

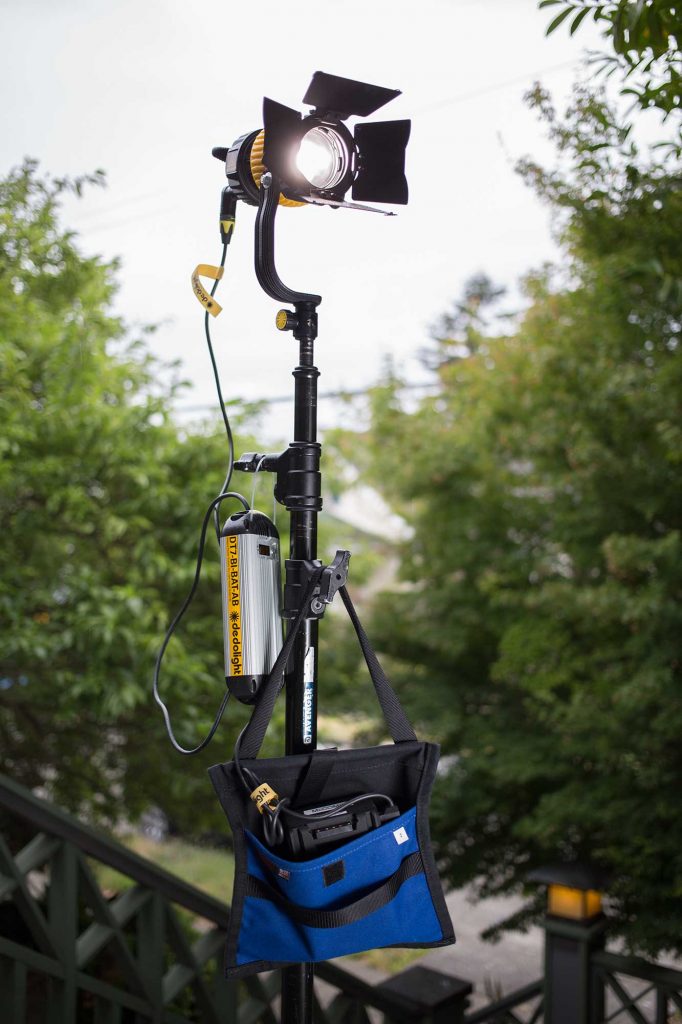
Dedolight DLED7: precise and versatile

The new DLED7 Turbo is an exceptionally precise and versatile light with all the Dedolight features plus optional battery operation

Lighting involves two big things: putting light where you want it, and NOT putting it where you don’t want it. To say a scene is lit means more precisely that an important part of it is lit, and an equally important part remains hidden. Placing shadows is just as important as placing highlights. And no light allows you to place shadows with less fuss than a Dedolight.

Original Dedolight

Original Dedolight

Dedolights have earned a reputation for precision in the film industry. The venerable 150-watt DLHM4-300 tungsten hot light can throw a 3200K beam exactly where you want it, with virtually no light spill, thanks to the company’s patented aspheric optics. What’s more projector attachments are available to further focus the light. With one of those, you can literally hit a nail on the head from across a room.

I’ve lusted after one of these beasts for a long time, but decided to wait until an LED version arrived, because more often than not, I’m mixing daylight on location rather than tungsten. The wait is now over, and it’s called the DLED7. (Note, Dedolight’s DLED4, which shares the same form factor,  has been available for more an a year but wasn’t powerful enough for my needs).
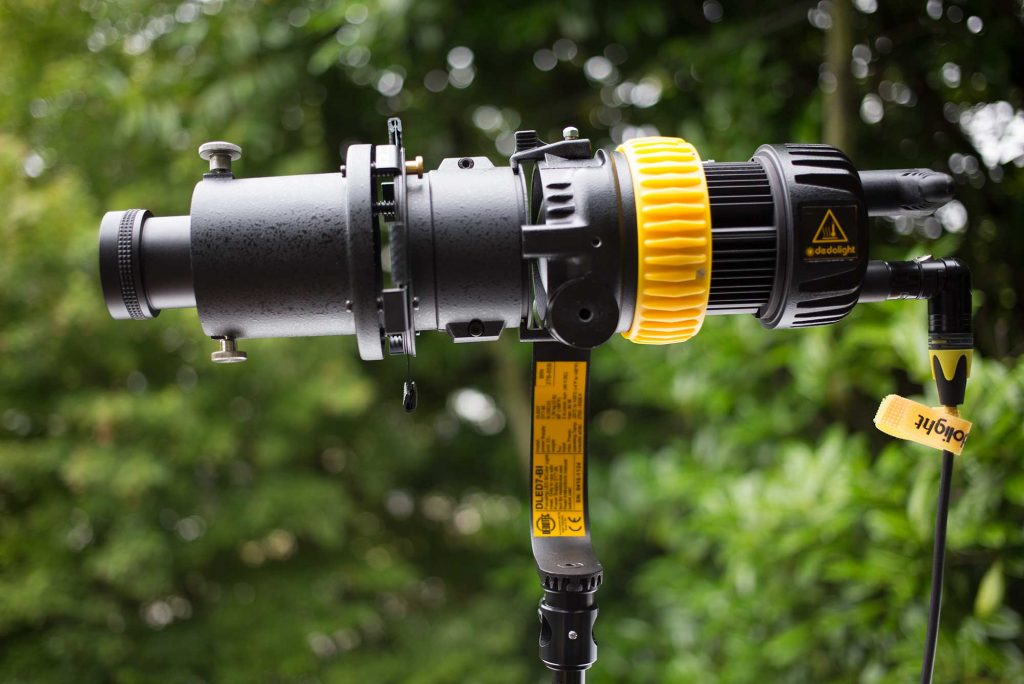
Dedolight DLED7 with DP2 projector

DLED7 rigged with optional DP2 projector

On paper, the DLED7 gives you everything its tungsten predecessor gave you in terms of precision while adding a number of new benefits:

  • Low power draw (90 watts) means it will run for a little over an hour at full power on a high-output v-mount battery such as the Switronix Hypercore 98WH.
  • Dimming is greatly improved, because the LEDs don’t suffer the red shift that tungsten lights do when dimmed.
  • The DLED7 is also runs much cooler, although it does require a very quiet fan. The light gets warm to the touch when operating, but never too hot to hold.
  • Color temperature is adjustable from 2700K to 7400K without gels.
  • The even beam of light produced by this instrument is gives you consistent light meter readings from nearly edge to edge. So you can use it to light a background with a single source. And, the light can be spotted from 1:20 (a typical fresnel is only 1:5) and cut very precisely with barn doors. Exciting stuff!

How does it work?

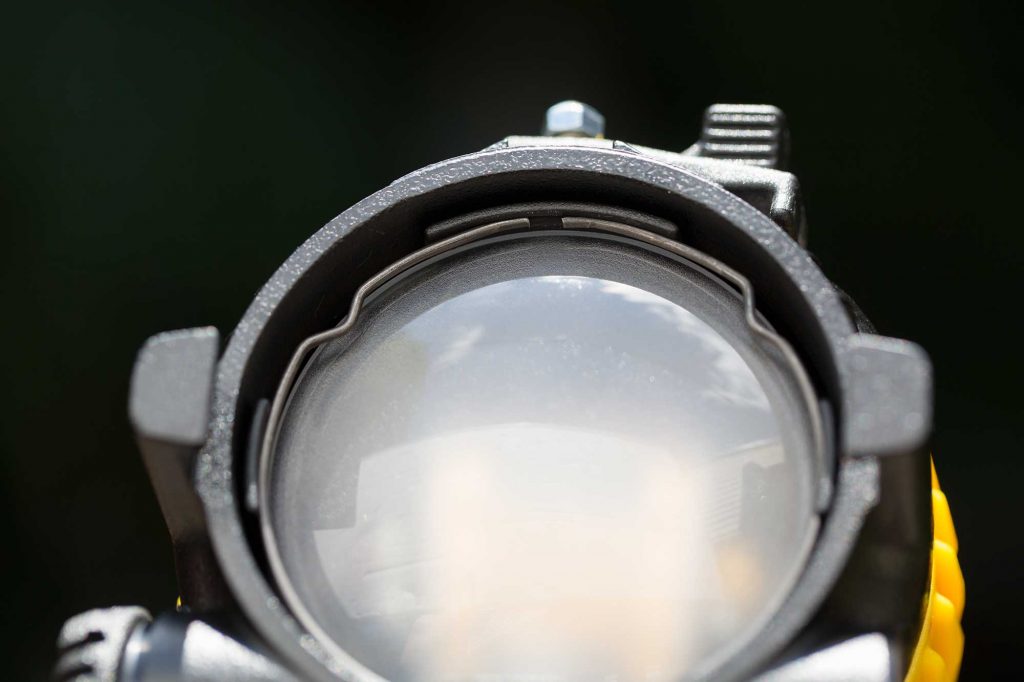
It’s a remarkable design achievement, really, that Dedo can make a bi-color light that remains fully focusable for both tungsten AND daylight. They achieve this by checkerboarding the different color LEDs at the focus point of the light behind the two aspheric lenses. I removed the lenses to have a peek at the guts:
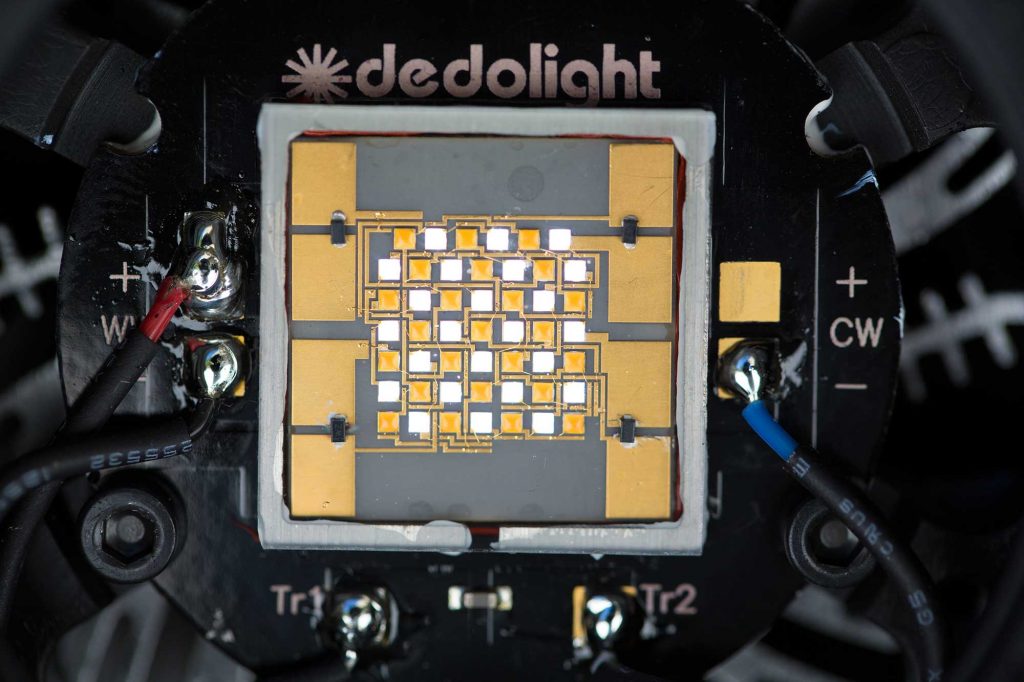
DLED7 aspheric lens

It’s a simple matter to remove the two aspheric lenses and get a look at the LEDs themselves.

The LEDs are arranged in a checkerboard shape.

The DLED7 LEDs are arranged in a checkerboard shape. Half of the LEDs are tungsten and half are daylight (90 watts total for each)
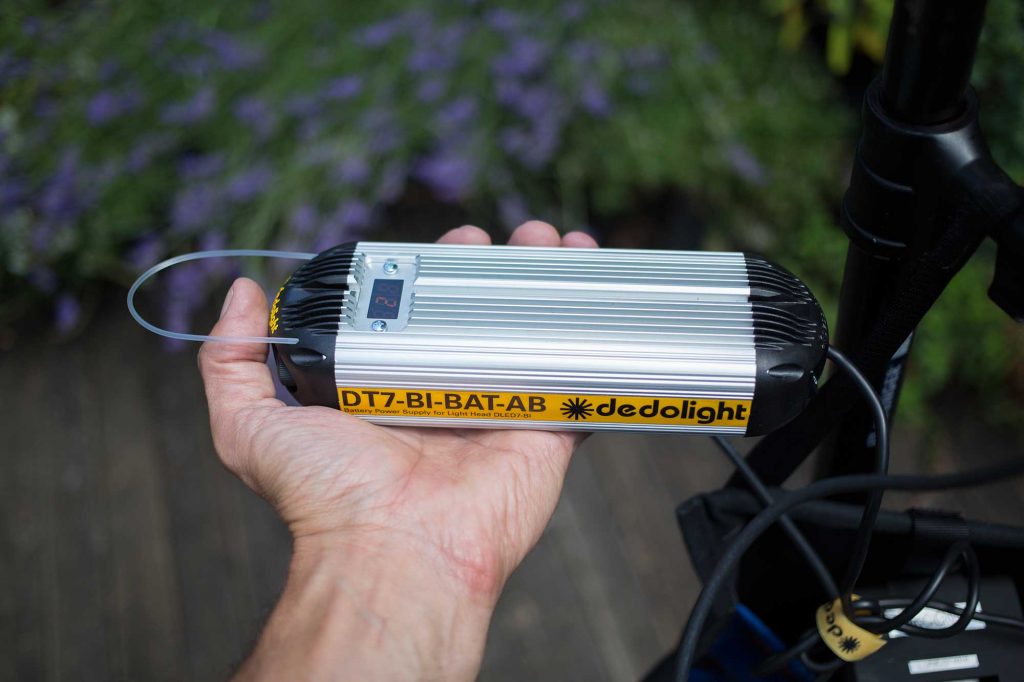
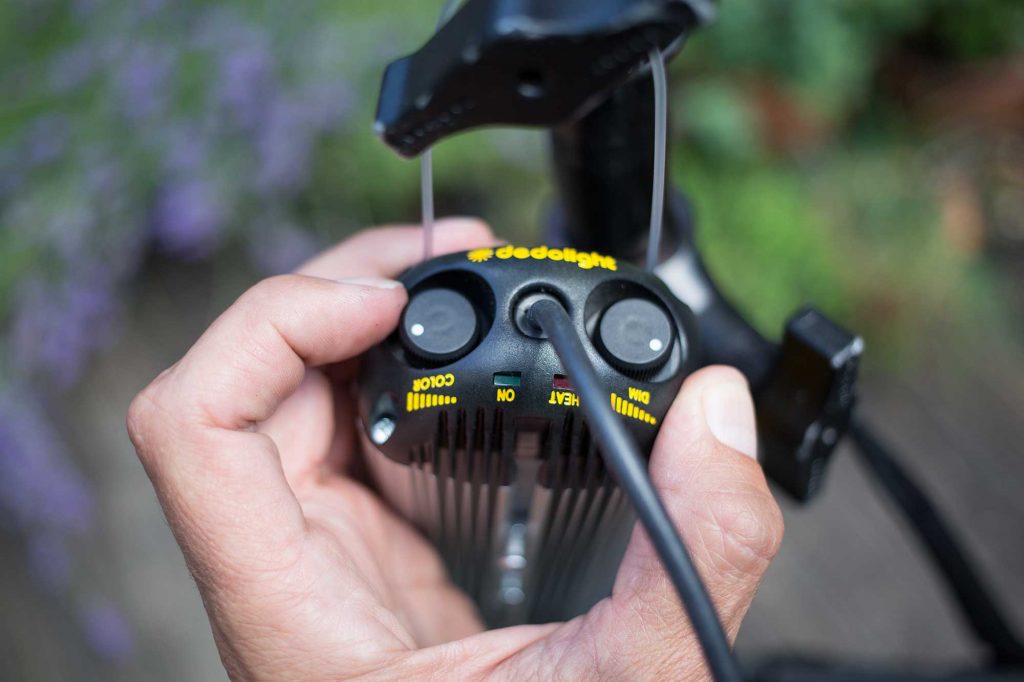
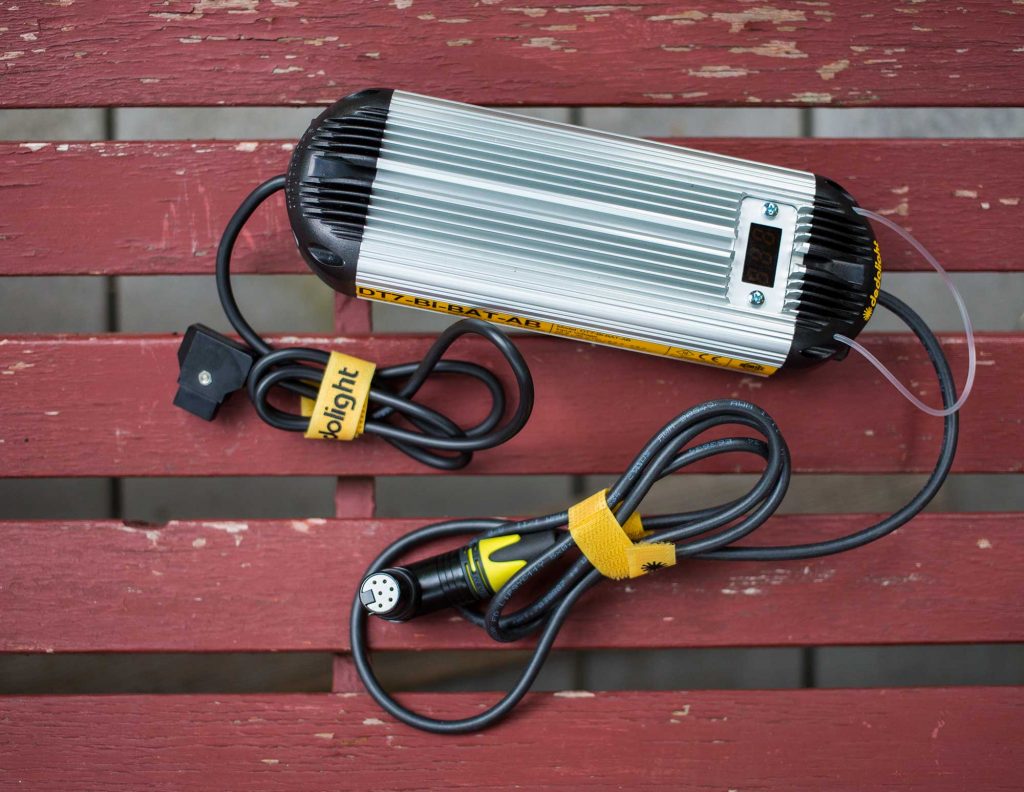
DLED7 battery ballast

DLED7 battery ballast is rather large and heavy. It offers dimming and color temp controls and on/off switch.

The first time I used the light for more than half an hour at full power, I was surprised how hot the ballast became. The temperature increases the longer you run it all the way up to about 140 degrees, which is almost too hot to touch. I emailed Dedolight support asking whether that was a problem. I received a personal note from Dedo Weigert himself, explaining that the heat is a design tradeoff they made to keep the ballast as small as possible.

Another observation about the dimmer: it is not stepless,  changing in small increments like aperture control on a Canon. The steps are small enough to not be an issue, but it’s impossible to do a completely smooth fade up or fade down the light without visible stepping, just as smooth iris pulls are impossible with Canon still lenses.

DLED7 ballast controls

DLED7 ballast controls

The first time I switched on the light, I was surprised it wasn’t brighter. But then I realized just how bright it gets when focused. Just how bright is it?

DLED7 vs Lowel Pro Light

By way of comparison, I put the DLED7 head to head with my Lowel Pro Light, a small 200-watt light that throws a very nice beam a long way. I found that the Pro Light is about 3 times brighter when fully spotted, to the DLED7 in tungsten mode spotted equivalently (which is about half spotted). However, it’s possible to focus the DLED7 MUCH more precisely. But daylight is the great equalizer. With a dichroic filter attached to the Pro Light to bring it to 5600K, the two lights are equally bright, and with equal throw.

Wide color range

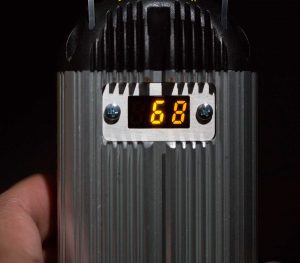
DLED7 color temperature indicator on the ballast

DLED7 color temp indicator

It’s worth noting that my DLED7 is slightly less bright at 3200K than it is at 5600K, by about 1/3 stop. The DLED7 goes even further up and down the Kelvin scale, though, advertised to go from between 2700K and 6800K. As it turns out, it actually goes quite a bit further up the Kelvin scale than that, as I discovered next.

Color accuracy scores

I tested the DLED7 with a Sekonik Spectromaster C-700R color meter, which reveals some interesting details about the quality of the light.

First test: How accurate is the ballast color temperature indicator vs. the actual measured color temp?

What I observed is that the DLED7 tends to run cooler than the ballast readout, and that the more you turn up the dimmer, the cooler the color temp gets. The only way I could hit 2700K, in fact, was to dim the light all the way down to 2 percent (the light is off at 1 percent), where it read 2733K.

Color temp set at 2700K:

Dim 2 percent: 2733K
Dim 10 percent: 2775K
Dim 25 percent: 2776K
Dim 50 percent: 2827K
Dim 75 percent: 2845K
Dim 99 percent (brightest setting): 2860K

Going to the far blue end of the scale, with my color temp set to 6800K, we find the same thing, only it’s even more blue-shifted. Here’s my readings:

Dim 2 percent: 6738K
Dim 10 percent: 6905K
Dim 25 percent: 7089
Dim 50 percent: 7395K
Dim 75 percent: 7459K
Dim 99 percent: 7422K

So where the DLED7 is furthest from its advertised color temp is when it’s at it’s bluest and brightest, at which point it’s about 600K over the mark. Definitely something to be aware of.

In practice, it’s pretty easy to adjust for this to hit 3200K. Just set the temp readout to 3100K, which put my readings within 100K of the target at all dimmer settings. For 5600K, though, things get trickier. At 25 percent dim, set to 5900K. At 50 percent, it wants to be at 5500K. At 99 percent, setting to 5300K got me real close. In practice, as long as you don’t mind being a few hundred K off your mark, you’ll be fine. But for precise color work? Carry a color meter and be ready to use it a lot.

How does the DLED7 stack up against other lights in terms of CRI rating?

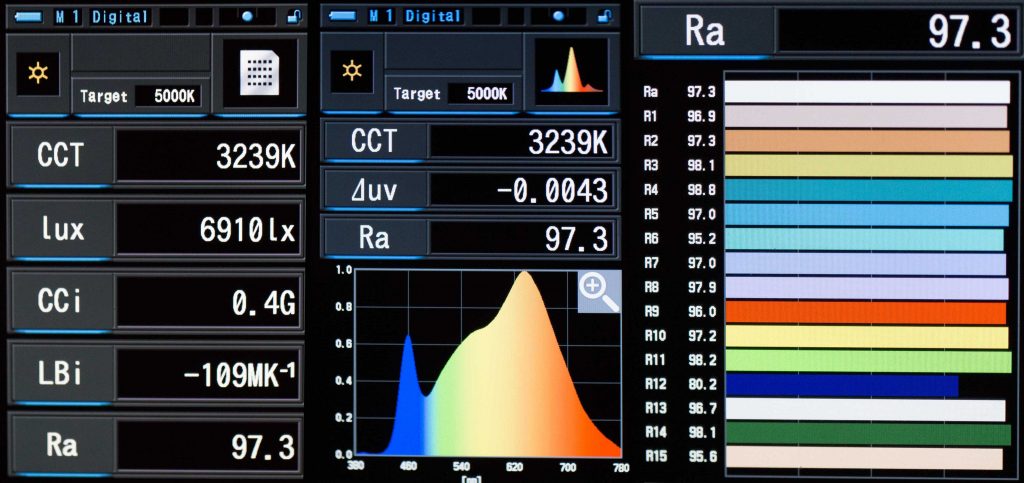
I tested the CRI and color spectrum of the DLED7 at both 3200K and 5600K (as measured on meter, not by the color temp readout on the ballast, because those numbers are slightly different as outlined above). For this test, I used a Sekonic Spectromaster C-700R.

At 3200, the DLED7 scores exceptionally well. CRI: 97.3

The DLED7 measured at 3200K

The DLED7 measured at 3200K

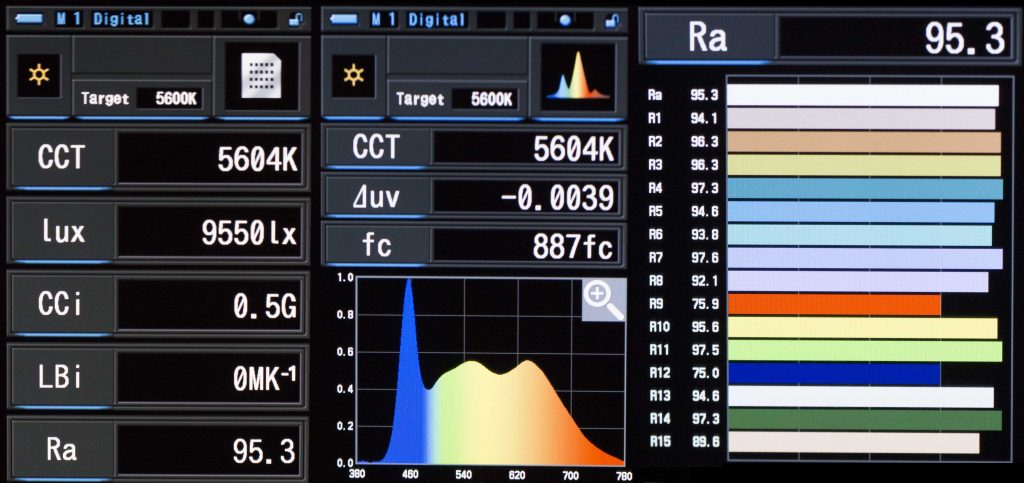
At 5600, things slip just a little a bit. CRI: 95.3

DLED7 at 5600K color rating

DLED7 measured at 5600K

Most notable is the R9 readout in the far right column, above. The R9 shows how well the light does in reproducing saturated reds. These are important colors for skin tones. So we would ideally like to see as high a rating as possible for R9.

It turns out, though, that scoring 75.9 in R9 is quite good for an LED light. By way of comparison, my lovely bi-color LiteGear LiteMat2 has a measured CRI of 93 and a R9 score of 73.2 for daylight and only 64.4 for tungsten. And yet, it still produces fabulous results with skin tones.

To illustrate why, consider this: professional gaffers wouldn’t hesitate to place a full CTB filter over a tungsten light to match daylight. But guess what that does to the R9 score of a tungsten light? See for yourself (measured with my Lowell Pro Light and full CTB):
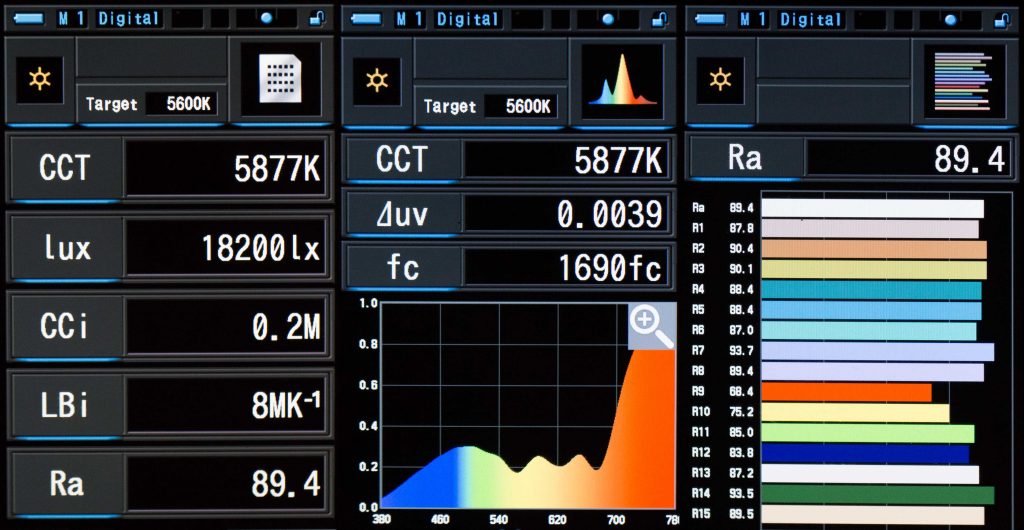
A tungsten light with full CTB filter shows even lower R9 and lower CRI

A tungsten light corrected to daylight with full CTB filter reveals an even lower R9 score of 68.4 with a CRI of 89.4.

Suffice to say, if the Dedolight DLED7 is posting scores that easily beat a tungsten light corrected with CTB, it’s more than good enough for film production work.

For information about how this light stacks up against other LED film lights, check out the very comprehensive light test results published by Indie Cinema Academy. As of this writing, their tests do not include ratings for the DLED7.

A few tips for getting the most from the DLED7:

Glue black felt on the  barn doors (the two larger ones, not the small adjustable ones). Because they no longer get hot, adding light-absorbing material to the surface of the doors makes them less reflective and improves their light shaping ability tremendously.

The barn doors feather the light when it is spotted, and cut it when it is flooded. For example, if you rake the light along a wall at full spot, closing the barn doors on the wall side, you can feather the light  to spread it evenly across the wall, achieving the same effect as a graduated scrim.
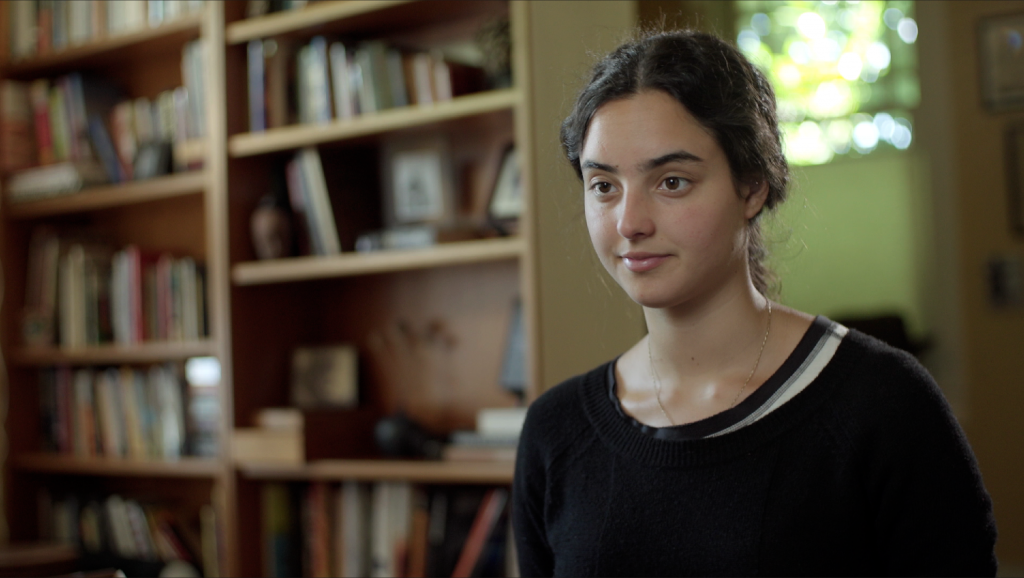
DLED7 as rim light

DLED7 as motivated rim light, with barn doors used to feather light as it falls off subject’s camera-right shoulder.

DLED7 as back light.

DLED7 as back light, visible as the splash of blue light on subject’s camera-right shoulder.

The power connectors on the ballast are well designed, and have plenty of length to allow you to run the light up a stand without fuss.

DLED7 battery ballast

DLED7 battery ballast

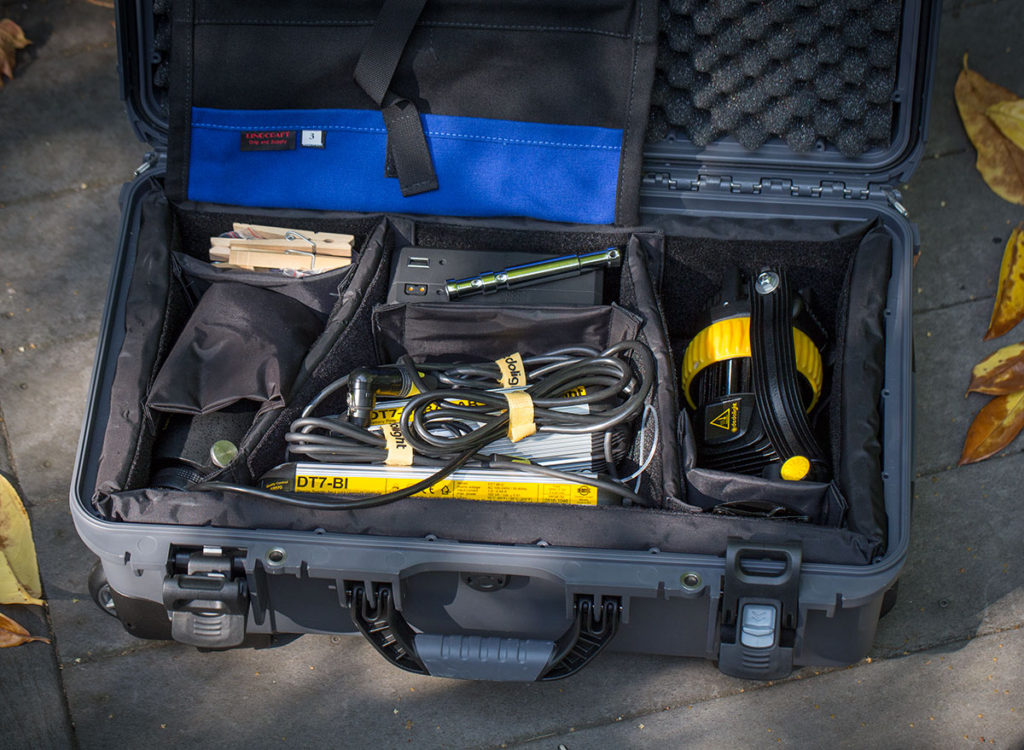
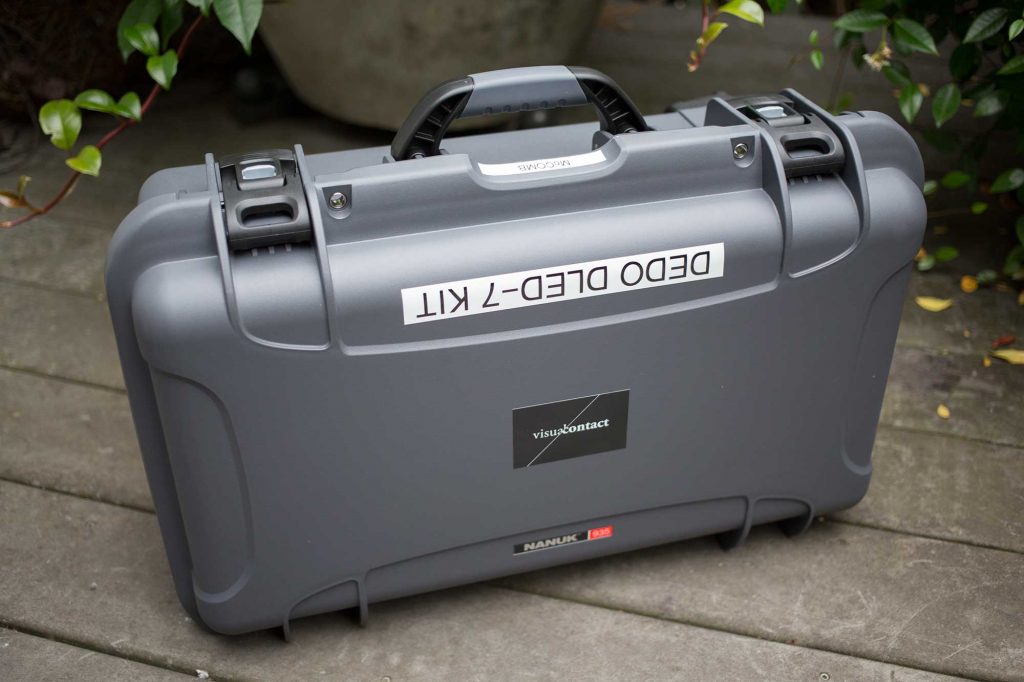
DLED7 kit all ready to roll in Nanuk road case.

My DLED7 kit all ready to roll in Nanuk road case, with both AC and DC ballast.

Hanging the DLED7

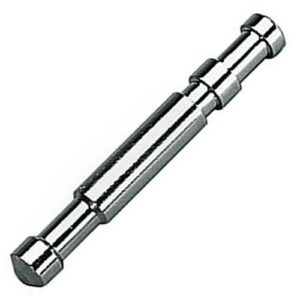
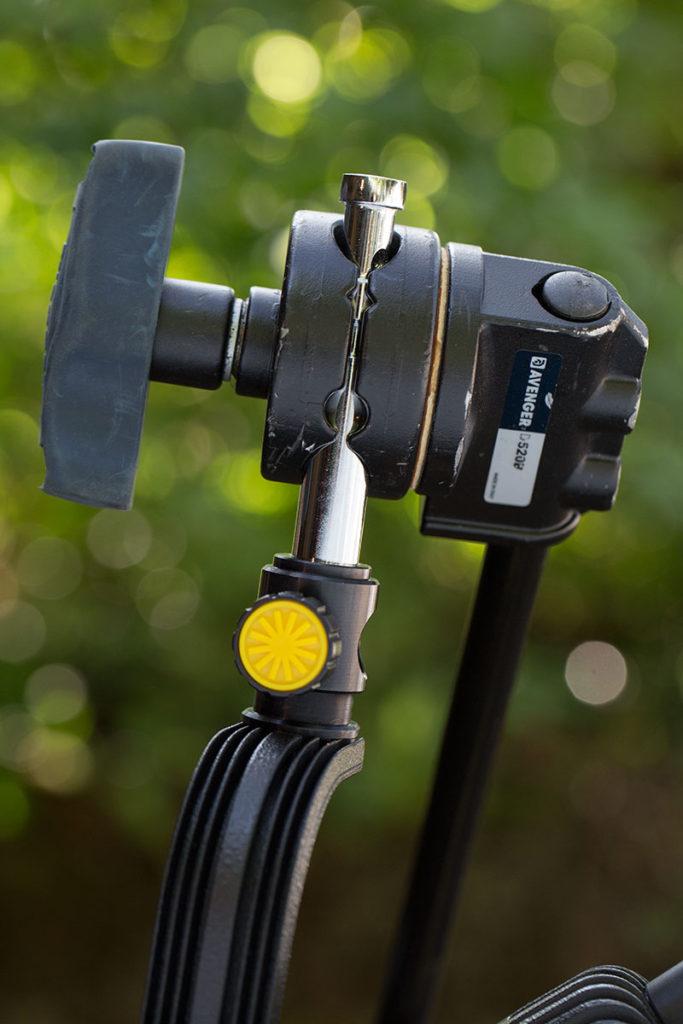
Avenger baby pin

Avenger baby pin

I’ve found that the best way to mount the DLED7 on a stand is with the aid of a 5/8″ baby pin. The yellow mounting screw on this light is a little funky, requiring like five turns to mount it to a light stand. And because it’s bottoming out at that point, it has to be over-cranked to get a firm enough bite to keep the light from slipping.

Using a pin gives you a lot more flexibility in how you mount the light, and because the 5/8″ pin is ticker than a standard light stand,  it doesn’t have to be over cranked.

Mounting DLED7 to stand using a 5/8" baby pin

Mounting DLED7 to stand using a 5/8″ baby pin allows more flexibility and security

A Norm’s Pin isn’t a good choice for this, because the DLED7’s receiver isn’t deep enough to engage properly. Instead, I use an Avenger E250 Long Double 5/8″ Baby pin which has a shallower lip. As a bonus, the Avenger baby pin also fits perfectly into a Manfrotto Boom Stand.

So, here’s what it all boils down to:

CONS

  • Pricey and doesn’t include required accessories.
  • LED version isn’t as bright as its tungsten predecessor.
  • Currently it’s a special order item in the US.
  • Measured color temperature runs cooler than ballast indicators display.
  • Dimming, especially at cool end, shifts the color temperature.

PROS

  • Wide color temperature range from 2700k – 7400K (measured)
  • Very portable
  • Dimming at warm end without significant color shift
  • Battery operable for long periods
  • Controllable, even light spread
  • Exceptionally focusable

The DLED7 is very special location light that can do what no other LED light can do in terms of focused throw with virtually zero light spill. It’s very easy to place a light or a shadow exactly where you want it with this light. It excels as a background light, and as a back light, rim light or hair light. For some kinds of commercial work, such as photographing a beer label illuminated just perfectly, it’s in a class all by itself. It’s portability, battery operability, and huge color temperature range make it the swiss army knife of location lights.

But at $1700, it’s also quite expensive and doesn’t ship with required accessories (you have to add a ballast, and the one for battery use costs over $500 and the one for AC use costs more than $700). The DP 2.1 projector with 85mm lens adds another $477. DP EYESET diffusers adds another $116. Barn doors: $50. Also, the ballast color temperature readout isn’t fully accurate, and especially at the cooler end of its spectrum, the light shifts color temperature as it is dimmed.

Nevertheless, this is a light that gives you real lighting superpowers: the ability to decide exactly where to place the light and shadow in your frame, at whatever color temp you want, without a power cord. I recommend it without reservation. It’s exceedingly well made and precise, exactly what you’d expect from a Dedolight. And the premium price is something we in the film industry expect to pay for top gear. I look forward to recouping that expense over the many years of service this light is likely to give me.

Want to try it out for yourself? Rent my Dedolight road kit, which includes all the above items, via Cameralends.com. (Seattle pickup only please.)
DLED7 road kit

DLED7 kit ready to roll in Nanuk 935 case


Shooting raw on Sony FS5 with Atomos Shogun Flame

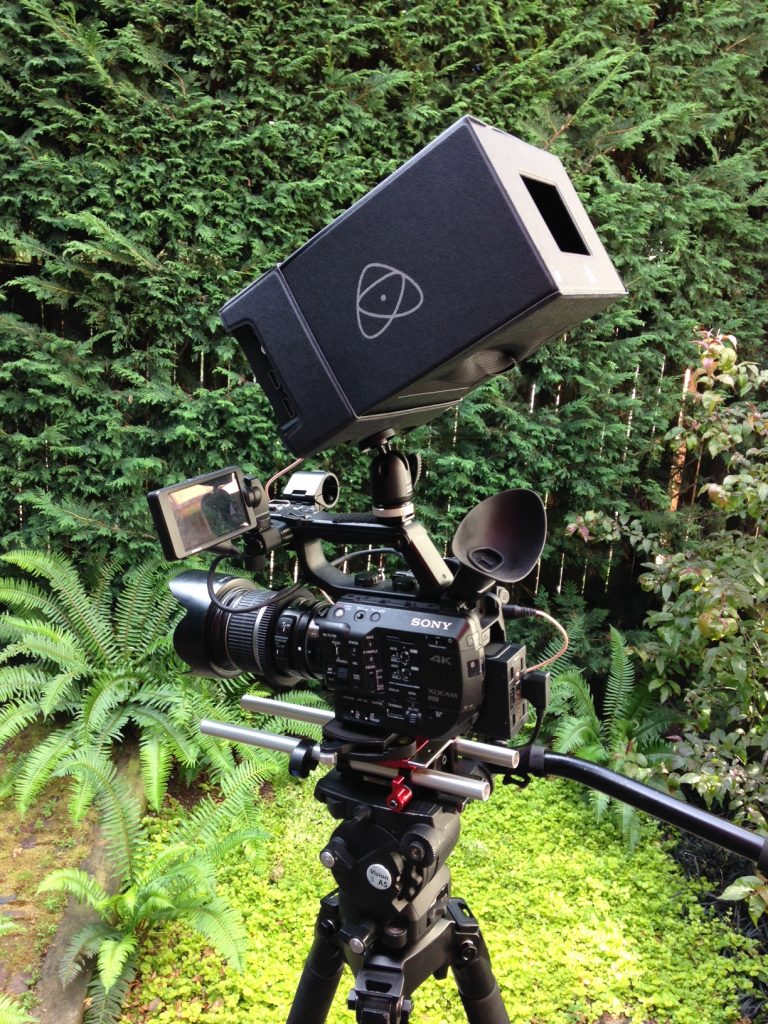
Atomos Shogun Flame with sun shade on Sony FS5

Atomos Shogun Flame with sun shade on Sony FS5

I have been eagerly awaiting the raw upgrade to Sony FS5 that was released last week. What does 12-bit 4K raw look like on this camera? I purchased the $600 CBKZ-FS5RIF upgrade as soon as I could, installed it, and over the weekend, had a chance to shoot a little on a music video project. Here’s my initial observations, based on recording with a Atomos Shogun Flame.

First insight: the Flame isn’t actually a raw recorder just yet. You are limited to recording 4K 10-bit ProRes or DNxHR from the Slog 2 or 3 12-bit raw signal that the camera sends. This means you don’t have the option, if you want it, to “develop” the digital negative to your liking from CDNG using raw tools like Resolve or Adobe Photoshop. Atomos says CDNG raw will be supported in a future firmware upgrade.

If you want 12-bit CDNG raw now, an Odyssey 7Q+ with the latest firmware and an FS5 will do the job. I look forward to testing that combination soon. However, from experience I know the Odyssey screen isn’t as bright as the Atomos Flame, and I love me a bright monitor. However, the Odyssey is OLED, which the Flame is not.

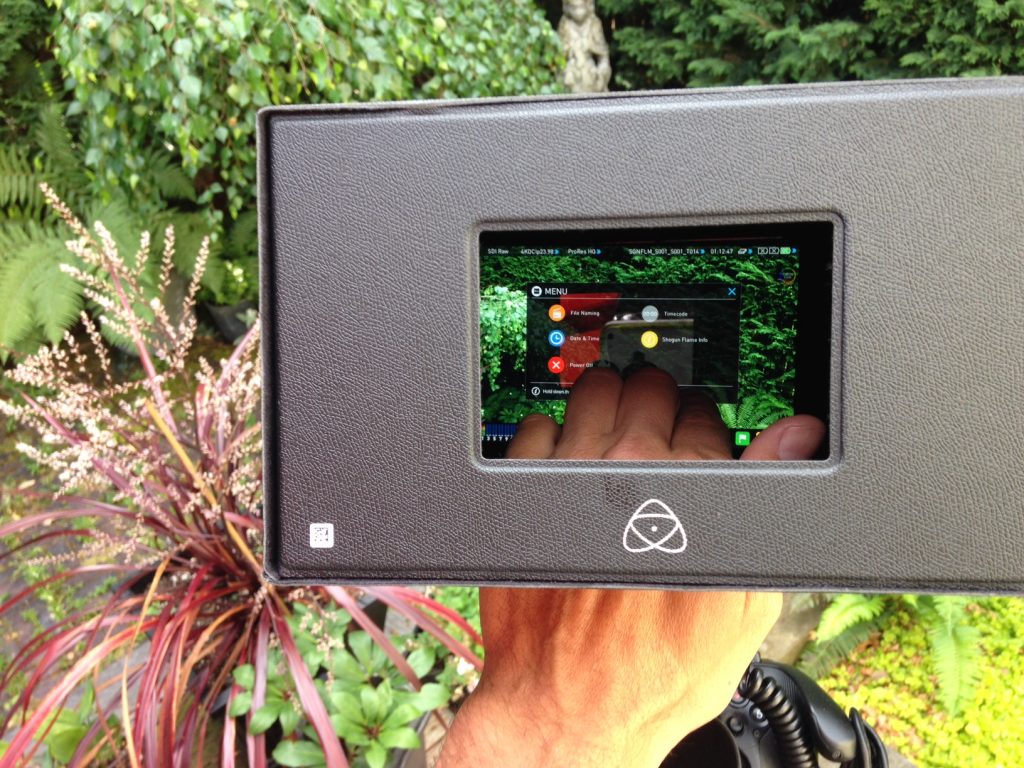
Atomos Shogun Flame sun shade

Atomos Shogun Flame sun shade allows touch screen to be accessed through an opening in the bottom.

So, just how bright is the Flame? The sun was shining in Seattle yesterday, so I had a chance to really work it. And I found that it’s noticeably brighter than a SmallHD 702 (1500 nits vs 1000 nits).  In direct sunlight, though, you still need the hood. That’s because the screen is highly reflective, and in glaring sunlight, you need to cut down on sources of reflection. The Atomos hood creates a box with a little window you can peer through, which effectively reduces the area of reflection to a small rectangle in the middle. I found that wearing a ball cap while operating further shades this opening, making it possible to view the screen pretty effectively even in direct sunlight. But the best option? Shade the camera and operator with a flag or umbrella.

The HDR mode is…interesting. It does look cool, visibly brighter than in rec 702 mode. But it feels a little 1.0 to me. The pixels aren’t OLED, so brightness feels like it’s coming from over cranking the LCD pixels. I’ve seen a real OLED Sony HDR monitor, and wow, it blew me away with its brightness. This monitor doesn’t even come close. It’s more like a preview of coming attractions than the real deal. But it’s a start, and I applaud Atomos for shipping it as soon as possible, because HDR is going to be amazing when it gets here and is widely supported on consumer monitors.

There’s a display mode on the Flame that tries to convert Sony SLOG2 or SLOG3 to Rec709 using Sgamma 3 or Sgamma 3.cine color modes. The problem is, it doesn’t really work for me, because I (properly) overexpose my SLOG. To visualize that, you need a LUT, and the Flame happily does support LUTs, allowing you to load up to 8 custom ones.

I found that the LUT I normally use with SLOG3 looked slightly different when applied to the raw signal of the FS5. So that will need some tweaking. But the good news is that your LUTs will work and can be applied, not only to the screen view, but you can burn them in to the recorded footage if you choose.

Slow Motion is a non-starter on this Shogun. The Flame will display a 60p signal, but the record button is disabled, meaning it does not support any slow motion frame rates above 30p. The Flame doesn’t display anything but noise when the S&Q option is enabled on the camera. You’ll need a Shogun Inferno to record at 4K 60p, in burst modes, and in the 2K slow mo mode.

There’s also no way to down-convert the raw 4K -> 2K on this recorder, which means you HAVE to record 4K, fwiw. Not a big deal since you can record 10-bit on the camera’s sd card. But it would be nice sometimes for workflow reasons to go straight to ProRes in 2K instead of having to transcode the footage first, something the Odyssey supports.

Neither SDI nor HDMI output is available when shooting raw, which means you can’t send a feed to a director monitor (at least not to the SmallHD 702 I used for testing).

Battery: The Flame chews through batteries. Bring lots of them if you plan on shooting for very long.

Sound: The Flame has a fan, but it runs nearly silently after noisy boot up.  In a hot production environment, this might be an issue.

So, how about that 4K image? Jury’s still out. I definitely noticed the same kind of noise in the shadows that you see with SLOG recorded in-camera. Apparently 10 bits isn’t enough to solve for that. I’ve been told that 12 bits isn’t enough either – that you need 16 bits before those shadows really come clean right out of the camera. So just be aware that you will still need to overexpose the same way you do with in-camera 8-bit or 10-bit SLOG. Beyond that, the benefits of shooting 4K in 10-bit are all there: you can push the file around in post more without degrading the image, you get better color information and no macro blocking and artifacting that you can see when pixel peeping your XAVC footage.

Conclusion: I wouldn’t buy this recorder, but I would happy rent it again – until the Inferno is available.

Update: I finally got a chance to test out the Inferno. In a nutshell, it’s the same recorder as the Flame, but it allows you to record up to 60p in 4K with the FS5. It still doesn’t allow you to record slow motion at frame rates above 60p, and it doesn’t yet support 12-bit raw recording to CDNG files. Choose the Odyssey 7q+ if you want any of those features.

Is DJI Osmo more than a toy?

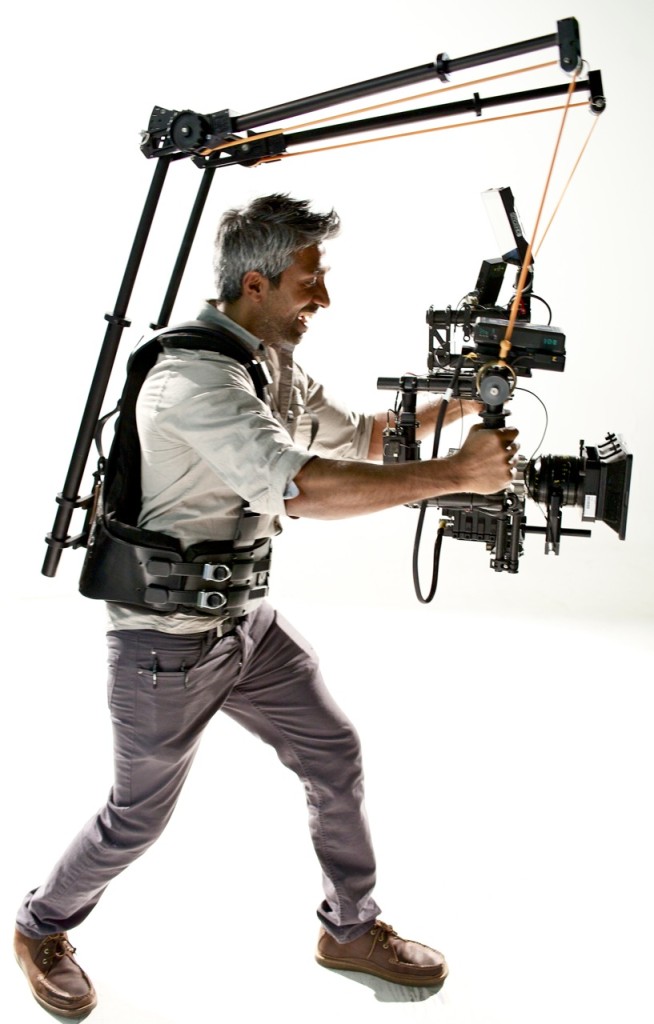
My first step on the journey from still photographer to cinematographer was to simply grab a camera and start shooting. I quickly learned to put it on a tripod instead. Or a shoulder rig. Or a slider. More recently, a Movi. But the reality of gimbal-stabilized shooting is that it can end up looking like this:

bigrig

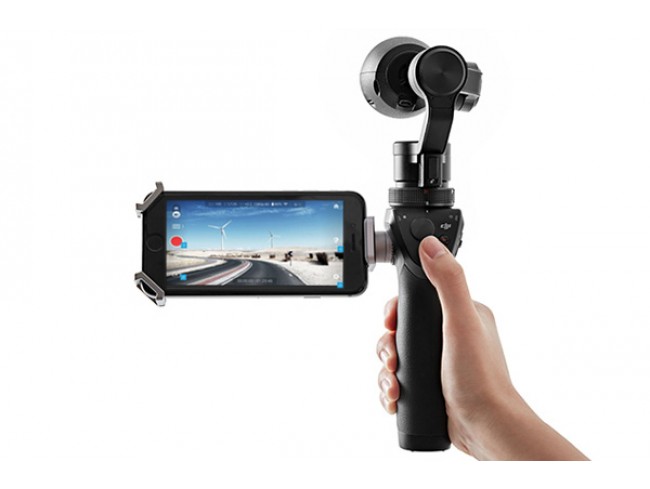
Hardly freeing! So when DJI announced the Osmo late last year, with the promise of a stable camera that fits in your palm, I was fully intrigued.

Osmo is priced aggressively enough that I didn’t have to think about it too long before deciding to buy. Over the Christmas break I had a chance to do a little shooting with it, to answer the question: is Osmo more than a toy? Could the footage it produces work on a real documentary production?

DJI-OSMO-01-650x489

The first thing I noticed out of the box is that Osmo is cute. Sexy, even.  The sleek black device invites holding and feels great in your hand. If it were white, I would swear it was an Apple product. But then I turned it on, and the next thing I noticed was that the horizon wasn’t level. And it kept crashing when I touched the screen in the wrong place. Definitely not an Apple product!

Based on my early observations, it’s clear that DJI released Osmo before the firmware was fully ready. DJI embodies a trend in which camera manufacturers use early adopters as beta testers for firmware that is still in development. But within a few weeks, and just in time for Christmas, DJI released new firmware, and most of the problems I observed are much improved, if not fully corrected.

The Osmo’s lens is fixed-focus, like a GoPro, which keeps everything more than 1 meter away in focus. Everything close than that falls out of focus. A meter is almost 40 inches, and to get the camera that far away, you’ll need to use the optional DJI selfie stick (currently in short supply) to get sharp images of yourself. I’ve ordered one and look forward to the option of getting the camera up high (drone like) for close aerial perspectives with the Osmo.

selfiesoft

Selfie mode at arms length

Shooting in selfie mode produces a slightly back-focused subject in frame. Click the image above to view at full resolution, which reveals the full extent of the problem (the downsampled image as rendered above disguises this).

Another challenge: the Osmo with X3 doesn’t do closeups. It doesn’t even do medium closeups. Remember, the Osmo field of view is the equivalent of a 20mm lens on a full frame camera. That’s wide!

tooclosecamera

Distortion and soft focus ensues when you get the Osmo closer than 1 meter

Moving Osmo too close both distorts your subject and throws it slightly out of focus. The slight defocusing is made all the more apparent because whatever is behind it will be perfectly sharp.   So, with Osmo, I have to fight my instinct to get the camera close, especially when shooting people.

The closest thing to a workaround (until the X5 camera for Osmo is released) is to shoot in 4k, and leave lots of room around the subject, then crop into the shot in post. But I find it’s best to just keep people a meter or more away. That’s just how this camera was designed to be used.

Slow motion

In 1080p, you have some nice framerate choices for conforming to 24p slow motion: 30p, 48p and 60p. You can also engage the slow motion mode which shoots at 120p in windowed mode.

The best quality slow motion results happen from shooting no more than 60fps. Anything more than that, and the image suffers from significant noise. To my eye it looks like 720p that’s been scaled up: a little soft, and very noisy. Still, with some denoising, you can get some usable results. The field of view when shooting in 120fps is much narrower due to the windowing of the sensor.

Battery life

You’ve got two batteries to stay on top of with Osmo: one in the handle that powers the camera, and one in your smart phone powering your screen. I find the Osmo batteries last about 30-40 minutes in constant use. So you’ll need a handful of them to get much shooting done.

iPhone battery life is greatly reduced when shooting with Osmo. During an afternoon of shooting, I was able to keep going by plugging my iPhone into a portable battery quick-charger. It’s easy to operate the Osmo with a charging cable running to your pocket. Your smart phone battery life may vary, but if you plan to shoot for more than 45 minutes or so I recommend something like this.

4K

I was unable to get the camera to record in cinema 4K at the DCI standard of 4096 x 2160. I thought at first that my card wasn’t fast enough, during the time I was writing this post, DJI released firmware version 1.4.1.8, and this resolved the issue (and many others). All 4K modes work perfectly now!

Selecting 4096 x 2160 changes the aspect ratio into a slighter wider field of view than 16×9 (approximately 1.9:1) and sets shutter to 24p. The more common UHD-1 (16×9 aspect ratio) 4k standard is supported in this camera in frame rates of 30p and 24p.

Screen Freezing issue

For some reason, the DJI Go app freezes occasionally when I tough the screen anywhere that isn’t a menu. This is definitely a bug, because the screen is designed to allow setting a spot-meter by touching the screen when in auto exposure modes. The v. 1.2.1.8 firmware update does not fix this problem. UPDATE: This issue has been fixed with the latest firmware update.

Manual controls

One of my favorite things about the Osmo is that it gives you full manual control over exposure. In practice, this means you will be able to get cinematic results from this camera that GoPro users can only dream about. For example, shooting in dark forested areas and emerging into more brightly lit areas, I was able to set the exposure to be correct on the brightest areas and allow the rest to go dark. Great for reveal shots. Trees and foliage tends to overexpose when set to auto, and going manual resolves this. The controls are easily accessible by touch, and unlike many other cameras, you can punch the screen while rolling without disturbing the shot because the brushless gimbals are doing their thing. So it works very well.

Another nice touch is the option to set shutter priority – which allows locking in a cinematic framerate of 50p, while letting the Osmo set aperture and ISO.

ND filtration

Although it doesn’t come with any ND, Neutral density filters can easily be screwed onto the Osmo’s threaded filter (it ships with a clear filter). The Osmo’s X3 camera uses the same filters as the Inspire 1. Luckily, there are quite a few options for ND filtration available for Inspire 1. I purchased a set of 3 Renaat ND filters for US $69. These filters weigh just 3 grams apiece, and won’t unbalance the gimbal. To purchase a set of your own, send an inquiry email to ceulenaere@gmail.com.

For overcast conditions, I found the 1/8 ND works great. For more brightly lit conditions and direct sun, the 1/16 and 1/32 filters will give you access to those cinematic shutter speeds. At 1/324, IR pollution becomes a bit of an issue, but I prefer to deal with a little color correct than to live with staccato shutter effect that results from high shutter speeds.

D-log

Osmo gives you a whole bunch of picture profiles to choose from. The most interesting one is d-log, which gives you a flatter image, holding onto highlight detail in post. I find it’s  more like Canon’s C-log than it is like Sony’s S-log: less dynamic range, but easier to grade. It feels to me like d-log gives you a ballpark of around 10 stops of dynamic range. Exceptionally good for this little camera!

In my original testing, d-log had a noticeable red shift, which had to be corrected in post. But this seems to have been corrected in firmware updates and I’m no longer seeing this issue.

What it’s really good at

Tracking shots! The Osmo excels when you’re in motion filming something that’s also in motion. For big establishing shots where you want everything in frame to be in focus, it’s killer. Think of it as a drone that you can hold in your hand, and shoot accordingly. So, passing between things or through things, big sweeping reveals, that sort of thing.

I’ve used the Osmo for one commercial project, and found it to be an incredible tool for getting shots I wouldn’t have been able to get any other way. In the video below, all of the traveling shots were shot with Osmo, and intercut with Sony FS5 footage. The cardboard walls in the space were 8′ tall, and I wanted a way to see over the top of the walls while moving, to reveal the participants interactions. I put the Osmo on a painter’s pole, which allowed me to extend it about 6 feet. This allowed me to get some dramatic crane-up reveal shots, like the shot that opens with the team huddled over an iPhone screen, booming up to reveal the view over the walls. Pretty sweet, and a shot I couldn’t have dreamed of getting with a larger camera rig in the cramped space.

What it’s not so good at

It doesn’t do closer than 1 meter, or selective focus.

Conclusion

The Osmo X3 is an exceptionally useful tool right now. For wide sweeping shots with movement, it’s killer. But the need to keep the camera at least a meter away from your subject limits it’s storytelling capabilities. The small sensor means everything in the frame is in focus.

When the X5 for Osmo is released, things will get a lot more interesting. Footage should then intercut seamlessly with higher quality cameras, and focus will be controllable, opening up a world of possibility.

But I’m not waiting for that. I’m carrying Osmo today on many of my commercial projects, looking to bag those special wide shots that I otherwise wouldn’t have time or budget for. The Osmo is the gimbal you can always have with you. And that makes it a winner with a very bright future.

How does Sony FS5 compare with Canon C100mkii?

Sony FS5: Best documentary camera ever?

Is the Sony FS5 the best documentary camera ever?

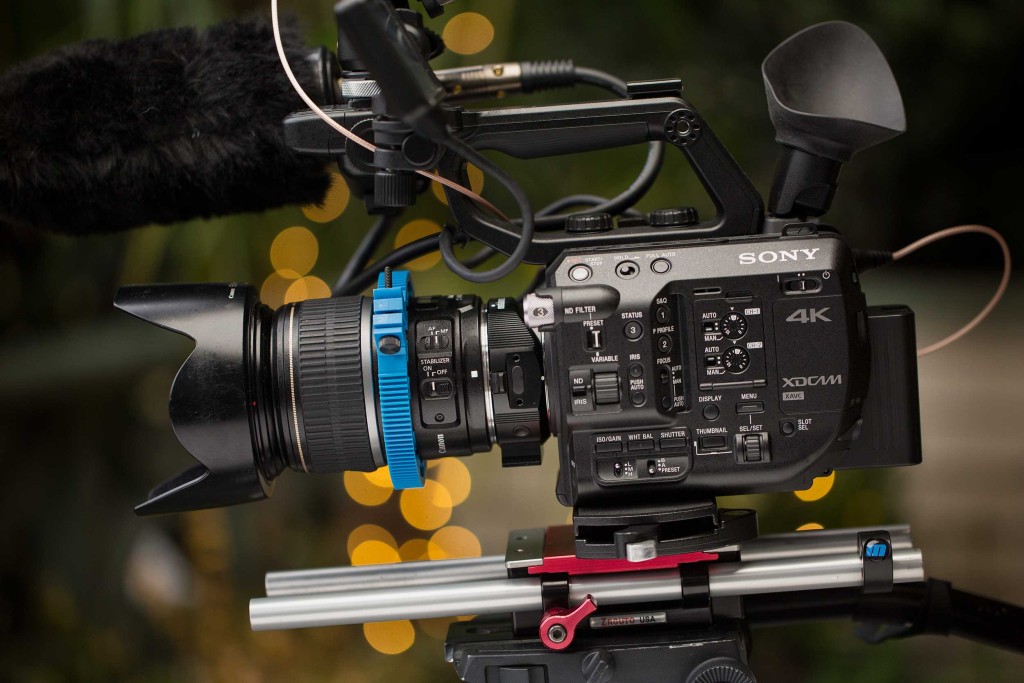
Over the past couple of years, I’ve migrated away from DSLR shooting to pretty much using the EOS c-series cameras, in particular the C100mkii, for most of the documentary-style shooting I specialize in. But a few weeks ago when the Sony FS5 began shipping, I opted to become an early adopter. The specs were just too tempting.

Last week I wrapped production on my first commercial project with the FS5. And while I have a long way to go in exploring this camera fully, I’d like to share some of what I have – and haven’t – observed so far.

IMG_0427

First up: I haven’t seen anything nasty in the footage, as others have reported. The only unacceptable quality I’ve seen so far is when shooting in center crop mode in low light, with the gain jacked up to 3200 ISO or higher. That produces nasty pebble-sized grain. But as long as I hang at 0db (ISO 1000 in hypergammas or ISO 3200 in slog) I find the results are spectacular. Razor sharp, crisp detail, plenty of color information to play with in 10-bit HD.

The FS5 gets noisy when pushed past 3200. In fact, I would say it’s best not to push it past 1600 ISO. And in SLOG, don’t pus it at all. It really wants a lot of light. Like one to two stops more than base ISO. So to my way of thinking, this is an ISO 1000 camera, whether you’re shooting SLOG or standard gammas. Set it in your head and forget it. And ISO 1000 is a pretty decent base ISO, isn’t it? The C100mkii’s base is 850. So we’re in the same ballpark with both cameras here. But the C100mkii can be pushed well over 3200 with great results. So Canon retains the edge for low-light shooting.

Canon color science is also more cinematic with less effort. All you have to do to get great looking footage when shooting C-log is drop on a LUT in post. The FS5, in SLOG, also requires dropping on a LUT (more about which ones in a moment). But then you have to do more work. Sometimes much more.

The good news is that the 10-bit HD footage loves to be graded! And it’s actually a lot of fun to push it around and you can do that to quite an extreme without the image falling apart. It’s definitely a different look, the Sony. I read somewhere that because Sony has a long tradition of news cameras, their look is more video than cinema. Canon, with it’s EOS C-series, is gunning squarely for cinematic results. And I have to say I prefer the Canon look. Skin tones look more alive. But it’s a subtle thing. I like the image coming out of the FS5 a lot, it’s just different from the C100mkii.

The first project I shot with the camera didn’t lend itself to shooting SLOG (as Allister Chapman has eloquently argued, SLOG isn’t good in low light) so I shot in PP6, which is Hypergamma 3/cine. No LUT required, off we go. Here’s how a few of the interview frames looked without too much grading – I just added a little Film Convert using FS7 settings:

1 2 3

You can see that the last guy’s skin tones are unfortunately rather lifeless, but that’s not the camera’s fault:  I didn’t do a good enough job flagging him off from ghastly artificial light in the warehouse location where the interviews were shot, so you get a lot of that light showing up under the key.

Regarding 4K, I haven’t shot with it enough to comment. And I don’t plan to use much 4K anyway. That’s not why I bought this camera. It’s a pain in the ass to edit 4k (at least on my circa 2011 iMac) and none of my clients are asking for it. The only reason I can imagine using it regularly would be for getting two shots out of an interview, but in most cases I’d rather have the 10-bit than the 4K. Still, it’s very nice to have the option, something the C100mkii doesn’t.

Above: properly (over)exposed SLOG looks blown out on FS5’s LCD. SmallHD 502 with LUT applied fixes that.

Above: properly (over)exposed SLOG looks blown out on FS5’s LCD. SmallHD 502 with LUT applied fixes that.

In my SLOG shooting tests, I definitely find that this camera needs to be overexposed by at least one stop to keep noise down in the shadows. This makes monitoring a challenge. With the FS5, you’re stuck with just a single LCD mode that boosts the contrast to help with focus – but does nothing to reduce the overexposure. Not good enough! You really do need to shoot with a LUT when shooting SLOG.

LUTs are not supported by the FS5, however, so to use them you need a third-party monitor that supports them. I rented the SmallHD 502 on the advice of Seattle DP Gabriel Miller, and liked it so much that I bought one after using it for a single day. I wouldn’t dream of shooting without it now. It’s screen is almost as big as my DP6, but it’s tiny. A photographer friend asked me if it was my iPhone when he first saw it! And ultra lightweight. It lives on the top handle of my FS5, without compromising the compact form factor of the camera. Unlike the Atomos Ninja, which I also rented. Way too big and makes the whole thing top-heavy. No good.

So, which LUTs to use for monitoring (and post)? I’ve found two very good LUTs for this purpose. The first is the Sony Alexa emulation LUT. It comes in two flavors, one- and two-stop pushes. The second is a higher contrast version of the same LUT, with a one-stop push, called AA709A, that was developed by Art Adams. I’ve packed up all three and tweaked them so they’ll work with the SmallHD 502. You can download the FS5 LUTs here.

Next up, I’d like to talk about my favorite thing about the FS5: it’s body.

The ergonomics of the FS5 are SUPERB. It’s the first camera I’ve used in years that makes me want to shoot handheld. And I’m doing it all the time now. I’d basically forgotten that shooting handheld was even an option for me, ever since trading in my JVC HM100 for a 5dmkii. Even with the C100mkii, I find it wants to live on a monopod. But not this camera. It begs to be held in your hand, and it’s so easy to get great results with it, because it’s so light and so easy to MOVE with it. It’s changing how I think about shooting b-roll.

With both the FS5 and the C100mkii, the beauty is you can arrive on location and pull your camera out of the bag and begin shooting without building anything. But I give the FS5 the edge here, because even with my SmallHD 502 monitor attached and rotated horizontal, it measures just 10” high. That’s enabled me to turn my unused Steadicam Merlin travel bag into the perfect grag-and-go camera case for the FS5. It’s the perfect size bag to fit camera with my Canon EFS 17-55mm f/2.8 zoom lens, with Metabones IV adapter, a shotgun mic, and 502 monitor attached. The only thing I have to do to begin shooting is rotate the monitor to the right shooting angle, and press record.

I find myself picking up the FS5 with my right hand, by reaching into the grip, squeezing it, and lifting it, one-handed. It’s so light you can do that. It just balances in your right hand like an extension of your body, freeing your left hand to focus, operate the menus, and to cradle the camera for stability. That right handle is perfectly balanced. Really, the design team at Sony deserves an award for the FS5.

lens-mount

I haven’t used the FS5 with any Sony lenses. I am using it with my Canon EF glass, using the Metabones adapter and speed booster. Unfortunately my Contax Zeiss set won’t work with speed booster, because there are elements on the lenses that protrude too far.  I haven’t been able to try out the autofocus features of the camera with Sony glass.

The nice thing about the Metabones adapters, at least the version IV one that I have, is that the firmware issues others have reported seem to be resolved. Changing the iris behaves as expected, with the aperture dial on the camera. Also, image stabilization works perfectly on Canon glass with the adapter. My go-to lens on the C100mkii has been the the Canon EFS 17-55mm f/2.8, and it works flawlessly on the FS5 with the Metabones adapter.

It’s also very nice to be able to punch in to center crop mode and get even more reach from the lens.  But I do find that center crop works best in plenty of light. The Clear Image Zoom feature is also handy, but in the situations I’ve tried it, I definitely noticed a drop in image quality. Not as bad as most digital zooms, but enough that I won’t plan on using it regularly. Apparently the feature works better in some situations than others, because it uses a database of images to determine what image processing to apply. This will require more testing before I determine its strengths and weaknesses.

To compare with the C100, the Sony FS5 is definitely a manual focus camera. I LOVE the autofocus on the C100mkii, and I will continue to rent the C100mkii when I have projects that need snappy autofocus such as sports shooting or other situations where I don’t have time or mental bandwidth to chase focus. However, paired with the 502, manual focusing with the FS5 is a joy.

Touching the joystick enlarges the image 4x or 8x

Touching the joystick enlarges the image 4x or 8x

Using the 502, I’m able to gauge focus on the FS5 very precisely. A quick flick of the joystick zooms me into the image to check focus while rolling, and the way SmallHD has implemented peaking on the monitor is superb. So I really don’t find I miss the C100 autofocus so far.

quickrelease-detail

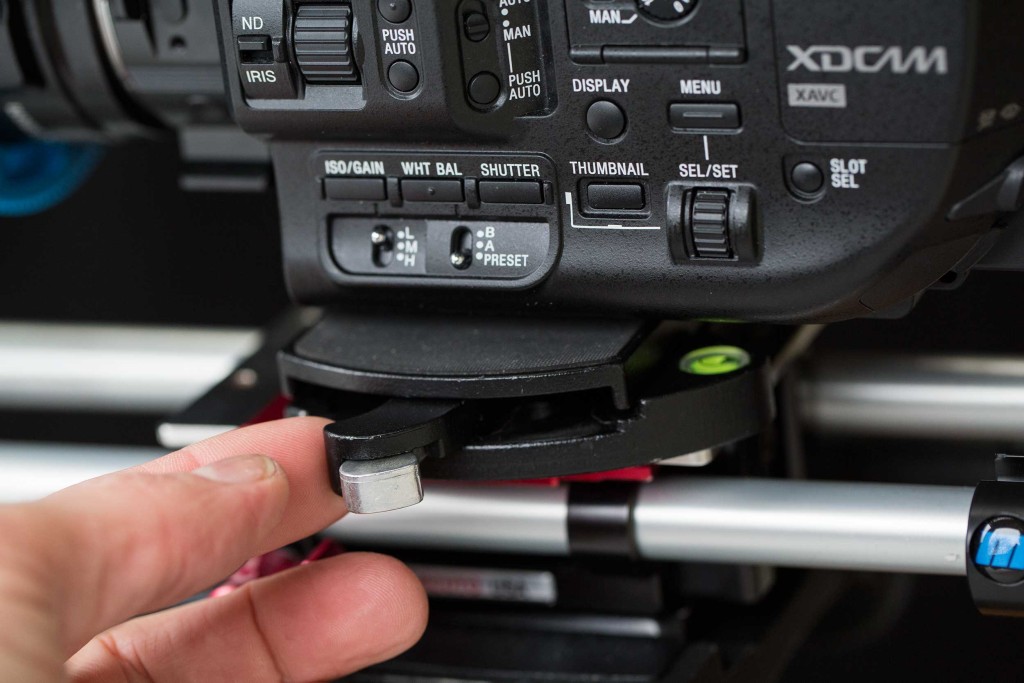
I have rigged up my FS5 with a Manfrotto quick release plate, which allows me to go instantly from rails and follow focus on a tripod, to handheld configuration. The camera is so lightweight that I have to rig it up and raise the center of gravity in order for it to balance on my Vinten AS5 fluid head. But the quick release gives me the best of both worlds: super stable, controlled tripod shooting one minute, and nimble handheld the next.

ball-head-detail

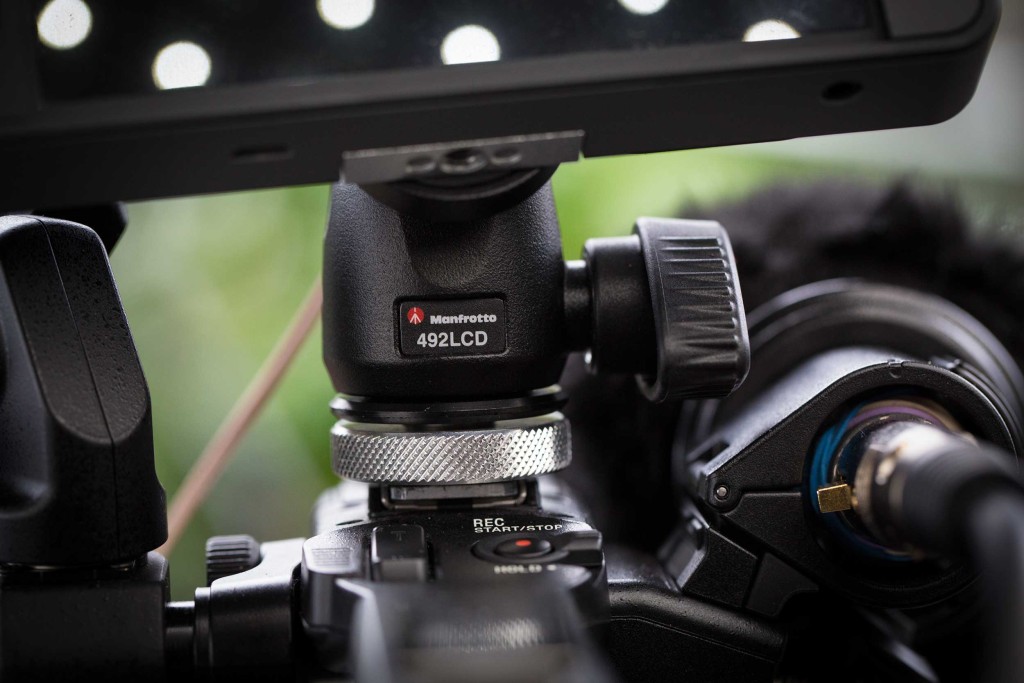
With a C100mkii, I use an external monitor mounted to an arm coming off a rail block. But with the FS5, I’m finding it most convenient to put the lightweight, compact 502 monitor right on top of the handle using a Manfrotto LCD ball head. This is a heavy ball head! It weighs as much as the monitor itself. But it’s buttery smooth in its operation, almost effortless to adjust, unlike the cheaper, lightweight ball heads. These have to be cranked down so hard it hurts your thumb, and they work loose and sometimes fall off. So it’s worth every penny and every ounce to get the Manfrotto. It’s the right tool for the job.

smallhd502

I find myself shooting with both the LCD and the 502, keeping the menu display active on the LCD, and the 502 clear of menus so I can focus and frame without any distraction. With the latest firmware, you now have the option to send the menu display to the external monitor, should you wish, as you can on the C100mkii. But the C100mkii’s monitor is in a much more awkward place than the FS5, which is completely configurable however you like it, and depending on your shooting situation. But the EVF on the C100mkii is superior to the FS5s, which feels just adequate.

smallhd_cbl_sgl_bnc_bnc_mm_thin24_thin_gauge_bnc_male_1446499276000_1194339

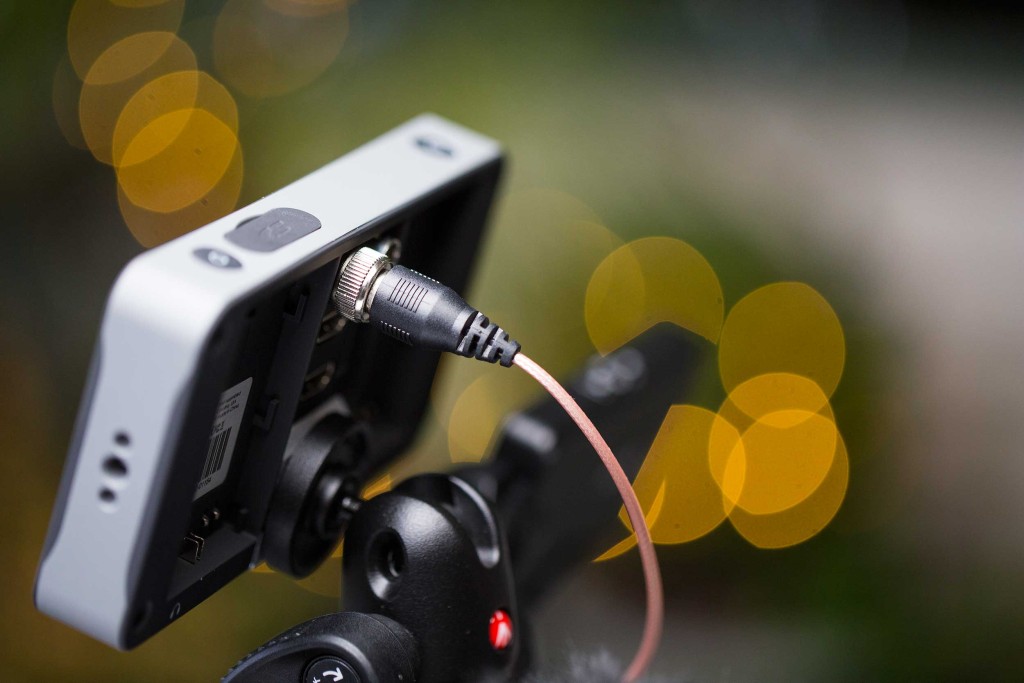
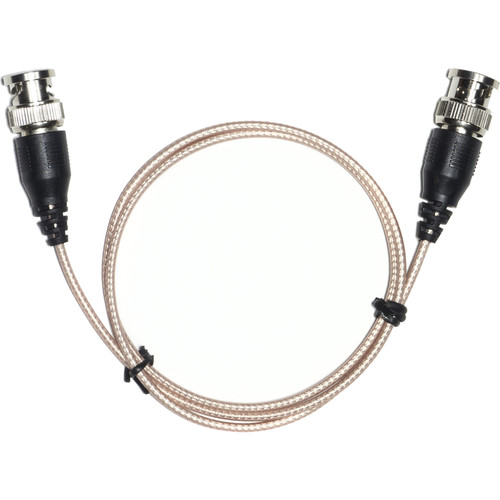
It makes sense to have everything as light as possible with this camera, and to that end, I purchased a very thin, very flexible thin gauge 24” SDI cable that SmallHD makes. It works amazing. This little guy is what you want for monitoring. HDMI cables don’t cut it! I’m SO very glad that FS5 includes an SDI out, something the Canon C100mkii does not. I can’t tell you how many times I’ve cursed the C100mkii when the signal drops out momentarily to my external monitor because I simply touched the HDMI cable. So yay for no more HDMI cables. And with the SmallHD SDI cable, you get the same thin flexibility as a thin HDMI cable. Yay!


swit

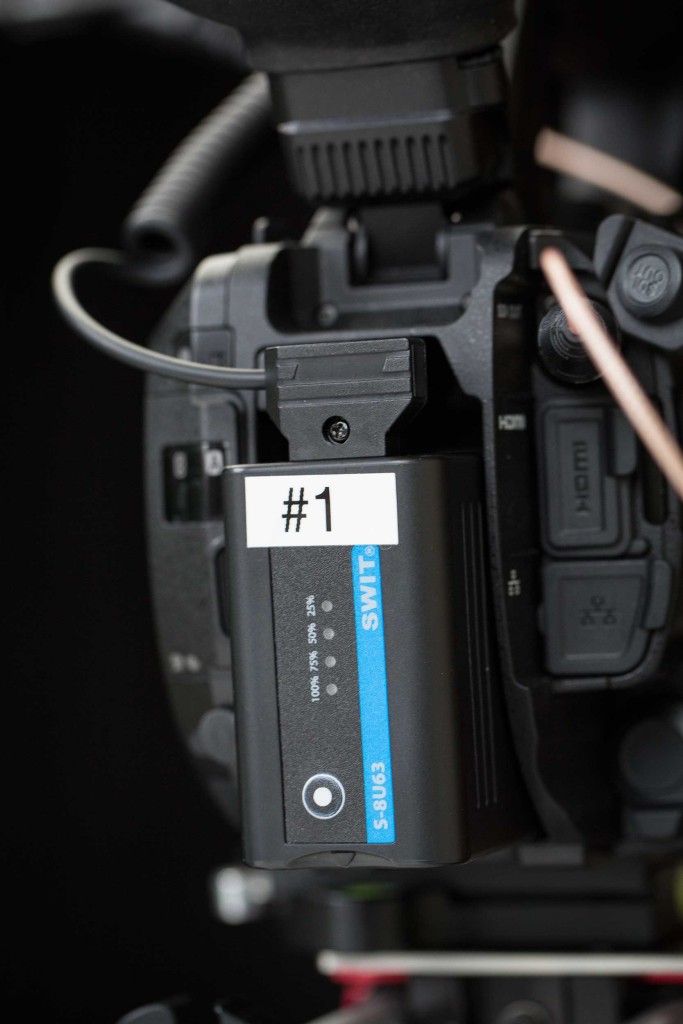
Another neat trick with the FS5 is to get Swit S-8U63 batteries that include a d-tap. I picked up 3 of these, which aren’t cheap at $180 apiece. But three batteries is enough for me to shoot all day. I get about 2.5 hours shooting time per battery while also powering the SmallHD 502. Also great news is that with the Sony FS5 charger, these batteries go from empty to fully charged in less than an hour. *UPDATE:  A reader commented that these batteries occasionally reset the camera clock on the FS5. This is something I’ve observed, but didn’t know it was the fault of the battery. So if you rely on accurate timecode for your projects, you should avoid Swit batteries for now, and choose Sony’s OEM batteries instead.

nd

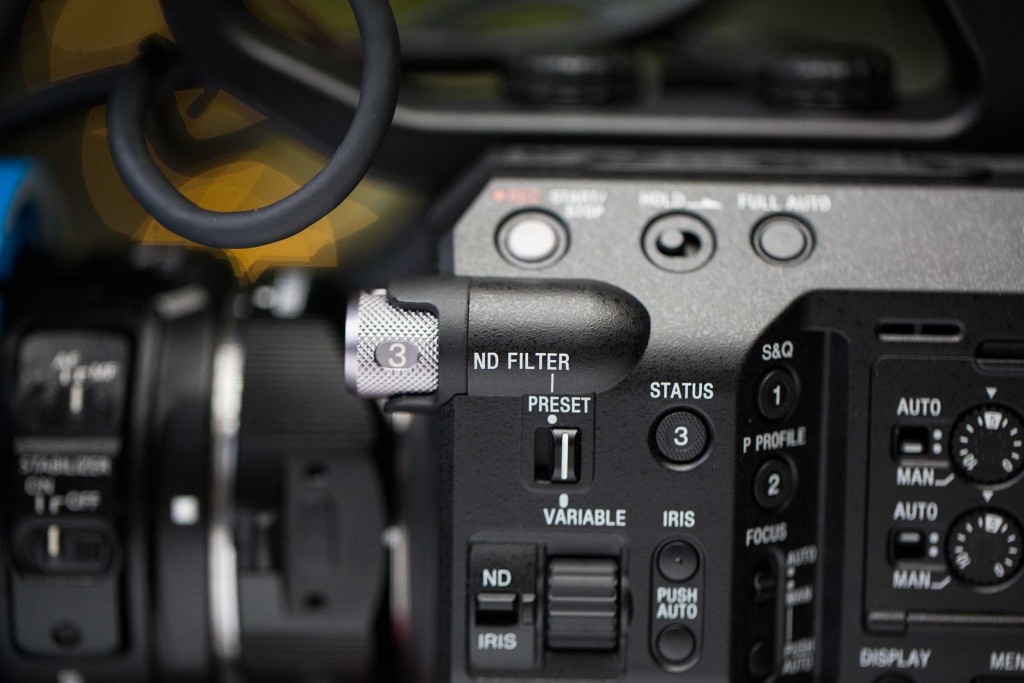
The ND wheel that allows you to smoothly and steplessly adjust the ND to control exposure is the killer feature of this camera. I can’t overstate how epic this is. Finally, a tool to control exposure without stepping the iris and changing depth of field! It’s the best thing ever for documentary style shooters. Goodbye, matte box. I don’t know if I can shoot anything else again after using this. And apparently Sony is going to release a firmware update that allows this to be set to an auto mode, which will automatically set the correct exposure using only this ND. How cool is that?

The slow motion features are fantastic, but I haven’t had a chance to use them much yet, so I won’t comment on that other than to say it gives me great pleasure to know that 240fps in full 10-bit HD is  just a button push away when I want it.

To sum up, I love this camera for it’s body. Does that make me shallow? I don’t think so. This camera has taught me that form IS function.  I’ll continue to admire the C100mkii for its look, for its autofocus and low light capabilities.  But for now I’m going steady with the FS5.

LiteGear’s LiteMat is an impressively versatile location LED

crate

For a long time I’ve been hunting for the perfect LED light. In the documentary-driven work I do, that means a light that packs down small, sets up quickly, controls spill, accurately reproduces color, is bright enough to fill strong window light, can dial from tungsten to daylight without gelling, is fully dimmable without flickering or color shifts, can run off a brick battery, and is a good value for the money. Is that too much to ask?

IMG_0245

LiteGear came to my attention on a recent commercial shoot with Jeremy Mackie, a supremely talented Seattle gaffer. I noticed Jeremy using a home-made box light that he built out of wood and LiteGear’s LiteRibbon. It looked a little scary to me, but the quality of light it produced was absolutely wonderful. So I went to LiteGear’s website to see if they had something a little more approachable for us less DIY types.

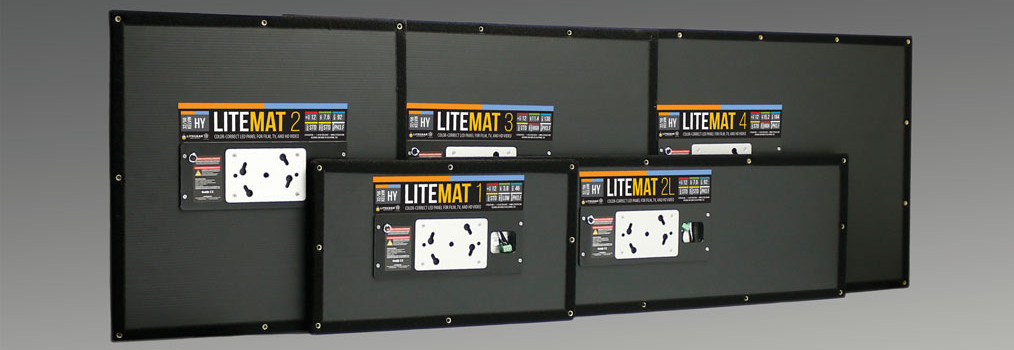
LiteMat-Slider-2-1014x350It turns out my timing was perfect. After learning what gaffers like Jeremy were doing with LiteRibbon (used to light the set of Her, among other significant films), LA-based LiteGear decided to make a light for rest of us. The result is called the LiteMat, which had just begun shipping. After reading the impressive specs, I chose the LiteMat2 because at 21″x21″ it seemed big enough to be effective in a variety of situations, but small enough to transport readily.

The first thing I noticed taking the LiteMat2 out of the box is that it looks like a cousin of the KinoFlo. It has a Kino center mount built into the unit, and the backing on the light feels like it’s constructed of the same study plastic hollow-core material as many Kino lights. The kit ships with a Kino-flo branded twist-on mount with 5/8″ baby receiver. Good stuff.

IMG_6253

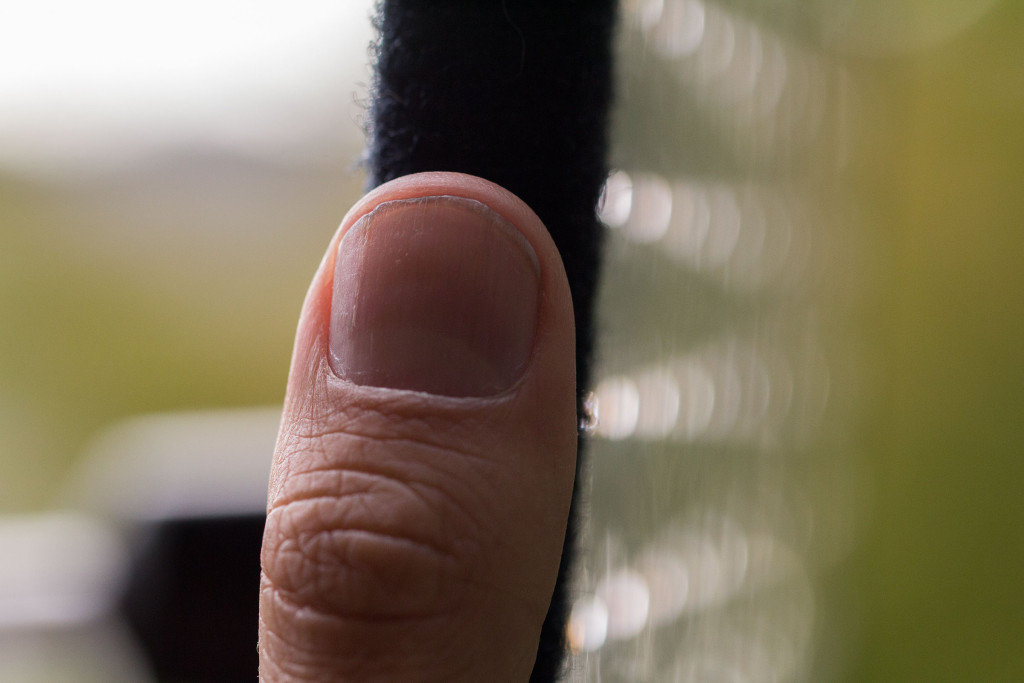
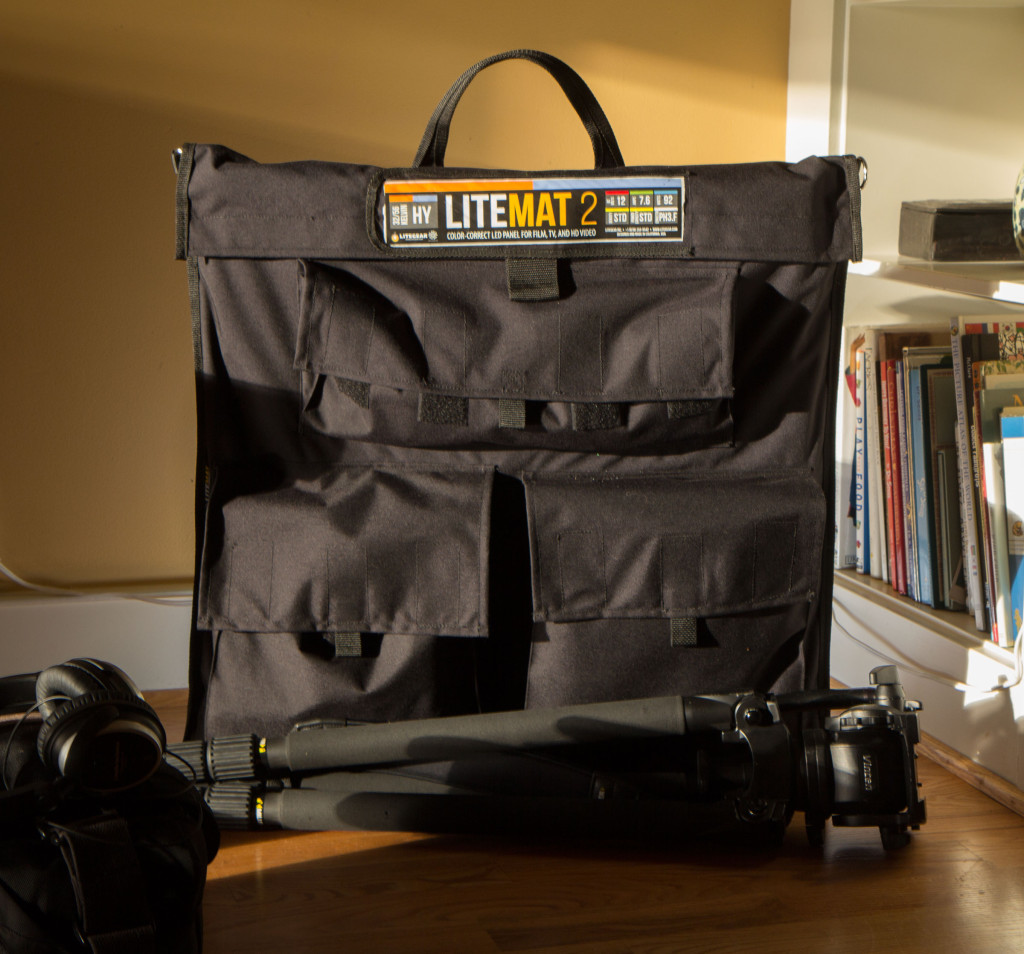
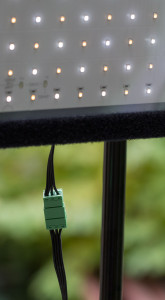
The LiteMat2 hybrid unit is the width of my thumb! This puts it into a special category of softbox.  At 21×21 inches, it’s a slightly awkward size to pack around. But the travel bag that comes with the unit has a pocket for everything, and it packs down really slim.

IMG_6468

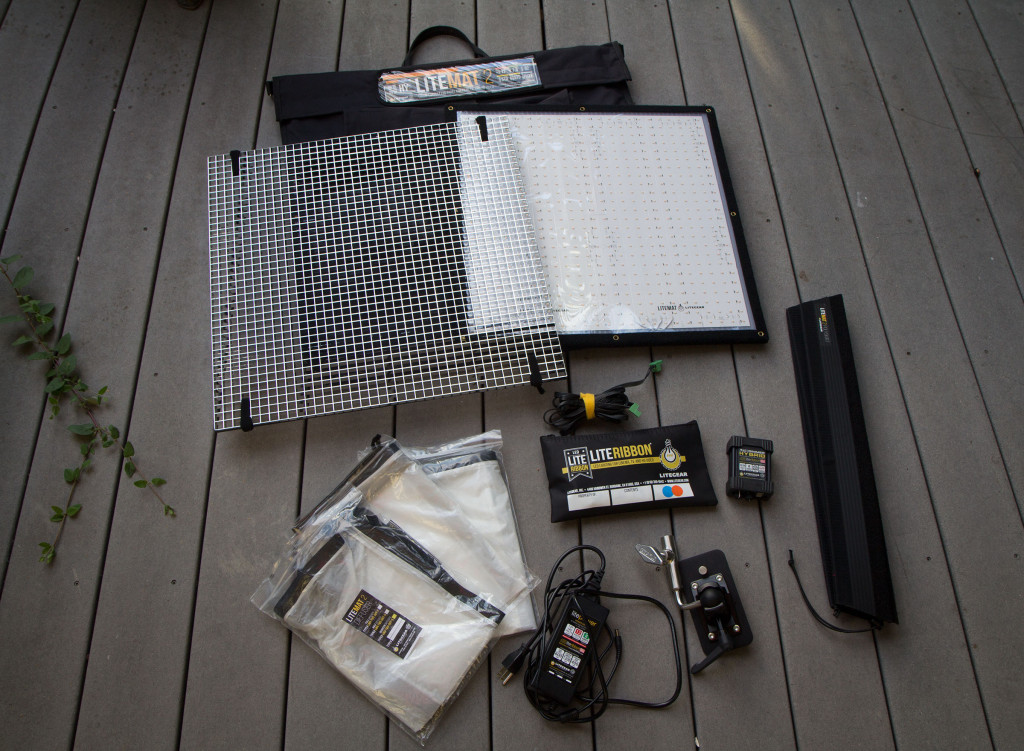
The LiteMat2 hybrid kit comes with everything you need to get the most from the light in a variety of situations:

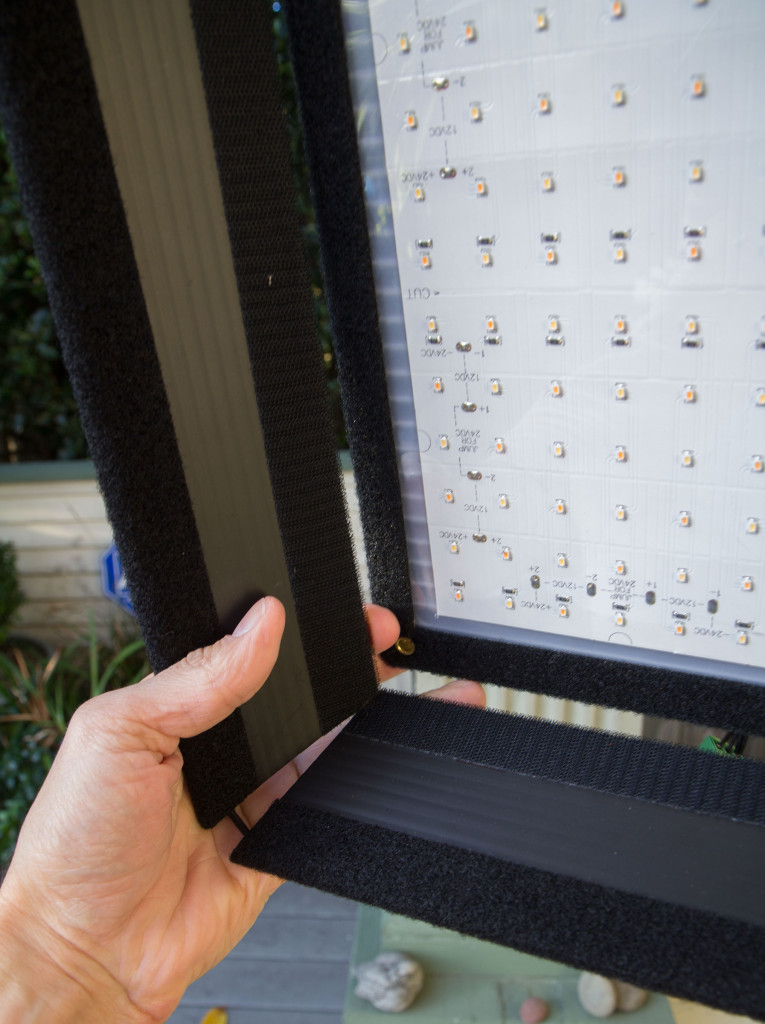
  • a velcro-lined skirt that allows you to control light spill and attach diffusion
  • a rugged travel bag with pockets for all accessories
  • 3 types of diffusion material (1/4 grid, 1/2 grid and full grid cloth)
  • flicker-free LED dimmer
  • extra-long power cable
  • AC adapter
  • mirrored egg crate that transmits 100 percent of the light (unlike the more common black crate that cuts output by up to a full stop).
  • Kino-flo twist-on mount with junior receiver.

IMG_6449

The whole kit weighs 14 pounds when packed. Because it’s so flat, it’s pretty easy to find space for it. The case is reinforced with hard plastic, so you really won’t need a hard case for this light, unless you plan to ship it. I haven’t flown anywhere with mine yet. For taking this baby on the road, I’m thinking a medium-sized suitcase in checked luggage.

IMG_6244The only additional item you’ll need, if you want to power the light from a brick battery, which I definitely recommend, is a $26 d-tap battery adapter.

Value comparison
As far as I know, no other LED panel that I’m aware of comes complete with this many accessories. Lets do a little comparison with LitePanels Astra, shall we? The Astra bi-color unit is $1,300. If you want to use a battery with it, you have to pay more – a lot more. If you want a softbox with it, more again. If you want different levels of softening for the front of the softball, each costs $50. Here’s a comparison:

Astra: $1,350
Softbox: $234
Set of 3 cloth diffusers $76.50
LitePanels grid: $225
Battery plate: $148
PortaBrace Astra case: $210

Astra total: $2,243.50
LiteMat2 total: $1,526

LiteMat2 savings: $719

IMG_6185

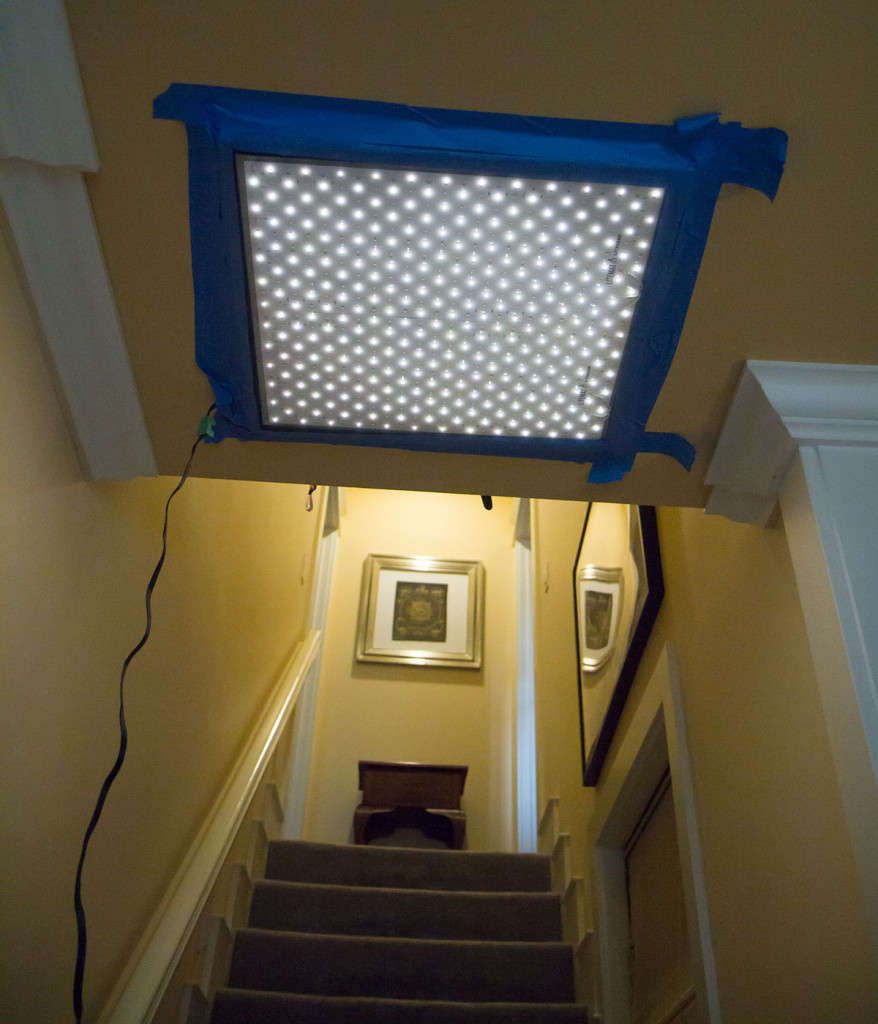
In addition to being a great value, the LiteMat2 is incredibly versatile. It’s light enough that you can tape it to the ceiling or a wall with painter’s tape, for example.

IMG_6470A velcro skirt attaches to the unit, turning it into a soft box.

IMG_6473

Three grades of grid cloth are included: 1/4, 1/2 and full grid.

I can imagine making a simple skirt for this light, using black fabric and velcro, that would turn it into a space light.

Brightness
I judge a light’s brightness by what f-stop I can set at ISO 800 at 6 feet. By that standard, this light is an f/4.0 cranked all the way up in normal (green) mode, 5600K, battery powered (see below for more on modes and battery operation). Which means it’s an f/2.8 at 12 feet, f/8 at 3 feet, etc.

That certainly makes it more than bright enough to use as a key light for an interior interview, and as fill for north window light. Controlling spill using the included egg crate is as simple as velcroing it on.

IMG_6375

It’s a cinch to hang it off a medium-duty light stand, using a stand extender to get it out over the subject, for a no-fuss interview key. In the example below, I’m using a scrim bag to hold the battery and dimmer, and a Manfrotto 420B combi-boom stand. This is a lightweight, aluminum stand, but with its counterweight bag, it’s no problem to boom this light securely.

IMG_6380

Battery operation
A surprising thing happens when the LiteMat is powered from a brick battery: it gets about 1/3 stop brighter than when plugged into AC power. I’m scratching my head over that one, but I love cutting the cord whenever I can, so I’m not complaining. Repositioning the light is as easy as grabbing the stand and moving it. Now that brick batteries are pushing beyond 250wh capacity, powering it with battery all the time becomes a real option.

How long does it last on a brick battery?  I tested it with a 98WH Switronix v-lock (make sure to use a high-output version such as the Switronix Hypercore – the older ones don’t support the required wattage draw of close to 100 wats). After an hour at full intensity (green mode, daylight), it had only lost 1/10th of a stop in brightness. Five minutes later, it was down 2/10ths of a stop. At 75 minutes, 1/3 stop brightness. By an hour and 20 minutes, it’s down a full stop, which is where I ended the test. Its slow decline in intensity probably says more about the battery than it does the light.

IMG_6243

Modes
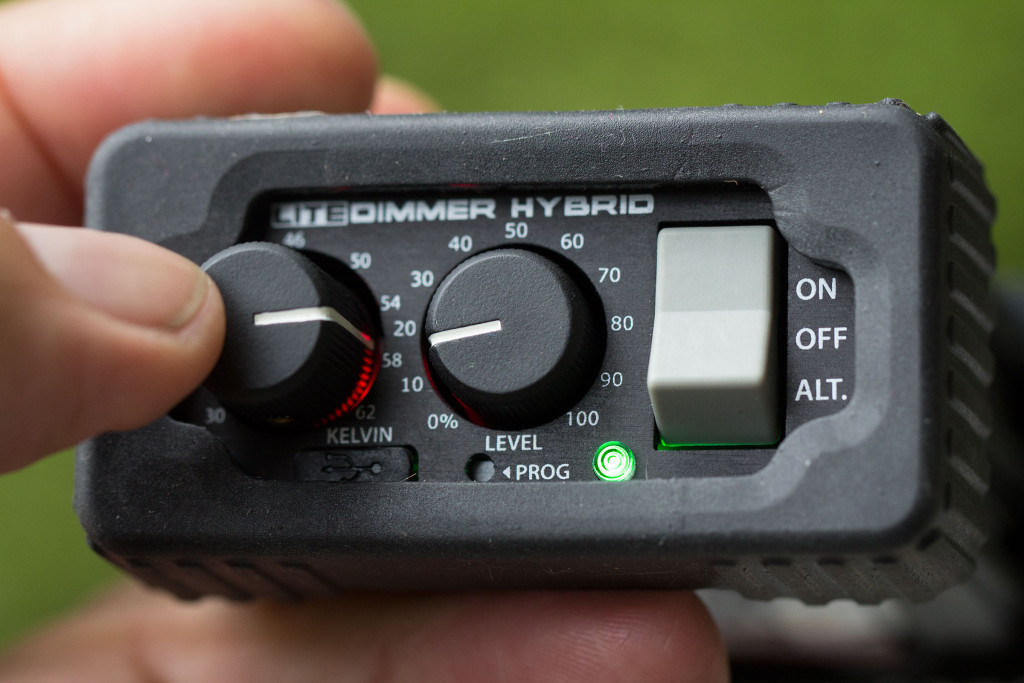
The dimmer can be easily programmed in three modes. To do so, press the recessed Prog button with a pen for about a second. The status light will begin blinking. Then, dial the Kelvin temp dial to select which mode you want. Depress the Prog button again to confirm setting.

Three are three modes (activated by pressing the Alt switch):

White: Overdrive (default). This provides 1/3 stop more light on the daylight (6000K) channel. It has no effect on the tungsten channel.

Blue: Low-power. This cuts the output by 75 percent (2 stops), allowing more precise dimming at low light levels.

Yellow: 2-channel. This allows you to control the brightness of the tungsten and daylight channels independently, which allows both channels to be powered at 100 percent at the same time. This allows you to get maximum brightness from the light, making it twice as bright as it would otherwise be at 4300 Kelvin.

Color accuracy
The numbers for this light are VERY good. Not only does it score well on the CRI standard, but it does well on the newer standard, TLCI. According to LiteGear, this light scores CRI 95 across the temperature range. But TLCI reveals it’s more accurate at the daylight end, scoring a 95 there, 92 in the middle at 4300K, and 89 on tungsten. Very impressive.

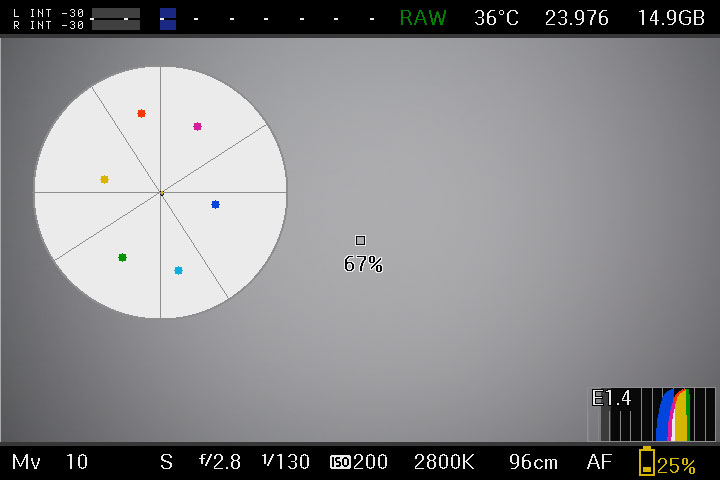
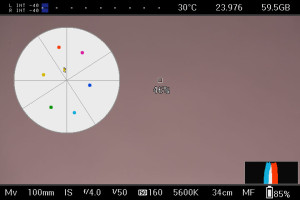
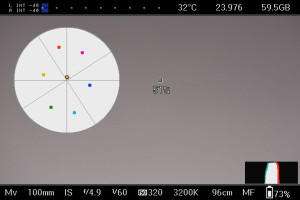
My own test is a simple one. I shoot a Kodak grey card, first at 3200k white balance on both the camera and light, and then at 5600k. I look at the vectorscope. There should just be a tight dot in the very middle of the crosshairs. However, that’s almost never the case.

With LiteMat2, the color range stated on the dimmer is 3000k – 6000k. However, I was able to place things closest to the crosshairs by setting 2800K on the warm end and 5600k on the cool end. Here’s what my test showed:

5600k

2800k

Looking at a scope like this from an LED makes me want to dance! Even though it’s not “perfect,” it’s really great. In fact, I’m guessing that my simple vectorscope measuring the temp is less accurate than LiteGear’s, but I wanted to see how it landed on my camera, since that’s what I’ve been using to measure all my other lights.

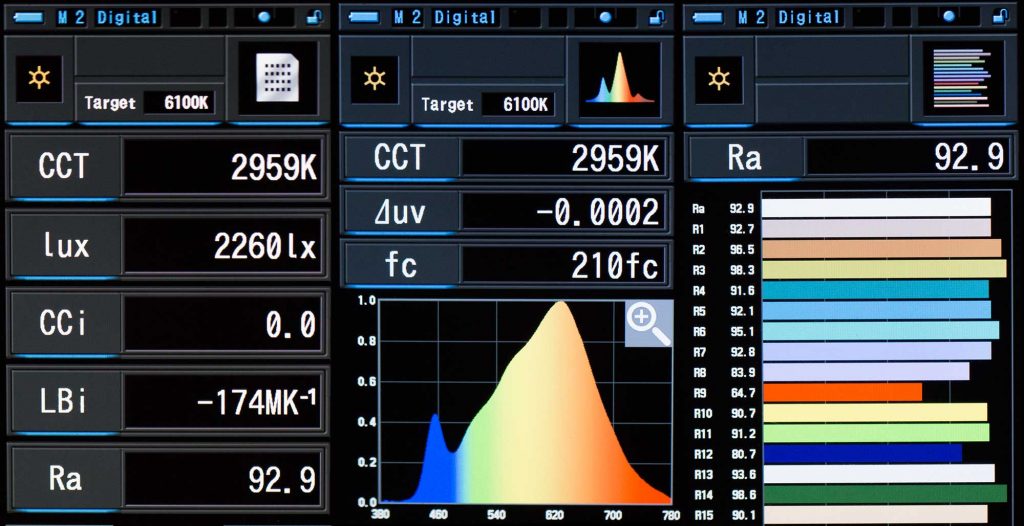
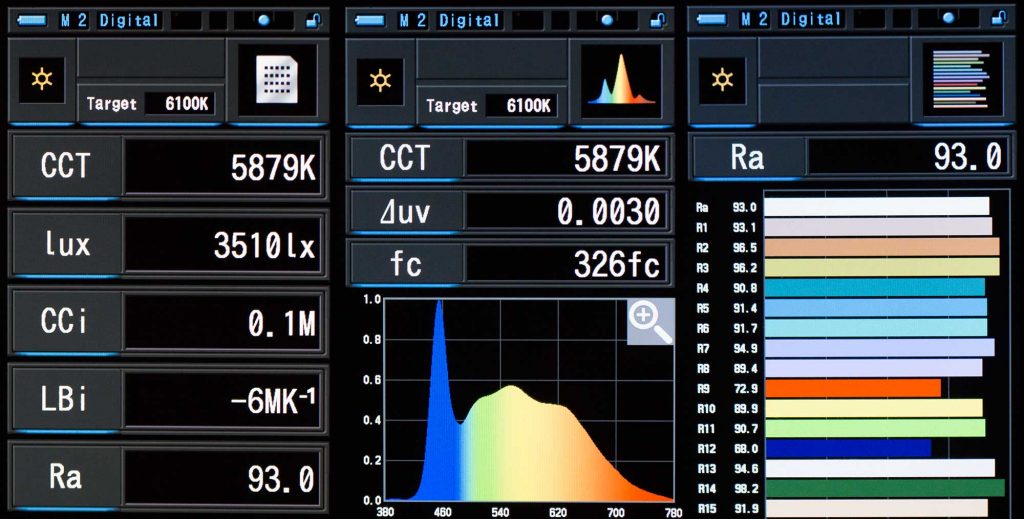
UPDATE 7/9/16: I tested my LiteMat2 with a Sekonic Spectromaster c-700R and here’s what I found.

Warm end: 2959K and 92.9 CRI

LiteMat2 measurements dialed to fully tungsten with CRI value

LiteMat2 measurements dialed to fully tungsten with CRI value

Cool end: 5879K and 93 CRI.

LiteMat2 at full daylight CRI rating and color temp scores

LiteMat2 at full daylight CRI rating and color temp scores

But enough about the numbers. How does the light actually look? I’ve been shooting with LiteMat2 on a few projects over the past couple weeks, and I’d like to share a few frames:

girl
LiteMat2 used as key light in softbox mode with 1/4 grid cloth

skerittLiteMat2 used as key-side fill with window light as key with 1/4 grid cloth

nicerLiteMat2 as key, with 1/4 grid cloth

boyLiteMat2 used as key-side fill to wrap light around face from window with 1/4 grid cloth and crate
Conclusion
This is, without hesitation, the best light I’ve ever used for quick interview setups. I can’t stress how freeing it is to control brightness and color by dial rather than by gel. I just set this light up, dim and color balance to eye, and roll camera. Most of my interviews last about 40 minutes, easily within the range of a 90wh brick battery, which in my testing lasted more than an hour.

No light is perfect, of course, and I find myself wishing that the mirrored crate wasn’t so heavy. It’s not as heavy as the light itself, but damned near. Is that all I can find to say bad about this light? For now, at least! I’ll update this post as I spend more time with it.

So. To sum up in a single sentence: the LiteMat2 is a versatile weapon in the war against lame lighting. It’s a light that gets me excited about lighting, because it shortens the distance between what I see in my imagination and what I see on the monitor. And it’s a real bargain considering it comes with virtually every accessory you’ll need.

Genaray GESPLR SpectroLED SP-LR review

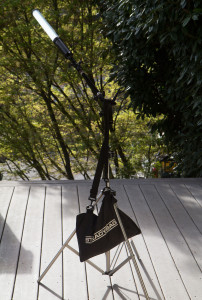
lightwithtripodbagAs a documentary cinematographer, I’m a big fan of available light. However, it’s rarely perfect. A little fill on the shadow side of a window, for example, can create magic out of a monster. So wouldn’t it be nice if there was a light small enough to take with you anywhere, that you could just snap your fingers when you needed it?  Or like, wave a magic wand?

skerritlightInterviewing Tom Skerritt using Spectro-LED as rim light
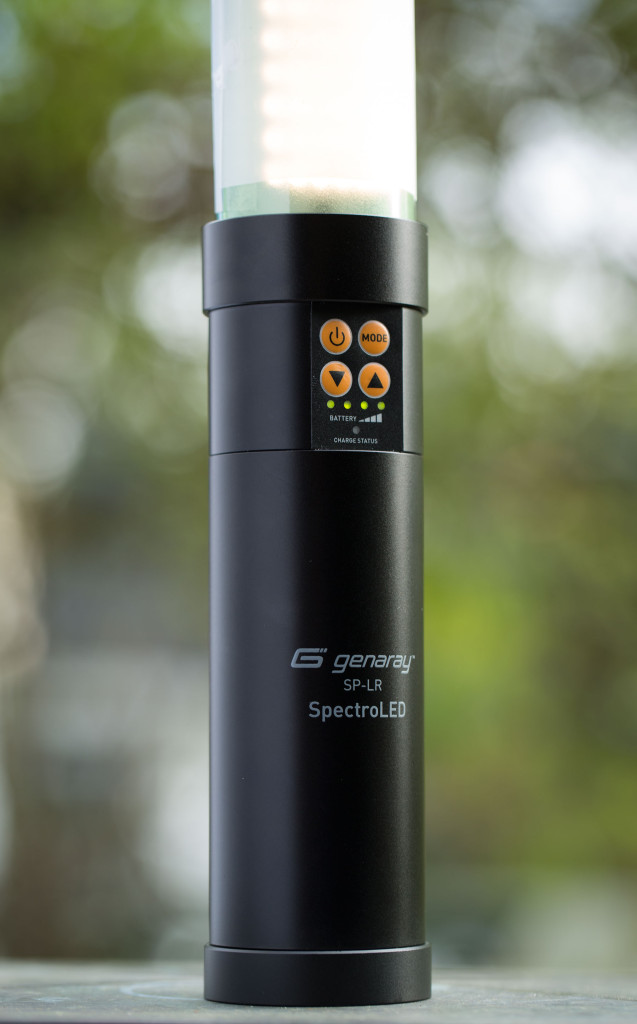
When first I saw the IceLight from Wescott, I felt it wasn’t quite right for a couple of reasons. One, it wasn’t powerful enough. Two, it felt overpriced to me. So I waited. Given the rapid pace of LED development, I knew it was only a matter of time before we’d see an exciting development. In fact, I’ve been Googling for it. When a recent search for “IceLight alternative” uncovered something called the Genaray GESPLR SpectroLED SP-LR, I was interested. When I saw it contained both tungsten and daylight balanced lights, I was impressed. When I saw it was listed at $250 (half the price of an IceLight), I was sold.

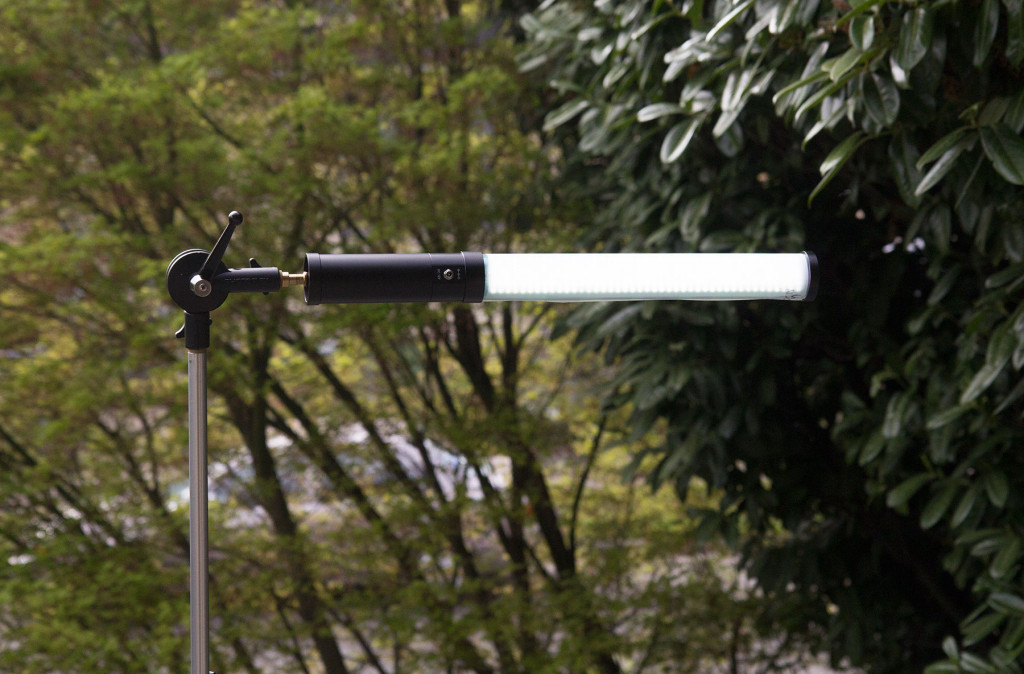
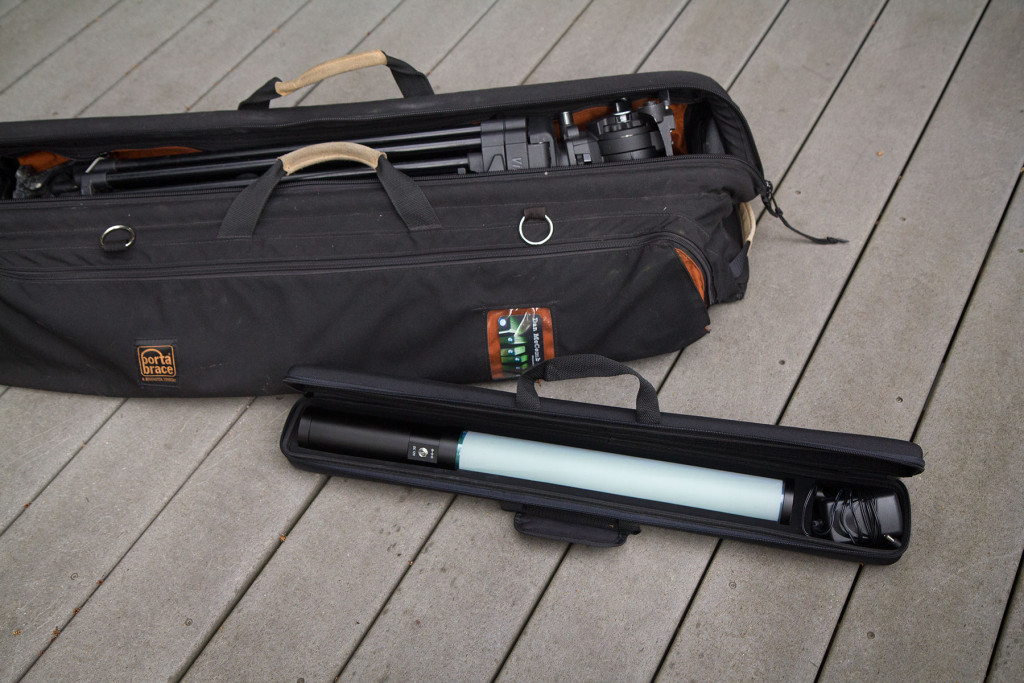
caseThe light arrived a couple of weeks ago, and the first thing that caught my eye was the case. It’s one of those padded, semi-hard things, solidly built, something I will actually use. The size of the light is nice and compact, at just under 22″ long. The active strip of light it produces is 14″ long. It tucks easily into my Porta-Brace tripod bag (with the tripod in it, too), which will allow me to carry it easily on the road.

tubehandleThis light is impeccably professional looking. The black, all-metal handle includes buttons that electronically switch between tungsten and daylight, and dim the unit from 100 percent to 10 percent.

The mode button switches between tungsten on one side of the light, and daylight balanced LEDs on the other.

The dimmer works well, and produces no audible buzzing or sound of any kind (yay). Also, the light is flicker free at all settings.

The light is advertised to last for 2.5 hours at full blast. I found that not quite true. After running for 1.5 hours, I measured a small dip in brightness. After 2.5 hours, the light was still running strong, but had further dimmed, losing perhaps 1/-8 to 1/4 of it’s original brightness. At 2:40 it was down to 1/2 original power, before dying completely at 2:46. So it dies with a whimper.

This is a drag. I’d far prefer a light that dies with a bang, so that I could count on it being consistently bright whenever it’s on. Still, the fact that you can get in excess of 3/4 of it’s power after 2.5 hours isn’t too shabby for such a compact light. It’s just one more thing to keep track of during a shoot. For those reason, I’d recommend powering it via the AC adapter for longer interviews, or if you’re doing multiple interviews, for the later ones.

The battery is built in, so it’s not possible to pop in a spare when it runs out. An AC adapter is included, however, so you can run it all day off the cord, which also charges the battery.

anglebracket

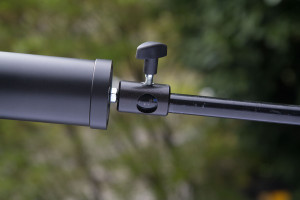
The light features a 1/4″ 20 female mount point in the handle. The included mounting spud has 1/4″ 20 screw on one end, and 3/8″ on the other. This makes it easy to attach to various mounting hardware such as tilt brackets that allow you to fly the light over camera for use as fill, for example.

c-standadapterTo hang it off the arm of a c-stand, you’ll want one of these little guys (photo at right), a Manfroto 5/8″ to 1/4″ 20 rapid adapter. The light itself is so light (just 2 pounds) that it’s actually possible to hang it off a regular light stand, using a Photoflex heavy-duty grip swivel with a stand extension.  In that scenario, you’ll need to counterweight the bag. However, using a c-stand (below) you can fly it anywhere without counterweight. Which  makes fast and easy to reposition the light between setups.

fillcouch

One gripe I have about the design is that, as shipped, it could use more diffusion. But it’s easy to add. Wrapping it with Lee 1/2 white diffusion softens it beautifully and completely eliminates the dreaded LED multiple shadow effect. The penalty for this is a full stop of light loss. However, given how bright it is,  this could be been seen as a positive, since the light doesn’t dim below 10 percent. If you just need the extra stop of light, it’s there.

Brightness

For such a compact light, it packs a big punch. (However, it loses some of that to color correction, as we’ll discover in a moment.) How bright? Here’s a real world example. After color correction gels were applied, I was able to set f/2.8 at 6′ with ISO 800 at a 48/sec shutter (24p). When dimmed fully, I read f/1.0 and a half. The tungsten side is about a third of a stop brighter due to needing less color correction.

Versatility

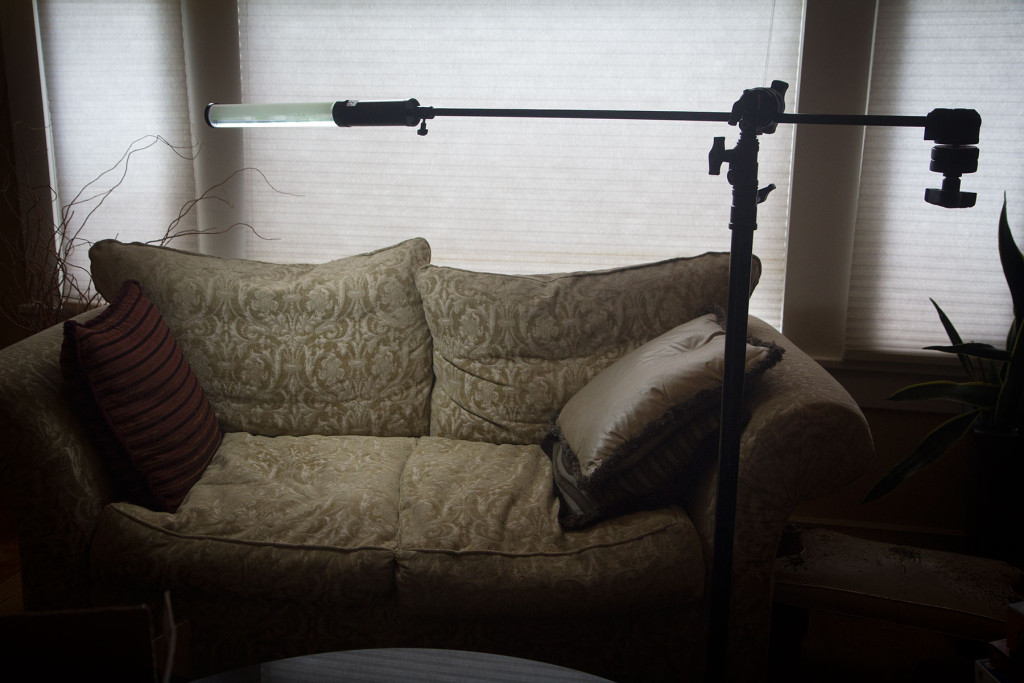
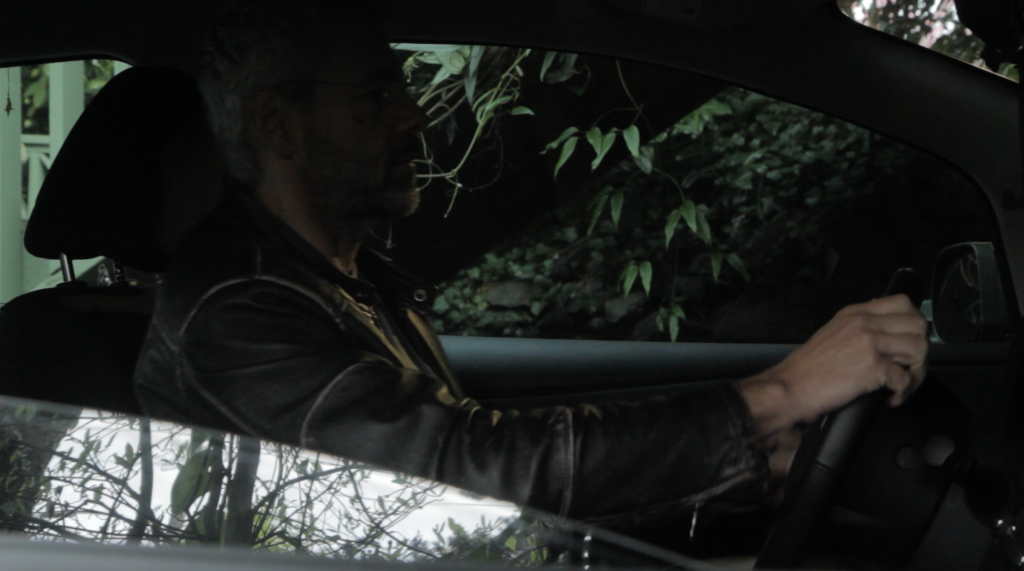
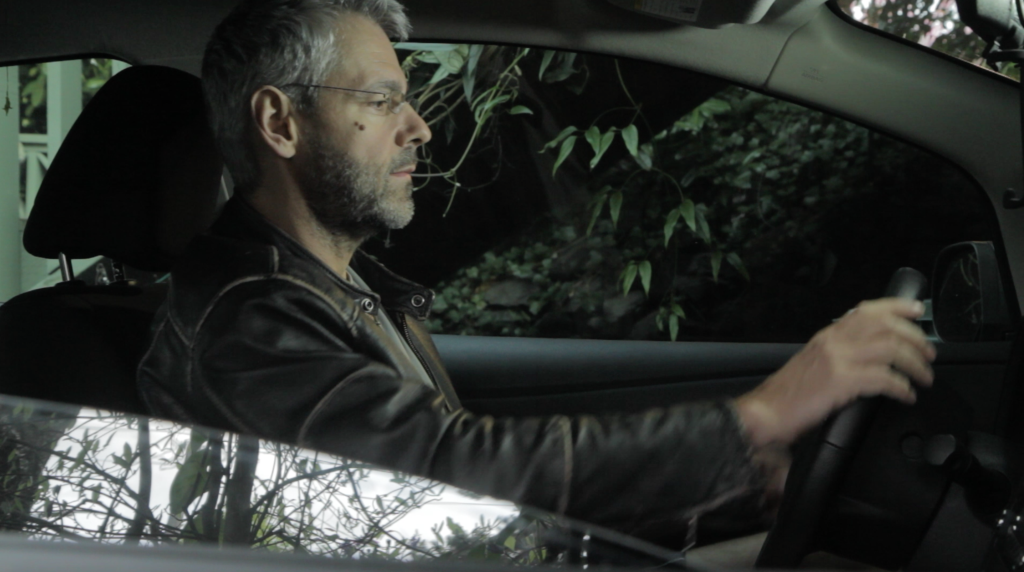
You can place the Genaray just about anywhere. With gaffer tape, you can affix it inside a car, for example, to get relatively soft illumination where you want it while hiding it from the camera.

Screen Shot 2015-04-03 at 9.36.25 AM

Before

Screen Shot 2015-04-03 at 9.35.50 AM

After

The light has a rather nice, softly directional falloff, like a Kino-flo tube (more on that in a moment). I found it easy to feather the light by twisting it, and cutting it further is possible by applying black wrap.

This is the light of a million uses. Here’s a few that I’ve tried.

backlight

On swivel grip

Back light: Because it weighs just a couple of pounds, you can put it on a light stand with a swivel grip and stand extension, and boom it. I have a 7-lb Steadybag that is heavy enough to counterweight the light in this scenario (photo at right).

Fill light: Again, it’s so easy to fly this light directly over your lens with a light stand, where you can use it as a subtle, relatively soft fill.

Kicker: Simply screw it on top of the 1/4 20 thread of any light stand, and you’ve got a vertical strip of kicker light, that can chisel out some definition in an otherwise flat interview.

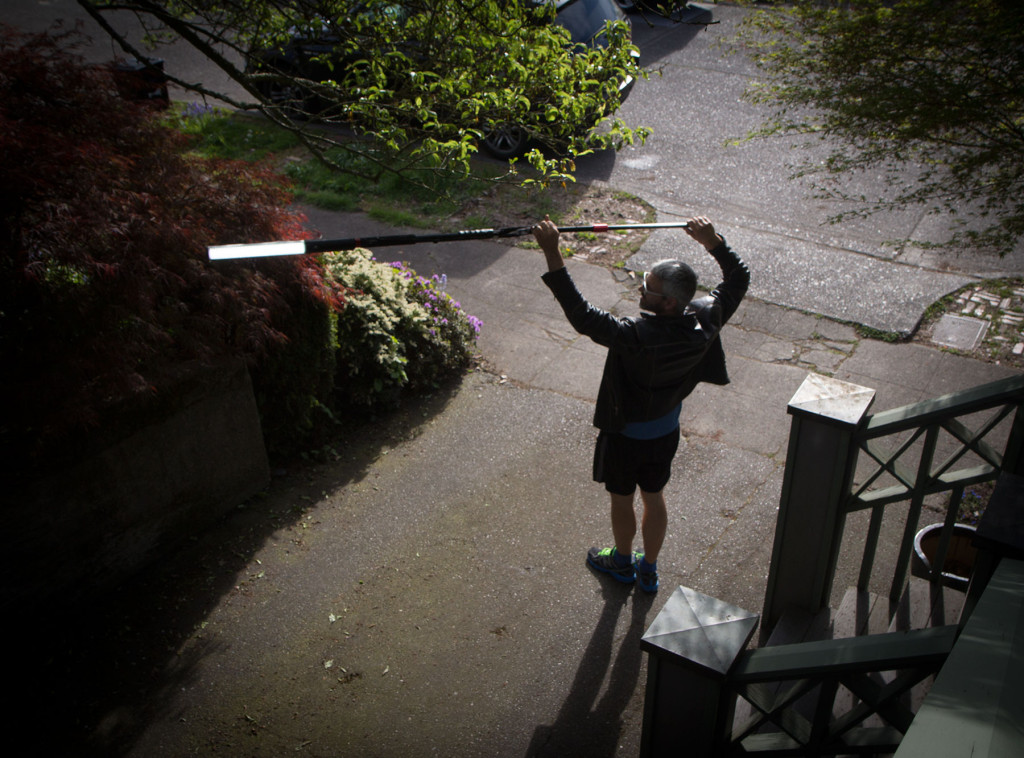
Traveling shots: Screw it onto the end of a Mogopod and you’ve got yourself a light boomed for traveling shots. It’s not as bright or as soft as the BBS Lighting Flyer, but then, that kit will set you back $3,499.

boomtravel

Quick and dirty traveling light boomed with Mogopod

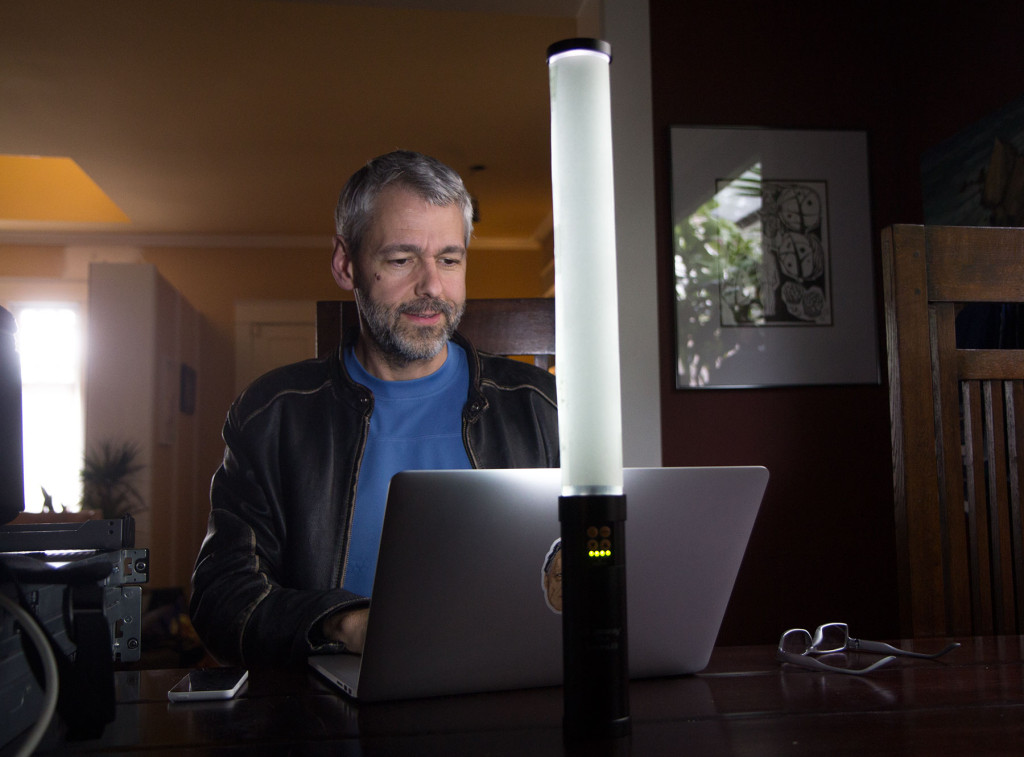
Bonus: Skype light. Just stand the light vertically on the counter behind your laptop to illuminate your Skype conversations:

wandskype

Illuminating your next Skype conversation is as simple as placing the Genaray upright on your desk.

Screen Shot 2015-04-07 at 2.21.32 PM

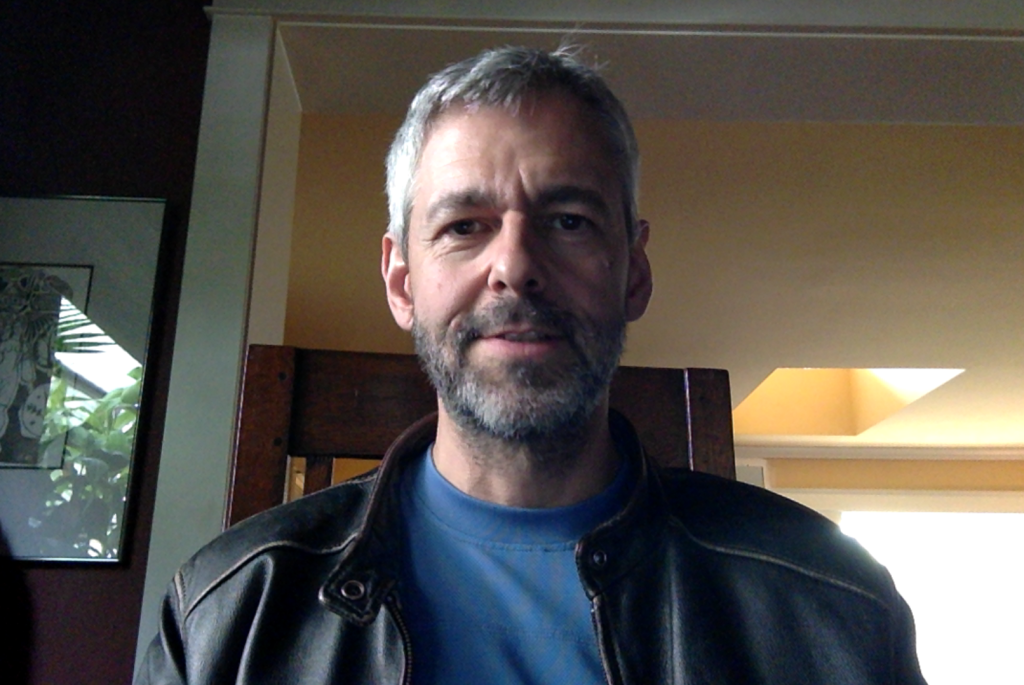
Before light (lit only with window light)

Screen Shot 2015-04-07 at 2.21.05 PM

After, with Genaray used as strong fill light

Bonus: Camping flashlight. This light works great to light up a campground picnic table!

So without doubt, this is a very flexible light. Great. But how does the light look?

Color accuracy

The Genaray is advertised at 3200K and 5600K. Previous inexpensive LEDs that I’ve reviewed have been all over the place with this. So, what can you expect out of a $250 LED these days?

5600kdefaultOn the right is what the vectorscope shows me at 5600K (a perfect balance would place a tight dot in the middle of the scope). So it’s immediately clear that we’ve got WAY too much red. We can correct this by adding a little CTB and a lot of plus green.  We’ll find out just how much in a moment. But first, let’s see how the 3200K side of the light stacks up.
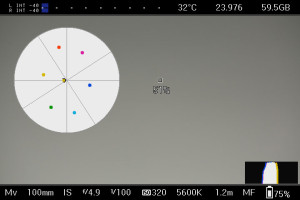
3200kdefault

The 3200K LEDs, shown at right, are much closer to proper color balance. However, there is still a noticeable magenta shift. For a photo light, I want to see that dot in the bullseye. So we’ll need to add some plus green to get dial it in.

NOTE: I used an 18 percent Kodak gray card to do this test, and Magic Lantern’s Vectorscope on my 5dmkiii.

halfgreenblueOK, let’s tackle fixing the 5600K side first. After much testing, here’s what I came up with:

+ 1/2 green
+ 1/4 blue

Now we’re erring slightly on the yellow/green side, but just barely. And that’s the side I prefer to err on, because skin tones always look better a little yellow than any other color. I tried adding 1/8 blue, but that put us too far over toward blue/cyan. So this is about as close as we’re going to get this light, given that filters come only in 1/8th increments. Also note that this reduces the  output of the light by a full stop in 5600k mode.

plusquartergreen3200Fixing the 3200K was easier:

+ 1/4 green

I think it’s a shame these lights don’t match the color temperature they are advertised. But not as much a shame as paying $500 for the IceLight2! The price of inexpensive LEDs, at present, seems to be color temperature accuracy. But as you’ve seen, it’s possible to dial them in with a little work.

The CRI is 85 on these lights, which means colors won’t be as faithfully reproduced as with higher CRI sources. But in my experience, 85 is plenty high enough for general documentary use. My guess is that these lights are probably all different. So you will likely have to do your own testing to correct your copy of the light.

Light quality

OK, now that we’ve corrected our color balance, let’s take a look at the light qualitatively. That is, how does it look on a human face?

The closest thing I can compare this light with is a Kino tube. Only, minus all the crap you have to pack around to get the Kino fired up. It produces the same signature shadow as a Kino tube – soft on one axis and sharp on the other. So it’s an interesting mix of hard and soft light.

If you hold the light horizontally above your subject’s forehead, it casts a sharp shadow under their nose – but spreads soft light across their face from left to right.

horizontal

Genaray held horizontally

Flip the light vertical to the subject, and you get soft shadows under the nose and chin, with rapid falloff of light on either side of the face (you also get nasty vertical glare on glasses, which is why they aren’t in the shot below).

vertical

General held vertically

Used as a backlight, above and behind the subject, it spreads the light across head AND shoulders. I prefer this look to a point source.

usedbacklight

Generay LED used as backlight

So to sum it all up: Despite being pretty far off the mark in terms of advertised color temperature, this light can be balanced with a little effort. And it’s effort that will pay off. For the price, you get a lot of light in a tiny package that can be put to work on just about any documentary shoot. Especially for travel, where space and weight are always a consideration, this light is a road warrior’s weapon.

Mogopod’s one-twist solution raises the bar for monopod users

The other day I went shopping for a monopod. I discovered a lot of options: skinny ones, tall ones, ones made from carbon fiber (expensive ones). One thing all of them had in common was a multi-stage design, which allows them to telescope. Most require screwing to adjust. Some have quick-release knobs. But one had something that got my attention: an intriguing twist-locking mechanism that allows the user to reset the height with a single flick of the wrist.

Screen Shot 2015-03-23 at 4.12.27 PM

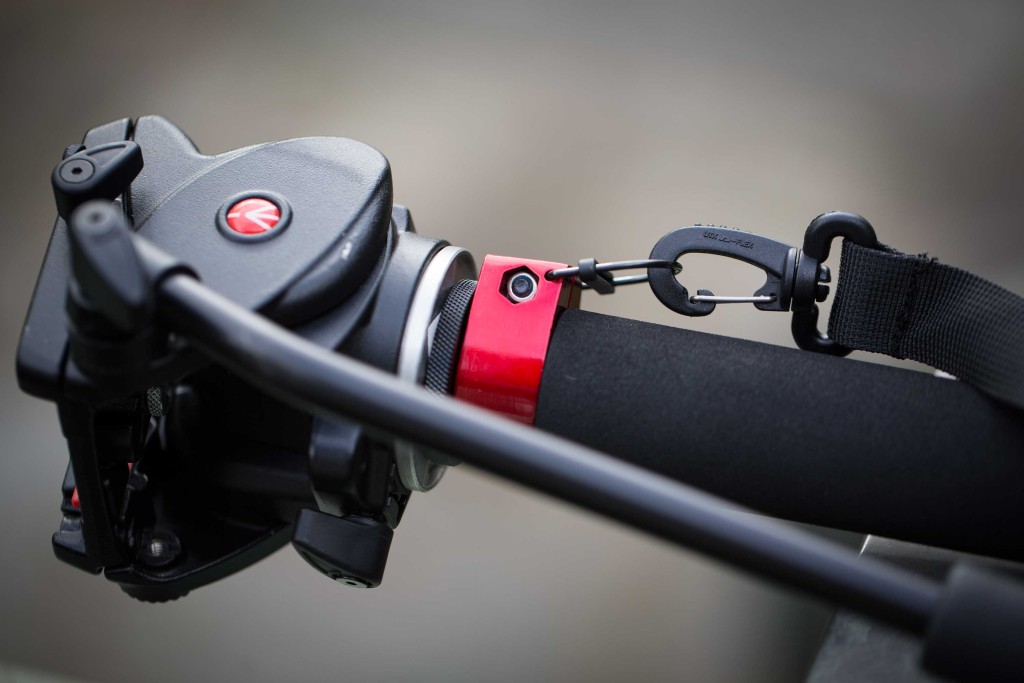
It’s called the Mogopod. And as I tried it out on the showroom floor, it immediately stood out as a product that had been designed with the user in mind. It fits beautifully into your hand, and includes a carrying strap that allows you to sling it over your shoulder between takes. But most impressively, the Mogopod is made from three stages, two of which telescope through an ingenious twist mechanism (which I’ve seen before on more expensive painter’s poles).

podtopReleasing the twist causes the stage above AND below to slide out simultaneously. And locking or unlocking doesn’t require multiple twist of the barrel – just a quick twist of the wrist. The result is a monopod that you can use to dance with your subjects, in my experience, quite literally.
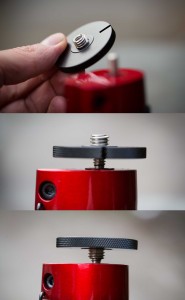
At a wedding I filmed recently, the happy couple took their first married steps on the dance floor together and realized I wasn’t high enough on the stick to get the shot. Instead of having to take a short timeout while I reset the height (possibly missing the moment), I just reached down, made one quick adjustment, and kept shooting.

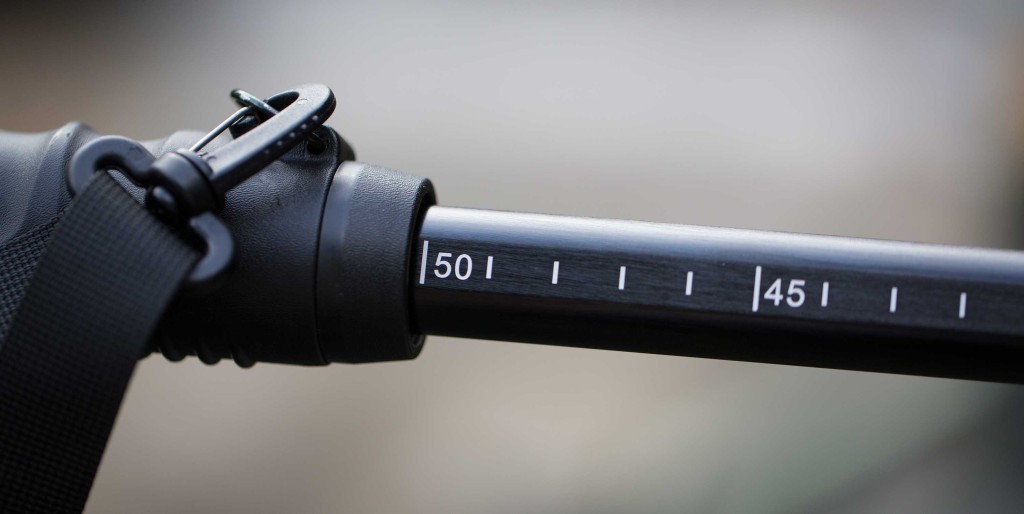
podlegThere are witness marks printed in inches on the side of the sticks that let you know exactly what height you’re at. I found that 50 inches was for me the “just about right” height for shooting while standing. So after going low, I knew immediately where to reset when coming up, saving me time.

toppinAt the top of the stick, another user-centered innovation is a dual-threaded reversible collar that allows you to select 1/4 20″ or 3/8 16″ studs. That sure beats those little screw-on adapters that I’m always losing every time I switch up to a video head on my other devices.

Adding a small, flat-mounting video fluid head such as my Manfrotto 701HDV allows quick upward and downward tilting of the camera. In this configuration I found it paired exceptionally well with the Canon C100 MKII for video work.

It isn’t the lightest monopod, as it is made from aluminum. And at 27″ when retracted, the medium sized Mogopod that I purchased doesn’t telescope down as short as many other pods (although the Mogopod Mk III Small, which I didn’t test, collapses to 20 inches). But if you don’t mind the slightly longer length, the increase in usability will more than compensate.

If you shoot like me, that means constantly changing your camera angle and camera height. So a monopod that gives you the ability to do that gracefully and quickly will make your day. It’s got a professional heft, and the red trim is an expensive-looking touch. But at $120, the Mogopod is one of the more affordable monopods on the market. That’s what I call raising the bar.

Domke Next Generation bag gets details right

nextgendomkecover

When I was in college, I had an opportunity to study photojournalism in London for a semester.  I didn’t shop much in those days, but one thing I remember spending a lot of time hunting for was the perfect camera bag. I wanted one that would protect my gear but didn’t scream “expensive cameras here.” In other words, I didn’t want to get mugged. So I bought my first Domke bag, because it resembled a canvas gym bag on the outside – with the guts of a camera bag on the inside.

My fears were justified. One night on the last train home to my N. Portobello Road flat, I took some epic photos of a couple making out in a tube station. I knew they were going to be good. Elated, I rewound the film, slung the camera over my shoulder, and marched to my flat, unaware that someone had noticed the camera and started following me. I opened the door to my flat and walked in without waiting for the door to close.

I never had time to be scared. The first thing I knew, my face was slamming into the wall. Shocked, I turned to see someone dashing out the door. I realized two things instantly: I had my Domke bag over my left shoulder, but I did not have my Nikon over the right.

If I had to be mugged any place in the world, London isn’t a bad choice. The thief’s only weapons were surprise and speed. But in that moment all I could appreciate was the fact that my camera was gone. Then I felt into my pocket and remembered I still had the film.  I flipped open my Domke bag, where I still had everything I needed to continue shooting: a second body, and my glass. And I thought: had I tucked that camera back into the bag where it belonged, I might still have it.

small-bagThe photos I took that night went on to win awards that helped me land my first newspaper job. I carried that Domke bag with me on every assignment for four years, until I literally wore a hole through the side of the canvas.

Domke bags haven’t changed much since then, and for good reason. How do you improve a bag that, by design, isn’t supposed to call attention to itself?

velcroSo I was intrigued and a little worried when I heard that Domke was making a new generation of camera bags. When I got an opportunity to review one called The Chronicle, a large bag posing as an item of military surplus, I jumped on it.

The first thing I noticed as I pulled the bag out of the box is the material. It’s made from the same waxy, waterproof stuff that Aussie cowboy slickers are made from. At a glance the bag still looks pretty unassuming. Which is what I would hope. But details matter. And that is where things get interesting.

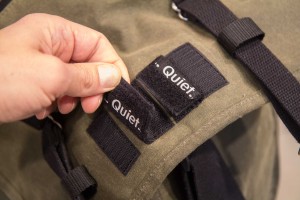
quietThe first detail I noticed was the velcro. Some very clever designer has solved a problem that I didn’t even know I had (yet one that has definitely plagued me over the years). You know that ripping sound it makes every time you open a pocket? Any time you’re on a film set with sound rolling, you can forget about opening those pockets. Sound recording and velcro don’t mix.

claspWell, Domke has a solution. You can now fold the velcro back on itself, reversing it to reveal a “quiet” label. In this configuration, the velcro won’t stick, rendering it completely quiet. So clever! All velcro closures on the next-gen bag has this new feature.

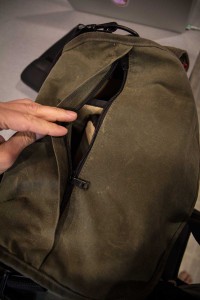
topzipper-vThe sturdy metal clips that have always secured the bag’s top flap have a minor improvement. They are slightly more heavy duty than on my old bags, and have a more ergonomic thumb release. In practice I’ve found that these snaps are a bit of a pain, so I often carry my bag with the snaps open, so I can quickly get in and out of the bag. But that leaves the contents less secure. A tradeoff, right? No more. This new bag allows me to have it both ways. A zipper running down the middle of the top flap provides access to the contents of the bag when it is clipped shut. This is a great solution.

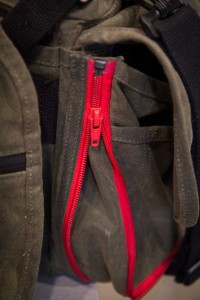
side-zip-pocketAnother clever detail: side pockets now have a zipper expansion option. Zipping them open provides twice the space. Closing them makes the bag much more compact. The front pockets have a snap that pops open to achieve a similar expansion, providing extra volume only when needed.

Do these details matter? Well, with the pockets fully expanded, I was able to fit in a change of clothes on a recent trip to Canada, allowing me to take just one bag. This would not have been possible with my previous Domke bag, which I still own. I like to travel light, so it’s definitely working for me!

theft-codeThe bag also includes a bar-coded ID tag. Ostensibly this is a way for you to be reunited with a lost bag, should some nice honest person find it. But actually it’s a clever way for Tiffen, the parent company of Domke, to get a ton of information about you for their mailing list. The 9 required fields on the signup form (including home address and phone number) includes the text “Email marketing you can trust” below the signup button. So you can trust you’ll be receiving spam from the 8 or 9 companies Tiffen owns if you hit submit.

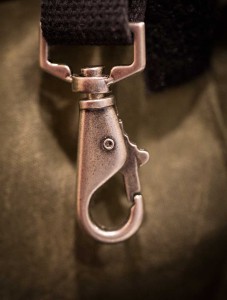
snapLuckily they’ve provided a low-tech solution: a key-ring snap on the inside of the back flap, where you could attach a name tag. It’s a little hard to find, though. It took me three months of using the bag before I stumbled upon it while examining it closely for this review.

The inside of the back has a nice partitioning system, with several dividers you can lock into place with velcro. You can quickly configure the bag to carry different types of camera and lens combinations. My old bag had a fixed divider, so it wouldn’t have been possible to, for example, reconfigure it to carry an FS700. With this bag, you can.

strapThe signature Domke bag straps are unchanged. I love the simple, unpadded wide strap with it’s shoulder-gripping rubber cord woven into the stitching.

All shoulder straps slip off, though, so it’s not foolproof. I was carrying this bag on my shoulder while juggling two other bags going into the Paris Metro last December, and it slipped off at just the right time to get caught in the turnstile. Those doors don’t open once they’re closed! Luckily a passenger on the other side freed my bag and then kindly handed it over the gate to me.

tagWhich brings me to my conclusion. What I most love about this new Domke bag is that it keeps it’s simple appearances, while adding some welcome features that make it even more pleasurable to use.


Cameralends.com aims to do for camera owners what AirBNB did for vacation homes

Screen Shot 2015-02-18 at 10.09.05 AMHave you ever thought about offsetting the cost of your expensive camera gear by renting it out? I have. But I’ve never done it, for two big reasons: I don’t know how to find renters, and I don’t know if I can trust them.

Enter a new service called CameraLends.com. CameraLends is a peer-to-peer lending community for photographers and videographers. Equipment owners post items for rent to other photographers. You can rent gear directly from local photographers, potentially faster and cheaper than through traditional vendors.

That’s nice, but what happens if your equipment gets damaged or stolen? Cameralends will reimburse you the replacement cost of your gear. Problem solved! And, they’ll help you find customers by connecting you to other photographers in your area who are looking to rent equipment. The price: 20 percent of each transaction.

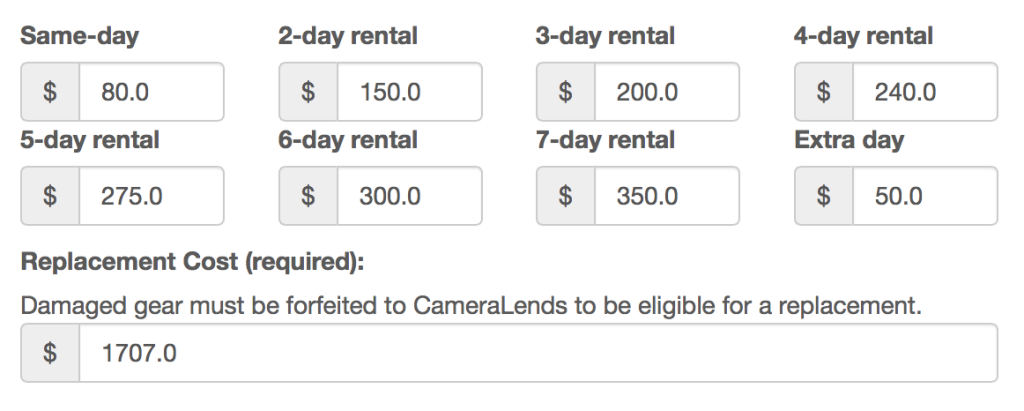
The service gives you full control over how much to charge for each piece of your equipment. You can even set discounted pricing for multi-day rentals, the same as most rental houses do. And you get to set the value amount, which is the amount you’ll be refunded should your gear be damaged.

Screen Shot 2015-02-18 at 10.57.20 AM

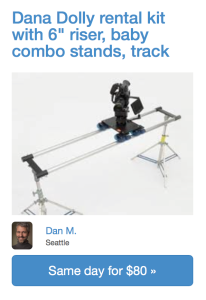
So, how does it work in practice? I decided to list one of my most expensive and least-used pieces of equipment, my Dana Dolly.

The signup process was straightforward (though missing a Facebook signup option). Once I created my account, the first item I decided to list was my $1,700 Dana Dolly rental kit, which I purchased a year ago and have used only on a handful of projects. It’s the perfect piece of gear when I need it, but that isn’t very often. So why not rent it out?

To save time, I simply cut and paste the product description from the manufacturer’s website. Paragraph breaks show up correctly on the back end – but not on Seattle Dana Dolly rental published page. This makes it difficult to read descriptions that are longer than a single paragraph. (Update: I’ve been told a fix for this is in the works).

Screen Shot 2015-02-18 at 10.56.16 AMUploading a photo is easy, and adds professional polish to your listing. You can add more than one photo, too.

The site conveniently provides  a drop-down menu listing all of the equipment they think you’re likely to own – but of course, my Dana Dolly wasn’t on the list. Luckily, there is an alternative field for adding a new item. But when I saved it, I discovered it had defaulted to 5D Mark III. Bug! I submitted the problem via email, and someone responded right away both to my message and by posting a bug fix within a few hours.

So far, I haven’t had any bites on my dolly. But it’s been just two days, so time will tell. If it hasn’t rented in a few weeks, I will adjust the pricing. One thing I have noticed immediately, though, is how quickly my rental comes up in search results. If I Google for “seattle dana dolly rental,” my listing already comes up in the top half of results on the first page.

I’m excited by the potential that Cameralends.com has to put some of my seldom used equipment to work, reduce the cost of ownership, and help other filmmakers connect with a great deal on local equipment.

Shooter Suite’s Denoiser II DOA in FCPX

My review of Red Giant Shooter Suite’s Denoiser II will unfortunately be very brief, because it turns out to be not compatible with my NLE, Final Cut Pro X. Red Giant posts this on their site:

At this time there is a technical feature which FCPX lacks and Denoiser II requires to function correctly. Unfortunately if we were to disregard this component and just made the product available for FCPX, it would not be as reliable and the results would be far below our standards when compared to other host software that Denosier is compatible with.

I appreciate Red Giant’s statement and understand the vagaries of software development. Until Apple feels Red Giant’s pain, though, I’ll stick with Neat Video Denoiser, a company that has managed to ship a reliable solution in spite of all that.