My most recent commercial piece, which Lisa Cooper and I made for Seattle startup Decide.com, is a great example of how a powerful Final Cut Pro X plugin called Neat Video can improve murky DSLR footage. We shot this piece on two Canon 60Ds, which like virtually all DSLRs, produce heavily compressed files that can get noisy when you lift the exposure levels.
Let’s start by taking a look at the finished video, and I’ll work backward from there.
Two challenges on this shoot combined to produce the noisy footage: mixed light at low levels, and monochromatic backgrounds. Let’s talk about mixed light first.
This office interior, like many, was lit by overhead fluorescent fixtures. But there was also big daylight windows. So the color temperatures didn’t match. My solution was to turn off the overheads, and set my white balance to daylight at 5400K, which I did with the employee interviews I’ll talk about shortly. The drawback to turning off overheads is that now the overall ambience of the room is darker. But, not so dark that I couldn’t bring them up to where I wanted them in post. But that’s where the problem comes in: lifting the levels in post introduces noise. And noise can look really ugly.
The second problem was the even tonality of the interview background, which was a bare, colored wall, which I hit with a Lowel ProLight to give it some life. But because of their highly compressed 8-bit codec, DSLR footage doesn’t hold up very well in large areas with the same color value. There just isn’t enough data available to make the subtle transitions appear totally smooth, especially when you have a gradient or subtle variations in color (a totally clear blue sky is another area where this problem often shows up).
In the example below, take a look at the grey background behind the subject. It’s essentially a gradation from darker shades of grey to middle shades of grey (actually, it was light green on left and grey on right before grading – grey throughout after).
As-shot section of video screen grab:
Notice there isn’t too much noise, but the image needs to be lightened quite a bit.
Graded, before Neat Video:
The color-adjusting and grading has improved the image dramatically, but also introduced lots of noise in the background. To help you see the noise, here’s a portion of the image cropped to 100 percent, at which the noise is most visible:
After Neat Video (below):
The noise is almost completely eliminated. Sweet. (Click the image above to view at 100 percent)
Here’s how it works.
First, download and install the Neat Video plugin for Final Cut. You can get a free trial, but it overlays a watermark, so to do any useful work, you’ll need to cough up $99. It’s totally worth it if you’re getting paid for your work.
Under the effects browser (Cmd-5), search for “noise.” The filter is called simply “Reduce Noise.”
Apply the filter to the selected clip in your timeline by double clicking the filter. It will appear in the Inspector, like so:
Click “Select to open” twice (for some reason it won’t open the first click). This will bring up these controls:
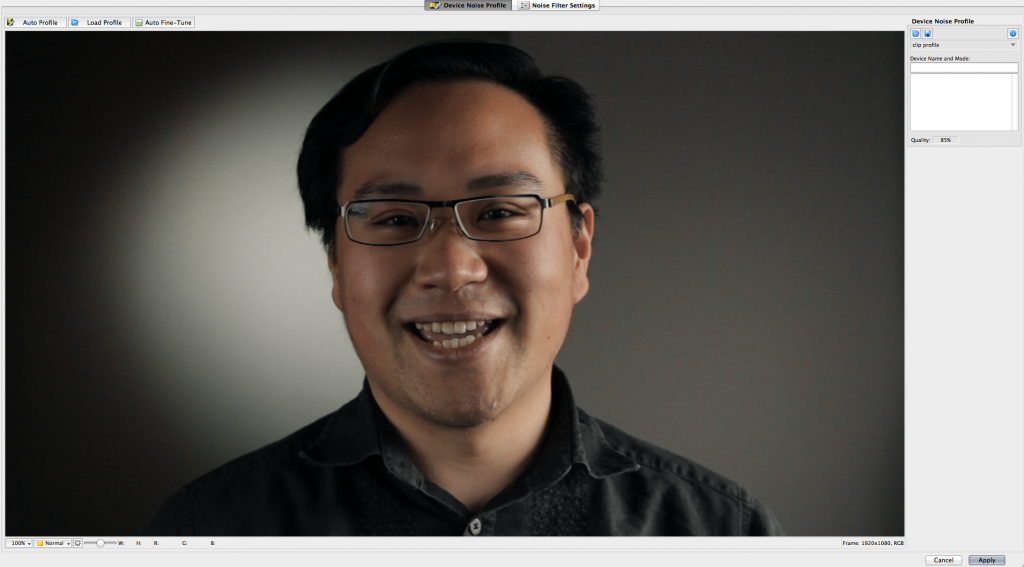
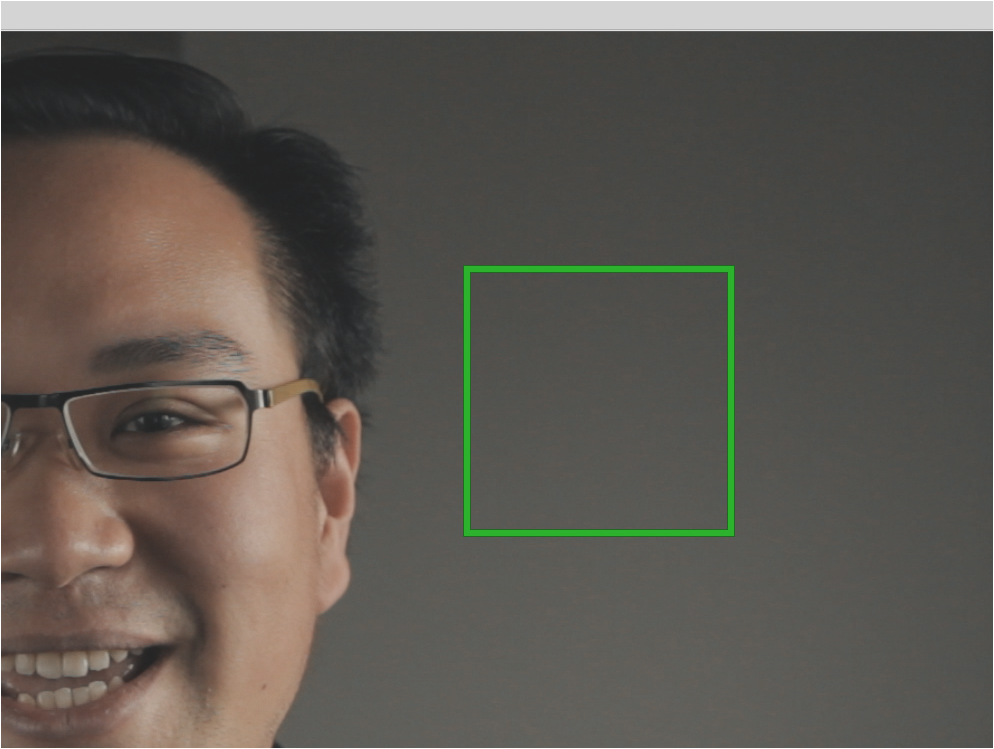
The first thing you want to do is click in the area where the most noise is, an area that has just noise, and no details that you care about preserving. In my case, the decision was easy: click and drag the box in the area against the background:
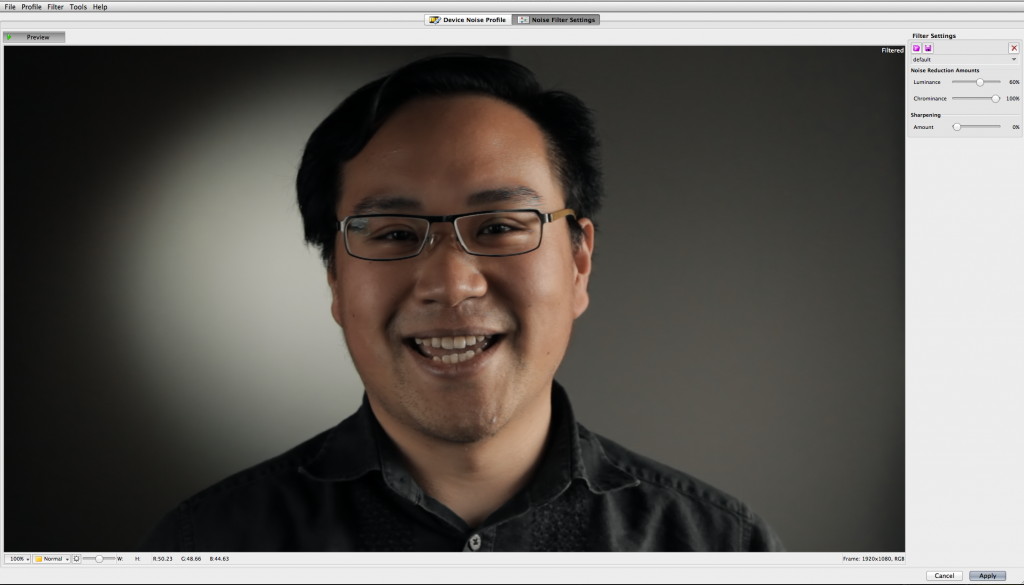
Next, select Auto Profile, then Noise Filter Settings to preview the results:
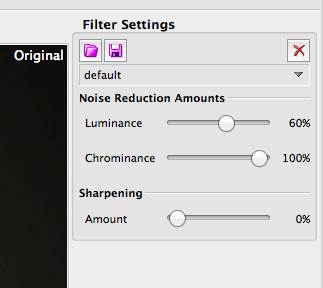
Under Filter Settings, you have the option to play with Luminance, Chrominance and Sharpening. I’ve found that it doesn’t seem to improve anything by fiddling with the first two defaults, so I recommend leaving them alone. Sharping is a powerful tool, so if you want to apply sharpening, be careful not to overdo it. It’s in effect the same thing as a sharpening effect, only it’s included within this plugin.
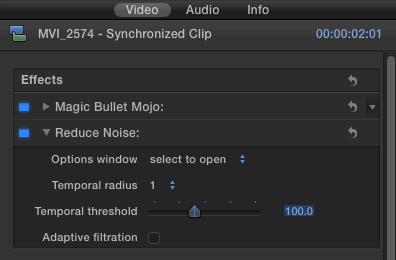
When everything looks good, click Apply in the lower right. Now, take a look at your Inspector, where you have a couple more options that you should leave alone until this point:
Temporal Radius
Temporal threshold
Adaptive filtration
Temporal radius refers to the number of frames that Neat Video analyzes when it’s determining how best to de-noise your clip. The higher the number, the more frames it looks at. Choosing a larger number than 1 will definitely improve your footage. BUT. It will SIGNIFICANTLY slow down your render times. And, at least on these clips, the footage looked plenty good enough at 2.
Temporal threshold should be lowered below 100 on footage that has a lot of motion, and raised above 100 if your footage is static. So, for my interviews, I chose 150 and it looked brilliant. Play with it until you see what looks best, or just accept the default.
Adaptive filtration should be checked only if the level of noise changes during your clip (ie if your camera was moving from a well-lit place to a dark place, for example). For an interview that is pretty static, leave it unchecked.
One final tip: Applying Neat Video to your clips should be the very last step in your editing process. Why? Because it slows your computer down big time. All of the complex calculations required to selectively remove the noise from your video will bring even a fast computer to a crawl. My iMac 2011 27″ i5 quad-core beast will let me work through just about anything, but not Neat Video. Plan to apply the clips and go for lunch. But when you come back, you’ll be thrilled with the results.
