I learned recently that SHINE: The Entrepreneur’s Journey, the short documentary about entrepreneurship that I made with Ben Medina, didn’t make the cut to screen at SIFF this year. But SIFF came up with a great consolation prize: an invitation to purchase a heavily discounted Seattle filmmaker pass, which for 75 bucks provides local filmmakers access to all press screenings, as well as some other benefits like a full year of SIFF membership. I’m a big believer that watching as many great films as possible is the best foundation for making great films, so I’m thrilled to have this outstanding opportunity. I picked up my pass this morning, and will hit my first press screening tomorrow morning. I’ll be posting about my favorite films here. Thanks SIFF!
Zoom H4N tip: Record voiceovers directly into Soundtrack Pro
The more I use the Zoom H4N, the more I love it and discover new uses for it. My latest find: it can work as an audio interface. I’ve been doing a lot of voiceover work lately, and was on the verge of purchasing a USB audio interface such as the Fastrack so that I could use a quality mic like my Octava MK0-12, to record directly into Soundtrack Pro. The Zoom H4N is supposed to work as a USB audio interface – but it doesn’t. I did a ton of testing, and all the voiceovers I recorded via the USB connection to the Zoom were distorted – not only tonally, but they had weird random snapping and crackling and occasional skipped sections of sound. Very bad. But there’s a workaround…
As I was on the verge of placing an order for the Fastrack, it occurred to me: why not simply use a 3.5mm male-to-male cable (which I already own) and connect the Zoom from its line out to the Mac using the Mac’s 3.5mm input jack? I tried it out, and it works great! That’s about $120 saved, and one less piece of equipment to clutter up my editing table. 
Configured like this, the Zoom does not have to itself be recording for this to work – I simply press the record button once (not twice, which would cause it to record onto the sd card), which puts it in standby mode, passing the signal through the line out and into the Mac, which handles the actual recording in Soundtrack.
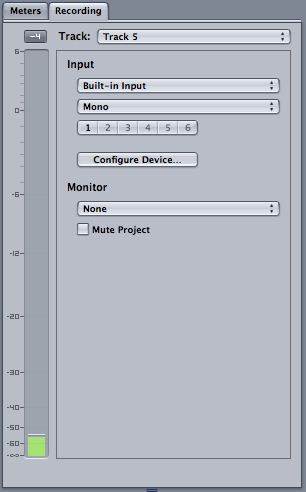
Soundtrack’s right pane is set as follows (see graphic to right):
Input – set to Built-in Input and Mono selected for voiceover work.
It’s best to leave the monitor set to None, or else you’re likely to have feedback issues while recording.
Finally, arm the track you want to record to, press the record button and away you go.
mRelease for iPhone makes getting releases a snap
I hate dealing with releases. It’s a huge pain in the ass to carry around reams of paper and intimidating to people you’re otherwise trying to put at ease. So I was thrilled when my friends Basil Shadid and Matt Freedman turned me onto an iPhone app they jointly developed, called mRelease. I’ve had a chance to use it for a couple weeks, and it’s successfully changed how I feel about getting releases!
Everything you need for your next release is contained within the app, beginning with boilerplate legal text (which Matt assures me they hired a real lawyer to create and vet). The novelty of signing with your finger is actually kinda fun, and the app let’s you snap a picture of the subject to attach to the release, so that if you forget the person’s name, you can id them by their photo later. It then emails a copy to yourself and the person signing. Sweet.
Here’s a few screen shots:
This app works great if you don’t have huge numbers of releases to collect, but it doesn’t work so well as a way to organize your releases and keep track of them. For that, you’re best off to take the PDF copy of the release that is emailed to you, and fit it into your existing system (I store mine in a folder called “releases” contained within the project folder for the film I’m working on, organized by date).
Included within the app so far (it’s been updated once already) are: Appearance releases (the most common type that I use), Property releases, Location releases and Crew releases. You have the option of giving them an unlimited release, or a release limited to the project you are working on. There’s an option for guardians to give consent for children as well.
The app costs $2.99, a bargain considering the amount you save on printing supplies and paper if you commit to going paperless with your releases. I’ve done it, and won’t be looking back.
How to record iphone conversations using Zoom H4N
 Recording conversations on an iphone is pretty simple once you know how, but I had to spend a couple days and repeated trips to Radio Shack to figure it out. If you need to make professional recordings of both sides of your conversations, such as for interviews, this approach is a winner.
So here’s what you’ll need:
1. iPhone (with earbuds that have inline mic).
2. Zoom H4N.
3. A professional microphone that uses XLR jack (I used my Octava MK-012).
4. An XLR cable.
5. A 3.5mm jack splitter (part number 42-2570 at Radio Shack).
6. A 3.5mm male to 3.5mm male audio cable (part number 42-2497 at Radio Shack).
The xlr mic is necessary to record your voice; the splitter running from the phone to the Zoom records the voice of the person you’re talking to. (You might think that your voice would be included on the splitter line, since you’re talking on a mic that transmits via that line – but it’s not.
To configure the Zoom, set the recording mode to “4 Channel,” which allows you to record input from the 3.5mm jack on the back AND from the XLR jacks simultaneously. It’s totally professional because your voice and the voice of the person you’re speaking with are recorded onto separate tracks, which is ideal for editing later in Soundtrack Pro and Final Cut. You can control the recording levels independently as well.
NOTE: At first I thought I could get this to work even more simply by using the Zoom H4N’s built-in mics to record my outgoing audio. But the built in stereo mic is disabled when you plug in the 3.5mm external mic jack. Hence, the need to use an XLR mic to pick up your side of the conversation.
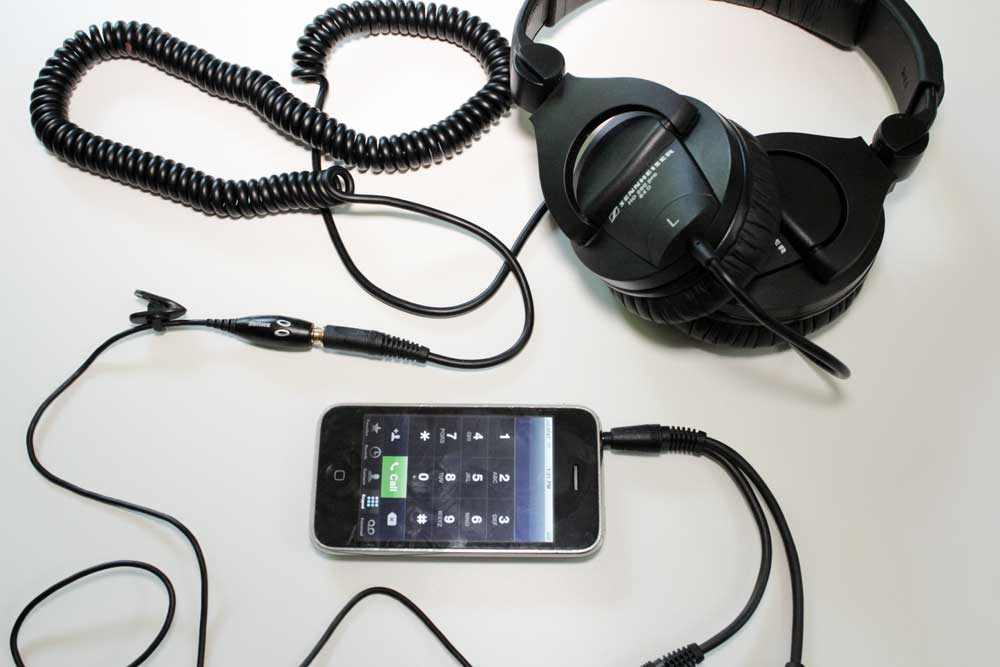
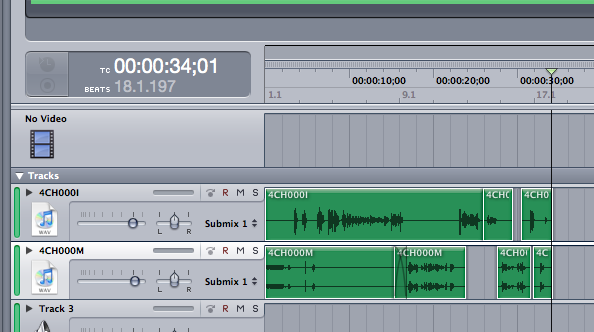 In this 30-second test conversation with my wife, which I edited in a very simple Soundtrack Pro multitrack project (see graphic), if you listen very carefully beginning halfway through, you can hear my wife’s voice being picked up by the very sensitive Octava mic from sound bleeding through from the earbuds. I replaced my earbuds partway through with proper Sennheiser 280 Pro circumaural headphones to keep any sound from spilling out, and for that you’ll need a third-party external mic such as the Shure Music Phone adapter. You can hear Lara telling me initially that it sounds like I’m on speaker phone when I’m using the Apple earbuds, but as soon as I hooked up the Shure, she noted a major improvement in sound. So here’s a snapshot of my final setup for professionally recording iphone interviews, below.
Herzog's Rogue Film School
I feel deeply honored to be among the 60 participants selected to attend Werner Herzog’s second annual Rogue Film School, which will be held just outside of New York in mid June. More than any other filmmaker, Werner Herzog embodies the spirit of independence and lifelong dedication to craft that inspires me to make films. Herzog has made more than 60 films during his career, films that cross the line between documentary and narrative and push the genre forward in pursuit of what Herzog calls “ecstatic truth.” If you asked me who my living heros are, I’d say Barak Obama, Steve Jobs, Nelson Mandela, and Werner Herzog. Roger Ebert once called Herzog “the most curious of men,” concluding:
You and your work are unique and invaluable, and you ennoble the cinema when so many debase it. You have the audacity to believe that if you make a film about anything that interests you, it will interest us as well. And you have proven it.
I've seen the future of workshops: it's called CreativeLive
I spent the better part of last weekend virtually attending the 3-day CreativeLive video dslr workshop hosted by Vince Laforet. This workshop was different from any other workshop of its kind that I’ve attended in two ways:
- I was able to participate live, from my couch, viewing the workshop happenings on my 6-foot projected screen and posting questions via chat.
- It was FREE.
I could add a third item: I actually learned something from the workshop. Stuff that will immediately begin making me money on my next commercial shoot, which begins Wednesday.
The folks at CreativeLive have such a great thing going, that I felt terrible about NOT paying, because I was worried about them not making a financial success of their endeavor. So I opted to pay the $79 class fee, not because I necessarily need access to the materials, but because I want them to succeed. I want to see a LOT more workshops of this kind on topics like Final Cut editing, film lighting, creativity workshops with masters, and many more.
If you’re someone with a photography background looking to get up to speed on filmmaking, save yourself months of hassle and just take this workshop right now. Because oh yeah, if you didn’t make the live event? No problem – you can still take video DSLR workshop the same as if it were live – only more tightly edited – for $129. Deal.
Prepping interview audio for Final Cut using Soundtrack Pro's Limiter Filter
I’m still in the early stages of developing my style as a filmmaker, and one technique that I’m already noticing is becoming part of my style is to record audio and video separately in two takes. That is, have a sit-down with the interview subject in which there are no cameras present – just audio recording. This puts people at ease, because they can focus on what they are saying, not HOW they are saying it, or how they LOOK while saying it. I find it makes for more authenticity, and it’s nice to be able to focus on JUST getting great audio in this pass.
Then I schedule a second session with the subject, in which it’s all about the video. I DO record reference audio with a camera-mounted shotgun mic during this second session, but find I rarely use this audio.
Breaking these steps into two also allows me to do everything: I can run sound the first day with a boom pole, and work the camera the second day. Of course not all shoots allow for the luxury of two days of shooting, and I do work with a great sound guy who is a student at Art Institute of Seattle when needed. But at this point in my career, part of the joy of filmmaking is doing it all. I missed film school, so it’s the only way to learn.
Ok so back to the reason I made this post: Using this approach creates a big long audio file, usually about an hour long, with a lengthy interview, which I then carve up into the much briefer segments needed for the edit. Initially, I would drop the file into Final Cut, and slice and dice until it was about right, before sending it to Sound Track Pro for sweetening and repair.
The problem I run into, though, is that since I’m essentially working on the same big long clip, just sliced into different segments, FCP gets unhappy when I try to send individual clips over to Sound Track for repair.
The solution: Drop the whole audio file into FCP, then immediately, before you do anything, send it to Soundtrack (ctrl-click the audio file, then select “send to > soundtrack pro audio file project”). Then apply a Limiter filter to limit the dynamic range of the entire interview, which means the quiet bits will have more volume and the loud bits won’t be too loud. For the details of how to do this, follow this step-by-step tutorial from Larry Jordan on using the Soundtrack Pro Limiter Filter.
Starting with my audio more or less correct at the beginning of the editing process has helped me immensely to get the rest of the mix right, ie, music at approximately the right level, etc.
Vincent Laforet in Seattle for DSLR workshop beginning April 30

Master DSLR filmmaker Vincent Laforet will be in Seattle to teach a 3-day introduction to DSLR cinema that starts on April 30. If you’d like to participate live, there’s room for only 5 participants at $600 each, quite a value in itself. But what’s really cool about this workshop is that the entire thing will be streamed live, FREE. As tempting as live attendance is, I’m going to save the $600 and put it towards some of the amazing gear that Vincent will be demonstrating during the workshop, and listen in online.
Sign me up for that: http://creativelive.com/courses/vince_laforet/
How to recover missing and corrupted files on Canon DSLR like my T2i
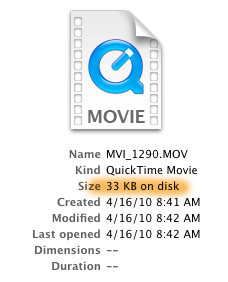 I had a potential disaster today: after returning from two big commercial shoots, which I shot with my T2i in 720p 60p, I popped in the 32 gb SD card with most of the morning’s work on it, and immediately came to the horrible realization that of more than 100 files on the card, only 6 were readable. The rest of the quicktime files were visible, but showed only 33 KB on disk for each of them. Obviously, something had gone horribly wrong.
I spent the next 7 hours researching all of the data recovery options available, initially without finding a solution (at one point I was so sure the data was gone for good that I contacted my client and told them I had to schedule a reshoot, never a fun conversation). But I kept trying the many tools available and finally found one that got my files back. So if you’re facing the same situation, read this first and hopefully you’ll be good to go a lot faster than I was.
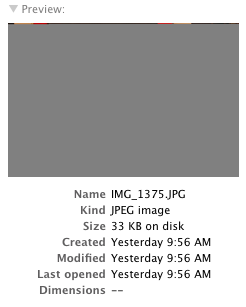 Two stills that I snapped during the shoot, which also showed up as 33KB files, I was able to open. However, only the first couple of lines of image data displayed – the rest was gray. Like this (see image to right).
Background: During my shoot this morning, my camera was overheating constantly – the little red temperature light was blinking like mad. But I’ve seen that before, enough not to worry about it – if it gets too hot, the camera just shuts down, cools off, and then you’re good to go in a few minutes. I had a perfect storm today: in addition to the overheating, the card got full and the battery died all at about the same time. All I remember is an error message displaying on the screen which said something to the effect of “Unable to save files to disk” and then it went black. I didn’t worry too much about it, because I’ve never had a problem before when the power dies on my T2i. But after today, I can tell you that I will very much worry about it. As best I can tell after researching this, it appears that the culprit for the lost data in my case was running out of power while shooting. Don’t let it happen to you. But if it does, all is not lost. Here’s how to resurrect your files.
 I’ll spare you the long list of 7 demo software applications I downloaded and tried, without success, and just jump straight into the killer app that saved the day: Klix Digital Picture Recovery. This $29 piece of software is worth every penny, and then some. After scanning my sd card, it built a list of all of the missing files. However, it did NOT include a preview – which at first led me to believe the files were not recoverable. But in fact, they were.
The way I discovered this was by trying the nuclear option – a company called Aero Quartet that has a sweet piece of software for Mac that you can download to diagnose your broken Quicktime files, called Treasured. Treasured scans your damaged quicktime files, and tells you the odds that your file is repairable, and walks you through the steps of preparing it for submission to them, where a real human will look at your file, and attempt to salvage it. They will give you an estimate of how much this will cost automatically, and a real person will confirm it before you are charged.

In my case, one of the diagnostic screens said “surprisingly, your file can be opened in quicktime.” I was all, huh? It can? I went back to the saved Klix file, and sure enough, it opened just fine. Audio was perfect too. Whew!
I’m grateful that I didn’t have to use Treasured’s more expensive service this time, but I’m grateful for their help diagnosing my file issues and really glad to know it exists.
And the next time the battery starts blinking red on my Canon dslr, you can bet that I’ll be changing the batteries BEFORE it goes dead.
UPDATE: The same software also works if you accidentally format your card before downloading the files.
How NOT to use a Zoom H4N
I’ve been happily using a Zoom H4N digital recorder since last October to record audio such as interviews. I use it primarily with a AT875 shotgun mic, which requires phantom power. It’s no problem, because the Zoom has a mode that provides it. But I’ve noticed the price you pay for using phantom power, at least with my AT875, is reduced battery life. WAY reduced. I generally can expect about two hours max of record time. And if you’re using rechargeable alkaline batteries, that drops to less than half an hour, as I discovered this morning.
But here’s a far worse discovery that I made today, which amounts to a serious design flaw with the Zoom: if you’re recording when the batteries die, you lose everything recorded on the clip up to that moment (it saves a 0 kb file, rather than a file with your data in it).
Bottom line: the Zoom H4n is a great recorder. Just don’t EVER let it run out of batteries, and it eats them like candy, at least if you’re using it with phantom power and an AT875.
