“Lighting is a subtle craft,” I told my students yesterday. Then we headed to a baseball field to see what that looks like. Our assignment: To shape natural light into something cinematic for an outdoor interview using only two pieces of grip. A 4×4 foam core bounce, and a Scrim Jim Cine Frame (8 x 8′).

Our first challenge was to choose a background. We placed our subject on the edge of the field, and slowly walked in a circle around him to observe how the light fell on him in relationship to the background.
People rarely look good in direct sunlight. It makes them squint. So we placed our subject with the sun behind him, as you can see from the shadows below.
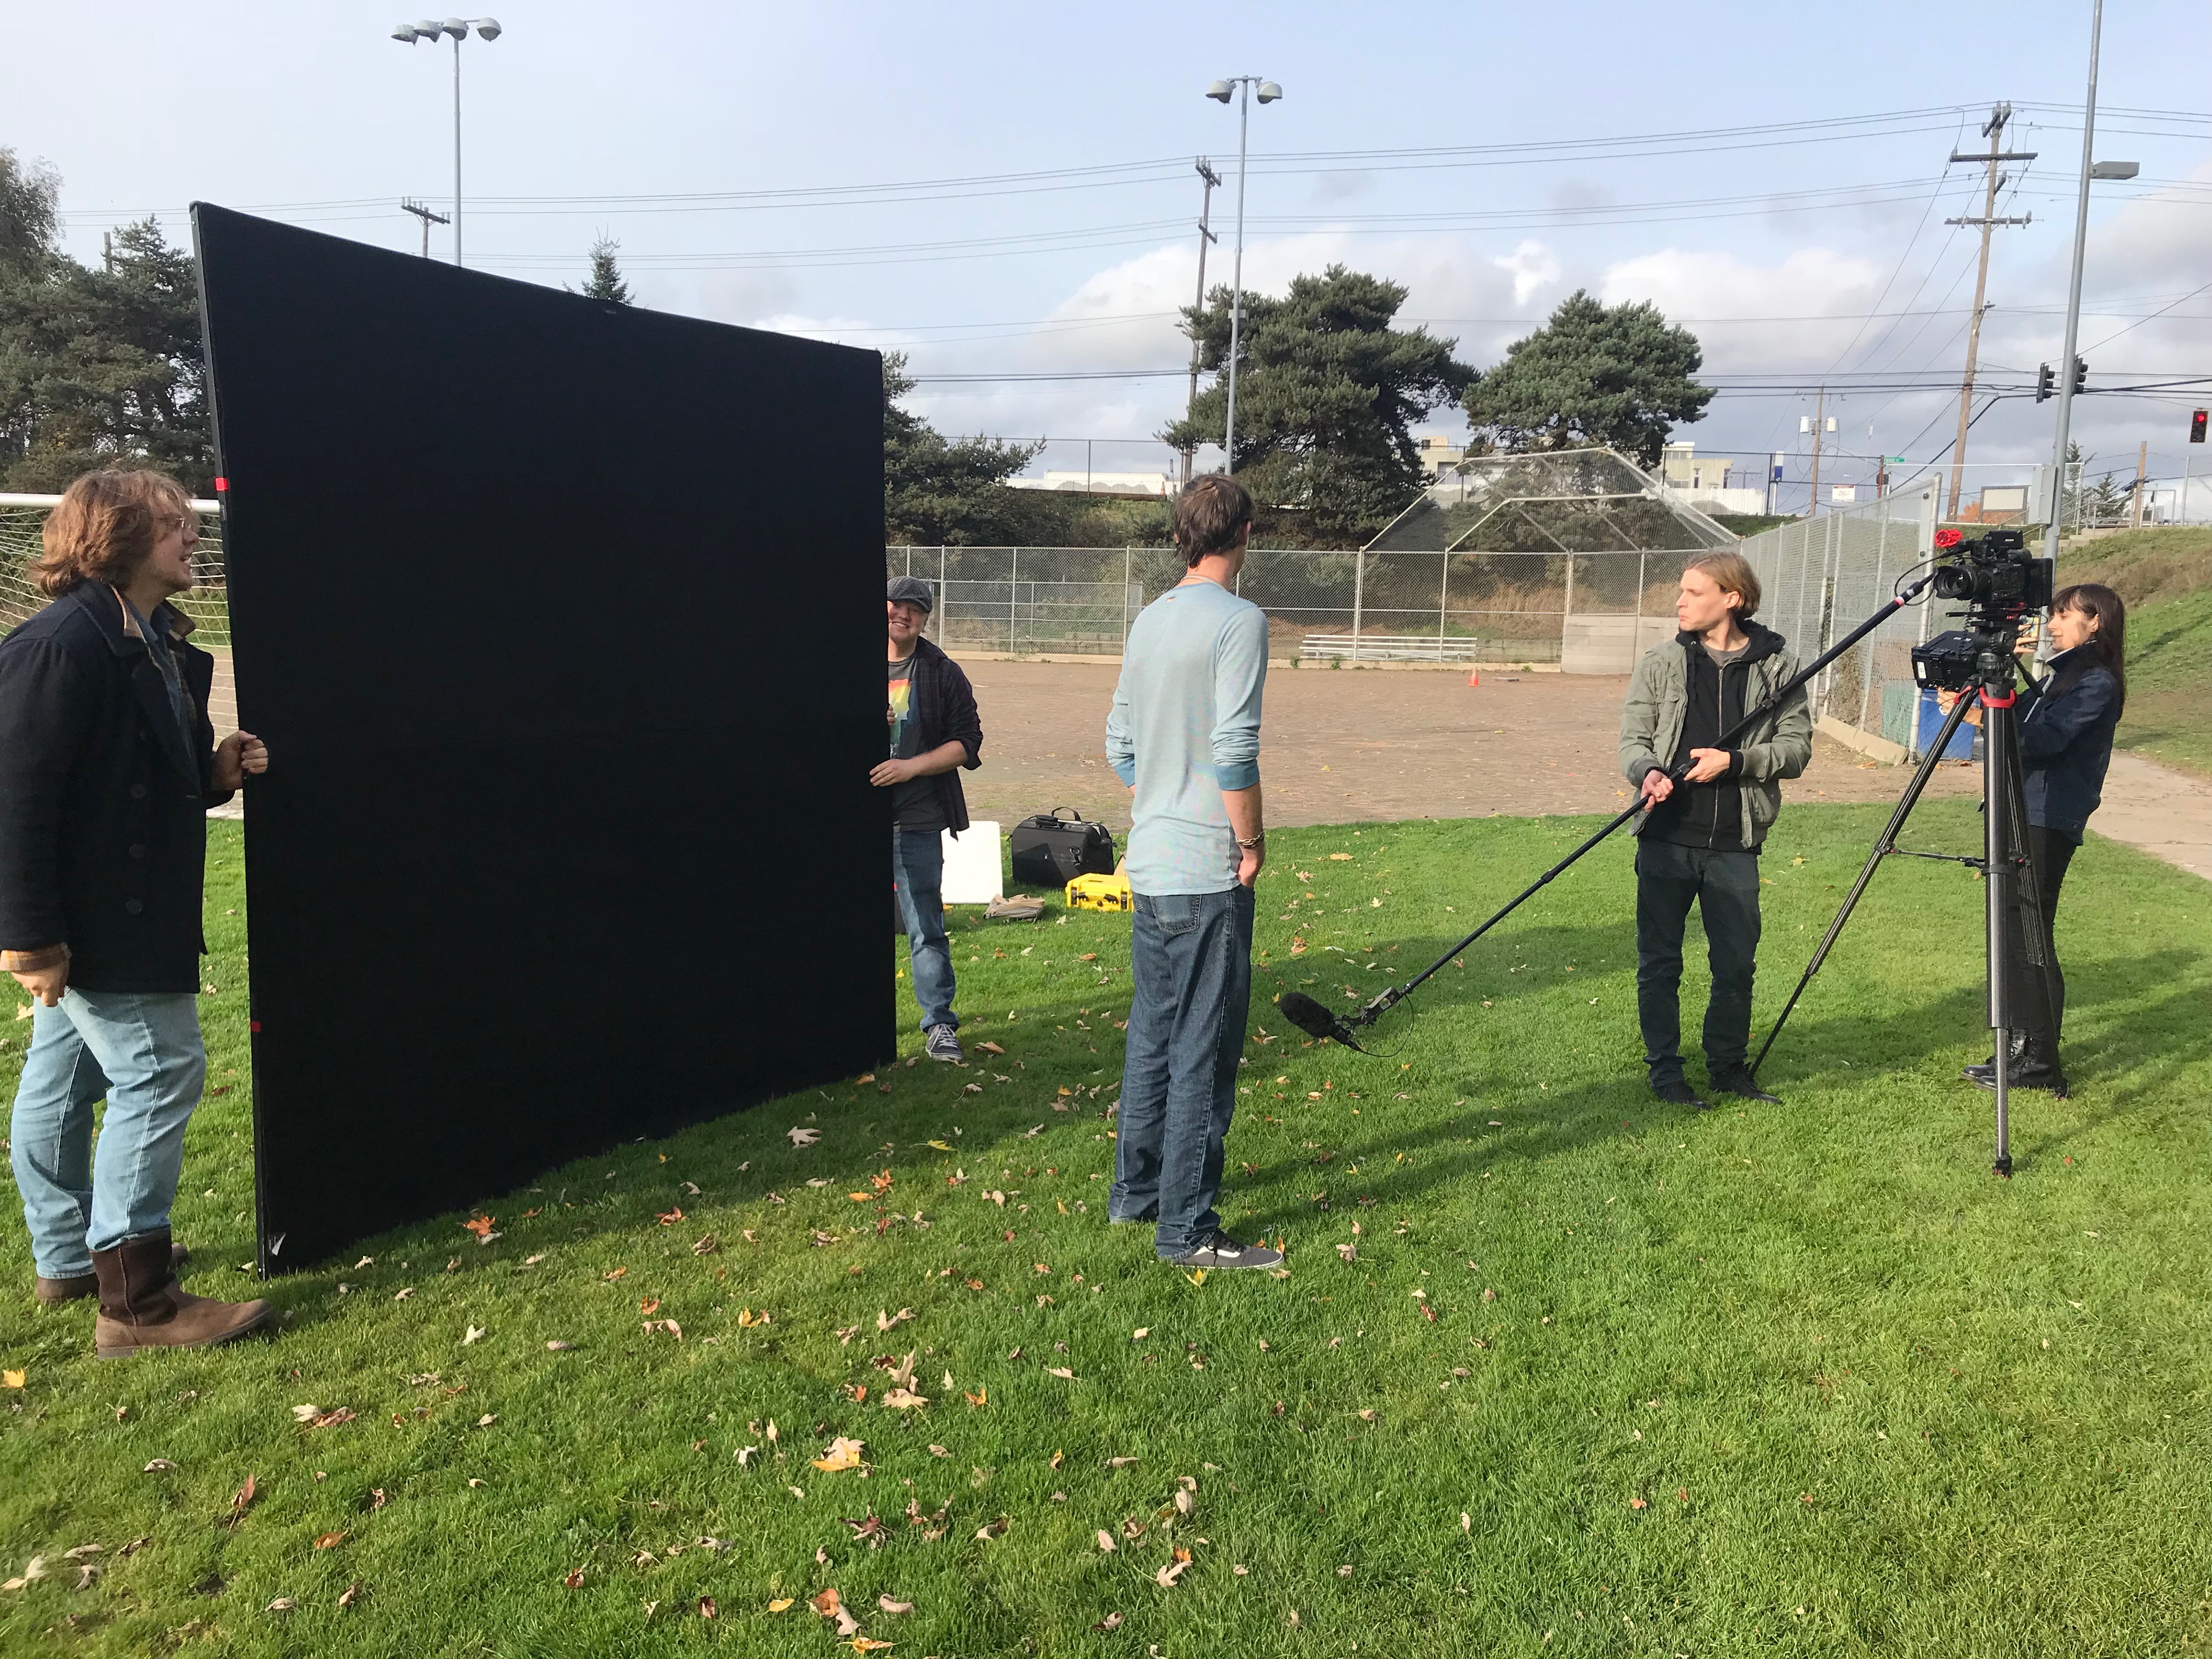
By doing this, we penciled him out from the background with natural rim light. This works best when you can find a background that is at least a stop darker than your subject. In this case, we could do that very easily, because there were lots of trees. Trees absorb light. So here’s our starting frame:
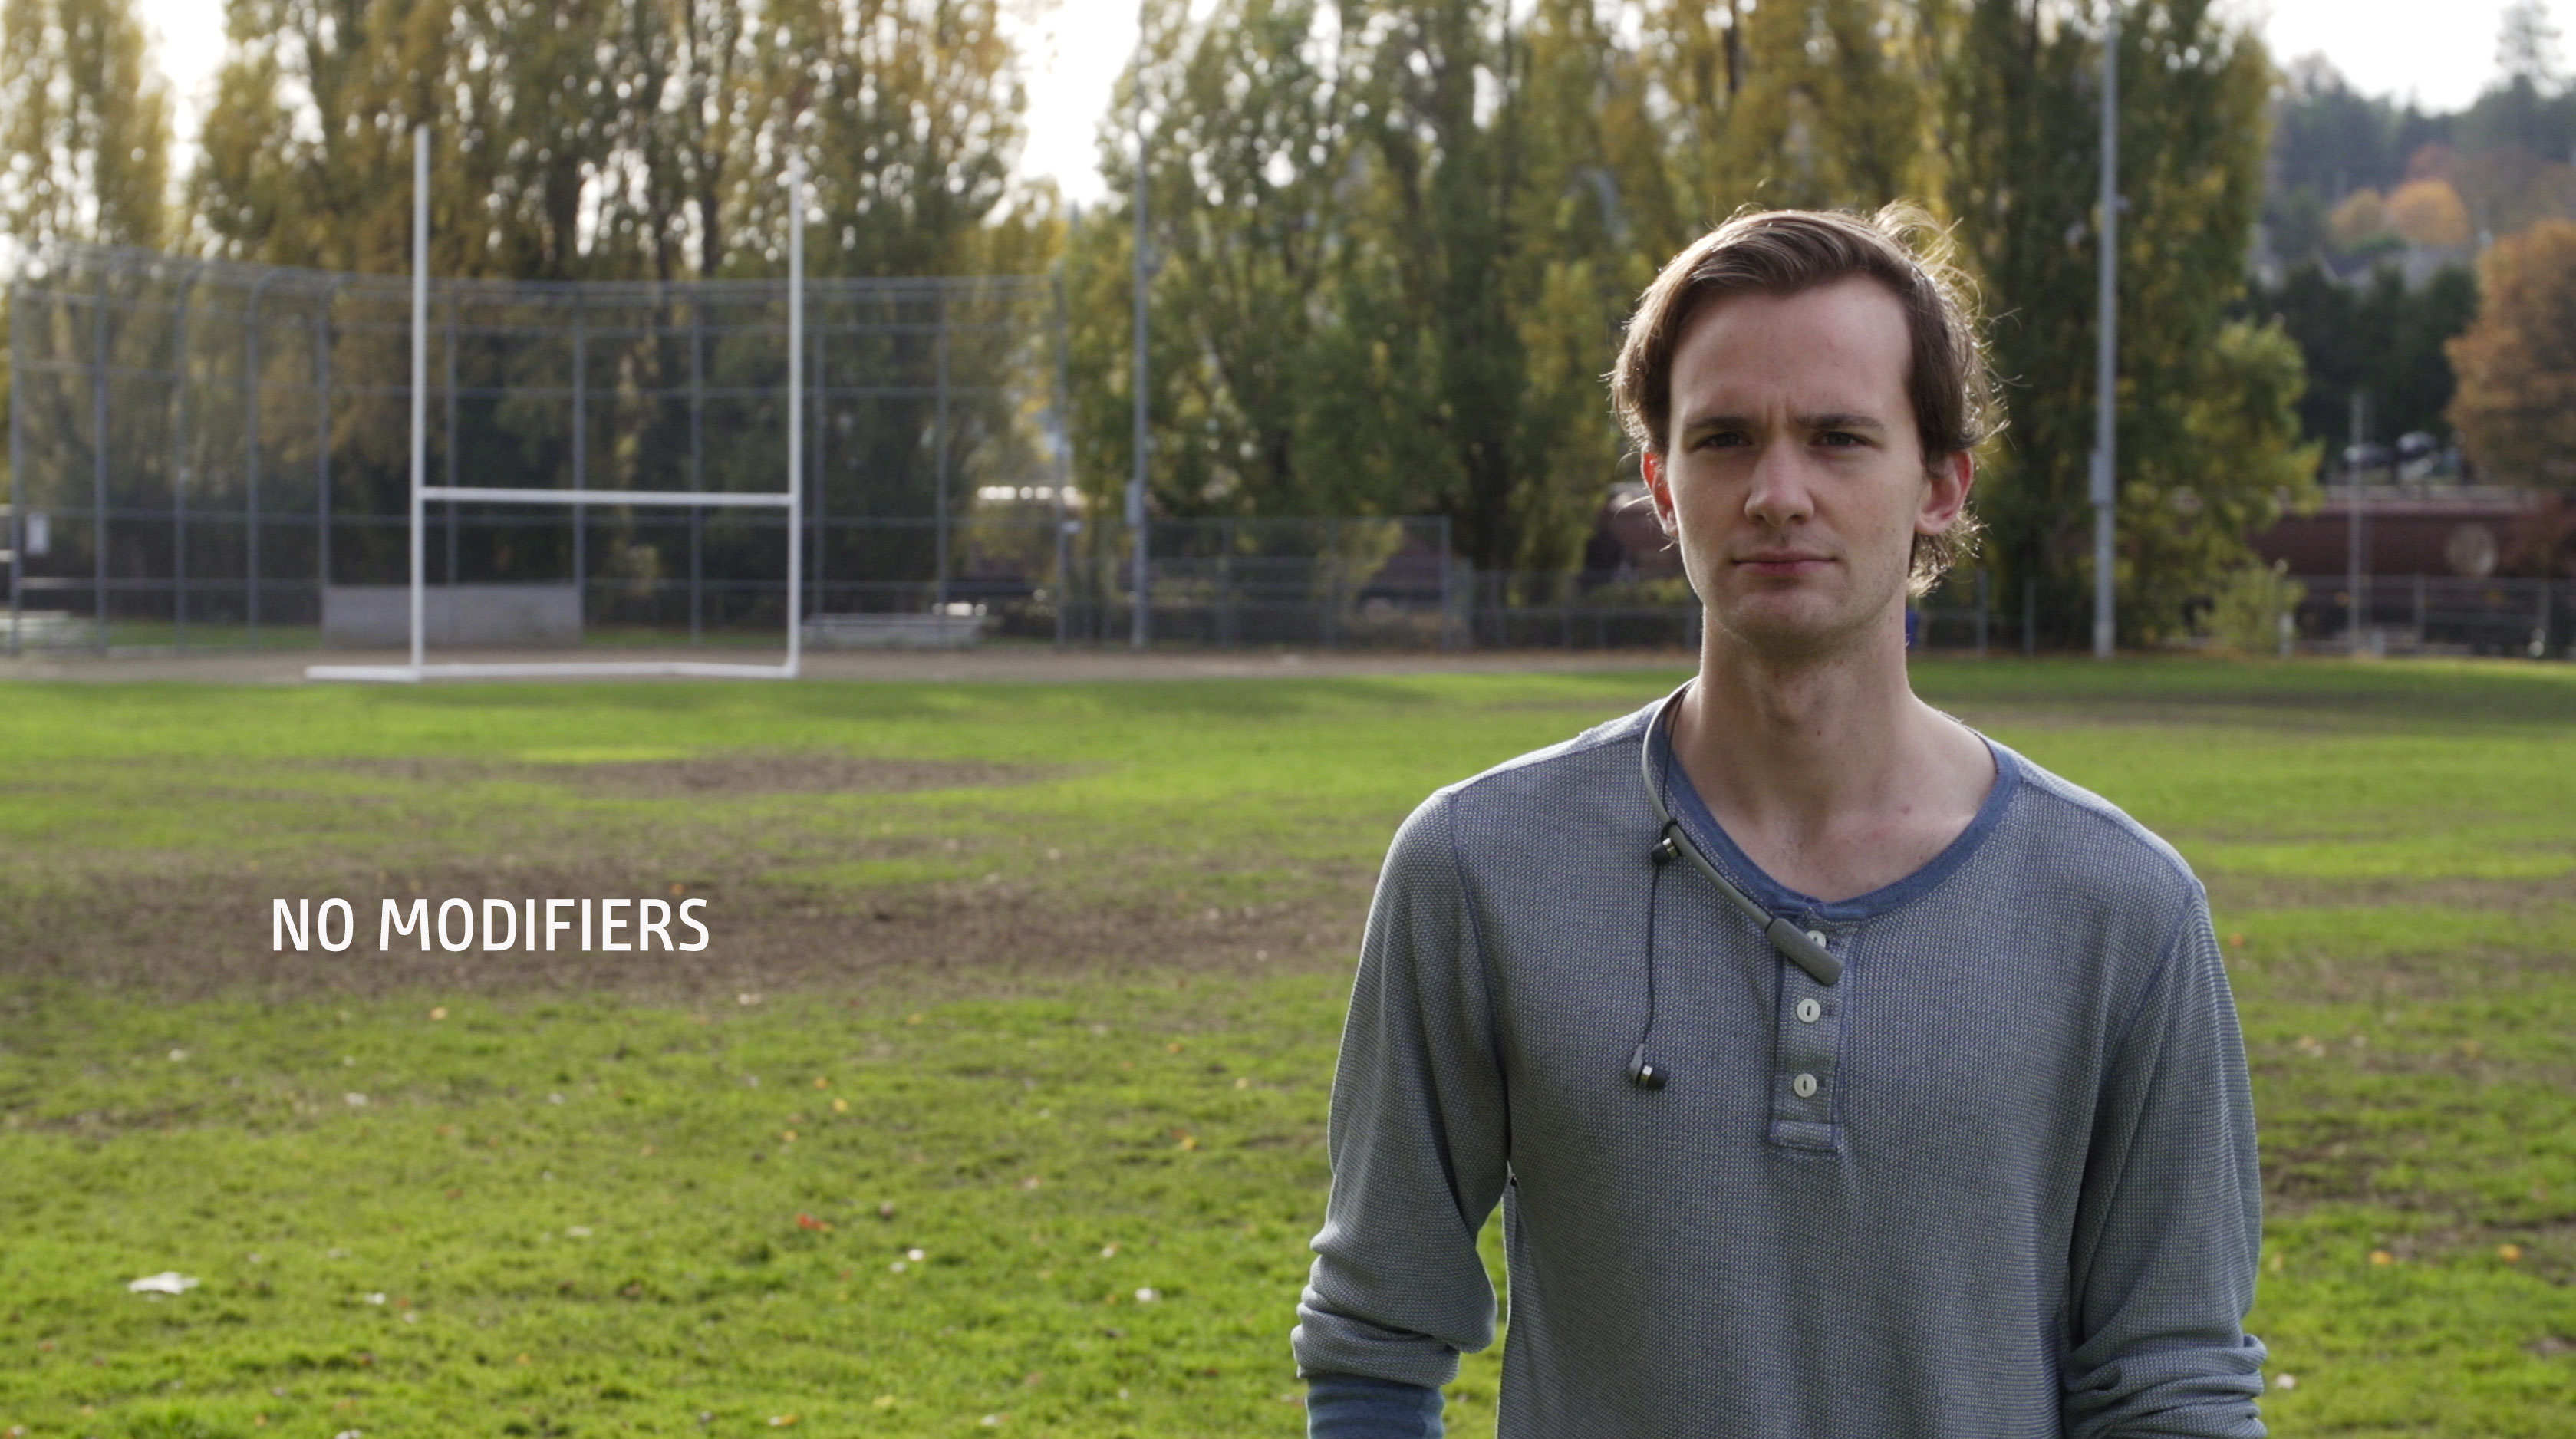
This first frame shows the importance of considering how nearby objects will impact your subject. If he had been standing in the middle of the field, his face would have been evenly illuminated. But because there is a line of trees behind us and camera left, the light is wrapping in from camera right which is exposed to open field.
Our goal here is to make the most of the tools we have to create a naturally lit interview that feels organic and makes our subject look great. So let’s start playing with our toys and see what each does for our shot.

Our first setup is to bounce light on the same side as the sun, 3/4 angle camera left. This evens out the light on his face, eliminating the dark areas created by the trees in front of him. But it’s pretty flat. Let’s move the bounce a little farther to the right…
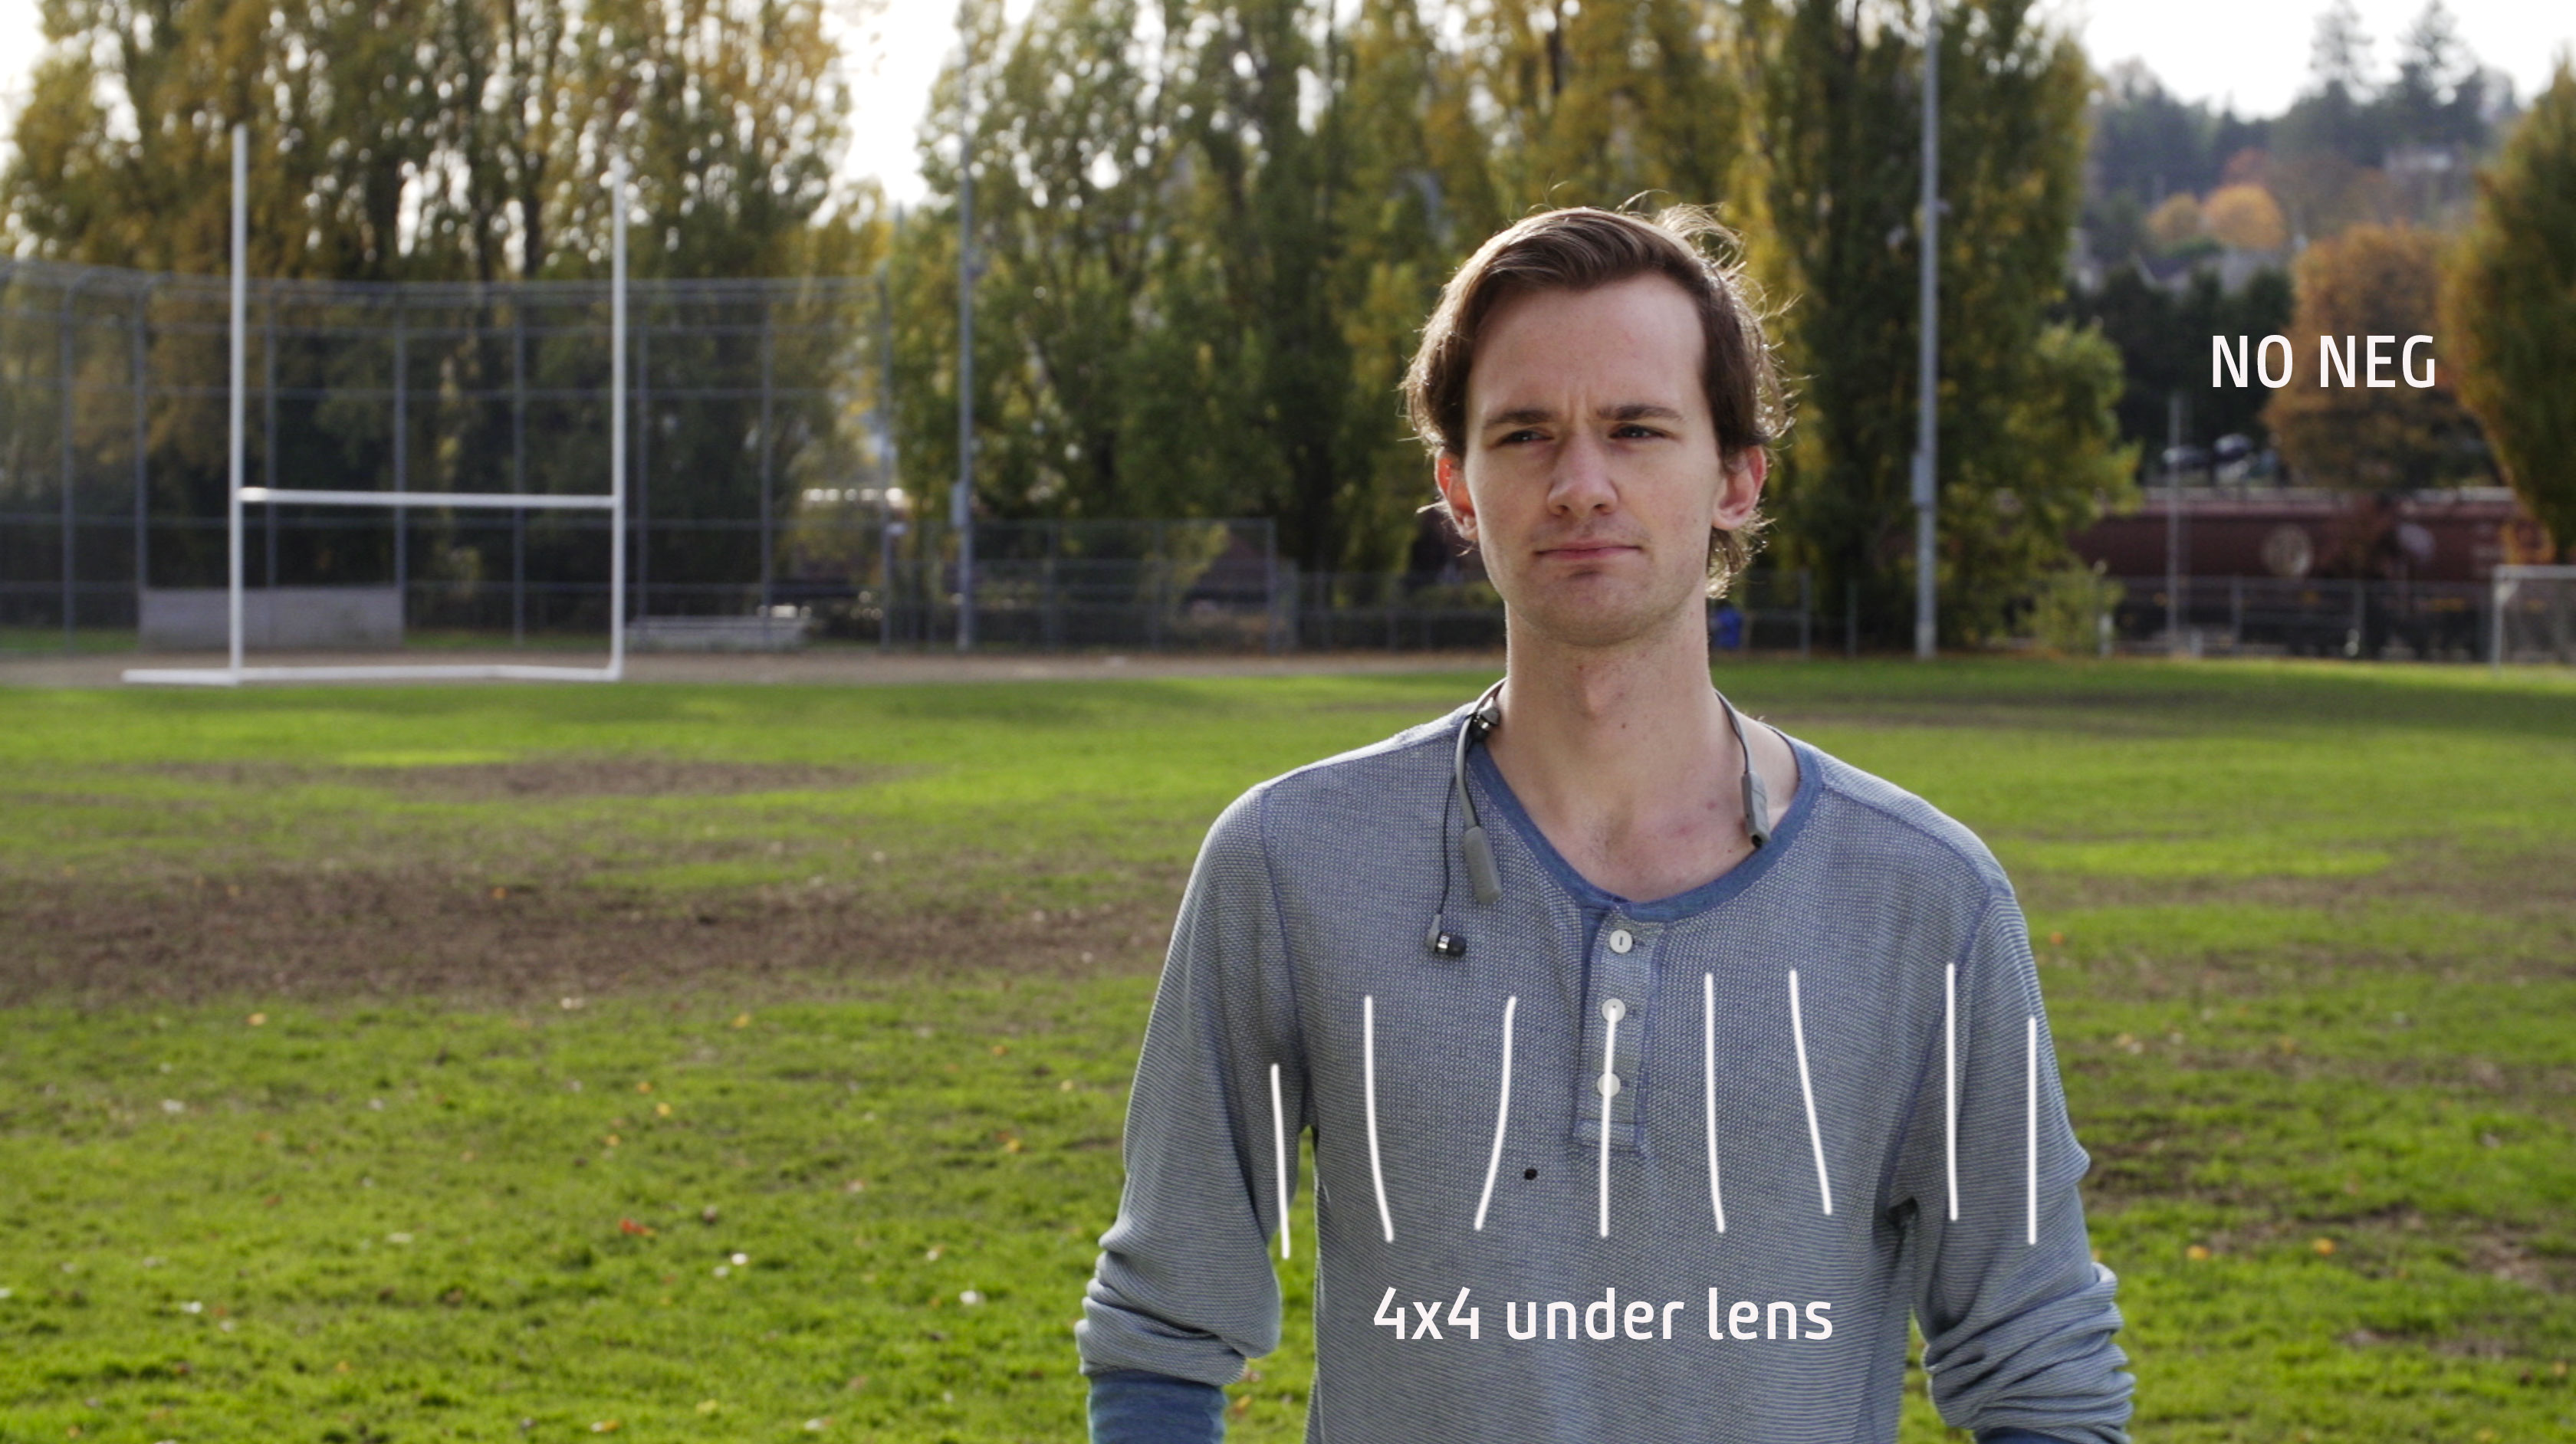
Placing the bounce directly under the lens is a pretty common sight on film sets. It’s a great way to get a nearly invisible fill up into the eye sockets of your talent. But in this case, it still feels pretty flat.
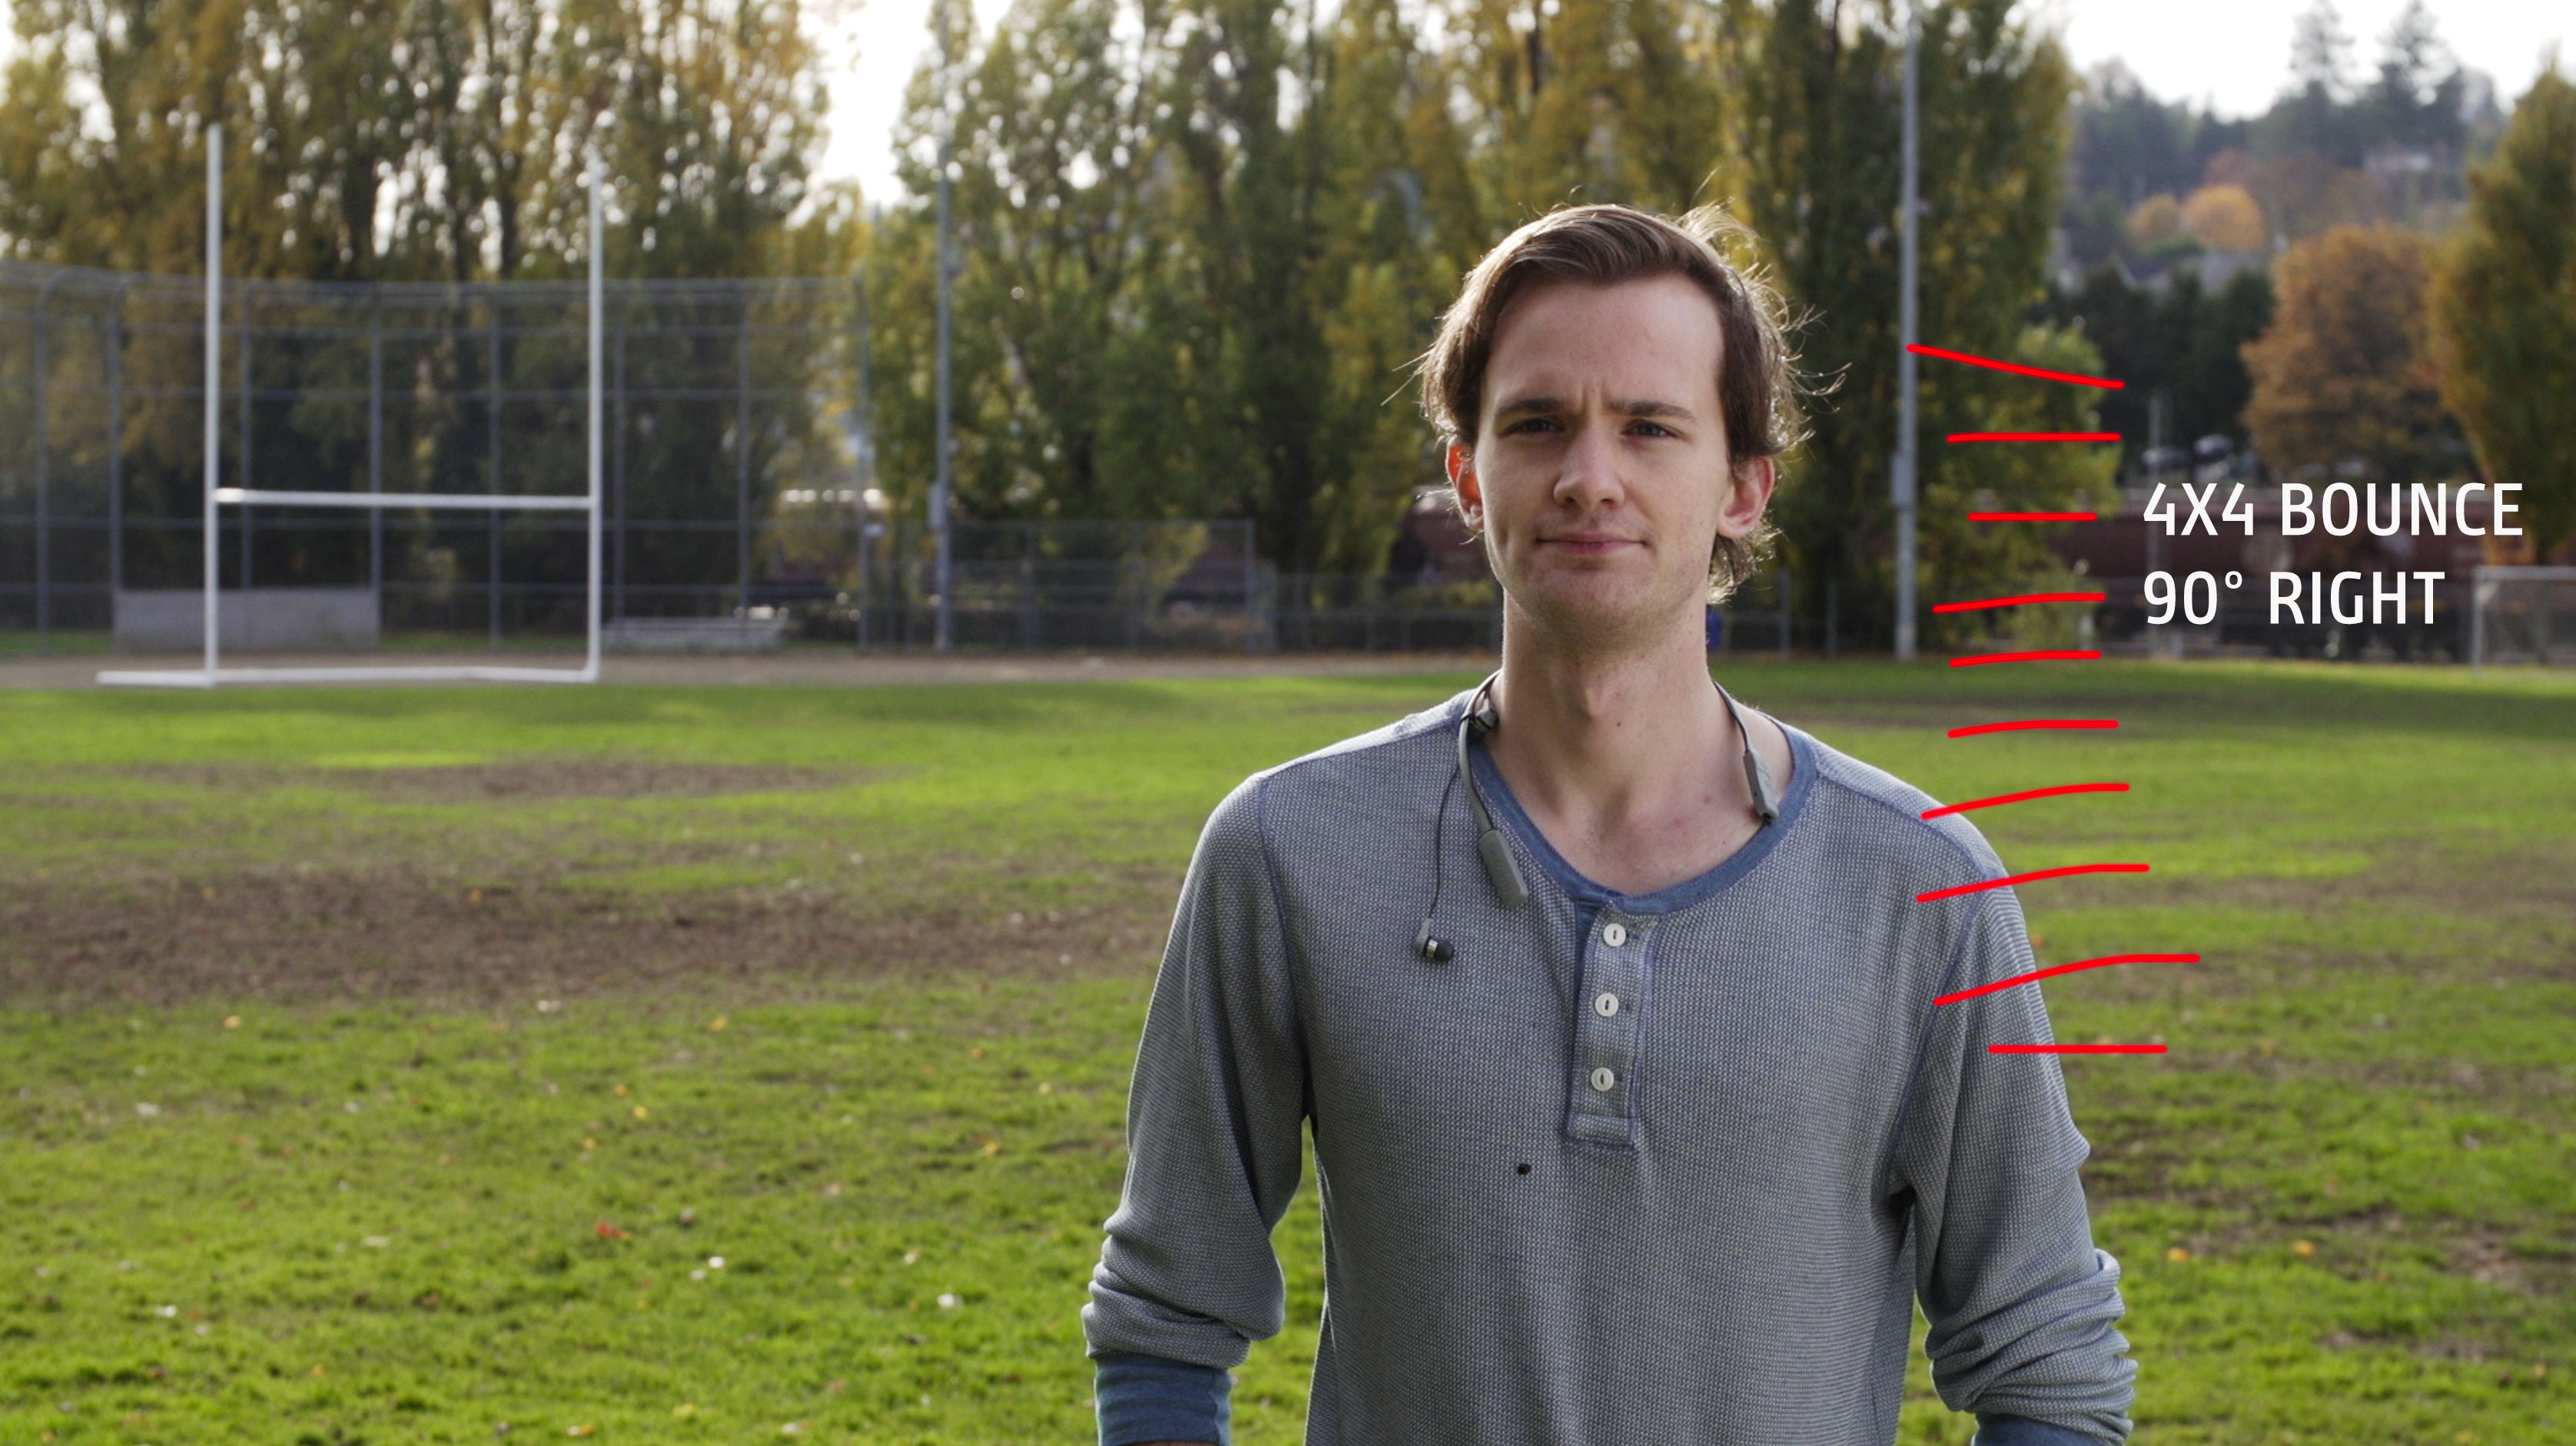
Placing the bounce on the camera right side gives us a nice dimensionality, but it doesn’t look organic, because the sun is coming from behind and to camera left. So it looks lit. No good. Let’s put down our bounce for a minute and see how the negative fill affects our shot.

The neg by itself does a nice job of evening out the light on his face, but he’s now too dark overall. If we raise our exposure to compensate, the background will get too hot, and we want to leave it alone at a stop under. So let’s bring back our bounce, on the same side as the sun (called “same-side fill”) and see what happens.
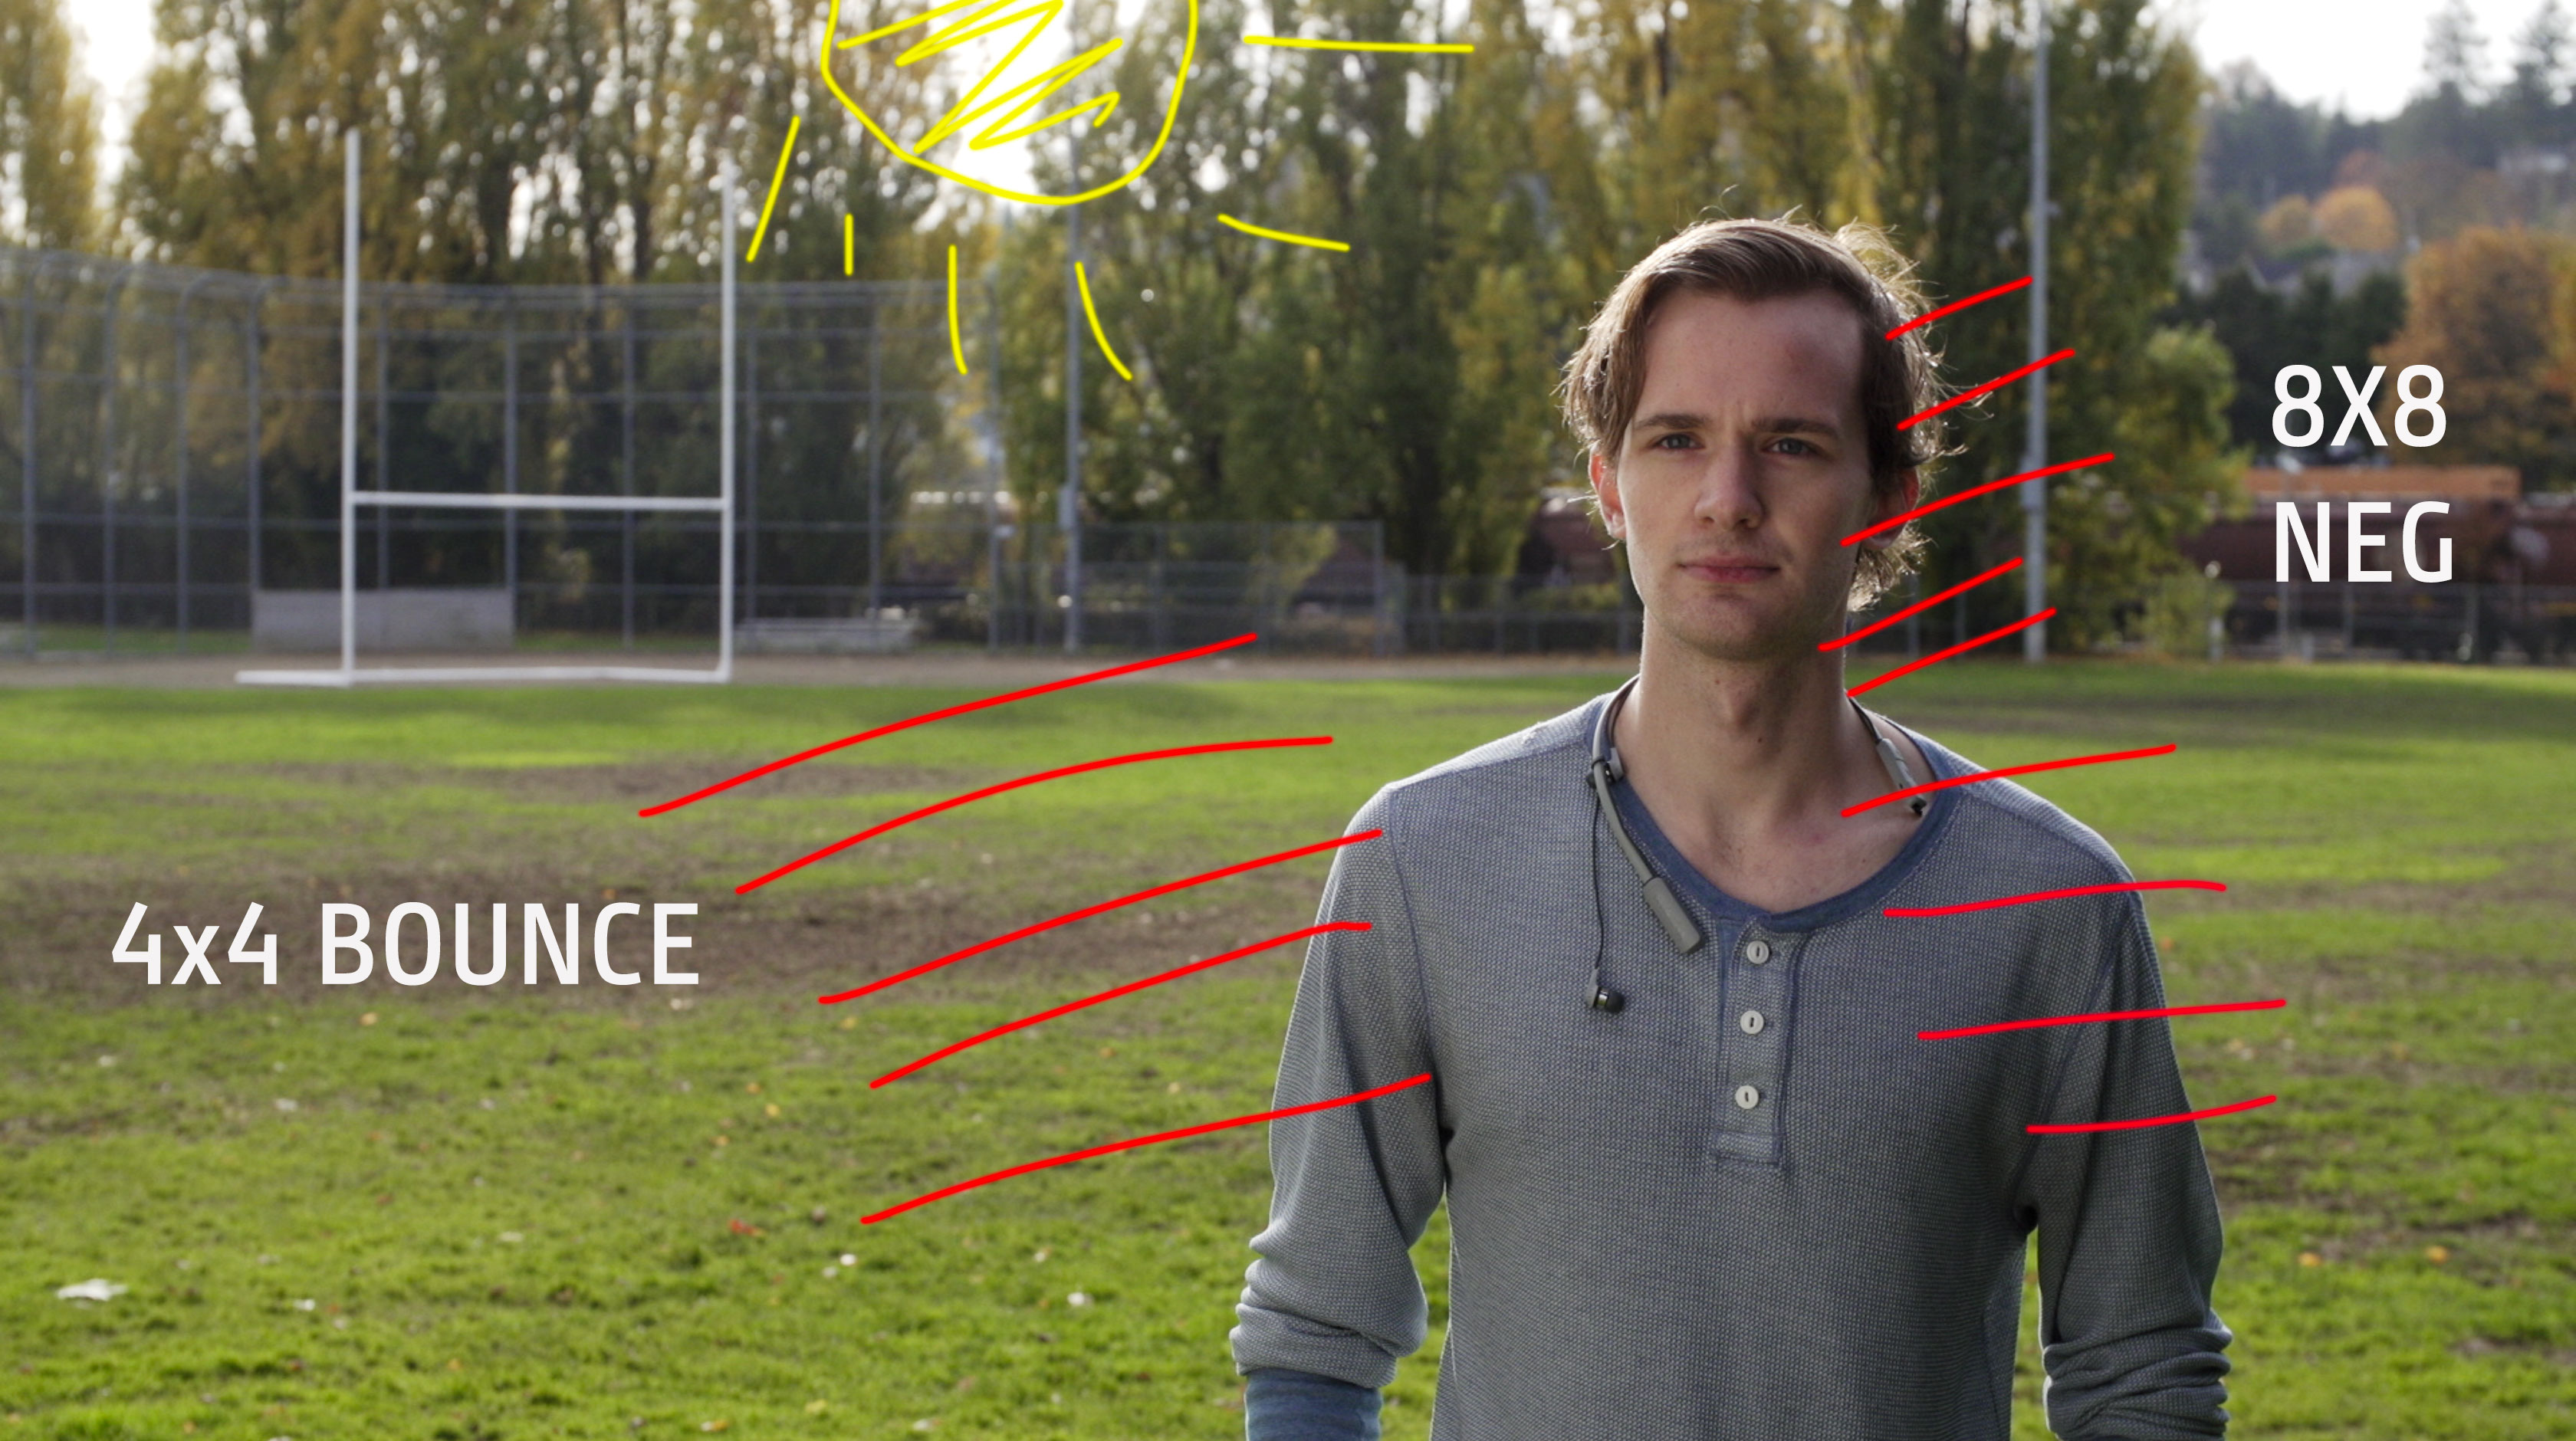
Wow! This looks pretty good. Adding the bounce wraps the light of the sun around his face very naturally, and the neg on the other side gives us the 3-dimensionality that we’re always striving for in cinematic shooting.
If anything, I’d say we could have raised the 4×4 bounce a little higher to do something about the shadow that’s forming a triangle between his camera right cheek and eye.
What techniques do you use to shape available light for cinematic outdoor interviews?
Awesome write up and excellent examples.
You could also use this in your outdoor kit — it’s a DIY Travel Bounce:
https://www.youtube.com/watch?v=BePuaa1xmtw
Hi James,
Hey thanks for sharing that great tip. Not only is that a totally workable solution, it’s also completely professional and something I’d be proud to show up with on location for any client!