Category Archives: Product reviews

Reviews of filmmaking products or services that I’ve personally used.

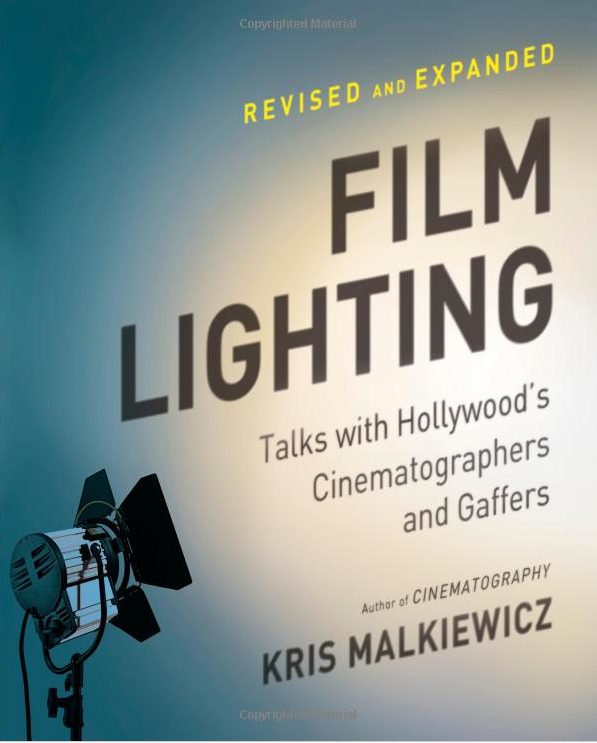
Great read: Film Lighting by Kris Malkiewicz

I was at Barnes and Noble a few weeks ago, poking around in the filmmaking section, and discovered a book that I almost couldn’t put down: Film Lighting by Kris Malkiewicz. I did, however, put it down long enough to find out whether it was cheaper to buy on my iPad. It was. So I downloaded it on the spot and walked out the door, past the Nook display, glad that physical bookstores still exist, and excited to be living in a world where this kind of instant comparison-choice-delivery is possible.

This is a new version of a classic book that has been revised to include coverage of digital video and new developments like LEDs. It’s a series of conversations with mostly Hollywood DPs and gaffers. But what surprised me is that much of the advice they give applies to tiny budget filmmakers like me. Who knew, for example, that using a Leko stage light is a great way to target bounce light? Yep. The venerable ellipsoidal spotlight is still a killer tool, because it’s infinitely controllable, equipped with shutters that allow you to shape the light without having to use cutters or barn doors. You can aim it at a bounce card across the room, and entirely eliminate any light spill. It’s the guided missile of lighting. And I was able to pick one up on ebay for $80.

Haskell Wexler shared this tip: “I find that I learn the most when working on documentaries. When the budget is minimal, you are forced to look at light as you find it and to make it look good.” There’s a big chapter in the book about how to light car interiors, and some of it gets pretty complicated. But Wexler is a fan of keeping it simple. “A lot of the equipment that we use when lighting inside cars is basically unnecessary to get good results. If you can control the intensity of the background with neutral density gels on the windows in the shot, it is possible to use the natural existing daylight in the car to make perfectly acceptable shots.”

That prompted me to pick up a 4’x25′ roll of .3 ND gel, which I’ve begun using everywhere. It’s a lot easier to pack that roll and a pair of scissors and tape than it is hump lights and the stands, sand bags, power cords, batteries, etc. to power them.

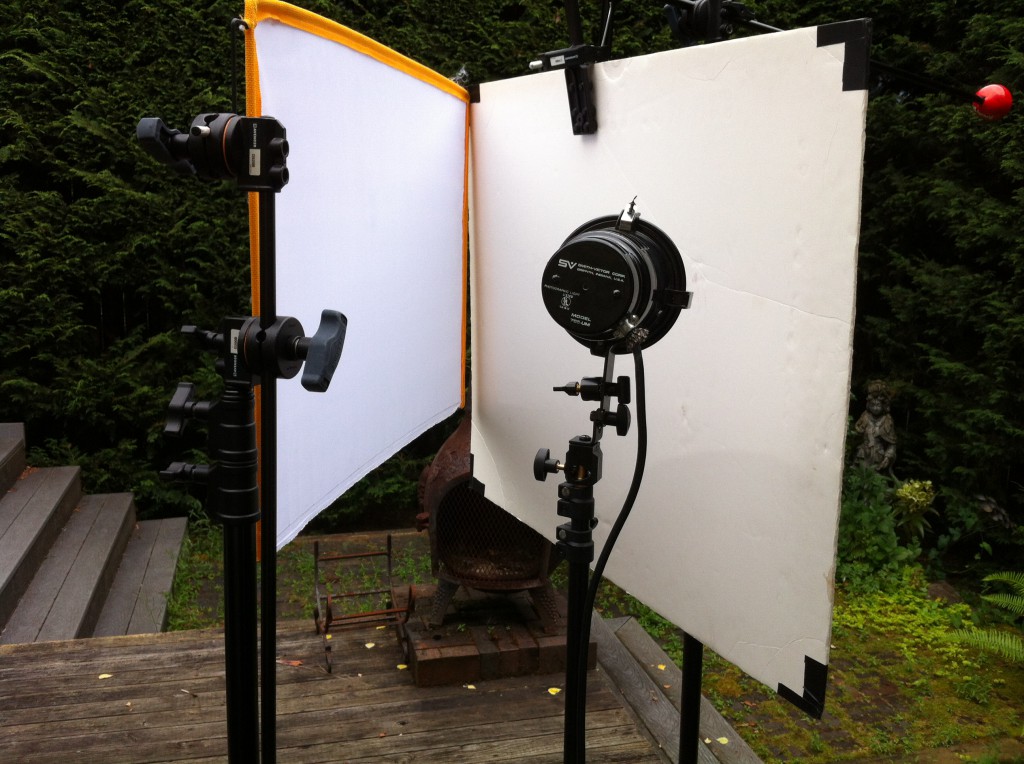
And speaking of books, ever heard of a book light? It’s a staple soft light in the film industry, what gaffers call the “seven-minute drill,” because it can be assembled very quickly. You take a big bounce board, and angle a light into it. Then, you place some diffusion such as a silk in front of the bounce, so that it connects with the bounce at the far end from the light, opening like a book toward the light. Like so:

This book is full of similar tricks from masters like gaffer James Plannette, who recommends improving car scenes by putting pieces of white sheet on the hood of the car to bounce light into actor’s faces. And, he says “it’s good to be shooting toward the south side of the street, so the fronts of the structures are not very bright.”

Robert Elswit offered a great tip that he learned on the set of There Will Be Blood. Because the characters were wearing hats, there was a lot of dark shadows that needed to be filled in. He took sheets of bleached muslin and laid them on the ground. This exaggerated the natural sun light just enough to perfectly light the faces.

What emerges from this book is that much of lighting is basic problem solving using a variety of tools, many of which are within reach of anyone. Reading it has helped me to become more conscious of the light everywhere: morning light, street light, breakfast table light, I notice all of it now.

I recently started a “light journal” which I’m slowly filling with snapshots of interesting light, grabbed with my iPhone. I’m also making screen grabs of nice lighting when I see it in videos and in stills. I plan to use it as a reference, a cook book of sorts that I can refer to when I’m planning shoots.
Better film lighting starts with Omnigraffle iPad app

I’ve tried out a lot of filmmaking apps since I began using an iPad last December. But so far only one has become a fixture on nearly every shoot. And it’s not even specifically a filmmaking app. It’s a $49 business app called Omnigraffle.

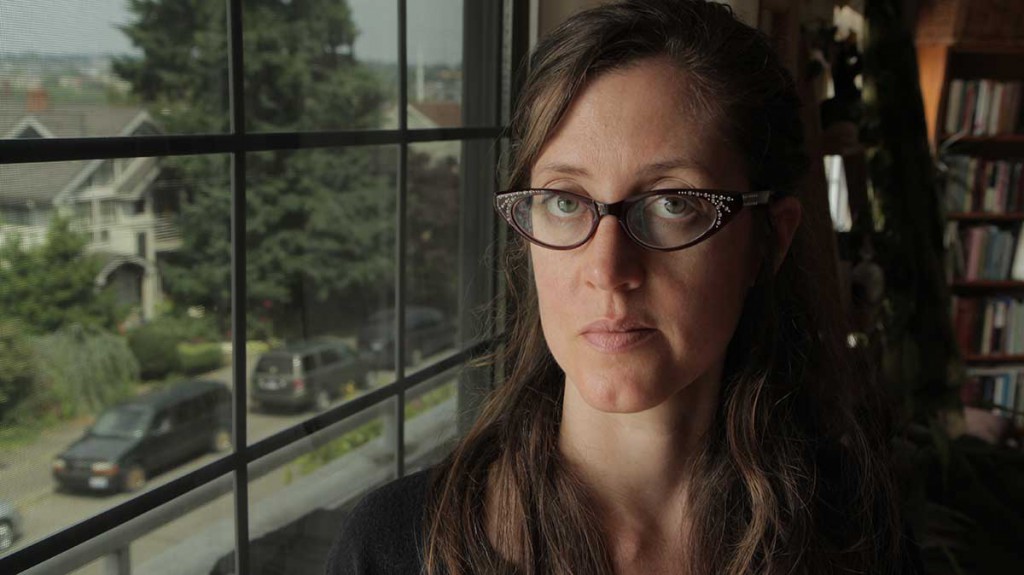
I use Omnigraffle to plan my lighting, even on simple interview setups like this one, which used simply window light. But it’s never as simple as it looks, is it. Here’s the process that works for me.

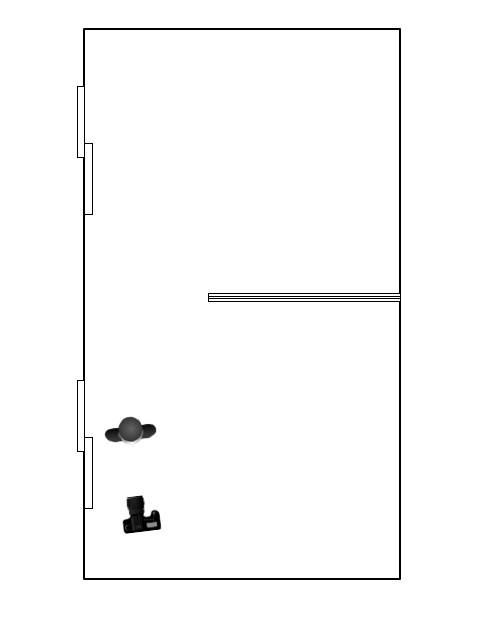
While I’m location scouting, I begin to sketch my plan on the iPad version of the app. It can be very simple, like so:

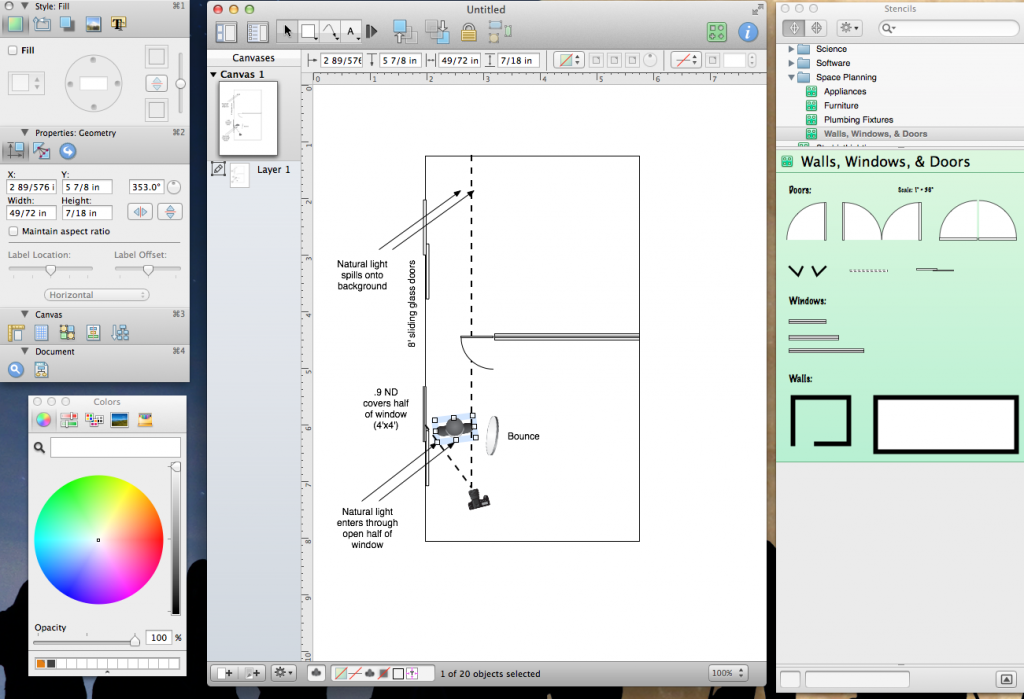
Then, I’ll email the file to myself via the built-in share tool (under Diagrams, press and hold the diagram icon to call it up). Then, I’ll open it with the more powerful desktop version of the app (which costs $99) where I’ll revise and enhance the plan (see below).

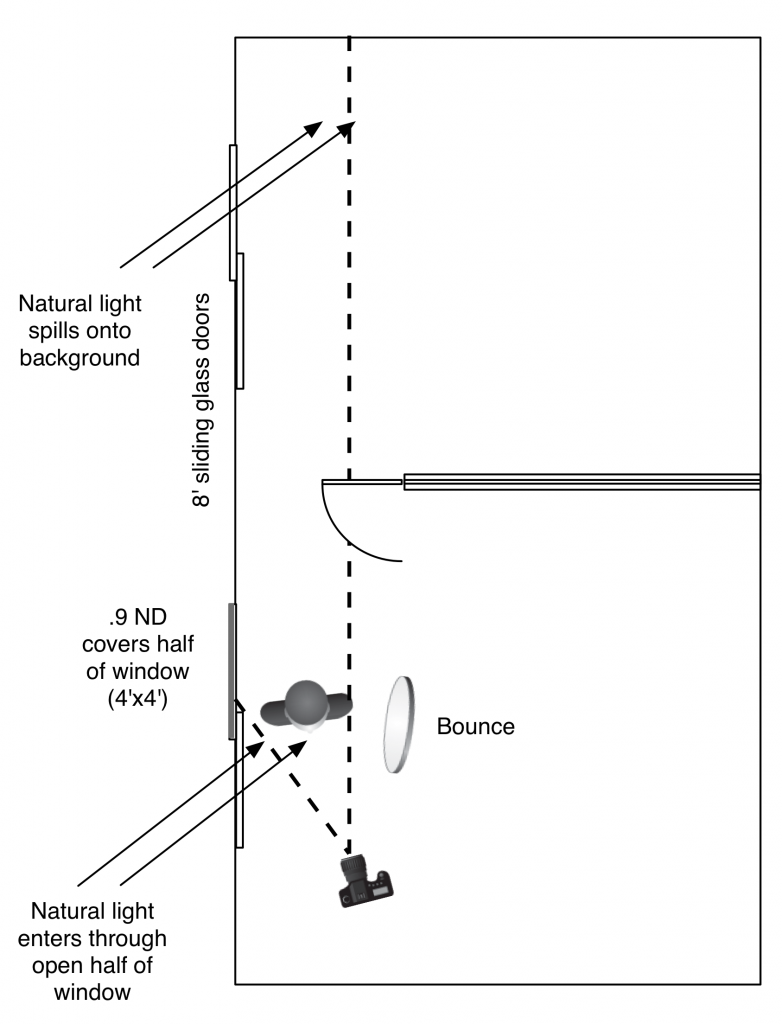
This is a lighting plan so simple that it doesn’t contain any artificial lighting! I used just two things to augment the lighting in this shot: a 4′ wide roll of Lee ND .9 filter gel, and a collapsible reflector disc. Check it out:

The trick to this natural lighting setup is to have a window that is large enough to split in half: one half you allow light to come through, the other half you cut down 3 stops by covering it with the roll of .9 ND gel. Place the subject just at edge of the ND covered portion of the window, so that the full daylight washes over her, but behind her, in the background, the camera sees only through the filtered area. Note that this wouldn’t work if direct sunlight were streaming into the window – in that case, you’d have to place some diffusion over the open side of the window first.

Omnigraffle helps me to previsualize lighting, and it also helps me share the plan with crew.

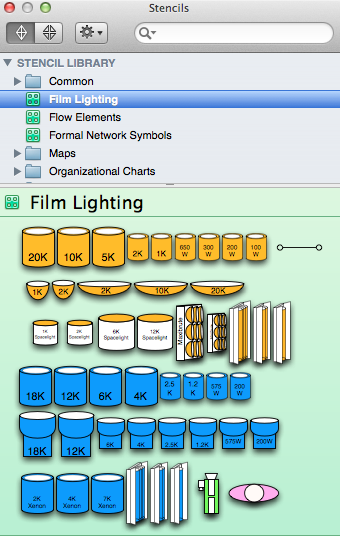
What’s powerful about Omnigraffle is that you don’t have to be an artist to draw complicated diagrams. The app allows you to install free plugins, called Stencils, which contain objects that you can combine to create your plans. You can find dozens of them at graffletopia.com. Check under the Film and TV category to find the most relevant ones. To install, just double click after downloading and they are automatically loaded. Here’s three of my favorites:

1. Film Lighting

2. Strobist Lighting

3. Space Planning > Walls, Windows and Doors (already installed by default).

One bug that I’ve encountered: I can’t begin a file on the desktop app, email it to my iPad, and open it. Every time I try, I get this error:

Is it worth the substantial $150 to buy both apps, when free alternatives are available? For me it is, because the free diagraming apps that I’ve tried have no support for downloadable stencils, which is what makes both versions of Omnigraffle so useful to me. I do think that $49 is a lot to pay for any app. But until something equally capable and more affordable comes along, Omnigraffle is the way to go.

Matthews triple header adds options to c-stand lighting

I love c-stands.They send lights safely soaring into the air with a reassuring heft. But until recently, I’ve basically been using them like big light stands: put light on c-stand; put light modifier (flag, silk, etc) on second c-stand; adjust; repeat. But all of this changed when a helpful Glazers rep suggested I take a look at a Matthews Baby Triple Header.

Here’s how it works. You mount the triple header on the top of the c-stand, and it gives you wings in the form of five 5/8″ jr. spuds: three on top, two underneath. And from these you hang lights and accessories.

At first glance, it might not seem that earthshaking. But it’s so much more than the ability to fly more than one light at a time. What I find most powerful is that I can attach and offset a gobo arm. This simple trick allows me to light and soften with a silk, using the same stand. In practice this means I can use one light with a medium silk, or two lights with a medium silk for extra punch.

With so many spuds, it’s a simple thing to attach more than one arm, too. So using my Road Rags, I can hang two small silks, one in front of each light, to imitate the light cast by two small windows next to each other in a wall.

I’ve got a feeling I’ve only just begun to explore the configurations possible with this accessory. What combinations have you thought of?

In search of the perfect camera cart

A few weeks ago, Lisa and I are heading to a commercial shoot. We’re stressing, because we don’t know what the location is going to look like, and we’ve got just 30 minutes to light everything before the talent arrives. I’m pushing our folding cart across Second Avenue, piled with plastic bins. And I hit a bump. The bins and their contents end up in the middle of the street.

Luckily, we had time to scoop everything up before the light changed. But this embarrassing and potentially dangerous scenario woke us to the reality that we’re either packing too much shit or it’s time to pack it properly. So the hunt began for the perfect cart.

Requirements: It has to fold down to fit in the back of my Nissan Leaf – but have big-assed, bump-taming, curb-mounting wheels. It’s gotta have stays on both sides, to prevent load shifting while in motion. Ideally, it should adjust to fit one or two bins, all the way up to big enough to handle my 50″ golf case, which I use to carry tripod, light stands, and c-stands to shoots.

I started my search online, where I discovered that good carts don’t come cheap. I found a couple amazing ones at filmtools.com, but a thousand bucks is more than I want to spend, and most of their carts look like you could use them to perform surgery on a horse. I need a cart without a horse. I also didn’t like the hand-truck convertible carts – I want a proper cart that’s born to be a cart and nothing but a cart. We spent hours scouring the web for something perfect, and came up empty.

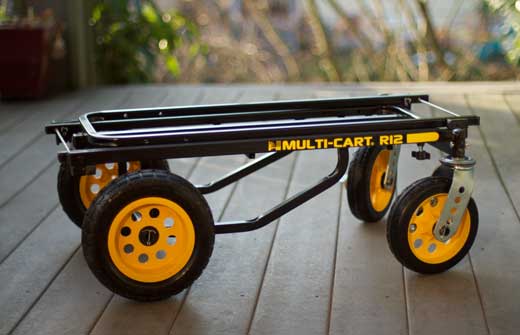
But today I was at Glazers here in Seattle, picking up a part for an upcoming shoot. I see this. “Tell me you sell this,” I said to the sales guy. “Why, yes, in fact, we’ve got a bunch of them in the back. This way.” He led me to back of shop, where a stack of cardboard boxes of varying sizes piled with carts. I didn’t even ask how much until the cashier told me $250. Deal.

So here you have it: the perfect cart. It’s called Multi-Cart, and I got the big one, the R12. They make some smaller ones which look pretty sexy too. But this one? Mine.

As you can see from the wheel detail shot below, there is a small amount of semi-permanent assembly required: you have to bend cotter pins around the axel to attach the wheels, which means you can’t get the cart to lie flatter than 12″ deep. Too bad there isn’t a way to quick-release the wheels, because then the cart would pack down even smaller for transport. It’s also not exactly light weight at just over 30 pounds. But I really like the quick adjustment, and folding uprights. And it’s smoooooooth rolling.

CN-900 LED light: a solid, affordable alternative to LitePanels

Every since I learned about LitePanels a couple years ago from Werner Herzog (who used them shooting Cave of Forgotten Dreams), I’ve wanted to own one. But the price tag approaching $2,000 has been a deterrent. Luckily, a lot of other companies have begun making LED lights over the past couple years, and some relatively inexpensive, quality alternatives have begun to appear on the market.

A couple weeks ago I learned that LitePanels is attempting to create a monopoly on LED lighting for itself, which would ensure that LED video lights sold in America will continue to be overpriced. Seems they own one of those vague, overly broad patents that the patent office hands out like candy nowadays, and they have the money to enforce it (it can cost as much as $5 million to defend against such patent claims, forcing even large corporations like Sony to settle out of court when faced with such action).

What’s intriguing is that the LitePanels cases are being heard in Texas Eastern District Court, which Ira Glass recently reported on in an expose story about patent trolls on This American Life, When Patents Attack.

But I digress. The LitePanels patent case has achieved at least something positive: it’s spurred me to purchase an affordable alternative while they’re still available. I recently purchased the CN-900 LED light, which is available on Amazon for about $450, after watching this review. I’ve had an opportunity to use the light on a project, so I’d like to add my observations.

The conference trailer I just finished for the upcoming Seattle Interactive Conference was a great opportunity for me to try out the CN-900 LED light. We shot 6 interviews with VIPs on tight schedules, making it essential that we set up quickly to get the job done. We asked for 20 minutes to set up our lights, 20 minutes for the interview, and did our best to stick to that. The easy transport and fast setup time of the CN-900 light was a big part of how we stayed on time and made the interviews look good.

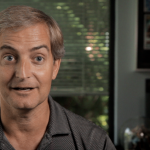
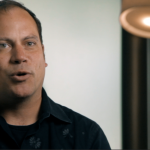
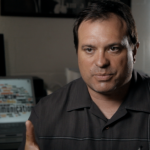
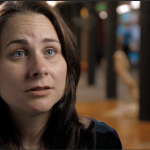
Here’s a frame grab from each interview (key light was CN-900 in all cases):

Key observations about this light:

  • It has a serious green cast, which is easily removed by using the included minus green diffusion, or by using 1/2 minus green gel
  • It has a CRI of 75, which at first glance might seem to be too low for professional use. The low CRI is the biggest downside of the light in comparison with the LitePanels, which advertise a CRI of 90. But the fact is, without a side-by-side comparison, I’m hard pressed to say these images don’t look great. The color correct easily and are easy to balance with other daylight sources at 5400K native balance.
  • If balancing for tungsten, the included orange diffusion filter is too yellow and is useless. Use a CTO gel instead, and be sure to add 1/2 minus green to remove the aforementioned green cast
  • The frame is totally solid, made out of metal, not plastic, and it’s just as thin as LitePanels

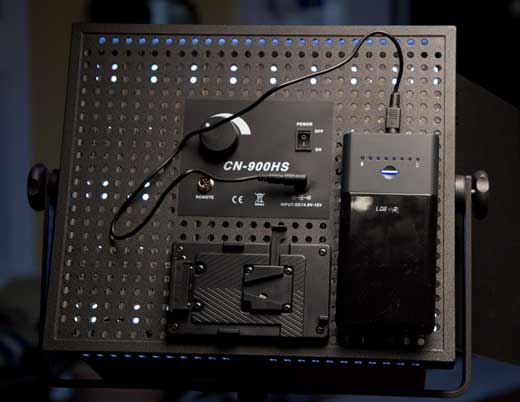
As reported elsewhere, the AC power cable is a real design flaw, because the weight of the DC converter hangs and puts stress on the connector when the light is on a stand. The solution is low tech and simple: form a loop out of the cable about 6 inches from the tip, and fasten with gaff tape. Then, hang the loop on one of the stand’s knobs, relieving pressure from the connector. See photo below:

What’s great about the CN-900 is that it can be battery powered – by the same Tekkeon myPower ALL Plus MP3450i Battery (5-19V) that I use to power my audio bag. Yes, the CN-900 comes with a Sony V-mount plate, but V-mount batteries are twice the price. The Tekkeon is just under $140. And I’ve discovered a few tricks about how to get the most from it.

Use velcro strips to attach the battery to the back of the light. Be sure to set the correct dip switch voltage (15 volts for the CN-900 LED) before powering up your unit.

If you power the CN-900 at full blast, it will run for just under 30 minutes on a full charge (27-29 minutes in my tests). Then the light will abruptly shut off, going from full power to nothing without any dimming beforehand. But what’s intriguing is that the battery shows half to 1/3 power remaining at this point. It seems that powering at full power for half an hour causes the battery to overheat, triggering the shutdown, even though there is quite a bit of juice left. After letting the battery cool for a minute, I was able to switch the light back on at half power, and it ran for an additional 40 minutes. So as long as you don’t need full power, you can get a lot of time out of this battery. It takes 3.5 hours to recharge the Tekkeon.

Update: Traveling with CN-900 LED lights

Update: V-mount battery powers CN-900 for more than an hour

Update: How to color match a pair of CN-900 LED lights

Major Drobo problem and speedy replacement from Data Robotics

Just when I thought it was safe to edit on my Drobo Pro…it up and dies on me. Weird things began happening not long after I connected the unit to my new iMac. As I was copying huge amounts of data using Final Cut X (which I was using to create proxy media of my entire film footage), Final Cut would sometimes freeze. Then the system would freeze, and I had to force-reboot more than once. With all the badmouthing Final Cut X has been getting, it was tempting for me to pile on and blame that.

But i had a sense that the Drobo was the culprit. Yesterday morning the fan on the unit went crazy, with all the red and blue lights on at the save time. The fan was on top speed, and would periodically go dark as if it were trying to restart. But it was stuck in an endless boot up loop.

I didn’t shell out the extra money for DroboCare, so I was stuck sending an email to tech support on a holiday. To my surprise, someone answered within an hour. Within a couple of email exchanges, they determined that the problem was fatal, and they would RMA me a new one. I’m grateful for that much, because I purchased mine 16 months ago – so it’s four months past the 1-year warranty that Drobo extends to US customers (EU customers get 2 years).

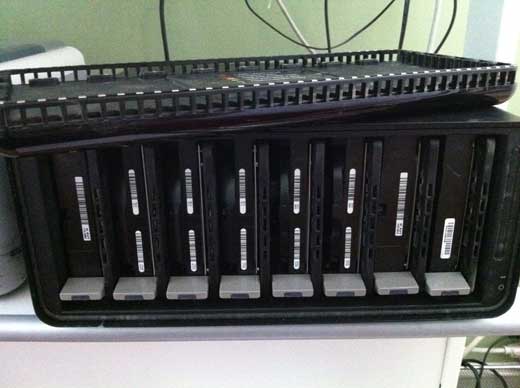
This morning they notified me that a new unit is on the way and will arrive Thursday via FedEx. I’m crossing my fingers that this one will work, and that all my data will be safe despite the unsafe shutdown it must have suffered when it went down. The nice thing about Drobo is that you can pull out all the old disks (what Drobo calls a “disk pack”) and insert them into the new box (with power off) and turn it on, and it should recognize everything as before. Wish me luck.

**UPDATE** My replacement Drobo Pro arrived within 48 hours. I followed the instructions: with both devices powered off, remove the media from the old drobo, and load it into the new drobo (disk order doesn’t matter, they say – but I put them back in the same order because I guess I’m superstitious that way). Then I stood back, and hit the power switch. Wait for it, wait for it…it works! All my data is safe, and the new Drobo is humming along nicely. I’ve copied several terabytes of data so far (yes, backing up my data to another set of external hard drives), and no problems. Average data transfer with iscsi seems to be somewhere around 60 Mbps, as measured by AJA System Test disk whack tool. My plan now is to try cutting my film on Drobo Pro, but when I can afford it to use Drobo Pro as backup and edit on a Thunderbolt RAID.

Drobo Pro actually can work for video editing – with the right machine

When I bought a Drobo Pro more than a year ago, I thought it was going to be the perfect solution to storing big files and editing them. With the Drobo Pro’s iscsi gigabit ethernet connector, it should be as fast as esata, which is plenty fast for editing HD video. But it didn’t end up so rosey: when I connected my 3-year-old MacBook Pro, iscsi never worked as advertised. In fact, it was slower than Firewire 800. Repeated support tickets were incapable of resolving the issue. So I was stuck using it as an archival storage server, rather than for editing on directly.

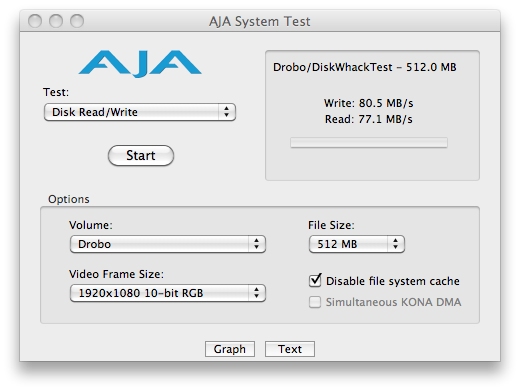
But yesterday, things changed. In preparation to cut my first feature film, I’ve purchased an iMac 27″ fully loaded war pony. And the thought occurred to me, as I saddled her up, to give Drobo iscsi one last chance. So I cabled it up, and boom, it works. Look at these numbers!

80 MB/s write times! 77 MB/s read times! It’s my editing dream come true. Well, actually, it’s what Drobo advertised when I bought the thing, but I’d come to expect much less from the company. I still wouldn’t recommend purchasing a Drobo Pro, because who knows whether it’ll work with YOUR machine. But today, at least, I am one happy boy, as I contemplate more than 3 terabytes of film and audio that I’ll be scrubbing, tagging, cutting, previewing, and rendering into a film without any storage bottlenecks.

And as for the iMac? Oh. My. God. It’s amazing. But that’s another post.

My first date with Final Cut Pro X

Ever since I heard that Apple was about to release a radically new version of Final Cut, I’ve had it in my head to cut my film Beyond Naked with it. And fate agreed: it was released on the same day that principal photography on my film ended. So today I sat down with FCPX to get acquainted.

The experts say you should take these things slowly. Cutting a feature film on a brand new Apple product is a bit like getting married after a single date. But I’m a confirmed early adopter, an Apple fan, and a bit of a romantic. So I’m going for it. I’ll let you know how it goes.

My first impression was to scratch my head. The interface is different. Really different. I had to spend about three hours with it before the lights began to blink on. But once they did, I can see why the new version is going to be killer. In descending order, here’s what blows me away:

1. Storyline vs. Timeline. The old timeline is history, replaced by a single “storyline” that everything magically drops into and stays connected with. No more keeping track of layers and layers of stuff: it’s all on the same line! Now, to layer something above or below the main clip, you do something called a Connect edit. That joins the clip you’re adding to the storyline. Do a couple of these and you’ll wonder how you ever did it the old way.

2. Audio sync: ahhhh, so easy to connect zoom audio with dslr reference audio for individual clips. And just as easy to drop out the reference and bring up the zoom audio, or to mix them together. But so far I don’t see a way to sync multiple clips at the same time, as you can with pluraleyes.

3. Events and metadata: In the old Final Cut, it was possible to log everything, put in notes about takes, label them, etc. But I never did any of that. Did you? Well, on this new version you will. Some of it’s done automatically for you, like recognizing what type of shot you’ve got, how many people are in it, and more. And tagging is a snap, and it’s so heavily incorporated into the interface that you find yourself wanting to tag everything. You can even tag a section of a clip, which creates something like a subclip.

I’ll have more to report as I get deeper into it. But after the first date, I’m confident this is going to be a love story.

Best DSLR shoulder rig for under $500

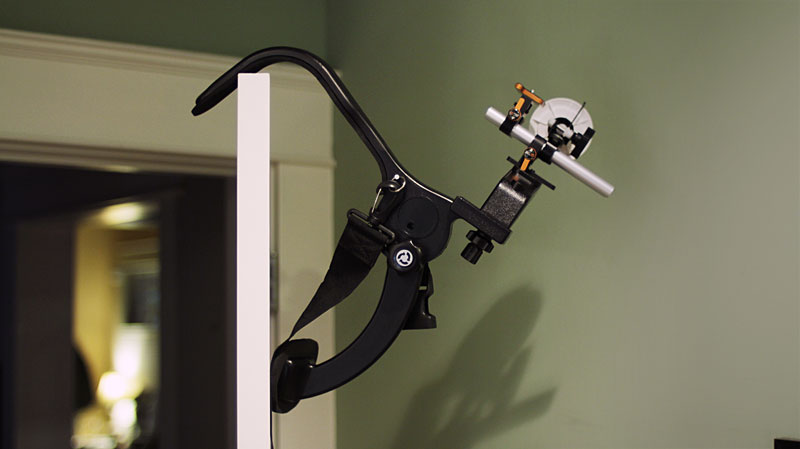
For nearly two years, I’ve searched in vain for a DSLR shoulder rig that does what I want it to do, at a price I’m willing to pay. But last week, I finally cracked the code. After taking a look at Ikan corp’s new Recoil XT shoulder rig (and realizing it was ergonomically and technically NOT the rig for me), I got the idea to combine affordable components from Jag-35 with an inexpensive shoulder stock that Philip Bloom once raved about from DotLine Corp. And the result is, for the first time ever, I’ve got exactly what I want. An affordable shoulder rig that:

1. Is balanced – I can completely let go with my hands without the rig falling over.
2. Is light as possible – no shoulder-numbing counter balance weights need to be added.
3. Includes follow focus for smooth cinematic focusing on the fly.
4. Is ergonomic – Z-finder is positioned in front of my right eye; I can comfortably use rig for longer than a few minutes.
5. Can be quickly reconfigured – camera can quick-release for use on tripod.

OK here’s the component parts, and how much each costs:

From Jag-35:

$59.99 DSLR tripod plate
allows mounting to stock and attachment of rails

$139.99 Quick Release Gorilla Stand attaches to rails allowing Zacuto Gorilla plate to quick-release camera on and off

$65.00 Zacuto 15mm rods 6.5″

$189.99 D|Focus follow focus V3

From B&H:

$69.95 Dot Line DL-0370 Hands-free video stabilizer

Total cost: $524.92 (see update below for how to shave almost $40, bringing total cost under $500)
Total weight: 2.5 pounds, including strap

*Also needed are the Zacuto Z-finder, mounting frame, and gorilla plate. But I won’t count that in the cost of the rig, since it’s really a separate bit of mandatory kit.

You might think that it would be hard to breathe while holding still a rig that rests partially on your lower chest, but it’s not that bad. The camera will move slightly every time you take a breath, but it’s easy to adjust your breathing pattern slightly for maximum stability (it simply involves being mindful not to push out your chest when inhaling – it’s easy to expand lungs down and sideways instead).

I was worried that the $69 stock would be cheap plastic, and it remains for me to use it awhile before the verdict is fully in. But it feels very solid. And as far as the Jag-35 components go, I’ve been very satisfied with the quality of their gear. It’s not top-of-line stuff, but it’s solid and dependable and simple, and a fraction of the price of competitors like Zacuto. That’s a winning combination for me every time.

UPDATE: Incredibly, I just found an apparently identical version of the $69 stock listed on Cowboy Studio via Amazon for $29.95. How’s that for a deal? Brings the total cost of this rig down to under $500. Sweet.

Fix clipped audio recordings with iZotope RX2 declipper

If you’ve been reading the same audio books as me, you’ll know that the cardinal sin of digital audio is recording too hot. You NEVER want signal above 0 db. Once that happens, you might as well throw the whole thing out and reshoot. Or so the experts say.

But this weekend I messed up. I wired a lav to a Zoom H1, planted it on my subject, took a guess at the recording levels, hit record and let it roll for 8 hours (until the batteries died – it was a long day). Later in post, I synced everything I’d shot during the day with PluralEyes. Piece of cake…except that my subject was in and out of cars, working crowds, basking in applause, oh, and he happens to be Italian, no stranger to high-spl outbursts when cute girls are nearby. Every time one of those things happened, I got clipped audio. Next time, I’ll remember to set the audio levels REALLY REALLY LOW. But what about THIS time?

I looked up audio clipping on Wikipedia, and breathed a sigh of relief when I read this: “It is preferable to avoid clipping, but if a recording has clipped, and cannot be re-recorded, repair is an option. The goal of repair is to make up a plausible replacement for the clipped part of the signal.” Wikipedia even pointed to a couple of tools. But none of them worked for me.

I figured somebody had to have an app for this. And I was right. After some digging on Google, I discovered an an audio repair app called iZotope RX. Their video is a great overview of how it works:

After trying out the demo version for 30 minutes, I was happily forking over my credit card number for the $250. Yep, it’s really that good. And a snap to use. It comes with a whole suite of other audio repair tools, such as a de-crackler, de-hisser, and de-noiser. And best of all, they work as plug-ins with Soundtrack Pro, so I can stay inside my favorite tool to use them.

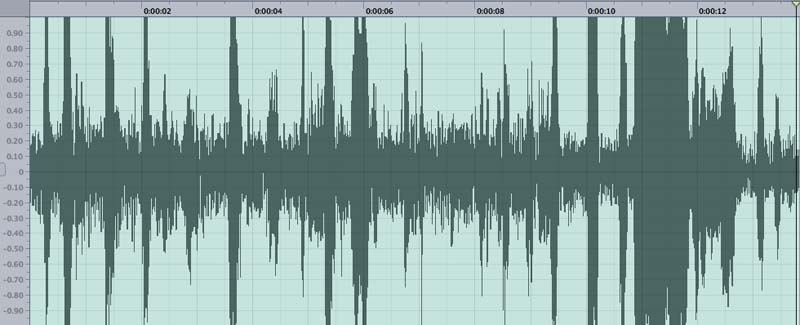
Here’s what my audio looked like in Soundtrack Pro BEFORE iZotope:

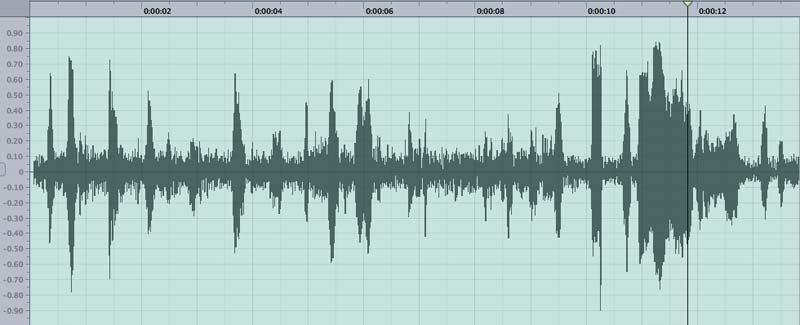
And here’s what it looked like AFTER iZotope RX de-clipper:

Have a listen to the difference yourself:

Before

After

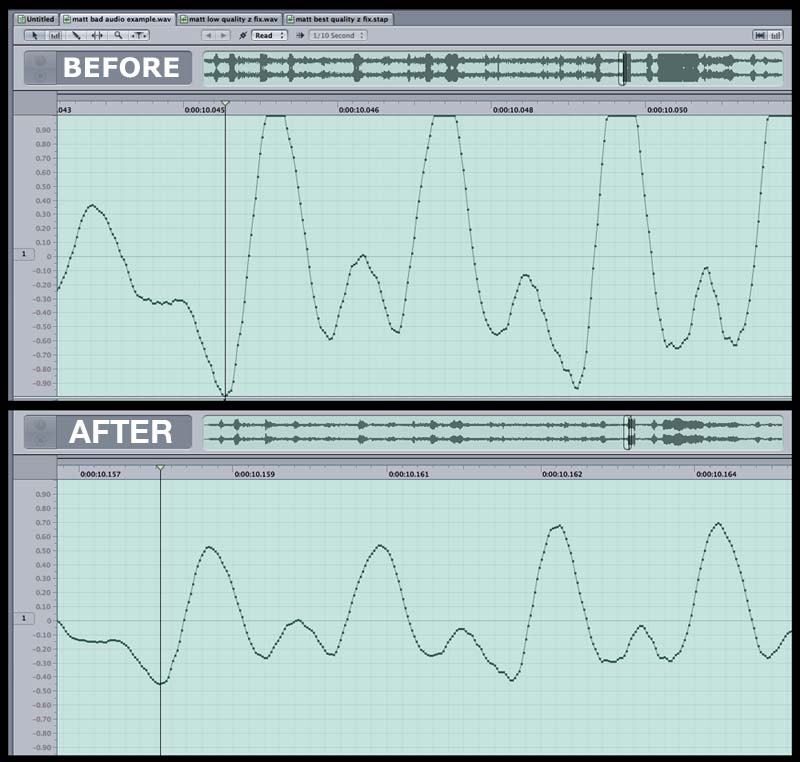
And finally, here’s a peek at what iZotope does to the individual waveforms: it actually creates data where none exists, presumably based on a careful analysis of what other nearby good peaks sound like. Whatever. I’m with Arther C. Clarke, who in 1961 said: “Any sufficiently advanced technology is indistinguishable from magic.”