Category Archives: Tips

3 location scouting tips for shooting better interviews

For making films, my background in photojournalism turns out to be both a blessing and a curse. On the plus side, I know plenty about cameras, optics, and how to compose a shot. But photojournalism is a reactive game. A photojournalist’s instincts are to show what she sees rather than what she imagines. This is a huge skill: the ability to react almost instantly, to maneuver the camera into the best place to capture the defining moment as it happens.

But making films, I’ve discovered that approach rarely works. There are just too many variables coming up at once that you have to be on top of: sound, light, motion, schedule pressures, crew questions, etc. To find my footing in this related but very different terrain, I’ve had to learn to be proactive. Even for a basic filmmaking task like shooting an interview.

What I’ve discovered is that the simplest and best way to get better interviews is to scout every shooting location. Yeah, I know, probably not news to anyone who’s attended film school. Or like my partner Lisa Cooper, who knew this instinctively. But for me it’s a hard-won lesson. So…

Here’s what works for me:

1. Visit location at least a day in advance of a shoot.
2. Take stills at the location.
3. Review stills, and make a lighting plan.

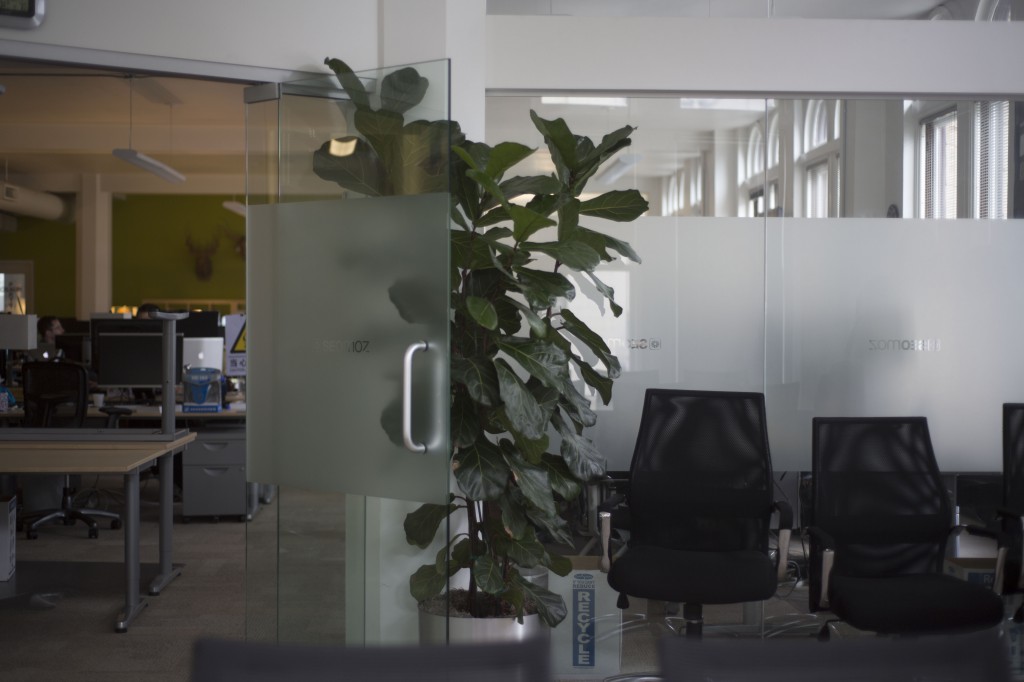
What happens for me when I walk through a location without the immediate pressure of shooting is awesome. Curiosity becomes my guide. Without the pressure to start shooting in 20 minutes, I see things I wouldn’t otherwise see: a frosted glass window suggests possibilities as a background, for example. But what about that open doorway? Sound might be a problem here…so how about the conference room?

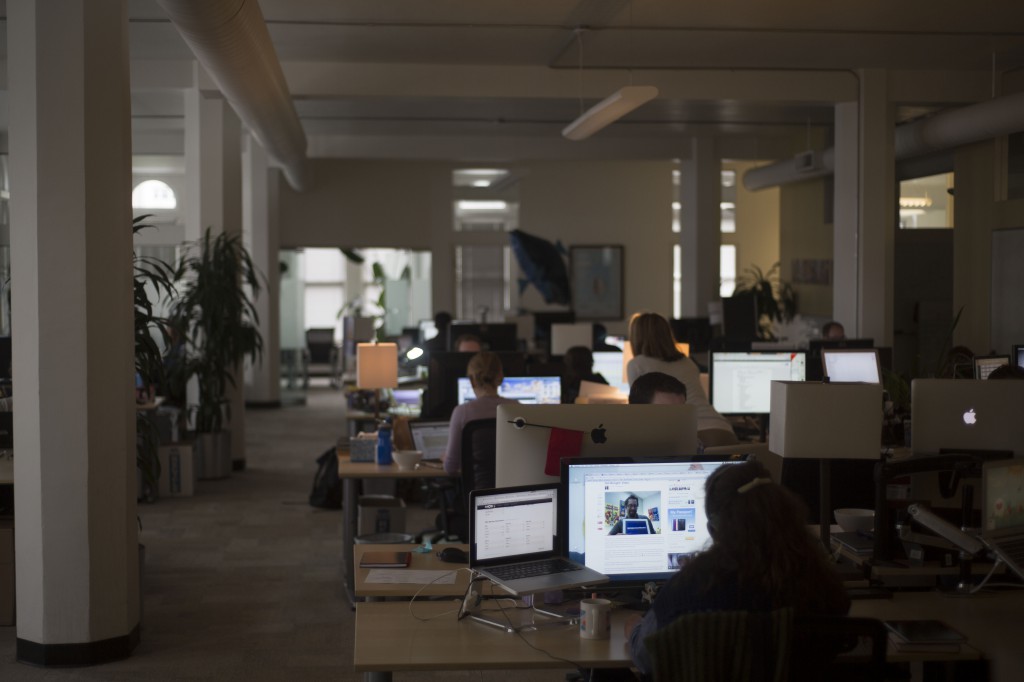
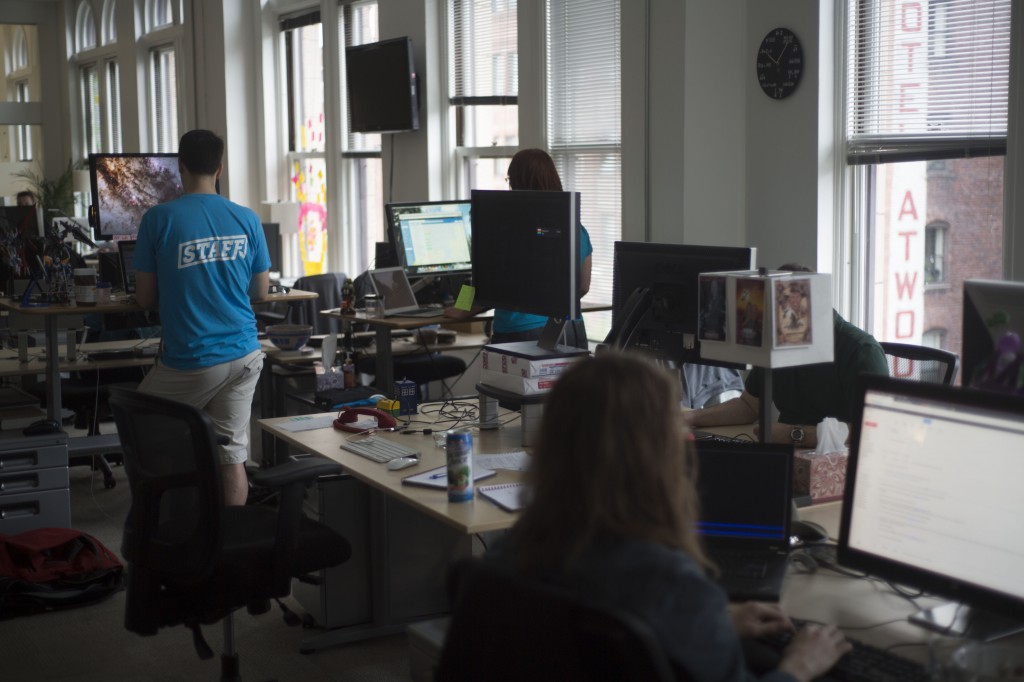
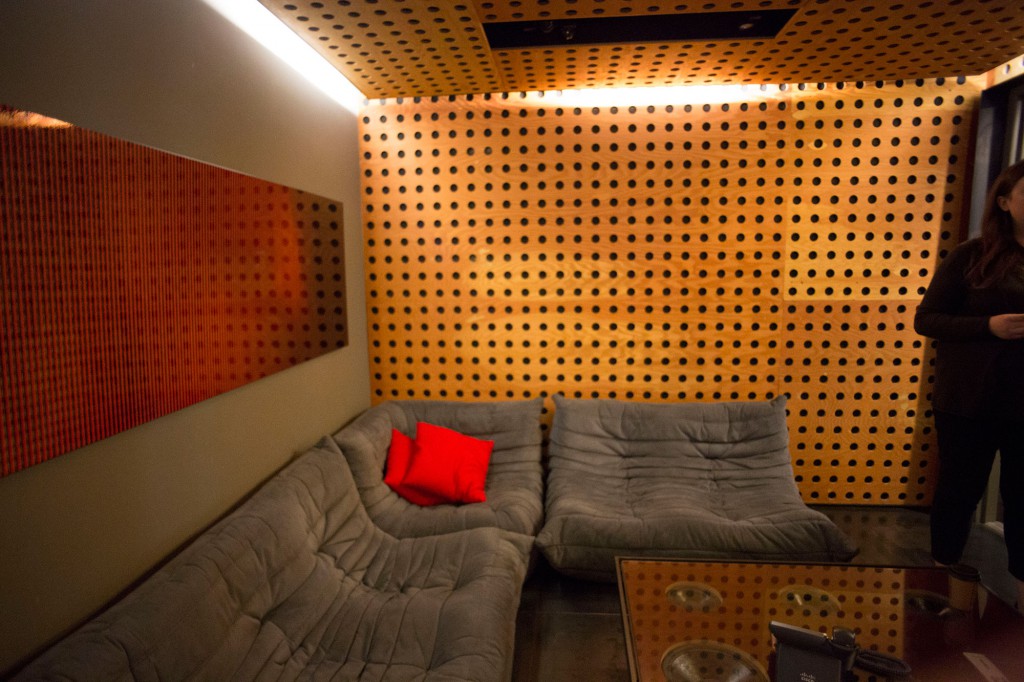
Here’s some shots I took on a recent walkthrough of an office space where we would be shooting two interviews:

As I visit the space, I take pictures. Lots of pictures. I explore every possible interview room from multiple angles. Even if I don’t think a room is going to work, I take pictures. And what often happens is that when I’m reviewing the shots later, the idea comes to me. Hits me right between the eyes, actually.

An iPhone is ok if you don’t have anything else, but I’ve found that shooting stills with my DSLR is much better. Sometimes background details will provide clues to how best to frame the interview. With the DSLR, I’m able to blow them up and see the detail.

In the case above, my walkthrough began with shots of the employees open office space, and ended up in a conference room that had some frosted glass panes. It was possible to close the blinds on all outside windows. Initially I thought I wanted to do something with window light, possibly with the subject framed in the open doorway so we could see some out-of-focus workers in the background.

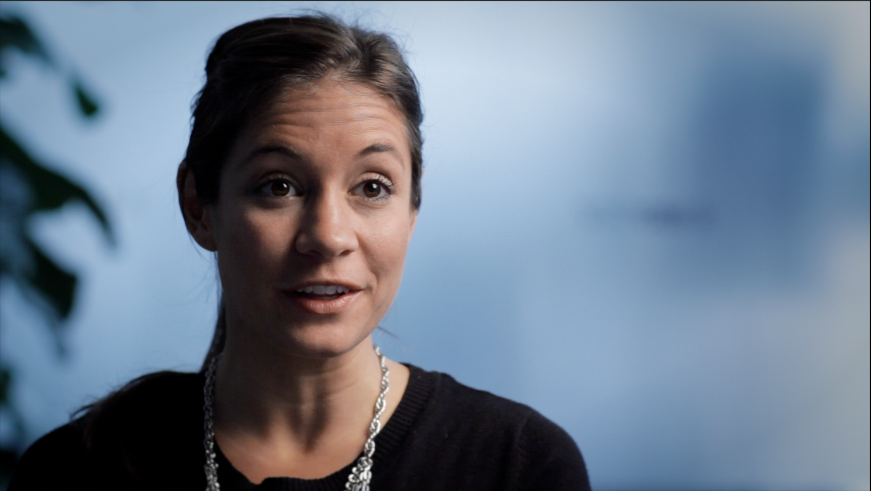
Later, when I was reviewing the photos, it occurred to me that the better way to do it was to use the frosted glass as a background, because the topic of the piece was about transparency in business practices. Even though the glass is opaque, the idea of transparency (or lack thereof) is at least hinted at. Here’s what the final interview, which was shot in the conference room, looked like:

Having this plan allowed me to mentally prepare to shoot the second interview, so that it would also match visually. For scheduling reasons, this second interview had to be shot in a totally different location at the same business, a small interior room without any windows. Lucily, however, it had one frosted glass wall, which faced a hallway. To recreate the daylight filtering through glass, I simply placed a daylight-balanced LED light outside and aimed it into the glass. It ended up matching pretty well:

I don’t know if I would have been able to come up with this approach on the spot. But because I had time to plan, I had figured out how to do this in advance, which made for a much more relaxed shoot day.

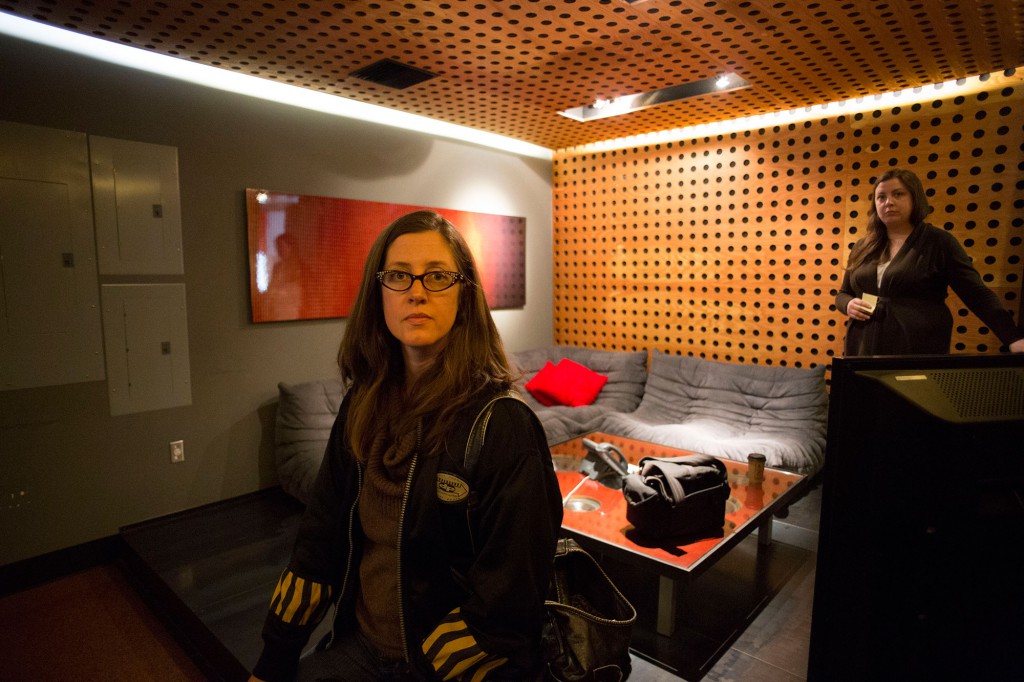
Another office location that we visited recently presented similar challenges. We walked through a busy office space and found a quiet editing bay, which caught my eye because of the interesting circular patterns. I had Lisa sit in approximately the place where I imagined setting up a soft box to light the subject.

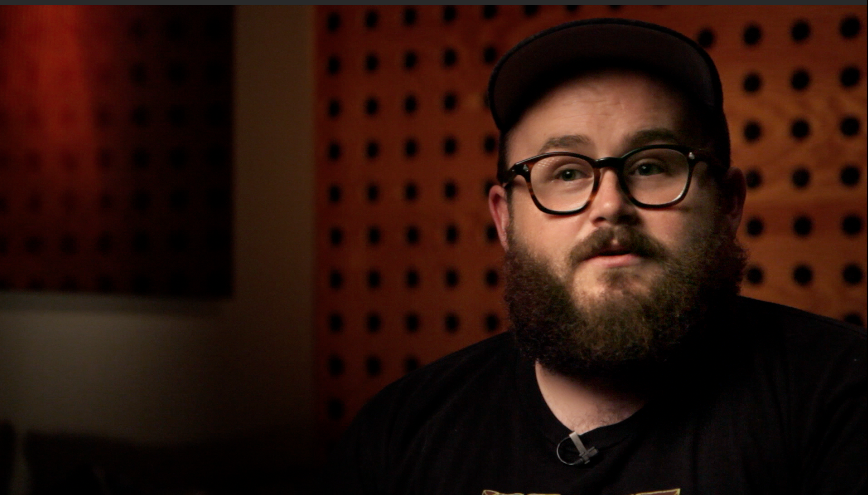
We ultimately shot two interviews in the space, changing them slightly to get each subject on opposite sides of the frame:

In my next post, I share how I use my two favorite iPad tools to make and share my lighting plans: Omnigraffle, and Lighting Designer.

Update: Here’s the post about using Omnigraffle as a tool for planning your lighting.

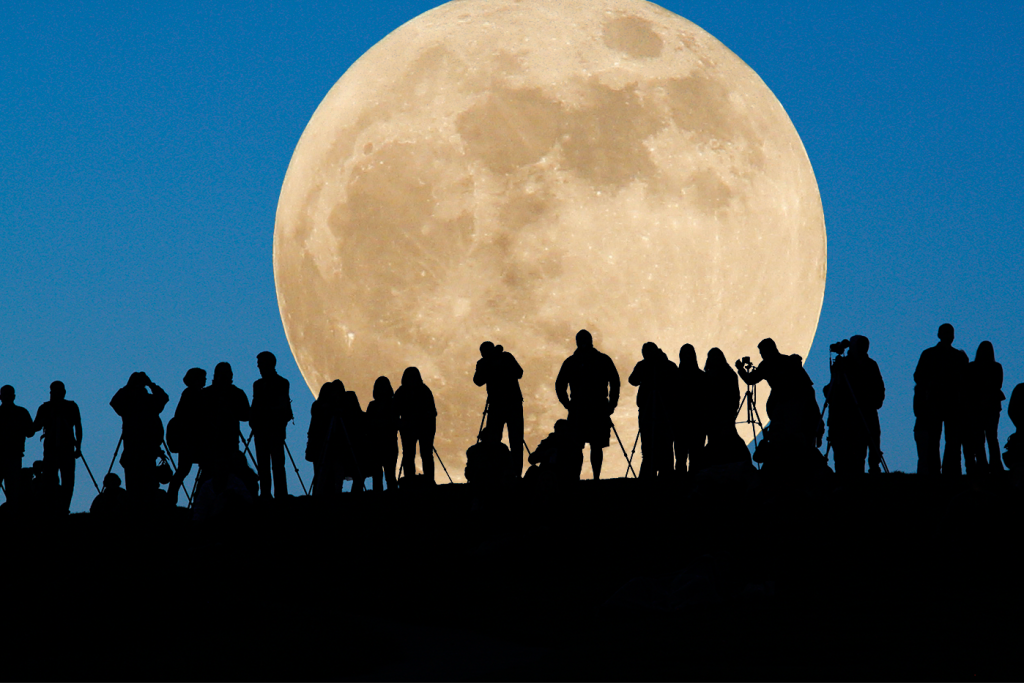
Shooting the Moon: combine two shots for one dramatic photo

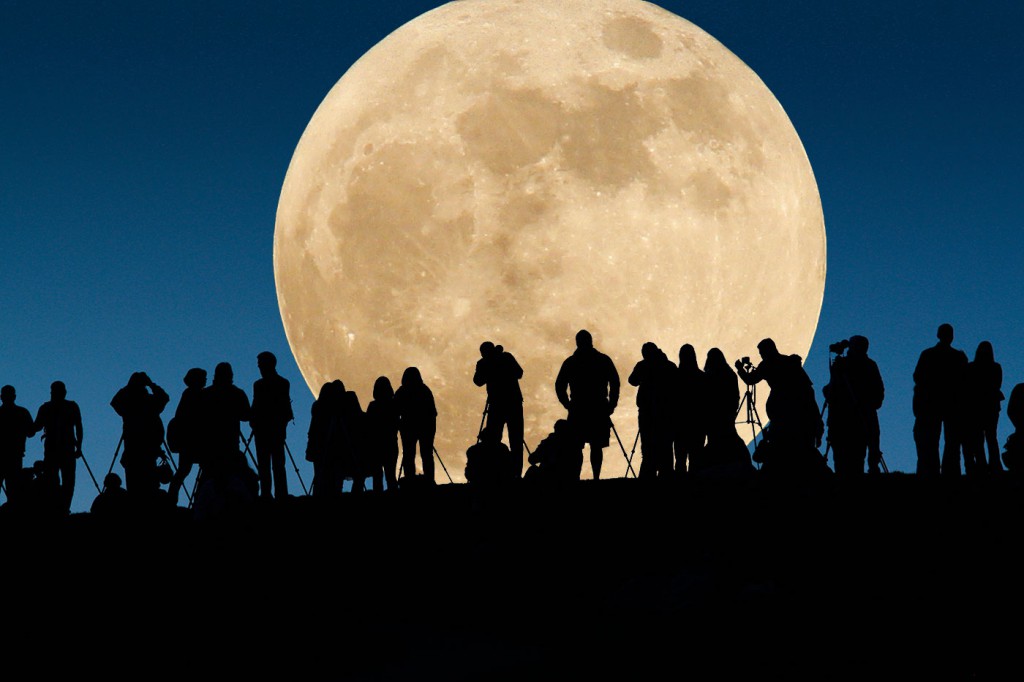
Last night’s Super Moon brought the moon close enough to Earth for NASA to call it 14 percent larger and 30 percent brighter. That was enough to send dozens of people, including me, scrambling for a place to stand to observe the rare spectacle. I headed to Seattle’s Gas Works Park, thinking I’d shoot a timelapse of the action from atop Kite Hill.

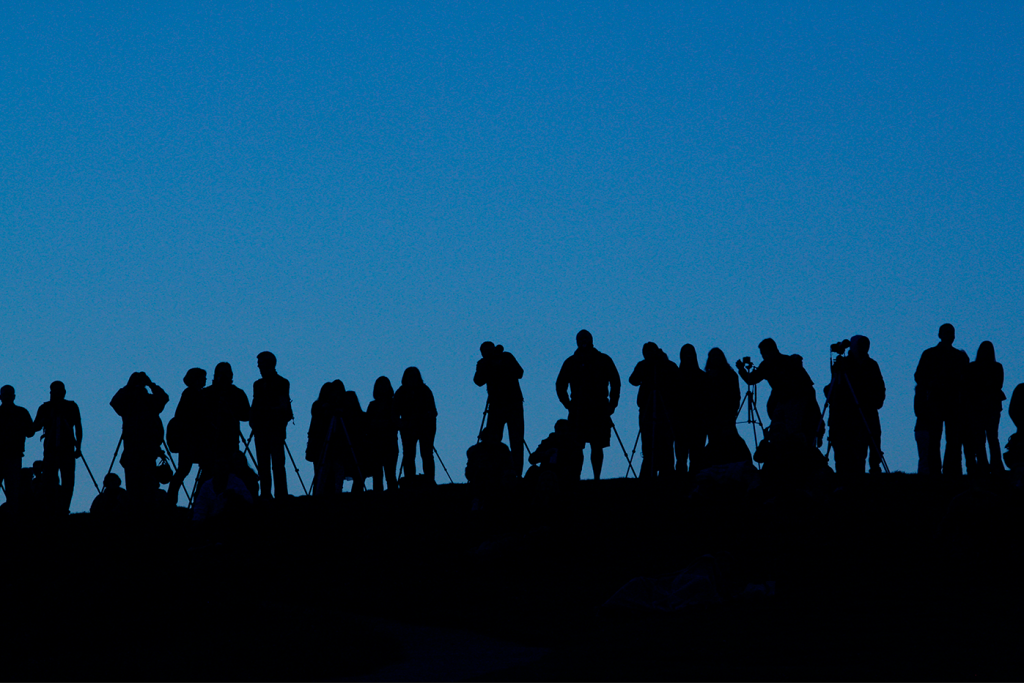
But when I arrived, I discovered the hill was already packed with moon seekers. So I set up my tripod from a more humble vantage, halfway down the hill, next to a couple of other late arrivals. Sometimes it pays to be late! Just before the moon appeared, the guy next to me said “I’m sure the moon’s going to be great and all, but I think the better photograph is that way,” pointing behind us. I turned around and saw this:

A nice shot, for sure. But with a little room for improvement.

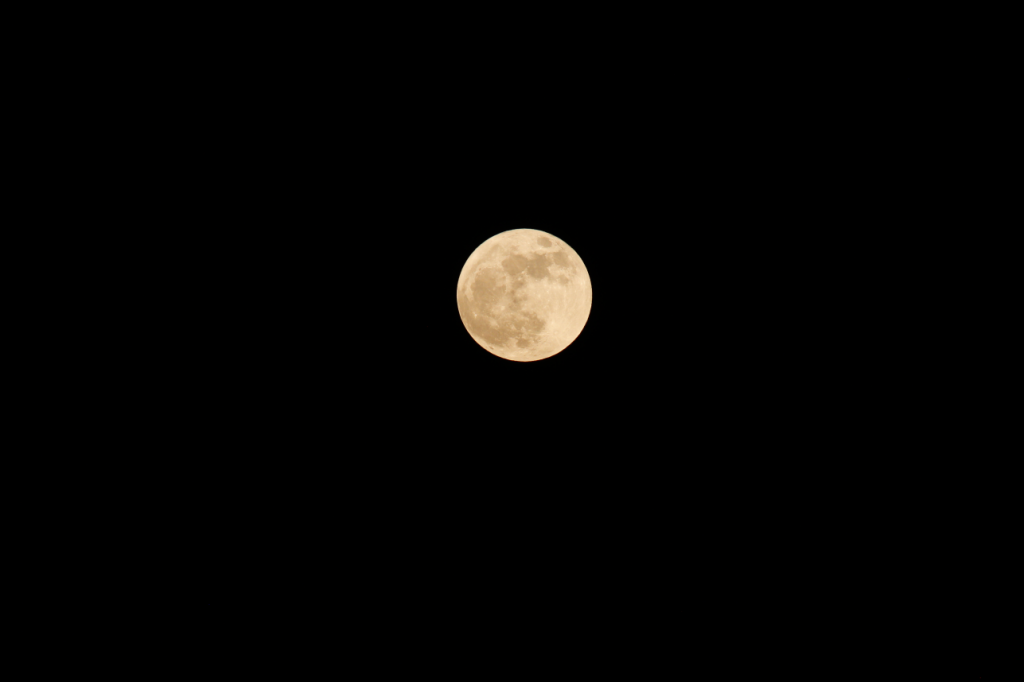
After the moon came up a few minutes later, I shot this frame with a 300mm Nikkor f/4. This is the uncropped version, just as it appeared through my camera’s viewfinder.

After the excitement of watching the moonrise was over, I went home, and imported my two shots into the Beta version of Photoshop CS6 that I recently downloaded from Adobe. My timelapse, incidentally, didn’t turn out at all. But I saw a lot of potential in these two frames. Here’s what I did to bring the magic together:

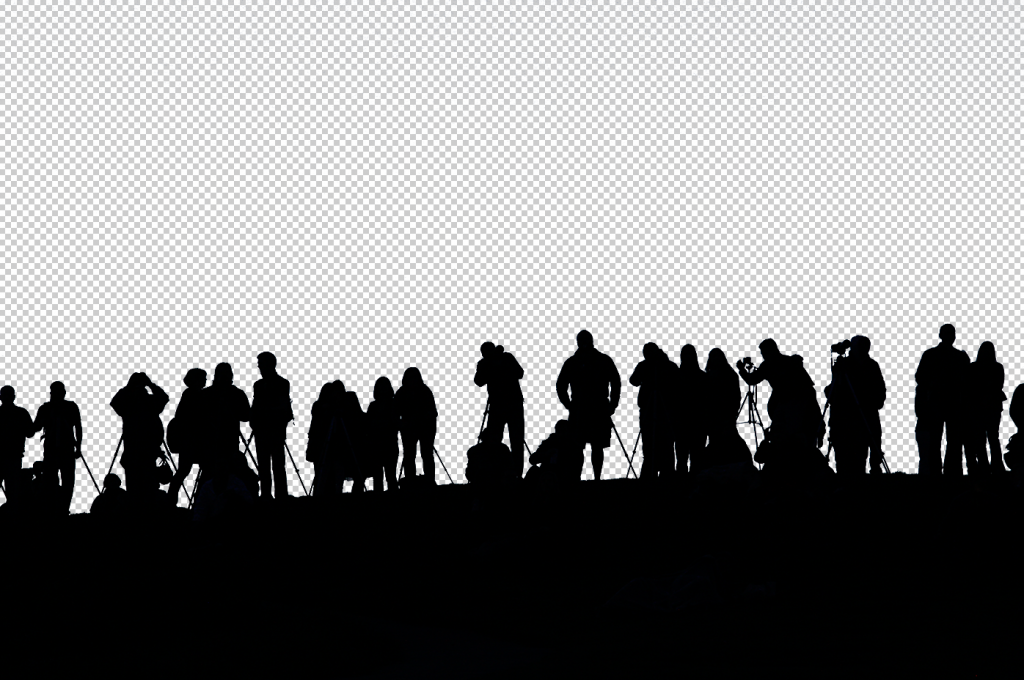
1. Rather than blow up the moon to appear larger in the frame, I started by down-sampling the people shot. It was destined for the web, so it didn’t need to be high resolution. I chose 1400 pixels wide. Using selective color, I made a selection of all the blue sky. The I pressed command-shift-i to select the inverse (the people), and commend-j to create a new layer with the selection. Here’s what it looked like:

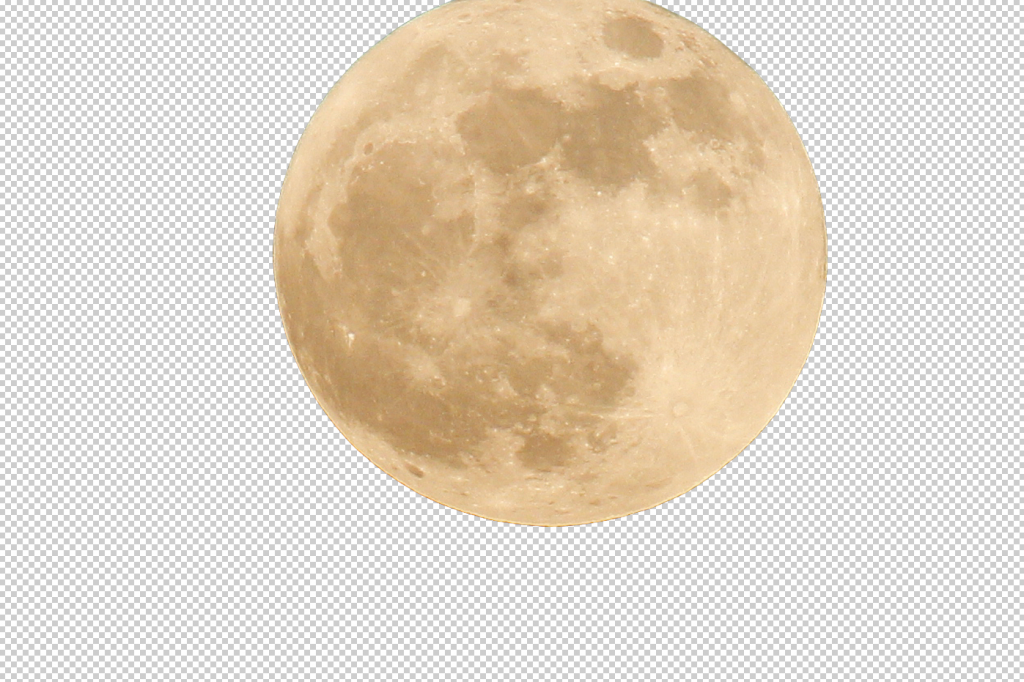
2. Next I opened the moon, which was easy to get on it’s own layer similarly, by using selective color to drop out the dark sky, and after a little refine edge work, it looked like this:

3. I placed them together, on separate layers, with the moon behind, to get this:

4. I had saved a copy of the original shot of the hill on it’s own layer, all the way in the background. Turning it on makes things looks like this:

5. Something didn’t look quite real about this. With normal lenses, the evening sky typically appears darker toward the edges of the frame, and that was missing from my original shot of the skyline, because it was shot with a longish 105mm lens. To get that feeling back, I needed to add a gradient. This took a little playing around – I tried several kinds of gradients, and ultimately settled for a standard black, white gradient, at 58 percent opacity, using “multiply” as the layer blending mode (which darkens only). Here’s how it looked, along with the settings I used in the layer:

6. Turning all the layers on reveals the finished shot: a whole bunch of photographers gathered to shoot one super big moon. Enjoy!

V-mount battery powers CN-900 for more than an hour

Today I will sing the joys of using an untethered LED light.

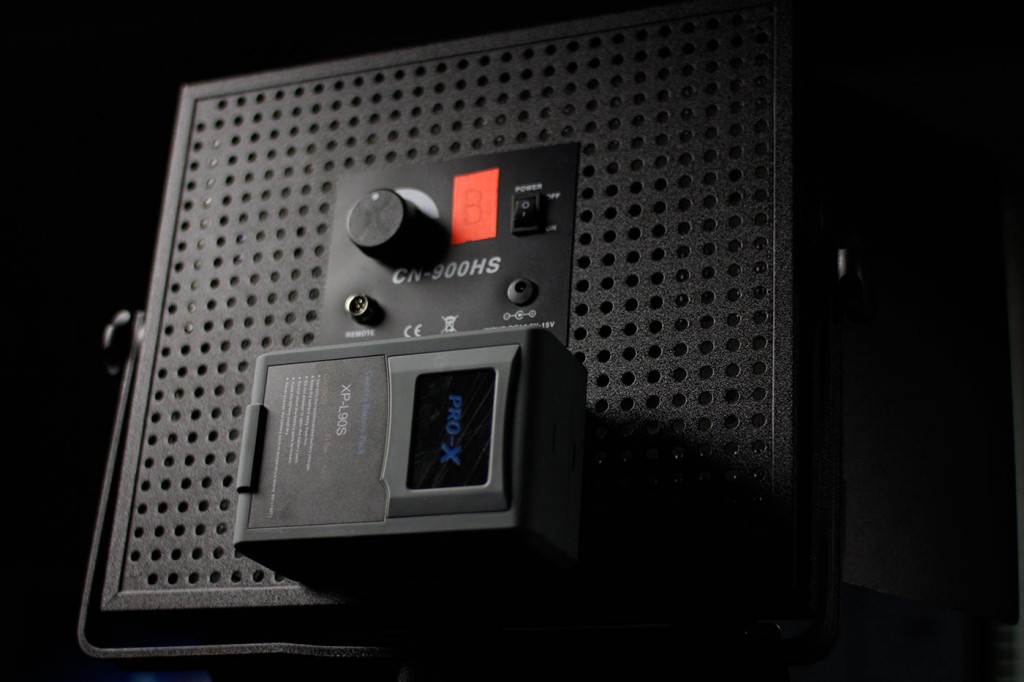
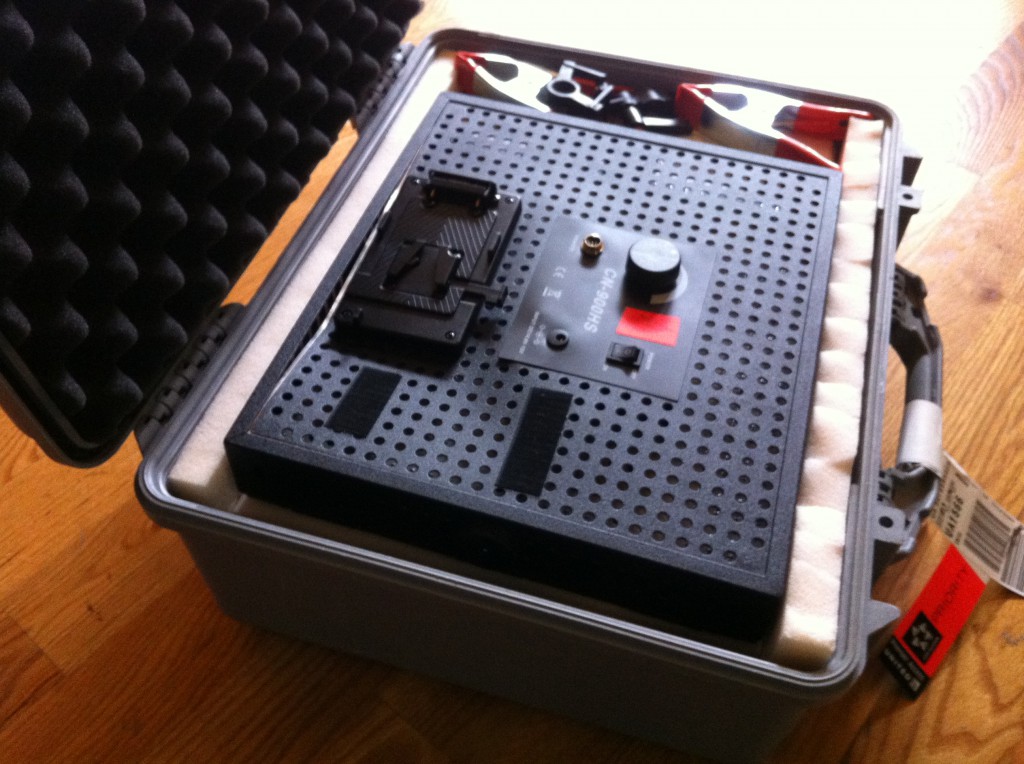
On my recent trip to Alaska, I wasn’t sure I’d have power everywhere I went. So I rented a v-mount battery and packed it along. The CN-900 conveniently includes a v-mount plate. I’ve posted previously about using a more affordable Tekkeon battery with the CN-900, but I’ve found I can get only about 20 minutes of full-power lighting out of the Tekkeon. For this trip I needed more than that, hence, the v-mount.

How’d it do? Well, I used it three times during the trip to shoot interviews that lasted on average 45 minutes each. And I never had to recharge the battery once.

Granted, I only once used the light at full power (I was using it as fill on two of the three occasions), but it was an awesome thing to just grab the light, and stand, and the battery, and be shooting with powered light moments later, both indoors and out.

I was so impressed that, back home, I immediately placed an order for a Switronix v-mount battery kit (includes charger), which happened to have a $150 rebate, bringing the total purchase to $279.95. (Switronix and B&H appear to be running the rebate semi-permanently; today it’s listed as running through June 30; when I placed my order it was April 30).

Frankly I think these batteries are overpriced, like so many of the products built for the film and TV industry. But having experienced the freedom of using one, I will say it’s worth the price if you can afford it. You can also use these batteries to power other devices, such as my Canon 60D during an all-night timelapse. That is, with this adapter which, incidentally, will set you back another $150. It feels like getting robbed to pay $150 bucks for a simple adapter. If you know of a more affordable alternative, please let me know.

Since I’ve taken delivery of my new battery, I’ve run some tests. And I’ve discovered that it will power the CN-900 for 65 minutes at full power, without any drop in brightness. After that, it’ll keep going for about half an hour, but the brightness begins to fall off, imperceptibly at first, then dramatically.

Together, the whole thing (light and battery) weighs 7.8 pounds. There are smaller and lighter v-mount batteries than the Switronix. But the Switronix was the most affordable I could find.

Now, if I could just find a padded pack that is at least 16.5 inches per side, I’d have a great way to carry the light, the battery, and a light stand. So the hunt is on. I’ll let you know what I find.

UPDATE: I’ve found three possible solutions on the market for packing these panels. All are specifically designed for 1×1 LitePanels, which are slightly smaller than the CN-900s (which measure 16.5 x 15.5 with yoke attached). Note, I haven’t listed any of the PortaBrace products for LitePanels, because all of them are sized too small to fit the CN-900. But any of the following three should be good:

Petrol Liteporter – $157.95
CamRade LP-Bag litepanel bag – $219
CamRade LP-Backpack for litepanels – $284.50

How to color match a pair of CN-900 led lights

I’m a fan of the inexpensive CN-900 led lights. Not because they are the greatest thing on the market – but because they are damned good, at a price I can afford ($450 vs. $1,800 or so for LitePanels that incidentally aren’t as powerful). I liked the first one I got so much that I got another one. But when I unpacked it and set it up next to the first one, it was immediately clear that the low price didn’t include matching the lights to each other: the two lights were visibly different in color temperature.

Rather than allow this to be a show stopper, I decided to test the lights using the excellent vector scopes built into Final Cut Pro X, and add color correction gels to bring them into balance with each other. With a little work and a few gels, I was able to match them. Here’s how.
1. Get a grey card (although a white piece of paper will work fine, as long as it’s pure white (be careful of expensive writing paper which could be warmer than pure white, but you could use cheap writing paper in a pinch if you need to save money).

2. In a darkened room (or after dark) that has neutral colored paint on the walls (white walls or grey walls are ideal), set up your first light on a stand. Make sure it has the included magenta filter in place, which is necessary to match daylight. Set up a second stand that has grey card clamped to it (or just tape it to the wall), and light the grey card roughly evenly at a 45 degree angle.

3. Set up your camera on a tripod in front of the grey card. Fill the frame with the grey card (it doesn’t matter if it’s in focus; just fill the frame). Make sure house lights are all off, so that only light hitting card is from your LED panel.

4. Custom set your camera’s white balance to 5400K, which is what these CN lights are supposed to be.

4. Roll 30 seconds of video or take a still with your camera (either is fine; I prefer still photo because I shoot with DSLR and that way I don’t have to loop footage in next step, but either is fine).

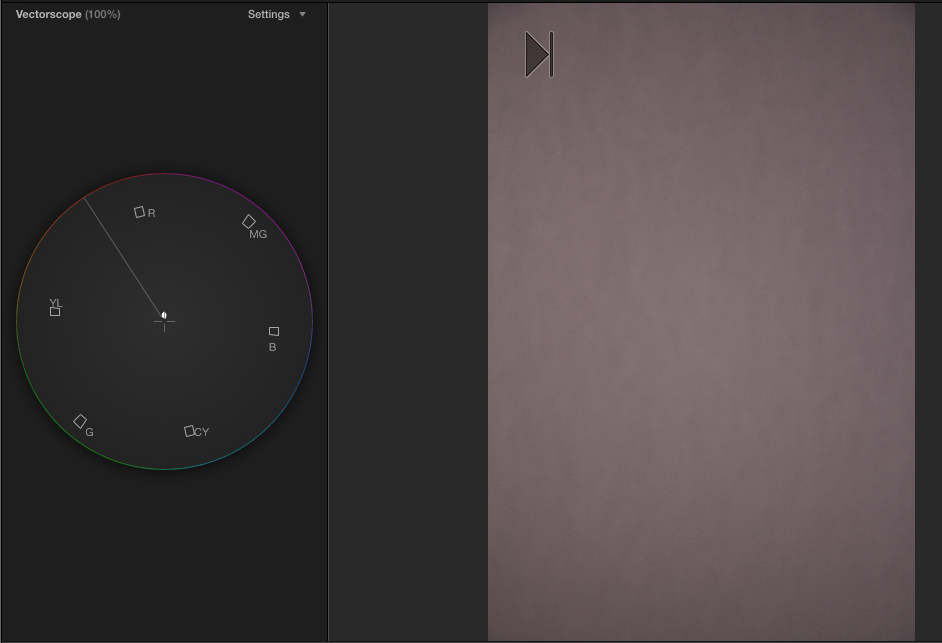
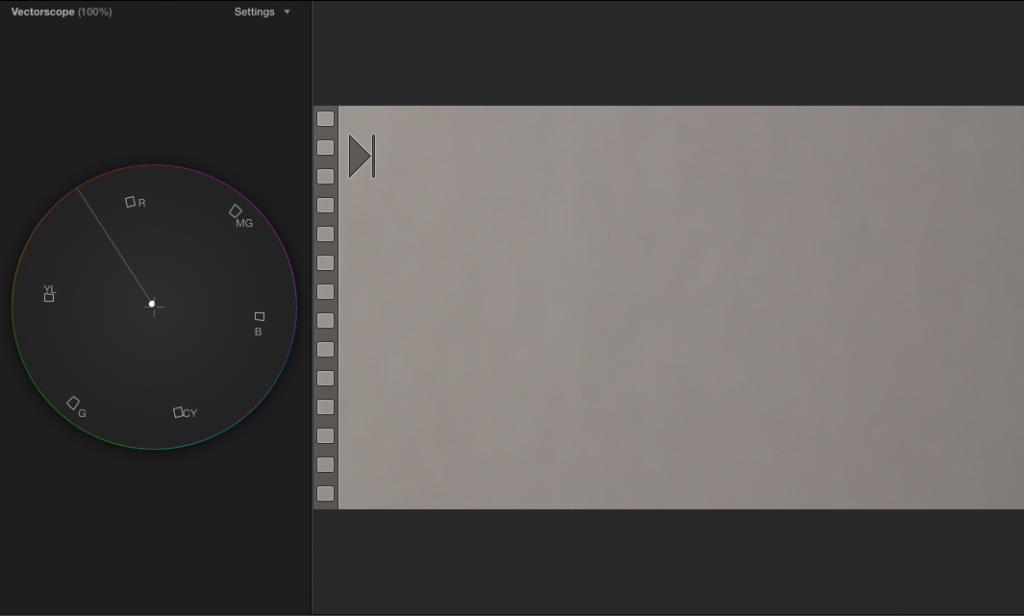
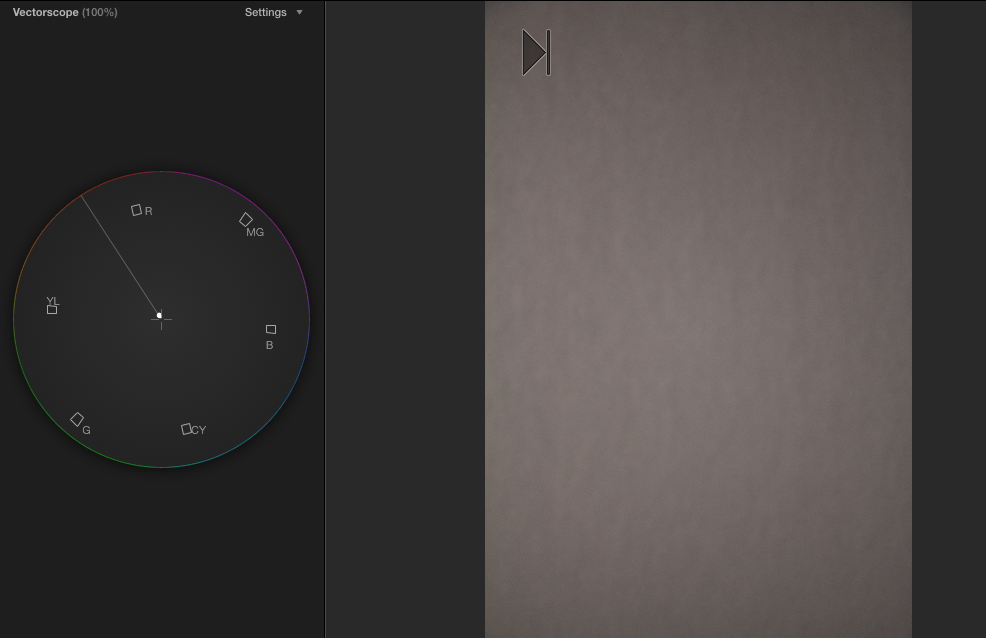
5. Import the still or video into your editing suite (I use Final Cut Pro X). Open the clip. Turn on your video scope. Your scope should show something like this:

Basically, you want to see a dot that is right in the middle, which means that your light is balanced correctly at 5400K, with no color cast to the image.

If you see this, then you are good to go with this light, and now you can perform this same test on your second light.

However, chances are good that your first light, and your second, won’t hit the circle perfectly. Here’s what I see on my A light:

My A light has too much red in it.

To get the red out, I needed to pull the light in the opposite direction of red. On the scope, that shows as Cyan. So if you had access to cyan filters, you could add a small amount of cyan, say 1/8th or 1/4, then test to see which brings you closest to the target.

In my case, I didn’t have access to cyan filters at my local camera shop, which has the much more common colors: CTO (redish yellow), CTB (blue), and plus green. Here’s how the scope reads after I’ve added 1/4th plus green:

It’s brought us closer to our crosshairs, but in doing so, it’s pulled us toward green. I need to go a teeny bit further, and get rid of the green. To do that, I added 1/4 blue:

Now we’ve gone too far to the blue. So let’s try a 1/8th blue (which, incidentally, is the smallest increment in which you can buy gel filters):

Bingo. This is as good as it gets. So to balance my A light to 5400K, I’ve permanently added 1/4 plus green and 1/8th plus blue gels by taping them to the magenta gel that ships with the CN units.

My B light looked a little different when I tested it:

So I only had to make one correction to it: I simply added 1/8th plus blue, and it’s all set, and now both lights match each other.

Hope that helps. The CN-900s are outstanding lights that will save you a ton of money if you’re willing to invest a bit of effort into matching them.
Traveling with a pair of CN-900 Led lights


I just returned from a week of shooting in a remote part of Alaska, a trip that I unfortunately can’t talk about because of a client non-disclosure agreement. But what I CAN talk about is a few lessons I learned about equipment: what gear to take, what NOT to take, and how to pack it.

First up: I want to talk about CN-900 LED lights, after I found this note waiting this morning from one of my blog readers, Jason:

“Dan, What kind of a case do you use to pack these up? The soft cases leave a lot to be desired.”

I packed both of my CN-900 lights on this trip, and ended up using only one of them. Lesson: One LED panel goes a long way when you’re on the road, working in stressful conditions where you have to set up quickly. I was relying on these lights to fill and augment the already existing light, so one light turned out to be enough. But I was glad I had the second one, just in case.

I have a Pelican 1550 case, and discovered that by removing the padded dividers and adding some 1″ foam that I picked up at Fred Meyer, I was able to fit both lights and their cords. But this required unscrewing the yokes and packing them separately, as they were too big to fit. This was a minor inconvenience, because it takes a minute to screw the yokes back on before the lights are ready for use. But what happens if you misplace the yokes? Luckily, that didn’t happen. But I’d really prefer to have all of the lights in one case, ready to go as soon as they are pulled out. And, I had to leave the assembled light out of the case when I was using it, because it was too big to fit back into the case once assembled. But this was offset by the fact that the 1550 is a nice small case.

One of the best things I did before the trip was to rent a powerful V-mount battery to power one of the lights. It made using the light massively easier than having to carry an extension cord and hunt for plug in ever time I needed to set up. Being untethered was the difference between using and not using the light on more than one occasion.

I have a rule: ALWAYS use a sand bag when placing a light on a stand. But because I was traveling, I decided paying an airline to ship sand didn’t make any sense, and that I would just be extra careful. Guess what? I backed into the light while moving around my subject filming. And the light, which was extra top-heavy because of the heavy battery, went crashing to the floor. Amazingly, it continued working. But it left a big dent in the light’s metal housing (see photo).

One thing about this incident: it speaks highly of the construction build of the CN-900. I once dropped a LitePanel Micro Pro about 2 feet onto a hardwood floor, and it died instantly. I had to send it back to LitePanels for repair, which they didn’t charge me for, but nevertheless, I was without the light for about 10 days. The CN-900 took a severe beating and kept working.

Dramatic interview lighting

Seattle Interactive Conference today launched the first in a series of short films that Visual Contact, my company, is making for them. We’re delighted to be working with SIC on this project, which over the next six months will spotlight some of the entrepreneurial minds involved with the conference.

I’d like to share a behind-the-scenes look at how we shot part of this first piece, a profile of Neumos co-owner Jason Lajeunesse, who is a panelist at this year’s event and host of the after party.

I gotta say this is the most beautifully shot piece we’ve made to date. Check it out:

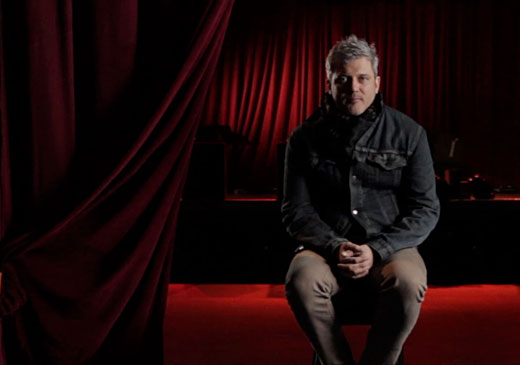
OK, so a few observations I’d like to share about making this piece. In particular, the interview setup. As is common, we had about 10 minutes to identify a spot to conduct the interview that was not only quiet, but looked fantastic. The main dance floor at Numos was the only quiet place during mid-day, as the bar next door was blasting music and pouring day drinks. Lisa just walked out into the middle of the floor next to a divider curtain and said “right here.” I protested for a minute, attracted to the only window along the north wall, where some beautiful natural light was falling. But that’s why we pack lights. Framing the shot with him behind the curtain in front of the stage was a perfect way to spotlight the owner of one of Seattle’s landmark night clubs (a place I’ve spent more than my fair share of evenings). I explain how we lit it in a minute.

But first, some frame grabs:

So, here’s how we approached lighting Jason for his interview shot.

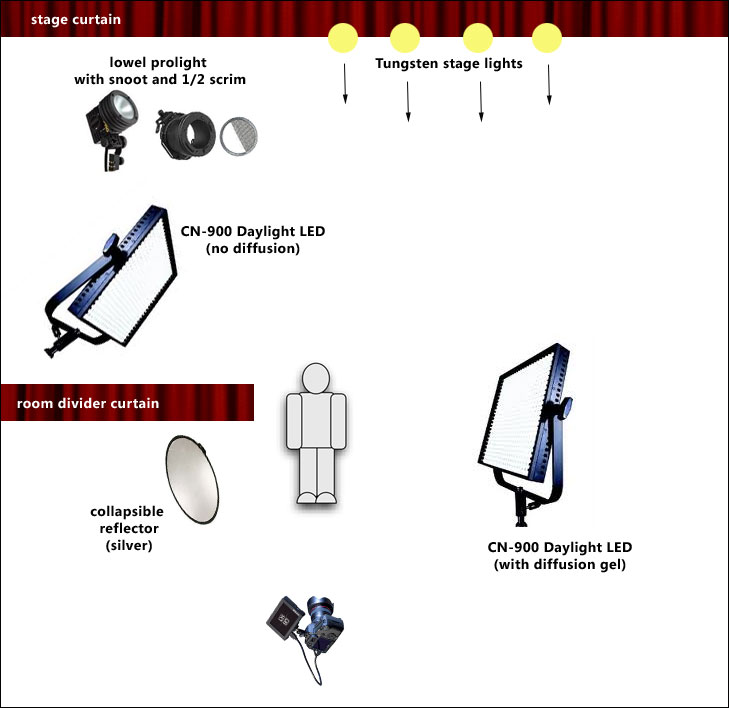
It was nice to have a lot of space in this scene, because it meant I didn’t have to flag off the lights. The light spill was absorbed by the large dark space. I used three lights in addition to available light:

Ambient light:
There were some tungsten house lights aimed toward camera spilling onto the floor, which provided the splash of red. Also there was one big vertical north-facing window that was letting in daylight but not nearly enough for a proper exposure. I simply augmented this light to make it my key.

I set the white balance on my Canon 60D to 5400K daylight, which made the tungsten light spill in the background a super-saturated red.

Background light: Lowel ProLight with snoot and 1/2 scrim (this blocks a stop of light from half of the light, so that the light projected across the curtain is more even). I use a cheap 300-watt dimmer that you can get at Home Depot with the ProLight, which draws just 250 watts. It’s a small light, but I find it incredibly versatile and I use it all the time as an edge light or hair light.

Key light: CN-900 LED at full power. I clipped a 24″ piece of full-stop diffusion onto the barn doors, which goes a long way to softening this light.

Rim light: CN-900 LED dimmed down quite a bit without diffusion.

Here’s the shot again, with a floor plan for how it was lit:

AUDIO

This is the second video we’ve recorded primarily with the amazing new Sennheiser MKH-8060. As backup, we also recorded lav audio with a Tram TR-50, which is a great lav, totally professional and used by lots of major productions. But wow, comparing the audio between these two mics was flat-out stunning. Who knew that a Tram could sound like such crap? The 8060 just blows it away entirely. Granted, it’s not a fair comparison to match a lav with a top-of-the-line shotgun mic. But my previous go-to shotgun mic, the AT875, was about on par with the tram, so I was gobsmacked at how sweet this mic sounds. It’s also incredibly forgiving to use – if you’re accidentally off-axis a bit, it’s a simple fix: just boost the levels, without need to tweak the EQ, because off-axis sound isn’t colored the way most every other mic is.

The MKH-860 is an incredibly rich sounding mic, and after using it a couple of times, there’s no doubt in my mind that it was worth every penny of the $1,200k it cost to acquire the beast. Audio is a massive part of every video we shoot, so it just makes sense to have an epic mic even more than an epic camera (or a c300, or even a 5dmkiii for that matter. We shot this film with a pair of Canon 60ds).

Lisa and I will be delivering a new video in this series every month between now and this year’s conference on October 30th, and we’ve got some incredibly talented and fascinating personalities in the pipeline.

How to make a DIY Kino Flo for $60

Yes, you CAN make a perfectly functional kino-style light with parts you pick up at Home Depot. One that’s flicker-free, looks good, and attaches flexibly and solidly to standard grip heads. It weighs just 4.2 pounds. And you can control the light spill. You won’t get the tough shell and transportability of the Kinos, but if, like me, you’re using the light for a specific job and won’t be using it every day, this is an affordable way to go with little compromise on the quality of the light.

I arrived at this parts list the hard way: by buying the wrong stuff first, learning what works and what doesn’t and why. Here’s what I’ve learned:

T12 tubes are a bad choice. They have what’s called “eratz flicker” unless you buy more expensive ballast. Plus, t12 bulbs are less efficient than the T8 and smaller tubes, so you get less light out of them, even at lower wattages. Instead, get inexpensive T8 fixtures at Home Depot, but not TOO inexpensive. I paid $25 for mine, and it’s great. Just make sure it has electronic high frequency ballast (50/60hz).

None of the tubes on sale at my local Home Depot had a high enough CRI for my purposes, so I called up a local Seattle lighting supplier, Pacific Lighting and Supply, and they hooked me up with to Phillips TL950 full-spectrum lights, which have a whopping 98 CRI, and are balanced at 5000K (a little on the warm side of the ideal 5600K, but close enough for me). The alternative was to purchase lights online but all I could find had minimum order of 4 bulbs, and expensive shipping. So buying local saved me money.

Primary parts:
Lithonia Lighting t8 two-strip fixture: $24.97
Two Phillips TL950 t8 fluorescent tubes: $26.81
Matthews drop ceiling scissor clamp: $8.95

Other stuff you’ll need:
Black wrap (available at filmtools for $23)
3″ gaffer tape (also available at filmtools for $31)
12′ electrical cord with plug (I cut mine off an old Ikea lamp)
2 heavy duty zip ties

To make the mount, I used a Matthews drop ceiling scissor clamp, which I zip-tied around the light using large zip-ties. This works fine in my case because the lamp fixture is extremely lightweight. If I had bought a wider shop light instead, for example, I would have used a stronger and wider Matthews baby plate for the mount. Make sure to get one with a long spud, preferably 6″. To hold everything in place, I gaff taped over that to hold the zip ties from slipping. In fact, I ran gaff tape over the entire light surface – it cuts down on reflections and black looks more professional, of course. The mount works with any c-stand’s gobo head, using a 5/8″ spud.

The fluorescent fixture I bought at Home Depot came ready to be wired, but without a plug. So I cut the cord off an old Ikea light, and wired it up (black to black, white to white – ignore the green if like me you’re wiring to a two-prong plug for maximum socket compatibility on location) using the twist connectors included with the light.

The inexpensive light fixture I purchased had no reflector. That turns out to be a good thing, because I prefer the foldable and shapeable one that I built myself. To do that, I took a 12″ wide strip of black wrap foil, and cut it to match the length of the light, 48.” I gaff taped the edges, which are kind of sharp, which stiffens it some, and gives it more durability. Then I gaff taped the wrap to the top of the light on both sides. Done.

Note, I at first thought I’d use Kino tubes in this light, but discovered that most Kino tubes are designed to be high-output, which means they require more powerful ballast to drive them with the proper color temperature. So buy the cheaper full-spectrum bulbs instead. The best brand for daylight, according to Shane Hurlbut, is Vita-lights.

Note on transport: This light fits perfectly into an inexpensive plastic golf bag case like this one, which I own. It has wheels and is a great way to carry c-stands, glide tracks, tripods and this light safely to location.

How to take a great headshot (without any other lighting) in overcast light

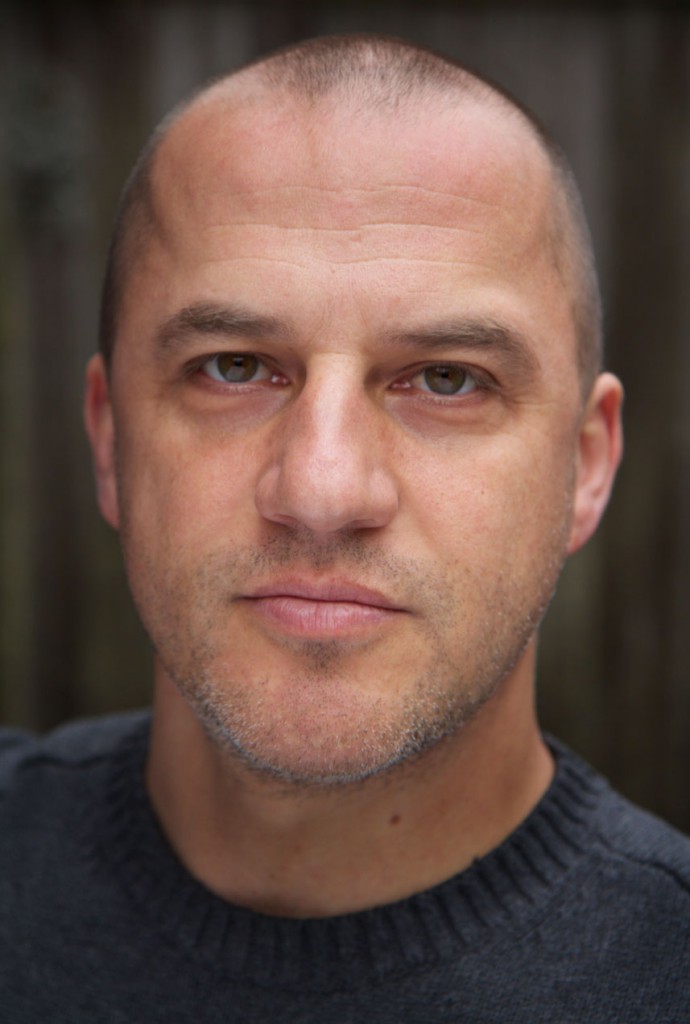
It’s grey in Seattle most of the time. I actually like it that way: it’s the world’s softest light, at your fingertips, and you don’t have to set up a single soft box. But it has its drawbacks when it comes to lighting head shots. With a head shot, I want light that is soft BUT has some modeling and one side darker than the other, to bring out the shape of a face. How to achieve that without adding any lights? You need just two things: a piece of black foam core, and piece of white foam core (or as I used in this case, a collapsible reflective fabric disc).

For this photo, I had the subject, my friend Vanya, balance the black foam core on his right shoulder, which shielded the right side of his face from the grey sky, making it slightly darker than the other side (the technical term for this is “adding negative fill” which is a fancy way of saying you are blocking light from reaching this side of his face. I used a 32″x40″ foam core that sells at University Bookstore for about $6). You have to get it pretty close to the subject’s face for this trick to work – like about 16″ away.

This alone would do the trick for many people, but Vanya’s got deep set Montenegro eyes that will pierce your soul (and go dark without fill). So that’s where the bounce comes into play. I simply had him hold it in his arm, so that it angled light up at him from below. This has the same effect that happens with “butterfly” lighting, which is to hide lines in faces and generally make the person look awesome. They say this works best for women, but I disagree: when is the last time you heard a middle aged man say “hey, can you light me so that the lines in my face look more prominent?” Using fill from below camera that is close to the subjects face is guaranteed to flatter.

In this case, it sent a little too much light up under his chin, so I had to darken that in Photoshop to bring the attention immediately to where it belongs: his face. I also slightly darkened his forehead, and a tiny bit on his sweater, and that’s it. A simple shot with available light, that looks fantastic.

Camera: Canon 60D
Lens: Canon EF 17-55mm f2.8 zoom (set at 55mm and f2.8).
Background: wooden fence in my back yard

More Final Cut Pro X editing tricks

Been doing nothing but edit the past few weeks and I’ve picked up a few tricks I’d like to share.

Matching Framing: If you’ve got your skimmer over a clip in the timeline and want to see the original clip in the browser, you can call it up by pressing Shift-f. This one is useful if want to see quickly whether there was more to the clip (saves you having to drag out the handles in the timeline to see whether anything is there). Or if you simply want to find the same clip because you know there’s something after the edit point that you want to use.

Sample-accurate sound editing: FCPX doesn’t allow you to split clips (audio or video) in increments smaller than a frame. This is fine for video, but sucks for fine audio editing, which contains many samples per frame. But there’s an easy workaround. Instead of cutting the clip, you can keyframe the audio level to -96db to remove it. Insert four keyframes in the audio level, then drag down on the middle to reduce the audio level and remove the offending audio.

Better Sound editing: Turn off video display in timeline and increase the size of the waveform. Makes your job way easier. You can do this quickly by pressing the light switch in the lower right of the timeline, and calling up the options available to you there.

Quick audio levels change: With video or audio clip selected, press Ctrl and the minus or plus key. This will drop or raise audio level by 1db.

Replace with gap: I find I often want to delete a section of video or audio, but leave a gap rather than have it close up. So instead of pressing “delete” use Shift-delete. That deletes and replaces selected range with a gap clip.

Lift edit: When editing dialog and b-roll, you sometimes find you want to put a clip that was in the main timeline onto a connected timeline, and replace it with a gap to preserve the length of the edit. Select the clip in the primary timeline, and press Opt-Cmd up arrow.

Select clip: When skimming over a clip in the timeline, pressing C will select the clip.