DroboPro isci connection woes continue

I’ve had my replacement DroboPro humming along nicely for a few days, but today marks the end of all that happiness. This afternoon, the same thing began happening as before with this new unit: while I’m working, it’s somehow partly disconnecting or actually disconnecting, causing my apps to freeze. The funny thing is that the Drobo remains visible in the finder. All my apps freeze up and get the spinning beachball of death whenever I try to navigate into the file structure below one or two levels down.

I’m almost certain that this is an iscsi problem, because this never happens with firewire 800. But I hate using fw800; it’s too slow for me to edit hd video on.

Guess it might be time to get that new Thunderbolt drive sooner rather than later.

Final Cut Pro X crashes a lot…and why I don't care

Just a moment ago I wanted to search through all of the events on an entire disk for a particular video clip, so I clicked on the disk icon in the event browser. After a few moments spent trying to read all of the events into ram, FCPX crashed.

It’s not a totally rare occurrence. Final Cut Pro X crashes. A lot. But I don’t care. Why? Because when I start it back up again, it puts me right back where I left off. Same window layout, same everything. This amazing app doesn’t even have a save button: it just saves everything automatically, right up to the moment. So the only thing I lose from the crash is the few seconds it takes (on my iMac 27″ ssd-equiped 16-megs of ram speed racer) to reboot.

I look forward to a more stable FCPX, of course, but for now, if the price of admission to this dreamy, freakishly fast, multi-tasking wonder is a few moments every now and again of rebooting, it’s a price I’m willing to pay.

Tips for reconnecting offline media in Final Cut Pro X

If you ever get into a situation where you are trying to store your media outside of Final Cut Pro X’s event folder structure, and Final Cut keeps copying the original media into the Final Cut Events > Original Media folder (which happened to me after using FCPX’s Merge Events commend), here’s a workaround. What you CAN’T do is simply put an alias to the original media into your Final Cut Events folder – Final Cut is too savvy for that, and it won’t connect to the media.

The simple solution: create a new event (which you’ll delete momentarily), import the media you want with ALL options unchecked in the import dialog, and then immediately quit FCPX after the files appear in the event browser. You’ll see an alert warning you that all background tasks will be aborted if you quit. Quit anyway – you don’t need the render files it’s churning away on.

Then, in the Finder, open the Original Media folder of your new event, and drag all of the FCPX-created aliases into the Original Media folder for the event you’re trying to reconnect. Make sure FCPX is quit while doing this. Now delete the new event, and start FCPX.

Boom, all your original files are reconnected.

You can use proxy files to sync audio in Final Cut Pro X

Here’s a discovery I made today: if you’re working with an assistant editor, you can send a bunch of proxy files to the assistant, have them sync audio with the proxy files, and then when you get the files back, you can merge them into your event and they will connect to the high-res files. It’s pretty slick, and obviates the need to send out original or ProRes media. The proxy media that Final Cut Pro X creates is a 1/4 size version of the ProRes media, and it’s so good that I’m hard-pressed to tell the difference between original and proxy in the Viewer while I’m editing. Of course, if you play back full screen, you see the jaggies.

NOTE: I’m using DualEyes for the audio syncing, since PluralEyes doesn’t yet have a FCPX version. And FCPX’s built-in synchronize clip feature only works when you know which two clips to sync – so you need DualEyes if you’re batch-processing large numbers of clips at a time.

Here’s the workflow:

1. Create an event (Opt-n) and import some video and audio into it (cmd-shift-i). On the import dialog box, make sure you place a check next to “Create proxy media.” Wait until the proxy files have been created. Quit FCPX.

2. Now we have to do some work in the finder: make sure you have the external hard drive mounted that you want to copy the event onto, which you’ll be passing to the assistant or taking away to work on yourself. Also make sure it has a folder called Final Cut Events in the root. Then navigate to your Final Cut Events folder (in your Movies folder if you’re working off local hard drive, or in root level of an external drive). Find your event folder. Copy the folder and all subfolders EXCEPT one: don’t copy the Render files folder, and deselect all the video files in the Original Media folder, so that you copy only the original audio files. The whole point of proxy media is to save space and time, so you don’t want the hi-res files leaving your primary storage.

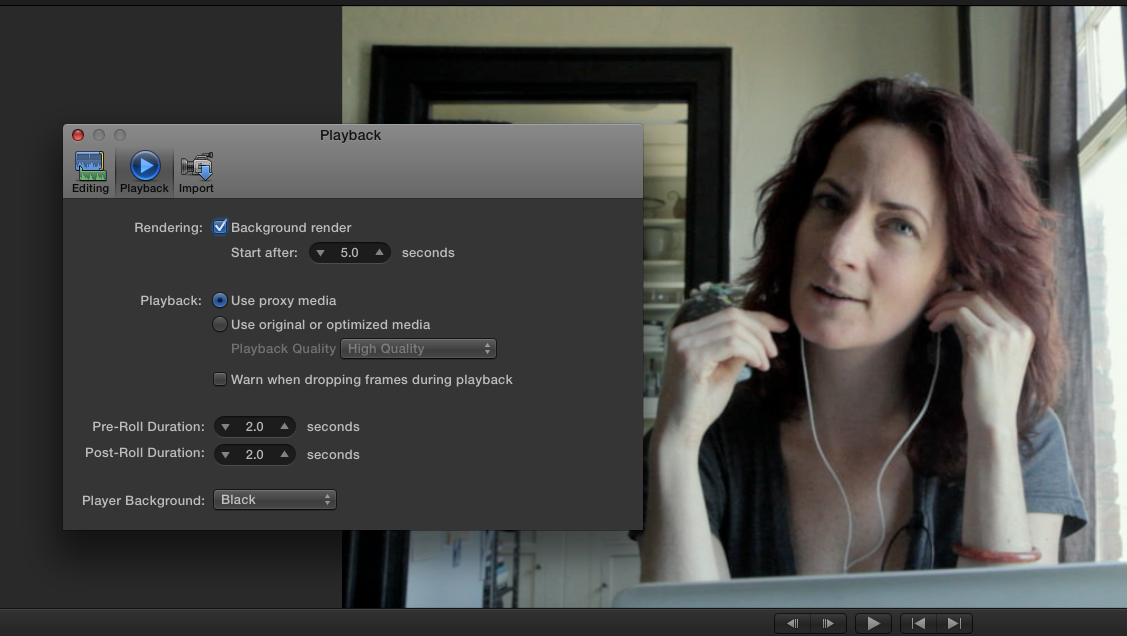
3. When the assistant gets the drive and opens FCPX, there will be a red alert displaying in the event, warning that the footage is offline. Don’t panic. Just press cmd-, or open preferences from the Final Cut Pro menu. Under Playback, select “use proxy media.” Now, everything is groovy: the proxy footage shows up, and your assistant can get to work, as follows.

4. Quit FCPX. In DualEyes, create a new project. Select the video files located on the Transcoded Meda > Proxy Media folder. Add the audio files located in Original Media. Run the sync (I always run with “try really hard” selected, because it always works better and is worth the extra waiting time). Files that match the length of your video clips will be added to the Proxy Media folder. Also a temp folder created by DualEyes. When the batch is finished, delete the temp folder, and move the new audio files over to the Original Media folder.

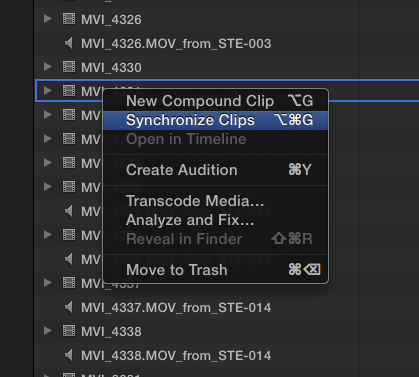
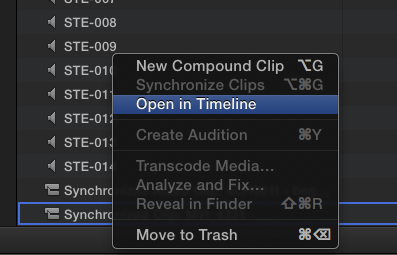
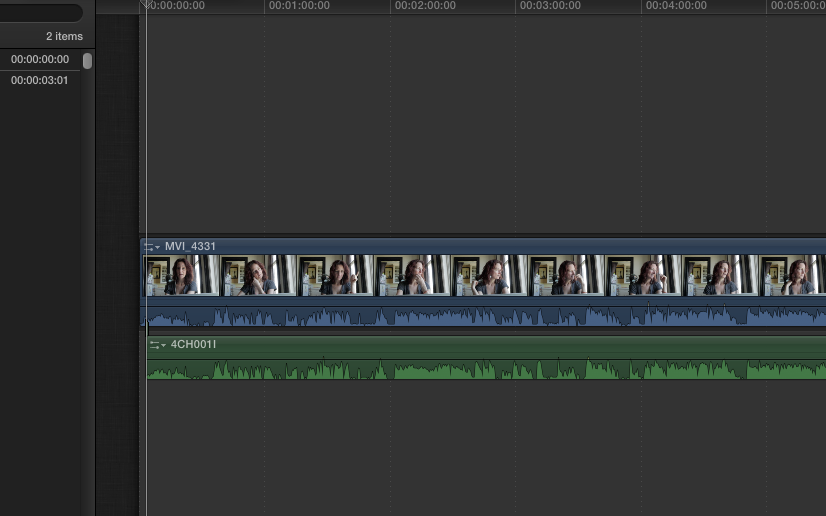
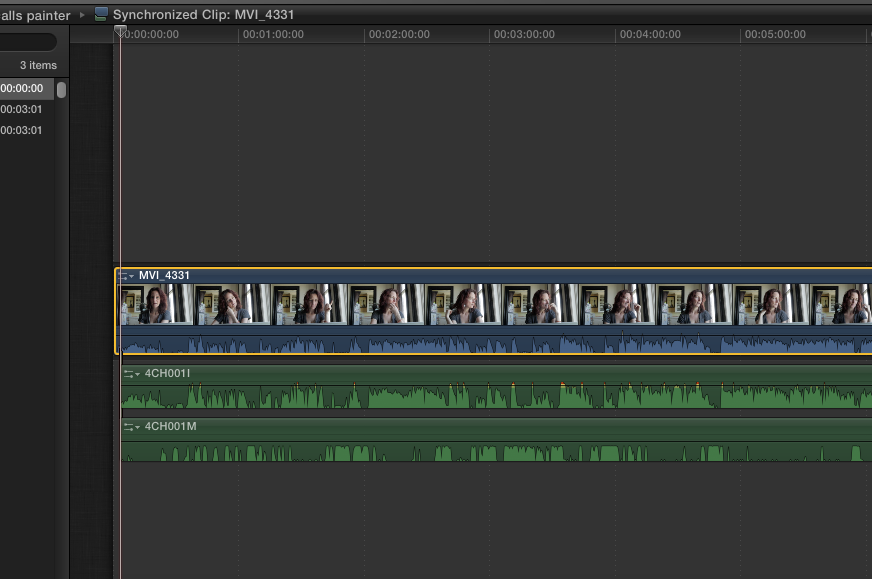
5. Now open FCPX. You’ll find all the new audio files added to your project. These will be named with both the video and audio clip they are associated with, so that you can tell immediately which file to synchronize by its name. Cmd-click on the video and the audio file to select both, then press opt-shift-G to synchronize the clips. FCPX creates a synchronized clip for each. At this point, the assistant can add keywords, create smart collections, and do whatever work is necessary on the files to send them back to the main project.

6. To bring the event back in, connect the external hard drive to your home system. Remove the event on the home system from the Final Cut Events folder, but don’t throw it away yet. Place the event coming from the assistant into the Final Cut Events Folder in its place (Final Cut should be closed while you do this). Grab the original media (or references to the original media) from the Original Media folder that you’ve parked on the home system, and move it to the Original Media folder on the incoming event. You can now throw away the old event, because the one from the assistant will replace it.

7. Start FCPX. Everything should read-in normally, and you’re good to go: the original files will now be used (provided the “use original or optimized media” is selected on the home system’s FCPX preferences).

It’s important to remember that in FCPX, you can’t modify the original media (or any other media, for that matter) outside of FCPX. It will render the media permanently offline inside of FCPX if you do, and you’ll have to re-import it. This is a problem that I hope is fixed in future versions.

Cutting a feature length documentary film on Final Cut Pro X: file prep

Update 12/23/2012: We just locked picture, and I have posted an update with an essential tip on media management for anyone using FCPX to cut their feature film. I’ll add one more absolutely critical thing that I’ve learned since writing this: never, never, ever choose the option of allowing FCPX to store your media outside of the Events folder. This causes an epic problem if you want to make a copy of your original media to, for example, send your film off for color grading. Just put the media where FCPX wants you to put it, and you’ll be fine. OK, back to what I was saying when I started the edit a year and a half ago…

In an effort to share what I’m learning, I’ve decided to post regularly about what it’s like cutting my film on Final Cut Pro X. Actually, the real reason is because I can’t imagine doing nothing but editing between now and Dec. 21. No, I need to be chatty or I’ll drive myself crazy. And by choosing to cut the film on FCPX, I know I’ll have a lot to talk about.

The first order of business is getting organized. The entire project weighs in at more than 3 terabytes of audio, video and stills. In production, I did what I think was a solid job of labeling every shoot as we completed it, putting everything into folders named as follows: date of shoot, followed by keywords describing it, as in: 2011-03-12 powerhouse photographer meeting. This has the benefit of always sorting correctly by date, and the contents are recognizable at a glance. Inside of this folder, I’ve got separate folders for a cam and b cam (we shot all but one day on no more than two cameras). We did dual-system sound, so almost every shoot has a corresponding file in a root level folder labeled Audio. Almost none of it has been synced.

It’s taken me about a week of noodling around with files and doing a couple of just-for-fun projects to wrap my head around FCPX’s brave new metadata world. And I finally get it. It’s very cool. But it’s different, and that takes patience. At a very high level, events are a lot like a folder into which you place your footage and all the media files associated with your project such as audio and stills. Final Cut actually creates folders for you and either stores the original media or an alias to your original media, but that’s behind the scenes. In the Browser Library, the two principle tools are keyword collections and smart collections. You can still create folders, but the only thing you can put into the folders are the two aforementioned items. So all your media has to be in one of the two before you can get started organizing. Final Cut helps by creating keyword collections for you based optionally on your folder naming, and it does some basic scanning of the files to try and identify people and categorize them into shot types: medium shot, group shot, two shot, etc. But I’ve found it gets it wrong a lot of the time with my footage, possibly because many of my shots have more than one type of scene (starts out as a medium shot on one person, and moves into a wide group shot, for example).

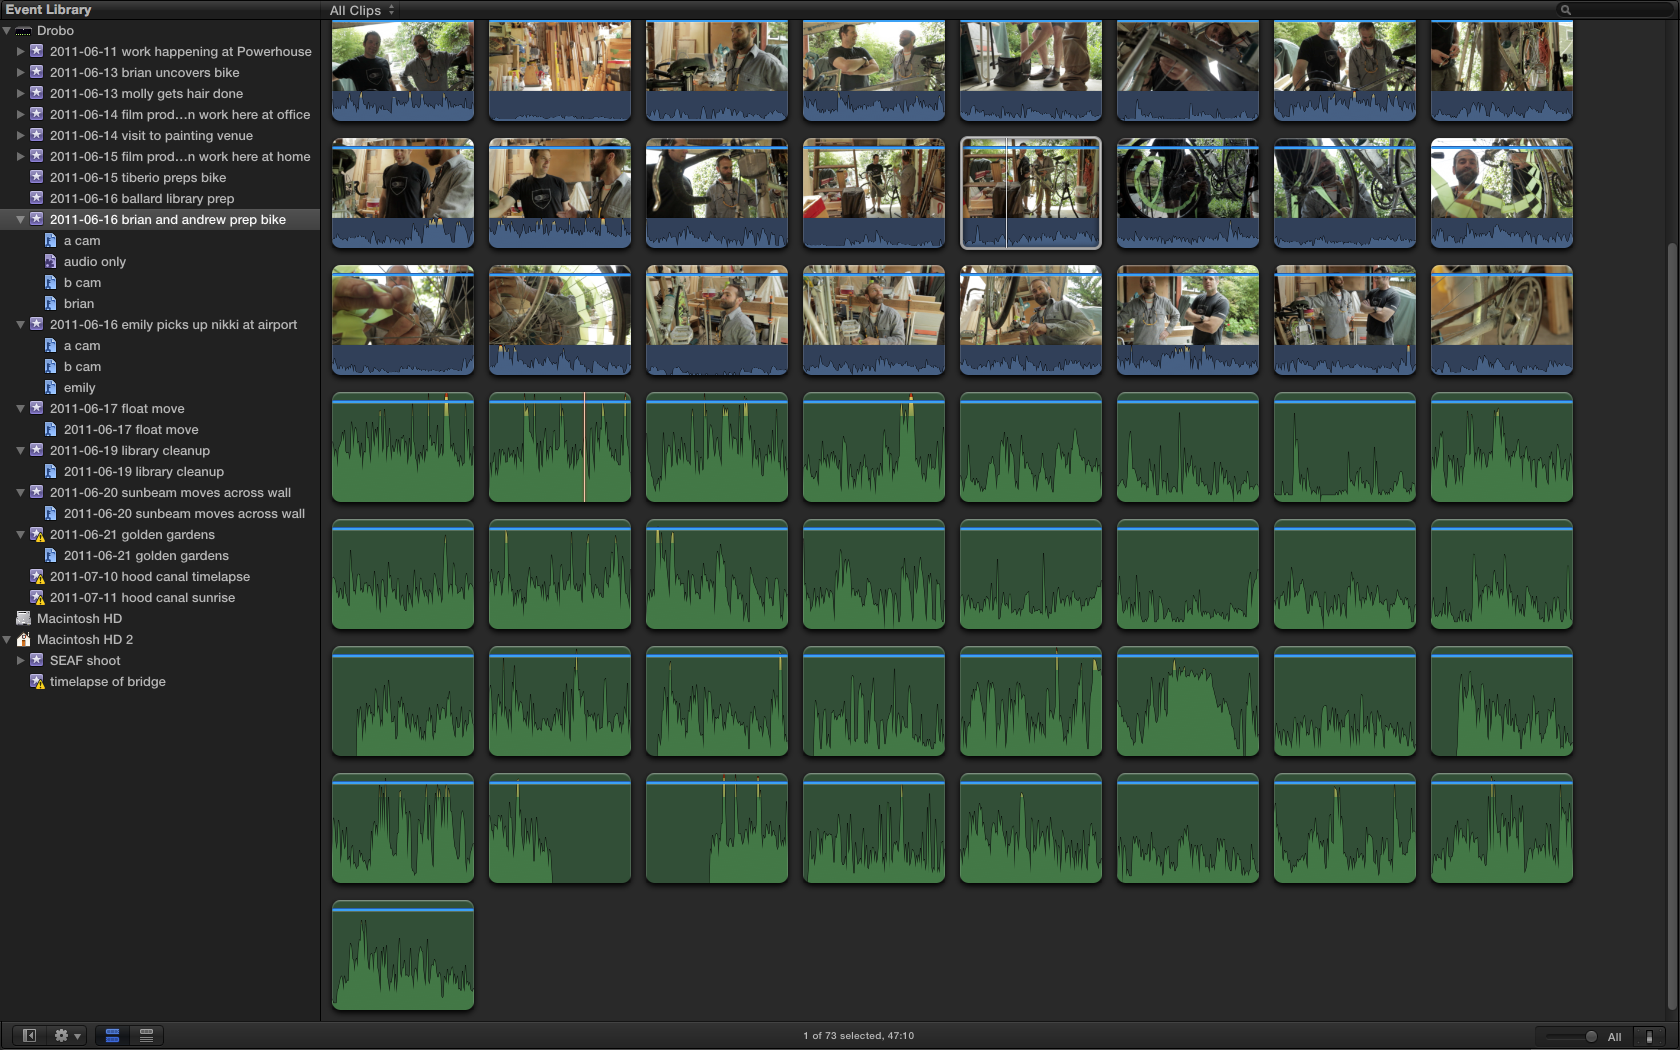
When I first started playing with the new Event library, it seemed to me that I should create a single event for the entire film: that way, I could easily find by keyword from the entire project. But I quickly realized that was a mistake: Final Cut has to read-in every event into as much RAM as it can whenever you select it. And you can imagine what a performance hit this would mean as the event grew larger and larger (even with my 16 megs of ram, it just won’t cut it). So I’m treating each “shoot” as an “event.” Note this is often – but not always – the same as organizing by date. Some days we had up to four shoots, and in each case, each is a separate event. Also note: It’s still possible to search the entire event library for the entire film: just click on the disk that contains all the events, and it loads them all (taking forever, as you can imagine, but I can imagine times where I’ll want to search everything for something I can’t otherwise find, so I love this option.)

I’m assisted by two people on the edit: Lisa Cooper and Josh Huffines. That means it’s complicated: I’ve decided to split the project into thirds, sending each of us with a manageable chuck of audio and video, and tasking each with importing each shoot into its own FCPX event, syncing the audio, and doing some very basic keywording of the data.

I discovered quickly that FCPX’s very cool audio syncing capability is only half useful in our task of syncing quantities of audio: it only works if you know which audio clip belongs with each video clip (I tried running it on more than two clips and it creates a monster). So we’re using DualEyes, the stand-alone audio syncing software from Singular Software. DualEyes works by creating a new audio file that is named with a combination of the video and audio clip names, and it places the new audio file into the video folder, ready for synchronization in FCPX. With the file named thusly, it’s a snap to sync each file using FCPX’s “synchronize clips” feature. However, it’s quite time-consuming: every single video and audio clip has to be touched manually.

I’ve run into a serious problem with DualEyes: it crashes whenever any of us select the “correct audio drift” option. Bruce at DualEyes has been extremely helpful in trying to resolve the problem we’re having, and he event gave me a new version of the software to try that supports multiple cores (and runs MUCH faster). However, as of now at least, it still crashes. The good news, though, is that the “correct audio drift” feature doesn’t seem to be necessary for our files, as I believe they all match (but I’m not sure about that, actually).

I headed out of town for the weekend, and naturally I wanted to take my work with me. However, I did not want to take my entire Drobo Pro with me, especially as it was in the process of doing some 14-hour data redundancy routine when I was preparing to leave Friday. So I copied off a chunk of the audio and the video files, put them onto my iMac’s internal hard drive, and hit the road.

I spent the weekend running DualEyes on audio and video files, and importing the results into FCPX events, where I linked them. Then I came home tonight, all ready to move the events from my local drive back to where they belong: on the Drobo Pro. It couldn’t be easier with FCPX: just Cmd-click on each of the events, the from the File menu, select Move Event. But this is where things started getting messy. First, it took forever to copy, which made me nervous: it shouldn’t actually be making copies of the files – I only ever want to reference the original files. But obviously when I made a copy of the data, then treated it in FCPX like the original, I was letting myself in for issues. In the old FCP 7, I would just delete the files I didn’t need, then the next time I started FCP, it would ask where the files were, and I’d hook up to the originals. I’m hoping that will work on this version as well, but I’ve heard it won’t. So I’m wondering how I’m going to sync to the originals. Maybe the “consolidate project media” item on the file menu? Or the “organize event files”? Both are not selectable while background tasks are running, so I’ll have to wait until tomorrow morning to see if that’s a solution.

But if you think I’ve got many bad things to say about Final Cut X, you’re probably going to be disappointed. The tools blows doors off of the old version. It’s FAST. So fast, that I’m still in disbelief and the amount of waiting I never find myself doing. Huge rendering, transcoding, and file management tasks run in the background and have no perceptible impact on the work I’m doing. It’s almost unbelievable, and I love it. Another feature I’m gobsmacked about: the skimmer. It’s easy to underestimate this little wonder, but it makes my ability to sample vast amounts of footage quickly almost god like. But most of all, FCPX brings the fun back to editing. Instead of wrestling with my footage, I feel like I’m dancing with it.

Major Drobo problem and speedy replacement from Data Robotics

Just when I thought it was safe to edit on my Drobo Pro…it up and dies on me. Weird things began happening not long after I connected the unit to my new iMac. As I was copying huge amounts of data using Final Cut X (which I was using to create proxy media of my entire film footage), Final Cut would sometimes freeze. Then the system would freeze, and I had to force-reboot more than once. With all the badmouthing Final Cut X has been getting, it was tempting for me to pile on and blame that.

But i had a sense that the Drobo was the culprit. Yesterday morning the fan on the unit went crazy, with all the red and blue lights on at the save time. The fan was on top speed, and would periodically go dark as if it were trying to restart. But it was stuck in an endless boot up loop.

I didn’t shell out the extra money for DroboCare, so I was stuck sending an email to tech support on a holiday. To my surprise, someone answered within an hour. Within a couple of email exchanges, they determined that the problem was fatal, and they would RMA me a new one. I’m grateful for that much, because I purchased mine 16 months ago – so it’s four months past the 1-year warranty that Drobo extends to US customers (EU customers get 2 years).

This morning they notified me that a new unit is on the way and will arrive Thursday via FedEx. I’m crossing my fingers that this one will work, and that all my data will be safe despite the unsafe shutdown it must have suffered when it went down. The nice thing about Drobo is that you can pull out all the old disks (what Drobo calls a “disk pack”) and insert them into the new box (with power off) and turn it on, and it should recognize everything as before. Wish me luck.

**UPDATE** My replacement Drobo Pro arrived within 48 hours. I followed the instructions: with both devices powered off, remove the media from the old drobo, and load it into the new drobo (disk order doesn’t matter, they say – but I put them back in the same order because I guess I’m superstitious that way). Then I stood back, and hit the power switch. Wait for it, wait for it…it works! All my data is safe, and the new Drobo is humming along nicely. I’ve copied several terabytes of data so far (yes, backing up my data to another set of external hard drives), and no problems. Average data transfer with iscsi seems to be somewhere around 60 Mbps, as measured by AJA System Test disk whack tool. My plan now is to try cutting my film on Drobo Pro, but when I can afford it to use Drobo Pro as backup and edit on a Thunderbolt RAID.

Drobo Pro actually can work for video editing – with the right machine

When I bought a Drobo Pro more than a year ago, I thought it was going to be the perfect solution to storing big files and editing them. With the Drobo Pro’s iscsi gigabit ethernet connector, it should be as fast as esata, which is plenty fast for editing HD video. But it didn’t end up so rosey: when I connected my 3-year-old MacBook Pro, iscsi never worked as advertised. In fact, it was slower than Firewire 800. Repeated support tickets were incapable of resolving the issue. So I was stuck using it as an archival storage server, rather than for editing on directly.

But yesterday, things changed. In preparation to cut my first feature film, I’ve purchased an iMac 27″ fully loaded war pony. And the thought occurred to me, as I saddled her up, to give Drobo iscsi one last chance. So I cabled it up, and boom, it works. Look at these numbers!

80 MB/s write times! 77 MB/s read times! It’s my editing dream come true. Well, actually, it’s what Drobo advertised when I bought the thing, but I’d come to expect much less from the company. I still wouldn’t recommend purchasing a Drobo Pro, because who knows whether it’ll work with YOUR machine. But today, at least, I am one happy boy, as I contemplate more than 3 terabytes of film and audio that I’ll be scrubbing, tagging, cutting, previewing, and rendering into a film without any storage bottlenecks.

And as for the iMac? Oh. My. God. It’s amazing. But that’s another post.

My first date with Final Cut Pro X

Ever since I heard that Apple was about to release a radically new version of Final Cut, I’ve had it in my head to cut my film Beyond Naked with it. And fate agreed: it was released on the same day that principal photography on my film ended. So today I sat down with FCPX to get acquainted.

The experts say you should take these things slowly. Cutting a feature film on a brand new Apple product is a bit like getting married after a single date. But I’m a confirmed early adopter, an Apple fan, and a bit of a romantic. So I’m going for it. I’ll let you know how it goes.

My first impression was to scratch my head. The interface is different. Really different. I had to spend about three hours with it before the lights began to blink on. But once they did, I can see why the new version is going to be killer. In descending order, here’s what blows me away:

1. Storyline vs. Timeline. The old timeline is history, replaced by a single “storyline” that everything magically drops into and stays connected with. No more keeping track of layers and layers of stuff: it’s all on the same line! Now, to layer something above or below the main clip, you do something called a Connect edit. That joins the clip you’re adding to the storyline. Do a couple of these and you’ll wonder how you ever did it the old way.

2. Audio sync: ahhhh, so easy to connect zoom audio with dslr reference audio for individual clips. And just as easy to drop out the reference and bring up the zoom audio, or to mix them together. But so far I don’t see a way to sync multiple clips at the same time, as you can with pluraleyes.

3. Events and metadata: In the old Final Cut, it was possible to log everything, put in notes about takes, label them, etc. But I never did any of that. Did you? Well, on this new version you will. Some of it’s done automatically for you, like recognizing what type of shot you’ve got, how many people are in it, and more. And tagging is a snap, and it’s so heavily incorporated into the interface that you find yourself wanting to tag everything. You can even tag a section of a clip, which creates something like a subclip.

I’ll have more to report as I get deeper into it. But after the first date, I’m confident this is going to be a love story.

It's a wrap

Last scene in Beyond Naked

As the sun lingered above the horizon on the longest day of the year, we filmed the final scene in Beyond Naked. Golden Gardens seemed like a fitting place to say goodbye to each other, and hello to summer.

It feels like we’ve come such a long way together. From the stillness of the opening scene shot six months ago on Dec. 21, to the thunderous climax of the Solstice Parade last Saturday, we’ve followed the arc of the sun. As it turns a corner, so do we.

By coincidence, Apple released a long-anticipated new version of Final Cut Pro, the editing software we’ll be using to cut this film, on the same day. It’s time for Lisa and I to put down our cameras, and put on our editing hats.

What sort of story will we find in the footage? We had help on Saturday from 42 amazing volunteers, who shot hours of yet unseen footage, which is freshly stored on our hard drives, like a present waiting to be opened. From inside that footage, as the sun travels south, we’ll pull the threads story. And on December 21, this film will be completed. And the sun will start this way once more.

I want to thank everyone who helped make this film: the four brave people we’ve been following, the dozens of people who helped cover the parade, and the 166 backers who funded our successful Kickstarter campaign. When it’s finished, I hope it makes you laugh, and cry, and more willing to do one thing every day that scares you.