This is a seriously smart project. The more I think about it, there are a lot of situations where this would obviate my need to haul around a 3-foot long cineslider. And just a little controlled movement can really go a long way to adding polish to footage of all kinds, from quick iPhone grabs to carefully rehearsed DSLR shoots. I’m in!
CN-900 LED light: a solid, affordable alternative to LitePanels
Every since I learned about LitePanels a couple years ago from Werner Herzog (who used them shooting Cave of Forgotten Dreams), I’ve wanted to own one. But the price tag approaching $2,000 has been a deterrent. Luckily, a lot of other companies have begun making LED lights over the past couple years, and some relatively inexpensive, quality alternatives have begun to appear on the market.
A couple weeks ago I learned that LitePanels is attempting to create a monopoly on LED lighting for itself, which would ensure that LED video lights sold in America will continue to be overpriced. Seems they own one of those vague, overly broad patents that the patent office hands out like candy nowadays, and they have the money to enforce it (it can cost as much as $5 million to defend against such patent claims, forcing even large corporations like Sony to settle out of court when faced with such action).
What’s intriguing is that the LitePanels cases are being heard in Texas Eastern District Court, which Ira Glass recently reported on in an expose story about patent trolls on This American Life, When Patents Attack.
But I digress. The LitePanels patent case has achieved at least something positive: it’s spurred me to purchase an affordable alternative while they’re still available. I recently purchased the CN-900 LED light, which is available on Amazon for about $450, after watching this review. I’ve had an opportunity to use the light on a project, so I’d like to add my observations.
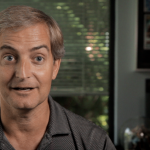
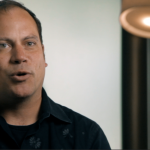
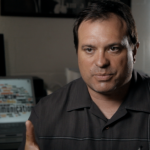
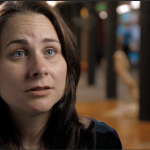
The conference trailer I just finished for the upcoming Seattle Interactive Conference was a great opportunity for me to try out the CN-900 LED light. We shot 6 interviews with VIPs on tight schedules, making it essential that we set up quickly to get the job done. We asked for 20 minutes to set up our lights, 20 minutes for the interview, and did our best to stick to that. The easy transport and fast setup time of the CN-900 light was a big part of how we stayed on time and made the interviews look good.
Here’s a frame grab from each interview (key light was CN-900 in all cases):
Key observations about this light:
- It has a serious green cast, which is easily removed by using the included minus green diffusion, or by using 1/2 minus green gel
- It has a CRI of 75, which at first glance might seem to be too low for professional use. The low CRI is the biggest downside of the light in comparison with the LitePanels, which advertise a CRI of 90. But the fact is, without a side-by-side comparison, I’m hard pressed to say these images don’t look great. The color correct easily and are easy to balance with other daylight sources at 5400K native balance.
- If balancing for tungsten, the included orange diffusion filter is too yellow and is useless. Use a CTO gel instead, and be sure to add 1/2 minus green to remove the aforementioned green cast
- The frame is totally solid, made out of metal, not plastic, and it’s just as thin as LitePanels
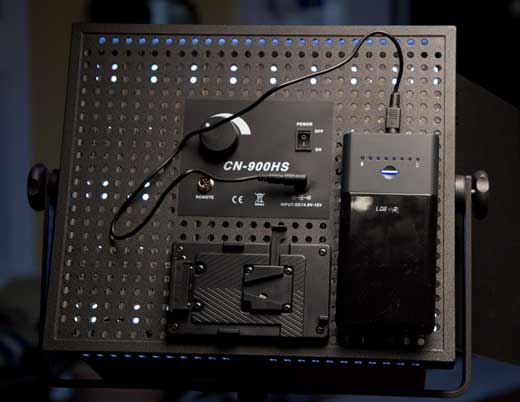
As reported elsewhere, the AC power cable is a real design flaw, because the weight of the DC converter hangs and puts stress on the connector when the light is on a stand. The solution is low tech and simple: form a loop out of the cable about 6 inches from the tip, and fasten with gaff tape. Then, hang the loop on one of the stand’s knobs, relieving pressure from the connector. See photo below:
What’s great about the CN-900 is that it can be battery powered – by the same Tekkeon myPower ALL Plus MP3450i Battery (5-19V) that I use to power my audio bag. Yes, the CN-900 comes with a Sony V-mount plate, but V-mount batteries are twice the price. The Tekkeon is just under $140. And I’ve discovered a few tricks about how to get the most from it.
Use velcro strips to attach the battery to the back of the light. Be sure to set the correct dip switch voltage (15 volts for the CN-900 LED) before powering up your unit.
If you power the CN-900 at full blast, it will run for just under 30 minutes on a full charge (27-29 minutes in my tests). Then the light will abruptly shut off, going from full power to nothing without any dimming beforehand. But what’s intriguing is that the battery shows half to 1/3 power remaining at this point. It seems that powering at full power for half an hour causes the battery to overheat, triggering the shutdown, even though there is quite a bit of juice left. After letting the battery cool for a minute, I was able to switch the light back on at half power, and it ran for an additional 40 minutes. So as long as you don’t need full power, you can get a lot of time out of this battery. It takes 3.5 hours to recharge the Tekkeon.
Update: Traveling with CN-900 LED lights
Steve Jobs Lives
 As the world says good bye to its greatest entrepreneur, I tip my hat to you, Steve, the man who made so much of my creative life possible. From the time I entered college until yesterday afternoon, when I finished cutting a short commercial video that will help me pay for keeping my daughter in the same school, your products have brought my dreams within reach. Thank you.
New commercial piece for Seattle Interactive Conference
I’m happy to announce the launch of a commercial piece we have completed for the Seattle Interactive Conference. For this video, Lisa and I interviewed 6 leaders in the local interactive scene, all of whom will be speaking at the first-ever conference in November. Since we had no footage from past events on which to draw, we went straight to the people who will be speaking at the event, and had a wide-ranging conversation about interactivity. Here’s the results:
Special thanks to Adam Sheppard of 8Ninths and Jamie Monberg of Hornall Anderson, who provided us with a substantial amount of the footage we used in cutting the video. And to the rest of the very busy people – Ed Fries, Vanessa Fox, and Shauna Causey – who made time for us and our equipment.
Tech details: We shot all the interviews on location with a two-person crew, myself (camera and editing) and Lisa (sound and production). I shot with Canon 60D, using a CN-900 LED as key light (a great light for traveling with, which I’ll blog about soon). I cut the piece on Final Cut Pro X 10.1, which is definitely more stable than the previous version. The biggest gripe I have about FCPX in the wake of finishing this piece, is a minor one: it’s tedious to color correct similar clips, because I found that cutting and pasting effects such as color corrections is unreliable when I had complex masks, audio filters, and third-party filters such as Magic Bullet Mojo, which I used to squeeze skin tones.
The opening shot I grabbed with my Canon S95 last Christmas on a family trip, as we were landing in Kito, Ecquador. Proving once again that the best camera is the one you have with you. After today’s big Apple announcement, I’m sure I’m not the only filmmaker lusting to have that be an iPhone 4s.
Rewire a Tekkeon battery to power MixPre and Zoom H4N
My biggest complaint about MixPre and Zoom H4N is that they are both battery hogs. I’m sick and tired of getting interrupted midway though shoots because my Zoom or Mixpre batteries need to be changed. I priced several industry-standard NP battery distribution systems, and they just seemed way overpriced, and frankly more than I need. Would it be possible for me to build a bomb-proof power distribution system with a Tekkeon My PowerAll MP3450i battery and inexpensive parts?
After about a week of ordering parts and teaching myself how to solder, I’m happy to say the answer is, definitively, yes. Including the cost of soldering iron and 3rd hand soldering clamp, I was able to build a power distribution system that will power my audio bag all day and then some, for $205.00. Here’s what it looks like, and how to make it.
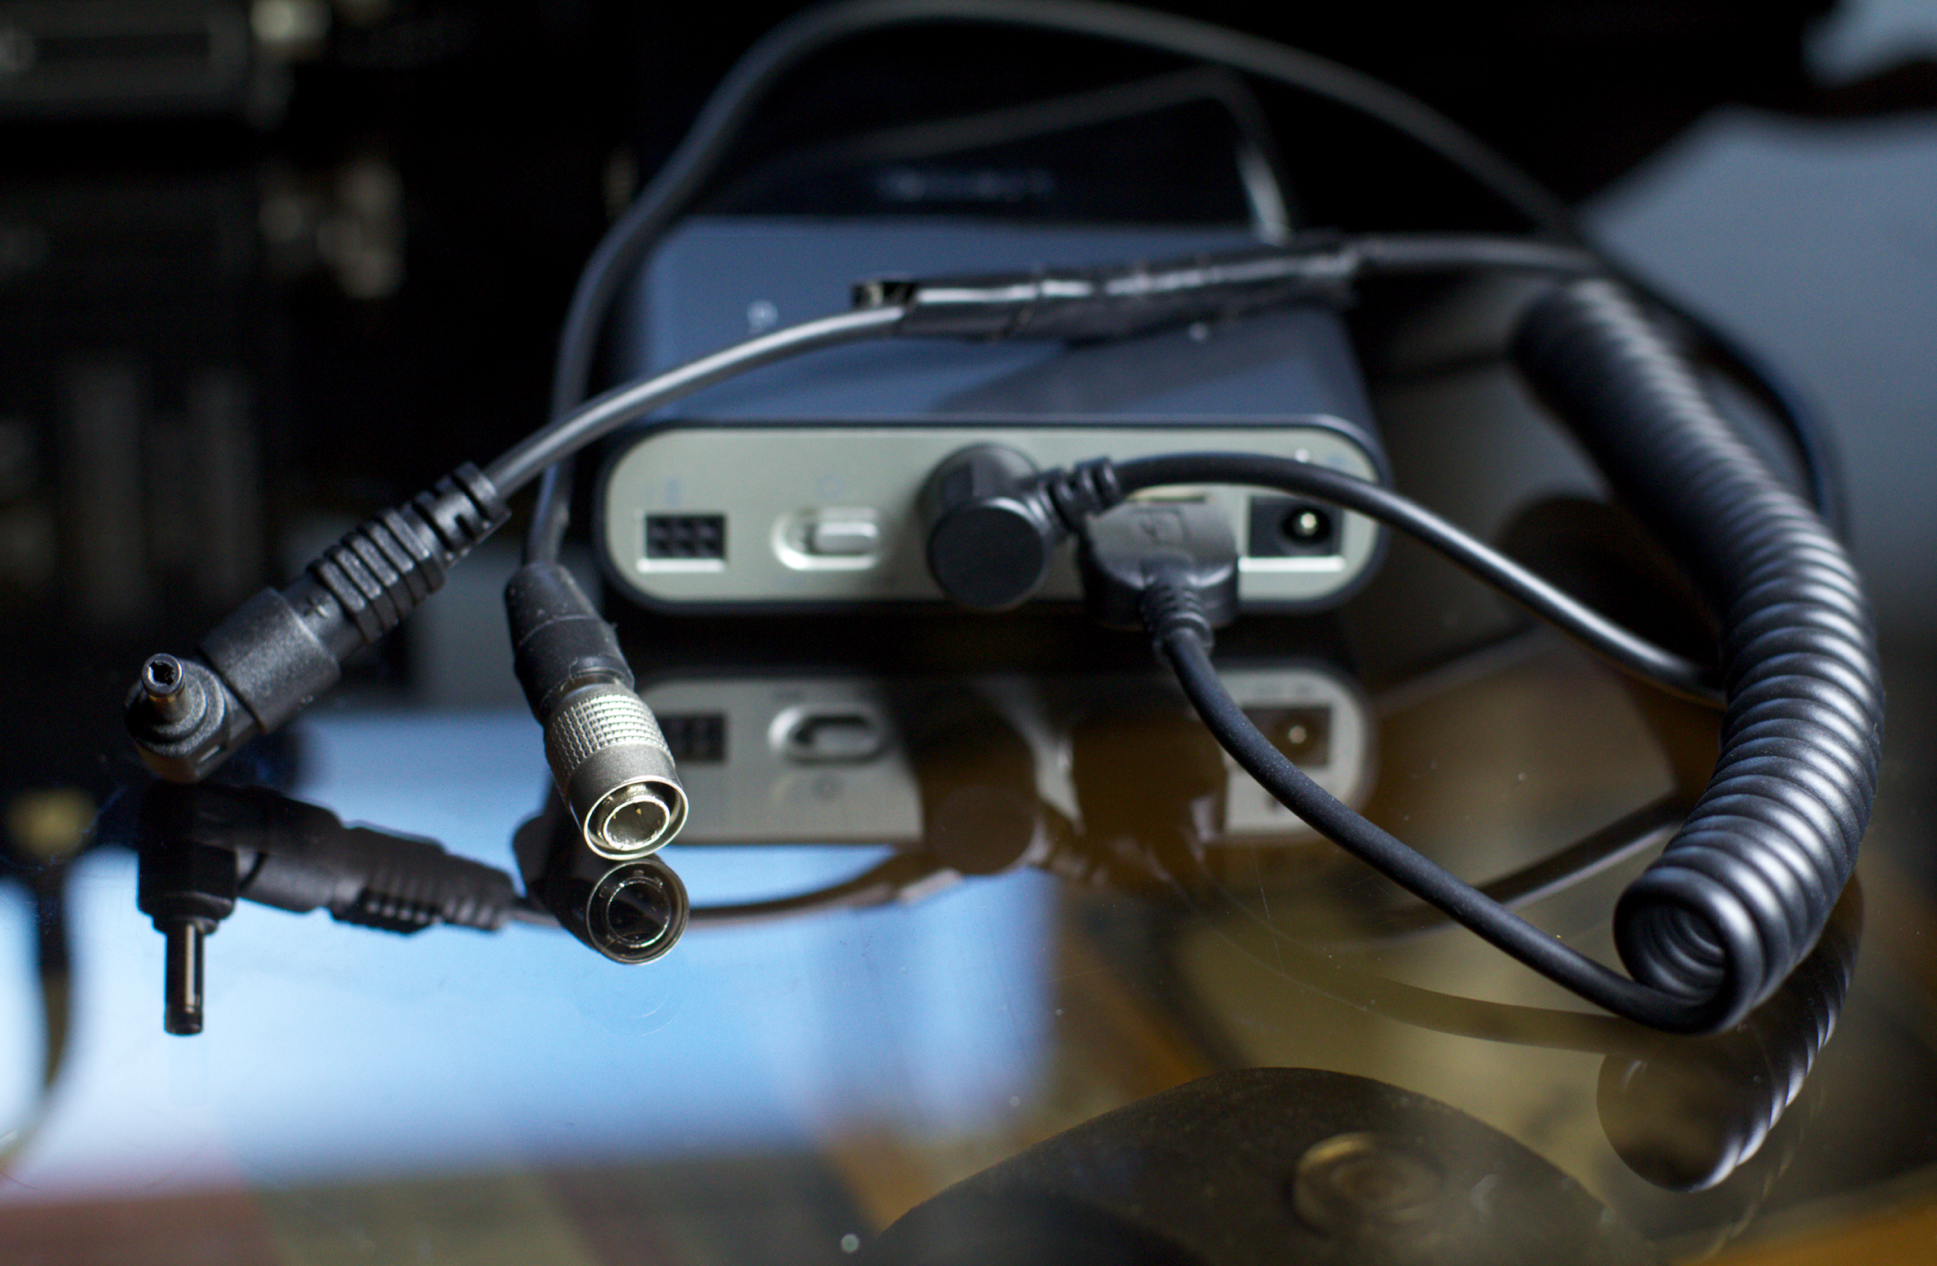
The battery and the DIY cables:
Ready to roll all day long:
Parts list:
- Gomadic Coiled USB Cable for the Zoom H4n with Power Hot Sync and Charge capabilities ($17.95)
- Hirose 4-pin power connector HR10A7P4PR ($12.32)
- Tekkeon myPower ALL Plus MP3450i battery, which you can set to provide 5-19 volts of power. ($139.99)
- MyPower Original Adapter Tips Set ($16.95)
- Tekton 7521 Helping Hand soldering holder with magnifying glass. ($9.80)
- Right-angle power cable for Tekkeon ($7.95)
The Tekkeon has two DC outputs: one is a variable voltage cable that supplies between 5 and 19 volts (set via a dip switch on the battery). The other is a USB out that provides 5 volts no matter what the rest of the battery is set to. The Zoom requires 5 volts, so it’s the obvious choice. This was theoretically the simplest cable – I ordered this one only and it was supposed to come with everything to immediately connect up to the Zoom, but they shipped me a unit with a tip that wouldn’t work with the Zoom. I was able to splice the correct connector by cutting off the tip of the Tekkeon power cable that I also ordered (see below), and putting on the appropriate tip, which Tekkeon sells in this pack of connectors. Just splice and solder the red and black wires together, and ignore the white and green usb data wires.
I didn’t want to perform surgery on the Tekkeon power cable that came with the unit, because I sometimes want to power my LED light with it. So I ordered one of the fine right-angle connectors from Tekkeon, which present a lower profile in the audio bag when plugged in. I cut the tip off it (which I put to work as outlined above), and got ready for the most challenging scene in this DIY drama: mating with the Hirose 4-pin male connector required by the MixPre.
First, you have to uncouple the Hirose connector, and remove the 4-pin connector that you must solder to. It unscrews from inside the main unit – I used a pair of needle nose pliers to get it turning, and then it came out by hand. Others recommend plugging it into your MixPre, which gives you a better grip to unscrew from. Here’s a picture that shows the Hirose broken down into it’s component parts, ready for soldering.
Soldering the Hirose 4-pin connector is not a trivial undertaking. The pins are very tiny, and my hands are the opposite of nimble. So a third hand device was mandatory for me, which I found for about $10 on Amazon, including a magnifying glass for extra credit. The magnifying glass turned out to be mostly useless, but the alligator clips were essential to holding everything in place during my many soldering attempts. The trick: pre-tin the cups and the wires, so that things bond quickly as soon as they’re hot. But first, which wires go where?
Knowing that the MixPre will simply ignore power that is the wrong polarity, I set about soldering different combinations until I found the right one. It took me 5 tries before I found the winning combo: #4 pin to positive (red), and both white AND black get soldered to the #1 pin. As I was grinding my way through the ordeal, some solder dripped onto the #2 pin while I was soldering the two cables to #1 pin, connecting the #2 and #1 pins with the both the black and white wires. So bit of a cluster there. Anyway, it works. (I think the #2 pin is ignored in this wiring scenario).
Oh, there’s one more thing. Once I had everything soldered up correctly, I realized I’d forgotten to slide the rubber jacket and screw-in body of the Hirose connector onto the cable BEFORE I started soldering. Which of course meant I had to redo everything. Don’t do that.
There’s some discussion in the forms about what voltage is ideal to set the battery to provide to the MixPre, which will accept anything from 5-18 volts. I chose 9 volts and it works great. The lights are much brighter on the MixPre when it’s powered this way, and it seems to power mics a bit hotter with 9 volts than it does with the internal AA batteries.
As a bonus, I discovered that both the Zoom and MixPre fail over to internal batteries automatically without interruption if the Tekkeon is accidentally switched off, runs out of battery, or if their cables come loose. Sweet.
Thanks to following websites for help: TaperJ on Tappersection.com has great advice on wiring Hirose connectors. Also thanks to instructables.com for advice on how to solder wire correctly.
La Figa performance at Vermillion
My friend Tiberio Simone performed at Vermillion art gallery last Thursday. The place was packed. In Seattle at least, Tiberio’s art clearly has legs!
I shot this short video with help from Lisa Cooper, who recorded audio. I cut it over the weekend with Final Cut Pro X. Music is from “Postcards in Full Color” CD by Max Richter, available on iTunes.
Seattle documentary association hosts DocForest retreat for filmmakers
Independent filmmakers tend to be a, well, independent lot. We like it that way, but it can get a little lonely at times. So it’s refreshing to see a local association specifically aimed at connecting local documentary filmmakers. Lisa and I have enjoyed attending a couple of SeaDocs screening events, where we met James Allen Smith, who joined our Beyond Naked filmmaking team on June 18. SeaDocs is putting on it’s largest event of the year next weekend, DocForest, and we’re looking forward to attending what looks like a great opportunity to connect with other local documentary filmmakers.
Here’s the scoop (from the SeaDocs website):
August 26-28 join the Seattle Documentary Association for DocForest, a documentary filmmaker’s retreat at the Kitsap Forest Theater. The weekend retreat formerly known as DocFarm will be filled with guided peer-to-peer workshops, documentary films, camaraderie, bonfires, and great food. Recharge your creative spirit at this breath-taking environment in the woods!
The weekend kickoffs Friday evening with a Happy Hour followed by Rapid Recharge an event where we show YOUR favorite, brain tingling, jaw dropping, inspiring clips. We will show five minutes of any genre of film you bring.
During workshops discover the myths of distribution; practice pitching your dream project and honing your idea; and explore the ethics of documentary filmmaking and the elements of storytelling.
Saturday evening is the screening of 10 min. Works-in-Progress clips.
DocForest events end Sunday at 2pm so you’ll have plenty of time to continue to enjoy the woods and head home.
Sleeping accommodations are available on site where you can bunk with twenty-five other people in the cabin or bring a tent to sleep alone. If you prefer to sleep offsite there are nearby hotels.
Ticket prices include the following chef catered meals: Friday Happy Hour; Saturday breakfast, lunch and dinner; and Sunday breakfast and lunch.
Get inspired and get to know your fellow documentary filmmaking community at the 2011 DocForest!
See http://foresttheater.com/driving-directions for directions to DocForest.
For Tickets:https://www.brownpapertickets.com/event/187084 or call 24/7 ticket hotline 1-800-838-3006
Time ramping in Final Cut Pro X: so easy I can do it
Time ramping. It’s been on my to-do list of “things to learn how to do in Final Cut” but never had time to face the fat tutorial. So this afternoon I thought I’d give it a shot in Final Cut Pro X, sans tutorial. It turns out to be ridiculously simple. Just click the magic wand icon (not kidding), select whether you want it to ramp up from 0 or down to 0, click, and you’re done.
This clip is all cut from time lapse footage that was shot slower than it should have been, so that it played back pretty jerky at 24p. I started out by slowing it to 50 percent using the incredible Optical Flow mode, which takes awhile to process, but the results are stunning, almost liquid. Then I sliced up the image and did some zooming on it to get the different close up views. Then I ramped the first clip from zero, and the last one to zero.
The difference between the old version of Final Cut and this new one is the difference between knowing you CAN do something, and actually doing it.
Final Cut Pro X: another favorite keyboard shortcut for browsing events
OK today I picked up another keyboard shortcut that I’m excited about.
When reviewing an event in filmstrip view, the default is to show 5-second increments. This is fine if you’re making a selection on a specific clip, but what if you just want to see thumbnails of ALL the clips? I find myself switching the view back and forth a lot. The official FCPX keyboard shortcut to do this requires holding down the left side of your keyboard all at once: cmd-opt-shift-,. And it only works if your focus is on the event browser (rather than on the event index). Which means if you’re in the timeline, you have to cmd-shift-1 to toggle the event browser index off before the aforementioned shortcut will work.
Luckily, and this is what I’m excited about, there’s a far easier way to do this. When you’re in the even library, just press shift-z! Yup, the long-standing Final Cut shortcut for “view all” does what you’d expect on the event library, showing you thumbnails for all clips in a single keystroke. Love it.
The default view:
The shift-z view:
Final Cut Pro X's elegant solution for synchronized clips with multiple tracks of audio
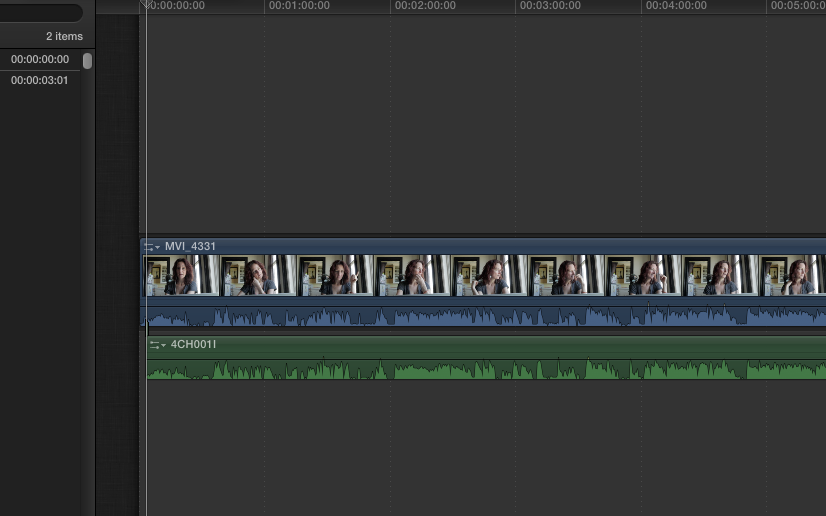
On my current film, Beyond Naked, most of the audio we recorded was fairly straightforward, dual-mono, 2-channel recording: lav audio was recorded on the left channel, and shotgun mic on boom went on the right channel. Reference audio was recorded with on-camera mic, which we use to sync the clips in DualEyes. Then, we create Synchronized clips in FCPX by connecting the video with the audio, and we’re ready to roll.
But occasionally we faced a more complicated situation: phone conversations. During production we recorded these situations on a Zoom H4N in 4-track mode, which produces individual files for each side of the conversation. So in post, instead of one audio and one video file, we have to sync three files: 1 video to 2 audio clips. And of course, the audio won’t sync to the audio clip of the person on the other end of the line, because only her side of the conversation is in that file, leaving nothing to sync to.
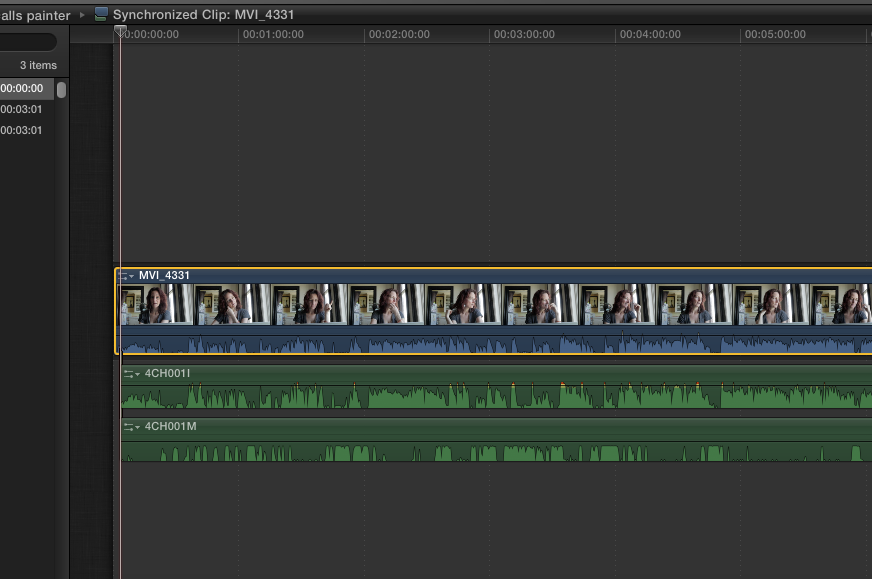
I spent a few hours today figuring out how to do this in FCPX, and discovered that the clever engineers at Apple have built an extremely elegant method for doing this and storing it in the clip rather than in the project. How cool is that? Here’s how it works.
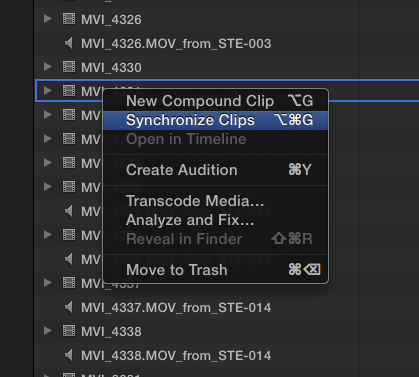
1. Select the video clip and the audio track that has the cleanly recorded version of the reference track. Right-click and select “Synchronize clips” or press cmd-opt-g.
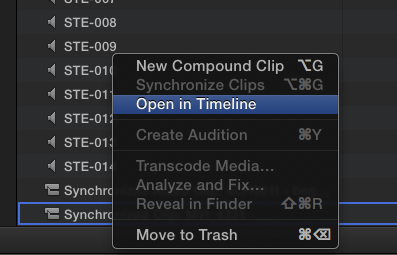
2. Right-click on the new synchronized clip, and select “Open in Timeline.”
3. With the clip open in the timeline, select the third audio file. Align the playhead to the start of the first audio file. Press Q.
4. The audio clip is immediately connected below the second audio clip, and is in perfect sync, because the two clips are of precisely the same length.
4. Close the clip in the timeline by pressing the back arrow located in the upper left of the timeline. The additional audio clip is now stored with your synchronized clip.
What’s so incredibly sweet about this technique is that the you’ve just created a compound sync’d clip, all before you’ve even created a single project file. Everything happens in the event library on the CLIP! Test this out by selecting the clip and spotting it to the timeline by pressing e. it comes with all the sweet audio goodness, ready to roll and for further refinement such as mixing one channel louder than the other. In the prior version, stuff like this happened in the sequences, so you had to create a temporary or placeholder sequence just to prepare your clips for editing. I hated the confusion that caused me. With this, it’s all clean and simple, and stays where it belongs: clips are clips, and the timeline is the place where you edit those clips.
