Category Archives: Tips

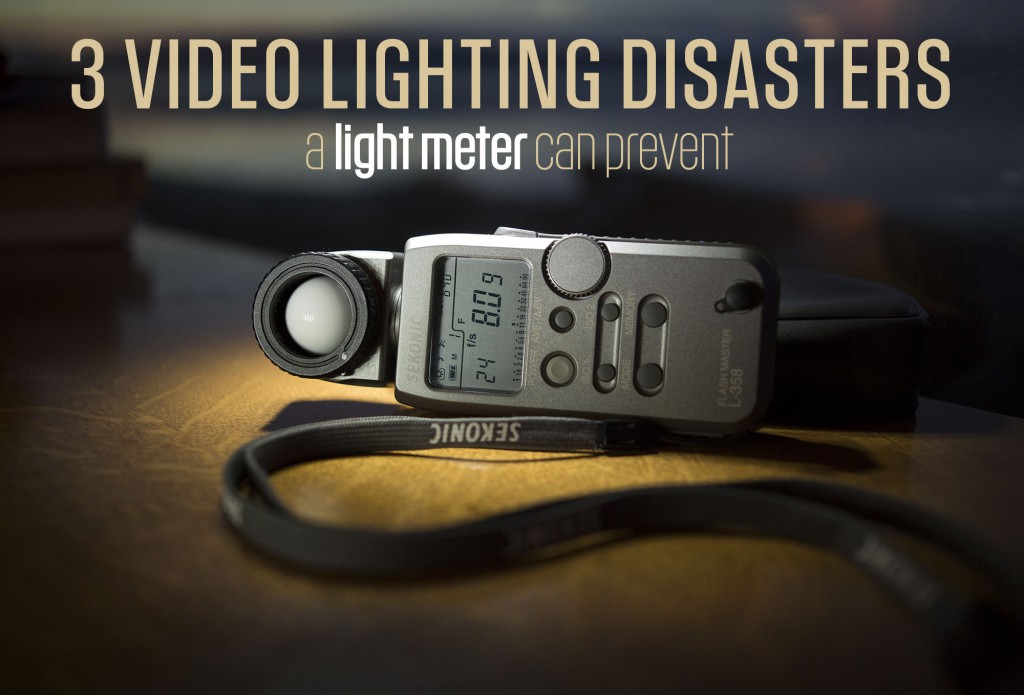
3 Video Lighting Disasters a Light Meter can Prevent

With digital video cameras, it’s tempting to shoot everything off the monitor. What you see is what you get, right? Well, sort of. I’m thrilled with the exposure tools we have today – in particular the waveform monitor and histogram that Magic Lantern has unlocked on my 5dmkiii. But there are some situations where depending soley on what you see can get you in trouble.

1. It looked good on your monitor when you shot it…but it’s too contrasty (or not contrasty enough) in post. No one knew how the film was going to be graded at the time it was shot, so somebody said “let’s just shoot it flat” (ie, using something like the ProLost picture style). Good idea. But shooting it flat isn’t the same as lighting it flat. For best results, you need to know what contrast ratio to use. And that’s where your light meter comes in.

How to find contrast ratio. Let’s assume a simple interview, with two lights: a key, and a fill. To determine the contrast ratio, turn off the fill light. Point the lumisphere at the key, take a reading and note it. Next turn off the key light, and repeat to read the fill light. You now have two f-stop values, i.e, f/8 for key, and f/5.6 for fill. To determine contrast ratio:

1:1 ratio = lights are the same, perfectly even
2:1 ratio = 1 stop difference between lights
3:1 ratio = 1.5 stop difference
4:1 ratio = 2 stop difference
8:1 ratio = 3 stops (one half of face is very dark)

On my Sekonic L-358, there is a handy feature for performing this calculation automatically, called “brightness difference” mode. I recommend investing in a light meter that can do this for you, otherwise you have to do some awkward math. And you’re don’t call yourself a filmmaker because you wanted to be an engineer, do you?

So, to avoid this lighting disaster, do some camera tests as described above in advance of your shoot, using several different contrast ratios. Then apply your intended grade to the footage, and see which contrast ratio best gives you the look you’re going for.

Tip: I most often grade with FilmConvert Pro, which is a quick and powerful way to get great-looking footage (esp. skin tones) out of DSLR video. With FilmConvert, I find that I have to shoot at a lower contrast ratio than looks normal on my monitor for best results with many (but not all) of the film stocks.

Side note: Be sure to get a light meter that supports cine frame rates. Many inexpensive light meters don’t allow selecting shutter speeds between 30th/sec and 60th/sec. For 24p video, you need 48th/sec. But it’s pretty easy to find a quality meter used. I was able to find a Sekonic L-358 for $160 on Craigslist, and it does everything I need and then some.

2. It looked good when you shot it…but you can’t repeat it. The director wants you to reshoot a scene – but you can’t remember how you lit it. Or you simply need to match the lighting from day to day on a multi-day project. You’ve got lighting continuity problems.

Solution: The first time you light it, take a light meter reading for each light on set. Record three values: ISO, aperture number, and frame rate. I.e, 640, 5.6.3, 24. That way, when the director calls you a month later begging for a reshoot, you’ll be able to say “no problem.” Lighting, at least, won’t be the cause of any continuity problems.

3. You scouted the location, but when you arrive on the day, your lights aren’t powerful enough to match the window light. Ooops. Had you carried a light meter while scouting, you’d have known what to bring.

When scouting a location, a light meter takes the guesswork out of the process. It also helps you communicate with the rest of the crew, which is invaluable for larger projects where someone other than yourself may be setting up the lights.

And finally, I’ve found that carrying a light meter is a great way to educate the eye. How bright is that overcast day in Seattle? (Almost f/11 at ISO 160 for 24p. Brighter than you might think!) How bright is that fluorescent office environment? Hmmm, f/4 at ISO 640? Hold up the meter, click, and discover that it’s f/2.8 and a half. Having this kind of instant feedback is key to rapid learning. After awhile, a light meter will make you pretty good at this game. And that can’t help but make you a better filmmaker.

Do you use a light meter on your projects? How do you use it?

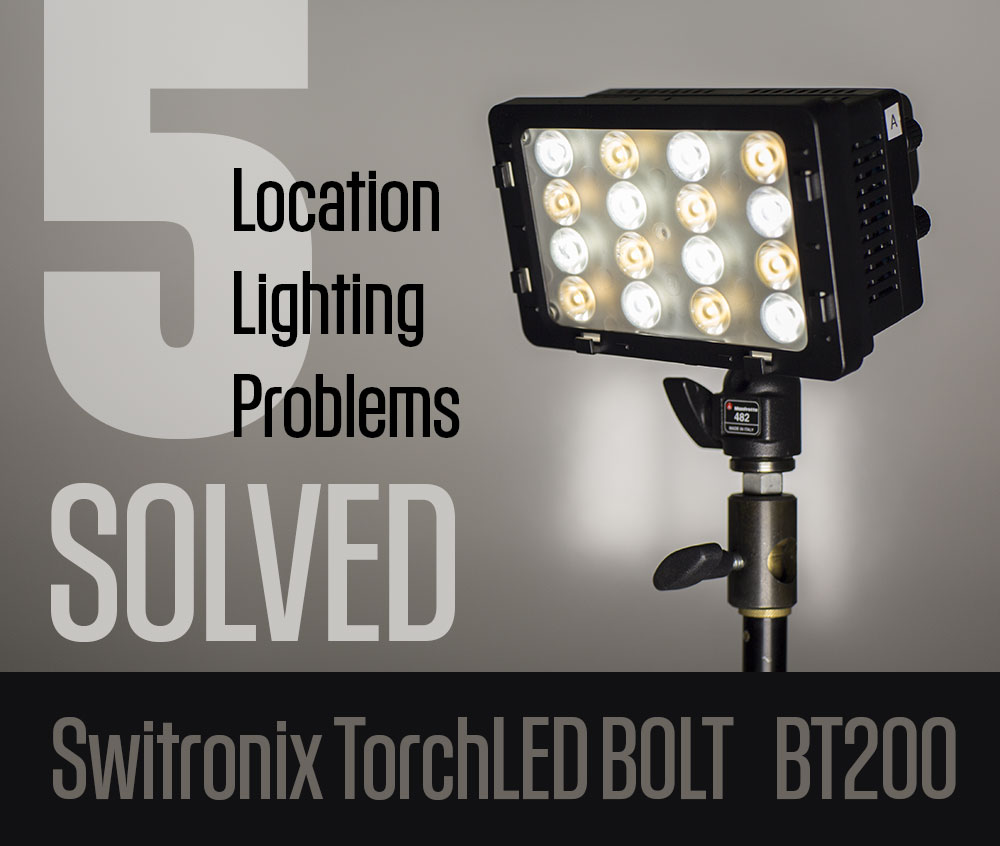
5 location lighting problems solved with Switronix TorchLED Bolt

Last summer I DP’d a short film written by Persephone Vandegrift. I’m in the basement preparing to shoot the scene we’ve been saving to the very end, in which Telisa Steen’s character destroys a dollhouse in a fit of grieving for her lost daughter. I’m a little nervous for three reasons. One, there would be no retakes, because the prop would be destroyed. Two, the home owners want us gone in an hour. And three, the ceiling in this bedroom is so low that I can reach up and touch it. So hiding a light is going to be a bitch. And I need something, fast, to separate Telisa from the background. What am I gonna do?

I reached for my “Peacemaker,” the sun gun that’s always within reach: a Switronix TorchLED Bolt. I’ll explain what I did with it in a moment. But first, I’d like to state that this post covers the TorchLED 200. I just learned that Switronix has announced an updated version, the TorchLED Bolt 220, that is 10 percent brighter, $120 more expensive (although B&H has steeply discounted it to $279 through dec. 4), and claims to fix a color mixing issue I discuss below.

The Switronix Bolt LED is hands down the most versatile video light I’ve ever used. In the 9 months since I got my hands on one, I’ve used it like a monkey wrench to fix all kinds of lighting problems. Here’s why:

  • It’s powerful for its size.
  • It’s tiny. So it’s easy take with you.
  • It’s controllable. It throws a tightly focused beam a long way without interfering with other lights.
  • It’s color adjustable. Two knobs allow you to select between 3200k tungsten and 5600k daylight.
  • It’s strong battery powered. L-mount Sony batteries keep you going for more than two hours at full blast, or more than twice that when dialed down a bit. Connect them to a Switronix V-lock battery using the included adapter cable, and you can run all day.
  • It’s inexpensive. About $250 including battery and cables.
Distance TorchLED LitePanels MicroPro
3 ft. f/11 f/2.8
6 ft. f/5.6 f/1.4
12 ft. f/2.8

Just how powerful is it? Take a look at the numbers to the right. I broke out my light meter and compared it to a venerable LitePanels Micro Pro, and got these light meter readings at 50th/shutter at ISO 640.

I recently bought a second one and they go everywhere with me in my camera case. Maybe that’s why they get used so much – they are always handy when I need them. And because they are battery powered, with batteries that last for hours, I don’t have to think about running extension cords when I want to deploy a light. Sometimes that’s the difference between adding a light and getting by without it.

OK, so let’s go back to that low-ceilinged room and see what we can do with it.

Problem 1: Low ceiling – no room for placing backlight without getting it into the shot.

Solution: Hang a Bolt from an autopole.

With the clock ticking, my camera assistant David Fareti was able to attach a Bolt to an autopole with a Matthelini clamp. The only other light with us that might have worked was a Lowell ProLight, but it would be so close to the ceiling that it might have caught the place on fire. And there’s the time it would have taken to hide the power cable. So it simply wasn’t an option. In the end, our shot come up looking like this frame from the film:

Problem 2: Talent shows up for interview wearing wide-brim hat. No time to re-light.

Solution: Place Bolt on stand close to camera lens, at eye level with talent, and dial it to provide -2 stops fill.

We’re filming a series of interviews with legendary graphic designers for the Seattle Design Lecture Series. Our first interview was with April Greiman, who arrived an hour late for the interview wearing this huge hat. We had to roll almost immediately because she was due to deliver her speech in about an hour. Gulp. I knew her eyes would go black under that hat, but I didn’t just want to lower the key and blast light up in there – the only thing worse than under lighting is over lighting. I have learned to keep a spare Switronix pre-mounted on a light stand for just kind of situation. I simply placed it just to my camera left at lens height, and dialed in about -2 stops of light. Like so:
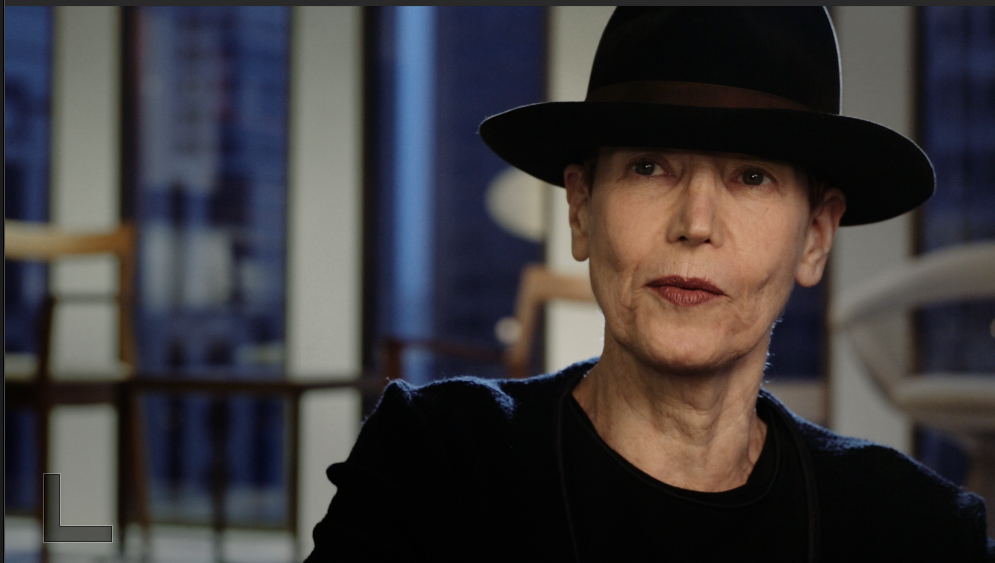
Instantly, her eyes come to life with the catch light in them, and her expression emerges from beneath the brim. Yet, a sense of mystery is preserved. Despite the fact that the Bolt is a small hard light, you can get away with using it undiffused as fill. Oh, and that’s my other Swit sketching her hat and shoulders with rim light.

Problem 3: Strong sunlight on subject needs a quick fill.

Solution: Put Bolt on camera and crank it all the way up.
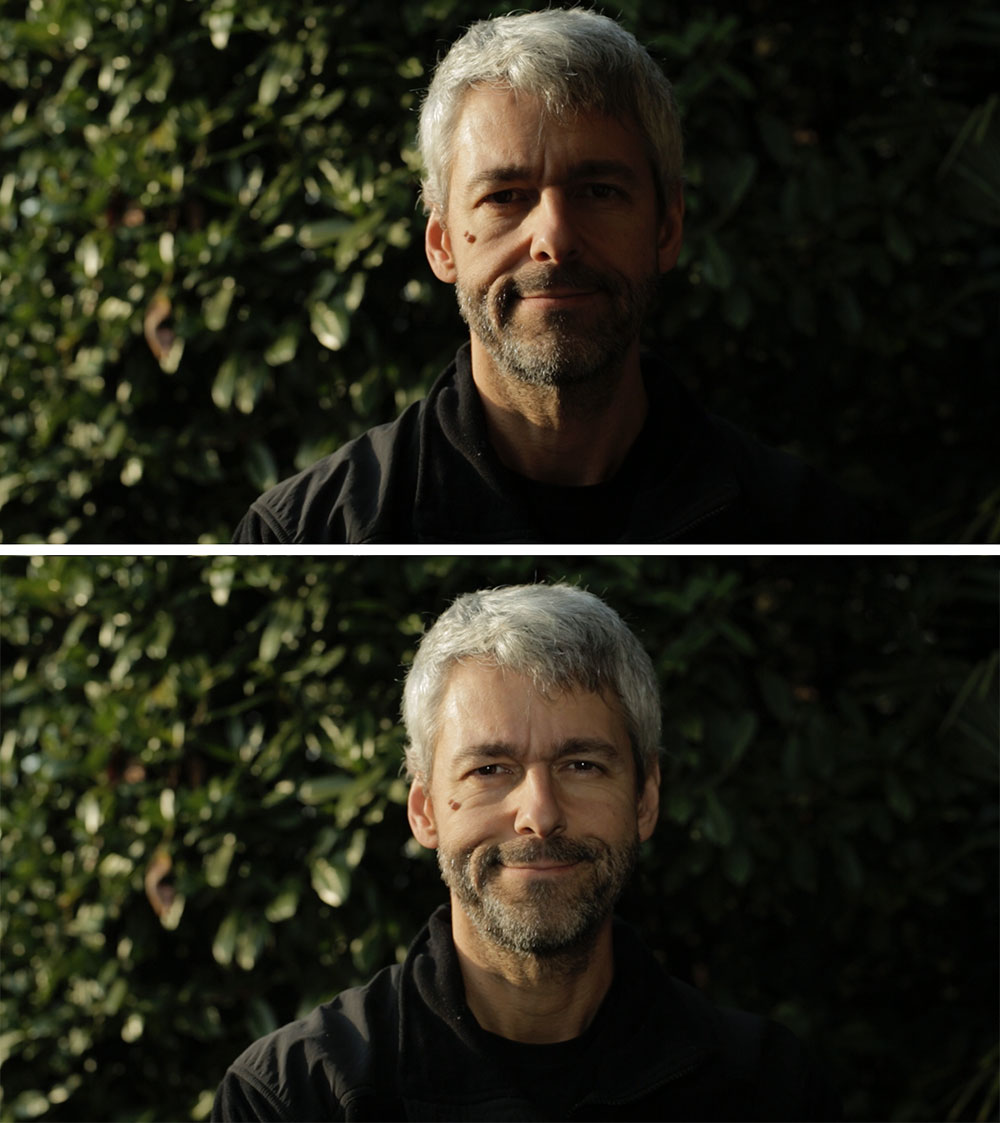
OK, so I wouldn’t normally light an interview like this. I’m showing you this to prove a point: for ENG-style interviews, the Bolt IS bright enough to fill direct sunlight…if you keep the subject within about 3.5 feet of the camera. For this selfie shot on my 5dmkiii, the Bolt was set to full power at 5600k, the aperture was at f/4.5 with a .9 ND filter (-3 stops) on 50mm lens, at ISO 160. Take that, sunshine!

Problem 4: Need a hair light but must avoid window reflections.

Solution: Clamp Swit Bolt to ceiling-mounted light track.

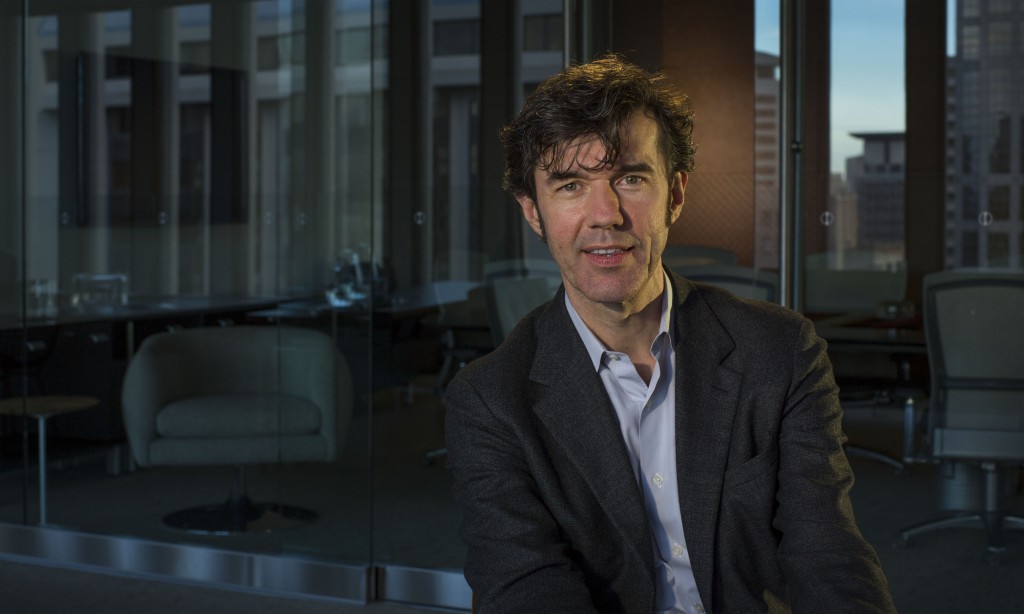
I recently had the pleasure of interviewing New York graphic designer Stefan Sagmeister for the Design Lecture Series put together by Civilization. I used quite a few tungsten lights gelled at 1/2 ctb, to get good color contrast with the blue window light that surrounded him. I couldn’t do what I normally do – place a light on a Manfrotto 420B boom arm for a backlight, because it would have been visible reflected in the glass windows behind him.

Luckily, there was some track lighting in the ceiling behind him, which wasn’t very sturdy. But it was strong enough for me to clamp a Bolt to it with a gaffer’s clamp. Lighting accomplished.
Problem 5: Need a quick kicker to add a little zest to otherwise good looking frame.

Solution: Swit on stand behind and beside talent.
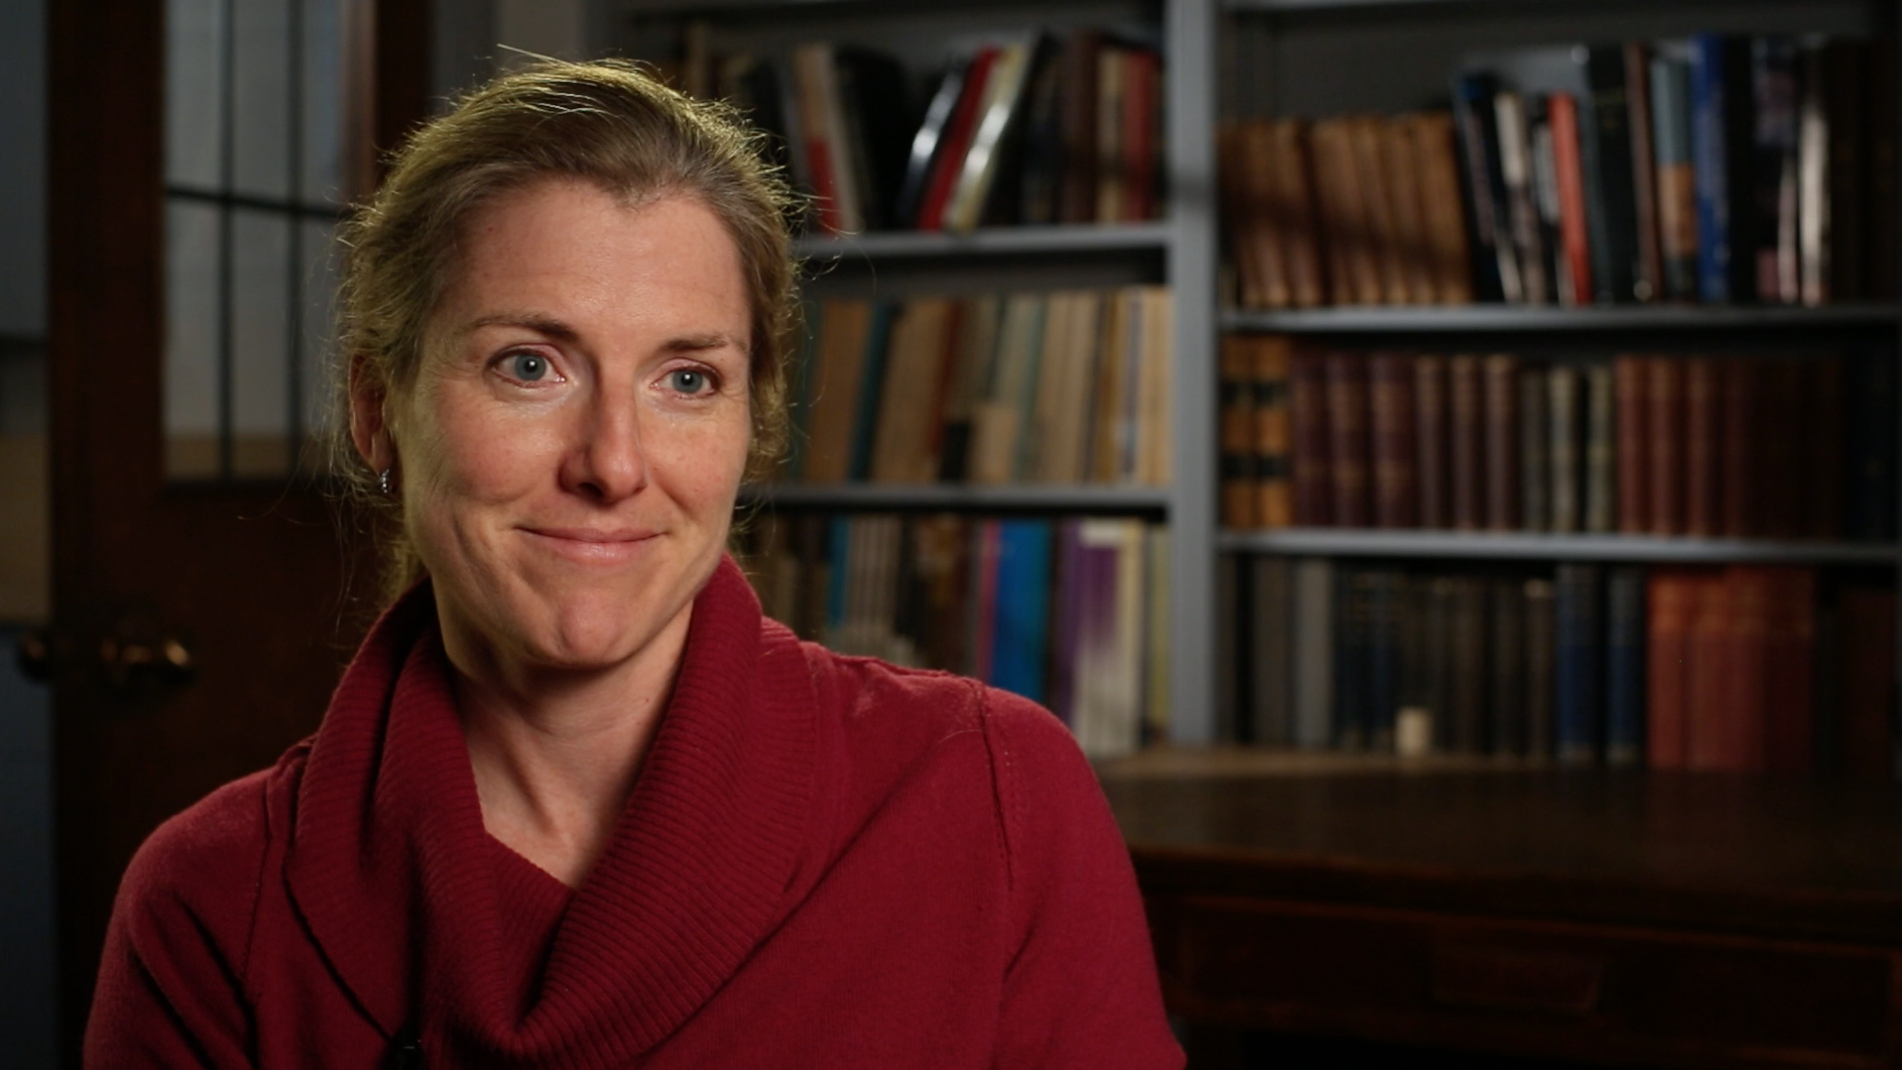
Here’s a shot that already looked pretty good with key light from a softbox, and background light pouring through a doorway window illuminating the books. But this UW professor wasn’t separating enough from her background. The solution was, you guessed it, two Bolt LEDs. The first I hung on a Manfrotto 420B arm which gave her a nice hair light, also illuminating her camera-right shoulder. Then I put a second Bolt on a light stand behind and beside her to camera left. This provided a kicker that also filled in the shadow side of her face a bit, and penciled out her shoulder. Roll camera.

A Phottix FTX2 Flash Bar allows placing two of these lights on a stand (this flash bar, which articulates at base, also allows mounting these lights inside an Apollo soft box). Conveniently, there’s a couple of slots for attaching a shoot-though umbrella. Pairing two lights through an umbrella, at 50th shutter and ISO 640, I get f/5.6 at 3 feet, f/2.8 at 6 feet, and f/1.4 at 12 feet. In practice, though, I rarely use them doubled up – that’s what my other lights (Arri 650, etc) are for, and these little problem solvers are better suited for use as kickers, rim and fill.
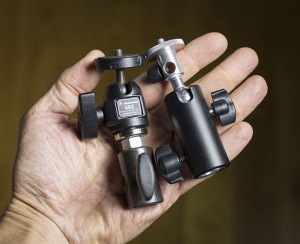
The Swit ships with a flimsy shoe-mount adapter, but for use on a light stand, you’ll need a stand adapter that has a ball head, like one of these. The one on the right is a flash swivel tilt bracket that you can pick up for about $12. And the other is a beefier 3/8″ stand adapter paired with a Manfrotto ball micro head that will run you $12 and $99 respectively.

One more small accessory that’s worth having with this light: to soften the light, check out the Airbox.

In practice I tend to use the Swit without diffusion, because I appreciate the beam that it throws. Putting any kind of softener on this light really cuts its output. But, there are times when I just want some soft fill up close, and this has come in handy.
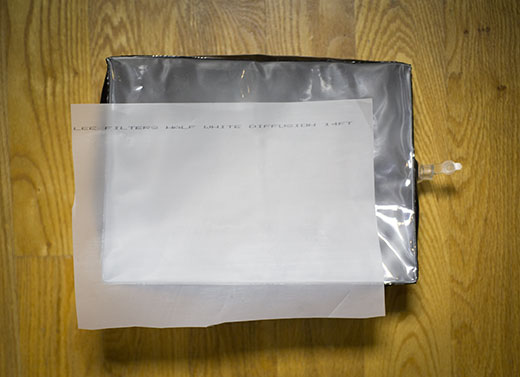
I have found that I need to tuck a sheet of 1/2 white diffusion gel into the sleeve on the front of the box, to get good diffusion. The clear vinyl alone doesn’t quite do it.

So, is everything amazing about this light? Almost. But there are a few things that I’m hoping will be improved with the next version of this light.

Drawbacks:

The batteries don’t exactly lock into place. You have to be very carefully placing these lights, or the batteries can fall out. I wish it had a positive locking mechanism.
Color mixing isn’t exact. The twin color-temperature dials on the back aren’t spot on with regard to color temp. I’ve noticed that I need to dial up about 1/3rd tungsten to 100 percent 5600 to get good daylight results – otherwise it’s too blue. The 5600k dial should be labeled the 6000k dial.
The diffuser card falls out. As with the batteries, there’s no way to lock the diffuser into place. Both of mine went missing very quickly. The same person at Swit seems to have designed this as and the battery plate. Seems like a small design change could fix both. My email to Switronix asking how to purchase a replacement has gone unanswered.

Bottom line:

Owning this light won’t make you a better filmmaker. Or will it? It’s made me a better one, because now it’s so easy to do the right thing – add that rim light, dial in that fill, tweak that color temp – that I’m actually doing it, instead of thinking about it. Having a Bolt in your bag arms you with a powerful light that delivers on the promise that LED lighting has been whispering for years: cool light when you need it, where you need it, no cords attached.
10 most common audio mistakes in documentary filmmaking

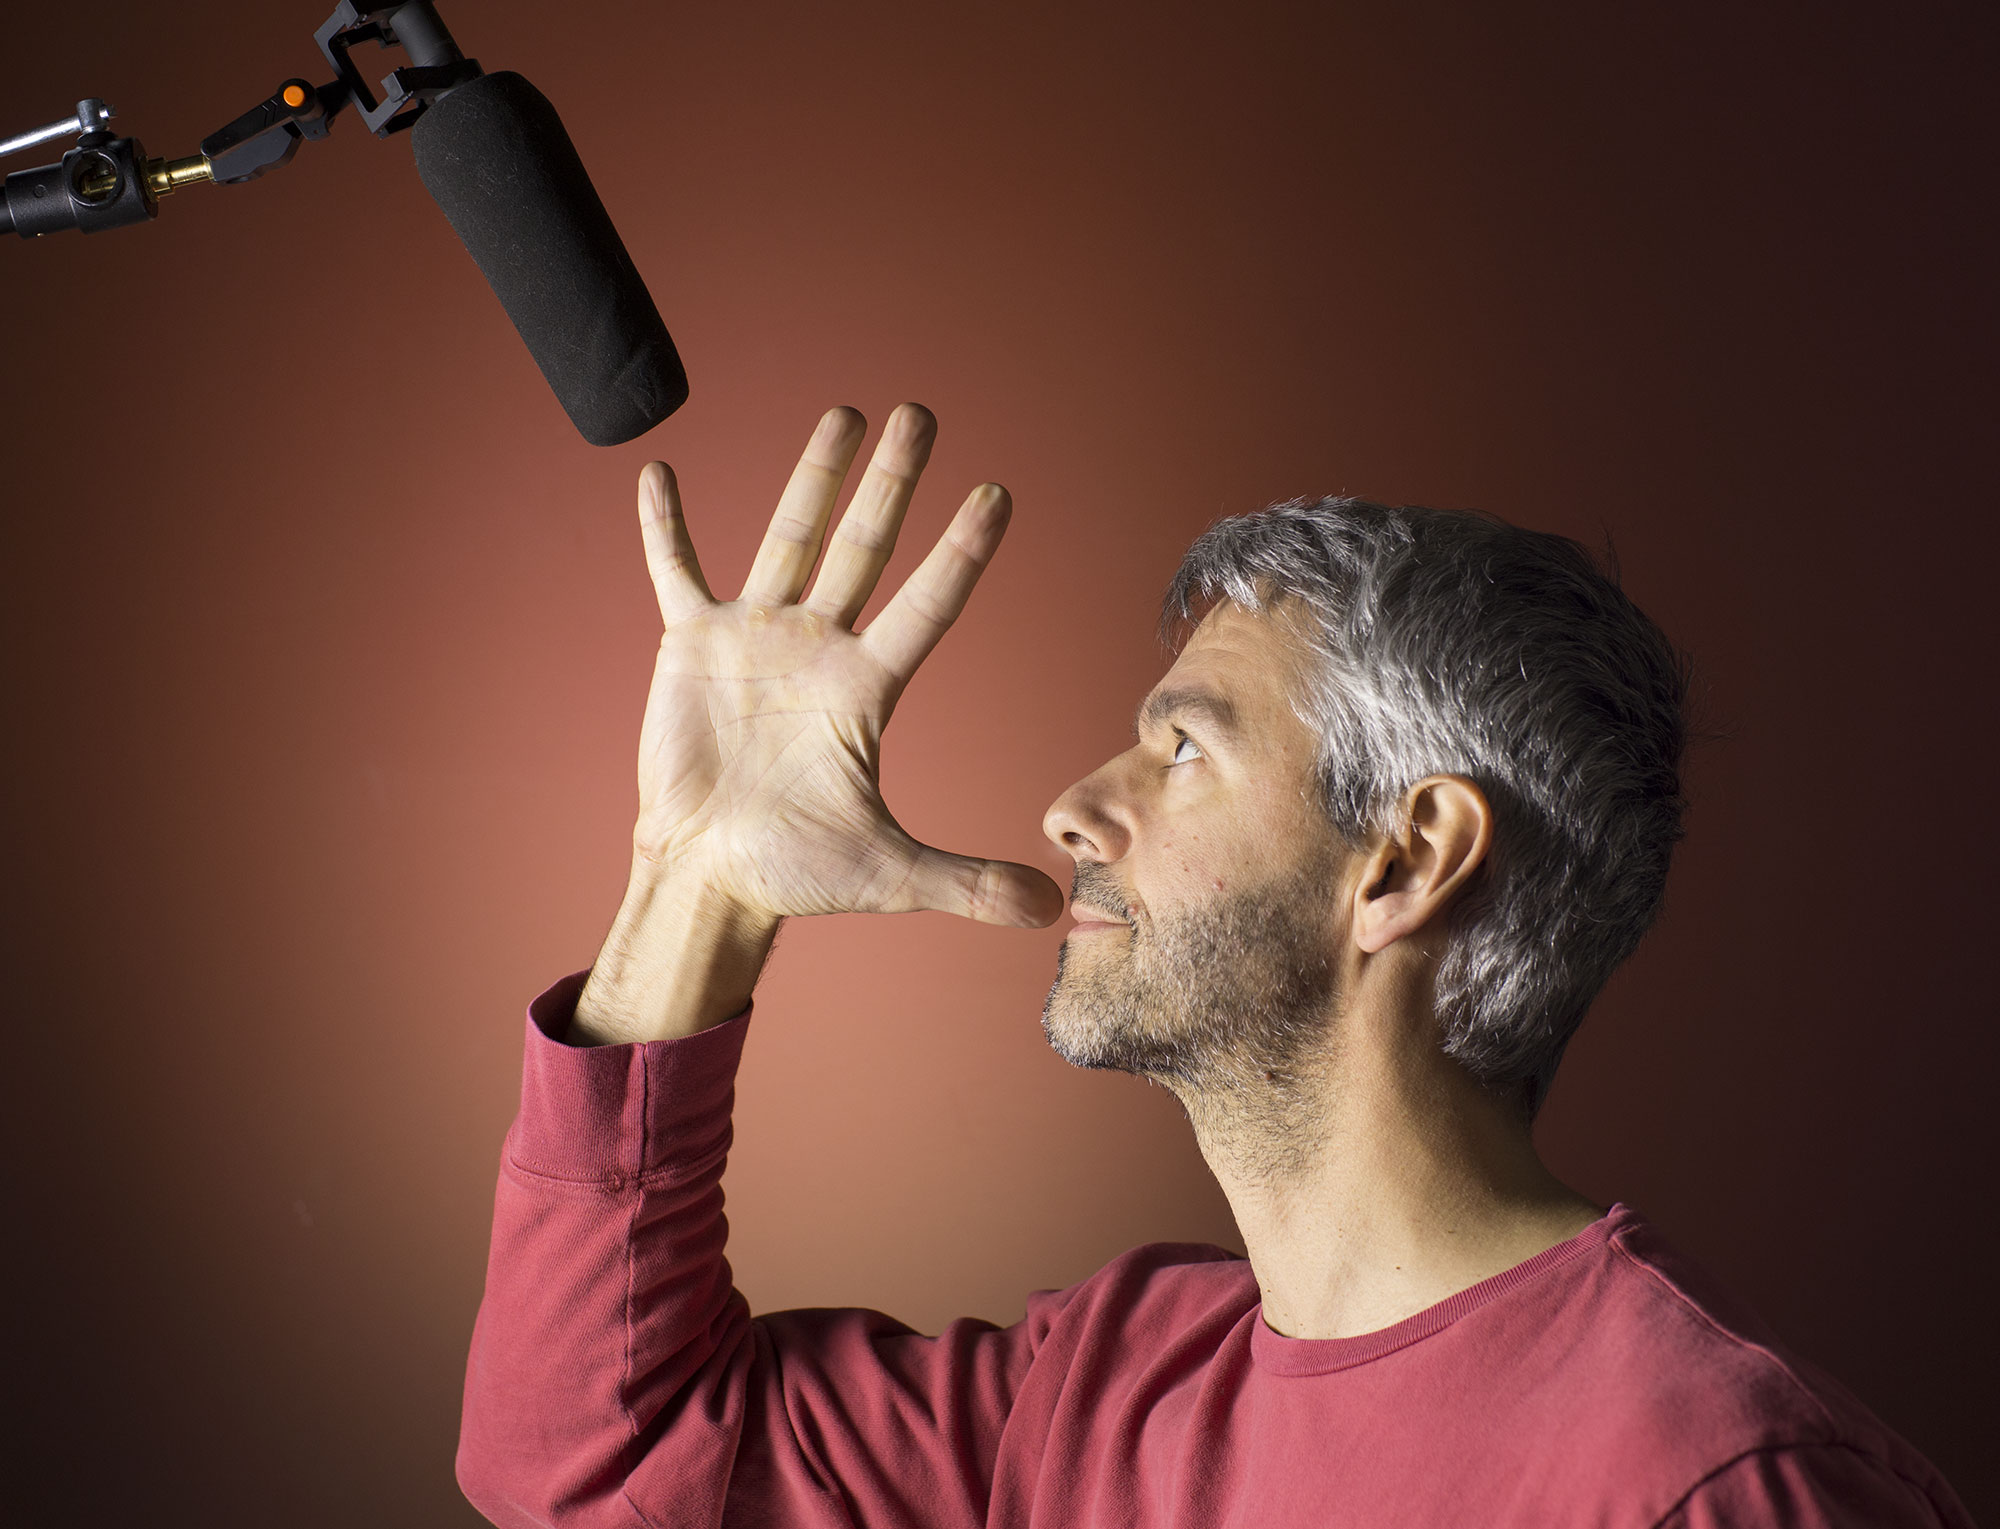
1. Not getting mic close enough. If you audio isn’t good enough, it’s probably because the mic isn’t close enough. Are you trying to get by with an on-camera mic? Get the mic off the camera. Really. At a minimum that will mean using a radio lavaliere. And preferably a shotgun mic operated on a boom pole. Use the hand trick to find the ideal mic position, as follows:

Place your thumb in front of your mouth. Fully spread your fingers at a 45 degree angle. The tip of your little finger is where the boom mic should ideally be, about 6-8 inches away. Of course, it varies with the subject, and with the shot. Sometimes you just can’t get that close without risking getting the mic in the shot. You can get away with 1′ away, maybe even 16″ away. But if you’re regularly 2-3 feet away, background noise is going to color your audio big time. And you can’t remove that in post.

2. Hiding lav on subject produces distracting clothing rustle. I’ve worked with professional sound recordists who tell me hiding lavs is the most challenging part of their job. And it’s true: once you put a lav under clothing, you’re going to have issues. It takes a lot of trial and testing to get it dialed correctly. Sometimes, it’s just impossible. I generally use lav audio as backup, preferring the cleaner sound that comes from a boom mic. But for those times when you’re counting on a hidden lav to pay your bills, here’s how to hide a lavaliere mic.

3. Handling noise caused by changing hand position on boom or mic. OK, you’ve committed to using a boom pole. Your sound is so much better already! But watch out – a low rumble will be introduced to your recordings every time you reposition your hands on the pole. So once you roll sound, settle quickly into a position you can hold for the entire take. It doesn’t have to be like lifting weights. Follow these boom mic recording tips and your audience will thank you.

4. Distracting noise in background. The most common offenders here are refrigerators and HVAC systems. Remember that shotgun mics are directional – so point the mic away from the direction of the noise. Better yet, eliminate it entirely by turning the heat down or tripping the fridge circuit breaker (put your keys in the fridge so that you don’t accidentally leave without restoring power). That’s why getting the mic overhead on a boom pole works so well – because sound rarely comes from below. But even shifting the mic 45 degrees can make a huge difference. Listen carefully before the take begins to find the best mic angle. The more background noise, the closer the mic will need to be.

5. Room is echoey (too “bright”). Small rooms are usually worse than large rooms, and any uncarpeted room with bare walls spells trouble. Basically, you want a room that is “homey”: carpeted, drapes on the windows, plush furniture, bookshelves lining the walls–anything that will break up sound waves. If you have a slight echo, however, it is now possible for you to fix it in post. Check out the Unveil plugin by Zynaptiq. It does magic to dampen slight reverb.

6. Forgetting to record room tone. When your take is finished, the last step is to record what silence sounds like in that particular environment. If you forget, as I still sometimes do, it makes it difficult to edit the dialog. So make it a ritual, like the chant I breath to myself every time I leave the house: keys, phone, wallet. Every time you say “that’s a wrap,” first say “30 seconds of room tone, please.”

7. Audio levels become clipped because of sudden loud noise. You’re recording some dialog and your subject starts laughing. Or cheering. Or shouting. If you have a good mixer, the limiter can automatically catch brief outbursts like this. But if you’re using inexpensive recorders and can’t turn the recording level down fast enough, you’ll get clipped audio. But once the damage is done, is there any way to fix this in post? Yes, believe it or not, there is. Some of the cheering crowd scenes in my documentary Beyond Naked would have been unusable if not for iZotope RX, an incredible suite of repair tools. The iZotope Declipper can rescue even horribly distorted audio.

8. Forgetting to charge/replace the batteries. Yep, it still happens to me. On some inexpensive recorders such as the Zoom H4N, if the batteries die during a take, you will lose the entire recording. So as a way to prevent this from happening, as well as a way to stay more organized, I recommend rolling early and often. On a lengthy interview, for example, don’t just hit record and forget about it until it’s over. At strategic points such as between questions, stop and re-roll. Also, get into the habit of charging/changing the batteries immediately AFTER each shoot. That way, you’ll always be ready to go.

9. Radio interference from cell phones. Almost everyone is carrying a smart phone these days. They stay connected by sending radio bursts that can be audible by a sensitive mic. Before every recording session, pretend that you are the captain of a plane about to take off: ask everyone in the room to put their phones into airplane mode. Not only will this prevent radio interference, but it will prevent your take from being ruined the old fashioned way: when the ringer goes off.

10. Using cheap gear. The difference between a $200 mic and a $1,200 mic is pretty amazing. And since pretty much every video you make from here to eternity will have sound, it makes sense to invest in a quality mic and a recorder that has decent pre-amps. Thankfully, Moore’s Law doesn’t apply to sound gear the way it does to camera sensors. You could easily be using the same mic you buy today in 10 or 15 years. So don’t scrimp on sound.

Tame hot backgrounds with reflected light

Yesterday I shot some interviews in a modern office building that had tons of big beautiful window light. Having all that natural light makes for an excellent interview setup, but it comes with a few challenges, too. Here’s a tip I’ve learned to help you work with the light, rather than against it – using just the available light (and an optional small LED light).

I love the look of light emanating from behind a subject. It just adds so much life to a talking head. So I always try to place my subject with window light behind them. This works best when you are in a corner that has windows on two sides: the window light coming behind them makes the background come alive, and the window beside provides the key light. The challenge is that the background window is always going to blow out, because it’s much brighter than the light reflected on the subject (assuming we’re ruling out direct sunlight, which I generally avoid for interviews because it moves during the interview, making it impossible to cut without continuity problems).

The simplest solution to this challenge is simply to let the background blow out altogether. This can work very well in some cases. Yesterday, for example, I shot this executive in his corner office bathed in window light:

I think this approach can work extremely well. We don’t really need to see detail in that background, which might distract from the subject anyway. But what if you WANT to see detail in the background?

Applying ND to every inch of window is impractical (not to mention very expensive). You could pack a powerful light, probably at least a 1k, and use that to key the subject. But if you’re in a modern conference room that has glass walls on all sides, there is a simple way to solve this problem. Instead of positioning the subject with their back to the window, position them facing the window, so that you’re now shooting the light reflected in the glass wall behind them. This magically brings the light into near perfect balance, like so:

You have to have the subject pretty close to the window to get the light level high enough, though. This makes it awkward for you to fit yourself and your camera into the small space remaining. Putting the subject further back in the room means they are underexposed. What to do?

This is where a small, hard light like the amazing Torch Bolt LED from Switronix comes in for the win. In the frame grab below, I’m using the Bolt to just bring up and slightly warm her face (by dialing just a bit of tungsten light with the 5600k). Mixing this hard source with the natural window light adds a lovely effect, in my view, while keeping the light looking natural and soft.

Can you see the subtle difference in the skin color in the two women above? I didn’t use the light on the woman in blue, and she looks much cooler and isn’t separated as well, because she’s lit with blue light coming in the window. I will be using my Torch next time!

So there you have it. One last thing to keep in mind: you have to watch out for reflections in the glass behind the subject. This means shooting at an angle, and making sure the subject is not too close to the glass wall behind them, or you will see their shadow in it.

Camera: Canon 5dmkiii
Lens: Zeiss 50mm f/1.7

Beware the 5-frame delay in Movie Slate

On most shoots, I rely on Pluraleyes to sync my audio automagically, precluding the need to slate anything. This works great when you can record a reference audio track. But ever since I began shooting with Magic Lantern raw, I’ve come face-to-face with the need to slate every single dialog take, because Magic Lantern raw has no reference track. So getting a perfect visual reference is key to avoiding nightmares in post.

Enter Movie Slate. The $49 iPad app is a great alternative to carrying around old fashioned sticks. You can enter all kinds of metadata and have it automatically increment with every take. But one thing I’ve had a hell of a time with is getting an accurate sync point.

So I did some testing today to figure out what’s going on. Here’s what I discovered: there is a 5-frame delay between when the sticks come together on the iPad and the slate begins to turn red, until the audible beep is emitted.

So that’s my tip for you today: just look for the first red frame, and nudge the audio clip spike 5 frames to the right. Link the audio and video clips, and you’re done.

Workflow secrets for rocking RAW on your 5dmkiii

I’ve been going nuts ever since the big announcement came last week that Magic Lantern had cracked the code. I raced to try it out, following the easy setup guide from Andrew Reid at Eoshd.com, who has been blogging at a fever pitch all week. It’s been fascinating to hear the silence on the subject from big-name DSLR bloggers like Philip Bloom (who belatedly invited James Miller to guest post on the topic), Vince Laforet. But I digress. Sexy is back on the 5dmkiii in a very big way.

Here’s a few clips I shot this weekend to test things out:

I’ve never seen colors like this, never seen sharpness like this, never seen files that hold up to heavy, serious color grading. It’s a whole new world.

But as with any new world, there’s lots to be discovered. Here’s a few things I’ve identified that can help you harness the breakthrough.

Get a 64 GB 1000x (udma 7) card.. Actually, get two: one to use until it’s (almost) full, then pop it out and start offloading to your laptop immediately. Continue shooting on your second one. I have what I believe is the fastest 64GB card on the market, the Lexar UDMA 7 1000x. It will set you back a whopping $300. On advice of Andrew at EOSHD, I picked up a $100 Komputer Bay 64GB 1000x. It writes just slightly slower than the Lexar, but fast enough to record full 1920×1080 raw without dropping frames. The word on the street is they are actually Lexar cards that didn’t pass stringent speed tests. This doesn’t make them any less reliable. Note, it takes about 8 minutes to offload a full 64GB card using a USB 3 Lexar CF card reader.

Format your CF card to Exfat (not Fat32). This will give you the option to record files larger than 4GB. On Mac, I used Disk Utility to do this.

It’s important to be running the latest nightly build. The improvements are coming fast, and the difference between the build that Andrew posted in his easy guide and the latest nightly are substantial. You can download the latest pre-compiled build here. Simply overwrite the similar files on your CF card to install.

The raw workflow is a lot of work, but the benefits are breathtaking. Besides the image, which I’m still blown away by, perhaps the most interesting benefit is that I’m forced to review all of my footage immediately after I’ve shot it. Since you have to make decisions about how to interpret your footage when you open it in Camera Raw, you get to think about the shot, how you exposed it, etc. It’s meditative, almost like the old darkroom days (without the smelly chemicals).

Raw files are way too expensive to store for very long. So don’t. Instead, commit. Make dailies immediately and delete the raw files. You’ll still have a thousand times more flexibility to grade your footage later than you ever dreamed of having before. Doing this, I’m actually saving storage space vs. my h264 workflow, because on FCPX, I don’t have to save an original file any more: the ProResHQ daily that I’m generating from raw IS the original file.

Don’t let yourself run out of card while shooting. The files that end because the space ran out seem to be non-openable by raw2dng. This will likely be fixed by a future update to either the firmware to to raw2dng.

Shooting at high isos seems to result in dropped frames (ie, your clip ends before you tell it to). Again, hopefully this won’t be an issue in the future, but for now, shooting with low iso helps.

Turn off sound and global draw to get the best results from your card. There is a small performance hit to using them, and this can make the difference. Record dual-system sound. There is an audio setting that emits a beep at clip start, which you can record with your external recorder, to help you sync your footage later in post.

There are several steps to the workflow: 1. Convert raw to DNG using Raw2dng. This app has gotten WAY better since the easy guide – be very sure to grab the latest version (currently 1.0).

Batch process your raw files by dragging the entire folder onto Raw2DNG.

When you’re ready to do the Camera Raw conversion, you have two options: Photoshop, and After Effects. Photoshop is nice for one-offs, and some people claim it’s faster. But there is a big problem with using Photoshop.

If you’re using Photoshop, you have to save out tifs, and open them in Quicktime 7 to save out the image sequence. And Quicktime 7, for some reason, causes a big gamma shift during this process. Every clip I make this way ends up being too light in the highlights. There’s probably some fix for this, but for me, it’s called AfterEffects.

Using AfterEffects is a little more clunky than Photoshop, but it allows you to queue your work. So it’s actually much less demanding on your attention. You can, in a single session, open all of your clips in Camera Raw, assign each to a different Comp, and add them to the Render Queue. Then when you’re ready to do something else, you hit “Render” and go. You can’t do this with the Photoshop method.

After Effects is painfully slow in rendering out ProRes dailies from dng. It takes about two hours to render a single 64GB card worth of clips on my MacBook Pro 2012 with Nvidia card and 8gb of ram. It’s even slower on my iMac 2011. And tinkering with the preferences and enabling multiprocessor support in AE seems to have no impact. Instead, I have a low tech solution to render speed: Use more than one computer. Yep. A raw workflow will easily keep more than one machine busy. The good news is a subscription to Adobe allows two computers to use the same software license, which I was happy to discover.

I’m hopeful that the Magic Lantern team can figure out how to save CinemaDNG files, because that would mean we could go straight into Davinci Resolve with the raw. That would be seriously awesome.

In the mean time, what workflow tricks are you using to manage your 5dmkRaw workflow?

How much better is 5dmkiii footage with an external recorder?

The short answer: a little bit. But it’s hard to tell the difference without enlarging the footage. Here’s some examples (click images below to get a closer look):

Below: Enlarged to 200 percent, can you tell which one is the Prores 4-2-2 and which is H.264 4-2-0?

The one on left is 4-2-2. You can see the compression artifacts if you look closely at the image on right.

A note on methodology: I shot the above clip about 1.5 stops underexposed, at 24p, with Hyperdeck Shuttle II. I had to boost the gain to get it to look normal. So what you’re looking at are images that are being pushed around a bit to see how well they hold up respectively.

Is this amount of improvement worth the extra hassle of lugging a portable recorder, and living with 3:2 pulldown judder in your 24p footage?

But wait, there’s one more thing…

My last test was to try pulling a key. Check this out.

So. There you have it. For greenscreen work, it’s the way to go.

Documentary Data Wrangling Demystified IV: first assembly to final output

Beyond Naked editor Lisa Cooper burning midnight oil with FCPX.

OK so you’ve got your Events all nicely structured after reading part i, part ii and part iii of this post. And now you’re wondering: what’s the right way to assemble a feature-length documentary film in Final Cut Pro X? That’s what Shane Tilston recently asked me in this question:

Did you work with just one project file for the whole film? If so, when you disabled certain events, did you just live with the “media missing” red notation? Or – did you use multiple projects for different scenes, and then combine them? If you did that, how did you combine them? I haven’t played around with that yet, but I’ve heard that’s tricky.

It is tricky! But the idea is simple: cutting a feature-length film is like loading a train. Have you ever seen trains load on a track? First the engine connects to one car (the first sequence), then a second is hooked up, and then the engine pushes the whole thing into a third one, connecting it. At some point in the process the engine may pull the entire assembly forward until passing a switch in the track, which is thrown, allowing the cars to be pushed down a different track to connect with different cars. It’s a tedious process, but eventually all the cars are connected to the train, which jubilantly toots its horn, and chugs away.

In Final Cut Pro X terms, each car is a Project, also called a sequence, in your film. Each sequence is composed of scenes, and the scenes are composed of shots. (Sometimes a single long scene is a sequence all to itself – but usually a sequence contains more than one). When I started out, this was a little mysterious to me. How do I know what to put into a sequence? How do I know where one sequence ends and another begins?

This is why developing a preliminary structure for your film is incredibly helpful at the beginning. We used sticky notes to write down key points and elements of story that we knew had to be in there somewhere. We stuck them to a big piece of white foam board. Then, we started to see things that belonged together, so we moved them next to the others. Eventually the stickies covered many white boards. As the structure came together, we used color-coded stickies to represent items that would go into the same sequence.

Then, you make adjustments to this board as you progress. Here’s an example. In the shot below, the board along the wall is dedicated to figuring out how the sequences should be fit together (the order of the cars in the train). Beneath that, you can see that each sequence has its red note, and yellow notes below that indicate which scenes are included, and their order.

The most important thing about this is that it is going to constantly change, especially in the beginning. But all through the process, up until “picture lock,” you can and will be moving things around to make them fit better. This was an exceedingly difficult process for me. Lisa, my creative partner, is much more organized than me, so I was able to depend on her for much of it, and that was indispensable. So if things stuff doesn’t come easily to you, find someone to collaborate with who can manage it. It’s essential.

So to sum up: we created a separate project file for each sequence in the film. From a technical standpoint, another reason for doing this is that it allows you to load only those Events that you need for the given sequence, instead of having to load all the Events in the film. In our case that was 2.5 terabytes of footage, which brought our 2011 iMac to its knees when we tried to open all Events simultaneously. Even with a super fast computer, the best case is that FCPX will behave erratically when you load too many Events. The secondary reason for doing this is it just allows you to work faster: you can put your finger on the footage you’re looking for much more quickly if you have three Events open than if you have 30.

As you progress further into the edit, you will have more and more sequences finished. Our film had 34 sequences in the end (including credits as the 34th sequence). When we got to the point where we were ready to put them all together into the “first assembly,” we shared each sequence as a master file, created a new Event called “Screener,” and imported each file into that Event.

Then we created a new project called “Assembly 1″ and dropped all the screener files, in order, into that. This is quicker if you title each exported sequence with it’s number first, ie., “01 opening sequence” and “02 Fremont Dawn,” etc. Then, we exported it, and viola, we had our first assembly. Grab a big notebook, and watch the first assembly, taking notes at the places you think aren’t working. Then, reopen those individual sequences and keep working. When you’re feeling good, make another assembly. Repeat. Again. And again. We repeated this process a dozen times or so, before we got to locked picture, where you get to write a sticky that looks like this:

One thing that’s a little awkward about this process is that some sequences will have music playing between them, or other transitional sound or picture elements. In that case, it may make sense to combine two sequences into one. In our film, there were a couple of sequences where this would have resulted in us having too many Events open, so we waited to lay in the connecting elements for those two sequences until the final assembly.

We did all of the color correction and first pass audio mixing inside each of the sequences, not in the assemblies. So that in the end, the assemblies only contain the master files, and in the case of the final assembly, two tracks of music that was used to bridge the two sequences mentioned above:

In the screen capture above, note the orange chapter markers. You can see where I’ve combined several sequences into one for ease of editing as we progressed in the process. The orange chapter markers reveal what earlier in the project was an individual sequence. These markers are there for easy navigation on final DVD, as well as for your own navigation, because you will need to replace individual sequences as you make final color corrections, audio edits, or editorial changes and having them makes it a snap to locate.

OK so let’s go back to where things are tricky. On FCPX, you can’t have an entire documentary feature-length film worth of Events open at once. We couldn’t, at least. So you have to selectively move events and projects in and out of where FCPX can see it, and restart to load only the stuff you need and ignore what you don’t. This is a pain in the ass. It’s the worst thing about FCPX. But it’s the price we pay for the wings that it gives us to fly over everything else. Lisa and I spend an insane amount of time moving folders around. We had dreams at night about moving folders into the wrong place and not being able to find them later. Until we discovered Event Manager X. I won’t say anything else about it here, since I’ve already raved about it.

That’s pretty much it. I’m sure there’s some things I’ve missed, so please ask questions and I’ll continue to flesh out this post in response.

Quick and dirty white background for video

We are shooting about 75 interviews over the next three months for Fred Hutch, a new client that we’re thrilled to be working for. It’s a great organization doing important things, and the people we’re interviewing, most of them research scientists, are doing fascinating work at the frontiers of medicine.

Here’s the approach we’re using to make it happen:

I thought I’d share a trick we use to make this work without killing ourselves to get the background to be perfectly even, which is actually quite difficult to do unless you have a lot of lights. We have just two lights for the background, and that results in visible drop off. As in:

The trick is to underexpose enough so that in boosting the face tones up to normal levels (between 50 and 75 percent) you force all the white in the background to clip past 100 percent. So that you get this:

In camera, that means setting flesh tone lighlights at no more than 50 percent. In this case, I set mine for between 25 and 50 (see as-shot histogram below):

In the histogram above, notice that all the flesh tones are below 50 percent. Also notice that the highlights fall off to about 75 percent on the edges. That means we need to push them up in the ballpark of 25 percent, and we’ve allowed ourselves some headroom in the flesh tones to do that without blowing things out. Here’s what my initial correction looks like:

The waveform now looks like this:

The flesh tones are just barely touching 75 percent, which is as high as I dare go. Flesh tones above 75 percent in an interview situation are going to look overexposed. We still need to go a little further, because there is some tones that aren’t clipping on both edges of the frame. To fix this is easy in FCPX – just add a couple of secondary selections and pump the highlights. Like so:

Now the waveform shows a nice even clip of the entire background, and our flesh tones are unaffected:

In a perfect world, you would light the background perfectly evenly, at something just shy of 100 percent. But getting that kind of perfectly even light is actually quite difficult unless you have some serious lighting to play with. For the rest of us, this will get the job done every time.

One final thing I should note: this technique works fine if your final destination is the web. If your final destination is broadcast, then you will need to create a compound clip (cmd – g) and drop a Broadcast Safe filter onto it in the timeline. Now you’re good to go.

What tricks do have for getting clean white backgrounds in your videos?