I just finished filming an epic drone sequence on Seattle’s waterfront, in which I filmed a mammoth barge headed out to sea. Unfortunately I can’t share the footage, which my client is keeping under wraps for the moment. But I can share with you the 4 plugins that I’ve found indispensable for cleaning up and presenting drone footage shot with my GoPro Hero 4 and Phantom 2.
 1. Flicker Free.
Cleans up the nasty interference pattern caused by quadcopter props when sun is a factor.
Any time you’re shooting into the sun, or when the sun is angled overhead in front of the camera, you can see this issue. It looks like a bad TV channel from the 60s: rapidly scanning lines caused by the shadow of the props on the lens. For the longest time I thought there was no way to fix this. One day I was using Flicker Free to clean up a time-lapse, and though: hey, why wouldn’t this work for aerial footage? I tried it, and it worked like magic. I generally get best results with the “remove horizontal bands 2” setting, but if that doesn’t work for you, try the other settings as well until you find one that does.
 2. Lock and Load X.
Stabilizes and reduces rolling shutter. Works especially well to make parallax shots looks smooth and intentional. Something about how this plugin works just smooths out overcorrections in steering. It works far, far better for this than the built-in plugin in Final Cut Pro X or Adobe’s Warp stabilizer. This is another one of those magical pieces of software that I apply to ALL of my drone footage, whether it needs it or not. It always makes it better. Try it yourself – they offer a fully functional 30-day trial.
 3. FilmConverPro with GoPro camera pack.
There are two presets for use with ProTune footage (which I use on my GoPro) that instantly make your footage look great. To get the most of this, you have to configure your GoPro Hero 4 the right way BEFORE you shoot. Here’s the settings I use:
- Pro Tune
- Flat
- Max ISO: 400
- Sharpening: low
I also find that the smoothest, most cinematic drone footage often results from shooting at 48fps in 2.7K (conformed to 24p in post). That way, in addition to the option for slow things down, if you ultimately export out to 1920×1080, you have a lot of extra frame that plugins such as Lock and Load and Fisheye Fixer can work with without losing any resolution. You can also crop in closer to your subject without losing resolution – which allows you to shoot a little loose – a little farther away from your subject. Improves the odds that you’ll get your drone back safely!
 4. Fisheye Fixer.
Straightens the horizon curvature that is always present with GoPro footage.
The curved horizon thing may look great for in-your-face sports action, but for the typical drone shot, it’s bullshit. Get rid of it!
Fisheye Fixer gives you fine grained control over how much curvature to remove, so you can dial in the perfectly flat horizon that we like so much.
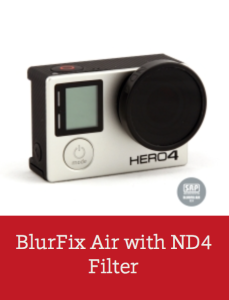 Bonus tip: Use an ND filter in front of your GoPro. This is like putting a pair of sunglasses on your lens, and reduces the amount of light coming in so that the shutter speed can come down to something more cinematic. This allows movement to blur and look natural. It also goes a long way to reducing jello shutter that is exacerbated by high shutter speeds.
I recommend using the Snake River Prototyping BlurFlix Air ND 4 (good for both cloudy days and sun). It’s currently the best on the market for drone use because of it’s light weight, which allows them to be used without upsetting your delicate gimbal.
For if you’ll be shooting in bright sunlight all the time, I’d recommend their ND 8 filter.
Happy drone shooting!