Sound Devices MixPre-3 first impressions

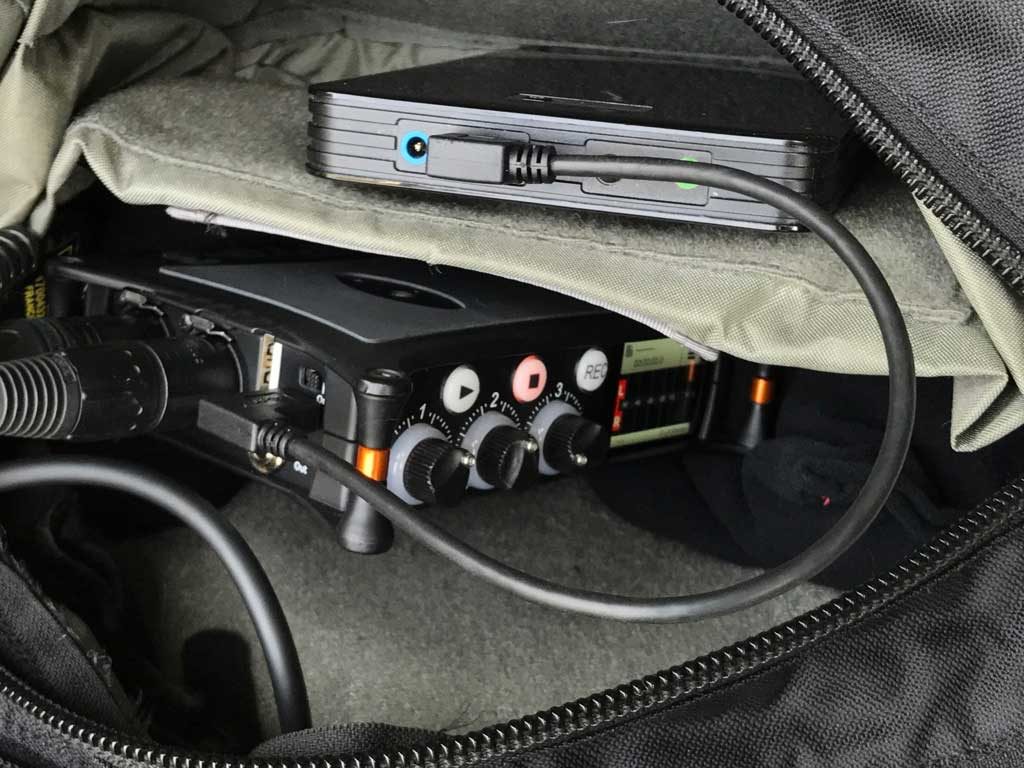
MixPre-3 sound bag

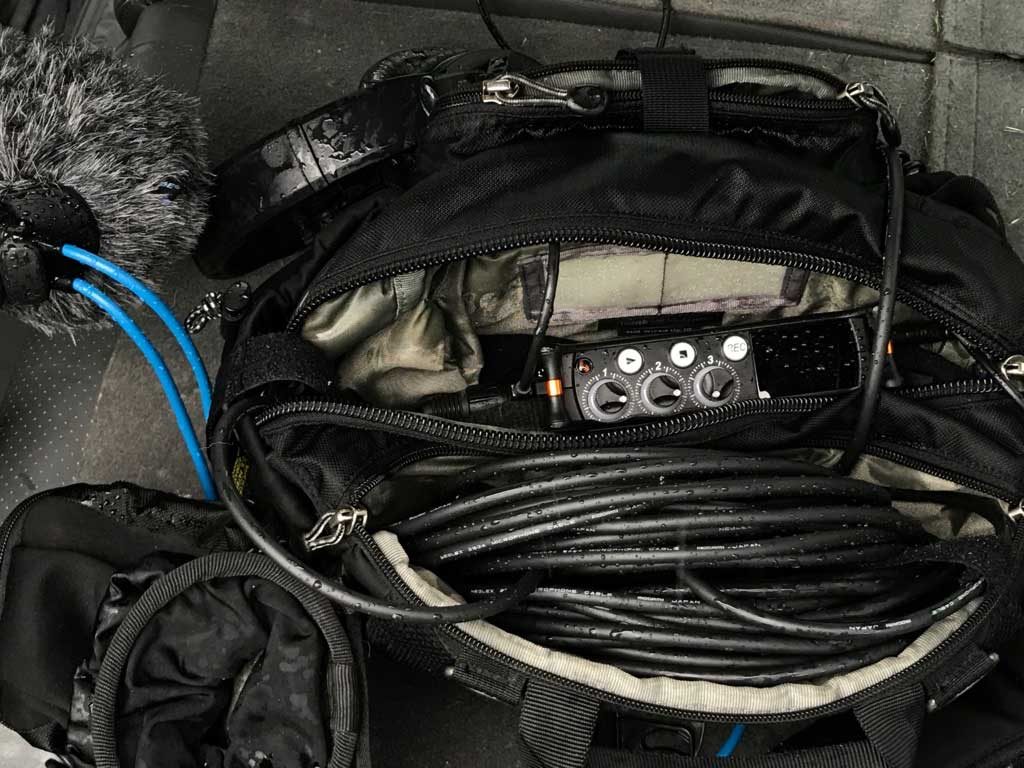
MixPre-3 at home in my sound bag

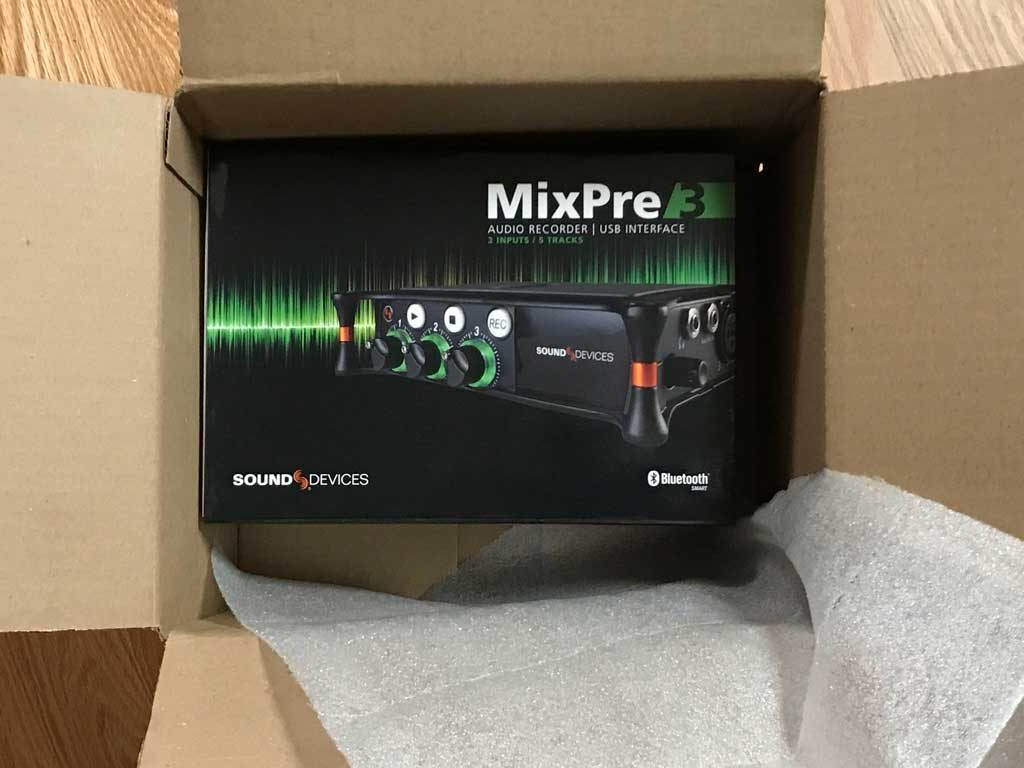
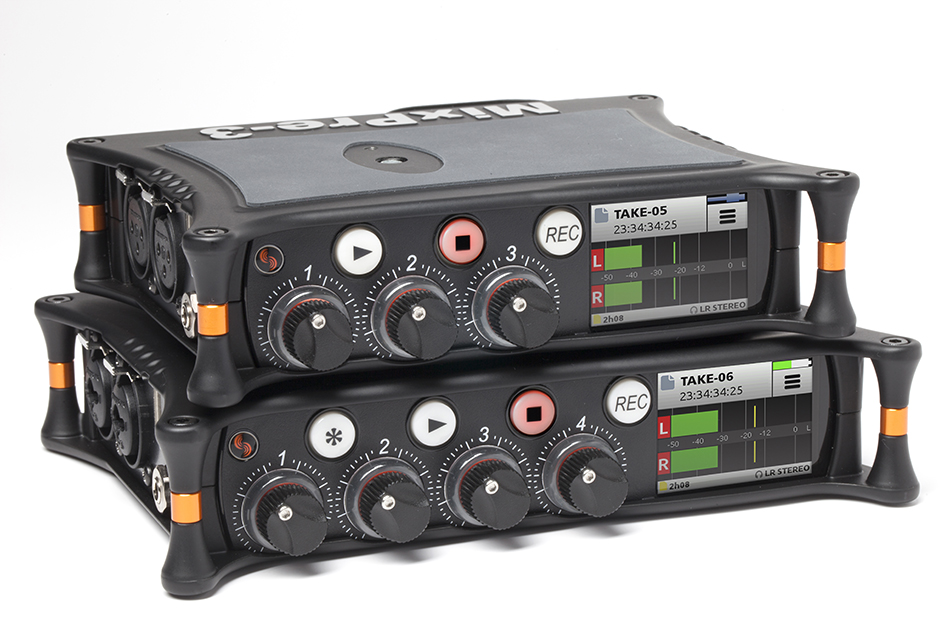
When the Sound Devices MixPre-3 announcement dropped at NAB 2017, I got excited. For years I’ve been dreaming about a device as small as my original MixPre, but with built-in recorders. Could this be it? I hit the pre-order button but didn’t expect to actually hold one in my hands until summer, despite Sound Devices promising delivery before the end of the month. So when this box from B&H arrived with a couple of days to spare, I was thrilled:

MixPre-3 in box

MixPre-3 in box

First impression: Sound Devices delivers on time.

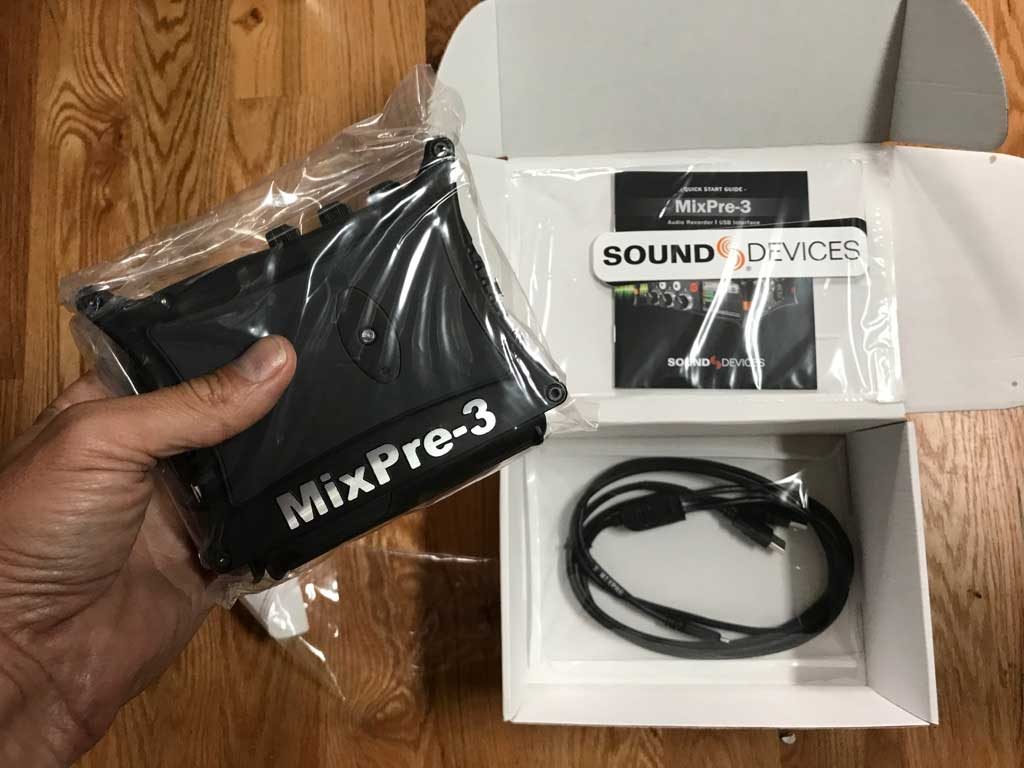
Next impression: This recorder is tiny. About the size of a sandwich:

The MixPre-3 is tiny.

The MixPre-3 is tiny.

Included is a Y cable that allows you to use the MixPre-3 as an audio interface while also powering the unit when attached to two USB-A ports. You also get two stickers – one “Sound Devices” logo and one that says “Video Devices.”
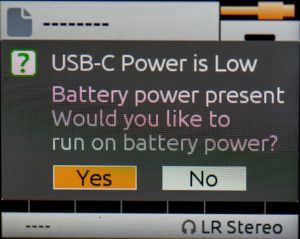
battery warningPowering the MixPre-3

I had previously ordered a USB-C to USB-A cable for powering the device, so I plugged that into my Energizer XP1800A and turned on the MixPre-3. I was greeted with this screen (see right):

Huh? The battery was fully charged. My first thought was that there was some sort of incompatibility with the current supplied by the Energizer. But it had worked just fine with my first-gen MixPre, so I figured something else must be going on. I pressed the Yes button, thinking that meant it would try to use the external battery. Instead it switched to the internal batteries. So I restarted, and this time when the screen came up I hit “No.” The result was that the screen slightly dimmed, but everything seemed to work fine.

MixPre-3 powered by USB-C to USB-A

MixPre-3 powered by USB-C to USB-A

I later learned (by reading the MixPre-3 user guide) that a single USB-C to USB-A connection isn’t capable of supplying the full power requirements of the MixPre-3. When it’s powered in this way, it enters a power-conservation mode that allows it to function at the expense of a few features. It turns off the USB-A port, dims the LCD, and won’t supply phantom power to on track 3, to name a few. Otherwise, it works perfectly fine. You can tell it’s in this mode because the USB cable icon in the upper left of the screen turns orange. The icon is green when fully powered.

To fully power the unit via USB-C, you need a USB-C to USB-C cable, and a power supply that supplies 7.5 watts to the MixPre. There aren’t a ton of these on the market right now, but I’m sure there will be soon. I went with the Anker Power Core+ 20100mAh charger, which comes with the required usb-c to usb-c cable. It’s a good value at $65. However, it takes forever to charge unless you also purchase a Anker Quick Charger.

Sound Devices has posted an exhaustive list of all the MixPre powering options.

Battery life?

Don’t even think about running the MixPre-3 off the standard 4 AA batteries. If you’re using phantom power, you’ll get like 20 minutes of record time before it sucks the life out of them. You definitely will want a robust battery option like the one I’ve described above.

How does it sound?

I performed a little changing-of-the-guard ceremony in my sound bag, pulling out my venerable MixPre and my Tascam DR-70D to make room for the new sheriff in town. Then I grabbed a Rode Stereo Videomic X  and headed to the beach, where as luck had it, a thunderstorm was brewing. Here’s what it sounded like on the MixPre-3 (with no tweaks other than normalizing levels in post):

I look forward to trying this mic out with dialog in a very quiet recording environment to see if the Kashmir preamps live up to their billing. But I sure like what I hear so far.

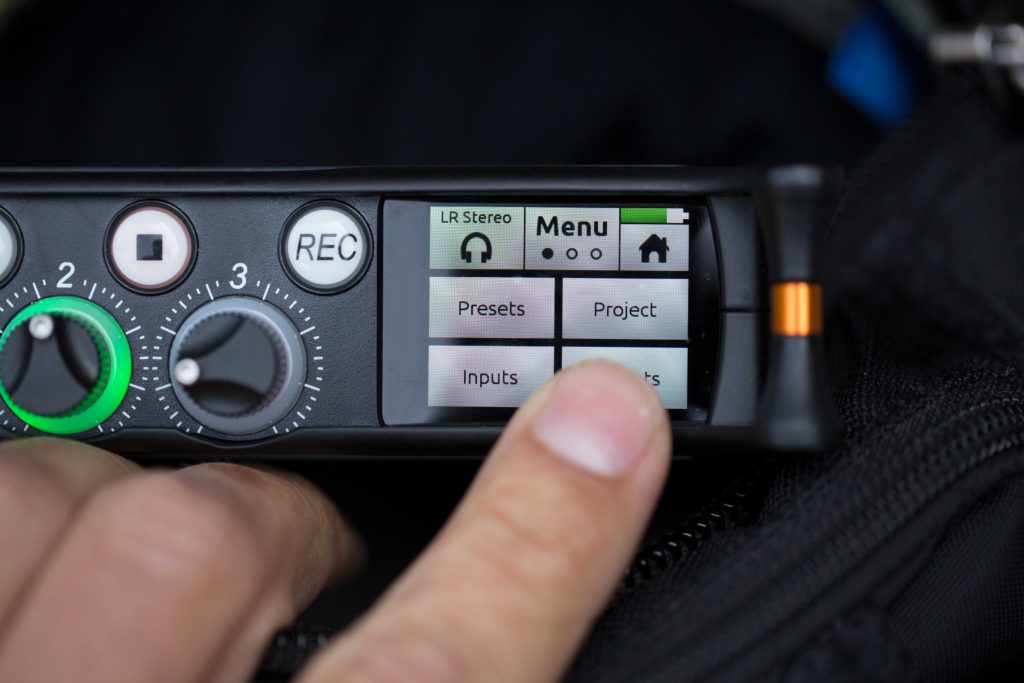
Touchscreen size

touchscreen

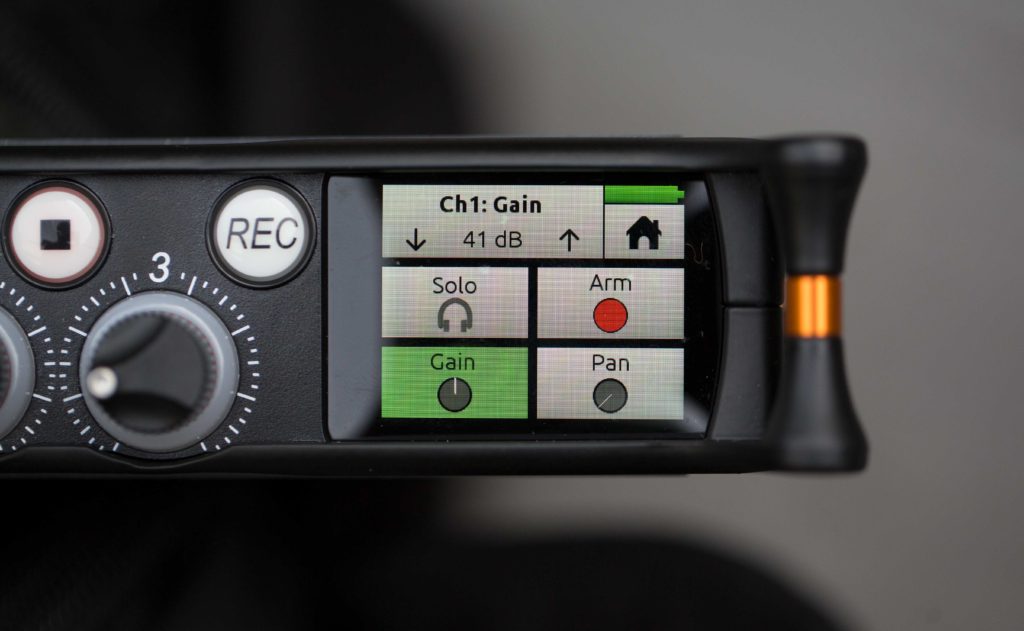
MixPre-3 touchscreen is small, but you get used to it quickly

The touch screen at first seems way too small to be functional. But after a little getting used to it, I found it worked just fine. However, I wouldn’t want to spend any time entering metadata this way. So it’s nice that you can do that via the Wingman app, OR by attaching a USB keyboard to the USB-A port.

Setting recording levels

It takes a little getting used to setting levels on the MixPre-3. Out of the box, they seemed much lower than on the original MixPre, on which most of my mics run hot. To get the levels up to where I expected them, I had to crank up the gain on the inputs to 41db (out of a possible 76db). On the screen this shows as middle-gain (see green Gain icon below):

Gain controls

Gain controls

Then I realized that the MixPre-3 is actually using an entirely different approach to the interface than the old MixPre. The old one was entirely analog – the new one is a mix of analog and digital. On the old mixer, you turned up the gain knobs until you found your levels. Done. On the new one, you set the base recording gain level digitally, then use the fader knobs to make minor adjustments during recording.

After working with the MixPre-3 for awhile, and looking at the files it creates, it became clear how to set the levels correctly. The steps are:

  1. Set fader knob to 0 (with silver dot at top).
  2. Plug in mic.
  3. Use gain screen to set levels a little lower than you would typically set them.
  4. Use fader knob to make minor adjustments.
  5. Record.

It’s very important to note that the adjustments you make with the fader will ONLY be applied to the mix tracks, and not the iso tracks. The iso tracks are recorded PRE fader. It’s a little confusing, because on your screen, your ISOs are labeled tracks 1, 2 and 3. When you open your files in post, the first two tracks, 1 and 2, are your mix tracks. Tracks 3, 4 and 5 are the ISOs.

For me, this whole idea of a mix track takes some getting used to. I prefer to cut with iso tracks. With my Tascam DR70D, I’m used to recording each stereo pair (or dual mono pair) to it’s own two-track file, and there’s no such thing as pre- or post fader. And, I WANT to control the levels on the iso tracks. So I suspect they way I’m going to actually use the MixPre-3 for most dialog recording is to set up the lav on the left, the shotgun on the right, and then pan them so they are isolated from each other on their own track anyway.

Nice touches
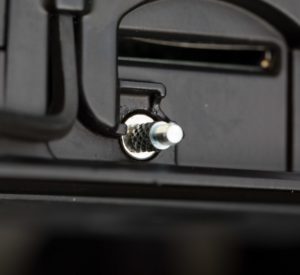
tools included

Tools included

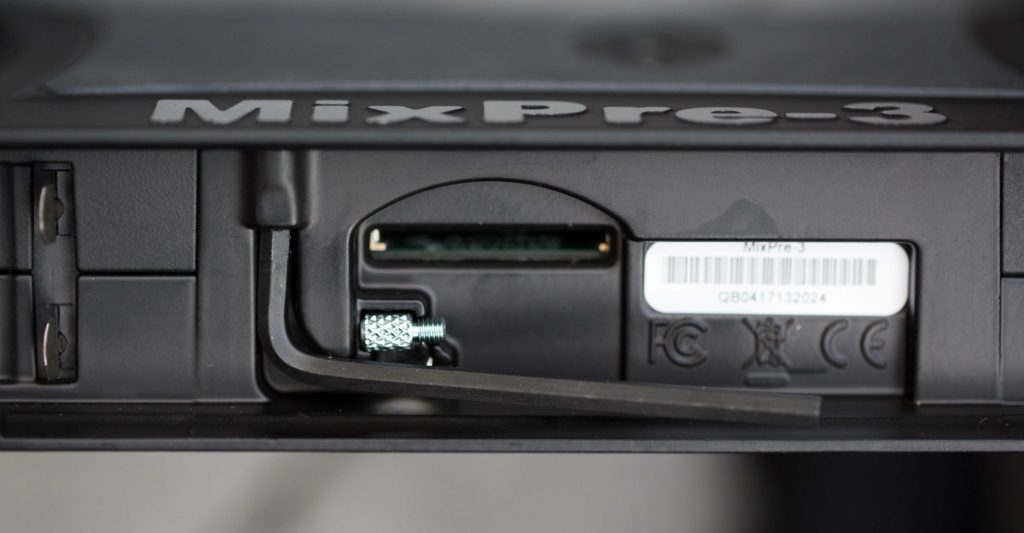
It’s abundantly clear that the engineers at Sound Devices put a lot of love into this project. As an example, check out the flexible options for attaching the recorder to a video camera. They’ve included a centering pin and a hex key required to turn the 1/4 20 screw.

But wait, there’s more! See that little round metal dot? It’s a very powerful magnet, which holds both the pin and the hex key in place, making it less likely you’ll lose them. I love that sort of attention to detail.

Wingman app
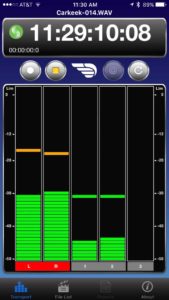
The Wingman app connects automatically to any MixPre-3 in the vicinity right out of the box. You can add a password to the MixPre if you want to secure it. The app gives you everything you need to enter basic file names and add notes, even while a clip is still recording.

It also reveals which tracks are armed (that is, which are actually being recorded) and gives you the ability to arm and disarm tracks by tapping on the left side of them (turning them red when armed and black when disarmed).

However, the UI is a little lacking. For example, the timecode displays on the screen in HUGE numbers, while the elapsed time is shown in tiny little numbers that are hard to see. I wish I could toggle between these, because I want my producer to take notes based on elapsed time of each clip. If you turn the timecode off on the MixPre-3, the big numbers just turn in to dashes, and the elapsed time remains so small that it’s hard to see by anyone over 50.

Nevertheless, the ability to see the elapsed time at all is a big step up for us. Our previous system involved my producer starting a stop watch at the same time as the sound recordist started rolling.

Working with the files in post
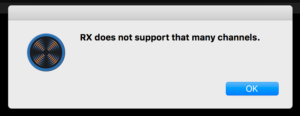
The MixPre creates polyphonic files. Thats a fancy way of saying that your files contain multiple tracks, and your NLE may have some issues with this. When I tried to drop the files into iZotope RX 6, for example, I get this error (see right):

FCPX interpretation of polyphonic files

FCPX interpretation of polyphonic files

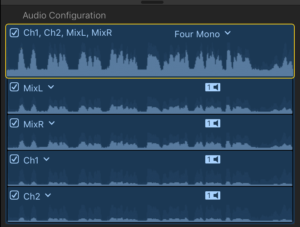
Also, when I drop stereo files that I recorded with MixPre-3 into FinalCut Pro X, it interprets them as 4 mono files. It’s easy to fix this – you simply change the file type to stereo, and disable the redundant tracks.

But what if you want it clean from the start?

There are several ways to resolve this. First, you can simply disable any tracks you don’t want before recording, using Wingman, or directly by pressing the fader for that track and disarming it. If you want to control the mix levels, you want to disable tracks 1 & 2, which is a little counter intuitive, since that appears to be disabling the track you are trying to record. But that’s not the case – you will find your MIX recorded on tracks 1 and 2 when you open the file in post.

There are advantages to letting MixPre-3 do it’s default thing, however, which is to record your mix AND lay down numbered iso tracks (which are recorded PRE fader, as we discussed earlier). That way, it’s like you have a backup recorded at a slightly lower level in case things get loud. But you still need to split those tracks up before importing them. How?
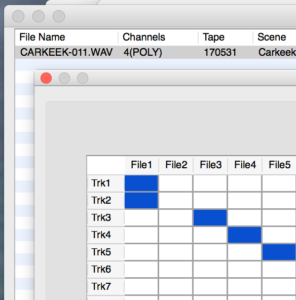
Sound Devices has foreseen this dilemma, and they created a free tool called WaveAgent. It lets you split out and export just the tracks you want, all nice and tidy. It also gives you a great interface for appending metadata to your audio files, should you wish to.

You can tell at a glance how many channels your file contains, the bit depth it was recorded at, etc.

To export tracks 1 and 2 into a single (stereo) file, for example, you click under File1 in Trk1 and Trk2. Then you select the file format you wish to export, select a location to save it, and export.

Presets are awesome
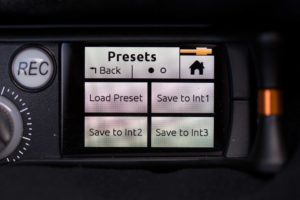
It used to be that when you got your mixer all set up correctly, you didn’t want anyone to touch anything. They could easily mess it up.

With the MixPre-3, those days are over. You just set up your mixer however you like – arm some channels, disable others, set levels, pan, etc.- then store that setting as a preset.

When you’re ready to use that configuration, you simply navigate to the present menu, dial down to your setup, and load it. Done!
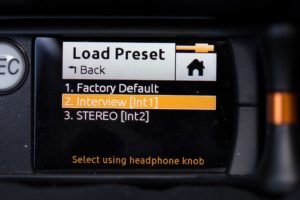
I’ve set mine up with two presets – one for recording sound effects and ambiences with my Rode Stereo Videomic X, and another configured with the lav for interviews. On the left channel I’ve got a lav without phantom power, on the right a shotgun mic with it.  If you label the preset by it’s function, it makes it very fast to set up your recorder to match the situation you’re working in.

A new benchmark for documentary sound?

I will be using the MixPre-3 heavily in production in the coming weeks, and I’ll post a more thorough review when I’ve had more time with it. But if initial impressions bear out, the MixPre-3 could easily become the new benchmark in documentary film audio. If you’re a stickler for sound, but you want to spend more time thinking about your story than you do about your tools, the MixPre-3 was made for you.
LiteMat SnapGrid ads new level of light spill control

I prefer LiteGear LiteMat’s over just about any other light for documentary location lighting. Why? Because they are so easy to control. With most lights, you need to deploy flags or bulky soft boxes keep the light from spilling everywhere. The LiteMat kits contain everything you need to control the light without requiring anything else – the poly skirt, the diffusion, and a poly grid. So when I heard about the LiteMat SnapGrid which promises even finer control, I investigated.

The SnapGrid is made by a company called The Rag Place (at their Georgia facility). For $200, they will custom-sew a 40-degree SnapGrid for the LiteMat1. That’s a lot of money for what you’re getting, really, but hey, it’s the film industry. I pulled the trigger on it and received email notification that my custom-sewn SnapGrid was finished and shipped within 3 days. That’s snappy!

Solidly built

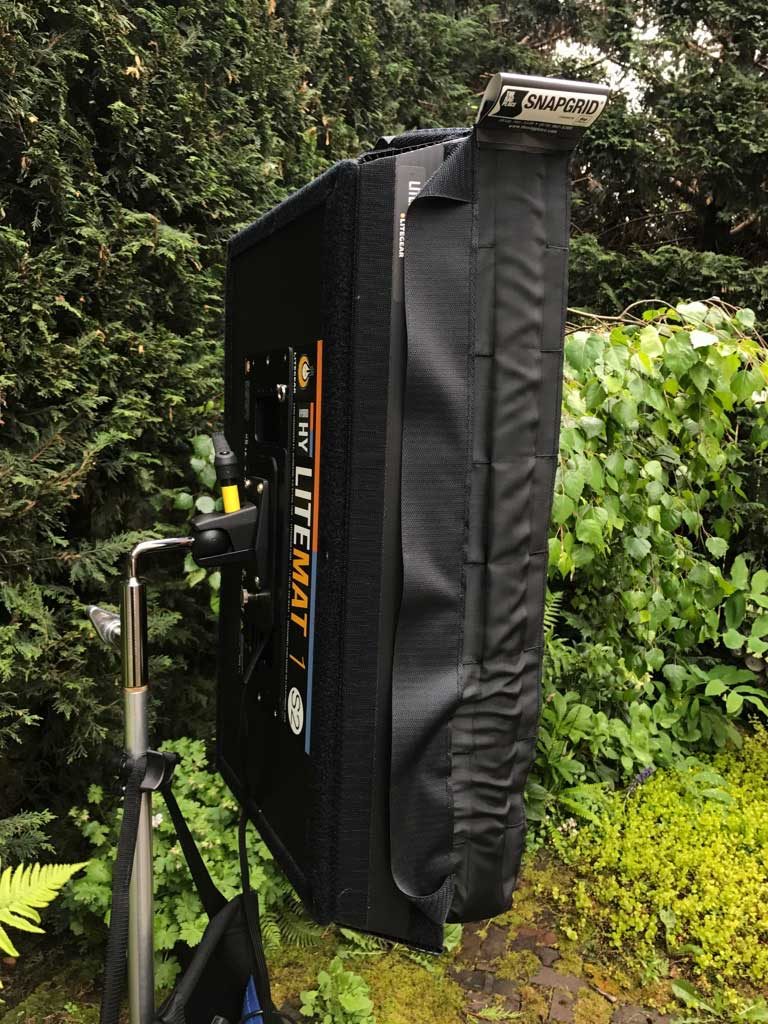
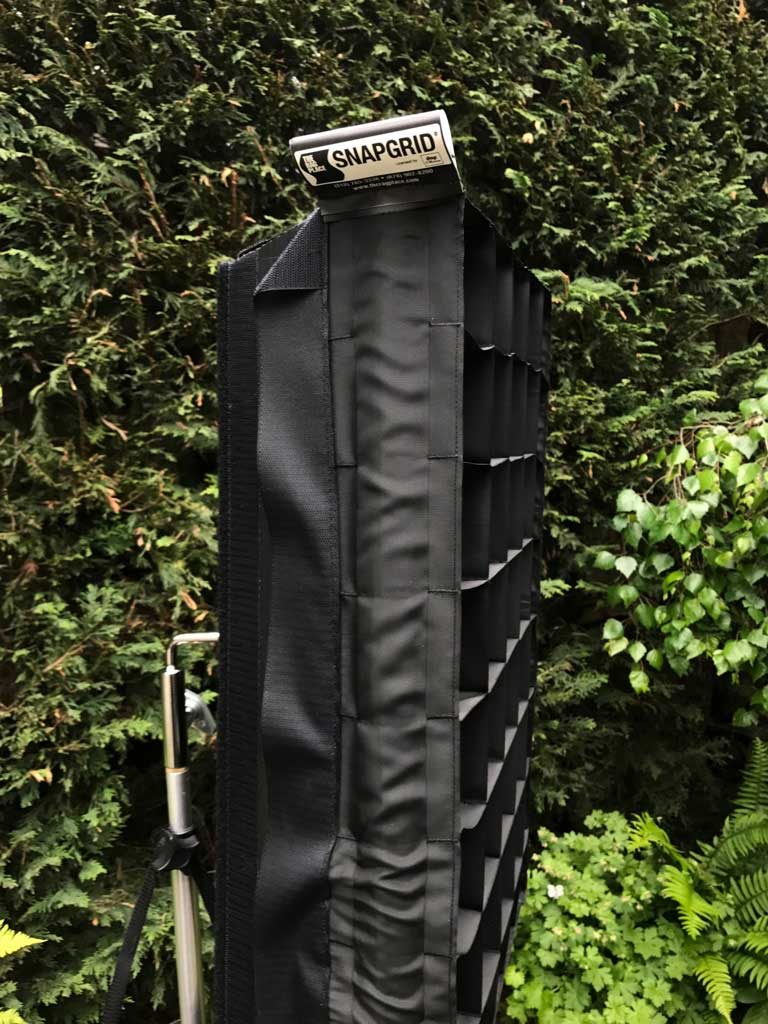
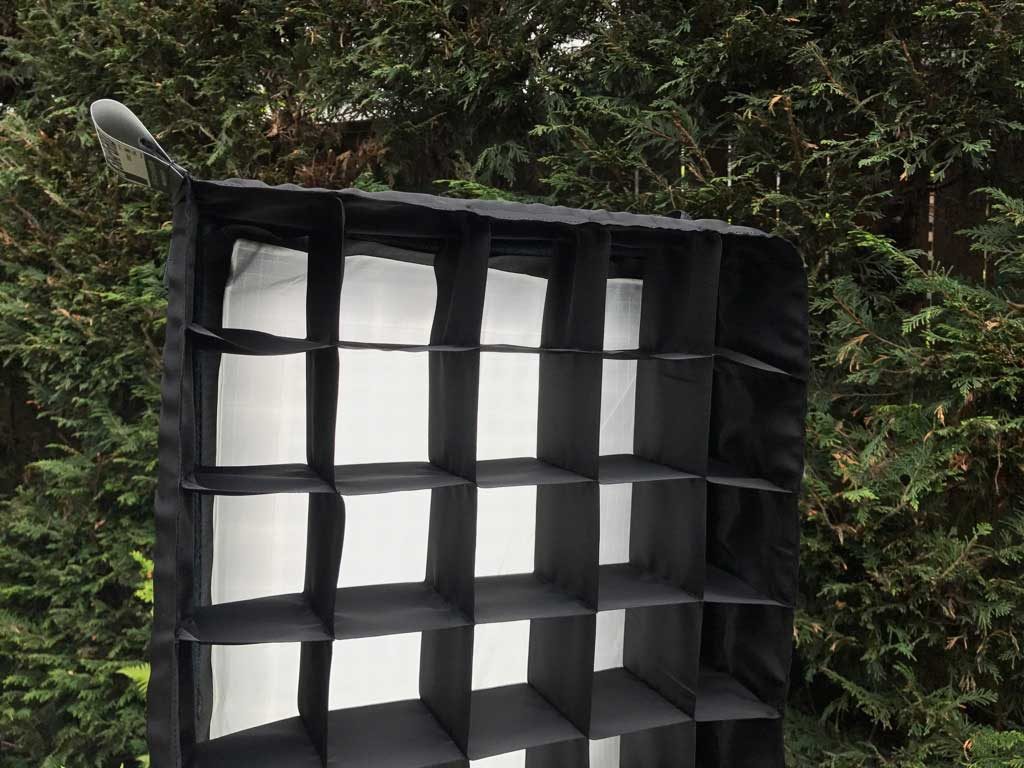
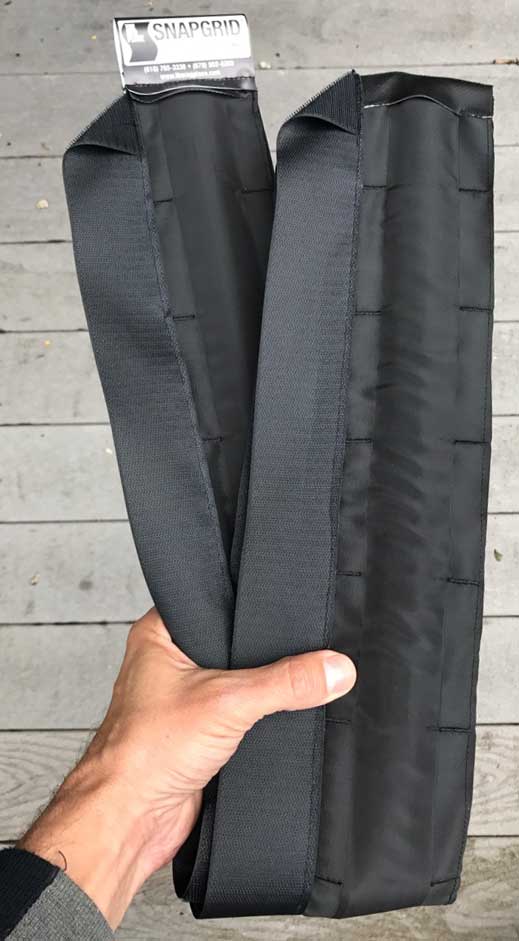
The SnapGrid arrives in a nice compact hand-sewn bag that’s made out of durable, water-shedding poly material. The grid itself, as it’s name implies, snaps open with what feels like blinds used as stiffeners under the black fabric.

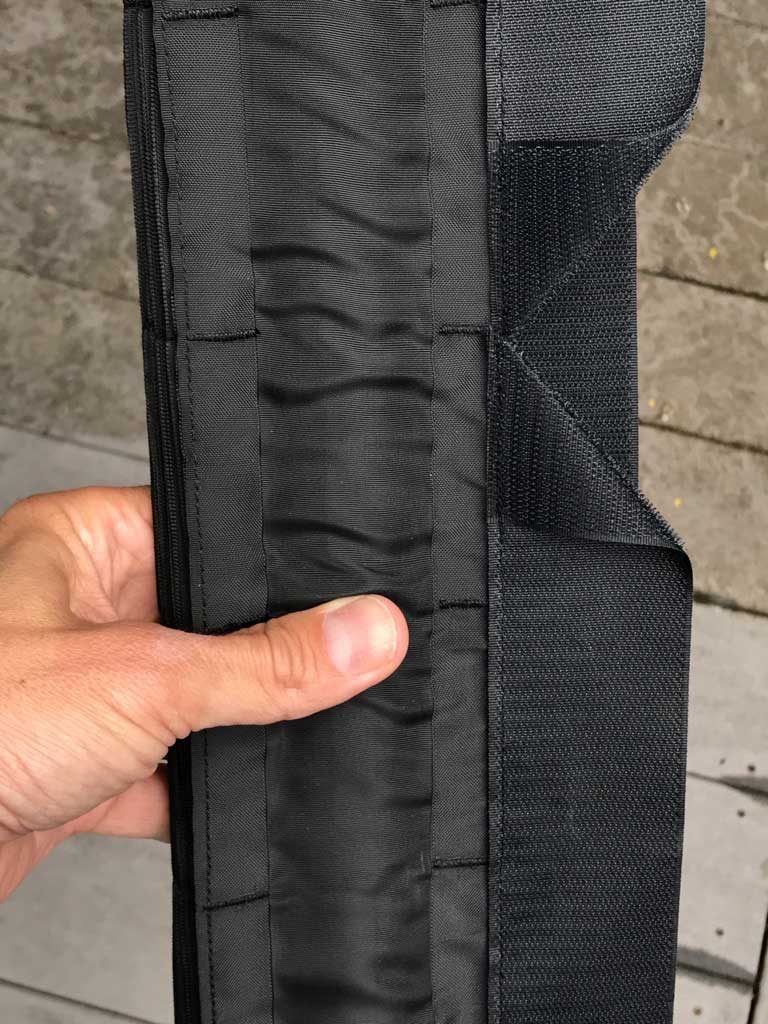
It’s made of material that seems well suited to day-in, day-out use. The unit velcros easily onto the poly skirt of the LiteMat 1, making a super-compact and highly controlled light source. You can also attach it directly onto the LiteMat without diffusion or the poly skirt if you want maximum light intensity.

With the grid in place, the light is very well controlled. With the light on a stand at 5 feet above the ground, you don’t see any light hitting the ground in front of it until you get to about 5.5 feet. By comparison, even with the poly grid that ships standard with the LiteMat kits, you get some spill at less than one foot.

Minimal light loss

The thing with thick black grids, however, is that they are lossy. You lose some of the light intensity. The larger the grid, the more it sucks up the photons of light. And this is a pretty thick grid, about 3 1/4″ deep. So just how much light do you lose? I set my light meter to ISO 1000 at 24p, and did a little test:

LiteMat1 S2 with 1/4 diffusion at 10′: f/2.0.4; with poly grid: f/2.0. with SnapGrid: f/2.0.1. 

So we’re looking about about a 1/3 stop light loss. Amazingly, the SnapGrid suffers slightly less light loss than the poly grid, at least in the center of the focus area. However, the focus area is much tighter, and the light intensity falls off quicker as you move away from the center.

Compact

As a bonus, the SnapGrid is small enough that you can fold it into one of the main compartments in the LiteMat1’s carrying case. And that’s great, because I am going to want to have it with me everywhere I go.  The SnapGrid really allows this light to reach its true potential as a location lighting power tool.


How we made beer beautiful for Sierra Nevada

Sierra Nevada today published a project that I worked on with director Mark Bashore. I was one of two DPs on the project, spending a day at the company’s beautiful brewery in Chico, where I shot the opening push-in shot on their bar. Then Mark and I returned to Seattle where he turned his living room into a studio for three evenings in a row, and we got down to the business of making beer beautiful. Here’s a few insights I learned in the process.

Probe the ingredients

To get inside the hops, we used a probe lens, which is designed for tabletop photography and special-effects shots. A probe lens was used for many of the special effects, which used models, in the original Star Wars. For our shoot, I rented one from Innovision Optics, an LA based company that helped pioneer the development of probe lenses in the 80s. They sent us their Probe II + package, which covers Super 35mm sensor cameras and comes in PL mount.

I rigged my Sony FS5 camera and probe lens on an Rhino EVO motion control sider, which allowed us to move the camera smoothly and repeatably into the bundle of dried hops which we suspended above and around the lens. To achieve the effect of sunlight shining through the hops, we used an Arri 650 fresnel, which Mark moved by hand outside the hop bundle. Our challenge was to get a bright enough light outside to simulate sunlight, but not so bright that it blew out our shot, or revealed how dried the hops really were. We shot many takes and the one we used seemed to strike the right balance.

Fill the Fish Tank

We filled a small fish tank with beer, and spent an entire evening placing the camera under it, beside it, and over it. We used a couple of Arri 650s directly without diffusion in some cases, and also bounced off foam core, to illuminate the beer. In many cases I shot at 120 and 240 frames per second to add a dreamy quality to the pouring. Basically it came down to repeated pouring and shooting from many different angles. We repeated that with the light in many different positions until Mark felt like he had enough stuff to take into the edit.

A forest of light stands

On this shoot I discovered that the smaller your subject, the more c-stands you’ll need. To properly illuminate the beer, and kill unnecessary glare, required a stand for everything: the lights, the flags, and the gobos we occasionally had to use to defeat glare or unwanted lens flares. We had two or three boom stands as well, and those were invaluable to get the lights into play where we needed them despite the room already being filled with other stands.

The perfect drop

The last shot, featuring the drop of beer that rises out of the water, is my favorite. I was shooting with a 100mm Canon macro f/2.8 lens, which doesn’t have much depth of field. So we had to really blast the Arri 650 pretty much directly from above. Mark’s wife Katrina just poured a LOT of beer until it happened. I set up the slow motion to capture with a rear trigger. This way, when we saw something that looked interesting I would press the record button. Then we’d have to wait 45 seconds or so, until the file could be written to disk from the buffer. The nice thing about using the rear trigger was that we only captured clips that had potential. Thus we avoided having to capture long sequences of slow mo that would have to be reviewed during editing. But the long write times definitely slowed us down during the shoot.

The slow-motion footage on the Sony FS5 can be pretty grainy, even when the Slog is properly overexposed. So I had to denoise the clips using Neat Video plugin. It’s pretty incredible how good the clips looked after that.


5 ways ditching your camera leads to more cinematic storytelling

5 ways ditching your camera leads to more cinematic storytelling

Turn on your TV. What’s the first thing you see? Somebody talking to the camera. Blah blah blah.  Open a film on Netflix. What’s the first thing you see? Action. The essence of cinematic storytelling is showing, not telling. So, if you aspire to cinematic storytelling with your documentary filmmaking, why film talking heads in the first place? Why not commit to showing instead of telling?

I’m a little hesitant to share this insight, because it’s valuable to me. Big medical organizations hire me to to tell their most important stories, and it’s a financially rewarding gig. Why give away my secret? But ideas are cheap – it’s execution that matters. So here’s a cheap idea that, when applied, has proven invaluable to me and my clients.

Stop shooting interviews with a camera.

Wait, what? How can you say that – aren’t you a camera guy? Yes, I am. But my first commitment is to story. And I’ve observed that:

  1. Being on camera feels like a performance to most people; being on mic feels more like a conversation. Talking heads are boring; mic’d conversations are more authentic.
  2. Cameras need lights, grip and crew. Sound needs only a mic, a recorder, and a quiet place, so audio costs less.
  3. If the audio interview doesn’t move you, you move on. It’s easy to do that because you’re less invested when you use a mic.
  4. Not having any interview footage forces you (and your client) to choose a visually interesting character who provides cinematic b-roll opportunities.
  5. Recording interviews audio-only adds a “radio edit” step to your editing workflow, building client buy-in early in the process. This translates into fewer client changes at the rough cut stage, faster delivery, and a happier client.

Let’s unpack this.

Talking heads are boring

Most people aren’t actors. So, they are uncomfortable when a camera is pointed at them. There are ways of minimizing this, but the simplest, most effective way is to simply nix the camera. Instead, bring only a microphone. That way, you can be sure they’re never thinking “how do I look?” But that’s just the tip of the iceberg.

Great interviews are genuine, human conversations. And when cameras are not in the mix, everything gets easier. Not only for the subject, but also for me.  No part of my brain is thinking about the lighting, or the frame rate, or the ISO. I’m just thinking about the person I’m talking to. I’m fully present. And THAT is the foundation of an extraordinary interview.

Camera interviews are expensive

In the large-nonprofit productions I do, a typical interview involves a crew of 3-4 people and a station wagon full of equipment. If we split the equipment up between picture and sound, about three-quarters of the “stuff” we bring belongs in the picture category. By going audio-only with your interviews, you eliminate three-quarters of your stuff. This also allows you to cut your crew in half. You see where I’m going with this: Cameras are expensive; talk is cheap.

Documentaries need casting, too

Great documentary films are built from great stories. Great stories emerge from great interviews. And great interviews come from great characters. To find great characters, you have to do casting.

When you use a mic for your interviews, you turn your interviews into casting sessions. If the interview is weak, it’s easy to move on to another story candidate without incurring the high costs of camera production. It allows you to cut your losses quickly.

On the other hand, if it’s an extraordinary interview, it’s easy to get your client to buy in to the story, with a radio edit. And the only thing left to do is the b-roll. More on that below.

It forces you (and your client) to choose wisely

Too often, clients settle. They settle for a boring character and an uninspiring story that has few b-roll options. They do this because you let them. And you let them by shooting interviews.

When you shoot an interview, you can always cover your lack of good b-roll by cutting to the talking head, like they do on TV. But no matter how well you’ve lit the interview, it’s still a talking head.

When you have no talking head, you force both yourself and your client to pick a strong character, who will provide you with action to film. That is, you force yourself to show instead of tell. That’s sometimes an uncomfortable place to be. But trust me, it’s a good place to be.

The radio edit advantage

We’ve all been there. You work really hard on an edit, you present it to your client, and you hold your breath. Will they like it? How many changes will they make? What if they don’t like it?

I have discovered that if you take the time to introduce your client to a story with a “radio edit,”  you (and your client) will be able to breathe a lot easier when it comes time to deliver your rough cut.

A radio edit is an audio-only version of your film that would totally work if it were aired on the radio, including music and pacing. The first time I did this, the client came back to me with a surprising comment: “Wow. This sound like a This American Life piece. We can’t wait to see what it looks like with video!”

By giving them a polished radio edit first, you introducing them to your story gently. You invite them to buy in to the story, and to your approach. I find that clients have a few changes at this stage. But these few are much easier and less expensive for you to make than they would be after you’ve added b-roll.

Here’s how it works

On this project, my client needed help launching a $2 billion fundraising campaign. They wanted to find a story that would inspire their audience to believe that heart disease was beatable, and that their donations could have a direct impact. Because of the big numbers at stake, the approval chain included a lot of brass, including the CEO. Red flag!

The first person we interviewed (mic only) didn’t move us. Neither did the second person. So we kept looking. Then we found Jim. Here’s his radio edit:

The client liked the radio edit, and suggested some minor changes. Here’s the final film:

When they saw the rough cut (for this and another film we made concurrently using the same approach), they sent me this email:

Dan. I don’t think we have ever given this little feedback on videos. They’re universally loved, and we think they’re going to work really well.

Werner Herzog once said “Good footage always cuts.” The visuals don’t have to literally match the dialog (as long as you have great story as a foundation). Somehow by choosing a character who inhabits an interesting environment, who does interesting things, the footage will always cut.

So. Next time you’re faced with a high stakes interview-based project, consider how ditching your camera can help you do more with less.


Why I’m buying a Sound Devices MixPre 3

Meet the new MixPre 3 and MixPre 6

Meet the new MixPre 3 and MixPre 6

For years I’ve been wondering why Sound Devices didn’t make something like my MixPre – which is an amazing little mixer – but with recorder built right in. Maybe to protect their high-end recorder mixers? Maybe too hard to fit everything into such a small package? But as more and more companies like Zoom began offering affordable versions of such a device, it became apparent that Sound Devices was leaving a LOT of small filmmaker dollars on the table that other manufacturers were only too happy to grab.

The dream comes true

So this year at NAB, Sound Devices finally turned my fantasy into reality by announcing two mixer/recorder devices: the MixPre-3 and MixPre-6. For about the cost of the original MixPre, you can now buy a full-fledged multi-track recorder that offers those incredibly pristine Sound Devices preamps. In fact, they’ve gone one better, and are shipping them with pre-amps that are even quieter than their professional 633 mixer/recorder! What’s more, both of these little miracles can be controlled and monitored from an iPhone app. Thank you Sound Devices!

The reason this is so huge for me is that it will allow me to throw away half of my sound bag, and consolidate to a single device, instead of two. This means less battery requirements, less bulk, fewer cables and fewer failure points. Additionally, I use a workflow in which my producer logs interviews, and for that, the iPhone app allowing her to see the audio timecode will be invaluable.

A new benchmark for small-production audio

The only physical difference between the two devices that I can see without getting my hands on one is that one has 4 individual XLR inputs and one has 3. So the MixPre 6 can record more individual tracks. There’s also one minor difference on the front – the MixPre 6 has an asterisk button that presumably allows super-easy annotation of the interview by pressing that button when you year a good sound byte. I use hand-written log notes, so that’s not a big thing for me. And I pretty much rarely do more than a two-person interview, so the ultra-compact 3-channel MixPre 3 is going to be PERFECT for my needs. And the price is so awesome: can you believe all of this from Sound Devices for $649?

The only thing missing from this mixer/recorder is XLR line outs. The only option to output to a camera is via a 3.5mm unbalanced jack, and that means I won’t be able to use it with my breakaway cable. So for shooting interviews, I’ll stick with my MixPre – Tascam DR-70D combo. But for audio-only interviews, which are the foundation of cinematic storytelling, the MixPre 3 is perfect.

This recorder/mixer is clearly on its way to becoming the new gold standard in audio recording for small documentary productions. Sound Devices is going to sell a ton of these, and I can’t wait to put mine to work.

Litepanels Hilio: an HMI alternative?

Ever since LEDs became a thing, I’ve been wishing for an LED that is bright enough to balance interiors with exteriors. Traditionally, you needed a HMI for this task. But HMIs are heavy, expensive, and hot. Nevertheless, gaffers love them for their ability to blast through diffusion and gel predictably. But for small productions like mine, generally just me, a sound recordist, and an assistant, having a light that packs the punch of an HMI but with the advantages of LEDs could be a real benefit. Enter the Hilio D12 Daylight Balanced LED Light from Litepanels.

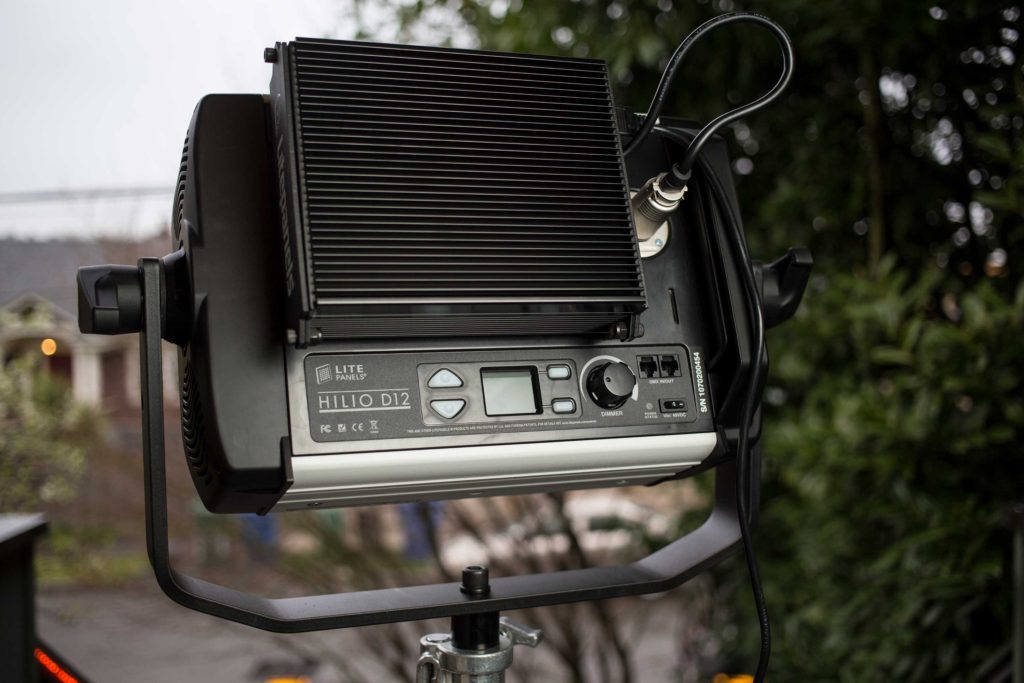
Hilio D12 controls

Hilio D12 controls

The Design

The Hilio has an all-in-one design, with the ballast attached to the upper back side of the unit. At first I found this pretty awkward, because the weight on top like that means the light always wants to flop onto its back when you release the twin locking grips to aim it. But with a Snapbag in place (and you really do need diffusion on this light – more about that below) the unit feels pretty well balanced. I think LitePanels made a good choice to keep the ballast on the unit instead of separate, like some other manufactures. It makes it really compact, but at 25 pounds, this isn’t a small light. In fact, you need something like a Master Combo HD Stand (11′) with a junior receiver that accept this light’s 1 5/8″ spud. You can’t place this light on a standard C-stand.

My problem with the design of this light is a nitpick, really: the power cord. At just 6 feet long, it is a lot less useful than the power cord that comes standard on Arri 650s. I really wish it had at least a 12′ cable with a more robust, locking connection to the unit. The ballast has a nice locking connector, so why not the power cord? Be sure to pack extra stingers when you use this light, because you really can’t plug it in without one.

With HMIs diffusion is nice; with Hilio D12, it’s mandatory

The thing with LEDs is that, apart from chip on board designs, they tend to have many individual points of light. That’s not a bad thing, but it means that you definitely have to diffuse the light to avoid multiple shadows. This is especially true of the Hilio, which is essentially an oversized light panel.

Here’s a comparison that shows how much diffusion is necessary to achieve good results:

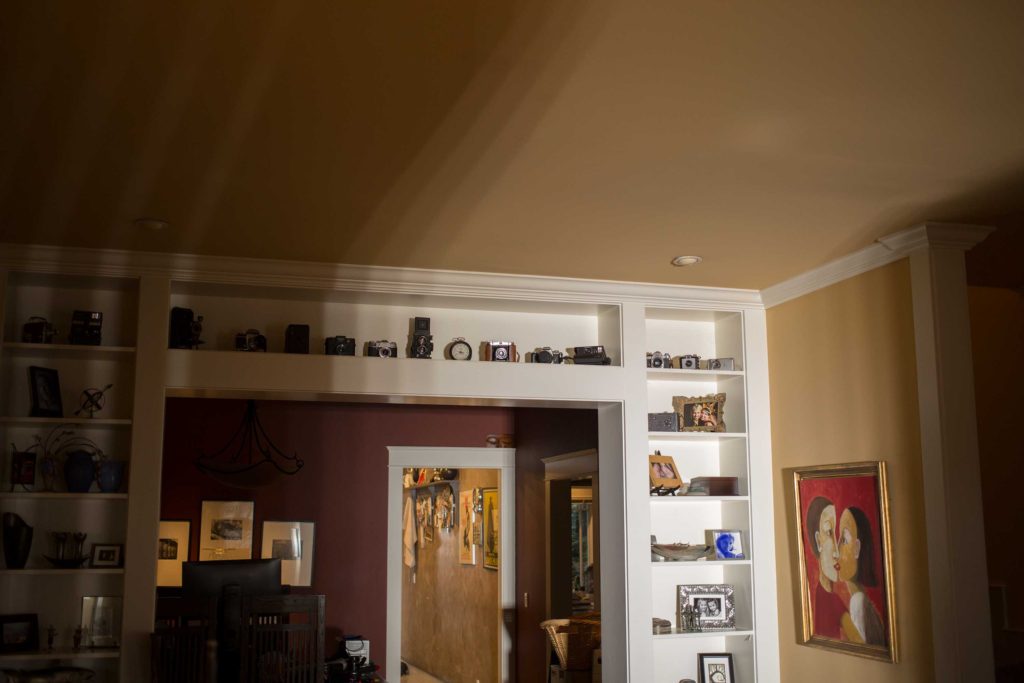
Raw beam

Raw beam through doorway

Raw beam through 4x4 of Hampshire frost light diffusion

Raw beam through 4×4 of Hampshire frost light diffusion (note lines are still visible)

Beam diffused with 1/4 grid lamp head bag

Beam diffused with 1/4 grid lamp head bag

The shots above make it pretty clear the Hilio D12 isn’t a great solution for throwing a hard beam of sunlight into a room, like you can with an HMI. LitePanels does offer a set of Nanoptic Lens Set For Hilio D12/T12 LED Lights which are advertised to help shape the light, but I’m not sure it would solve this multiple-shadow problem. The loaner I tested for this review did not include the filters.

Snapbag soft box

Snapbag soft box

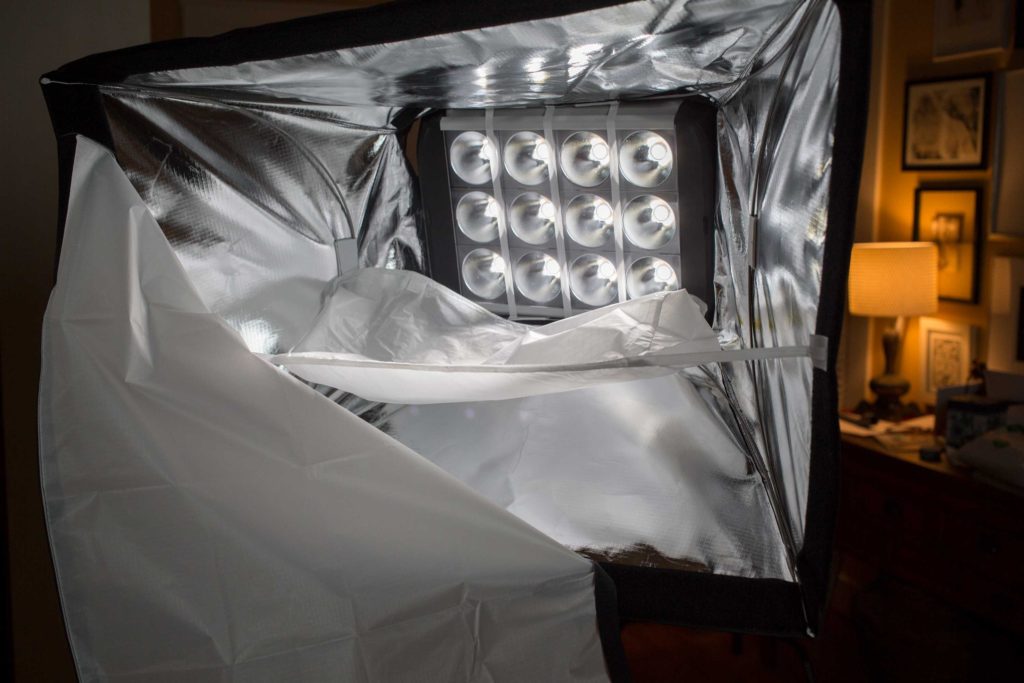
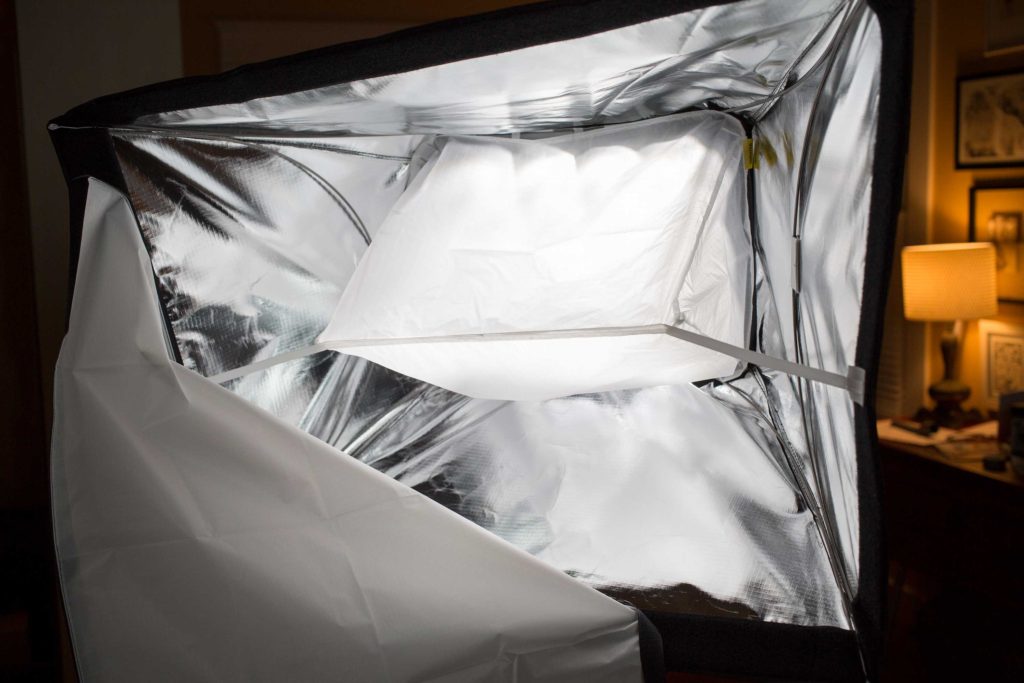
Snapbag with 1/4 grad lamp head diffusion attached

Snapbag with 1/4 grid lamp head diffusion attached

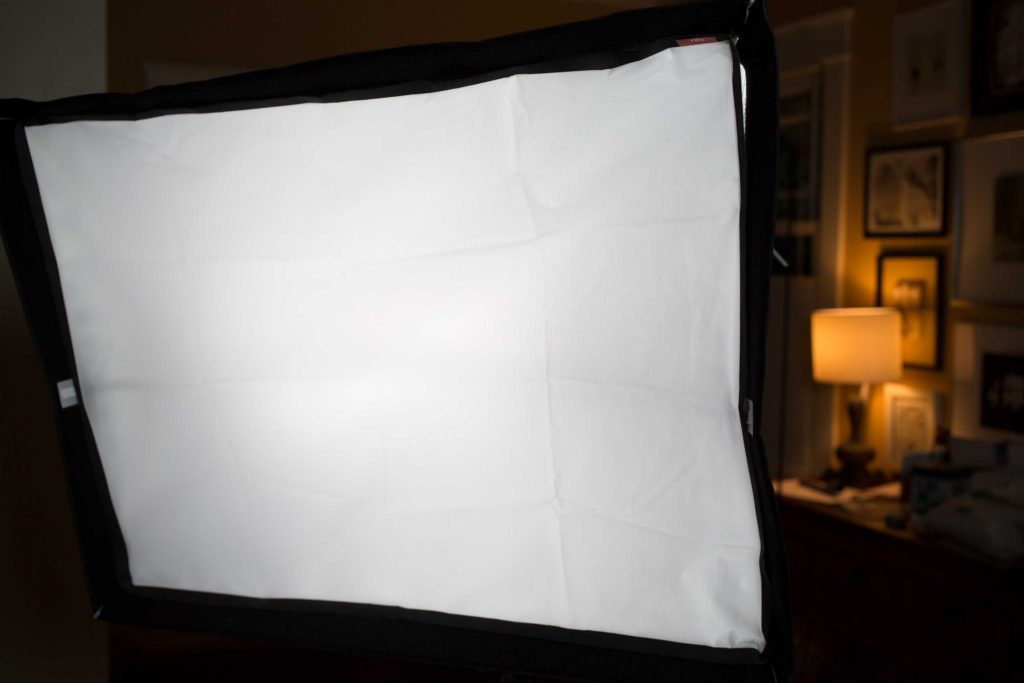
Snapbag with full grid diffusion in place

Snapbag with full grid diffusion in place

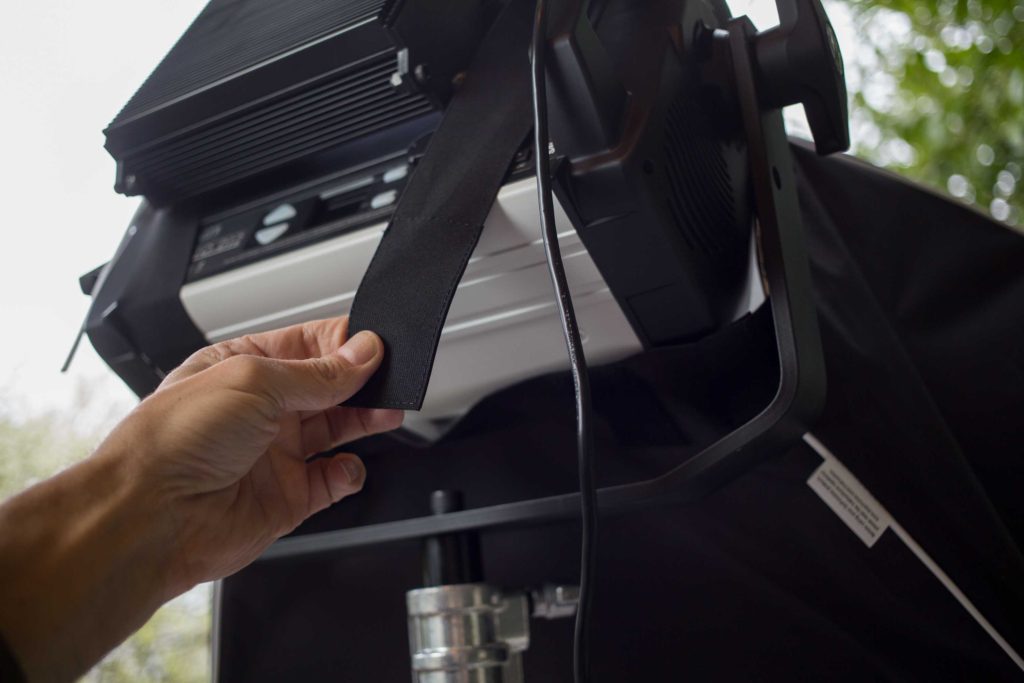
The Oversized Softbox with Baffle for Hilio D12/T12 LED Light (Otherwise known as Snapbag) is very impressive. It folds right out of its bag without requiring any assembly or hardware, and attaches to the head of the light with two velcro straps in a few seconds. It’s not a big softbox, but I found it to be a nice working size – not too big to be unwieldy on location, but not too small to diffuse the light adequately.

Snapbag straps

Snapbag straps

However, I noticed that even with the 1/4 grid lamp head bag AND the full grid on the face of the Snapbag, the light emitted wasn’t particularly even. See photo above. I recently spent a week shooting on location with Kino Flo Celebs, and their perfectly even illumination surface made them a joy to work with.

Finally, using the quarter grid and full grid really cuts down the power of this light. You find yourself pretty quickly wanting to diffuse the hell out of this light, but not being able to, because you need more punch. But that’s a problem with HMIs too, right?

The window test

So, how much power do we really need, anyway? I’m not all that interested in foot candles or LUX; I prefer to talk about real-life scenarios. With artificial intelligence, you have the Turing test. With lighting, you have the window test. In my world, an LED is only a contender for the HMI equivalent prize if it’s bright enough to light a subject so that she looks good in front of a background that includes a window. So how does the Hilio do?

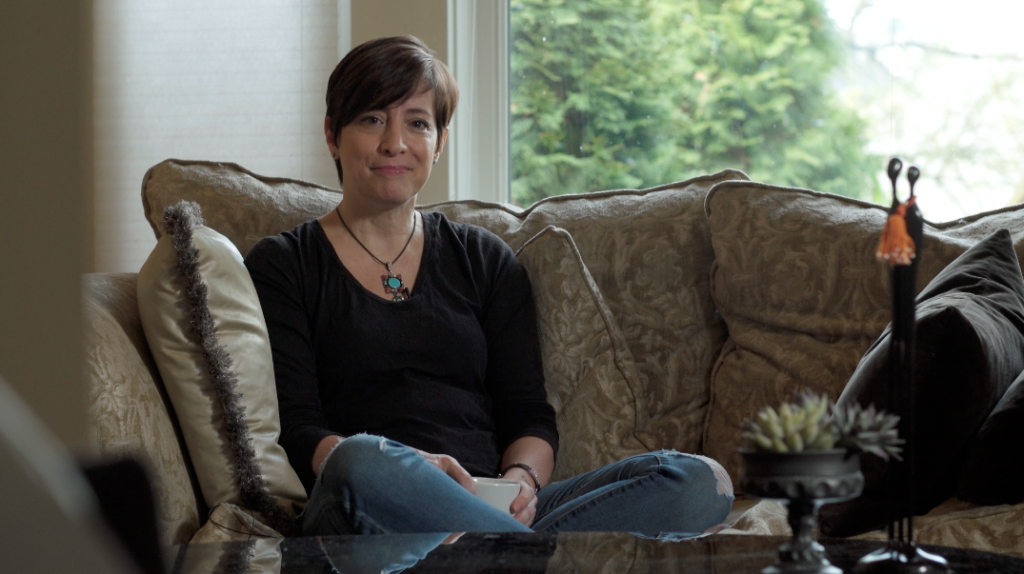
Hilio D12 as key in window

Hilio D12 as key with window in background

In the frame above, the Hilio was positioned, at full power, about 8′ from subject with the 1/4 grid lamp head bag to give it basic softening and spread. The light was further softened with a 4×4 of Hampshire frost (which costs just 1/3 stop of light). I used a sheet of black foam core to cut the light off the background and foreground. The light is slightly hard on her face (see the shadow cutting across the camera left side of her neck). But this light totally works for me.

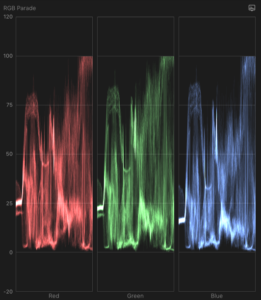
RGB Parade

RGB Parade

Looking at the RGB parade for this exposure, you will notice that the right side of the window is actually blown out. Shooting SLOG3 with my Sony FS5 allows the highlights to roll off pretty smoothly, though, retaining some of the texture of the branches. So I would say this is acceptable. However, this wasn’t shot on a particularly bright day here in beautiful Seattle. Had their been bright sunlight hitting those trees, it would have blown them out with the light at 8′ from subject.

Moving in for a close up, I wanted to further soften the light. I got rid of the Hampshire, and velcroed on the full grid which ships with the Snapbag  (in addition to the 1/4 lamp head diffusion already in place). This gave us this result (which in hindsight is a little overlit for my taste -dialing the light intensity down half a stop would improve the shot):

Hilio D12 close up

Hilio D12 close up

In this frame, the sun has indeed come out for a minute, so I’ve had to close down a stop to hold detail in the window. The light can handle that because I’ve moved it in closer – here it’s about 4 feet from her, AND there’s only foliage visible in the window frame. Foliage is actually quite dark, absorbing a couple of stops more light than more reflective objects such as buildings.

In summary

The Hilio isn’t something to cart around with you just in case you need it. You’ll be needing some crew to deploy this light. It’s a big gun, and that means being proactive rather than reactive about your lighting setups. Too heavy to travel with easily, it’s your friend in  situations where you need to balance interior and exterior lighting. However, it doesn’t take gels the way tungsten or HMI lights do, so if you want to tweak the color you’ll need the 5-Piece CTO Gel Set with Bag for Hilio D12 LED Light which is tuned to match the light’s LED emitters. This makes the light a poor team player for work on sets with traditional lights. But if you work in small crew situations, like I do, it is a real workhorse.

LiteGear’s S2 LiteMat 1 is a small miracle

LiteMat 1 S2 handheld. Photo by Doug Plummer

LiteMat 1 S2 handheld. Photo by Doug Plummer

"Hollywooding" a LiteMat 1 S2. Photo by Doug Plummer

“Hollywooding” a LiteMat 1 S2. Photo by Doug Plummer

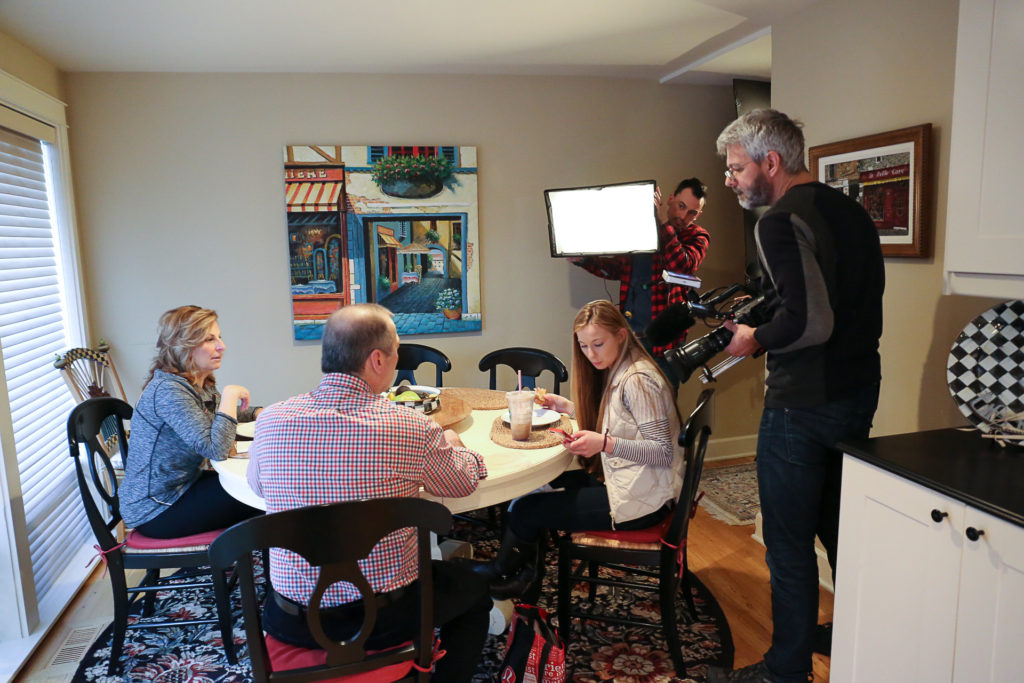
When you’re a documentary filmmaker, it’s easy to fall into the habit of shooting b-roll with available light all the time. The need for speed can eclipse all other considerations, especially with regard to lighting. But it doesn’t have to be that way. LiteGear’s S2 LiteMat 1 makes it possible for documentary cinematographers to bring a little Hollywood to their next production. You don’t need a big crew – just one assistant who stays glued to your side while you work. Your assistant (with your direction) solves the lighting challenges, while you and your camera stay focused on the story.

What is the difference between videography and cinematography?

Videography is about placing lights to accurately expose your subjects. Cinematography is about placing shadows to create the mood your story needs.

But remember, lighting is a subtle thing. If it looks lit, you’re probably overdoing it. The approach I’m sharing with you is really designed to complement the light you find, not overpower it. The LiteMat S2 unit is quite bright, but it’s never going to balance your subject with direct sunlight.

The good news is it doesn’t have to. All you need it to do is wrap light into places where it doesn’t quite reach, and reveal detail in shadows that would otherwise go black.

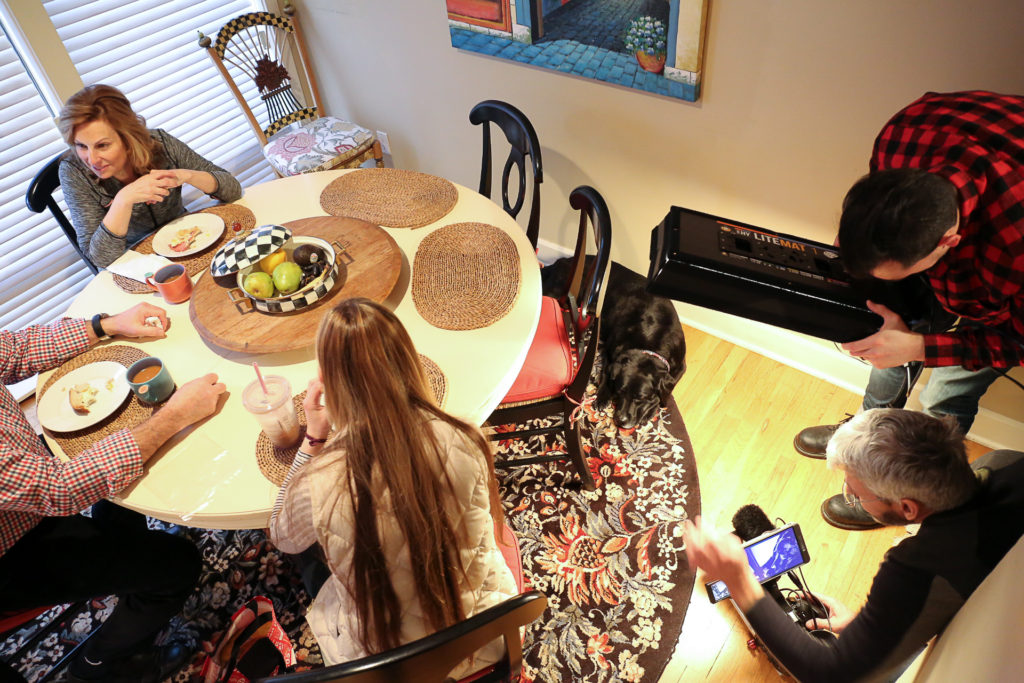
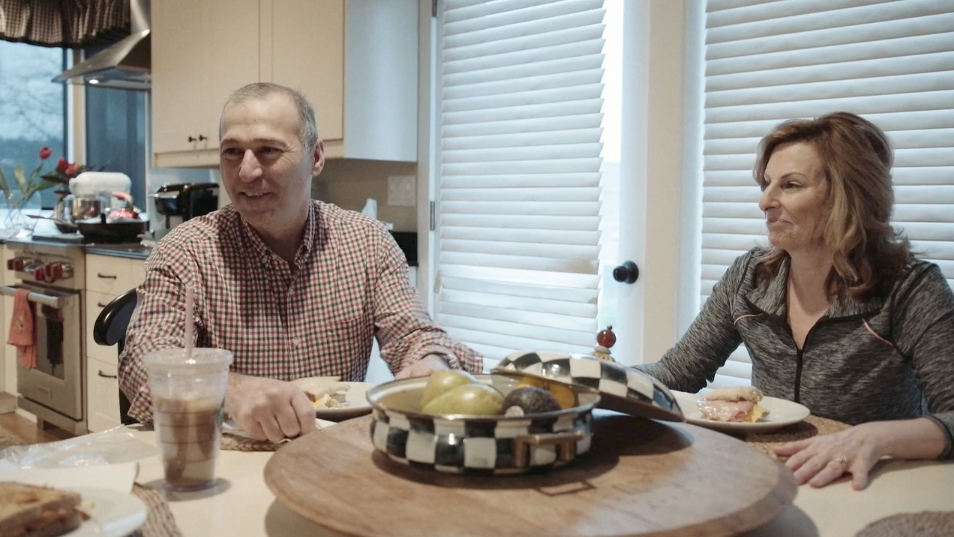
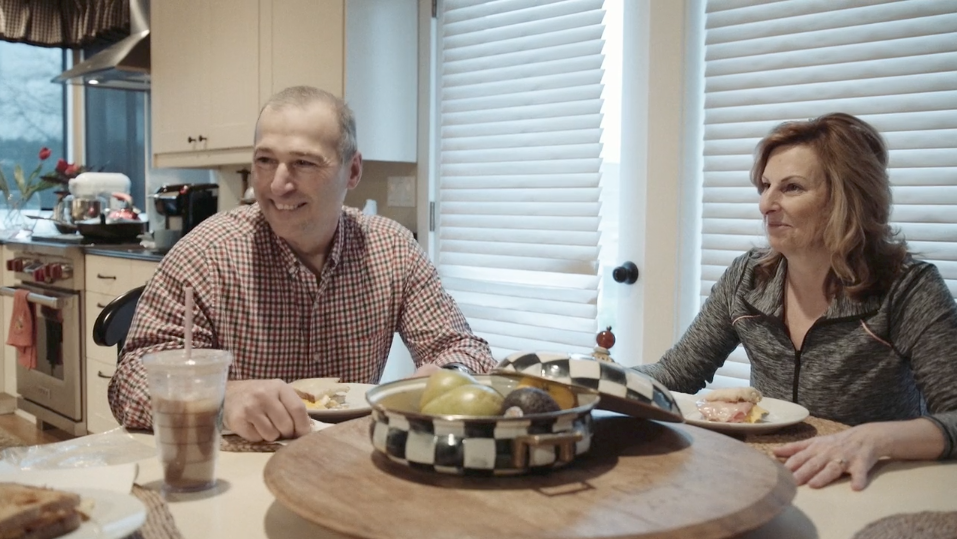
Take the frames below. In the first frame below, the man has leaned back so that our Hollywooded fill light is being blocked by another person sitting at the table. This reveals what this shot would look like with just available lighting. (Note that woman on right has correct fill on her in both frames.)

Without fill, available overhead light casts harsh shadows into eye sockets

Without fill on his face, available overhead light casts harsh shadows into his eye sockets

With fill, we can see clearly into the shadows, but they still feel like shadows.

With fill, we can see clearly into the shadows on his face, but they still feel like shadows.

The mood I was going for with this shoot was warm and happy family time, so opening up the shadows under his face (while at the same time keeping a natural vibe) was the appropriate way to handle this. The LiteMat and an assistant allowed me to achieve that.

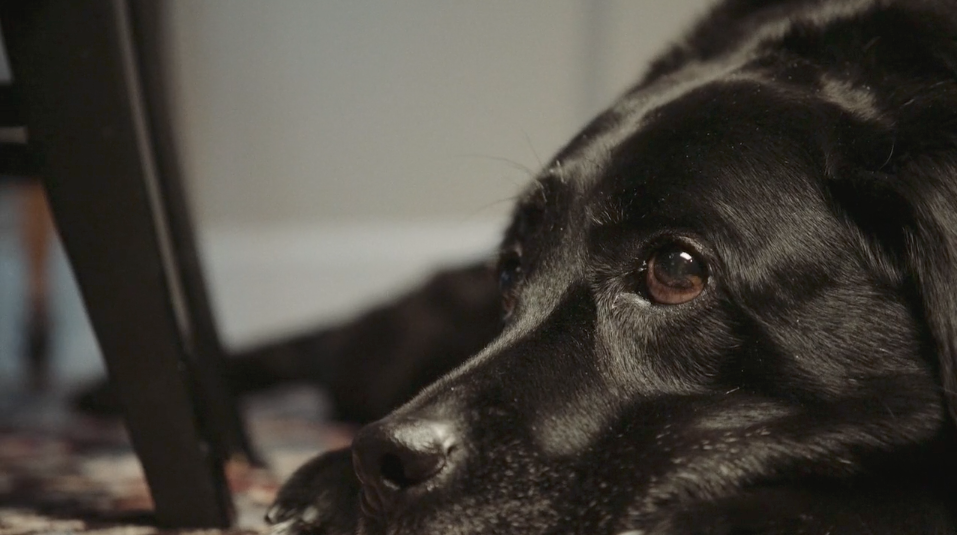
Here’s another frame:

Hollywooding a light allows picking up this shot quickly without fuss

Hollywooding a light allows picking up this shot quickly without fuss

I wanted to include the dog in this piece (because audiences love dogs) but he was lying under the table. Which is to say, he was in extremely low light. Basically he would have been silhouetted without the light. But because I was working with an assistant and light, I was able to see the dog, call for the light, and grab the shot within a few seconds, without disrupting the flow of the action on the table which was my primary focus. Good thing we worked fast, too – the dog got up and moved out of the shot just moments after I was able to grab the shot. And it ended up in the final film, helping me create the story I wanted to tell.

Note: the S2 version of LiteMat is not only 40 percent brighter than the original LiteMat, but it has a wider color temperature. So now, you can go all the way down to 2600k (warm incandescent bulbs) and up to 6000K, which is a good starting point for matching north window light. In other words, it can instantly match just about any light you’re working with on a documentary production.

Here’s how the finished piece turned out:


“Hollywooding”

In film-speak, to “Hollywood” a light means to hold it by hand rather than placing it on a stand. It’s a common technique that is used on productions both large and small, most frequently when a subject is moving and the light needs to travel along with it.

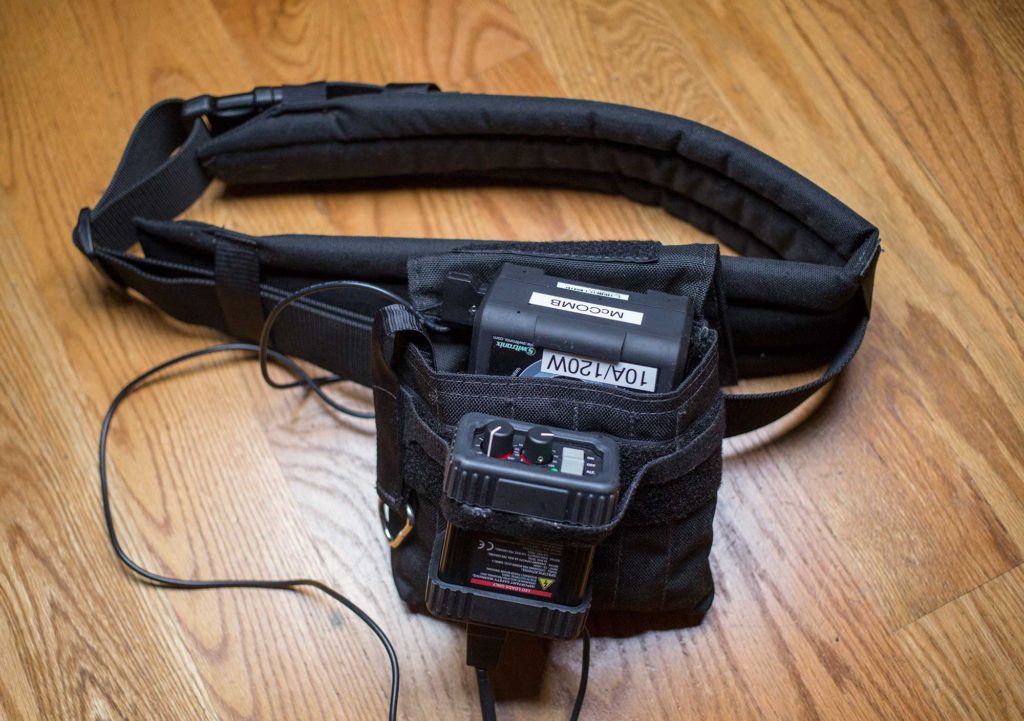
The nice thing about the LiteMat 1 is that it’s large enough to give you a reasonably soft source, while small and lightweight enough to support easily for long periods of time. And with a few accessories, you can rig it up so that the battery and dimmer attach to a belt for completely untethered Hollywooding that puts dimmer and color temp controls at your assistant’s fingertips.

But be careful: the calibre of your documentary camera work will rise using this approach. Clients will start expecting it. Once you start Hollywooding, you can never go back!

What you need

  1. A battery pouch. We use the Lindcraft assistants tool pouch from Filmtools because it fits a v-lock battery almost perfectly. It also has velcro sewn on the front, which which makes it possible to attach the dimmer.
  2. A padded set belt (the one pictured below is no longer made, but you can find others like it at B&H or Filmtools).
  3. A high-capacity battery such as the HyperCore 98Wh 14.8V V-Mount Battery pictured here. It lasts 1.5 hours at full power; much longer when dimmed.
  4. An 8″ length of 1.5″ wide hook velcro strap for attaching the dimmer to the loop velcro on the pouch.
Battery belt for LiteMat 1

Improvised battery belt for Hollywooding the LiteGear S2 LiteMat 1

Tips

  • Holding the light close to camera at eye-level with your subjects is a great place to fill from. Hold the light slightly higher to eliminate shadows on walls behind your subject.
  • Unlike a c-stand, your assistant has feelings. Communicate with them clearly, be patient, give them breaks, and remember to thank them for a job well done.
  • Use the LiteMat’s skirt. With the skirt and grid cloth attached, you have some ability to direct the light. For even more focused throw, attach the egg crate that is included with all LiteMat kits. However, this adds significant weight.
  • Switch off the light when you’re not using it, to save battery.

Thanks to photographer Doug Plummer who took these photos while working on assignment for our mutual client on this project.

Fujinon MK 18-55: the Tesla of documentary filmmaking?

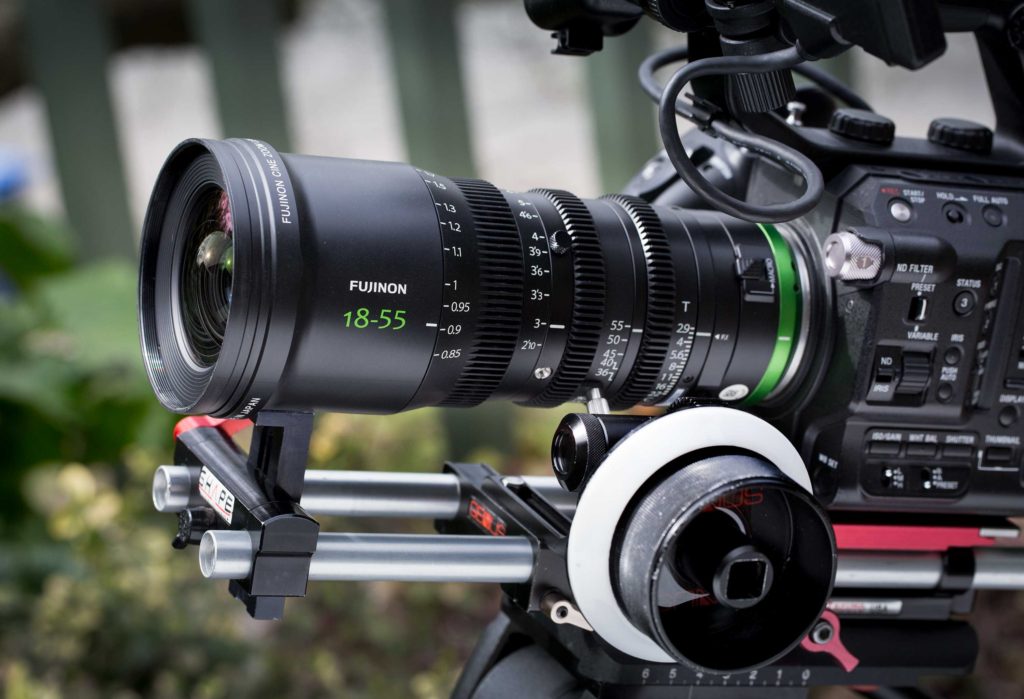
Fujinon HK 18-55

Fujinon HK 18-55

The Fujinon MK 18-55 is the first legit cinema lens that this documentary shooter has a prayer of owning. But $3,700 is still a lot of money. Is it worth it? To find out, I was among the very first people to rent one.

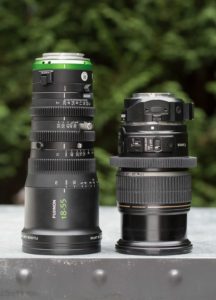
MK 18-55 vs Canon EFS 17-55

Fujinon MK 18-55 vs Canon EFS 17-55 with Metabones adapter.

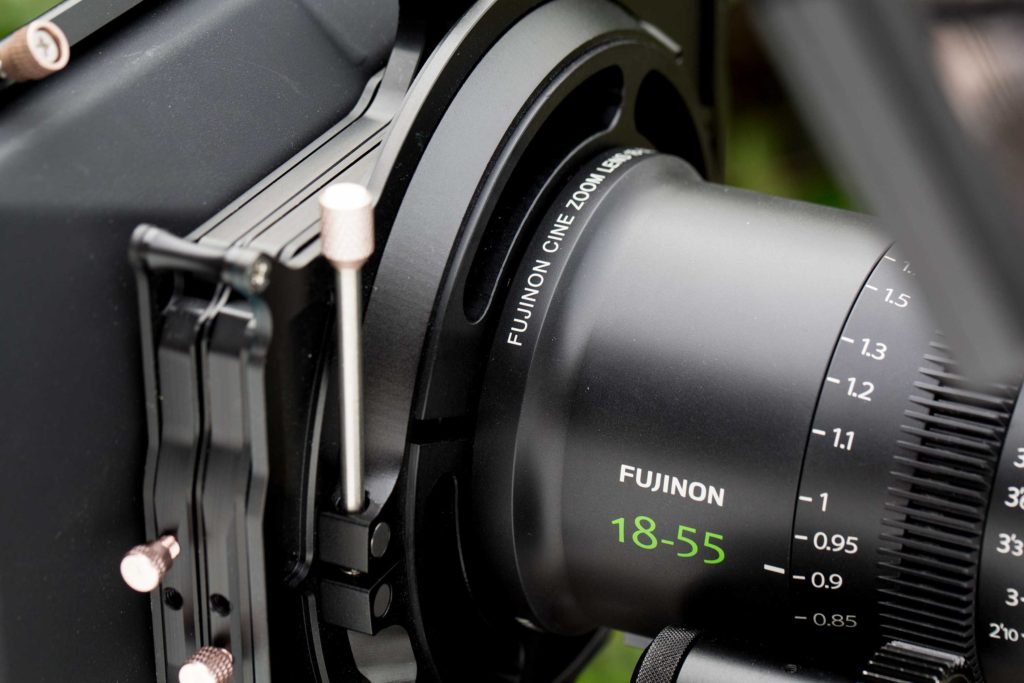
First off, it’s much more compact and lightweight than the photos I’ve seen imply. By way of comparison, my go-to lens on the Sony FS5 has until now been the EF-S 17-55mm f/2.8 IS USM Lens with T Smart Adapter Mark IV. Check out the photo on the right: this extraordinary lens from Fujinon is about the same weight, and only slightly longer.

The Fujinon MK 18-55 is also sharper than my Canon 17-55. But not dramatically sharper – I had to blow the image up 200 percent to perceive the difference. See below.

What about barrel distortion? The difference is slight, but the Canon EFS 17-55, which has plenty of barrel distortion on the wide end, fares better than the Fujinon MK 18-55. I do wish that the MK didn’t bend vertical lines (i.e., walls) the way it does shooting on the 18mm end.  And there’s really no way to correct that in post, like you can automatically do when shooting with the Canon on a C100 with lens profile correction enabled, for example.

Warmer and sharper

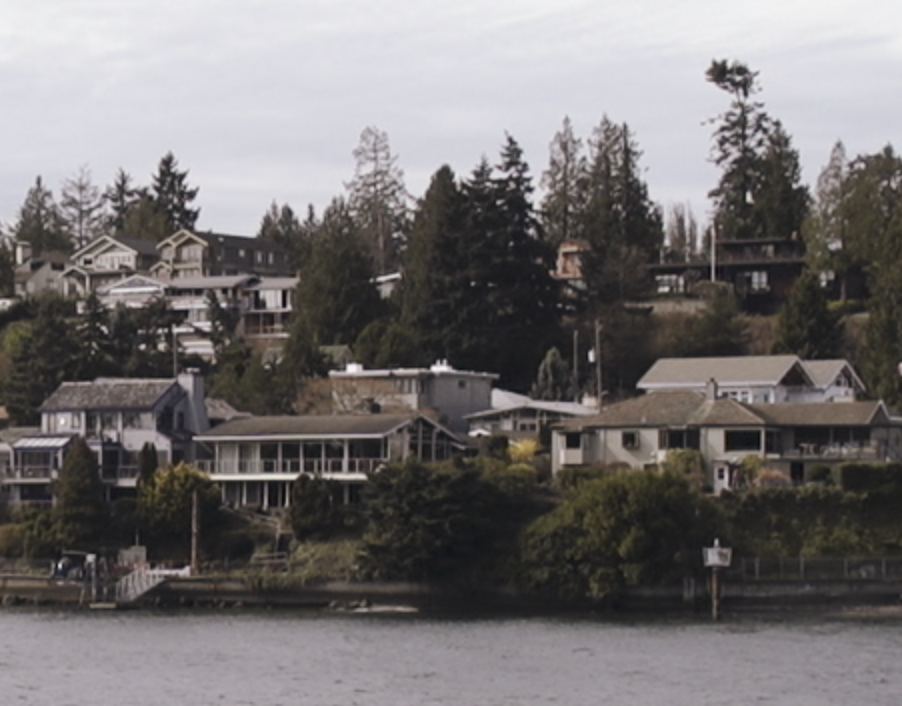
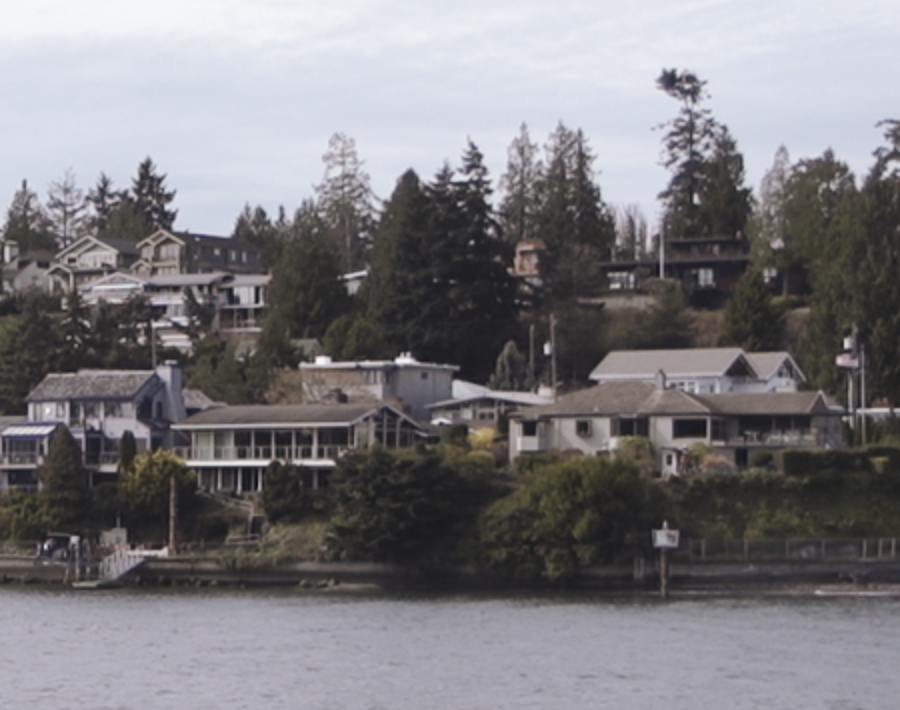
Compared to Canon EFS 17-55, this lens is warmer, sharper, and a little wider. See for yourself:

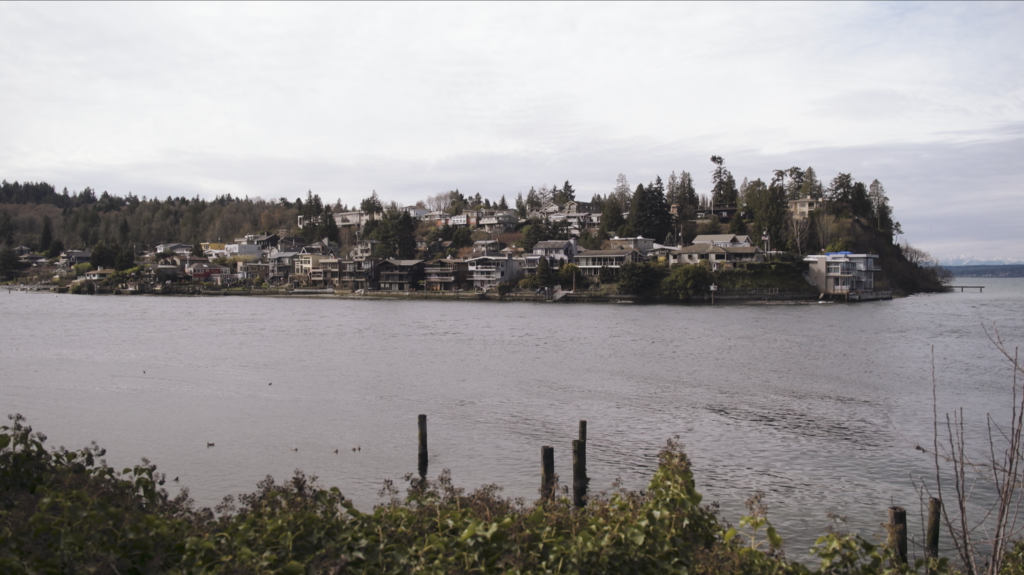
Fujinon MK 18-55 at 18mm

Fujinon MK 18-55 at 18mm (Sony FS5, Cinegama 1)

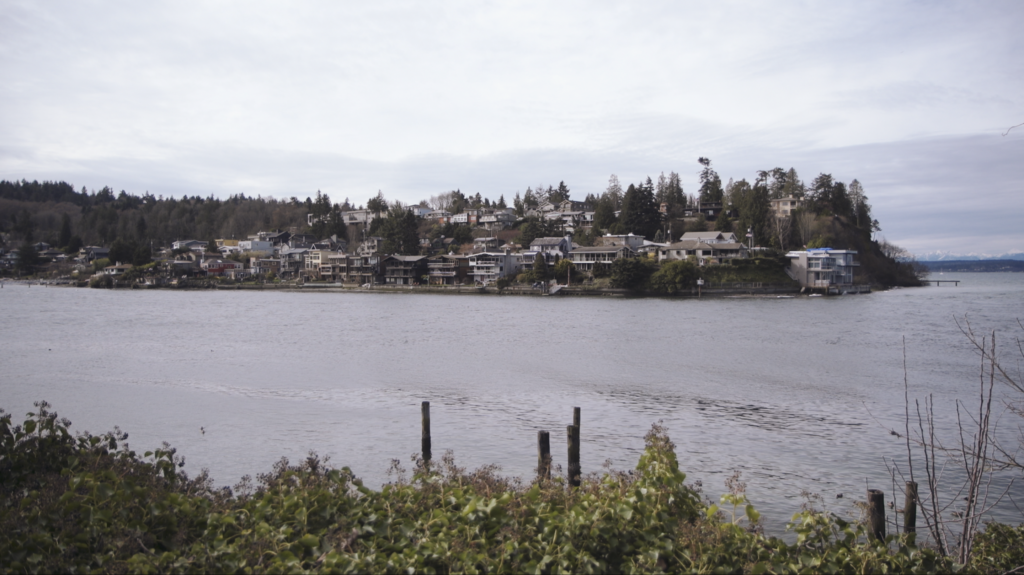
Canon EFS 17-55 at 17mm

Canon EFS 17-55 at 17mm (Sony FS5, Cinegama 1)

In the frame above, the Fujinon 18-55 reveals itself to be significantly warmer glass than the Canon.

To see the difference in sharpness, you need to zoom in to 200 percent:

Fujinon 18-55 @200 percent

Fujinon 18-55 @200 percent (uncorrected)

Canon EFS 17-55mm

Canon EFS 17-55mm @200 percent (uncorrected)

Smooth operator

This lens makes me want to pull focus all day. I was really impressed by how easy it is to get extremely precise pulls. The heft of the rotating elements, all three of which are geared, is just right for hitting repeatable, consistent marks. It would be a joy to use this lens with a wireless focus puller.

As a rule, I don’t use zooming as shooting technique. But after rocking this lens, I’m beginning to wonder: why not? With the Fujinon MK 18-55, it’s hard not to feel like I’ve just added a new word to your vocabulary.  “Parfocal.” Mmmmmm. Sexy.

While it is still quicker to digitally punch in to check focus, with this lens it’s possible to crash zoom in, grab focus, and back out to your shot. Where that’s truly useful for a documentary shooter is when you’re rolling on something, and want to cut in-camera. Instead of having to refocus every time you zoom in or out, now you just keep rolling and watch your keeper count go up, up, up.

Look Ma, No Breathing!

This is the first lens I’ve ever used that doesn’t show any noticeable breathing. Know what I’m talking about? Narrative-style focus pulls, coming soon to a documentary screen near you. To see how lovely this is, here’s a short clip comparing the Fujinon MK 18-55 to the heavy breathing Canon EFS 17-55:
BUT: There’s NO IS

As you probably noticed in that clip above, you have to be really careful when pulling focus not to jar the camera. With no IS, any shaking or vibration translates directly into your shot. Small amounts of this can be removed in post, but for many situations, such as shooting handheld, there’s no substitute for IS. For example, I was working on a doc a couple weeks ago where I found myself shooting on a bridge, with lots of car vibration. For those situations, this will not be your lens. Let me repeat that. If you want to handhold this lens, forget about it. If you’re going from shooting an IS lens to this, you are going to notice your footage has one hell of a case of the jitters.
But for precision situations where you’re going on sicks, or any other controlled motion situation, you will most definitely want this to be your lens.

Mind the gap

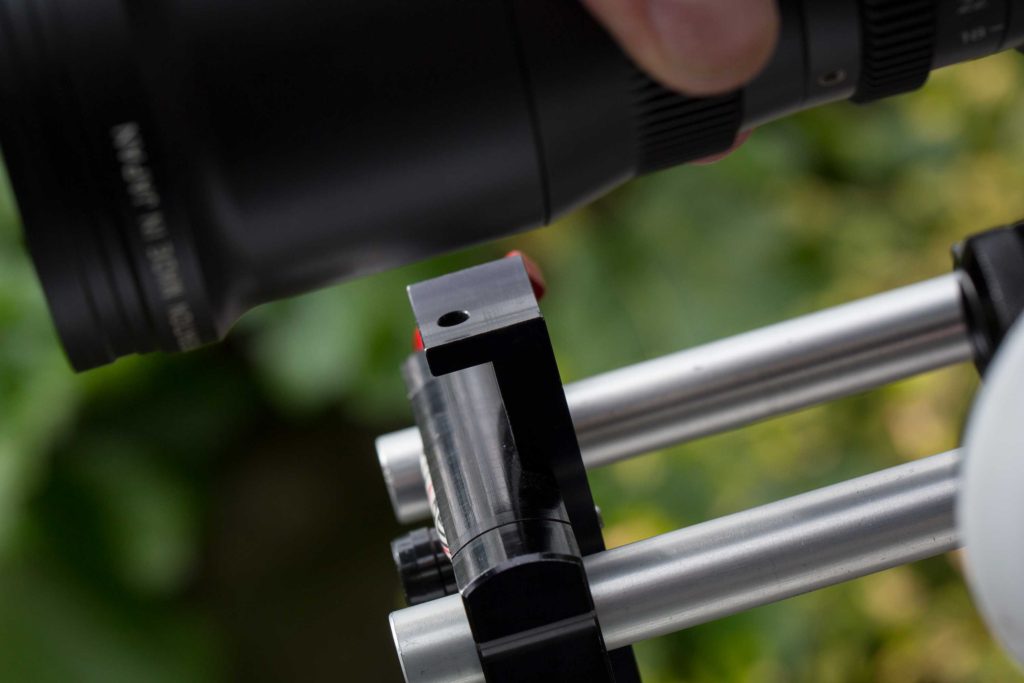
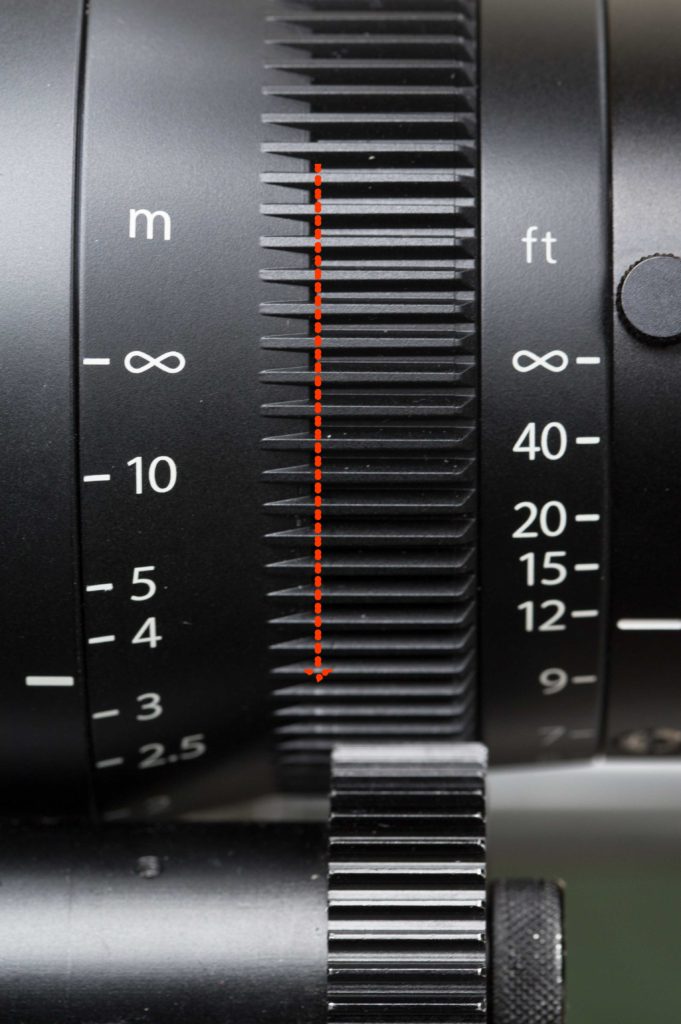
You have to pay attention to the focus gears when pairing this lens with a focus puller. The Fujinon MK 18-55 appears on first glance to have a very wide gear width in which to seat the focus puller, but actually, it isn’t that wide – the geared area slopes down toward the front, causing your gears to not mesh correctly if mounted too far forward. Be sure to place your gears behind the red line:

focus gear inset

Correctly mounted focus puller, above. It’s easy to mistakenly mount focus puller too far forward.

Best lens support: Shape

This lens is long enough that you really should use a lens support. It’s not absolutely essential, but for vibration-free focus pulls, I found I needed it.

Shape lens support

Shape lens support pairs perfectly with MK 18-55

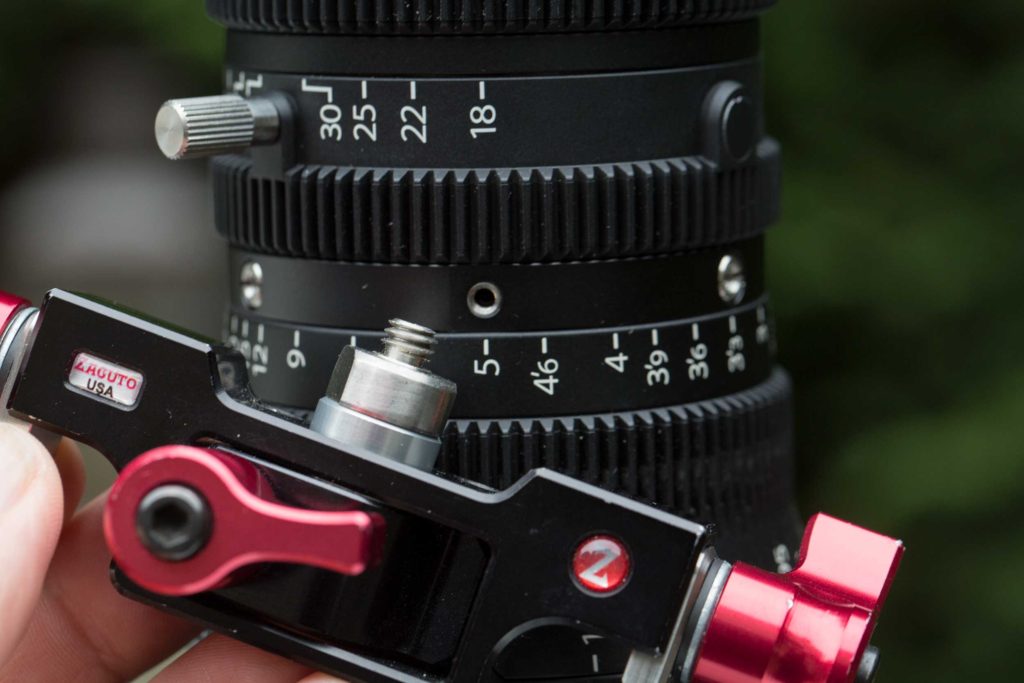
I tested the lens with two supports, Zacuto 1/4 20″ Lens Support and Shape Lens Support. The winner, hands down, for documentary shooting was the Shape support. Not only is it far more affordable than the Zacuto, but it also allows faster lens changes.

The Shape lens support simply cradles the lens perfectly. The Zacuto requires screwing in a locking support rod, and that will slow down your lens changes. Speaking of that, this lens will really come into its own when it’s sister, the MK 50-135, is released this summer. That will give you a range that will cover most documentary situations with just two lenses. So you’ll be able to spend more time shooting and less time swapping glass.

It’s worth noting that the Fujinon MK 18-55 does not have a 1/4 20″ support mount hole. It’s mount screw is smaller:

mount point

The Fujinon MK 18-55 does not have a 1/4 20″ mounting point, so if you want to attach a support you’ll have to use the adapters that ship with the lens (but not with the rental).

Lensrentals.com did not include the adapter in their package, so be sure to specify that you want the adapter if you plan on supporting this lens with a screw-in support.

Mattebox Mate

Using still lenses with a matte box is a pain in the ass because every lens diameter is different. But the MK 18-55 is designed to mate seamlessly with a matte box in seconds.

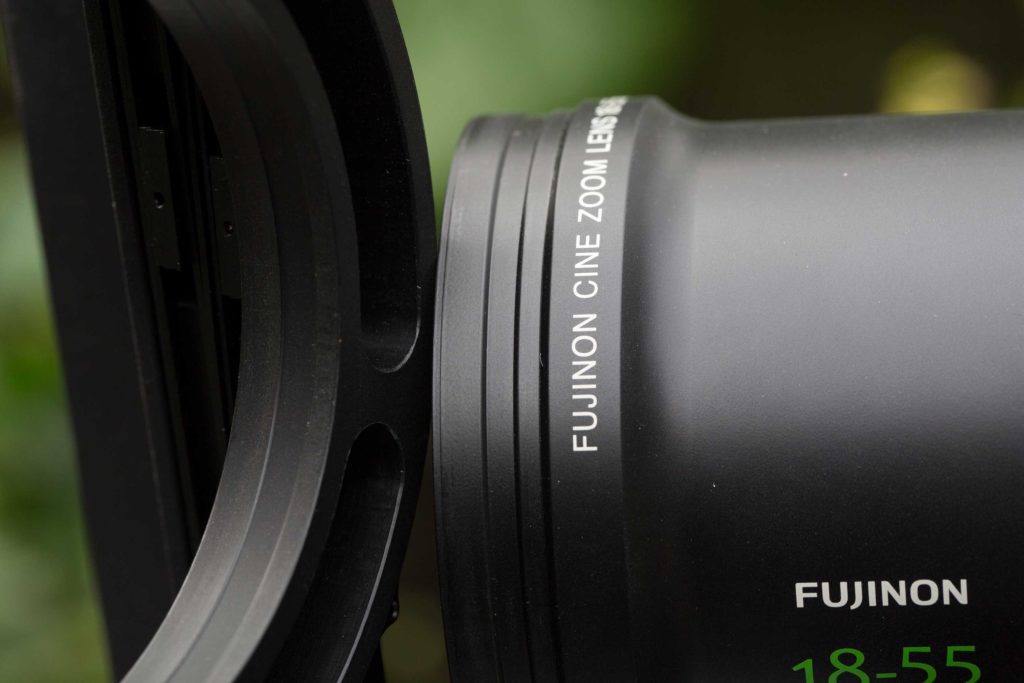
How easy is it to swap the lens in and out with a matte box? I tried it out with my Genus Production Matte Box, and I was delighted to discover that the GPMB default lens fitting pairs perfectly with the Fujinon HK 18-88. The box simply sides over the front element of the lens, and screws tight to mate. Like so:

Genus Production Mattebox

Genus Production Mattebox pairs perfectly with Fujinon MK 18-55.

85mm-clamp-on-fit

The Genus Production Mattebox’s default 85mm clamp is perfect to mount it securely to the lens.

I found the best way to use the Production Matte Box was to remove the rail block mount altogether, and simply clamp the matte box to the lens. It’s overall lighter that way, and the Fujinon MK 18-55 lens is designed to accommodate the weight of a matte box without damaging the lens in any way. Contrast that will many still lenses, like my Zeiss CZ 50mm f/1.7, which fell apart under the weight of my Genus Matte Box Lite, forcing me to use them only with rail-mounted boxes.

How to adjust the backfocus

The focus can change depending on the temperature and humidity with this precision lens, so it’s important to set back focus on the Fujinon MK 18-55 correctly before a big shoot. Here’s how it’s done.

First, grab a tape measure and focus chart, if you have one. Otherwise just focus on something with fine detail.

  1. Set up on sticks, and measure 10 feet to your subject.
  2. Set iris wide open at 2.9.
  3. Zoom to 55mm. Focus.
  4. Zoom to 18mm. Release backfocus screw, and rotate it (not the focus barrel) until you get sharpest image.
  5. Repeat 3-4 until your lens is perfectly focused at both 55 and 18mm.
  6. Lock the backfocus screw.

Another neat trick this lens does is maintain the same light level throughout the entire zoom range. When I zoom from wide to tight on my Canon EFS 17-55, it gets noticeably darker on the long end. But not the Fujinon – it’s precisely the same brightness at both ends of the zoom.

“Demanding.” That’s a word I’d use to describe this lens. It’s not forgiving like IS glass. But once you go there…

“Tesla.” That’s another word that wasn’t in my vocabulary until a few years ago. I don’t own one (yet). But I imagine owning this lens could make me feel a lot like someone who does.

Travel lighting: 2-person interviews with Kino Flo Celebs

I just returned from a week on the road, shooting 2-person, 2-camera interviews for a documentary film that we hope will shine a light on an unsolved murder. Although I can’t talk about the content yet, I can talk about our lighting package. I chose Kino Flo Celebs, and I have some insights to share about these industry workhorses.

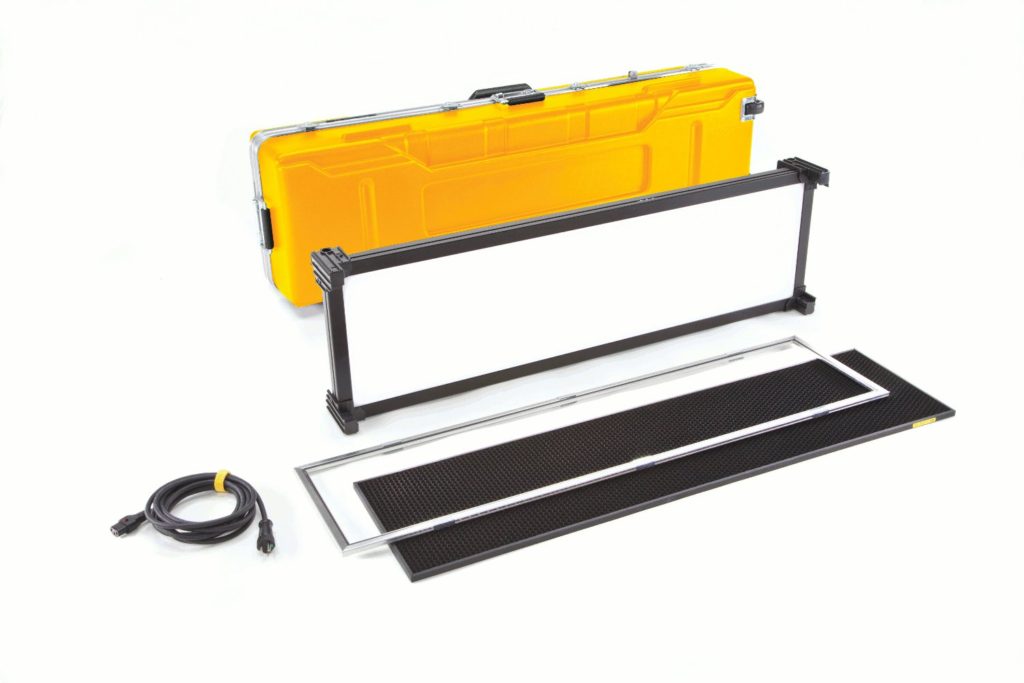
Kino Flo Celeb 401 kit

Kino Flo Celeb 401 kit

Kino Flo 201 Celeb kit

Kino Flo Celeb 201 kit

For this documentary production, we needed to light both the interviewer and the interviewee. So the job required something a little bigger than my usual kit. The shoot location was in a major US city that I would be flying to. And with extra baggage fees, it became clear that it would be more cost effective to rent locally than it would be to travel with my own lights.

Kino Flo Celebs rental package

Rent it or pack it?

On American Airlines, your first piece of checked luggage is $25. The second is $35. Each additional bag jumps to $125 each. I already needed two checked bags for my camera and tripod. Therefore, to bring my own lighting kit would have required two additional checked bags, totaling $600 round trip. With fees like that, it makes more sense to rent locally – and skip the hassle of traveling with all those cases.

Here’s what I specified in our package, which came to $942 for a 5-day rental:

  • 2 Kino Flo 201 Celebs
  • 1 Kino Flo 401 Celeb
  • 4 c-stands (2 for 201s, 1 for my Dedo DLED 7 which I packed, and 1 for sound guy)
  • 1 combo stand (for 401, which requires a Junior receiver)
  • 1 25′ stinger (with power strip for distribution)
  • 4 15lb sand bags (for c-stands)
  • 1 25lb sand bag (for combo stand)
  • 6 A-clamps
  • 2 furniture pads (for blocking light if needed)

To drive all this around, we rented a Yukon SUV.  It was big enough to fit our 4-person filmmaking team and the entire lighting package and camera gear in the back.  Note that we also hired local sound recordists, who drove their own vehicles. We also had a local PA for a couple of shoot days, but we traveled light enough to not require a PA.

What I packed:

Why Celebs rock

When you’re both the gaffer and the DP, you really don’t have the time or the mental bandwidth to fuck with the lighting for very long. You have to put your camera hat on pretty quickly. I chose the Celebs because they offer controlled, soft light right out of the case. A light that requires setting cutters or flags or diffusing isn’t going to cut it. I need a light that I can set and forget.

The Kino Flo Celeb is perfect for these situations. Not only are Celebs soft without additional diffusion, they also include a honeycomb grid that focuses the soft light and aims it just where you want it. It’s hard to overstate how well this honeycomb works. One of the best things about the Celeb is its ability to minimize light spill.

To set up a Celeb,  you just pull it out of its case, yolk-mount it on a c-stand (in the case of the 201s) or on a junior stand (in the case of the 401). The 401 really does need the Junior stand – it weighs 26 pounds. That’s a lot of light.

Celebs are built like a tank. They are designed to withstand the wear and tear of day-in, day-out production. A set of convenient metal handles allows you to easily lift the lights in and out of their road cases. The only cord you have to hook up is the power cord – the ballast is built into the back of the unit. And as color-selectable LED sources, the lights can be dialed from 2700K – 6500K. You can also dim them to about 2 percent, invaluable when you want just a hint of fill.

The lighting setups

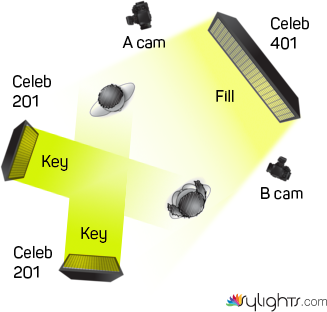
The basic setup for our 2-person, 2-camera interviews was to place the 401 as fill for both subjects on the camera side. Then we placed the 201s on the opposite side to key each person individually. We could then adjust the fill level down to get the dark, brooding vibe the director wanted, while still holding enough detail to reveal expressions.

kino-flo-celebs-basic-setup

Basic 2-person, 2-camera interview lighting setup

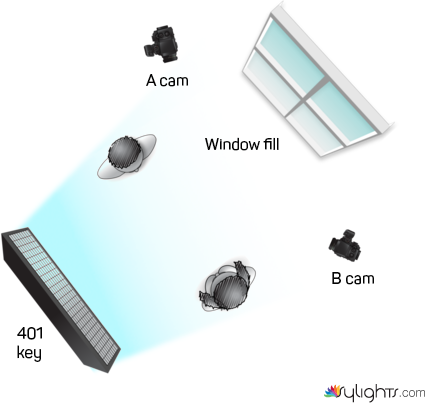
The above setup worked great in conference rooms without windows. But we also often shot in rooms that had a daylight window on one or more sides. In those cases, sometimes I would use the window as fill, and the 401 as key for both subjects, with a 201 to wrap the light a little further around onto the fill side of their face if needed.

Daylight window lighting setup

Daylight window lighting setup

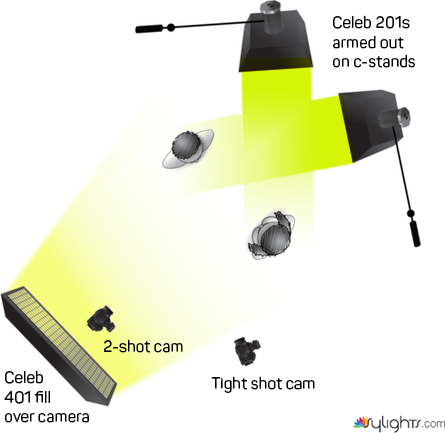
Sometimes we filmed a 2-shot with one of the cameras, placing the 401 as fill by raising it above the 2-shot camera. This setup required placing both 201s on c-stand arms and raising them until their stands are out of the shot:

2-shot interview lighting setup

2-shot interview lighting setup (note both 201 lights are raised on arms to avoid seeing their stands in background of 2-shot camera)

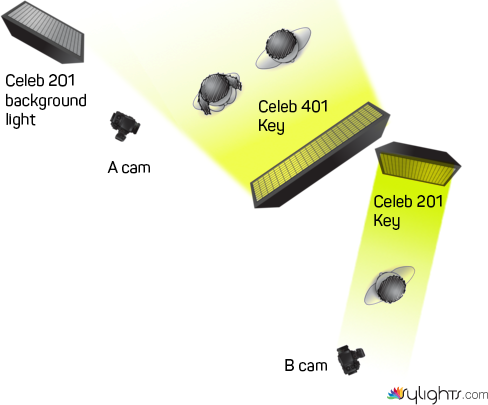
In one case, we had to light three people: two interview subjects sitting next to each other,  with the interviewer opposite them:

3-person lighting setup

3-person interview lighting setup (note 401 is raised and on c-stand arm to keep it out of both camera shots, which requires counterweighting the arm. Dicey!)

Sketchy to boom

We had to shoot the above 3-person setup at night. So I chose to use the 401 as key for the 2 subjects so they could be lit evenly. However, to keep the stands out of frame, I had to boom the light out over the camera and aim it down on the subjects at a 45. I was able to make this work by clamping the yolk in a c-stand grip head, and placing a 25’lb bag on the other end of the arm as a counterweight. But this was a pretty shaky setup, and I probably should have used a 201 for each of the subjects and the 401 for the interviewer. This is where having something like a LiteGear LiteMat2L (which weighs just 3 pounds) would have been really nice.

Nitpicks

The Celebs are not bright enough to match open window light in the background of a shot. You’d need HMIs for that. But they are bright enough to match windows that are controlled with shears, curtains or blinds. And on overcast days when you have foliage in the background of a window (which reduces the light level a couple of stops) the Celebs can match it. If the sun comes out, though, you’re cooked.

I also wish the locking power cord, which is only about 8′ long, was at least twice that length, the way Arri lights are. Because manufacturers really should include a usable length of cord with their units.

Kino Flo Celebs are clearly built to withstand the rigors of daily use in production. However, I feel they are actually overbuilt. Why couldn’t these lights be both lighter weight and durable? Competitors like Aladdin and LiteGear are making lights that are almost the same size but weigh a tiny fraction of these beasts. So I look forward to reviewing some of the lighter Celeb alternatives soon.

Lesson’s learned

  • Pack a small light stand. Many rental houses don’t have them, and standard C-stands don’t let you place small backlights like the Dedo DLED7 as low as you may want to.
  • A Baby Pin is a much better way to mount 201 Celebs to a C-stand. This allows you to mount them on the grip-head end of the stand’s gobo arm, and angle the light more precisely.
  • For really soft light, or room ambience, bounce the 401 into a wall or ceiling (or foam core, but we didn’t have any of that with us).
  • 1 stinger with power strip wasn’t always enough. I should have asked for 2 25′ stingers in my G&L package.

Bottom Line

With the Kino Flo Celebs and a small crew, I was able to handle a wide variety of documentary lighting challenges. The honeycomb grids allowed me to effortlessly control light spill by simply angling the light, rather than placing flags or cutters (which require more stands).  Due to it’s design, you’ll never see a single LED. Celebs produce a light that is soft enough to require no further diffusion, and they pack up very quickly. That allowed us to schedule more shoots in a day. Because of this all-in-one design, I noticed that it took more time to break down our c-stands than it did to break down and pack up our lights.

It’s no wonder NAB awarded Kino Flo Celebs “best new light” in 2014.

As for that unsolved murder? It’s a long-standing mystery, one that our team believes deserves a new hearing in the court of public opinion. So stay tuned.

Fiilex Matrix LED is about as bright as an Arri 650. But much cooler

Fiilex Matrix LED

Fiilex Matrix LED

I got my hands on one of the new Fiilex Matrix LED location lights the other day. It was for a shoot that was unfortunately canceled, so I didn’t have a chance to use it on a job. But I tested it out, and I do have some observations I’d like to share.

The Matrix is quite compact – about 8.5″ square on the front, and 5.5″ deep on the side. It packs into a rolling case that would be easy to check on a plane, but too big for carry-on (though once you start checking luggage, you’re usually better off renting lighting at your destination, given how expensive extra luggage fees are these days).

This light has been billed as an HMI replacement. Others have described it as comparable to a 1,500 watt source. So I was keen to test its punch.

I found it most comparable to a 650 watt Arri fresnel in terms of intensity. A bit of a letdown in that department. But it’s much cooler in other ways.

Placing the Matrix side by side with an Arri 650, the beam of the Matrix with it’s unique quad fresnel lens is slightly wider than the 650 fully flooded. But it doesn’t focus, so it’s impossible to spot it like a 650. But the Matrix doesn’t really seem designed for use as a fresnel; it’s more at home bounced into foam core or diffused with a softbox.

With the fresnel attachment on, and the Arri almost fully flooded, the two lights match each other in intensity in Tungsten mode (at 15′, my Sekonic light meter gave me a reading of f/4.1 @1000 ISO @48th sec. shutter).

Bounced into a 4×4 bead board at same distance, my meter gave me f/2.0 for the Matrix and f/2.3 for the Arri 650 (both at 3200K). I was able to squeeze another half stop of brightness out of the Matrix by going to 5600K.

The Matrix’s ability to spit out daylight is very very cool. But by the time it’s softened through a softbox or bounce, I found the Matrix is no match for holding sunny daylight window detail in the background of a shot, unless you move the light very close to the subject. Way too close.

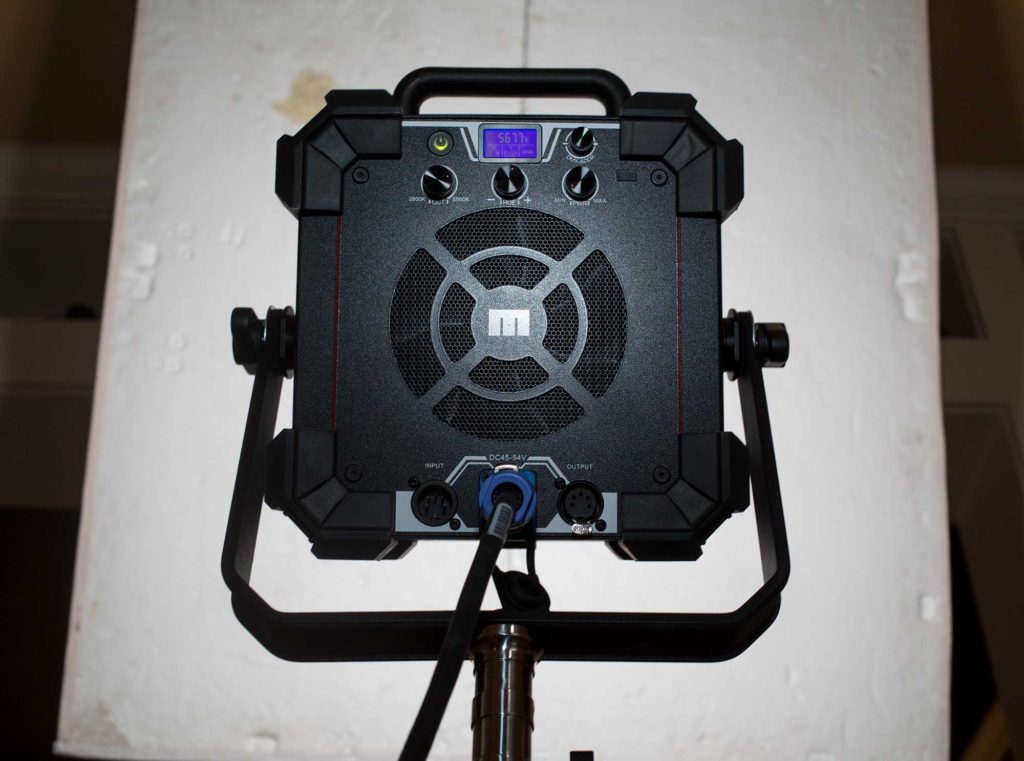
The controls on the back of the panel give you not only the ability to control color temperature and dimming, but the middle knob gives you plus or minus green, which could come in very handy on shoots where you’re trying to match fluorescent lighting.

The Matrix has a built-in fan that runs quiet enough to be inaudible in all but the most pristine recording environments.

The speed ring that is built into the M1 is larger than a standard ring, and the rental house told me it wouldn’t work with soft boxes other than the one Fiilex makes specifically for this unit. However, I was able to fit my medium Photoflex softbox on the M1 without too much difficulty.  But I sure wish the holes were slightly angled (about 15 degrees, like this speedring) to make removing the softbox easier. I found it a real pain to get boxes on and off, including the Fiilex box.

I long for the day when I can roll up to a location with an LED the size of the M1, and turn on the grid-cloth-punching power of an Arri M18. That day is coming. But we’re not there yet.

LED lighting is getting brighter by the year, and the M1 Matrix from Fiilex represents a step in the right direction.