Best practices for batch-syncing FCPX audio and video with PluralEyes

After my last post about audio syncing in FCPX, I thought I would give the new PluralEyes for FCPX a second look. When it first came out, I decided not to use it because it required creating project files to sync audio. I thought that meant you had to store files in projects, like in the bad old days on Final Cut Studio. But after further experimenting, I’ve discovered it’s possible to use PluralEyes to sync clips and keep them in the event library. But it involves some housekeeping. Here’s how it’s done.

1. Create an Event and import your video clips and the audio that you want to sync them with.

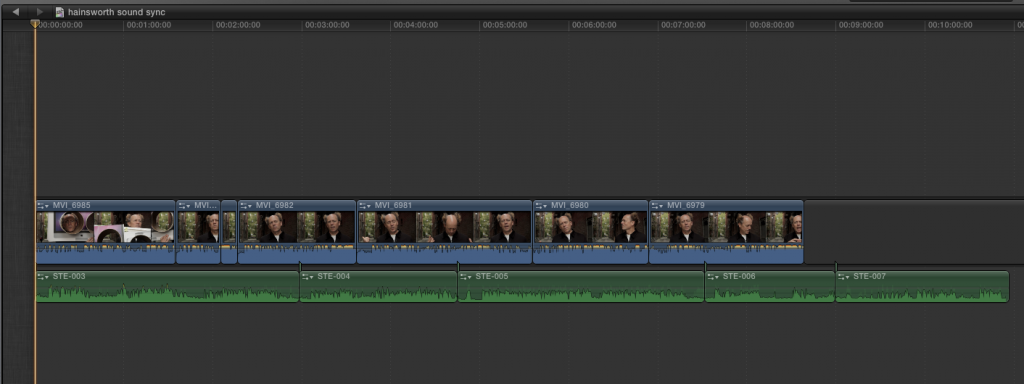
2. Create a temporary new project (I include the words “sound sync” so I can easily find it after and delete it) and place all of the video you want to sync into the timeline. Then, add all the audio files as connected clips. Creating this project is a temporary step – you will delete it as soon as the sync is complete.

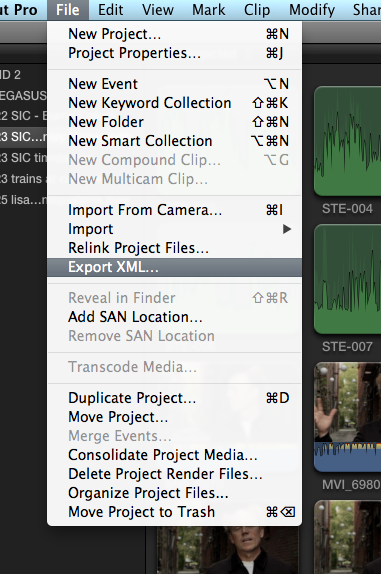
3. Press Cmd-0 to view the project library. Select the project you just created, and from the File menu, choose “Export XML.” Save the file to your desktop.

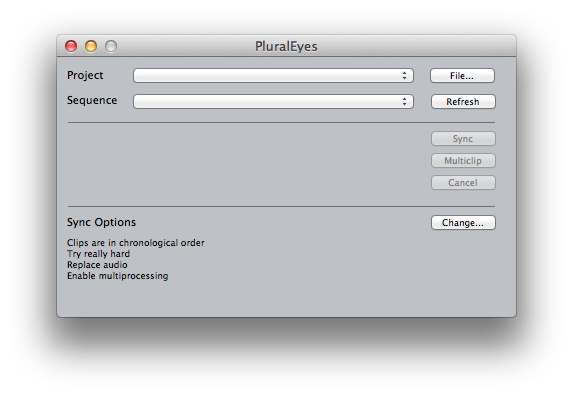
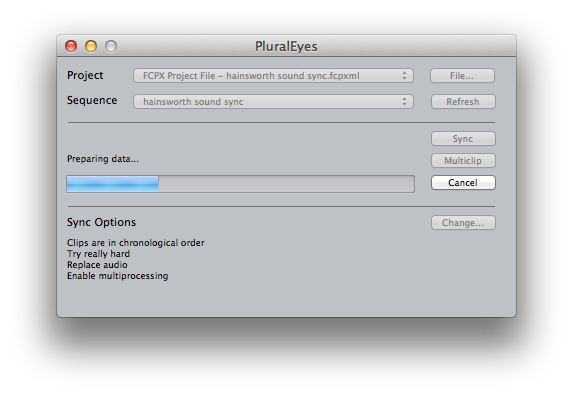
4. Start PluralEyes. It’s a stand-alone application, not a plug-in, so you have to launch it separately. Once open, the interface presents like so:

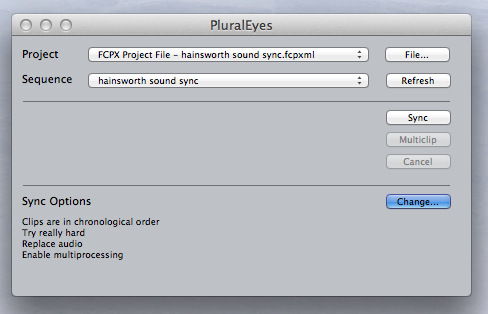
5. Press “File” button and select the XML file you saved out in step 3.

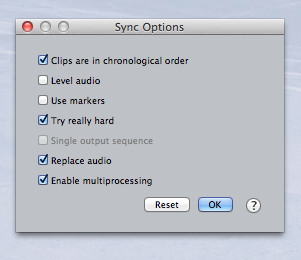
6. Press “Change” button and review your options. I set mine as follows:

The options above are as follows:

Clips are in Chronological Order: This will speed up processing a bit if you place the audio and video clips into the timeline in order they were recorded.

Level Audio: I avoid this because I prefer to do my own audio leveling using FCPX’s Limiter plugin.

Use Markers: I haven’t yet found a reason to sync to markers, so I leave it unchecked.

Try Really Hard: Of course you want it to do that!

Replace Audio: By checking this, PluralEyes will create a new Event that contains all of the synced clips, with their native audio deleted, and the good audio connected. On DualEyes I never check this, but on PluralEyes, I do. If you need the reference audio, you can still get it as we’ll see in a moment.

Enabled Multiprocessing: Yes.

7. Click “Sync.” This runs the sync.

8. When the sync is finished, FCPX automatically opens and you will see that several things have been created:

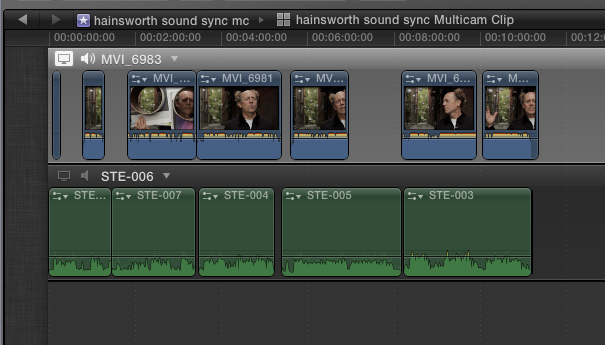
a). A new project called “(your name) synced.” You should see the good audio moved into place below the reference tracks, like so. If you notice that some files are out of place or missing, double check your settings and run sync again (a common problem is checking “files are in order” when they aren’t.)

b). A new event containing a multi-cam clip called “(your project) mc.” I don’t see much use for this. The only reason I can think of is if you want to use reference audio. PluralEyes includes the reference audio in this clip, so that’s where you’ll find it if you need it.

c). A new event called “(your project) synced.” This is the one you want. It contains all of your synced files, minus the reference audio. This saves you having to go in and turn off the reference audio, a real timesaver over my DualEyes workflow if you are syncing lots of files at once.

9. If everything synced successfully, it’s time for cleanup. PluralEyes has created a whole bunch of stuff we don’t need, and we need to get rid of that stuff to keep our files organized. Start by deleting the project you created in step 2. You don’t want to have project files hanging around after sync is complete – you want all your files to live in the Event Library. Next, delete the project created by PluralEyes in step 8A. Finally, if you don’t need reference audio, delete the mutlti-cam event that it created. That should leave you with your original event, and the new event with the “sync” suffix. As a final cleanup step, let’s merge them.

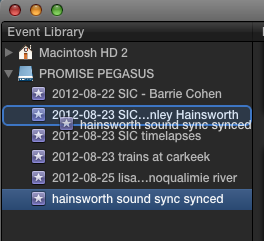
10. Merge events. Click on the “sync” event and drag it over the original event.

Final Cut will merge the two events by creating a new Event, which by default is named same thing as the event you’re merging with:

Now all your files are where they belong, in the Event Library. You’ve successfully batch-synced all the audio. As a final step, I recommend highlighting the reference audio clips and pressing the delete key to mark them as rejected clips. This way, you won’t run the risk of using the crappy audio when you should be using the good stuff.

6-step workflow for pristine interview audio synchronization in Final Cut Pro X

I’ve been cutting on Final Cut Pro X for more than a year now. And during that time, I’ve learned to hate working on rough cuts where the audio levels are too low, clipped, or noisy. It’s too tempting to yank on the volume levels of individual clips and introduce problems that will bite you down the line. So over the past year, I’ve evolved a workflow for prepping interview clips that is pretty close to perfect for us at Visual Contact. In our approach, we make the clips sound good as part of the import process, BEFORE we start cutting. It’s made our work a lot smoother, and ultimately it saves us time (and money). Here’s how we do it.

But first, some background on our production technique. When we shoot an interview, we record dual-system sound (reference audio on the camera, and two mics on the subject: a lav and a shotgun mic, recorded to left and right channels respectively, via a MixPre to Zoom H4N. All things being equal, we usually don’t end up using the lavalier audio, preferring the superior sound of a shotgun mic. But experience has made us believers in redundancy.

After a shoot, I import all of the files (audio and video) into Final Cut Pro X, which places all files into the Original Media folder of the Event. From there, my workflow involves the following steps, each of which I’ll explain below:

  1. Batch-sync audio with DualEyes.
  2. Organize files into Smart Collections.
  3. Change sync audio files to Dual Mono.
  4. Create synchronized clips.
  5. Assign keywords to synchronized clips.
  6. Fix glaring audio problems.

Step 1: Batch-Sync Audio.

While it’s possible to individually sync audio within Final Cut Pro X by selecting individual files and creating a sychronized clip, this only works when you know which audio file belongs with which video file. If you have a lot of both, you’re screwed. Unless you were slating everything, which we documentarians almost never do (in part because what I’m about to share with you is much faster).

Batch-syncing in our workflow is made possible with DualEyes. It creates audio files that are clearly labeled with both the video clip from which they are derived, AND the audio clip. This makes syncing them in Step 2 a snap. Note, the latest version of PluralEyes can also accomplish this – but the syncing process involves placing files into a timeline, exporting them out via xml, running PluralEyes, and then bringing them back into FCPX. If you use this method, be very sure to delete the project files that PluralEyes creates after the sync, so you don’t get confused about where your files are – they should only ever be in the Event Library.

So let’s get started. First, quit FCPX (so it doesn’t try read in the temp files that DualEyes is about to create). Open DualEyes, and create a new project. I save it to my Desktop, where I can remember to delete the temp files it creates after the sync. Now drag all your interview audio files and video files into the project.

If your shoot included clips unrelated to the interview such as b-roll, you CAN just drag everything in. It won’t hurt anything (unless you have a ton of clips). But it will take longer for DualEyes to run.

Before you click the scissors icon to begin the sync, check the options. Here’s my settings:
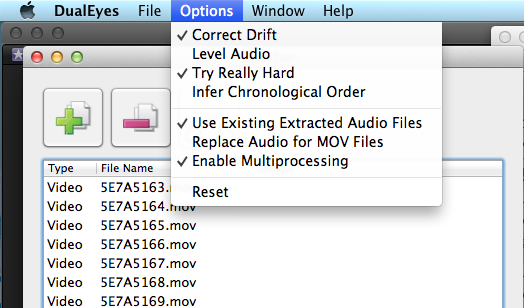
  • Correct Drift: This will create a new audio file that is timed to precisely match the reference audio. Check it.
  • Level Audio: This performs an adjustment to the audio levels, which is probably fine for quick and dirty projects, but if you want to have full control over how your dialog sounds, definitely leave this unchecked.
  • Try Really Hard: Of course you want your software to work hard for you, right? It takes longer, but it does a better job. Check it.
  • Infer Chronological Order: generally your files will be numbered sequentially, but if you are using multiple cameras or different audio recorders, leave this off.
  • Use Existing Extracted Audio Files: This saves time if you are doing a second pass on the files (for example, if it missed some files on first pass, and you’re trying again, it will use the same temp files without having to recreate them, saving time). Check it.
  • Replace Audio for MOV Files: Checking this box will strip out the reference audio from the MOV file and replace it with the good audio. I like to keep my options open, in case I want to use the reference, so I never check this.
  • Enable Multiprocessing: Check it.

Click the scissors to run the sync. Your machine will churn for awhile. When it’s done, take a look at the new files created in your Original Media folder:
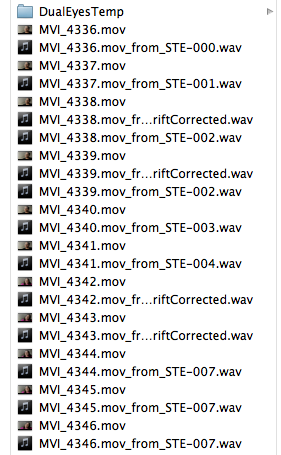
Note that DualEyes has created audio files for you, which are perfectly timed to match the length of the MOV file. And, it titles each file with the name of the mov file AND name of the audio file, important for the next step. You’ll also see that a folder called DualEyes has been created. Delete it, after checking to ensure that a new audio file appears below each video file that you expected to synchronize. If any is missing, run the sync again.

Step 2: Organize Files into Smart Collections.

It’s time to start getting organized. Start FCPX, and open the event. I start by creating a Smart Collection for each of the media types in my project (for example, one called Stills for all the still photos, and one called Audio Only for the audio files.
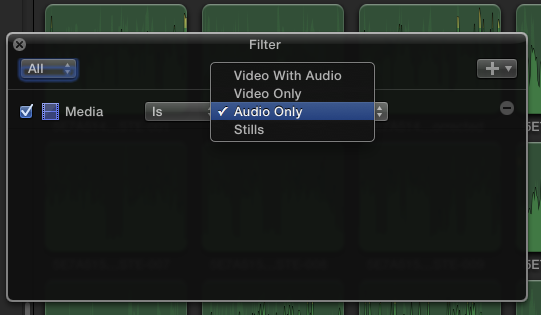
I also create a temporary Smart Collection called Sync Audio to make the next step faster:
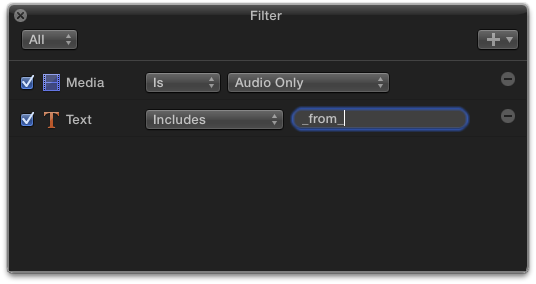
In this collection are listed all of the files that DualEyes created for you. They need some work, which we’ll do next.

Step 3: Change sync audio files to Dual Mono.

Choose the “sync audio” smart collection. Select them all in the event library (Cmd-shift-A). Then, open the Inspector. You should see something like this:
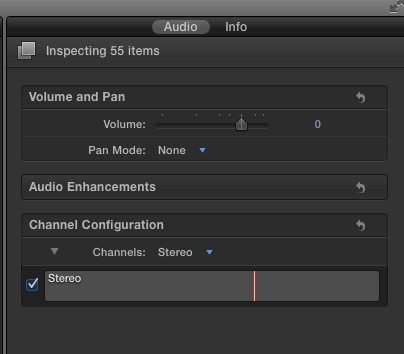
Notice that the default setting of Stereo. Change this to “Dual Mono.”

This will allow you to choose only the best-sounding mic (or to mix both mics) in later steps. But first, we need to create synchronized clips in FCPX.

Step 4: Create Synchronized Clips

Put the Event Library into list view (opt-cmd-2), and select the event title so that all clips in the event are displayed. At the bottom of the event browser, click the settings gear, and make sure you have selected these options:
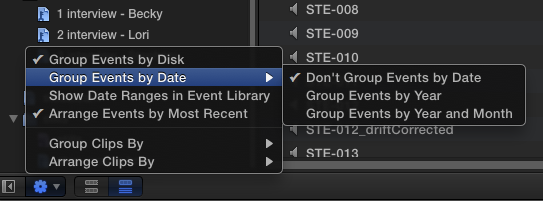
This will ensure that all your clips are displayed by name, next to each other, like so:
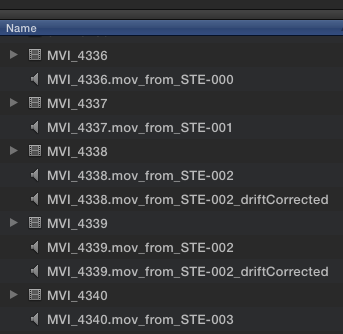
Select the first movie file, hold down the command key, and select the audio file immediately under it (select the “drift corrected” version if you have more than one).
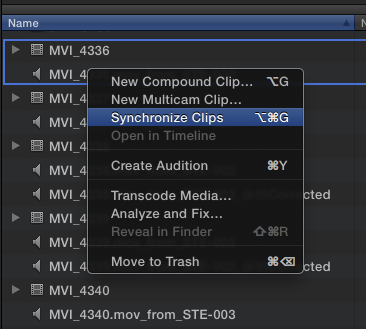
Repeat this for each file. When you’re done, your directory will be filled with synchronized clips, which are the ones you’ll be using for the rest of your edit.
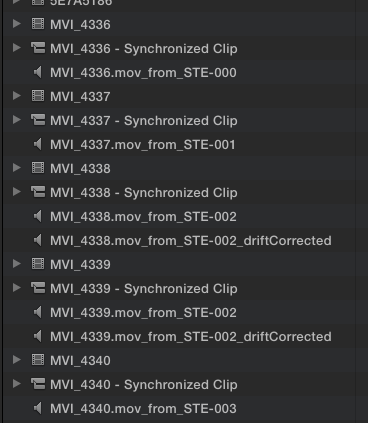
At this point, I create a new Smart Collection called Sync Video, so I can keep track of all the new clips and have them all in once place for the next round of work, adding keywords.
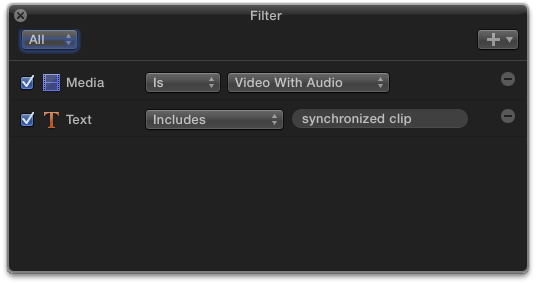
Step 5: Organizing with Keywords.

In this example, my shoot included two interviews with different people. Later in the edit I’ll want to quickly find interviews with each person, so I’m going to assign keywords to each. To do this quickly using the files that have the good audio linked to them, I start by putting the Event Browser into Browse view (opt-cmd-1). Now I can see at a glance which clip has which person.

In the image above, you can see I’ve created a folder called “Interviews” into which I’ve created two keyword collections. To assign, I select all the clips with each person and drag them into their respective keyword.

If you’re lucky and your audio levels are perfect at this point, and you like the balance between the lav audio and the shotgun mic, you’re done. But because we live and work in the real world, it probably isn’t quite that neat. Your audio levels, like these, might be too low, and maybe there was an HVAC system running in the background that leaves a low level noise you want to remove. And in my case, the lav audio needs to be turned off altogether, because the shotgun sounds far better. The next step is where we do that, keeping basic adjustments where they belong – with the file in the event library, before editing starts.

Step 6: Fix audio problems.

In the Event Library, select the keyword collection with that contains the synchronized clips you want to work on. Select the first clip, and open it in the timeline.
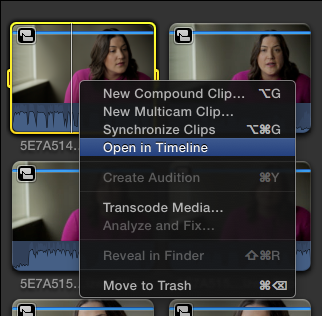
You’ll see the clip above the attached audio below, in green.

Select the blue clip, and make sure you can see the Inspector (cmd-6).

Since this clip contains only our reference audio, turn it off entirely by unchecking the box under Channel Config.
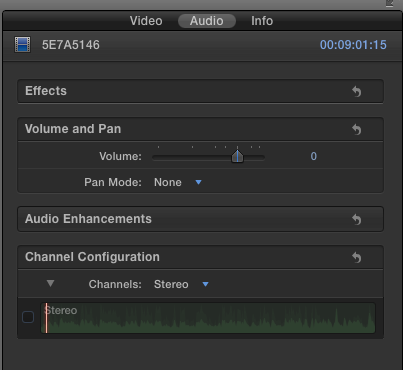
Now go back into the timeline, and click on the green audio file. In the Inspector’s channel config, both tracks are enabled.
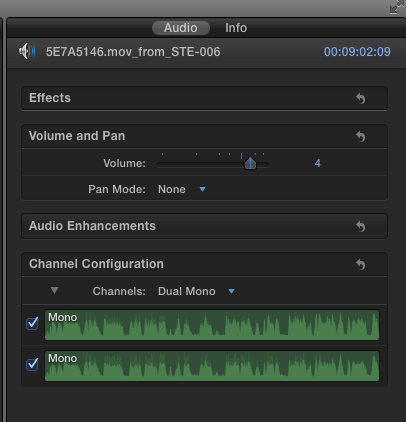
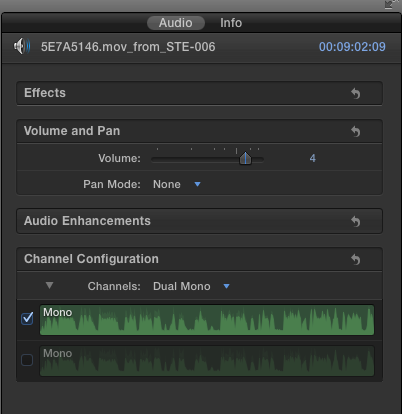
In my case, I want to turn off the lavalier track, which is on the right channel, because it is inferior quality to the shotgun mic.
Now that I’ve got the best audio quality, it’s time to check my levels. Here’s how the clip looks. I can see just by looking at the waveform that the volume is too low:
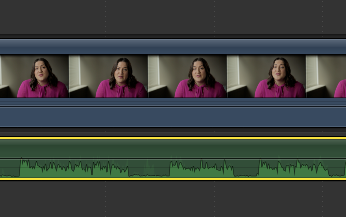
While playing our clip, the audio meters show the levels are bouncing between and -11 and -30 db. That’s too low. A good rough levels setting is between -6 and -20 db. Let’s fix that.

I could just yank up the volume, but that would leave us open to spikes of volume that might clip. I want to raise the levels without the danger of clipping, and leave any micro adjustments to levels to later editing. So I’ll use Final Cut’s Limiter effect, located in the Effects Browser, under Audio > Levels.
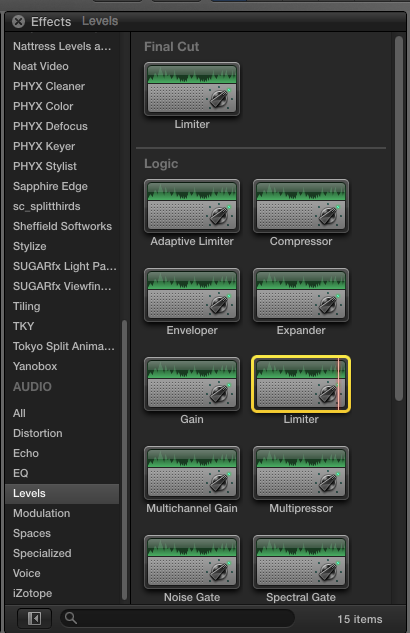
With the audio clip selected, double click the Limiter effect to apply it. It now appears in the Inspector.
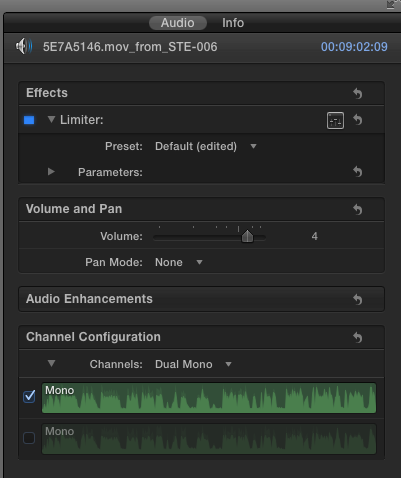
Click the slider icon to bring up the HUD controls for the Limiter.
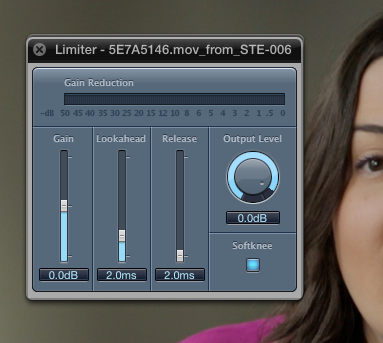
Here’s how I set mine:

Output Level: -3.5db. This means that the Limiter will “limit” the volume level to -3.5db, no matter how loud the clip gets. This is the correct setting if you don’t plan to use music under the piece. This is a pretty good baseline setting. If you know for sure that there will be music under the dialog, set it to -4.5.

Release: set to about 300ms for dialog.

Lookahead: leave it set to 2ms.

Gain: This will depend entirely on your clip. Drag the slider upwards until you are seeing levels that sound good, that range between -6 and -20 or so.

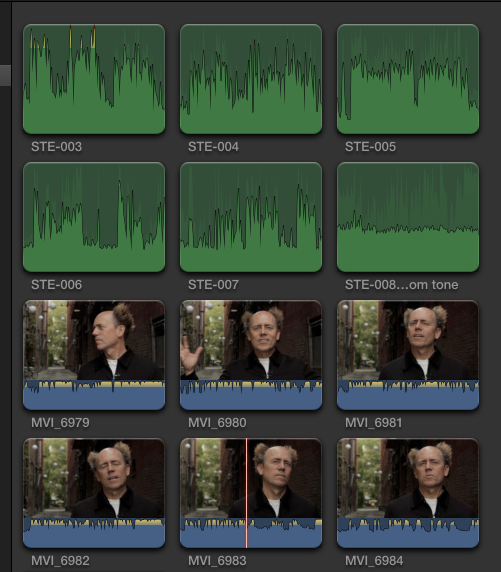
You will likely see some peaks reaching into the yellow in the timeline:

Listen to your clip one more time. In my case, I’m hearing an annoying HVAC system in the background that needs to be cleaned up. For that, I use iZotope RX, an insanely useful suite of audio repair plugins that work within FCPX. If you routinely work with dialog recorded on location, you won’t regret shelling out the $349 that it costs. It can also do miracles with clipped audio, which many audio engineers say is impossible to fix.

It’s beyond the scope of this tutorial to explain how to use iZotope, but in this case, I’ve applied the Denoiser effect, trained it to identify the noise with room tone I recorded at the location, then applied the setting to the clip to nix the HVAC. It doesn’t entirely remove the offending sound, but most of it is now gone.

At this point I’m done fixing things. It was a lot of work, and I don’t want to have to repeat it on every clip. So we’re going to select the audio clip, copy it (which also copies the effects which have been applied to it). Now, you’ll need to open each of the remaining clips, select the audio track, and choose Paste Effects.
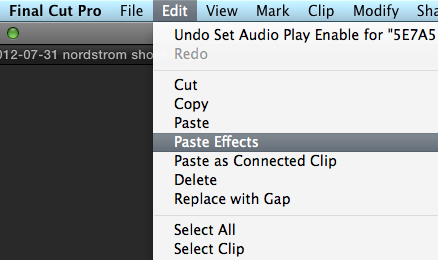
You can select all of the clips at once, and paste the effects to all of them. But if you have individual channels turned on or off, as I have, you will have to open each clip individually to adjust that.

Now you’re all set to start cutting with the confidence that your clips will sound great from the moment they land in your timeline.

Transform underexposed dslr footage with Neat Video for FCPX

My most recent commercial piece, which Lisa Cooper and I made for Seattle startup Decide.com, is a great example of how a powerful Final Cut Pro X plugin called Neat Video can improve murky DSLR footage. We shot this piece on two Canon 60Ds, which like virtually all DSLRs, produce heavily compressed files that can get noisy when you lift the exposure levels.

Let’s start by taking a look at the finished video, and I’ll work backward from there.

Two challenges on this shoot combined to produce the noisy footage: mixed light at low levels, and monochromatic backgrounds. Let’s talk about mixed light first.

This office interior, like many, was lit by overhead fluorescent fixtures. But there was also big daylight windows. So the color temperatures didn’t match. My solution was to turn off the overheads, and set my white balance to daylight at 5400K, which I did with the employee interviews I’ll talk about shortly. The drawback to turning off overheads is that now the overall ambience of the room is darker. But, not so dark that I couldn’t bring them up to where I wanted them in post. But that’s where the problem comes in: lifting the levels in post introduces noise. And noise can look really ugly.

The second problem was the even tonality of the interview background, which was a bare, colored wall, which I hit with a Lowel ProLight to give it some life. But because of their highly compressed 8-bit codec, DSLR footage doesn’t hold up very well in large areas with the same color value. There just isn’t enough data available to make the subtle transitions appear totally smooth, especially when you have a gradient or subtle variations in color (a totally clear blue sky is another area where this problem often shows up).

In the example below, take a look at the grey background behind the subject. It’s essentially a gradation from darker shades of grey to middle shades of grey (actually, it was light green on left and grey on right before grading – grey throughout after).

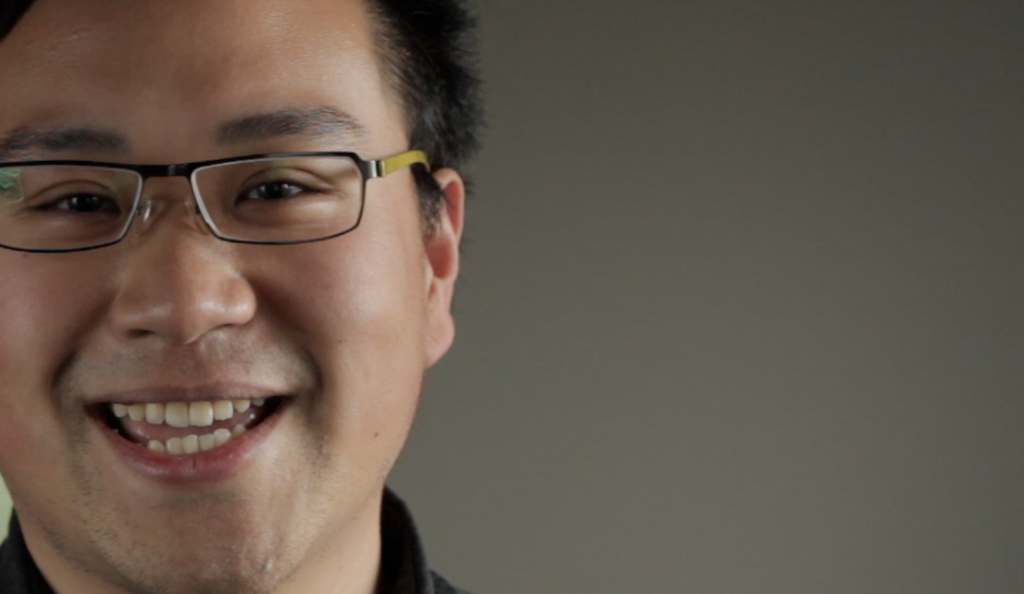
As-shot section of video screen grab:

Notice there isn’t too much noise, but the image needs to be lightened quite a bit.

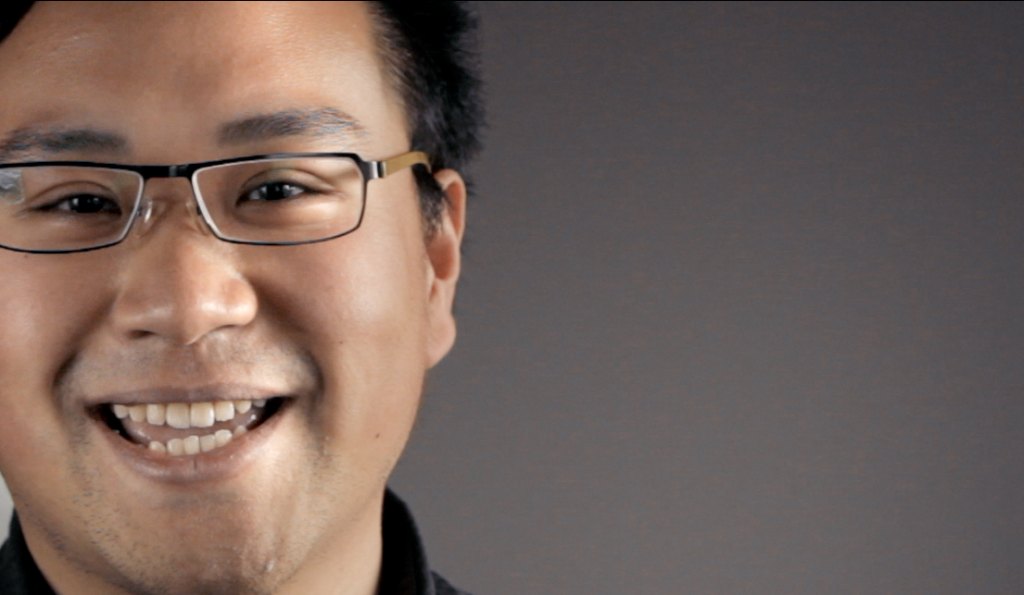
Graded, before Neat Video:

The color-adjusting and grading has improved the image dramatically, but also introduced lots of noise in the background. To help you see the noise, here’s a portion of the image cropped to 100 percent, at which the noise is most visible:

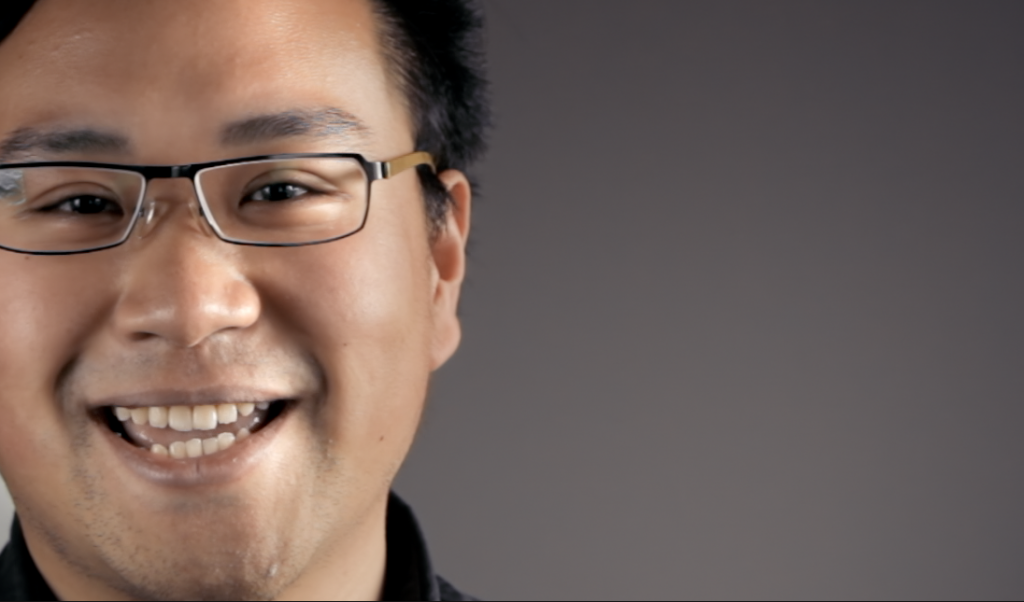
After Neat Video (below):

The noise is almost completely eliminated. Sweet. (Click the image above to view at 100 percent)

Here’s how it works.

First, download and install the Neat Video plugin for Final Cut. You can get a free trial, but it overlays a watermark, so to do any useful work, you’ll need to cough up $99. It’s totally worth it if you’re getting paid for your work.

Under the effects browser (Cmd-5), search for “noise.” The filter is called simply “Reduce Noise.”

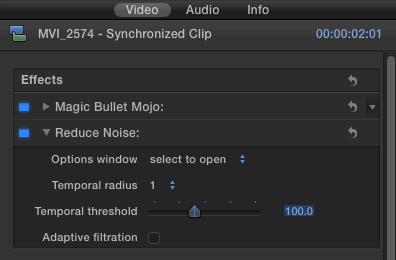
Apply the filter to the selected clip in your timeline by double clicking the filter. It will appear in the Inspector, like so:

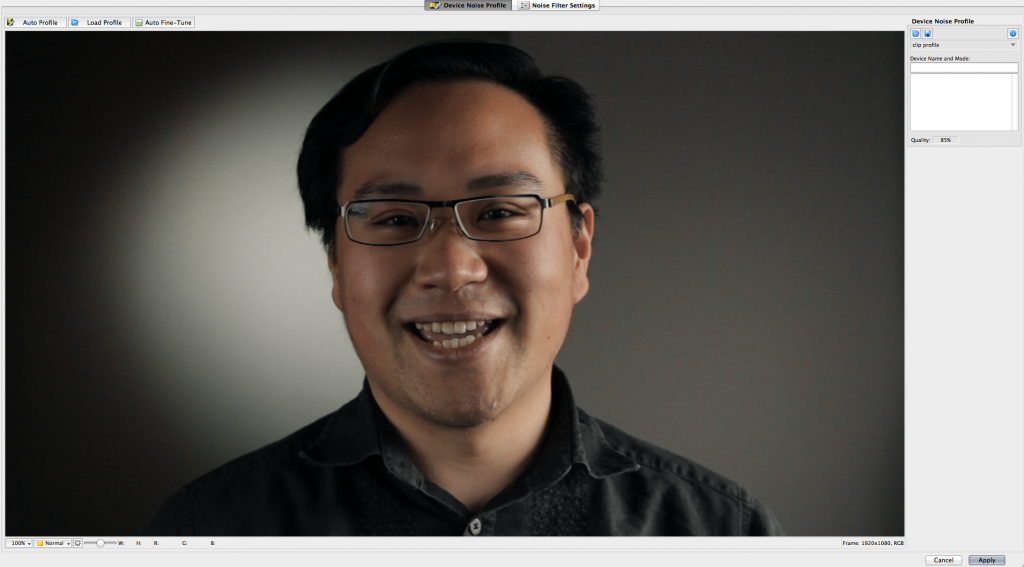
Click “Select to open” twice (for some reason it won’t open the first click). This will bring up these controls:

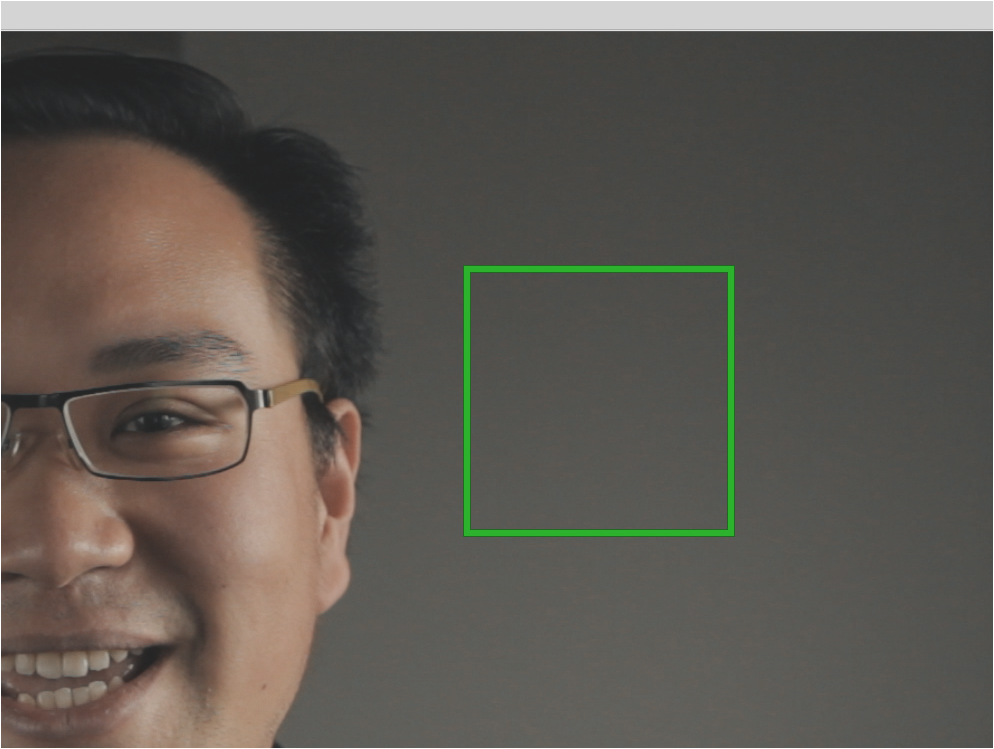
The first thing you want to do is click in the area where the most noise is, an area that has just noise, and no details that you care about preserving. In my case, the decision was easy: click and drag the box in the area against the background:

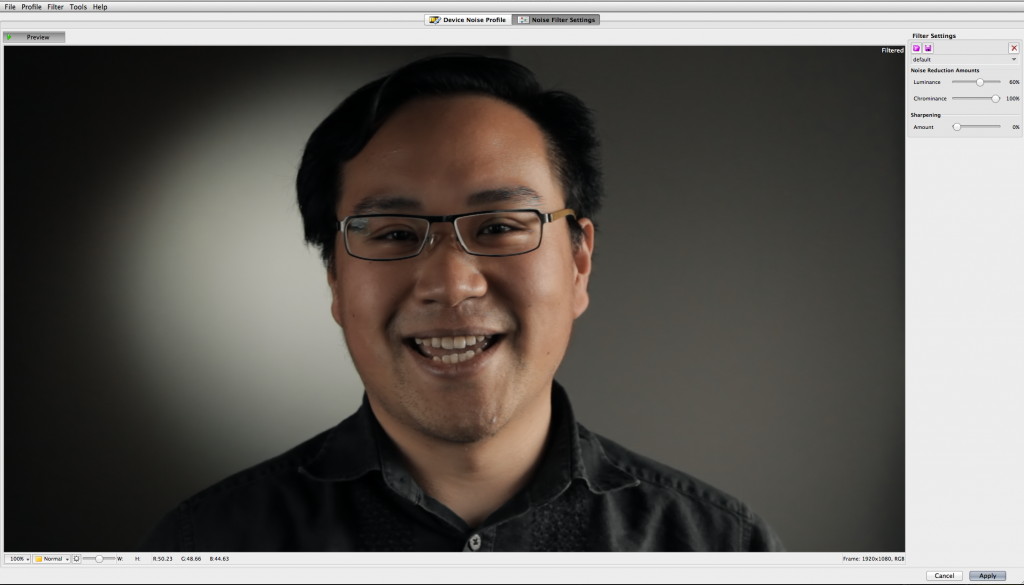
Next, select Auto Profile, then Noise Filter Settings to preview the results:

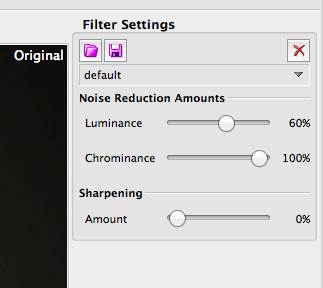
Under Filter Settings, you have the option to play with Luminance, Chrominance and Sharpening. I’ve found that it doesn’t seem to improve anything by fiddling with the first two defaults, so I recommend leaving them alone. Sharping is a powerful tool, so if you want to apply sharpening, be careful not to overdo it. It’s in effect the same thing as a sharpening effect, only it’s included within this plugin.

When everything looks good, click Apply in the lower right. Now, take a look at your Inspector, where you have a couple more options that you should leave alone until this point:

Temporal Radius
Temporal threshold
Adaptive filtration

Temporal radius refers to the number of frames that Neat Video analyzes when it’s determining how best to de-noise your clip. The higher the number, the more frames it looks at. Choosing a larger number than 1 will definitely improve your footage. BUT. It will SIGNIFICANTLY slow down your render times. And, at least on these clips, the footage looked plenty good enough at 2.

Temporal threshold should be lowered below 100 on footage that has a lot of motion, and raised above 100 if your footage is static. So, for my interviews, I chose 150 and it looked brilliant. Play with it until you see what looks best, or just accept the default.

Adaptive filtration should be checked only if the level of noise changes during your clip (ie if your camera was moving from a well-lit place to a dark place, for example). For an interview that is pretty static, leave it unchecked.

One final tip: Applying Neat Video to your clips should be the very last step in your editing process. Why? Because it slows your computer down big time. All of the complex calculations required to selectively remove the noise from your video will bring even a fast computer to a crawl. My iMac 2011 27″ i5 quad-core beast will let me work through just about anything, but not Neat Video. Plan to apply the clips and go for lunch. But when you come back, you’ll be thrilled with the results.

Magic Lantern is ready for prime time with 2.3 release

I’ve been using Magic Lantern on my Canon 60D for over a year, despite the fact that it would occasionally freeze my camera in the middle of a shoot. But it unlocked so many powerful controls such as ability to zoom in and check focus while rolling, that I was willing to tolerate the occasional hiccup. The solution was (and remains) simple: remove the battery from the camera, and restart.

Luckily, that era of instability appears to be behind us now, with the release of Magic Lantern 2.3. I’ve been beta testing this release for a few days, and so far it hasn’t shut down on me once.

For shoot next week, I’m renting a 5DMKIII. This will be the third shoot I’ve done with the camera, and one of my biggest frustrations with it is that I can’t run Magic Lantern on it. I’ve gotten so that I depend on the features that Magic Lantern provides. Here’s my favorites:

1. Waveform displayed on the monitor – allows me to visually check exposure levels.
2. Audio levels read out in monitor, so you can visually see whether your sound is at correct levels while rolling.
3. Spot meter in center of focus area reads out exposure values in percentage value. So I can see instantly whether a face is too hot, for example, but checking the percentage. This alone has changed the way I shoot. I feel naked without the spot meter reading, and I constantly move this around the frame to check my exposure values.
4. Time elapsed during a take OR space remaining in the card is displayed in the upper right corner of frame, which allows me to keep tabs on how much time is left in a take (important because of the approximately 11-minute clip limit of my DSLR).
5. Zerbras! This new version offers even faster zebras, and you can set the sensitivity. I generally set mine to clip anything above 95%, which it displays as solid blocks of red color.
6. Exposure override in movie mode: allows setting an extremely slow shutter speed and correspondingly slow frame rate of two frames per second. This is great for getting a timelapse effect – for example, mount it on car and drive through city streets at night to record streaks of light flying by.

Exciting new features that come with this release:

1. Vectorscope displayed on the monitor – allows checking color values and especially skin tones.
2. Blub ramping – allows flicker-free lowering of shutter speed as night falls, or increase of speed as sun rises. Haven’t tested this feature yet myself, but looks promising.
3. Stability. That’s the biggie for me.

The Magic Lantern project is completely open source and the developers creating it are volunteers. You can support the project by donating here (scroll to bottom of page). I have donated to them twice, because they are doing what Canon could easily have done, but chooses not to. Canon in recent times have chosen to unlock features such as these only in their high-end offerings priced in the neighborhood of $15,000. This is extremely disappointing, and it makes me very happy to support this project, which is giving extremely powerful pro tools to us for FREE.

Congratulations to the crew at Magic Lantern on this major release. Now, how soon can you have this running on a 5DMKIII?

SEOmoz on Radical Transparency in Business

The idea of being honest with your customers sounds great, but what about when things go wrong? Here’s the most recent installment in the series we’re doing for Seattle Interactive Conference, a 2-minute look at what radical transparency means to the people running Seattle-based SEOmoz.

This is the first piece that my partner Lisa Cooper edited, almost entirely on her own, in Final Cut Pro X, with very little help from me. Nice job Lisa!

Nordstrom's windows

Our most recent commercial piece is up today on Nordstrom’s Facebook Page. Lisa and I shot this piece primarily with three GoPros, all running concurrently in timelapse mode, one frame every two seconds. We repositioned the cameras a couple times to get more angles covered. But I think what makes it especially fun is the very brief moments of dslr footage intercut with it.

Some frame grabs:

Great read: Film Lighting by Kris Malkiewicz

I was at Barnes and Noble a few weeks ago, poking around in the filmmaking section, and discovered a book that I almost couldn’t put down: Film Lighting by Kris Malkiewicz. I did, however, put it down long enough to find out whether it was cheaper to buy on my iPad. It was. So I downloaded it on the spot and walked out the door, past the Nook display, glad that physical bookstores still exist, and excited to be living in a world where this kind of instant comparison-choice-delivery is possible.

This is a new version of a classic book that has been revised to include coverage of digital video and new developments like LEDs. It’s a series of conversations with mostly Hollywood DPs and gaffers. But what surprised me is that much of the advice they give applies to tiny budget filmmakers like me. Who knew, for example, that using a Leko stage light is a great way to target bounce light? Yep. The venerable ellipsoidal spotlight is still a killer tool, because it’s infinitely controllable, equipped with shutters that allow you to shape the light without having to use cutters or barn doors. You can aim it at a bounce card across the room, and entirely eliminate any light spill. It’s the guided missile of lighting. And I was able to pick one up on ebay for $80.

Haskell Wexler shared this tip: “I find that I learn the most when working on documentaries. When the budget is minimal, you are forced to look at light as you find it and to make it look good.” There’s a big chapter in the book about how to light car interiors, and some of it gets pretty complicated. But Wexler is a fan of keeping it simple. “A lot of the equipment that we use when lighting inside cars is basically unnecessary to get good results. If you can control the intensity of the background with neutral density gels on the windows in the shot, it is possible to use the natural existing daylight in the car to make perfectly acceptable shots.”

That prompted me to pick up a 4’x25′ roll of .3 ND gel, which I’ve begun using everywhere. It’s a lot easier to pack that roll and a pair of scissors and tape than it is hump lights and the stands, sand bags, power cords, batteries, etc. to power them.

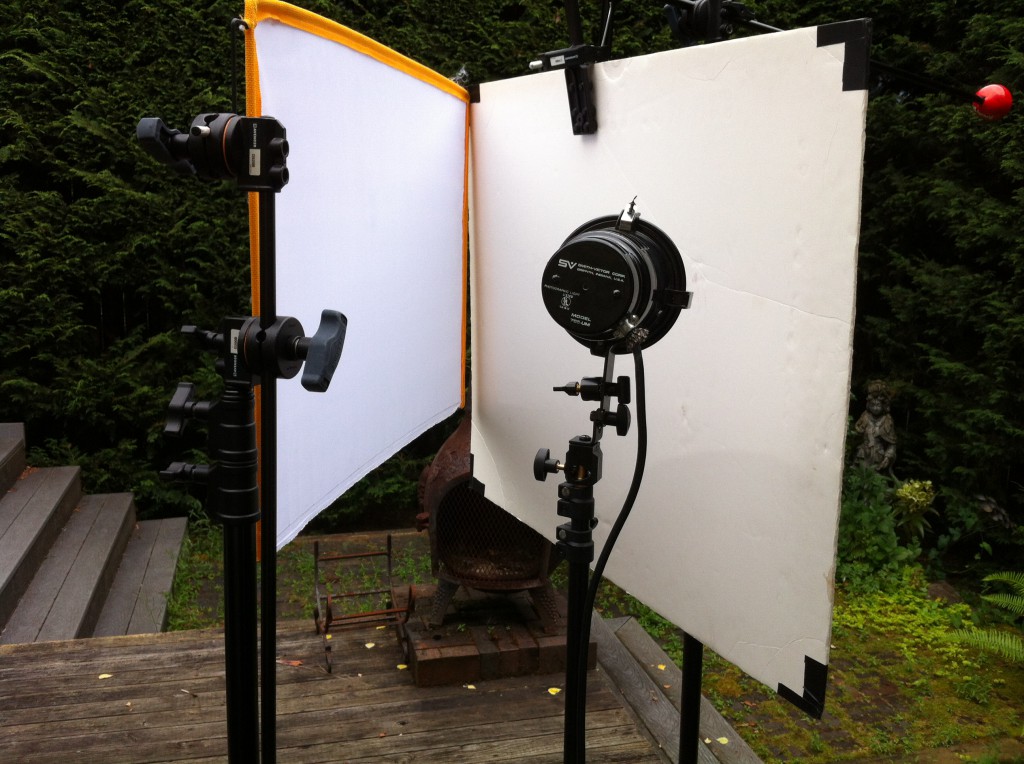
And speaking of books, ever heard of a book light? It’s a staple soft light in the film industry, what gaffers call the “seven-minute drill,” because it can be assembled very quickly. You take a big bounce board, and angle a light into it. Then, you place some diffusion such as a silk in front of the bounce, so that it connects with the bounce at the far end from the light, opening like a book toward the light. Like so:

This book is full of similar tricks from masters like gaffer James Plannette, who recommends improving car scenes by putting pieces of white sheet on the hood of the car to bounce light into actor’s faces. And, he says “it’s good to be shooting toward the south side of the street, so the fronts of the structures are not very bright.”

Robert Elswit offered a great tip that he learned on the set of There Will Be Blood. Because the characters were wearing hats, there was a lot of dark shadows that needed to be filled in. He took sheets of bleached muslin and laid them on the ground. This exaggerated the natural sun light just enough to perfectly light the faces.

What emerges from this book is that much of lighting is basic problem solving using a variety of tools, many of which are within reach of anyone. Reading it has helped me to become more conscious of the light everywhere: morning light, street light, breakfast table light, I notice all of it now.

I recently started a “light journal” which I’m slowly filling with snapshots of interesting light, grabbed with my iPhone. I’m also making screen grabs of nice lighting when I see it in videos and in stills. I plan to use it as a reference, a cook book of sorts that I can refer to when I’m planning shoots.

Better film lighting starts with Omnigraffle iPad app

I’ve tried out a lot of filmmaking apps since I began using an iPad last December. But so far only one has become a fixture on nearly every shoot. And it’s not even specifically a filmmaking app. It’s a $49 business app called Omnigraffle.

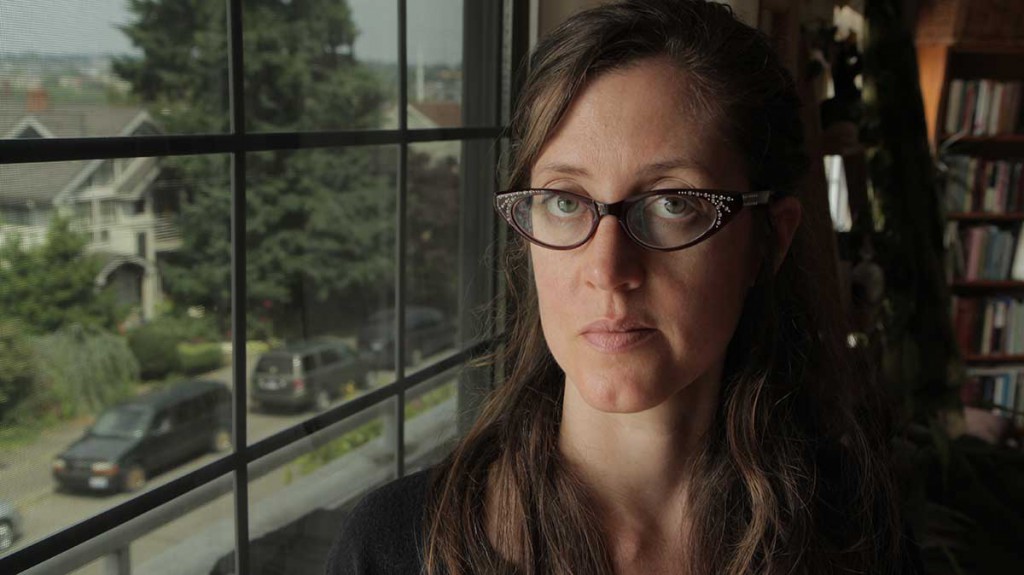
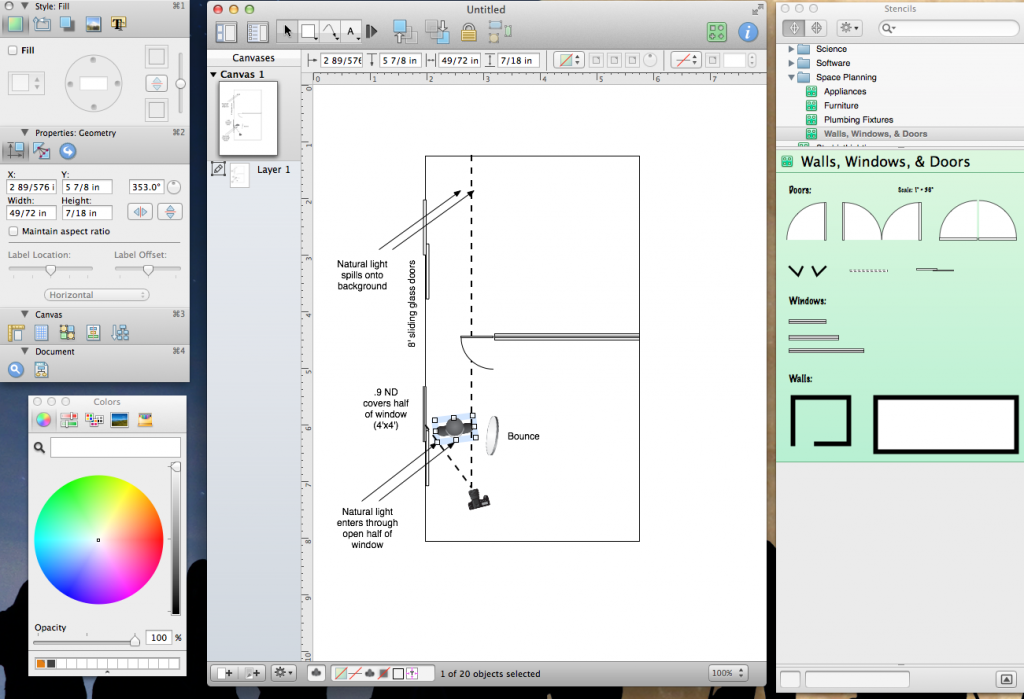
I use Omnigraffle to plan my lighting, even on simple interview setups like this one, which used simply window light. But it’s never as simple as it looks, is it. Here’s the process that works for me.

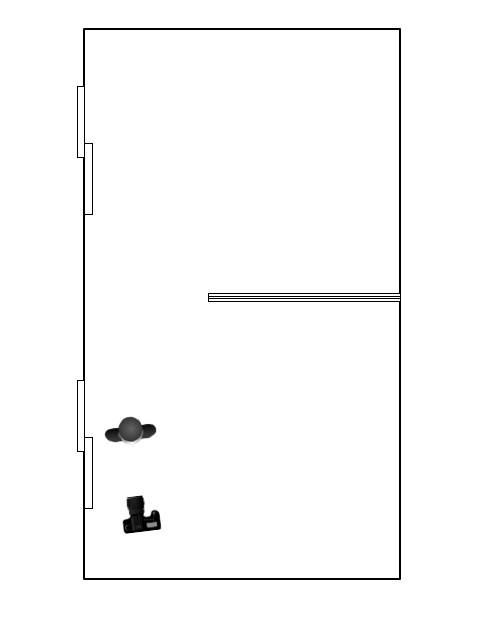
While I’m location scouting, I begin to sketch my plan on the iPad version of the app. It can be very simple, like so:

Then, I’ll email the file to myself via the built-in share tool (under Diagrams, press and hold the diagram icon to call it up). Then, I’ll open it with the more powerful desktop version of the app (which costs $99) where I’ll revise and enhance the plan (see below).

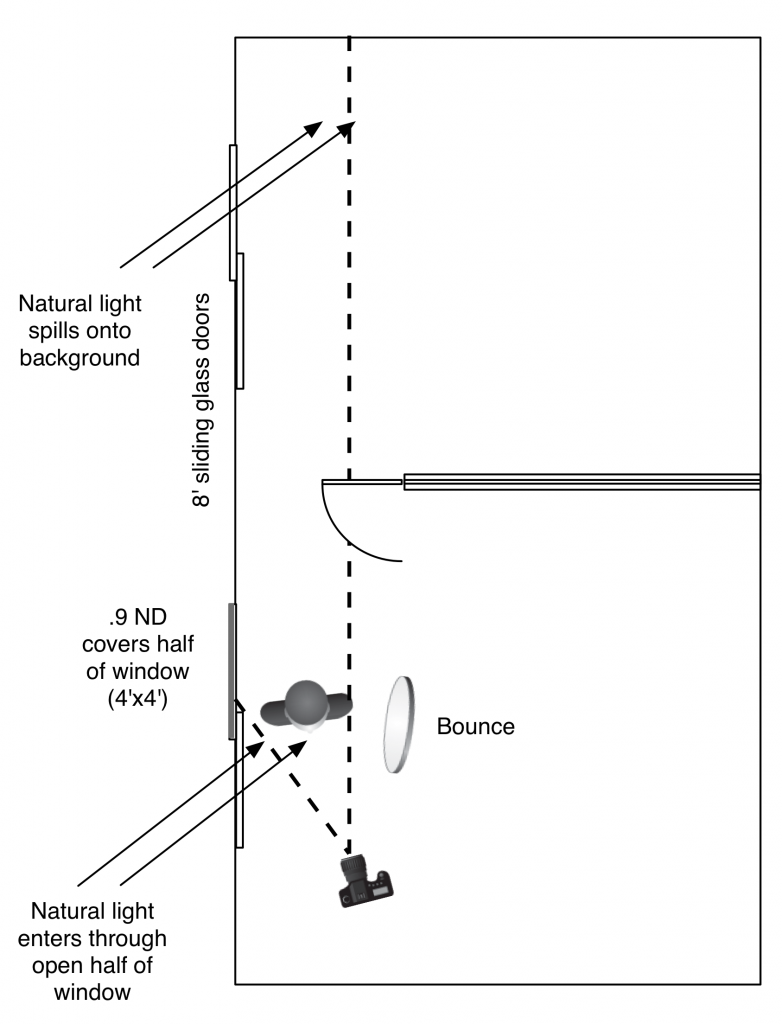
This is a lighting plan so simple that it doesn’t contain any artificial lighting! I used just two things to augment the lighting in this shot: a 4′ wide roll of Lee ND .9 filter gel, and a collapsible reflector disc. Check it out:

The trick to this natural lighting setup is to have a window that is large enough to split in half: one half you allow light to come through, the other half you cut down 3 stops by covering it with the roll of .9 ND gel. Place the subject just at edge of the ND covered portion of the window, so that the full daylight washes over her, but behind her, in the background, the camera sees only through the filtered area. Note that this wouldn’t work if direct sunlight were streaming into the window – in that case, you’d have to place some diffusion over the open side of the window first.

Omnigraffle helps me to previsualize lighting, and it also helps me share the plan with crew.

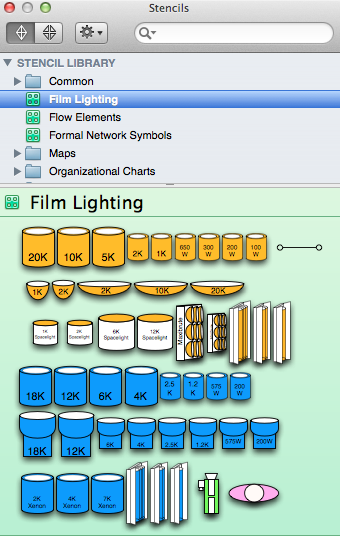
What’s powerful about Omnigraffle is that you don’t have to be an artist to draw complicated diagrams. The app allows you to install free plugins, called Stencils, which contain objects that you can combine to create your plans. You can find dozens of them at graffletopia.com. Check under the Film and TV category to find the most relevant ones. To install, just double click after downloading and they are automatically loaded. Here’s three of my favorites:

1. Film Lighting

2. Strobist Lighting

3. Space Planning > Walls, Windows and Doors (already installed by default).

One bug that I’ve encountered: I can’t begin a file on the desktop app, email it to my iPad, and open it. Every time I try, I get this error:

Is it worth the substantial $150 to buy both apps, when free alternatives are available? For me it is, because the free diagraming apps that I’ve tried have no support for downloadable stencils, which is what makes both versions of Omnigraffle so useful to me. I do think that $49 is a lot to pay for any app. But until something equally capable and more affordable comes along, Omnigraffle is the way to go.

If you had 6K to spend and didn't own any lenses, what would you buy?

A friend facebooked me this multiple-choice question this morning: If you had 6K to spend and didn’t own any lenses, what would you buy?

A) Canon 5d mk3 and used lenses from craigslist
B) Used Canon 5d mk2 and more lenses
C) 2 used canon 5d mk2 and less lenses
D) 1 canon 5d mk2 and 1 7D and lenses
E) Blackmagic Cinema Camera
F) Something else

I run everything at Visual Contact with a pair of Canon 60Ds, and quite a bit of used Nikon glass. In practice, I actually just use two things for probably 85 percent of my shooting: one Canon 60D and one Canon Zoom lens, the EF 18-55mm f/2.8. Having the second 60D body is great, and I do sometimes use it. But more often than not, it’s there just in case something breaks on my A camera. Which hasn’t ever happened. Yet.

So my snap answer, based on my experience and shooting style: I’d pick one camera and one sweet zoom that covers (in 35mm equivalent terms) the 24-70mm range (which is good for everything from establishing shots to interviews). I’d buy that lens new, because great used glass holds it resale so well, so you’re not saving much, and you’ll be able to sell it for most of what you paid for it.

Which camera to buy is a tougher question.

I’ve used the Canon 5dmkiii twice, and I really like it. In addition to being exquisitely sensitive to low light, it gives me the option to go really wide with my 20mm Nikor lens, the widest prime lens I own, which on my 60D equates to just a 32mm lens. But my favorite thing about the 5dmkiii is that Canon has fixed the moire issues that plague all first-generation DSLRs. Is it worth $3,500 just for that? Maybe.

Ever since their big announcement at NAB, I’ve been trying to figure out how to justify spending $3,000k on the Black Magic Design Cinema Camera. It’s not very much money for what you get, of course, but it’s a lot for me. I’m going to start out by renting it. It looks like an amazing camera. But with a 2.4 crop factor, finding wide glass for this camera could be a bitch. And after shooting on APS-C, I’ve got reservations about the Super 16 sensor size that I look forward to exploring when I get my hands on the camera. What’s most promising about this camera to me is the purported 13-stops of dynamic range. That’s very attractive to my style of shooting, which depends on doing a lot with minimally augmented lighting.

I quite like the APS-C sensor size of my 60Ds. It’s very close to Super 35 film size, and it gives all my glass extra reach, turning my 300mm Nikor into a far-seeing 480mm lens. And in the two and a half years that I’ve been shooting on my 60D, I’ve never once had a client complain about the image. When I compare the 5D image next to the 60D image, however, I do love the extra smoothness, color fidelity and shallow depth of field that I see. It also produces a slightly sharper image. The one Achilles heel of this camera is moire. I have to deal with it all the time and it drives me nuts.

I’m curious to see what Canon has up its sleeve with the next generation of the 60d, which some people are referring to as the 70d. Canon didn’t fix moire in the T4i, so it’s possible they won’t fix it in the new version of the 60D. If that’s the case, I won’t buy it and I’ll lean more heavily toward the BMDCC. There’s also rumors that Canon will make an entry-level full-frame camera soon, possibly in September. If they could bring the price of that down to something closer to 60D territory, and still fix the moire issues, I’ll probably buy one and use it a lot.

So there you have it. I’d spend about half of the money on a camera, and half on the best zoom lens you can afford in the 24-70mm range. And any money I had left over I’d spend on renting the specialty lenses you need only when you actually need to use them.

Visual Contact welcomes intern Alex James

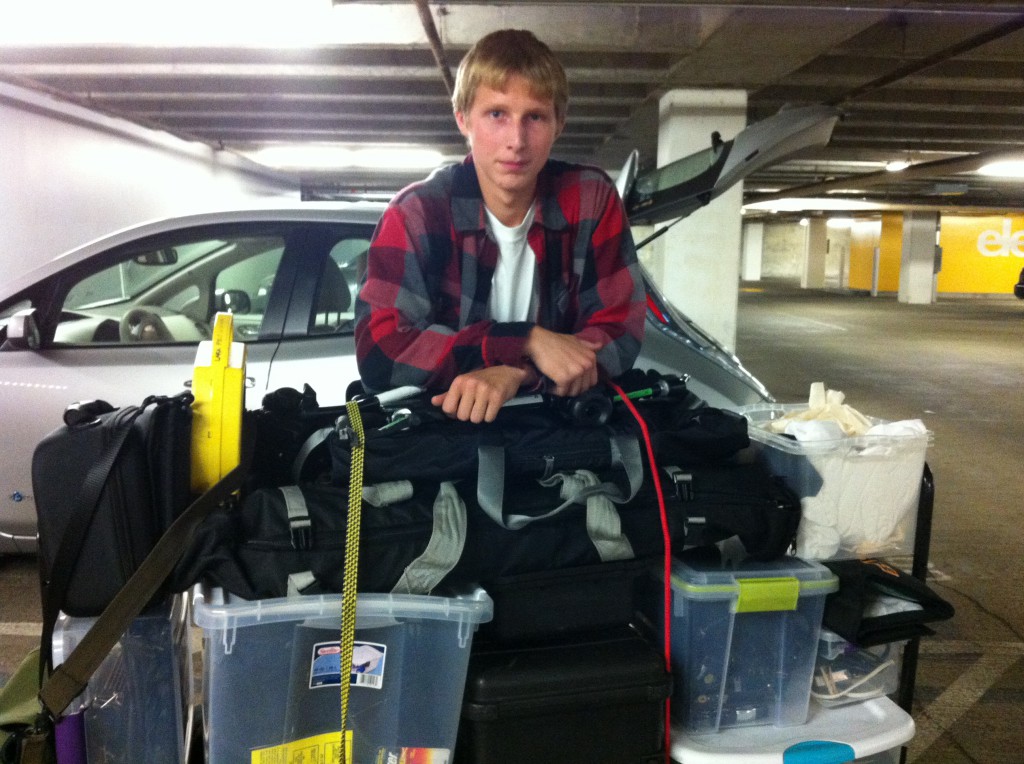
Today was our first shoot with Alex James, who is interning with us at Visual Contact. Alex passed the “how the hell can you fit all this filmmaking equipment into the back of this Nissan Leaf” test today, and we’re thrilled to have him on the team this summer. Alex is a senior at Ballard High School, where he recently got his hands on the Oscar won by Undefeated director TJ Martin, who spoke to his class. “It was very, very heavy,” he said. Welcome Alex!